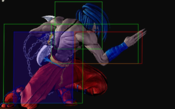
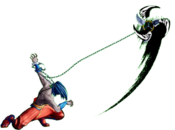
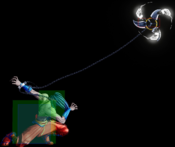
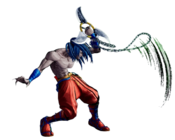
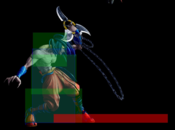
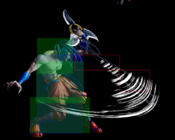
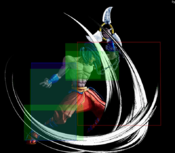
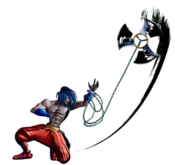
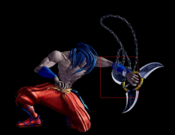
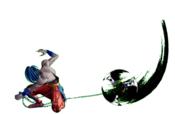
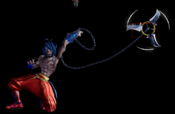
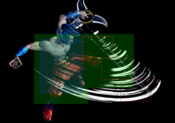
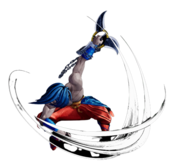
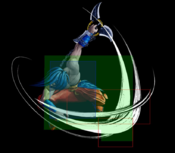
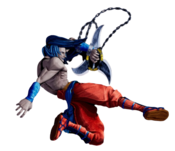
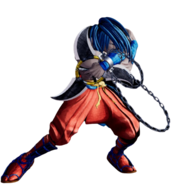
Samurai Shodown/Basara: Difference between revisions
(→Neutral: I added neutral. That's really all there is to it.) |
Scrubsaibot (talk | contribs) |
||
| (106 intermediate revisions by 11 users not shown) | |||
| Line 1: | Line 1: | ||
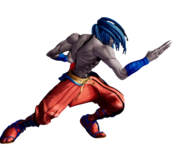
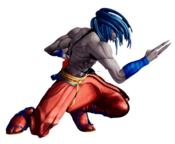
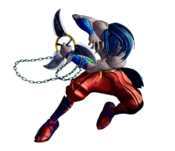
[[File:SS_Basara_Profile.png|<center><font size="4"><b>Basara</b></br> | {| class="wikitable" style="float:right; margin-left:10px;" | ||
|- | |||
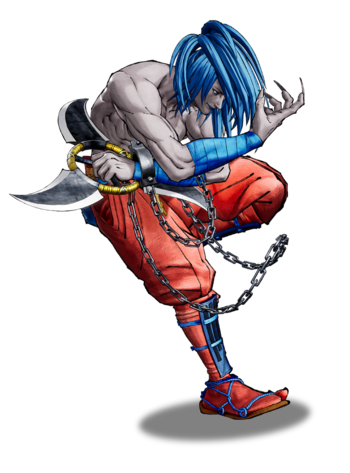
|[[File:SS_Basara_Profile.png|350px|center|]] | |||
<center><font size="4"><b>Basara</b></br>首斬り破沙羅, Kubikiri Basara</font></center> | |||
|- | |||
| {{#lst:Samurai Shodown/System Data|Basara Data}} | |||
|} | |||
{{TOClimit|2}} | {{TOClimit|2}} | ||
==Introduction== | ==Introduction== | ||
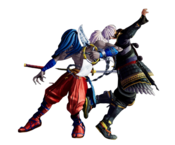
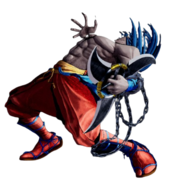
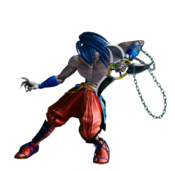
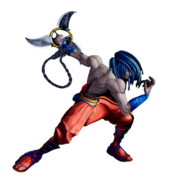
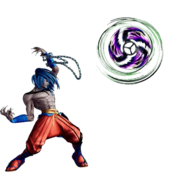
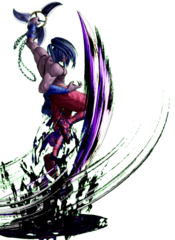
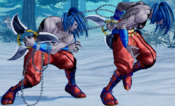
"Basara the Executioner" ( | "Basara the Executioner" (首斬り破沙羅, Kubikiri Basara) is the 3rd DLC character added to SamSho. In the transition to SS7, he kept most of his <s>gimmicks</s> tools making him a very tricky character to play against. | ||
Basara's tools are designed to frustrate the opponent and force them to misplay, so Basara can punish them for it. Armed with a good variety of anti-airs, a homing projectile, long-range normals and shadow clones which mimick Basara's movement, a good Basara will make most opponents play the neutral game by his rules. Once the opponent's conditioned, Basara can punish the opponent for respecting him with instant overheads, a command grab and high-low mix. | |||
== | {{ProConTable | ||
|intro=<center>[[File:SS_Basara_Icon.png|40px]] '''Basara''' is a tricky zoner with deceptive movement and strong mix-ups from a knockdown.</center> | |||
|pros= | |||
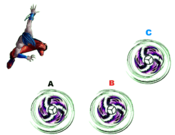
*'''Unique movement options''': Basara has unique dashes that make him temporarily invisible, along with a tracking attack and being able to move around below the ground for a while. | |||
*'''Strong okizeme''': Basara has great 50/50 options from multiple ranges and has threating oki due to the "puffball" tracking fireball, which forces opponents to give up screen space or stay blocking and take his mix-ups. | |||
*'''Good zoning''': Using his long-ranged normals and Shuriken Toss, Basara is very good at controlling space from afar. | |||
*'''Lots of knockdowns''': Basara has many ways to knock the opponent down such as shuriken, command grab, 66D and j.3D, allowing many opportunities to get his oki game started. | |||
*'''Feints''': Basara's Shadow Feint gives him access to many layers of mind games with his opponent. | |||
|cons= | |||
*'''Cannot combo into WFT normally''': Basara requires very specific setups to combo into WFT, often reducing the damage of the WFT which make said combos usually not worth going for. | |||
*'''Unsafe neutral''': Basara's long-ranged normals and specials have high startup and very high recovery. His far normals do not recoil and are very negative on block. | |||
*'''Lacks punish options''': Basara cannot cancel combo into any of his specials and his longer normals are quite slow, so it is hard for him to capitalize off of punishes if he cannot land throw, command grab, or 66C. | |||
*'''Feints''': Basara's clones are exposed by certain visual tells and it is hard to use them as a legitimate mix-up against experienced players without conditioning them beforehand. | |||
*'''Mediocre jump normals''': Shallow jump normals with poor range make it hard for Basara to control space in the air. | |||
}} | |||
==Gameplan== | ==Gameplan== | ||
===Neutral=== | ===Neutral=== | ||
Basara’s neutral can be daunting since a lot of his buttons are pretty committal. He usually has to rely on his moves like 5A, 66A, etc. to apply pressure. | |||
5A and 2A are some of his best moves. Very non-committal and are relatively quick. They can be used offensively (running up and jabbing) and defensively (trying to get someone off of you). 2D is good for the latter as well and is good for stuffing out throw attempts. 5B and 2B are very committal but the latter is integral. 5B is a very low damaging move that’s unsafe and can be deflected. There’s not much use for it at all. 2B is very unsafe because of its high recovery but when combined with an orb on screen it can help to punish people not blocking low. It can also be used in Orb block strings to gain Guard Crush. 66A is a good check button in neutral since its safe and you can deflect after. 66A is also useful in orb block strings to gain space and add Guard Crush. 66B is also a good tool for opening up your opponent, as it's an overhead that knocks down, with a cancel window. It's vulnerable to being poked out, though. You can cancel into command grab (623D) and puddle (214D) from it. Puddle is not recommended as, while it can be used to escape, it has a lot of recovery. 66B should generally be used as a quick mix up close if you noticed they are blocking low or as mix after orb. You can set up for recoil on block as well. 5C is good from a longer range, as it'll catch people trying to run in for a good chunk of damage. You generally wanna use this and 236S series (mentioned later) for punishing approaches. 66D is useful as a more committal low that knocks down. Depending on the character, you can also use this to setup deflect. | |||
When it comes to approaching, Basara has a high, annoying jump arc, with two different command normals. j. | Much like his grounded buttons, his specials are all slow, but effective, with his 623S series being the slowest DP in the game, with no startup invincibility. C DP is your best friend against zoning characters, as it allows you to punish fireballs from fullscreen and start your pressure. You can also use 236A or 236B in the air to punish fireballs if you’re in the position to do so. His 236S series, on the other hand, is amazing at anti-airing approaches, being a big lingering hitbox. You can even use 236+A spaced on block as a deflect setup or buffer DP after a blocked one to potentially punish projectiles. A useful tool for neutral is backdash into his aerial 236S (although C is the only useful one with backdash), being another way to cover people running, while retreating at the same time. It is, however, highly unsafe on block. It counts as an overhead though! | ||
When it comes to approaching, Basara has a high, annoying jump arc, with two different command normals. j.2D does a surprising chunk of damage, and on hit or block, allows you to alter your momentum to potentially avoid a DP in retaliation, though the fact that it doesn't knock down leaves you potentially punishable on hit. j.1/3D is his best jump button. It beats out a lot of moves, crosses up, knocks down, is pretty quick, does some good chip damage to close out games, and is pretty safe. You can even do stance break baits and deflect setups with it if you land lower to the ground. You wanna be using this a lot combined with j. C and jump feint (421A) since j.C can now cross up and does more damage while you can use the jump feint to mix up your jumps and to make the opponent guess on anti-airs. j.B is also a very good air button. It hits below Basara with a pretty sizeable hitbox so you can catch a lot of buttons from a good distance if you space it. | |||
Of course, the part that makes Basara annoying when it comes to neutral is his feint series (421S), each input relating to a different action. While feinting, Basara is invisible, but also locked in place, and totally vulnerable. The A version mimics a forward jump, which is a godsend for baiting anti-airs, and if you bait out a full DP, you can get a 5C, or even an SSM, both of which are good damage. A+D version mimics slowly walking forwards for a few steps, which can be good for baiting out a poke, but will require conditioning, since you'll need to occasionally walk forwards yourself. B+D | Of course, the part that makes Basara annoying when it comes to neutral is his feint series (421S), each input relating to a different action. While feinting, Basara is invisible, but also locked in place, and totally vulnerable. The A version mimics a forward jump, which is a godsend for baiting anti-airs, and if you bait out a full DP, you can get a 5C, 236S, or even an SSM, both of which are good damage. A+D version mimics slowly walking forwards for a few steps, which can be good for baiting out a poke, but will require conditioning, since you'll need to occasionally walk forwards yourself. B+D feints a dash forward, which is useful for faking an approach, and baiting out a poke, which can be retaliated through your own poke, or even a 5C. Those are the most useful ones, and while the others have uses, they're more niche, and varies based on your opponent. | ||
Overall, Basara's neutral is committal, but allows him to bait and punish, while keeping his opponents away, while leaving them standing to prevent any roll approach, and his pressure can be overwhelming. His feint series is integral to playing him to his peak efficiency, and combined with his C DP's ability to teleport to follow the opponent anywhere, and puffball's ability to block off the air space for a good few seconds, Basara can take a life lead early on and sit on it, waiting for his opponents to make mistakes, usually with a devastating counterattack. | |||
===Okizeme=== | |||
Basara's okizeme is among probably the best in the game, and it's all due to one move. 236D, also known as "Oreo" or "Puffball", depending on who you're talking to, is a slow projectile that travels through the air, rather mediocre against a grounded opponent, only giving a small amount of hitstun, blockstun, and damage. However, its natural arc covers the airspace, all the way around, and curving around the opponents back to hit the ground near their feet at max range, which is vital to certain setups. Against an aerial opponent, however, the projectile will slowly track, and it knocks down on hit, creating a minor juggle state, though this is difficult to combo with outside of specific setups. | |||
Generally, you'll always want to set up a puffball anytime you get a knockdown, outside of perhaps after a WFT (As you won't have enough time to throw out a puffball and still approach to pressure your opponent before they get their weapon back), as, even if you're too close to get the full benefit of the puffball, it can still act as a framekill without any downside. From a command grab, puffball will basically block your opponent from jumping. If the opponent tries to roll in to gain distance, you can go for a command grab, since their options at that point are to jump (which gets hit by the puffball), backdash (which limits their punish options), or dodge. And if they get hit, you can just set up another puffball. Outside of that, Basara has a quite good high/low mixup, between his UOH and backdash j.236C for overheads (both of which knock down), 2D, 3D, and 66D for lows, the latter two knock down. While negative, both options are relatively safe. 6D is also a possible overhead, but it's not an amazing option, as it's +0 on hit, but perfectly safe on block. | |||
Another thing is that his oki can benefit him with Guard Crush as you can do orb block strings to build it up quickly. An example of this would be 236D > 66A > Orb Hit > 2B. | |||
Other notes: j.2D can be useful for pressure, but not for okizeme itself, as the move is too slow, and will whiff if they don't wake up where you expect. Particularly useful against a cornered opponent without a good antiair right above their head, such as Haohmaru. 66B can be useful against a rising opponent, though its effectiveness is somewhat limited if an opponent rises in place, as the grab will whiff and leave you vulnerable, meaning the only threat is the overhead, which is reactable if your opponent knows to look for it. | |||
==Normal Moves== | ==Normal Moves== | ||
| Line 44: | Line 55: | ||
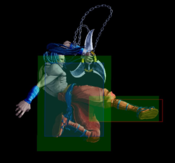
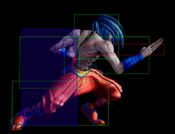
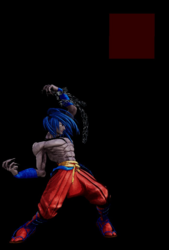
{{MoveData | {{MoveData | ||
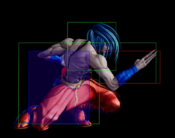
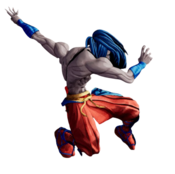
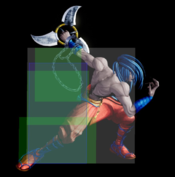
|image=SS_Basara_5A.png | |image=SS_Basara_5A.png | ||
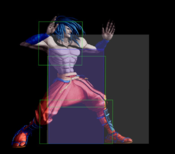
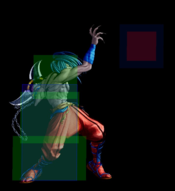
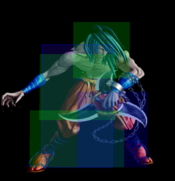
|hitbox=SS7_Basara_5A_hb.png | |||
|caption= | |caption= | ||
|name=5A | |name=5A | ||
| Line 51: | Line 63: | ||
|guard=Mid | |guard=Mid | ||
|startup=7 | |startup=7 | ||
|active= | |active=2 | ||
|recovery= | |recovery=11 | ||
|hitAdv=0 | |hitAdv=0 | ||
|total=19 | |total=19 | ||
| Line 60: | Line 72: | ||
|recoil= | |recoil= | ||
|deflect=No | |deflect=No | ||
|unarmed= | |unarmed=No | ||
|description= Basara does a jabbing poke with his fingers jutting out. Can be used as quick button to interrupt slower actions from the opponent, though 2A is similar but faster. Despite having special cancel properties it does not combo into any specials. | |description= Basara does a jabbing poke with his fingers jutting out. | ||
* Can be used as quick button to interrupt slower actions from the opponent, though 2A is similar but faster. | |||
* Despite having special cancel properties it does not combo into any specials. | |||
}} | }} | ||
}} | }} | ||
| Line 69: | Line 83: | ||
|image=SS_Basara_5B.png | |image=SS_Basara_5B.png | ||
|caption= | |caption= | ||
|hitbox=SS_Basara_5B_hb.png | |||
|name=5B | |name=5B | ||
|data= | |data= | ||
| Line 75: | Line 90: | ||
|guard=Mid | |guard=Mid | ||
|startup=12 | |startup=12 | ||
|active= | |active=15 (1(6)1(6)1) | ||
|recovery= | |recovery= 25 | ||
|hitAdv=-3 | |hitAdv=-3 | ||
|total=51 | |total=51 | ||
|blockAdv=-13 | |blockAdv=-13 | ||
|guardDmg= | |guardDmg=17 | ||
|cancel=No | |cancel=No | ||
|recoil= | |recoil= | ||
|deflect=Yes | |deflect=Yes | ||
|unarmed= | |unarmed=No | ||
|description= Basara flings his shuriken straight out in front of him. This move hits a total of three times based on distance from the opponent, he gets more hits the closer he is. This is one of his primary mid ranged poking and spacing tools which can check people running at him or punish whiffed moves at mid screen. Also has slight potential as a far ranged anti-air since there's no hurtbox on the shuriken as it is going out. | |description= Basara flings his shuriken straight out in front of him. | ||
* This move hits a total of three times based on distance from the opponent, he gets more hits the closer he is. | |||
* This is one of his primary mid ranged poking and spacing tools which can check people running at him or punish whiffed moves at mid screen. | |||
* Also has slight potential as a far ranged anti-air since there's no hurtbox on the shuriken as it is going out. | |||
5B will miss on the following characters if | <br><br>''5B will miss on the following characters if they are offensive crouching (2 or 3 input): Basara, Nakoruru, Tam Tam, Rimururu, Kazuki, Shizumaru'' | ||
}} | }} | ||
}} | }} | ||
| Line 94: | Line 112: | ||
{{MoveData | {{MoveData | ||
|image=SS_Basara_5C.png | |image=SS_Basara_5C.png | ||
|hitbox=SS_Basara_5C_hb.png | |||
|caption= | |caption= | ||
|name=5C | |name=5C | ||
| Line 101: | Line 120: | ||
|guard=Mid | |guard=Mid | ||
|startup=18 | |startup=18 | ||
|active= | |active= {{Tooltip |text=22 |hovertext=1 (1) 1 (1) 1 (1) 1 (1) 1 (1) 1 (1) 1 (1) 1 (1) 1 (1) 1 (1) 1 (1)}} | ||
|recovery= | |recovery=26 | ||
|hitAdv=-8~+2 | |hitAdv=-8~+2 | ||
|total=65 | |total=65 | ||
| Line 110: | Line 129: | ||
|recoil= | |recoil= | ||
|deflect=Disarm | |deflect=Disarm | ||
|unarmed= | |unarmed=No | ||
|description= Basara flings his shuriken along the ground and snatches it back up once it reaches about half screen. This is Basara's long range whiff punish tool due to its speed and reach. While it can function as a poke it is prey for deflect and counter moves due to its start-up and travel time, so caution is advised. The move is typically not going to be punished on block if it lands towards the end of the active frames. | |description= Basara flings his shuriken along the ground and snatches it back up once it reaches about half screen. | ||
* This is Basara's long range whiff punish tool due to its speed and reach. | |||
* While it can function as a poke it is prey for deflect and counter moves due to its start-up and travel time, so caution is advised. The move is typically not going to be punished on block if it lands towards the end of the active frames. | |||
}} | }} | ||
}} | }} | ||
| Line 118: | Line 139: | ||
{{MoveData | {{MoveData | ||
|image=SS_Basara_2A.png | |image=SS_Basara_2A.png | ||
|hitbox=SS_Basara_2A_hb.png | |||
|caption= | |caption= | ||
|name=2A | |name=2A | ||
| Line 125: | Line 147: | ||
|guard=Mid | |guard=Mid | ||
|startup=5 | |startup=5 | ||
|active= | |active= 2 | ||
|recovery= | |recovery=10 | ||
|hitAdv=1 | |hitAdv=+1 | ||
|total=16 | |total=16 | ||
|blockAdv=-2 | |blockAdv=-2 | ||
| Line 134: | Line 156: | ||
|recoil= | |recoil= | ||
|deflect= | |deflect= | ||
|unarmed= | |unarmed=No | ||
|description= Basara does a jabbing poke with his fingers jutting out. Very similar to 5A in purpose except two frames faster in startup. Use to interrupt or pressure opponent when up close. Like 5A, it has special cancel property but is unable to combo into any specials. | |description= Basara does a jabbing poke with his fingers jutting out. | ||
* Very similar to 5A in purpose except two frames faster in startup. Use to interrupt or pressure opponent when up close. | |||
* Like 5A, it has special cancel property but is unable to combo into any specials. | |||
}} | }} | ||
}} | }} | ||
| Line 142: | Line 166: | ||
{{MoveData | {{MoveData | ||
|image=SS_Basara_2B.png | |image=SS_Basara_2B.png | ||
|hitbox=SS_Basara_2B_hb.png | |||
|caption= | |caption= | ||
|name=2B | |name=2B | ||
| Line 149: | Line 174: | ||
|guard=Low | |guard=Low | ||
|startup=15 | |startup=15 | ||
|active= | |active=15 (1(6)1(6)1) | ||
|recovery= | |recovery=29 | ||
|hitAdv=-7 | |hitAdv=-7 | ||
|total=58 | |total=58 | ||
|blockAdv=-17 | |blockAdv=-17 | ||
|guardDmg= | |guardDmg=17 | ||
|cancel=No | |cancel=No | ||
|recoil= | |recoil= | ||
|deflect=No | |deflect=No | ||
|unarmed= | |unarmed=No | ||
|description= Basara flings his shuriken straight out in front of him along the ground. This move hits a total of three times based on distance from the opponent, he gets more hits the closer he is. The primary differences between this and far 5B is that this move is much lower to the ground, has longer horizontal distance and must be blocked crouching. Although slower in startup than its standing counterpart, the low poke can be used to counter opponents who are walking back too much or putting out deflect looking for 5B. | |description= Basara flings his shuriken straight out in front of him along the ground. | ||
* This move hits a total of three times based on distance from the opponent, he gets more hits the closer he is. | |||
* The primary differences between this and far 5B is that this move is much lower to the ground, has longer horizontal distance and must be blocked crouching. | |||
* Although slower in startup than its standing counterpart, the low poke can be used to counter opponents who are walking back too much or putting out deflect looking for 5B. | |||
}} | }} | ||
}} | }} | ||
| Line 166: | Line 194: | ||
{{MoveData | {{MoveData | ||
|image=SS_Basara_2C.png | |image=SS_Basara_2C.png | ||
|hitbox=SS_Basara_2C_hb.png | |||
|caption= | |caption= | ||
|name=2C | |name=2C | ||
| Line 173: | Line 202: | ||
|guard=Mid | |guard=Mid | ||
|startup=25 | |startup=25 | ||
|active= | |active=16 | ||
|recovery= | |recovery=33 | ||
|hitAdv=-10~-8 | |hitAdv=-10~-8 | ||
|total=73 | |total=73 | ||
| Line 182: | Line 211: | ||
|recoil= | |recoil= | ||
|deflect=Disarm | |deflect=Disarm | ||
|unarmed= | |unarmed=No | ||
|description= Basara flings his shuriken into the air. The hitbox is present as the shuriken is rising but not as it is being pulled back. This move can counter opponents who are in the air but to use as a direct anti-air it needs to be used preemptively rather than as a reaction due to its slow start-up time. The long recovery of the move makes Basara especially vulnerable to counter attack if it whiffs. If used as a raw poke, its slow start-up time makes it prey to deflects and counter specials. | |description= Basara flings his shuriken into the air. | ||
* The hitbox is present as the shuriken is rising but not as it is being pulled back. | |||
* This move can counter opponents who are in the air but to use as a direct anti-air it needs to be used preemptively rather than as a reaction due to its slow start-up time. | |||
* The long recovery of the move makes Basara especially vulnerable to counter attack if it whiffs. | |||
* If used as a raw poke, its slow start-up time makes it prey to deflects and counter specials. | |||
}} | }} | ||
}} | }} | ||
| Line 191: | Line 224: | ||
{{MoveData | {{MoveData | ||
|image=SS_Basara_n5B.png | |image=SS_Basara_n5B.png | ||
|hitbox=SS_Basara_n5B_hb.png | |||
|hitbox2=SS_Basara_n5B_hb_2.png | |||
|caption= | |caption= | ||
|hitboxCaption=Frame 1 | |||
|hitboxCaption2=Frames 2-3 | |||
|name=n.5B | |name=n.5B | ||
|data= | |data= | ||
| Line 198: | Line 235: | ||
|guard=Mid | |guard=Mid | ||
|startup=10 | |startup=10 | ||
|active= | |active=3 | ||
|recovery= | |recovery=22 | ||
|hitAdv=-2 | |hitAdv=-2 | ||
|total=34 | |total=34 | ||
| Line 207: | Line 244: | ||
|recoil= | |recoil= | ||
|deflect=Yes | |deflect=Yes | ||
|unarmed= | |unarmed=No | ||
|description= Basara holds his shuriken while whipping his hand up to hit his opponent with the chain. This move can be used to punish moves up close. Despite having special cancel property it doesn't combo directly into any special moves. | |description= Basara holds his shuriken while whipping his hand up to hit his opponent with the chain. | ||
* This move can be used to punish moves up close. | |||
* Despite having special cancel property it doesn't combo directly into any special moves, unless it's the resident big boi, Earthquake. | |||
' | |||
}} | }} | ||
}} | }} | ||
| Line 215: | Line 255: | ||
{{MoveData | {{MoveData | ||
|image=SS_Basara_n5C.png | |image=SS_Basara_n5C.png | ||
|hitbox=SS_Basara_n5C_hb.png | |||
|hitbox2=SS_Basara_n5C_hb_2.png | |||
|hitbox3=SS_Basara_n5C_hb_3.png | |||
|hitboxCaption=Frames 1-2 | |||
|hitboxCaption2=Frames 3-4 | |||
|hitboxCaption3=Frames 5-6 | |||
|caption= | |caption= | ||
|name=n.5C | |name=n.5C | ||
| Line 222: | Line 268: | ||
|guard=Mid | |guard=Mid | ||
|startup=19 | |startup=19 | ||
|active= | |active=6 | ||
|recovery= | |recovery=25 | ||
|hitAdv=-2 | |hitAdv=-2 | ||
|total=48 | |total=48 | ||
| Line 231: | Line 277: | ||
|recoil= | |recoil= | ||
|deflect=Disarm | |deflect=Disarm | ||
|unarmed= | |unarmed=No | ||
|description=Basara slashes the opponent with shuriken in hand. Can be used for a stronger punish on larger recovery moves and is typically the button you will combo into after a throw. | |description=Basara slashes the opponent with shuriken in hand. | ||
* Can be used for a stronger punish on larger recovery moves and is typically the button you will combo into after a throw. | |||
}} | }} | ||
}} | }} | ||
| Line 239: | Line 288: | ||
{{MoveData | {{MoveData | ||
|image=SS_Basara_n2B.png | |image=SS_Basara_n2B.png | ||
|caption | |hitbox=SS Basara n2B 2.png | ||
|hitbox2=SS_Basara_n2B_hb.png | |||
|hitboxCaption=Frames 1-2 | |||
|hitboxCaption2=Frames 3-8 | |||
|caption | |||
|name=n.2B | |name=n.2B | ||
|data= | |data= | ||
| Line 246: | Line 299: | ||
|guard=Mid | |guard=Mid | ||
|startup=12 | |startup=12 | ||
|active= | |active=8 | ||
|recovery= | |recovery=16 | ||
|hitAdv=-7 | |hitAdv=-7 | ||
|total=35 | |total=35 | ||
| Line 255: | Line 308: | ||
|recoil= | |recoil= | ||
|deflect=Yes | |deflect=Yes | ||
|unarmed= | |unarmed=No | ||
|description=Basically the same as its standing counterpart except two frames slower and does more damage. | |description= Basara whips the opponent with his chain. | ||
* Basically the same as its standing counterpart except two frames slower and does more damage. | |||
}} | }} | ||
}} | }} | ||
| Line 263: | Line 318: | ||
{{MoveData | {{MoveData | ||
|image=SS_Basara_n2C.png | |image=SS_Basara_n2C.png | ||
|image2=SS_Basara_n2C_2.png | |||
|hitbox=SS_Basara_n2C_hb_1.png | |||
|hitbox2=SS_Basara_n2C_hb_2.png | |||
|caption= | |caption= | ||
|name=n.2C | |name=n.2C | ||
| Line 270: | Line 328: | ||
|guard=Mid | |guard=Mid | ||
|startup=15 | |startup=15 | ||
|active= | |active= {{Tooltip |text=34 |hovertext=1(1)1(1)1(1)1(1)1(1)1(1)1(1)1(1)1(1)1(1)1(1)1(1)1(1)1(1)1(1)1(1)1(1)}} | ||
|recovery= | |recovery= 31 | ||
|hitAdv=-11~-5 | |hitAdv=-11~-5 | ||
|total=79 | |total=79 | ||
| Line 279: | Line 337: | ||
|recoil= | |recoil= | ||
|deflect=Disarm | |deflect=Disarm | ||
|unarmed= | |unarmed=No | ||
|description=Basara flings his shuriken up and then drags it back down. This move does two hits, one when it is thrown out and another as the shuriken is returning back to him. The two hits will combo on hit and are true block string on block. However, there are some ranges, especially on smaller characters, where the second hit will whiff on opponent leaving Basara open to being counter attacked. Can be used as close range punish due to it's fairly fast startup for a C button. | |description=Basara flings his shuriken up and then drags it back down. | ||
* This move does two hits, one when it is thrown out and another as the shuriken is returning back to him. | |||
* The two hits will combo on hit and are true block string on block. However, there are some ranges, especially on smaller characters, where the second hit will whiff on opponent leaving Basara open to being counter attacked. | |||
* Can be used as close range punish due to it's fairly fast startup for a C button. | |||
| Line 291: | Line 352: | ||
{{MoveData | {{MoveData | ||
|image=SS_Basara_5D.png | |image=SS_Basara_5D.png | ||
|hitbox=SS_Basara_5D_hb.png | |||
|caption= | |caption= | ||
|name=5D | |name=5D | ||
| Line 298: | Line 360: | ||
|guard=Mid | |guard=Mid | ||
|startup=9 | |startup=9 | ||
|active= | |active=10 | ||
|recovery= | |recovery=14 | ||
|hitAdv=-3 | |hitAdv=-3 | ||
|total=32 | |total=32 | ||
| Line 307: | Line 369: | ||
|recoil= | |recoil= | ||
|deflect=No | |deflect=No | ||
|unarmed= | |unarmed=Yes | ||
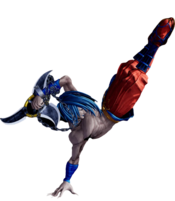
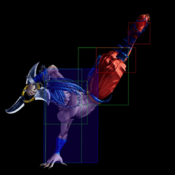
|description=Basara does a handstand with one arm and kicks straight up into the air. One of Basara's main anti-air tools, it's quick and can be done on reaction. Doesn't hit characters who are crouching with the exception of Genjuro and Earthquake. | |description=Basara does a handstand with one arm and kicks straight up into the air. | ||
* One of Basara's main anti-air tools, it's quick and can be done on reaction. | |||
* Doesn't hit characters who are crouching with the exception of Genjuro and Earthquake. | |||
}} | }} | ||
}} | }} | ||
| Line 315: | Line 379: | ||
{{MoveData | {{MoveData | ||
|image=SS_Basara_6D.png | |image=SS_Basara_6D.png | ||
|hitbox=SS_Basara_6D_hb_1.png | |||
|hitbox2=SS_Basara_6D_hb_2.png | |||
|caption= | |caption= | ||
|name=6D | |name=6D | ||
| Line 322: | Line 388: | ||
|guard=High | |guard=High | ||
|startup=26 | |startup=26 | ||
|active= | |active=4 | ||
|recovery= | |recovery=17 | ||
|hitAdv=0 | |hitAdv=0 | ||
|total=46 | |total=46 | ||
| Line 331: | Line 397: | ||
|recoil= | |recoil= | ||
|deflect=No | |deflect=No | ||
|unarmed= | |unarmed=Yes | ||
|description= Basara leaps into an axe kick. This move is one of Basara's overheads. It can be used to go over moves low to the ground. While it is an overhead, the slow startup time makes it difficult to use in a mixup situation | |description= Basara leaps into an axe kick. | ||
* This move is one of Basara's overheads. It can be used to go over moves low to the ground. | |||
* While it is an overhead, the slow startup time makes it difficult to use in a mixup situation. | |||
}} | }} | ||
}} | }} | ||
| Line 339: | Line 407: | ||
{{MoveData | {{MoveData | ||
|image=SS_Basara_2D.png | |image=SS_Basara_2D.png | ||
|hitbox=SS_Basara_2D_hb.png | |||
|caption= | |caption= | ||
|name=2D | |name=2D | ||
| Line 346: | Line 415: | ||
|guard=Low | |guard=Low | ||
|startup=6 | |startup=6 | ||
|active= | |active=3 | ||
|recovery= | |recovery=11 | ||
|hitAdv=-1 | |hitAdv=-1 | ||
|total=19 | |total=19 | ||
| Line 355: | Line 424: | ||
|recoil= | |recoil= | ||
|deflect=No | |deflect=No | ||
|unarmed= | |unarmed=Yes | ||
|description=A standard low kick. One of Basara's faster moves, use to interrupt slower moves or to check opponent walking back during pressure. | |description=A standard low kick. | ||
* One of Basara's faster moves, use to interrupt slower moves or to check opponent walking back during pressure. | |||
}} | }} | ||
}} | }} | ||
| Line 362: | Line 432: | ||
====== <font style="visibility:hidden" size="0">3D</font> ====== | ====== <font style="visibility:hidden" size="0">3D</font> ====== | ||
{{MoveData | {{MoveData | ||
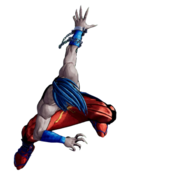
|image= | |image=SS_Basara_66D.png | ||
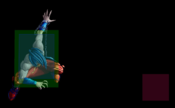
|hitbox=SS_Basara_66D_hb.png | |||
|caption= | |caption= | ||
|name=3D | |name=3D | ||
| Line 370: | Line 441: | ||
|guard=Low | |guard=Low | ||
|startup=12 | |startup=12 | ||
|active= | |active=5 | ||
|recovery= | |recovery=24 | ||
|hitAdv=KD[+96] | |hitAdv=KD[+96] | ||
|total=40 | |total=40 | ||
| Line 379: | Line 450: | ||
|recoil= | |recoil= | ||
|deflect=No | |deflect=No | ||
|unarmed= | |unarmed=Yes | ||
|description=A standard roundhouse sweep. Low hitting poke that knocks down on hit. | |description=A standard roundhouse sweep. | ||
* Low hitting poke that knocks down on hit. | |||
}} | }} | ||
}} | }} | ||
| Line 388: | Line 460: | ||
{{MoveData | {{MoveData | ||
|image=SS_Basara_66A.png | |image=SS_Basara_66A.png | ||
|hitbox=SS_Basara_66A_hb.png | |||
|caption= | |caption= | ||
|name=66A | |name=66A | ||
| Line 395: | Line 468: | ||
|guard=Mid | |guard=Mid | ||
|startup=5 | |startup=5 | ||
|active= | |active=10 | ||
|recovery= | |recovery=13 | ||
|hitAdv=-2~+3 | |hitAdv=-2~+3 | ||
|total=27 | |total=27 | ||
| Line 404: | Line 477: | ||
|recoil= | |recoil= | ||
|deflect=No | |deflect=No | ||
|unarmed= | |unarmed=No | ||
|description=Basara does a full body elbow thrust. A fast running poke that can interrupt and even clip people trying to jump away. If the move is spaced out then it cannot be punished, and Basara is given the opportunity of baiting with deflect.<br><br>''66A will miss on the following characters if they are holding down or down-forward (2 or 3 input): Basara, Nakoruru, Tam Tam, Rimururu, Kazuki, Shizumaru'' | |description=Basara does a full body elbow thrust. | ||
* A fast running poke that can interrupt and even clip people trying to jump away. If the move is spaced out then it cannot be punished, and Basara is given the opportunity of baiting with deflect. | |||
<br><br>''66A will miss on the following characters if they are holding down or down-forward (2 or 3 input): Basara, Nakoruru, Tam Tam, Rimururu, Kazuki, Shizumaru'' | |||
}} | }} | ||
}} | }} | ||
| Line 412: | Line 487: | ||
{{MoveData | {{MoveData | ||
|image=SS_Basara_66B.png | |image=SS_Basara_66B.png | ||
|hitbox=SS_Basara_66B_hb.png | |||
|caption= | |caption= | ||
|name=66B | |name=66B | ||
| Line 419: | Line 495: | ||
|guard=High | |guard=High | ||
|startup=24 | |startup=24 | ||
|active= | |active=7 | ||
|recovery= | |recovery=13 | ||
|hitAdv=KD | |hitAdv=KD | ||
|total=43 | |total=43 | ||
| Line 428: | Line 504: | ||
|recoil= | |recoil= | ||
|deflect=Disarm | |deflect=Disarm | ||
|unarmed= | |unarmed=No | ||
|description=Basara lifts his shuriken in the air and then slams it down. | |description=Basara lifts his shuriken in the air and then slams it down. | ||
* Hits overhead. | |||
* The interesting part of this move is that it can be special canceled as he is holding up the shuriken. This allows Basara to bait with the overhead animation and then immediately switch into command throw or 214D to retreat from the opponent for example. | |||
}} | }} | ||
}} | }} | ||
| Line 436: | Line 514: | ||
{{MoveData | {{MoveData | ||
|image=SS_Basara_66C.png | |image=SS_Basara_66C.png | ||
|hitbox=SS_Basara_66C_hb.png | |||
|caption= | |caption= | ||
|name=66C | |name=66C | ||
| Line 443: | Line 522: | ||
|guard=Mid | |guard=Mid | ||
|startup=12 | |startup=12 | ||
|active= | |active=4 | ||
|recovery= | |recovery=38 | ||
|hitAdv=KD | |hitAdv=KD | ||
|total=53 | |total=53 | ||
| Line 452: | Line 531: | ||
|recoil= | |recoil= | ||
|deflect=Disarm | |deflect=Disarm | ||
|unarmed= | |unarmed=No | ||
|description=Basara hops then does a large slash while holding shuriken. Running whiff punish for a decent amount of damage. | |description=Basara hops then does a large slash while holding shuriken. | ||
* Running whiff punish for a decent amount of damage. | |||
* Knocks down. | |||
* Mostly used after throw for the knockdown and damage. | |||
}} | }} | ||
}} | }} | ||
| Line 460: | Line 542: | ||
{{MoveData | {{MoveData | ||
|image=SS_Basara_66D.png | |image=SS_Basara_66D.png | ||
|hitbox=SS_Basara_66D_hb.png | |||
|caption= | |caption= | ||
|name=66D | |name=66D | ||
| Line 467: | Line 550: | ||
|guard=Low | |guard=Low | ||
|startup=12 | |startup=12 | ||
|active= | |active=5 | ||
|recovery= | |recovery=23 | ||
|hitAdv=KD[+97] | |hitAdv=KD[+97] | ||
|total=39 | |total=39 | ||
| Line 476: | Line 559: | ||
|recoil= | |recoil= | ||
|deflect=No | |deflect=No | ||
|unarmed= | |unarmed=Yes | ||
|description=Basically the same move as 3D with the forward momentum from running. | |description= Basara sweeps his opponent's legs | ||
* Basically the same move as 3D with the forward momentum from running. | |||
}} | }} | ||
}} | }} | ||
| Line 485: | Line 569: | ||
{{MoveData | {{MoveData | ||
|image=SS_Basara_jA.png | |image=SS_Basara_jA.png | ||
|hitbox=SS_Basara_jA_hb.png | |||
|caption= | |caption= | ||
|name=j.A | |name=j.A | ||
| Line 492: | Line 577: | ||
|guard=High | |guard=High | ||
|startup=7 | |startup=7 | ||
|active= | |active=3 | ||
|recovery= | |recovery= | ||
|hitAdv= | |hitAdv= | ||
| Line 501: | Line 586: | ||
|recoil= | |recoil= | ||
|deflect= | |deflect= | ||
|unarmed= | |unarmed=No | ||
|description=Basara | |description=Basara does a quick air slash. | ||
* His go-to crossup option. | |||
* Has light hitstun/blockstun which enables tic throws. | |||
}} | }} | ||
}} | }} | ||
| Line 509: | Line 596: | ||
{{MoveData | {{MoveData | ||
|image=SS_Basara_jB.png | |image=SS_Basara_jB.png | ||
|hitbox=SS_Basara_jB_hb.png | |||
|caption= | |caption= | ||
|name=j.B | |name=j.B | ||
| Line 516: | Line 604: | ||
|guard=High | |guard=High | ||
|startup=13 | |startup=13 | ||
|active= | |active=4 | ||
|recovery= | |recovery= | ||
|hitAdv= | |hitAdv= | ||
| Line 525: | Line 613: | ||
|recoil= | |recoil= | ||
|deflect= | |deflect= | ||
|unarmed= | |unarmed=No | ||
|description=Basara | |description=Basara whips with his chain. | ||
* His main air-to-air as well as a situational jump-in for baiting anti-air attempts. | |||
}} | }} | ||
}} | }} | ||
| Line 533: | Line 622: | ||
{{MoveData | {{MoveData | ||
|image=SS_Basara_jC.png | |image=SS_Basara_jC.png | ||
|hitbox=SS_Basara_jC_hb.png | |||
|caption= | |caption= | ||
|name=j.C | |name=j.C | ||
| Line 540: | Line 630: | ||
|guard=High | |guard=High | ||
|startup=14 | |startup=14 | ||
|active= | |active=3 | ||
|recovery= | |recovery= | ||
|hitAdv= | |hitAdv= | ||
| Line 549: | Line 639: | ||
|recoil= | |recoil= | ||
|deflect= | |deflect= | ||
|unarmed= | |unarmed=No | ||
|description= | |description= Basara does a big downwards slash. | ||
* Standard deep jump-in attack. | |||
* Can cross up. | |||
}} | }} | ||
}} | }} | ||
| Line 557: | Line 649: | ||
{{MoveData | {{MoveData | ||
|image=SS_Basara_jD.png | |image=SS_Basara_jD.png | ||
|hitbox=SS_Basara_jD_hb.png | |||
|caption= | |caption= | ||
|name=j.D | |name=j.D | ||
| Line 564: | Line 657: | ||
|guard=High | |guard=High | ||
|startup=11 | |startup=11 | ||
|active= | |active=10 | ||
|recovery= | |recovery= | ||
|hitAdv= | |hitAdv= | ||
| Line 573: | Line 666: | ||
|recoil= | |recoil= | ||
|deflect= | |deflect= | ||
|unarmed= | |unarmed=Yes | ||
|description= Fairly standard jumping kick attack, nothing particularly special about it. | |description= Basara does an air kick. | ||
*Fairly standard jumping kick attack, nothing particularly special about it. | |||
}} | }} | ||
}} | }} | ||
| Line 582: | Line 676: | ||
{{MoveData | {{MoveData | ||
|image=SS_Basara_u5S.png | |image=SS_Basara_u5S.png | ||
|hitbox=SS_Basara_u.5S_hb.png | |||
|caption= | |caption= | ||
|name=u.5S | |name=u.5S | ||
| Line 589: | Line 684: | ||
|guard=Mid | |guard=Mid | ||
|startup=7 | |startup=7 | ||
|active= | |active=2 | ||
|recovery= | |recovery=11 | ||
|hitAdv=0 | |hitAdv=0 | ||
|total=19 | |total=19 | ||
| Line 598: | Line 693: | ||
|recoil= | |recoil= | ||
|deflect=No | |deflect=No | ||
|unarmed= | |unarmed=Only | ||
|description=Same attack as 5A | |description= * Same attack as 5A. | ||
}} | }} | ||
}} | }} | ||
| Line 606: | Line 701: | ||
{{MoveData | {{MoveData | ||
|image=SS_Basara_u2S.png | |image=SS_Basara_u2S.png | ||
|hitbox=SS_Basara_u2S_hb.png | |||
|caption= | |caption= | ||
|name=u.2S | |name=u.2S | ||
| Line 613: | Line 709: | ||
|guard=Mid | |guard=Mid | ||
|startup=5 | |startup=5 | ||
|active= | |active=2 | ||
|recovery= | |recovery=11 | ||
|hitAdv=1 | |hitAdv=+1 | ||
|total=16 | |total=16 | ||
|blockAdv=-2 | |blockAdv=-2 | ||
| Line 622: | Line 718: | ||
|recoil= | |recoil= | ||
|deflect=No | |deflect=No | ||
|unarmed= | |unarmed=Only | ||
|description=Same attack as 2A | |description= * Same attack as 2A | ||
}} | }} | ||
}} | }} | ||
| Line 630: | Line 726: | ||
{{MoveData | {{MoveData | ||
|image=SS_Basara_juS.png | |image=SS_Basara_juS.png | ||
|hitbox=SS_Basara_u.jS_hb.png | |||
|caption= | |caption= | ||
|name=ju.S | |name=ju.S | ||
| Line 637: | Line 734: | ||
|guard=High | |guard=High | ||
|startup=8 | |startup=8 | ||
|active= | |active=3 | ||
|recovery= | |recovery= | ||
|hitAdv= | |hitAdv= | ||
| Line 646: | Line 743: | ||
|recoil= | |recoil= | ||
|deflect= | |deflect= | ||
|unarmed= | |unarmed=Only | ||
|description= | |description= Basara does a sweeping air chop. | ||
* Standard unarmed normal. | |||
}} | }} | ||
}} | }} | ||
| Line 654: | Line 752: | ||
{{MoveData | {{MoveData | ||
|image=SS_Basara_u66S.png | |image=SS_Basara_u66S.png | ||
|hitbox=SS_Basara_66A_hb.png | |||
|caption= | |caption= | ||
|name=u.66S | |name=u.66S | ||
| Line 661: | Line 760: | ||
|guard=Mid | |guard=Mid | ||
|startup=5 | |startup=5 | ||
|active= | |active=10 | ||
|recovery= | |recovery=13 | ||
|hitAdv=KD | |hitAdv=KD | ||
|total=27 | |total=27 | ||
| Line 670: | Line 769: | ||
|recoil= | |recoil= | ||
|deflect=No | |deflect=No | ||
|unarmed= | |unarmed=Only | ||
|description= | |description= Basara does an elbow strike. | ||
* Similar to his 66A, but it knocks down. Standard unarmed 66A. | |||
}} | }} | ||
}} | }} | ||
| Line 699: | Line 799: | ||
|deflect=No | |deflect=No | ||
|unarmed=Yes | |unarmed=Yes | ||
|description=Universal throw. | |description=Universal throw. | ||
* Usually followed up by 66C when done raw, as it's his most damaging move after throw that gives him a knockdown. | |||
* Opponents can be thrown into his 236D/puffball, giving you unique combo opportunities. | |||
}} | }} | ||
{{AttackData-SS2019 | {{AttackData-SS2019 | ||
| Line 716: | Line 818: | ||
|deflect=No | |deflect=No | ||
|unarmed=Yes | |unarmed=Yes | ||
|description=Universal throw. | |description= Universal throw. | ||
* Has a tricky setup where Basara can combo into his WFT from backthrow, although the damage is low and generally not worth it, unless you really need the disarm. | |||
}} | }} | ||
}} | }} | ||
| Line 725: | Line 828: | ||
|caption= | |caption= | ||
|name=Surprise Attack (Overhead) | |name=Surprise Attack (Overhead) | ||
|hitbox=SS_Basara_5BC_hb.png | |||
|input=5B+C | |input=5B+C | ||
|data= | |data= | ||
| Line 732: | Line 836: | ||
|guard=High | |guard=High | ||
|startup=21 | |startup=21 | ||
|active= | |active=8 | ||
|recovery= | |recovery=16 | ||
|hitAdv=KD | |hitAdv=KD | ||
|total=44 | |total=44 | ||
| Line 742: | Line 846: | ||
|deflect= | |deflect= | ||
|unarmed=Yes | |unarmed=Yes | ||
|description=Basara does a front flip kick as his universal overhead. Moves Basara forward and can go over fireballs that are low to the ground as well as lows. Knocks down on hit | |description=Basara does a front flip kick as his universal overhead. | ||
* Moves Basara forward and can go over fireballs that are low to the ground as well as lows. | |||
* Knocks down on hit, same with the unarmed version. | |||
}} | }} | ||
}} | }} | ||
| Line 767: | Line 873: | ||
|deflect=N/A | |deflect=N/A | ||
|unarmed=Yes | |unarmed=Yes | ||
|description=Universal dodge. Avoids all attacks for a brief moment, and is mainly used to avoid throws.<br><br>''Complete invincibility from frames 1 to 10. Strike invincibility from frames 11 to 16.'' | |description=Universal dodge. | ||
* Avoids all attacks for a brief moment, and is mainly used to avoid throws. | |||
<br><br>''Complete invincibility from frames 1 to 10. Strike invincibility from frames 11 to 16.'' | |||
}} | }} | ||
}} | }} | ||
| Line 799: | Line 907: | ||
{{MoveData | {{MoveData | ||
|image=SS_Basara_236AB.png | |image=SS_Basara_236AB.png | ||
|hitbox=SS_Basara_Deflect_hb.png | |||
|caption=Counter | |caption=Counter | ||
|image2=SS_Basara_u236AB.png | |image2=SS_Basara_u236AB.png | ||
|hitbox2=SS_Basara_Blade_Catch_hb.png | |||
|caption2=Blade Catch | |caption2=Blade Catch | ||
|name=Counter / Blade Catch | |name=Counter / Blade Catch | ||
| Line 819: | Line 929: | ||
|deflect=N/A | |deflect=N/A | ||
|unarmed=No | |unarmed=No | ||
|description=Universal counter. Allows you to follow up with a guaranteed attack of your own. The amount of time you have to followup depends on the strength of the attack you counter, with heavy attacks staggering the opponent for the longest amount of time. Additionally, if you counter a heavy slash or a running slash, your opponent will be disarmed. | |description=Universal counter. | ||
* Allows you to follow up with a guaranteed attack of your own. | |||
* The amount of time you have to followup depends on the strength of the attack you counter, with heavy attacks staggering the opponent for the longest amount of time. | |||
* Additionally, if you counter a heavy slash or a running slash, your opponent will be disarmed. | |||
* Successful deflects give you a WFT punish. Scoring a heavy/dash deflect allows an SSM punish. | |||
}} | }} | ||
{{AttackData-SS2019 | {{AttackData-SS2019 | ||
| Line 836: | Line 950: | ||
|deflect=N/A | |deflect=N/A | ||
|unarmed=Yes | |unarmed=Yes | ||
|description=Universal counter. | |description=Universal counter. | ||
* Disarms and knocks the opponent away on successful catch, regardless of the slash strength used by the opponent. }} | |||
}} | }} | ||
| Line 860: | Line 974: | ||
|recoil= | |recoil= | ||
|deflect= | |deflect= | ||
|unarmed= | |unarmed=No | ||
|description=Unblockable pushback attack. | |description=Unblockable pushback attack. | ||
* Since Rage Explosion puts the opponent in unblockable, 0 damage hitstun, it can be used in very risky, but potentially game-winning unblockable setups by using the knockback to knock people into your puffball then following up with WFT/Issen. | |||
}} | }} | ||
}} | }} | ||
| Line 886: | Line 1,001: | ||
|deflect=No | |deflect=No | ||
|unarmed=No | |unarmed=No | ||
|description=Has projectile invulnerability and anti-airs. Damage scales up based on remaining health. | |description= | ||
* Has projectile invulnerability and anti-airs. | |||
* Damage scales up based on remaining health. | |||
* Can be combo'd into with puffball. | |||
}} | }} | ||
}} | }} | ||
| Line 922: | Line 1,040: | ||
{{MoveData | {{MoveData | ||
|image=SS_Basara_236S.png | |image=SS_Basara_236S.png | ||
|image2=SS_Basara_236S_2.png | |||
|hitbox=SS_Basara_236S_hb.png | |||
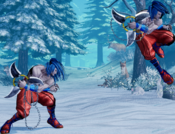
|caption= | |caption= | ||
|caption2=Toss trajectories. | |||
|name=Ground Slash | |name=Ground Slash | ||
|input=236S | |input=236S | ||
| Line 931: | Line 1,052: | ||
|guard=Mid | |guard=Mid | ||
|startup=35~50 [12] | |startup=35~50 [12] | ||
|active= | |active=40 | ||
|recovery= | |recovery=26 | ||
|hitAdv=KD | |hitAdv=KD | ||
|total=77 | |total=77 | ||
| Line 941: | Line 1,062: | ||
|deflect= | |deflect= | ||
|unarmed=No | |unarmed=No | ||
|description= | |description= Also referred to as "Toss". | ||
Basara twirls his shuriken in a circular pattern. | |||
* The hitbox is active throughout most of the animation but disappears right as he's retrieving the shuriken. | |||
* Hits opponents in the air much sooner than it would hit them on the ground (the sole exception is Earthquake, who is tall enough to get hit on the ground early). | |||
* Basara instantly retrieves the shuriken on hit/block. In the case of a projectile clash, the projectile will be nullified unless it is a special projectile (Rimu WFT, Shizu SSM). | |||
* If whiffed, can still hit people during the first frames on its way back. | |||
* Basara's primary anti-air due to the properties named above | |||
* To differentiate it from normal attacks, the shuriken gains a purple and orange glow during the attack. | |||
* A toss will extend about a character's length away before returning. | |||
Startup in brackets is against airborne opponents. | <br><br>''Startup in brackets is against airborne opponents.'' | ||
}} | }} | ||
{{AttackData-SS2019 | {{AttackData-SS2019 | ||
| Line 955: | Line 1,082: | ||
|guard=Mid | |guard=Mid | ||
|startup=40~55 [14] | |startup=40~55 [14] | ||
|active= | |active=42 | ||
|recovery= | |recovery=35 | ||
|hitAdv=KD | |hitAdv=KD | ||
|total=89 | |total=89 | ||
| Line 965: | Line 1,092: | ||
|deflect= | |deflect= | ||
|unarmed=No | |unarmed=No | ||
|description= | |description= | ||
* Goes about 3/4s of the screen before returning. All other aspects the same as the light version. | |||
}} | }} | ||
{{AttackData-SS2019 | {{AttackData-SS2019 | ||
| Line 975: | Line 1,102: | ||
|guard=Mid | |guard=Mid | ||
|startup=44~59 [16] | |startup=44~59 [16] | ||
|active= | |active=44 | ||
|recovery= | |recovery=41 | ||
|hitAdv=KD | |hitAdv=KD | ||
|total=100 | |total=100 | ||
| Line 985: | Line 1,112: | ||
|deflect= | |deflect= | ||
|unarmed=No | |unarmed=No | ||
|description= | |description= | ||
* Goes almost full-screen. | |||
}} | }} | ||
}} | }} | ||
| Line 994: | Line 1,121: | ||
{{MoveData | {{MoveData | ||
|image=SS_Basara_j236S.png | |image=SS_Basara_j236S.png | ||
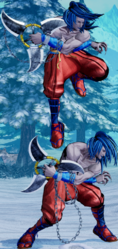
|image2=SS_Basara_j236S_2.png | |||
|hitbox=SS_Basara_j236S_hb.png | |||
|caption= | |caption= | ||
|caption2=Air toss trajectories. | |||
|name=Aerial Jab | |name=Aerial Jab | ||
|input=j.236S | |input=j.236S | ||
| Line 1,000: | Line 1,130: | ||
{{AttackData-SS2019 | {{AttackData-SS2019 | ||
|version=A | |version=A | ||
|damage= | |damage=130 | ||
|guard=High | |guard=High | ||
|startup=8 | |startup=8 | ||
|active= | |active= 37 | ||
|recovery= | |recovery= Until landing + 21 | ||
|hitAdv=KD | |hitAdv=KD | ||
|total=22 | |total=22 | ||
| Line 1,013: | Line 1,143: | ||
|deflect= | |deflect= | ||
|unarmed=No | |unarmed=No | ||
|description=Basara tosses out his shuriken at an angle slightly in front of and below him | |description=Basara tosses out his shuriken at an angle slightly in front of and below him. | ||
* Hits overhead | |||
* The move has falling and landing recovery which makes it SSM punishable by aware opponents. | |||
* Basara instantly retrieves the shuriken on hit/block. In the case of a projectile clash, the projectile will be nullified unless it is a special projectile (Rimu WFT, Shizu SSM). | |||
* If whiffed, can still hit people during the first frames on its way back. | |||
* Primarily used to punish anti-air attempts on jump-ins or to punish a j2K punish attempt. | |||
* Can be done from backdash, as Basara is considered airborne while backdashing. Basara will primarily only use the C version from backdash though, as A and B's flight angles make it hard, if not impossible, to hit from a backdash. | |||
* To differentiate it from normal attacks, the shuriken gains a purple and orange glow during the attack. | |||
* A version flies at a 30 degree angle. | |||
}} | }} | ||
{{AttackData-SS2019 | {{AttackData-SS2019 | ||
| Line 1,030: | Line 1,162: | ||
|guard=High | |guard=High | ||
|startup=8 | |startup=8 | ||
|active= | |active= 37 | ||
|recovery= | |recovery= Until landing + 21 | ||
|hitAdv=KD | |hitAdv=KD | ||
|total=21 | |total=21 | ||
| Line 1,040: | Line 1,172: | ||
|deflect= | |deflect= | ||
|unarmed=No | |unarmed=No | ||
|description= | |description= | ||
* Flies at a 45 degree angle. | |||
}} | }} | ||
{{AttackData-SS2019 | {{AttackData-SS2019 | ||
| Line 1,048: | Line 1,181: | ||
|guard=High | |guard=High | ||
|startup=8 | |startup=8 | ||
|active= | |active= 37 | ||
|recovery= | |recovery= Until landing + 21 | ||
|hitAdv=KD | |hitAdv=KD | ||
|total=21 | |total=21 | ||
| Line 1,058: | Line 1,191: | ||
|deflect= | |deflect= | ||
|unarmed=No | |unarmed=No | ||
|description= | |description= | ||
* Flies straight forward. | |||
* The most used version due to the aforementioned backdash properties allowing Basara to use it as a unique whiff punish tool and overhead. | |||
* Can also be used as a situational air-to-air for hitting airborne opponents that are further away from you. | |||
}} | }} | ||
}} | }} | ||
| Line 1,065: | Line 1,201: | ||
{{MoveData | {{MoveData | ||
|image=SS_Basara_623S.png | |image=SS_Basara_623S.png | ||
|hitbox=SS_Basara_623S_hb.png | |||
|caption= | |caption= | ||
|name=Shadow Exit | |name=Shadow Exit | ||
| Line 1,074: | Line 1,211: | ||
|guard=Mid | |guard=Mid | ||
|startup=27 | |startup=27 | ||
|active= | |active=10 (2(1)7) | ||
|recovery= | |recovery=37 | ||
|hitAdv=KD[+87] | |hitAdv=KD[+87] | ||
|total=82 | |total=82 | ||
| Line 1,084: | Line 1,221: | ||
|deflect= | |deflect= | ||
|unarmed=No | |unarmed=No | ||
|description= | |description= Basara takes a quick dive into the underworld and reemerges, slashing upwards with the blade of his shuriken. | ||
* A version is stationary and has the least vertical distance. | |||
* Throw invulnerability on startup. | |||
* Used mostly as a very situational anti-air for people directly above you at heights A toss won't reach and the character has too much momentum for the C version to properly track. | |||
}} | }} | ||
{{AttackData-SS2019 | {{AttackData-SS2019 | ||
| Line 1,092: | Line 1,232: | ||
|guard=Mid | |guard=Mid | ||
|startup=27 | |startup=27 | ||
|active= | |active=15(2(1)12) | ||
|recovery= | |recovery=39 | ||
|hitAdv=KD[+79] | |hitAdv=KD[+79] | ||
|total=89 | |total=89 | ||
| Line 1,102: | Line 1,242: | ||
|deflect= | |deflect= | ||
|unarmed=No | |unarmed=No | ||
|description= | |description= | ||
* Goes forward a fixed distance and has slightly more vertical range than the A version. | |||
* Rarely used like the A version, as most of its uses are very situational. | |||
}} | }} | ||
{{AttackData-SS2019 | {{AttackData-SS2019 | ||
| Line 1,110: | Line 1,253: | ||
|guard=Mid | |guard=Mid | ||
|startup=27 | |startup=27 | ||
|active= | |active=22 (2(1)19) | ||
|recovery= | |recovery=36 | ||
|hitAdv=KD[+76] | |hitAdv=KD[+76] | ||
|total=93 | |total=93 | ||
| Line 1,120: | Line 1,263: | ||
|deflect= | |deflect= | ||
|unarmed=No | |unarmed=No | ||
|description= | |description= | ||
* Tracks the last position of the opponent at the end of the startup. | |||
* One of Basara's unique whiff punish tools, as it allows him to punish moves most of the cast has to hold, like full-screen projectiles. | |||
}} | }} | ||
{{AttackData-SS2019 | {{AttackData-SS2019 | ||
|header=no | |header=no | ||
|version=Rage | |version=Rage | ||
|damage=190 | |damage=190(Base) | ||
|guard=Mid | |guard=Mid | ||
|startup=27 | |startup=27 | ||
|active= | |active=22 (2(1)19) | ||
|recovery= | |recovery=36 | ||
|hitAdv=KD[+99] | |hitAdv=KD[+99] | ||
|total=93 | |total=93 | ||
| Line 1,138: | Line 1,283: | ||
|deflect= | |deflect= | ||
|unarmed=No | |unarmed=No | ||
|description= | |description= | ||
*Rage version of C DP adds 8 additional hits, more damage and gives a better knockdown. | |||
}} | }} | ||
}} | }} | ||
| Line 1,145: | Line 1,291: | ||
{{MoveData | {{MoveData | ||
|image=SS_Basara_236D.png | |image=SS_Basara_236D.png | ||
|hitbox=SS_Basara_236D_hb.png | |||
|caption=OREO | |caption=OREO | ||
|name=Soul of The Beast | |name=Soul of The Beast | ||
| Line 1,154: | Line 1,301: | ||
|guard=Mid | |guard=Mid | ||
|startup=35~122 | |startup=35~122 | ||
|active= | |active=93 | ||
|recovery= | |recovery=20 | ||
|hitAdv=+13~ | |hitAdv=+13~ | ||
|total=54 | |total=54 | ||
| Line 1,164: | Line 1,311: | ||
|deflect= | |deflect= | ||
|unarmed=No | |unarmed=No | ||
|description= | |description= Also referred to as "puffball/puff". | ||
Basara sends out the spirit of a Nue to hunt his opponent down. | |||
* Flies upwards in an arc on startup. | |||
* After reaching maximum height, it will start flying down while tracking the opponent. | |||
* Stays on screen for 93 frames before disappearing. | |||
* Basara's main tool after scoring a knockdown. | |||
* Enables combos that are otherwise impossible and gives slight juggle state on air hit. | |||
* A threatening tool that forces people to respect Basara. | |||
}} | }} | ||
}} | }} | ||
| Line 1,180: | Line 1,335: | ||
|guard= | |guard= | ||
|startup= | |startup= | ||
|active= | |active=47 | ||
|recovery= | |recovery=16 | ||
|hitAdv= | |hitAdv= | ||
|total= | |total= | ||
| Line 1,190: | Line 1,345: | ||
|deflect= | |deflect= | ||
|unarmed=Yes | |unarmed=Yes | ||
|description=Basara sinks into his shadow and is able to move left or right afterwards, and he will reemerge after a set period of time. Capable of crossing up opponent. | |description=Basara sinks into his shadow and is able to move left or right afterwards, and he will reemerge after a set period of time. | ||
* Capable of crossing up opponent. | |||
* Throw invincible on startup. | |||
* Can move under opponents | |||
* Used as a situational escape tool due to the recovery being slow. | |||
}} | }} | ||
}} | }} | ||
| Line 1,199: | Line 1,356: | ||
{{MoveData | {{MoveData | ||
|image=SS_Basara_j2D.png | |image=SS_Basara_j2D.png | ||
|caption= | |hitbox=SS_Basara_j2D_hb.png | ||
|caption= boing | |||
|name=Flaying Feet | |name=Flaying Feet | ||
|input=j.2D | |input=j.2D | ||
| Line 1,208: | Line 1,366: | ||
|guard=High | |guard=High | ||
|startup=3 | |startup=3 | ||
|active= | |active=Until landing | ||
|recovery= | |recovery= | ||
|hitAdv= | |hitAdv= | ||
| Line 1,218: | Line 1,376: | ||
|deflect= | |deflect= | ||
|unarmed=Yes | |unarmed=Yes | ||
|description=Basara stomps on his opponent while in the air. If the attack lands on the opponent, hit or block, he will automatically bounce back up again. He has all of his air actions available again after he bounces back up. | |description= Also referred to as "Pogo" | ||
Basara stomps on his opponent while in the air. | |||
* If the attack lands on the opponent, hit or block, he will automatically bounce back up again. | |||
* He has all of his air actions available again after he bounces back up. | |||
* Holding forward or back will make Basara bounce a fixed distance in an arc in the held direction, otherwise he will bounce up vertically. | |||
* Stays active as long as Basara is airborne. | |||
}} | }} | ||
}} | }} | ||
| Line 1,225: | Line 1,389: | ||
{{MoveData | {{MoveData | ||
|image=SS_Basara_623D.png | |image=SS_Basara_623D.png | ||
|hitbox=SS_Basara_623D_hb.png | |||
|caption=KAGARIBI! | |caption=KAGARIBI! | ||
|name=Friendly Rip | |name=Friendly Rip | ||
| Line 1,234: | Line 1,399: | ||
|guard=Throw | |guard=Throw | ||
|startup=6 | |startup=6 | ||
|active= | |active=1 | ||
|recovery= | |recovery=48 | ||
|hitAdv=KD | |hitAdv=KD | ||
|total=54 | |total=54 | ||
| Line 1,243: | Line 1,408: | ||
|deflect= | |deflect= | ||
|unarmed=No | |unarmed=No | ||
|description= | |description= Basara grabs the opponent and drags them into the underworld. | ||
* An important tool for Basara's neutral to condition overly defensive opponents. | |||
* Gives a good knockdown on hit, allowing for puff oki. | |||
}} | }} | ||
}} | }} | ||
| Line 1,249: | Line 1,417: | ||
====== <font style="visibility:hidden" size="0">Shadow Feint</font> ====== | ====== <font style="visibility:hidden" size="0">Shadow Feint</font> ====== | ||
{{MoveData | {{MoveData | ||
|image= | |image=SS_Basara_421_A.png | ||
|caption= | |image2=SS_Basara_421_B.png | ||
|image3=SS_Basara_421_C.png | |||
|image4=SS_Basara_421_A+D.png | |||
|image5=SS_Basara_421_B+D.png | |||
|image6=SS_Basara_421_C+D.png | |||
|caption=A Version | |||
|caption2=B Version | |||
|caption3=C Version | |||
|caption4=A+D Version | |||
|caption5=B+D Version | |||
|caption6=C+D Version | |||
|name=Shadow Feint | |name=Shadow Feint | ||
|input=421S or 421S+D | |input=421S or 421S+D | ||
| Line 1,268: | Line 1,446: | ||
|recoil= | |recoil= | ||
|deflect= | |deflect= | ||
|unarmed= | |unarmed=Yes | ||
|description=Basara becomes invisible and then sends out a | |description=Basara becomes invisible and then sends out a shadow clone to mimic an action. | ||
* Basara's defining neutral tool and the move that perfectly ties his moveset together. | |||
* Basara will go invisible when sending out a shadow clone that mimicks an action depending on the button(s) pressed, which disappears after the action is done. | |||
* Clones are vital for conditioning the opponent to fall for Basara's gimmicks. | |||
* Clones can be told apart from the real Basara by aware opponents, as they have some subtle, yet important differences from the real Basara: | |||
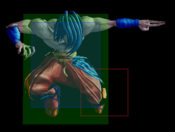
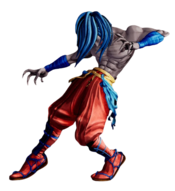
** They don't have blood splatters on them. | |||
** They do ''not'' move the camera forwards or backwards when feinting an action. | |||
** They don't have a shadow under them (duh). | |||
* Basara can still be hit while feinting, so avoid overusing clones, as it'll make your opponents more eager to mash. | |||
A version mimics forward jump. | A version mimics forward jump. | ||
| Line 1,288: | Line 1,475: | ||
|recoil= | |recoil= | ||
|deflect= | |deflect= | ||
|unarmed= | |unarmed=Yes | ||
|description= B version mimics neutral jump. | |description= B version mimics neutral jump. | ||
}} | }} | ||
| Line 1,306: | Line 1,493: | ||
|recoil= | |recoil= | ||
|deflect= | |deflect= | ||
|unarmed= | |unarmed=Yes | ||
|description=C version mimics back jump. | |description=C version mimics back jump. | ||
}} | }} | ||
| Line 1,324: | Line 1,511: | ||
|recoil= | |recoil= | ||
|deflect= | |deflect= | ||
|unarmed= | |unarmed=Yes | ||
|description=A+D version mimics walking forward. | |description=A+D version mimics walking forward. | ||
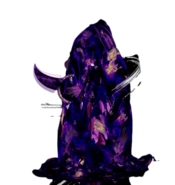
}} | }} | ||
| Line 1,342: | Line 1,529: | ||
|recoil= | |recoil= | ||
|deflect= | |deflect= | ||
|unarmed= | |unarmed=Yes | ||
|description=B+D version mimics dashing forward | |description=B+D version mimics dashing forward | ||
}} | }} | ||
| Line 1,360: | Line 1,547: | ||
|recoil= | |recoil= | ||
|deflect= | |deflect= | ||
|unarmed= | |unarmed=Yes | ||
|description=C+D version mimics Shadow Sucker special and moves straight forward. | |description=C+D version mimics Shadow Sucker special and moves straight forward. | ||
}} | }} | ||
| Line 1,368: | Line 1,555: | ||
{{MoveData | {{MoveData | ||
|image=SS_Basara_j1D_or_j3D.png | |image=SS_Basara_j1D_or_j3D.png | ||
|hitbox=SS_Basara_j3D_hb.png | |||
|caption= | |caption= | ||
|name=Skull Cleaver | |name=Skull Cleaver | ||
| Line 1,377: | Line 1,565: | ||
|guard=High | |guard=High | ||
|startup=11 | |startup=11 | ||
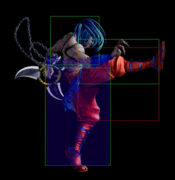
|active= | |active=8 | ||
|recovery= | |recovery=Until landing | ||
|hitAdv=KD | |hitAdv=KD | ||
|total= | |total= | ||
| Line 1,386: | Line 1,574: | ||
|recoil= | |recoil= | ||
|deflect= | |deflect= | ||
|unarmed= | |unarmed=Yes | ||
|description=Basara does a falling flip kick | |description=Basara does a falling flip kick. | ||
* Knocks down on hit. | |||
* Plus on block, even at max height, allowing for tickthrows and mixup situations. | |||
* Surprisingly generous hitbox that stuffs a good amount of moves. | |||
* Can cross up. | |||
}} | }} | ||
}} | }} | ||
| Line 1,395: | Line 1,588: | ||
{{MoveData | {{MoveData | ||
|image=SS_Basara_WFT.png | |image=SS_Basara_WFT.png | ||
|image2=SS_Basara_WFT_2.png | |||
|image3=SS_Basara_WFT_3.png | |||
|hitbox=SS_Basara_WFT_hb.png | |||
|caption= | |caption= | ||
|name=Shadow Dance Dream Pull | |name=Shadow Dance Dream Pull | ||
| Line 1,404: | Line 1,600: | ||
|guard=Mid | |guard=Mid | ||
|startup=1+23~39 | |startup=1+23~39 | ||
|active= | |active=19 | ||
|recovery= | |recovery=21 | ||
|hitAdv=KD | |hitAdv=KD | ||
|total=62 | |total=62 | ||
| Line 1,413: | Line 1,609: | ||
|deflect=No | |deflect=No | ||
|unarmed=No | |unarmed=No | ||
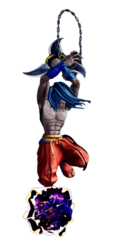
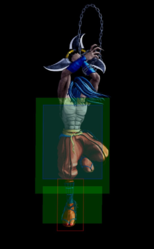
|description=Basara disappears and reappears a moment later to dash straight at the opponent. | |description=Basara disappears and reappears a moment later to dash straight at the opponent, assaulting him with a flurry of attacks, finishing with a throat slice. | ||
* A real reversal this time around, having full invincibility. | |||
* On block, makes Basara bounce back almost fullscreen with some hefty recovery. | |||
* On whiff, makes Basara just dash right by with little recovery. | |||
* Solid damage for a WFT, although almost impossible to combo into due to the slow startup. | |||
* Can be used as a very risky, but also very punishing callout on people mashing medium/heavy/dashing buttons. | |||
<br><br>''Complete invincibility from frames 2-19.'' | |||
}} | }} | ||
| Line 1,421: | Line 1,624: | ||
{{MoveData | {{MoveData | ||
|image=SS_Basara_SSM.png | |image=SS_Basara_SSM.png | ||
|hitbox=SS_Basara_SSM_hb.png | |||
|caption= | |caption= | ||
|name=Shadow Dance Deep Abyss | |name=Shadow Dance Deep Abyss | ||
| Line 1,430: | Line 1,634: | ||
|guard=Mid | |guard=Mid | ||
|startup=10+19 | |startup=10+19 | ||
|active= | |active=5 | ||
|recovery= | |recovery=82 | ||
|hitAdv=KD | |hitAdv=KD | ||
|total=115 | |total=115 | ||
| Line 1,439: | Line 1,643: | ||
|deflect=No | |deflect=No | ||
|unarmed=No | |unarmed=No | ||
|description= | |description= Basara creates a massive shadow pillar, summoning his wife Kagaribi to drag his opponents into the underworld to decimate them. | ||
* Good as an anti-air due to the vertical hitbox, but has a rather small amount of active frames, which means that good timing is essential when AA-ing with this move. | |||
* Poor horizontal range, making it not as good on deflects as other SSMs. | |||
* Solid damage for an SSM. | |||
}} | }} | ||
}} | }} | ||
| Line 1,457: | Line 1,665: | ||
Grab combo mostly the same. | Grab combo mostly the same. | ||
* '''5CD / 4CD'''<br>''Throw into the corner...'' | * '''5CD / 4CD'''<br>''Throw into the corner...'' | ||
** ''' | ** '''n.5C''' <br>''Can't really get the far one.'' | ||
** '''n.2C''' <br>''Put Basara in a good spacing for more pressure.'' | |||
===Universal=== | ===Universal=== | ||
* '''jump C (Deep hit)...''' | * '''jump C (Deep hit)...''' | ||
** '''5C / | ** '''5C / n.5C''' <br>''Universal combo after jump C deep hit.'' | ||
** '''Lighting Blade''' <br>''Issen combo.'' | ** '''Lighting Blade''' <br>''Issen combo.'' | ||
===Guard Crush=== | ===Guard Crush=== | ||
*''' | *'''n.5C / 5C...'''<br>''After recovery...'' | ||
** ''' | ** '''n.5C / 5C / 2C''' <br>''Standard follow up that's damaging enough.'' | ||
** '''SSM''' <br>'' | ** '''SSM''' <br>''SSM follow up. (Be careful with opponent bursting to avoid it, timing is tight after far 5C if do not use Shadow Feint cancel, see below)'' | ||
*'''n.5C / 5C...'''<br>''Cancel recovery...'' | *'''n.5C / 5C...'''<br>''Cancel recovery...'' | ||
** '''Lighting Blade'''<br>''Universal Issen combo.'' | ** '''Lighting Blade'''<br>''Universal Issen combo.'' | ||
** '''WFT'''<br>''WFT follow up.'' | |||
** '''421S...'''<br>''Shadow Feint...(The version doesn't matter)'' | |||
*** '''SSM''' <br>''The Shadow Feint cancel makes it easier to get SSM but it's not required. (Be careful with opponent bursting to avoid it)'' | |||
===236D/Puffball combos=== | |||
*'''236D > 66A > puff hit > 5C''' <br>''Requires precise timing on the puff hit to combo into 5C, which is on the later hitstun frames of 66A'' | |||
*'''236D > air hit > 623C''' | |||
*'''236D > 2K > puff hit > 5C''' <br>''Requires precise timing on the 5C.'' | |||
*'''236D > forward throw > puff hit > 5C/66C''' | |||
==Videos== | ==Videos== | ||
*[https://www.youtube.com/watch?v=c7WLb0o7hUA Basara tutorial and combos] by LegendaryWolf Shirou | *[https://www.youtube.com/watch?v=c7WLb0o7hUA Basara tutorial and combos] by LegendaryWolf Shirou | ||
*[https://www.youtube.com/watch?v=QpefsCpQmrc&t=1h3m44s ShinChie vs Jackorcb at WNF Online Edition] | |||
*[https://www.youtube.com/watch?v=yFVp4sX3LO4&t=1h39m48s SpaceDetectiveKh vs LewdStares at WNF Online Edition] | |||
==Colors== | ==Colors== | ||
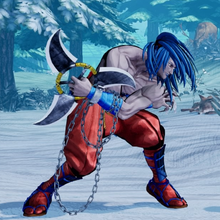
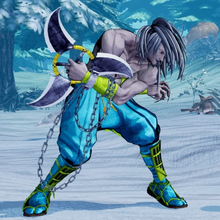
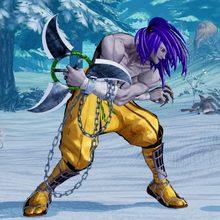
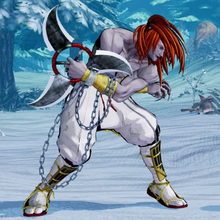
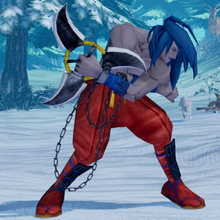
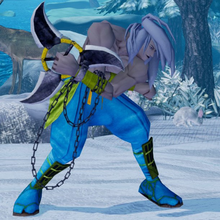
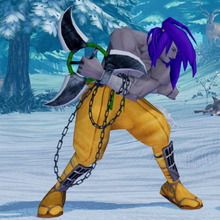
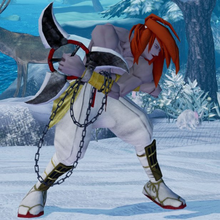
===Default=== | |||
{{Colors-SS2019 | {{Colors-SS2019 | ||
|Character=SS_Basara | |Character=SS_Basara | ||
}} | |||
===3D Retro Costume=== | |||
{{Colors-SS2019 | |||
|Character=SS_Basara_Retro | |||
}} | }} | ||
Latest revision as of 08:05, 31 October 2023
|
首斬り破沙羅, Kubikiri Basara |
|
Introduction
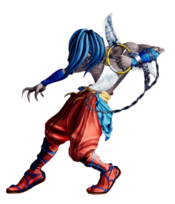
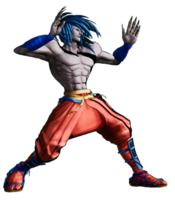
"Basara the Executioner" (首斬り破沙羅, Kubikiri Basara) is the 3rd DLC character added to SamSho. In the transition to SS7, he kept most of his gimmicks tools making him a very tricky character to play against.
Basara's tools are designed to frustrate the opponent and force them to misplay, so Basara can punish them for it. Armed with a good variety of anti-airs, a homing projectile, long-range normals and shadow clones which mimick Basara's movement, a good Basara will make most opponents play the neutral game by his rules. Once the opponent's conditioned, Basara can punish the opponent for respecting him with instant overheads, a command grab and high-low mix.
| Strengths | Weaknesses |
|---|---|
|
|
Gameplan
Neutral
Basara’s neutral can be daunting since a lot of his buttons are pretty committal. He usually has to rely on his moves like 5A, 66A, etc. to apply pressure.
5A and 2A are some of his best moves. Very non-committal and are relatively quick. They can be used offensively (running up and jabbing) and defensively (trying to get someone off of you). 2D is good for the latter as well and is good for stuffing out throw attempts. 5B and 2B are very committal but the latter is integral. 5B is a very low damaging move that’s unsafe and can be deflected. There’s not much use for it at all. 2B is very unsafe because of its high recovery but when combined with an orb on screen it can help to punish people not blocking low. It can also be used in Orb block strings to gain Guard Crush. 66A is a good check button in neutral since its safe and you can deflect after. 66A is also useful in orb block strings to gain space and add Guard Crush. 66B is also a good tool for opening up your opponent, as it's an overhead that knocks down, with a cancel window. It's vulnerable to being poked out, though. You can cancel into command grab (623D) and puddle (214D) from it. Puddle is not recommended as, while it can be used to escape, it has a lot of recovery. 66B should generally be used as a quick mix up close if you noticed they are blocking low or as mix after orb. You can set up for recoil on block as well. 5C is good from a longer range, as it'll catch people trying to run in for a good chunk of damage. You generally wanna use this and 236S series (mentioned later) for punishing approaches. 66D is useful as a more committal low that knocks down. Depending on the character, you can also use this to setup deflect.
Much like his grounded buttons, his specials are all slow, but effective, with his 623S series being the slowest DP in the game, with no startup invincibility. C DP is your best friend against zoning characters, as it allows you to punish fireballs from fullscreen and start your pressure. You can also use 236A or 236B in the air to punish fireballs if you’re in the position to do so. His 236S series, on the other hand, is amazing at anti-airing approaches, being a big lingering hitbox. You can even use 236+A spaced on block as a deflect setup or buffer DP after a blocked one to potentially punish projectiles. A useful tool for neutral is backdash into his aerial 236S (although C is the only useful one with backdash), being another way to cover people running, while retreating at the same time. It is, however, highly unsafe on block. It counts as an overhead though! When it comes to approaching, Basara has a high, annoying jump arc, with two different command normals. j.2D does a surprising chunk of damage, and on hit or block, allows you to alter your momentum to potentially avoid a DP in retaliation, though the fact that it doesn't knock down leaves you potentially punishable on hit. j.1/3D is his best jump button. It beats out a lot of moves, crosses up, knocks down, is pretty quick, does some good chip damage to close out games, and is pretty safe. You can even do stance break baits and deflect setups with it if you land lower to the ground. You wanna be using this a lot combined with j. C and jump feint (421A) since j.C can now cross up and does more damage while you can use the jump feint to mix up your jumps and to make the opponent guess on anti-airs. j.B is also a very good air button. It hits below Basara with a pretty sizeable hitbox so you can catch a lot of buttons from a good distance if you space it.
Of course, the part that makes Basara annoying when it comes to neutral is his feint series (421S), each input relating to a different action. While feinting, Basara is invisible, but also locked in place, and totally vulnerable. The A version mimics a forward jump, which is a godsend for baiting anti-airs, and if you bait out a full DP, you can get a 5C, 236S, or even an SSM, both of which are good damage. A+D version mimics slowly walking forwards for a few steps, which can be good for baiting out a poke, but will require conditioning, since you'll need to occasionally walk forwards yourself. B+D feints a dash forward, which is useful for faking an approach, and baiting out a poke, which can be retaliated through your own poke, or even a 5C. Those are the most useful ones, and while the others have uses, they're more niche, and varies based on your opponent. Overall, Basara's neutral is committal, but allows him to bait and punish, while keeping his opponents away, while leaving them standing to prevent any roll approach, and his pressure can be overwhelming. His feint series is integral to playing him to his peak efficiency, and combined with his C DP's ability to teleport to follow the opponent anywhere, and puffball's ability to block off the air space for a good few seconds, Basara can take a life lead early on and sit on it, waiting for his opponents to make mistakes, usually with a devastating counterattack.
Okizeme
Basara's okizeme is among probably the best in the game, and it's all due to one move. 236D, also known as "Oreo" or "Puffball", depending on who you're talking to, is a slow projectile that travels through the air, rather mediocre against a grounded opponent, only giving a small amount of hitstun, blockstun, and damage. However, its natural arc covers the airspace, all the way around, and curving around the opponents back to hit the ground near their feet at max range, which is vital to certain setups. Against an aerial opponent, however, the projectile will slowly track, and it knocks down on hit, creating a minor juggle state, though this is difficult to combo with outside of specific setups.
Generally, you'll always want to set up a puffball anytime you get a knockdown, outside of perhaps after a WFT (As you won't have enough time to throw out a puffball and still approach to pressure your opponent before they get their weapon back), as, even if you're too close to get the full benefit of the puffball, it can still act as a framekill without any downside. From a command grab, puffball will basically block your opponent from jumping. If the opponent tries to roll in to gain distance, you can go for a command grab, since their options at that point are to jump (which gets hit by the puffball), backdash (which limits their punish options), or dodge. And if they get hit, you can just set up another puffball. Outside of that, Basara has a quite good high/low mixup, between his UOH and backdash j.236C for overheads (both of which knock down), 2D, 3D, and 66D for lows, the latter two knock down. While negative, both options are relatively safe. 6D is also a possible overhead, but it's not an amazing option, as it's +0 on hit, but perfectly safe on block.
Another thing is that his oki can benefit him with Guard Crush as you can do orb block strings to build it up quickly. An example of this would be 236D > 66A > Orb Hit > 2B.
Other notes: j.2D can be useful for pressure, but not for okizeme itself, as the move is too slow, and will whiff if they don't wake up where you expect. Particularly useful against a cornered opponent without a good antiair right above their head, such as Haohmaru. 66B can be useful against a rising opponent, though its effectiveness is somewhat limited if an opponent rises in place, as the grab will whiff and leave you vulnerable, meaning the only threat is the overhead, which is reactable if your opponent knows to look for it.
Normal Moves
Far Slashes
5A
5A
|
|
|---|---|
Toggle Hitboxes Toggle Hitboxes
|
5B
5B
|
|
|---|---|
Toggle Hitboxes Toggle Hitboxes
|
5C
5C
|
|
|---|---|
Toggle Hitboxes Toggle Hitboxes
|
2A
2A
|
|
|---|---|
Toggle Hitboxes Toggle Hitboxes
|
2B
2B
|
|
|---|---|
Toggle Hitboxes Toggle Hitboxes
|
2C
2C
|
|
|---|---|
Toggle Hitboxes Toggle Hitboxes
|
Near Slashes
n.5B
n.5B Frame 1 Frames 2-3
|
|
|---|---|
Toggle Hitboxes Toggle Hitboxes
|
n.5C
n.5C Frames 1-2 Frames 3-4 Frames 5-6
|
|
|---|---|
Toggle Hitboxes Toggle Hitboxes
|
n.2B
n.2B Frames 1-2 Frames 3-8
|
|
|---|---|
Toggle Hitboxes Toggle Hitboxes
|
n.2C
n.2C
|
|
|---|---|
Toggle Hitboxes Toggle Hitboxes
|
Kicks
5D
5D
|
|
|---|---|
Toggle Hitboxes Toggle Hitboxes
|
6D
6D
|
|
|---|---|
Toggle Hitboxes Toggle Hitboxes
|
2D
2D
|
|
|---|---|
Toggle Hitboxes Toggle Hitboxes
|
3D
3D
|
|
|---|---|
Toggle Hitboxes Toggle Hitboxes
|
Dash Normals
66A
66A
|
|
|---|---|
Toggle Hitboxes Toggle Hitboxes
|
66B
66B
|
|
|---|---|
Toggle Hitboxes Toggle Hitboxes
|
66C
66C
|
|
|---|---|
Toggle Hitboxes Toggle Hitboxes
|
66D
66D
|
|
|---|---|
Toggle Hitboxes Toggle Hitboxes
|
Air Normals
j.A
j.A
|
|
|---|---|
Toggle Hitboxes Toggle Hitboxes
|
j.B
j.B
|
|
|---|---|
Toggle Hitboxes Toggle Hitboxes
|
j.C
j.C
|
|
|---|---|
Toggle Hitboxes Toggle Hitboxes
|
j.D
j.D
|
|
|---|---|
Toggle Hitboxes Toggle Hitboxes
|
Unarmed Normals
u.5S
u.5S
|
|
|---|---|
Toggle Hitboxes Toggle Hitboxes
|
u.2S
u.2S
|
|
|---|---|
Toggle Hitboxes Toggle Hitboxes
|
ju.S
ju.S
|
|
|---|---|
Toggle Hitboxes Toggle Hitboxes
|
u.66S
u.66S
|
|
|---|---|
Toggle Hitboxes Toggle Hitboxes
|
Universal Mechanics
Guard Break
Guard Break (Throw) 5/6C+D / 4C+D Neutral / Forward Throw Neutral / Forward Throw Back Throw Back Throw
|
|---|
Surprise Attack
Surprise Attack (Overhead)
5B+C |
|
|---|---|
Toggle Hitboxes Toggle Hitboxes
|
Dodge
Dodge
5A+B |
|---|
Stance Break
Stance Break
A+B during Just Defense |
|---|
Counter / Blade Catch
Counter / Blade Catch 236A+B Counter Counter Blade Catch Blade Catch
|
|
|---|---|
Toggle Hitboxes Toggle Hitboxes
|
Rage Explosion
Rage Explosion
5A+B+C |
|---|
Lightning Blade
Lightning Blade (Issen)
5A+B+C during Rage Explosion |
|---|
Command Moves
Wall Jump
Wall Jump
(near wall) j.9 |
|---|
Special Moves
Ground Slash
Ground Slash 236S Toss trajectories. Toss trajectories.
|
|
|---|---|
Toggle Hitboxes Toggle Hitboxes
|
Aerial Jab
Aerial Jab j.236S Air toss trajectories. Air toss trajectories.
|
|
|---|---|
Toggle Hitboxes Toggle Hitboxes
|
Shadow Exit
Shadow Exit
623S |
|
|---|---|
Toggle Hitboxes Toggle Hitboxes
|
Soul of The Beast
Soul of The Beast 236D OREO OREO
|
|
|---|---|
Toggle Hitboxes Toggle Hitboxes
|
Shadow Sucker
Shadow Sucker
214D |
|---|
Flaying Feet
Flaying Feet j.2D boing boing
|
|
|---|---|
Toggle Hitboxes Toggle Hitboxes
|
Friendly Rip
Friendly Rip 623D KAGARIBI! KAGARIBI!
|
|
|---|---|
Toggle Hitboxes Toggle Hitboxes
|
Shadow Feint
Shadow Feint 421S or 421S+D A Version A Version B Version B Version C Version C Version A+D Version A+D Version B+D Version B+D Version C+D Version C+D Version
|
|---|
Skull Cleaver
Skull Cleaver
j.1D or j.3D |
|
|---|---|
Toggle Hitboxes Toggle Hitboxes
|
Supers
Weapon Flipping Technique
Shadow Dance Dream Pull
236B+C |
|
|---|---|
Toggle Hitboxes Toggle Hitboxes
|
Super Special Move
Shadow Dance Deep Abyss
641236C+D |
|
|---|---|
Toggle Hitboxes Toggle Hitboxes
|
Combos
List combos, use numpad notation.
(No real combos other than follow ups. Potential setups with his 236D)
Midscreen
- 5CD
Forward throw...- 5C
Max damage follow up no knock down. - 66C
Less damage but grants a knock down.
- 5C
- 4CD
Back throw...- 5C
Precise micro walk back to get the far one for max damage. - 2C
Easy follow up that puts opponent at mid range. - 66C
Less damage but grants a knock down.
- 5C
Corner
Grab combo mostly the same.
- 5CD / 4CD
Throw into the corner...- n.5C
Can't really get the far one. - n.2C
Put Basara in a good spacing for more pressure.
- n.5C
Universal
- jump C (Deep hit)...
- 5C / n.5C
Universal combo after jump C deep hit. - Lighting Blade
Issen combo.
- 5C / n.5C
Guard Crush
- n.5C / 5C...
After recovery...- n.5C / 5C / 2C
Standard follow up that's damaging enough. - SSM
SSM follow up. (Be careful with opponent bursting to avoid it, timing is tight after far 5C if do not use Shadow Feint cancel, see below)
- n.5C / 5C / 2C
- n.5C / 5C...
Cancel recovery...- Lighting Blade
Universal Issen combo. - WFT
WFT follow up. - 421S...
Shadow Feint...(The version doesn't matter)- SSM
The Shadow Feint cancel makes it easier to get SSM but it's not required. (Be careful with opponent bursting to avoid it)
- SSM
- Lighting Blade
236D/Puffball combos
- 236D > 66A > puff hit > 5C
Requires precise timing on the puff hit to combo into 5C, which is on the later hitstun frames of 66A - 236D > air hit > 623C
- 236D > 2K > puff hit > 5C
Requires precise timing on the 5C. - 236D > forward throw > puff hit > 5C/66C
Videos
- Basara tutorial and combos by LegendaryWolf Shirou
- ShinChie vs Jackorcb at WNF Online Edition
- SpaceDetectiveKh vs LewdStares at WNF Online Edition
Colors
Default
3D Retro Costume
External Links
- Twitter hashtag: #SS_BA
