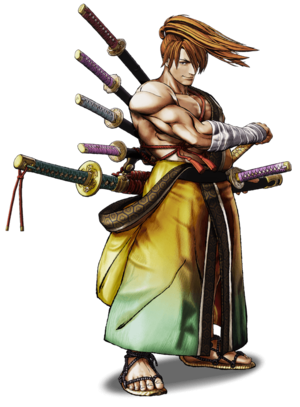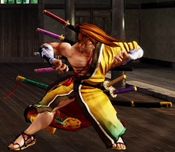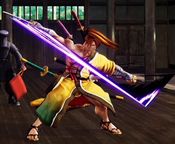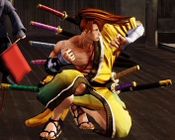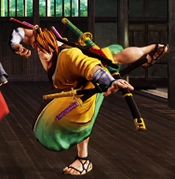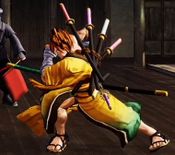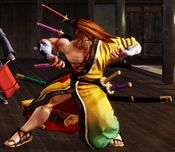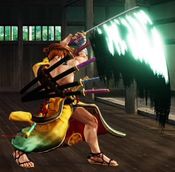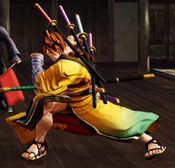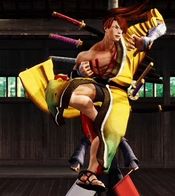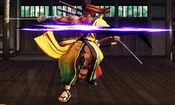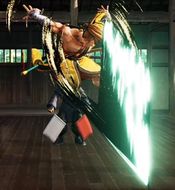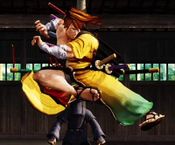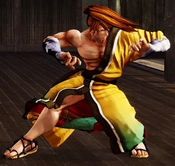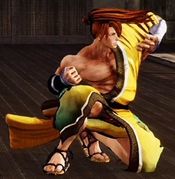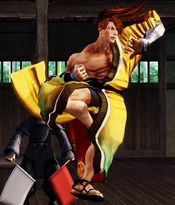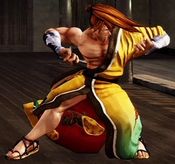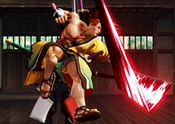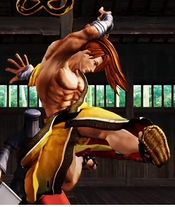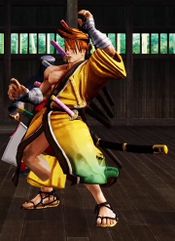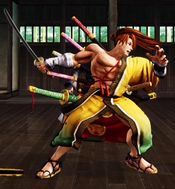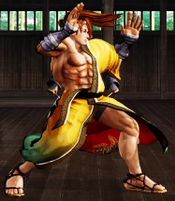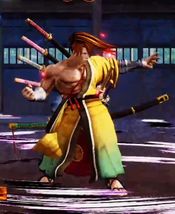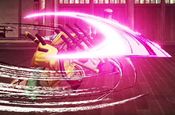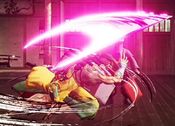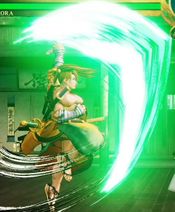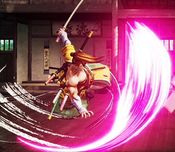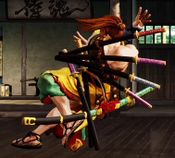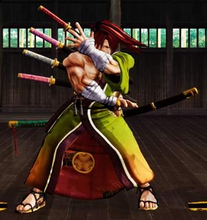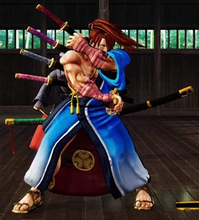
Yoshitora Tokugawa
徳川 慶寅, Tokugawa Yoshitora Introduction
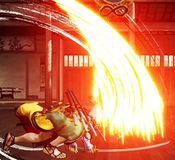
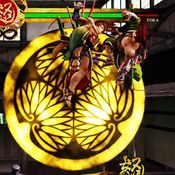
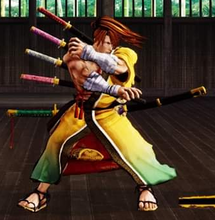
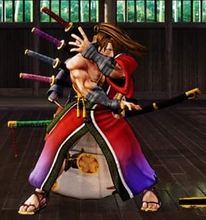
The truest definition of a “Jack of all trades, master of none” -type character, Yoshitora comes loaded with specials for just about every situation and must make use of all the tools in his kit to be played to his full potential.
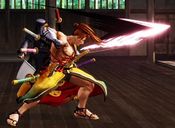
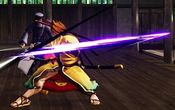
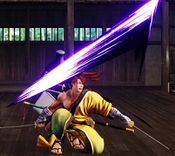
While every move in Yoshi’s arsenal has some use, there are a few stand-out examples: Yuugao (623D) is finally a real command grab, which nicely complements Yoshitora’s close range game. j.C is a powerful jump-in with an awkward hitbox making it very difficult to anti-air for some characters. Sadly, it can no longer cross up as well. Lastly, if you manage to use all your specials (or your SSM), you get access to Yoshitora’s seventh and final sword - Yuuchouka (632146AB) for the rest of the round you unlocked it in. A towering, full-screen projectile that is basically next to impossible to win against.
Yoshitora can be played in a variety of ways. He doesn’t really have any glaring weaknesses except the fact he loses a huge part of his moveset when getting disarmed. His multi-hit attacks are also quite easy to JD, so you need to be careful when on the offensive.
| Strengths |
Weaknesses
|
- Hugely varied playstyle with tons of options to choose from
- Can play offense and defense equally well
- Light Tsubaki (421A) is an amazing neutral tool, being a low commitment movement option, complete with a guard point through most of the move.
- Has a unique alternate win-condition in unlocking Yuuchouka
|
- Basically turns into a declawed kitten when disarmed.
- Lacks a projectile or a safe, long-range move.
- Easy to JD, only made worse by the 2.1 buffs to Stance Break.
- Yuuchouka is quite slow, and since launch, more characters have answers to it, in addition to the universal Issen punish.
|
Data
- Damage Taken: 100%
- Rage Factor: 0.22
- Rage Duration: 11 seconds
- Jump: 43 frames (Fast)
- Forward Walk Speed: 0.3 (Average)
- Back Walk Speed: 0.25 (Above Average)
- Dash Speed: 1.25 (Average)
- Back Dash: 27 frames
- Weapon Pickup / Drop: 40 / 69 frames
Gameplan
Yoshitora is a Swiss army knife of a character with just about everything you could ask for -- strong combos and punishment, good defensive tools and no shortage of ways to call your opponent out on their obvious tendencies. The only issue is that all of his tools tend to serve far more specific purposes than those of most other characters, which demands that players have a good understanding of what each of his moves are, and what they are used for. Compounding that, none of said tools are very safe, so he relies quite heavily on making much harder reads than most other characters have to.
All that being said, if you make the right read and know which tool is best for the occasion, you can scare people into submission, giving you a chance to run his surprisingly scary mixup game.
Unless, of course, you manage to unlock Yuuchouka. In which case, show 'em the true power of the Shogun.
Neutral
Yoshitora unfortunately lacks the safe long-range poking he once had due to B Nadeshiko (236S) now being significantly less safe on block, so he needs to think more carefully about how to find his way into the mid-range where he can more easily threaten people with his pokes and mixups. He mostly wants to do this by using his fairly strong movement tools -- in particular, his fast jump arc and big, annoying jC can give plenty of characters a hard time stopping him from approaching. Another way in outside of jC would be Tsubaki (421S). The M/H versions are risky callouts, but good for if your opponent likes to throw out slower buttons in neutral. The light version is pretty good in most circumstances, with a frame 1 guard point that lasts most of the way through the move, it's an almost free way in in neutral, and you can land, then grab or command grab on someone trying to guard the attack.
Once you find yourself closer to your opponent, you can start to run your suspiciously Ukyo-esque mixups. Kara Botan (5BC~j236S) gives you access to a strong, hard to see overhead, which is only bolstered by strong lows of varying levels of safety (2D, 2C, A Nadeshiko) and a very strong grab game thanks to powerful grab combos, and a very threatening command grab in Yuugao (623D).
If he finds himself on the defensive, he has no shortage of tools to keep people off him -- he can use 2B, Shiraryuri (623S), or even a TK Botan (2369S) to shut down aerial approaches, and Heavy Shiraryuri (623C) is fully invincible. C Nadeshiko is also a possibility, but it's a bit riskier, as you need to call them out right as they start jumping. To get out of pressure, you have the universal options, plus your invincible DP, and Tsubaki, with the light version being safest, while the medium and heavy versions come with a risky attack attached.
Finding opportunities to deflect is especially good for Yoshitora, as he arguably has one of the best deflect games out of the entire cast. While most characters are able to get some kind of strong punish, or even a Super Special Move from a deflect, Yoshitora benefits heavily from this as landing his SSM grants him access to Yuuchouka for the rest of the round, allowing him to very easily close it out. On top of that, Yuuchouka itself is also guaranteed from a deflect, and landing it in full does just as much (if not more) damage than a SSM.
Okizeme
Yoshitora's okizeme can be whatever you want it to be. While a knockdown is an excellent opportunity for him to apply his high/low/throw mixups, he also has the tools to play a more reactive game based around calling out the opponent's tendencies after waking up.
If you want to take advantage of his mixup game in the corner, you can go far by copying Ukyo's playbook -- harass the opponent with 2D to condition them into blocking low, mix up with kara Botan for your overhead and either run up normal throw or command throw depending on what you want. Bear in mind, however, that as Ukyo-esque as your mixup may be, it is not Ukyo's mixup. Kara Botan, while an excellent hard-to-see overhead, is slightly slower than Tsubame Gaeshi, so you will need to be ready to hard call out the opponent's attempts to jump out of your mixup, which you are certainly not lacking in options for.
Yoshitora has a powerful unreactable mixup on wakeup between kara Botan (Cancel BC into 236S), and 2C, both of which do respectable damage, and knock down, but both of them give up your turn on block, with Botan being downright punishable by a good chunk of the cast. This is the most reliable way to get Botan's flower, though. With a bit of practice, you can space yourself so the mixup will hit a forward roll, or standard rise.
Additionally, 66A is quick, safe, and can cross up on a roll, though this might take some practice to get the spacing. In general, Yoshitora's okizeme works best if you know where your opponent is going to wake up, so conditioning them to stop rolling is a good thing.
Unlocking Yuuchouka
As powerful as Yoshitora's seventh sword may be, it is not without its limitations. Outside of it needing to be unlocked by landing all of your other special moves or your SSM, if you unlock it, it will only be available for the round you unlock it in -- you'll be back to zero as soon as the round is over. However, there are a few subtleties to Yuuchouka's unlock requirements that gives his kit a whole extra layer of strategic depth.
Unlocking with SSM
The easiest and quickest way to unlock Yuuchouka. The most consistent ways you'll be getting SSM to land is more or less the ways everyone has -- deflect or spot dodging a throw. Because SSM does so much damage, and Yuuchouka does even more, the main strategy here is to use Yuuchouka to close out the round. Because you'll only have Yuuchouka for the round you land SSM in (on top of only getting one SSM per match), it's a good idea to save this strategy for the second or third round where it will win you the match.
Unlocking with special moves
Here's where things get interesting. While Yuuchouka is only available for the round it's unlocked in, Yoshitora's flowers (i.e. the special moves he's already landed) carry over between rounds. For example, if you land four of Yoshitora's special moves in the first round, you will only need to land the remaining two in the second round to unlock Yuuchouka. This gives you room to think about saving certain moves for the second round to score yourself an early unlock and get the opponent scared of your big new toy.
On top of that, post-round special move hits count towards the unlock. While very niche, this is a very nice option to have for landing your more difficult to use special moves. Think getting the kill with n.5B and then buffering a cancel into Tsubaki.
Normal Moves
Far Slashes
5A
5A
|
| Damage
|
Guard
|
Startup
|
Active
|
Recovery
|
Total
|
Hit Adv
|
Block Adv
|
Guard Dmg
|
Cancel
|
Recoil
|
Deflectable
|
Unarmed
|
| 30
|
Mid
|
7
|
-
|
-
|
-
|
-9
|
-5
|
5
|
No
|
-
|
Yes
|
-
|
A light poke with nice range. Will hit crouching opponents, but also has a high enough hitbox that it can occasionally anti-air.
|
|
5B
5B
|
| Damage
|
Guard
|
Startup
|
Active
|
Recovery
|
Total
|
Hit Adv
|
Block Adv
|
Guard Dmg
|
Cancel
|
Recoil
|
Deflectable
|
Unarmed
|
| 100(30/30/40)
|
Mid
|
13
|
-
|
-
|
45
|
-2
|
-12
|
10
|
Yes
|
Yes
|
Yes
|
-
|
Yoshitora swings three times with his swords. Kind of hard to use as a poke due to its somewhat low speed and range, but a valuable tool nonetheless. Special cancel on the third hit. Since version 2.10, it now has extended hitbox horizontally on the second hit.
|
|
5C
5C
|
| Damage
|
Guard
|
Startup
|
Active
|
Recovery
|
Total
|
Hit Adv
|
Block Adv
|
Guard Dmg
|
Cancel
|
Recoil
|
Deflectable
|
Unarmed
|
| 260(50/50/50/50/60)
|
Mid
|
26
|
-
|
-
|
96
|
-6
|
-24
|
25 (5*5)
|
No
|
No
|
Disarm
|
-
|
Five hit sword wave. Good range, but extremely slow. Only usable as a punish or with a godlike read, but be wary of doing so against Hanzo or Galford, as they can teleport out of it and punish you for free. This move is also very susceptible to Rage Explosion punishes, so be mindful of that, too. This move is also punishable on hit if the first hit catches someone jumping, because the rest of the move will play out, but they'll air reset and the rest will whiff. However, it's also one of the longer ranged 5C's, and due to how the Guard Crush system works, you can get massive damage off of it.
|
|
2A
2A
|
| Damage
|
Guard
|
Startup
|
Active
|
Recovery
|
Total
|
Hit Adv
|
Block Adv
|
Guard Dmg
|
Cancel
|
Recoil
|
Deflectable
|
Unarmed
|
| 30
|
Low
|
9
|
-
|
-
|
24
|
-3
|
-5
|
5
|
No
|
Yes
|
No
|
-
|
Basically a crouching version of 5A. This hits low, so it's useful for harassing people. No longer deflectable as it got fixed.
|
|
2B
2B
|
| Damage
|
Guard
|
Startup
|
Active
|
Recovery
|
Total
|
Hit Adv
|
Block Adv
|
Guard Dmg
|
Cancel
|
Recoil
|
Deflectable
|
Unarmed
|
| 90(40/50)
|
Mid
|
6
|
-
|
-
|
-
|
-8, -3
|
-12
|
10
|
Yes
|
Yes
|
Yes
|
-
|
Yoshitora swings at the opponent's shins before swinging upwards. The first hit, despite not hitting low, is special cancelable and has pretty okay range. The second hit is actually really good for anti-air. Good punish tool due to being 6 frames with good range, but hit confirming is impossible due to the very short gap between the first and second hits. To cancel into a special and have it work, you need to buffer the special immediately after inputting 2B.
|
|
2C
2C
|
| Damage
|
Guard
|
Startup
|
Active
|
Recovery
|
Total
|
Hit Adv
|
Block Adv
|
Guard Dmg
|
Cancel
|
Recoil
|
Deflectable
|
Unarmed
|
| 150(60/90)
|
Low, Low
|
9, 19
|
3
|
-
|
44
|
KND
|
-10
|
25 (14,11)
|
No
|
No
|
No
|
-
|
A two-hit sweep. Comes out fairly quickly, but unfortunately lacks the cancel window it had in VSp. Still, a useful low for when you need a knockdown.
|
|
Near Slashes
n.5A
n.5A
|
| Damage
|
Guard
|
Startup
|
Active
|
Recovery
|
Total
|
Hit Adv
|
Block Adv
|
Guard Dmg
|
Cancel
|
Recoil
|
Deflectable
|
Unarmed
|
| 30
|
Mid
|
5
|
-
|
-
|
17
|
+1
|
-2
|
5
|
Yes
|
No
|
No
|
-
|
Quick elbow jab. Very small disadvantage on block makes this move useful for tick throws.
|
|
n.5B
n.5B
|
| Damage
|
Guard
|
Startup
|
Active
|
Recovery
|
Total
|
Hit Adv
|
Block Adv
|
Guard Dmg
|
Cancel
|
Recoil
|
Deflectable
|
Unarmed
|
| 80(60/20)
|
Mid
|
8
|
-
|
-
|
37
|
0
|
-12
|
10
|
Yes
|
Yes
|
Yes
|
-
|
Two quick slashes. Yoshitora's main close range punish button. The second hit can hit behind you. Special cancel on the second hit.
|
|
n.5C
n.5C
|
| Damage
|
Guard
|
Startup
|
Active
|
Recovery
|
Total
|
Hit Adv
|
Block Adv
|
Guard Dmg
|
Cancel
|
Recoil
|
Deflectable
|
Unarmed
|
| 200(30/30/30/110)
|
Mid
|
15
|
-
|
-
|
-
|
+1
|
-28
|
25
|
Yes
|
-
|
Yes
|
-
|
Yoshitora swings three times before following up with one more big downward swing. While it's pretty slow on startup, this is your big boy punish button. On most characters you can combo this after a back throw, as well as a forward throw in the corner. Special cancel on the third hit.
|
|
n.2A
n.2A
|
| Damage
|
Guard
|
Startup
|
Active
|
Recovery
|
Total
|
Hit Adv
|
Block Adv
|
Guard Dmg
|
Cancel
|
Recoil
|
Deflectable
|
Unarmed
|
| 30
|
Mid
|
6
|
3
|
-
|
-
|
+2
|
-1
|
5
|
Yes
|
-
|
No
|
-
|
Much the same as n.5A, but crouching. Still good for tick throws, but a special cancel window also makes it useful for quick punishes at close range. Thankfully lacks the deadzone with 2A that it used to have, so it's much safer to mash.
|
|
Kicks
5D
5D
|
| Damage
|
Guard
|
Startup
|
Active
|
Recovery
|
Total
|
Hit Adv
|
Block Adv
|
Guard Dmg
|
Cancel
|
Recoil
|
Deflectable
|
Unarmed
|
| 50
|
Mid
|
8
|
5
|
-
|
-
|
-3
|
-6
|
5
|
Yes
|
-
|
No
|
-
|
A quick side kick with decent range given the button it's on. Slight disadvantage on block makes this useful for poking at closer ranges, and while the special cancel doesn't grant any combos, it does give you an opportunity to see how your opponent reacts and respond accordingly.
|
|
6D
6D
|
| Damage
|
Guard
|
Startup
|
Active
|
Recovery
|
Total
|
Hit Adv
|
Block Adv
|
Guard Dmg
|
Cancel
|
Recoil
|
Deflectable
|
Unarmed
|
| 30
|
Low
|
13
|
-
|
-
|
KND
|
KND
|
-14
|
5
|
Yes
|
-
|
No
|
-
|
Sliding low kick that knocks down on hit. Pretty unsafe on block, but has a special cancel window that may make your opponent think twice about trying to punish, especially if you're willing to represent Tsubaki or even a deflect.
|
|
2D
2D
|
| Damage
|
Guard
|
Startup
|
Active
|
Recovery
|
Total
|
Hit Adv
|
Block Adv
|
Guard Dmg
|
Cancel
|
Recoil
|
Deflectable
|
Unarmed
|
| 20
|
Low
|
6
|
2
|
-
|
-
|
+1
|
-2
|
5
|
No
|
-
|
No
|
-
|
Quick kick at the opponent's toes. Small disadvantage on block makes this useful for harassing people and conditioning them to block at close range.
|
|
3D
3D
|
| Damage
|
Guard
|
Startup
|
Active
|
Recovery
|
Total
|
Hit Adv
|
Block Adv
|
Guard Dmg
|
Cancel
|
Recoil
|
Deflectable
|
Unarmed
|
| 70
|
Low
|
11
|
7
|
-
|
KND
|
KND
|
-15
|
5
|
No
|
-
|
No
|
-
|
La-Z Boi Kick. While it lacks the horizontal range it had in VSp, it's still a great button to throw out thanks to its generous active window. Combined with its higher angle and its ability to low profile some hitboxes, this is actually pretty good to use as anti-air every once in a while, especially since it now knocks down on air hit.
|
|
Dash Normals
66A
66A
|
| Damage
|
Guard
|
Startup
|
Active
|
Recovery
|
Total
|
Hit Adv
|
Block Adv
|
Guard Dmg
|
Cancel
|
Recoil
|
Deflectable
|
Unarmed
|
| 30
|
Mid
|
6
|
-
|
-
|
-
|
-3
|
-6
|
5
|
Yes
|
-
|
No
|
-
|
Dashing n.5A. Slightly more disadvantageous on block, but has a special cancel -- cancelling to 623A will combo.
|
|
66B
66B
|
| Damage
|
Guard
|
Startup
|
Active
|
Recovery
|
Total
|
Hit Adv
|
Block Adv
|
Guard Dmg
|
Cancel
|
Recoil
|
Deflectable
|
Unarmed
|
| 80(60/20)
|
Mid
|
7
|
-
|
-
|
-
|
-5
|
-35
|
10
|
Yes
|
-
|
Yes
|
-
|
Similar to n.5B, but with the key difference that it only cancels on the first hit. Still very important for run-in punishes. Though you can recoil cancel on block, this button has heavy recoil, so don't be too hasty.
|
|
66C
66C
|
| Damage
|
Guard
|
Startup
|
Active
|
Recovery
|
Total
|
Hit Adv
|
Block Adv
|
Guard Dmg
|
Cancel
|
Recoil
|
Deflectable
|
Unarmed
|
| 140
|
Mid
|
10
|
-
|
-
|
KND
|
KND
|
-33
|
20
|
No
|
-
|
Yes
|
-
|
Big upward sword swing. Decently fast and has good range, so useful for a run-in punish if you're not confident you can get something better. Hits high enough that you can smack people out of the air, too. Super unsafe on block, though.
|
|
66D
66D
|
| Damage
|
Guard
|
Startup
|
Active
|
Recovery
|
Total
|
Hit Adv
|
Block Adv
|
Guard Dmg
|
Cancel
|
Recoil
|
Deflectable
|
Unarmed
|
| 70
|
Low
|
14
|
-
|
-
|
KND
|
KND
|
-12
|
5
|
No
|
-
|
NO
|
-
|
Much like 6D, but without the special cancel and much worse on block. You can still catch people off-guard with this in the neutral, but be careful about committing to it.
|
|
Air Normals
j.A
j.A
|
| Damage
|
Guard
|
Startup
|
Active
|
Recovery
|
Total
|
Hit Adv
|
Block Adv
|
Guard Dmg
|
Cancel
|
Recoil
|
Deflectable
|
Unarmed
|
| 30
|
High
|
5
|
-
|
-
|
-
|
-
|
-
|
5
|
-
|
-
|
-
|
-
|
Stumpy upward angled elbow. Really only made to hit people above him, but Yoshitora doesn't really want to be meeting people in the air anyway.
|
|
j.B
j.B
|
| Damage
|
Guard
|
Startup
|
Active
|
Recovery
|
Total
|
Hit Adv
|
Block Adv
|
Guard Dmg
|
Cancel
|
Recoil
|
Deflectable
|
Unarmed
|
| 100(50/50)
|
High
|
9
|
-
|
-
|
-
|
-
|
-
|
10 (5,5)
|
-
|
-
|
-
|
-
|
Two-hit sword swing. The first hit really isn't anything special, but the second hit is notable in that it's very easy to cross up with it. Generally Yoshitora's most rewarding cross-up button.
|
|
j.C
j.C
|
| Damage
|
Guard
|
Startup
|
Active
|
Recovery
|
Total
|
Hit Adv
|
Block Adv
|
Guard Dmg
|
Cancel
|
Recoil
|
Deflectable
|
Unarmed
|
| 180(40/40/40/60)
|
High
|
18
|
-
|
-
|
-
|
-
|
-
|
4.5*4,6.5
|
-
|
-
|
-
|
-
|
The Hundred Dollar Jump-In. Yoshitora swings downwards in a wide arc four times, throwing out hitboxes that most characters will have a hard time challenging. This button can also cross up, but doesn't lead to big reward as consistently as jB. Crossing up is more difficult than ever, but it's still just as hard to punish. Due to the Stance Break changes in 2.1, it's possible to SB it if it's low enough, but if you throw it out early enough, the SB will whiff, and you'll punish with the other hits.
|
|
j.D
j.D
|
| Damage
|
Guard
|
Startup
|
Active
|
Recovery
|
Total
|
Hit Adv
|
Block Adv
|
Guard Dmg
|
Cancel
|
Recoil
|
Deflectable
|
Unarmed
|
| 30
|
High
|
6
|
-
|
-
|
-
|
-
|
-
|
5
|
-
|
-
|
-
|
-
|
Yoshitora sticks out his foot. Decent range and angle for jumping in, and low blockstun can make this useful for tick throwing.
|
|
Unarmed Normals
u.5S
u.5S
|
| Damage
|
Guard
|
Startup
|
Active
|
Recovery
|
Total
|
Hit Adv
|
Block Adv
|
Guard Dmg
|
Cancel
|
Recoil
|
Deflectable
|
Unarmed
|
| 50
|
Mid
|
5
|
-
|
-
|
-
|
-1
|
-6
|
5
|
-
|
-
|
-
|
Yes
|
n.5A but 20pts more damage and worse on block. Please try to get your swords back.
|
|
u.2S
u.2S
|
| Damage
|
Guard
|
Startup
|
Active
|
Recovery
|
Total
|
Hit Adv
|
Block Adv
|
Guard Dmg
|
Cancel
|
Recoil
|
Deflectable
|
Unarmed
|
| 50
|
Mid
|
6
|
-
|
-
|
-
|
0
|
-5
|
5
|
-
|
-
|
-
|
Yes
|
n.2A but 20pts more damage and worse on block. Please try to get your swords back.
|
|
ju.S
ju.S
|
| Damage
|
Guard
|
Startup
|
Active
|
Recovery
|
Total
|
Hit Adv
|
Block Adv
|
Guard Dmg
|
Cancel
|
Recoil
|
Deflectable
|
Unarmed
|
| 50
|
Mid
|
5
|
-
|
-
|
-
|
-
|
-
|
5
|
-
|
-
|
-
|
Yes
|
Exactly the same as j.A but with slightly more damage.
|
|
u.66S
u.66S
|
| Damage
|
Guard
|
Startup
|
Active
|
Recovery
|
Total
|
Hit Adv
|
Block Adv
|
Guard Dmg
|
Cancel
|
Recoil
|
Deflectable
|
Unarmed
|
| 50
|
Mid
|
5
|
-
|
-
|
-
|
KD
|
-10
|
5
|
-
|
-
|
-
|
Yes
|
66A but it does 20pts more damage and is worse on block. But it also knocks down on hit. Use it to try and get your swords back.
|
|
Universal Mechanics
Guard Break
Guard Break (Throw)
4/5/6C+D Forward Throw Forward Throw Back Throw Back Throw
|
| Version
|
Damage
|
Guard
|
Startup
|
Active
|
Recovery
|
Total
|
Hit Adv
|
Block Adv
|
Guard Dmg
|
Cancel
|
Recoil
|
Deflectable
|
Unarmed
|
| Forward
|
-
|
-
|
-
|
-
|
-
|
-
|
-
|
-
|
-
|
-
|
-
|
-
|
-
|
Universal throw. Can be followed up with an attack.
|
| Back
|
-
|
-
|
-
|
-
|
-
|
-
|
-
|
-
|
-
|
-
|
-
|
-
|
-
|
Universal throw. Can be followed up with an attack.
|
|
Surprise Attack
Surprise Attack (Overhead)
5B+C Armed Armed Unarmed Unarmed
|
| Version
|
Damage
|
Guard
|
Startup
|
Active
|
Recovery
|
Total
|
Hit Adv
|
Block Adv
|
Guard Dmg
|
Cancel
|
Recoil
|
Deflectable
|
Unarmed
|
| Armed
|
70
|
-
|
20
|
-
|
-
|
-
|
+2
|
-11
|
10
|
-
|
-
|
-
|
-
|
Universal overhead. Mostly used to kara cancel into Botan.
|
| Unarmed
|
60
|
-
|
21
|
-
|
-
|
-
|
+3
|
-10
|
10
|
-
|
-
|
-
|
Yes
|
Universal overhead. Please try to get your swords back.
|
|
Dodge
Dodge
5A+B
|
| Damage
|
Guard
|
Startup
|
Active
|
Recovery
|
Total
|
Hit Adv
|
Block Adv
|
Guard Dmg
|
Cancel
|
Recoil
|
Deflectable
|
Unarmed
|
| -
|
-
|
-
|
-
|
-
|
-
|
-
|
-
|
-
|
-
|
-
|
-
|
-
|
|
|
|
Stance Break
Stance Break
A+B during Just Defense
|
| Damage
|
Guard
|
Startup
|
Active
|
Recovery
|
Total
|
Hit Adv
|
Block Adv
|
Guard Dmg
|
Cancel
|
Recoil
|
Deflectable
|
Unarmed
|
| 0
|
Mid
|
5
|
-
|
-
|
55
|
KD
|
-24
|
-
|
No
|
-
|
-
|
Yes
|
|
|
|
Counter / Blade Catch
Counter / Blade Catch
236A+B Counter Counter Blade Catch Blade Catch
|
| Version
|
Damage
|
Guard
|
Startup
|
Active
|
Recovery
|
Total
|
Hit Adv
|
Block Adv
|
Guard Dmg
|
Cancel
|
Recoil
|
Deflectable
|
Unarmed
|
| Armed
|
-
|
-
|
-
|
-
|
-
|
-
|
-
|
-
|
-
|
-
|
-
|
-
|
-
|
Universal counter. Allows you to follow up with a guaranteed attack of your own. The follow up depends on the strength of the attack you counter. If you counter a heavy slash, your opponent will be disarmed.
|
| Disarmed
|
-
|
-
|
-
|
-
|
-
|
-
|
-
|
-
|
-
|
-
|
-
|
-
|
-
|
Universal counter. While disarmed, your counter will disarm and knock away your opponent regardless of slash level used. While they're down, please try to get your swords back.
|
|
Rage Explosion
Rage Explosion
5A+B+C
|
| Damage
|
Guard
|
Startup
|
Active
|
Recovery
|
Total
|
Hit Adv
|
Block Adv
|
Guard Dmg
|
Cancel
|
Recoil
|
Deflectable
|
Unarmed
|
| 0
|
-
|
-
|
-
|
-
|
-
|
-
|
-
|
-
|
-
|
-
|
-
|
-
|
Unblockable pushback attack.
|
|
Lightning Blade
Lightning Blade (Issen)
5A+B+C during Rage Explosion
|
| Damage
|
Guard
|
Startup
|
Active
|
Recovery
|
Total
|
Hit Adv
|
Block Adv
|
Guard Dmg
|
Cancel
|
Recoil
|
Deflectable
|
Unarmed
|
| -
|
-
|
-
|
-
|
-
|
-
|
-
|
-
|
-
|
-
|
-
|
-
|
-
|
Has projectile invulnerability and anti-airs. Damage scales up beased on reamaining health.
|
|
Special Moves
Pink Blossoms
Pink Blossoms
236S 撫子 (Nadeshiko) 撫子 (Nadeshiko)
|
| Version
|
Damage
|
Guard
|
Startup
|
Active
|
Recovery
|
Total
|
Hit Adv
|
Block Adv
|
Guard Dmg
|
Cancel
|
Recoil
|
Deflectable
|
Unarmed
|
| A
|
90
|
Low
|
17
|
-
|
52
|
-
|
KD
|
-12~-14
|
15
|
No
|
No
|
No
|
No
|
Low advancing sword slash. Mostly used in combos from slightly further ranges, but can be useful as a low to complement kara Botan if you're feeling lucky.
|
| B
|
100
|
Mid
|
21
|
3
|
49
|
-
|
KD
|
-11~-13
|
25
|
No
|
No
|
No
|
No
|
Mid hitting version. Slower on start-up than A or C. Quite unsafe on block, so far less useful for approaching than in VSp. Mostly only useful as a whiff punisher if your opponent is being obvious.
|
| C
|
110
|
Mid
|
11
|
-
|
43
|
-
|
KD
|
N/A
|
-
|
No
|
No
|
No
|
No
|
This will not hit opponents while standing, but it does work extremely well as anti-air, covering the area directly above Yoshitora's head as well as to the front. Knocks down on air hit, too. After version update it doesn't hit Earthquake standing any more.
|
| Rage
|
264 ((70+70+80)x1.2)
|
Low,-,Mid
|
17,27
|
-
|
65
|
-
|
KD
|
-33,-13
|
5,15,12
|
No
|
No
|
No
|
No
|
The Rage version combines all three verions and does a grip of damage. Very worth keeping Rage for. In version 1.70 its command changes to 236A at rage instead of 236C.
|
|
White Lilies
White Lilies
623S 白百合 (Shirayuri) 白百合 (Shirayuri)
|
| Version
|
Damage
|
Guard
|
Startup
|
Active
|
Recovery
|
Total
|
Hit Adv
|
Block Adv
|
Guard Dmg
|
Cancel
|
Recoil
|
Deflectable
|
Unarmed
|
| A
|
120
|
Mid
|
12
|
-
|
-
|
KND
|
KND
|
-31
|
10
|
-
|
-
|
-
|
-
|
Fastest version of Yoshitora's DP. No invincibility, but fast enough and hits high enough that it can be used as functional anti-air directly above you if you perform it early.
|
| B
|
140
|
Mid
|
14
|
-
|
-
|
KND
|
KND
|
-32
|
12
|
-
|
-
|
-
|
-
|
Similar to the A version, but slightly slower and more damaging, with air invincibility on start up. Can be used similarly to 623A for anti-air.
|
| C
|
160
|
Mid
|
17
|
-
|
-
|
KND
|
KND
|
-33
|
15
|
-
|
-
|
-
|
-
|
Slowest and most damaging version of the move. Harder to use as anti-air because of its startup, but retains the B version's startup strike invincibility, which can make it useful as both a reversal and a gutsy recoil cancel.
|
|
Tree Peonies
Tree Peonies
j.236S 牡丹 (Botan) 牡丹 (Botan)
|
| Damage
|
Guard
|
Startup
|
Active
|
Recovery
|
Total
|
Hit Adv
|
Block Adv
|
Guard Dmg
|
Cancel
|
Recoil
|
Deflectable
|
Unarmed
|
| 110
|
High
|
12
|
-
|
-
|
KND
|
KND
|
-40
|
22
|
-
|
-
|
-
|
-
|
Yoshitora swings in a downward arc with one of his swords. The fairly wide hitbox can make this move useful as air-to-air occasionally, but this is mostly used as a quick overhead by kara cancelling from 5BC (5BC~236S). All versions have the same properties. The quick speed from 5BC and the knockdown make this an exceptionally strong mixup tool. Yoshitora bounces away on block, which can make the punish awkward for some characters.
|
|
Camellias
Camellias
421S 椿 (Tsubaki) 椿 (Tsubaki)
|
| Version
|
Damage
|
Guard
|
Startup
|
Active
|
Recovery
|
Total
|
Hit Adv
|
Block Adv
|
Guard Dmg
|
Cancel
|
Recoil
|
Deflectable
|
Unarmed
|
| A
|
-
|
-
|
-
|
-
|
-
|
-
|
-
|
-
|
-
|
-
|
-
|
-
|
-
|
Yoshitora hops forward about a half screen's distance with his back towards his opponent. During the hop, Yoshitora has full guard point. The hop is also considered airborne, meaning he cannot be thrown and will dodge most low attacks. This is mainly used as a fake-out for the B/C version of the move (albeit an unsafe one), but it can also be used to pass through some projectiles or other long range moves if you're not confident you'll be able to punish with the B/C version. Naturally, this version cannot earn you this move's flower.
|
| B/C
|
130
|
Mid
|
31
|
-
|
-
|
KND
|
KND
|
-25
|
18
|
-
|
-
|
-
|
-
|
Yoshitora starts with the guard point hop before taking a step forward and slashing with one of his swords. This is primarily used as a hard callout for obvious buttons in the neutral, although it can also serve as a recoil cancel every now and then if you expect your opponent to challenge with a stronger button. Bear in mind that opponents will most likely be able to recover in time to block the slash if they performed a move that doesn't recoil on block, which will generally lead to you getting punished really hard. Use with caution.
|
|
Morning Glory
Morning Glory
214S 朝顔 (Asagao) 朝顔 (Asagao)
|
| Version
|
Damage
|
Guard
|
Startup
|
Active
|
Recovery
|
Total
|
Hit Adv
|
Block Adv
|
Guard Dmg
|
Cancel
|
Recoil
|
Deflectable
|
Unarmed
|
| A
|
120
|
Mid
|
20
|
-
|
-
|
KND
|
KND
|
-18
|
4*7
|
-
|
-
|
-
|
-
|
Yoshitora takes a huge step forward, swinging his sword twice before stabbing several times, finishing with a final swing. This attack will "catch" opponents on hit, locking them into the full animation, meaning it cannot be Rage Exploded on hit. This version starts up the fastest, but does the least damage. While it is still unsafe, this is the only version of the move that will connect with all hits on block, meaning you can potentially use it to chip people out, although they can interrupt it if they have an invincible move. Not really worth much for that, though, since this move is really only used in punishes, although the huge range on the forward step may give this some utility as a long range whiff punisher. Do be aware that, due to the sheer amount of hits this move does, it will give your opponent a lot of meter; think about whether or not you want to end a combo with this if your opponent is not already in Rage.
|
| B
|
140
|
Mid
|
232
|
-
|
-
|
KND
|
KND
|
-43
|
4*n
|
-
|
-
|
-
|
-
|
Much the same as the A version, but slightly slower on startup and slightly more damage.
|
| C
|
180
|
Mid
|
23
|
-
|
-
|
KND
|
KND
|
-71
|
4*n
|
-
|
-
|
-
|
-
|
The big time waster. While sporting the slowest startup, this is Yoshitora's best damage for big punishes. Because it distributes its damage over 28 hits (and roughly five whole seconds), this move can make the clock work for you or against you depending on the life standings. If you can't afford to chew up that much time for your punish, use 623C instead, as it's much faster and only deals 20 points less damage.
|
|
Moonflower
Moonflower
623D 夕顔 (Yuugao) 夕顔 (Yuugao)
|
| Damage
|
Guard
|
Startup
|
Active
|
Recovery
|
Total
|
Hit Adv
|
Block Adv
|
Guard Dmg
|
Cancel
|
Recoil
|
Deflectable
|
Unarmed
|
| 150
|
-
|
6
|
-
|
-
|
KND
|
KND
|
-
|
-
|
-
|
-
|
-
|
-
|
GREAT GOOGLY MOOGLY IT'S A COMMAND GRAB
Yoshitora's already quite fearsome mixup is bolstered by this. While it does sideswap, it's a far safer whiff and gives you one extra flower towards Yuuchouka. Not necessarily something you'll be relying on, but it can definitely catch people off guard and help to condition more aggressive responses for you to take advantage of.
|
|
Fluttering Butterfly Blossom
Fluttering Butterfly Blossom
632146AB 遊蝶華 (Yuuchouka) 遊蝶華 (Yuuchouka)
|
| Damage
|
Guard
|
Startup
|
Active
|
Recovery
|
Total
|
Hit Adv
|
Block Adv
|
Guard Dmg
|
Cancel
|
Recoil
|
Deflectable
|
Unarmed
|
| 797
|
Mid
|
28
|
-
|
-
|
KND
|
KND
|
-4
|
4*9
|
-
|
-
|
-
|
-
|
The Big Boy Sword. Unlocked by landing all of Yoshitora's special moves or his Super Special Move, this is an incredibly powerful move, though by no means something he has to rely on. Swinging his final sword (reaching about a half screen's length), he unleashes a massive projectile that travels full screen, reaches up to the top of the screen, and deals incredible damage every step of the way (for reference, compare this move's 797 damage with his SSM's 670). If you have this, you can throw it out with some level of impunity depending on the matchup, but given that it is still a huge commitment, it's better to not be stupid with it. This move is guaranteed off of any deflect, which makes Yoshitora's deflect game absolutely terrifying, especially when you consider that his SSM is also guaranteed off of deflect.
Bear in mind that if you throw this from a distance, your opponent can Rage Explode and immediately Issen for a guaranteed punish. Hanzo and Galford are also able to teleport out for a guaranteed punish if they are hit by the initial sword swing. Yashamaru can also high profile it with double jump.
|
|
Supers
Weapon Flipping Technique
Hollyhocks
236B+C 葵 (Aoi) 葵 (Aoi)
|
| Damage
|
Guard
|
Startup
|
Active
|
Recovery
|
Total
|
Hit Adv
|
Block Adv
|
Guard Dmg
|
Cancel
|
Recoil
|
Deflectable
|
Unarmed
|
| 408
|
Low
|
8
|
-
|
-
|
KND
|
KND
|
-32
|
-
|
-
|
-
|
-
|
-
|
Yoshitora sweeps the opponent off their feet, chasing them into the air with several rising sword slashes before punching them back down to earth, all with a seal of the Shogunate to prove that your defeat was decreed by the heavens themselves. This WFT is, in fact, a low, although you'd likely get more mileage out of comboing into it instead of using it as a mixup. It can pretty easily combo from most of Yoshitora's main punish tools, but its short range means you won't be scoring tons of whiff punishes with the move by itself.
|
|
Super Special Move
Profusion of Flowers
641236C+D 百花繚乱 (Hyakka Ryouran) 百花繚乱 (Hyakka Ryouran)
|
| Damage
|
Guard
|
Startup
|
Active
|
Recovery
|
Total
|
Hit Adv
|
Block Adv
|
Guard Dmg
|
Cancel
|
Recoil
|
Deflectable
|
Unarmed
|
| 670
|
Mid
|
30
|
-
|
-
|
KND
|
KND
|
-42
|
-
|
-
|
-
|
-
|
-
|
Yoshitora's SSM certainly lives up to his name. He begins with a running tackle, and if he hits the opponent, he'll proceed to bombard them with every sword he has in a very stylish combo before he takes a final swing with his seventh sword, all while proclaiming to the opponent how awesome he is. This SSM is threatening beyond just the impressive damage afforded to all SSMs -- landing Yoshitora's SSM unlocks Yuuchouka, giving him an opportunity to close out a round already close to over. The fact that the tackle can travel fullscreen before hitting the opponent gives it some utility as a punish for moves that put the opponent far away on block, like Ukyo's Tsubame Gaeshi or Yashamaru's Wintry Gust.
|
|
Combos
Midscreen
- 66B(1) / 2B(1) / n.5B(2)...
Dash in / Fastest close range / Most damage.
- xx 623C
Most damage.
- xx WFT
WFT combo.
- xx 236A
If you need Nadeshiko, or more damage when you have rage and don't wanna get a WFT.
- xx 214A
If you need Asagao.
- 5B(3) xx 236A / WFT
Decent range, WFT will whiff if it's not at the closest range.
- (5A / 2A / 66A) xx 623A / WFT
Hard to confirm but faster than mediums so.
- 5CD...
- 5B xx 236A
Your primary combo from a far 5B. Does more damage than DP combo with rage.
- 66B...
Dash in for more combos.
- xx 623C
Most damage.
- xx WFT
WFT combo.
- xx 236A
If you need Nadeshiko, or more damage when you have rage and don't wanna get a WFT.
- xx 214A
If you need Asagao.
- 4CD...
- n.5C(3)...
- xx 214C / 623C
214C does only a bit more damage than DP and give your opponent a ton of rage, and it's a total time scam as well.
- xx WFT
WFT combo.
- xx 236B / 236A
If you need Nadeshiko, the A version does more damage with rage if you don't wanna get a WFT.
- cross-up j.B...
- 2C
Ridiculous move that's safe on block, can't be delflected, does 25% guard damage, and good for set up for stuff after. (USE IT IF YOU ARE NOT CONFIDENT ON YOUR JUMP IN BEING DEEP)
- 5B xx 236A
If you are far for range.
- 66B(1) / 2B(1) / n.5B(2)...
Most reliable / Fastest / Most damage.
- xx 623C
Most damage.
- xx WFT
WFT combo.
- xx 236A
If you need Nadeshiko, or more damage when you have rage and don't wanna get a WFT.
- xx 214A
If you need Asagao.
- n.5C(3)...
His close heavy is faster now so it works.
- xx 214C / 623C
214C does only a bit more damage than DP and give your opponent a ton of rage, and it's a total time scam as well.
- xx WFT
WFT combo.
- xx 236B / 236A
If you need Nadeshiko, the A version does more damage with rage if you don't wanna get a WFT.
- deep j.C...
Same as cross-up j.B.
Corner
- 5CD...
- n.5C(3)...
- xx 214C / 623C
214C does only a bit more damage than DP and give your opponent a ton of rage, and it's a total time scam as well.
- xx WFT
WFT combo.
- xx 236B / 236A
If you need Nadeshiko, the A version does more damage with rage if you don't wanna get a WFT.
- n.5B(2)...
- xx 623C
Most damage.
- xx WFT
WFT combo.
- xx 236A
If you need Nadeshiko, or more damage when you have rage and don't wanna get a WFT.
- xx 214A
If you need Asagao.
UOH Meaty
- UOH hit meaty...
Usually setup on wakeup, can be spaced in neutral but nearly impossible.
- xx 5A xx 623A / WFT
Hard to confirm.
- xx 2B(1)...
1 frame link.
- xx 623C
Most damage.
- xx WFT
WFT combo.
- xx 236A
If you need Nadeshiko, or more damage when you have rage and don't wanna get a WFT.
- xx 214A
If you need Asagao.
Guard Crush
- 5C / n.5C...
Cancel second hit after GC...
- 421A...
The second hit wouldn't come out...
- SSM
SSM follow up. (Be careful with opponent bursting to avoid it)
- Don't cancel if you don't want Issen or SSM, it's far more deadly to combo, see below.
- 5C...
Combo from last hit (5th)...
- 421C
A good way to get Tsubaki.
- 632146AB
It would KILL for sure!
- Lighting Blade
Universal Issen combo, combo from last hit.
- Anything works as long as it's in range.
- n.5C...
Combo from last hit (4th)...
- 421C
A good way to get Tsubaki.
- 632146AB
It would KILL for sure!
- Lighting Blade
Universal Issen combo, combo from last hit.
- Anything works as long as it's in range.
Videos
Colors
External Links
