|
|
| Line 644: |
Line 644: |
| |jumpCancel= No | | |jumpCancel= No |
| |icCancel= Yes | | |icCancel= Yes |
| | |cancel= IC |
| |description= | | |description= |
| }} | | }} |
| Line 659: |
Line 660: |
| |jumpCancel= No | | |jumpCancel= No |
| |icCancel= Yes | | |icCancel= Yes |
| | |cancel= IC |
| |description= | | |description= |
| }} | | }} |
| Line 675: |
Line 677: |
| |jumpCancel= No | | |jumpCancel= No |
| |icCancel= Yes | | |icCancel= Yes |
| | |cancel= IC |
| }} | | }} |
| {{AttackData-EFZ | | {{AttackData-EFZ |
| Line 690: |
Line 693: |
| |jumpCancel= No | | |jumpCancel= No |
| |icCancel= Yes | | |icCancel= Yes |
| | |cancel= IC |
| }} | | }} |
| {{AttackData-EFZ | | {{AttackData-EFZ |
| Line 704: |
Line 708: |
| |jumpCancel= No | | |jumpCancel= No |
| |icCancel= Yes | | |icCancel= Yes |
| | |cancel= IC |
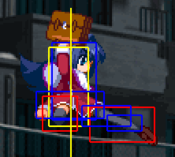
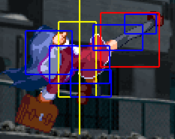
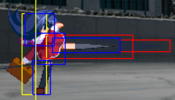
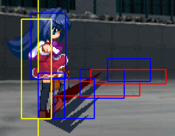
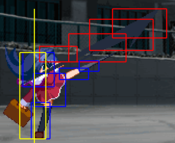
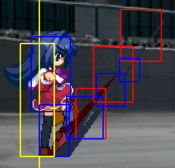
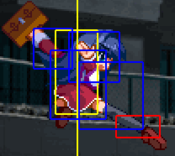
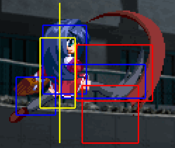
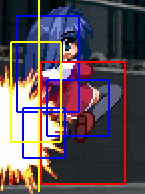
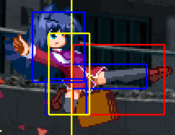
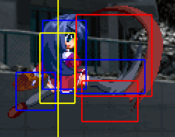
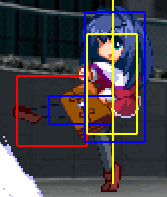
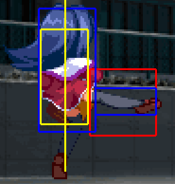
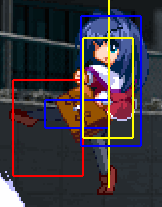
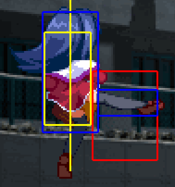
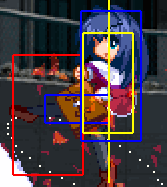
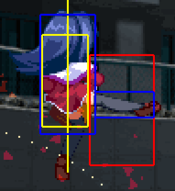
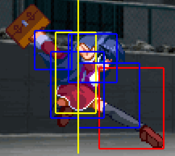
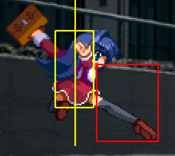
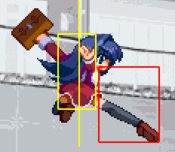
| |description= Nayuki does her best toku impression and approaches with a diving kick. | | |description= Nayuki does her best toku impression and approaches with a diving kick. |
|
| |
|
Revision as of 01:21, 15 May 2021
 Minase Nayuki (awake)
Introduction
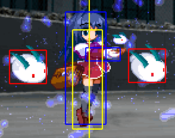
Minase Nayuki (awake) (水瀬 名雪(起) is a straightforward, rushdown-oriented character whose main features are her very fast dash and high damaging combos. She has a few decent moves to play footsies with, but her main goal will be to take advantage of her dash to find openings and catch the opponent off-guard. She doesn’t have much in the way of extended pressure, and relies mostly on staggers and far-reaching lows to force respect from the opponent. However on a good knockdown she has time to set up her snowbunny super, similar to Rose orbs from Street Fighter, which allows her to stay on top of the opponent for much longer. For breaking defense she has a decent standing overhead and throw, both leading to a potential left/right mixup afterwards. As her gameplan and combos are both easy, Nayuki is a character well suited for players new to the game.
Nayuki is one of the heroines of Kanon, a visual novel produced by Key in 1999. She is Yuiichi's cousin, childhood friend, and has always been in love with him. Nayuki is the daughter of Akiko, and is also classmates with her friend Kaori. She is an extremely fast runner and is the captain of the school's track team because of this. On the other hand she is a very heavy sleeper, with a massive collection of alarm clocks that are able to wake up Yuuichi in the adjacent room, but do not seem to work on her at all. Nayuki really enjoys strawberry jam and strawberry sundaes, but is completely terrified at the mere mention of her mother's "special" jam. During Kanon, Yuuichi is warmly supported by Nayuki as he tries to help the people he cares about, but as he starts to remember what happened with Nayuki 7 years ago...
Stage: In Front of the Minase House (Day) (水瀬家前(朝))
BGM: 2 Steps Toward
Character-Specific Notes
- Nayuki is able to air jump once, and air dash/backstep once. Once Nayuki has air dashed/backstepped, she cannot perform any more air jumps until she lands or air recovers.
Normal Moves
The notation for the movelists can be found under Controls.
The normal move data table can be found under Eternal Fighter Zero/Nayuki Minase (awake)/Move Data.
Standing
5A
5A
|
| Damage
|
Proration
|
Juggle
|
Guard
|
Startup ¹ ²
|
Active
|
Recovery
|
Adv Hit
|
Adv Block
|
Cancel
|
| 180
|
-
|
-
|
Low
|
6 / 6.33
|
2.66 / 3
|
6
|
+2
|
+1
|
N Sp Su J IC R
|
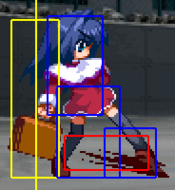
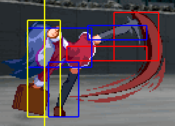
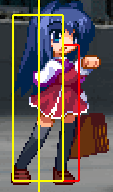
Standing, spammable low kick. While it isn't the fastest, this is a staple in Nayuki's repertoire of normals. It does not sport much frame advantage on block, but it's enough to setup frame traps or tick throws. The kick itself actually has a good hitbox that is a decent distance away from Nayuki, so it serves as a nice poke that can be convertible from its range as well. Unfortunately, this move being a standing low means that we cannot use this move to anti-air after RGing someone in the air. Overall, a good move. Learn to love it.
|
|
5B
5B
|
| Damage
|
Proration
|
Juggle
|
Guard
|
Startup ¹ ²
|
Active
|
Recovery
|
Adv Hit
|
Adv Block
|
Cancel
|
| 400
|
-
|
-
|
Ground
|
8
|
3
|
12
|
+2
|
0
|
N Sp Su J IC f5B
|
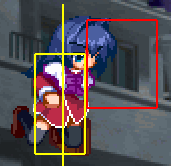
Nayuki kicks the opponent's side.
- Naturally combos into f5b if B is pressed again.
This move is primarily a combo tool, as you will often use this to catch the opponent in the air after the B version of V-Shaped Thrust, or in the corner to catch characters after a successful air chain. Jump cancelable. Rather quick for a B normal, and does have its usage in pressure to check for lower body invulnerable moves on wake up.
For Recoil Guard battles, this is one of your two 8 frame normals (the other is 5C). If spaced correctly, this can beat some 4f and 5f normals on crouch RG, and will beat anything 6f and onwards. If Recoil Guarded, this move can go into f5B if you predict that a low will come afterwards.
|
|
f5B
f5B
|
| Damage
|
Proration
|
Juggle
|
Guard
|
Startup ¹ ²
|
Active
|
Recovery
|
Adv Hit
|
Adv Block
|
Cancel
|
| 450
|
-
|
-
|
Ground
|
15
|
4
|
9
|
+4
|
+2~+5
|
N Sp Su IC
|
Nayuki does a small skip and kicks the opponent with a stretched out leg. This move also comes out if you press B again after 2B or close 5B.
- Lower body invulnerable 8f~24f
One of two Nayuki's plus on-block normals, and a great one at that. While it is slow, this move has excellent utility. Along with slightly moving her forward, this move can hop over a great amount of lows if timed right, making it great for trumping most 2A mashes and an excellent pressure tool overall. Nayuki is not considered airborne during this move, so she can special cancel this into anything and will naturally combo into 5C or 2C.
Excellent utility for neutral and Recoil Guard battles due to lower body invulnerability, but often the target of Recoil Guard. If Recoil Guarded, this can go into 5C or 2C, but often times it might just be best to Recoil Guard back.
|
|
5C
5C
|
| Damage
|
Proration
|
Juggle
|
Guard
|
Startup ¹ ²
|
Active
|
Recovery
|
Adv Hit
|
Adv Block
|
Cancel
|
| 580
|
-
|
-
|
Ground
|
8
|
8
|
20
|
-4
|
-6
|
Sp Su JH IC
|
Nayuki does a soccer kick and blows the opponent back.
Fairly decent move with multiple usages. This is the closest to an anti-air normal you will get, but will blow the opponent back rather far. While this move is jump cancelable, you won't be able to convert off of this midscreen. However, you can convert from this if you are close to the corner. Used in optimal combos frequently. 5C unfortunately cannot be cancelled into 2C, but it can be special or super cancelled.
In Recoil Guard battles, this is one of your two 8 frame moves. If spaced correctly, this can beat up a good chunk of 4f and 5f moves after crouch RG. If this move itself gets Recoil Guarded, you should have some caution special cancelling this, but there are options. 623A and 214A are your fastest options, but any 236* move is an option as well, albeit slower.
|
|
Crouching
2A
2A
|
| Damage
|
Proration
|
Juggle
|
Guard
|
Startup ¹ ²
|
Active
|
Recovery
|
Adv Hit
|
Adv Block
|
Cancel
|
| 185
|
-
|
-
|
Low
|
5
|
3
|
9
|
-1
|
-2
|
N Sp Su J IC R
|
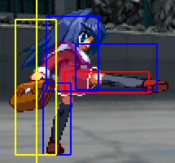
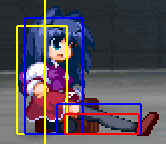
A crouching, spammable low kick to the opponent's feet. This move is slightly faster than 5A, but holds no advantage. Has very little knockback on block, so you can throw out a couple of these on block without too much fear. In conjunction with 5A, 2A is another one of your staple normals, and works quite well with 5A's block advantage. This normal also has a great use if you use this while carrying the momentum from a dash.
|
|
2B
2B
|
| Damage
|
Proration
|
Juggle
|
Guard
|
Startup ¹ ²
|
Active
|
Recovery
|
Adv Hit
|
Adv Block
|
Cancel
|
| 380
|
-
|
-
|
Low
|
6
|
10
|
6
|
+1
|
-1
|
N Sp Su J f5B IC
|
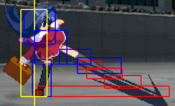
Nayuki stretches out her leg to catch the opponent's ankles.
- Naturally combos into f.5B if B is pressed again.
A staple normal in Nayuki's moveset due to its range. This move is VERY active, so much so that it can be plus if meatied. Has an excellent stagger window, so you can delay into f5B, 5C, 2C, or any of her specials.
Excellent in Recoil Guard battles due to good startup and range, and the ability to cancel into f5B. Can beat the majority of 4f normals after Recoil Guard.
|
|
2C
2C
|
| Damage
|
Proration
|
Juggle
|
Guard
|
Property
|
Startup ¹ ²
|
Active
|
Recovery
|
Adv Hit
|
Adv Block
|
Cancel
|
| 600
|
-
|
-
|
Low
|
I: 1-2.66
|
11
|
16
|
13
|
/
|
-6
|
Sp Su IC
|
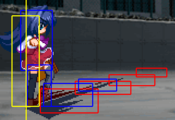
Nayuki does a baseball slide and trips the opponent.
- 2.66F full invuln on startup.
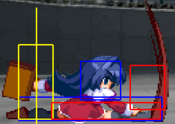
Nayuki's sweep is one of her stronger normals, but one of her slowest as well. On the upside, this is a slide, so it moves her forward. This not makes not only an excellent poke, but an integral hit confirm, as it can be special and super cancelled. Because it is a C button, it cannot be cancelled into other normals. While this move does grant Nayuki a low profile which can dodge certain moves, she can still be clipped by some moves on recovery. Funnily enough, this move has 2 frames at the beginning where she is fully invulnerable. This frame might save you sometimes, but don't count on it.
Despite it being 11 frames startup, this move can be decent to throw out in Recoil Guard battles, but often times should be used as a last resort if no other normal can reach. If this is Recoil Guarded, you either have to Recoil Guard back or chance it on a DP.
|
|
Jumping
j5A
j5A
|
| Damage
|
Proration
|
Juggle
|
Guard
|
Startup ¹ ²
|
Active
|
Recovery
|
Adv Hit
|
Adv Block
|
Cancel
|
| 180
|
-
|
-
|
High, Air
|
5
|
18
|
4
|
/
|
/
|
N Sp Su J AD IC R
|
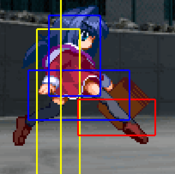
Flying knee! j.A is a versatile air normal that can be used in a couple of ways. Despite its short hitbox, it can be used to intercept the opponent air-to-air. It can also be used to start pressure from an air dash, and able to be canceled into either j.B (what should mostly be done) or j.C. If you only do a single press, this move is actually fairly active for a while, but not to the extent of other similar normals. Due to this, you could use this as a way to catch air techs.
|
|
j5B
j5B
|
| Damage
|
Proration
|
Juggle
|
Guard
|
Startup ¹ ²
|
Active
|
Recovery
|
Adv Hit
|
Adv Block
|
Cancel
|
| 390
|
-
|
-
|
High, Air
|
7
|
10
|
10
|
/
|
/
|
N Sp Su J AD IC
|
Nayuki does the most generic jumping shoto move in the game. Thankfully, this has the same properties of most shoto jumping medium kicks, where she can cross up with it! This is easily Nayuki's best air normal. You will be using this for jump-ins, crossups, combo filler, air-to-air... just about anything, really. Is cancelable into j.C, which is nice for combo filler or air-to-ground purposes.
|
|
j5C
j5C
|
| Damage
|
Proration
|
Juggle
|
Guard
|
Startup ¹ ²
|
Active
|
Recovery
|
Adv Hit
|
Adv Block
|
Cancel
|
| 550
|
-
|
-
|
High, Air
|
9
|
4
|
24
|
/
|
/
|
Sp Su J AD IC
|
Nayuki does 5C but in the air. Like 5C, this knocks back quite a long distance, but it does have its uses. As usual, this move is used for combo filler, and can be used to setup either a V-Shaped Thrust (236C) or Surface-To-Air Freezer (236236x). This move excels more in the corner during BIC combos, as this move along with 5C will rack up a nice amount of damage. Unfortunately, it doesn't work too well air-to-air, but the rare times won't do you any favor. This is also your option select button for air throw.
|
|
Dashing
66A
66A
|
| Damage
|
Proration
|
Juggle
|
Guard
|
Startup ¹ ²
|
Active
|
Recovery
|
Adv Hit
|
Adv Block
|
Cancel
|
| 220
|
-
|
-
|
Low
|
6
|
3
|
6
|
+2
|
+1
|
Sp Su J IC
|
Primarily a pressure tool to reset pressure if pushed back enough, but has limited combo usage. On hit, this cancels into 623A. This can also be used after ICing 236A to convert into a combo.
Often the target of Recoil Guard. Unfortunately, there are little options after dash moves beyond special and super cancelling. Consider getting ready to Recoil Guard back.
|
|
66B
66B
|
| Damage
|
Proration
|
Juggle
|
Guard
|
Startup ¹ ²
|
Active
|
Recovery
|
Adv Hit
|
Adv Block
|
Cancel
|
| 400
|
-
|
-
|
Ground
|
8
|
3
|
12
|
+2
|
0
|
Sp Su J IC
|
Primarily a combo tool, but not the best for pressure strings. Jump, special, and super cancelable on hit. The hit advantage is just enough to go into 236236x. Stringing together 66Bs in BIC combos requires you to slightly delay them from one another, as the opponent will go upwards with each hit.
|
|
66C
66C
|
| Damage
|
Proration
|
Juggle
|
Guard
|
Startup ¹ ²
|
Active
|
Recovery
|
Adv Hit
|
Adv Block
|
Cancel
|
| 650
|
-
|
-
|
Ground
|
8
|
3
|
25
|
/
|
-6
|
Sp Su IC
|
An excellent launcher from her quick dash. 66C in neutral is something to be respected, as it is ICable and thus able to be converted into combos. Despite being -6, it can be relatively safe if you hit this on the tip. Is both special and super cancelable.
|
|
662A
662A
|
| Damage
|
Proration
|
Juggle
|
Guard
|
Startup ¹ ²
|
Active
|
Recovery
|
Adv Hit
|
Adv Block
|
Cancel
|
| 185
|
-
|
-
|
Low
|
5
|
3
|
9
|
-1
|
-2
|
Sp Su IC
|
This move sucks. Don't bother.
|
|
662B
662B
|
| Damage
|
Proration
|
Juggle
|
Guard
|
Startup ¹ ²
|
Active
|
Recovery
|
Adv Hit
|
Adv Block
|
Cancel
|
| 400
|
-
|
-
|
Any
|
12
|
10
|
8
|
-2
|
-4
|
Sp Su AD IC
|
Running knee. This move can go under lows, but for the most part, it’s not that impressive. Extremely negative on block, but is special and super cancelable. On block, consider using 214A. On hit, this can combo into 623A.
|
|
662C
662C
|
| Damage
|
Proration
|
Juggle
|
Guard
|
Startup ¹ ²
|
Active
|
Recovery
|
Adv Hit
|
Adv Block
|
Cancel
|
| 650
|
-
|
-
|
High
|
27
|
2
|
24
|
/
|
-4
|
Sp Su IC
|
Overhead. Cancelable into 236A or 236C for a second mix up provided that the opponent does not RG it. While this move would be excellent for snow bunny mixups, this move has an astoundingly bad proration that brings the combo to 3.0 power. Use it to catch the opponent off guard or to finish a round.
|
|
Grabs
Close 6C/4C
Ground Grab
Close 6C/4C
|
| Damage
|
Proration
|
Juggle
|
Guard
|
Startup ¹ ²
|
Active
|
Recovery
|
Adv Hit
|
Adv Block
|
Cancel
|
| 1200
|
-
|
-
|
Grab
|
5
|
1
|
28
|
/
|
/
|
-
|
Throws the opponent behind Nayuki. It’s not an impressive grab by any means, but Nayuki’s pressure is primarily strike/throw, so it’s something. This will toss the opponent quite a distance, but at the very least you can get a safe jump or basic mixup out of it. If timed properly with snow bunnies, you can throw the opponent into them and convert afterwards.
|
|
Close j6C
Air Grab
Close j6C
|
| Damage
|
Proration
|
Juggle
|
Guard
|
Startup ¹ ²
|
Active
|
Recovery
|
Adv Hit
|
Adv Block
|
Cancel
|
| 1200
|
-
|
-
|
Grab
|
2
|
1
|
/
|
/
|
/
|
-
|
Tosses the opponent behind Nayuki, usually to the corner at most heights. Fairly standard air grab.
|
|
Special Moves
The notation for the movelists can be found under Notation.
The special move data table can be found under Nayuki Minase (awake)/Move Data
Specials
236*
V-Shaped Thrust
(V字型スラスト)
236* 236A 236A 236B 236B 236C 236C
|
| Damage
|
Proration
|
Juggle
|
Guard
|
Startup ¹ ²
|
Active
|
Recovery
|
Adv Hit
|
Adv Block
|
Cancel
|
| 450
|
-
|
-
|
|
14
|
2
|
30
|
/
|
/
|
IC
|
Nayuki thrusts her legs forward, hitting the opponent twice. Your bread-and-butter for combos and pressure. For the most part, all versions of the move are safe, especially considering the distance of all of them. Generally if this move is blocked, your pressure ends there. At max distance of both A and B versions, you can go for 66C to catch the opponent off guard, or attempt another V-Shaped Thrust.
|
| 450
|
-
|
-
|
|
21
|
2
|
23
|
/
|
-3
|
IC
|
- A version:
- Both hits are lows.
- It's possible to pick up from 236A(2) IC into 66A 66B (juggle combo).
- B version:
- Hits mid.
- Mainly used in combos.
- The first hit can be used as an excellent poke in neutral if you IC it.
- C version:
- The second hit is an overhead.
- Can anti-air, but not air unblockable. Don't count on it too much.
|
|
623*
Somersault Spike
(弱サマーソルトスパイク)
623* 623B Frame 1 Invulnerability 623B Frame 1 Invulnerability
|
| Version
|
Damage
|
Proration
|
Juggle
|
Guard
|
Startup ¹ ²
|
Active
|
Recovery
|
Adv Hit
|
Adv Block
|
Cancel
|
| A
|
700
|
-
|
-
|
Any
|
4
|
4
|
35
|
/
|
-16
|
IC
|
- Incredibly fast start up.
- After IC, you must jump afterwards to followup.
|
| B
|
700
|
-
|
-
|
Any
|
6
|
4
|
39
|
/
|
-21
|
IC
|
- High invuln 1-7f
- Identical hitboxes to 623A.
- Nayuki goes slightly higher and leaps backwards.
|
| C
|
500
|
-
|
-
|
Any
|
7
|
4
|
40
|
/
|
-23
|
IC
|
| -
|
700
|
-
|
-
|
Any
|
22
|
4
|
26
|
/
|
-8
|
IC
|
- Full invuln 1-10f.
- Identical hitboxes to 623A.
Nayuki’s dragon punch. Despite it being a dragon punch, the invulnerability of it is not that impressive. However, they still function as a reliable anti-air, and with IC is fully convertible into combos.
623A can be used as an option for Recoil Guard battles, as it is one of Nayuki's few 4f moves. Converting off of this move requires you to jump afterwards. Using it as an anti-air is a little tough since it lacks invulnerability frames, but it is possible.
623B on wakeup is generally not advised, but you are considered airborne on frame 1. On hit, this will lead you to an air juggle state, and very little time for the opponent to pick up. Provided the opponent reacts to it, they can combo you afterwards. If this gets through, chances are the opponent did something wrong.
623C is one of two only true reversals in her arsenal besides 236236B. However, it does not knockdown the opponent. Ideally, you should IC the first hit available. One unfortunately note is that if this move is Recoil Guarded, Nayuki is unable to Recoil Guard back.
Something to note in conjunction with her dash is that her dash makes her hurtbox slightly lower. Using this with DP makes this a bit more viable for anti-air.
|
|
412*
Nayu-chan Kick
(弱なゆちゃんキック)
412* / j412* 412A 412A 412B 412B 412C 412C
|
| Version
|
Damage
|
Proration
|
Juggle
|
Guard
|
Startup ¹ ²
|
Active
|
Recovery
|
Adv Hit
|
Adv Block
|
Cancel
|
| A
|
750
|
-
|
-
|
Any
|
25 / 18
|
8
|
12
|
+3
|
+1
|
IC
|
| B
|
750
|
-
|
-
|
High, Air
|
28 / 23
|
2
|
20
|
+2
|
0
|
IC
|
| C
|
350
|
-
|
-
|
Any
|
8 / 3
|
6
|
46
|
-
|
-
|
IC
|
| -
|
350
|
-
|
-
|
Any
|
20
|
15
|
25
|
-
|
-
|
IC
|
| -
|
600
|
-
|
-
|
Any
|
41
|
2
|
17
|
/
|
+3
|
IC
|
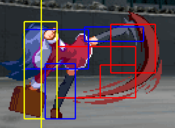
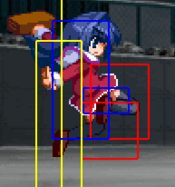
Nayuki does her best toku impression and approaches with a diving kick.
Despite it looking pretty flashy, it has some niche uses. The A version can be used as a pressure extender that if spaced correctly can lead to a full combo on hit. As it is rather slow, you should be prepared for your opponent to potentially RG this move when you use it. The A version is fully active until it lands. In BIC combos, this can be used as a combo tool that scales pretty nicely and does a decent chunk of damage.
The B version is decent for snow bunny pressure, as it acts as yet another overhead for her. This move goes a set distance and does not track, so this can be either used as an overhead, or you can use it to crossup the opponent. There's no real way to convert off this move unless you dedicate your resources to making it work.
The C version is a three-part kick which does a respectable amount of damage into hard knockdown. For the most part, it's hard to justify meter usage for this move, but it does look pretty cool. One of the unfortunate things about EX Nayu-Chan Kick is that it does not have any form of invulnerability whatsoever. It can be used as a combo ender if you have IC meter available and not super. The air version has 3 frames of startup, which could be useful if someone ground Recoil Guarded your air normals, but that might have to be looked into.
|
|
214*
Nayu-chan Twister
(なゆちゃんツイスター)
214* / j214* 214A 214A 214B 214B 214C 214C
|
| Version
|
Damage
|
Proration
|
Juggle
|
Guard
|
Startup ¹ ²
|
Active
|
Recovery
|
Adv Hit
|
Adv Block
|
Cancel
|
| A
|
200 x 4
|
-
|
-
|
Any
|
7 / 9
|
3 x 4
|
-
|
+2
|
0
|
-
|
| B
|
200 x 7
|
-
|
-
|
Any
|
19 / 9
|
3 x 7
|
-
|
/
|
+5
|
-
|
| C
|
200 x 16
|
-
|
-
|
Any
|
13 / 7
|
2 x 16
|
-
|
/
|
+10
|
-
|
Nayuki’s tatsumaki senpakyuu. This move will continue to be active until Nayuki lands, which makes it decent for crossup. All versions of the move will affect your momentum to some extent, with the weaker version doing it the least. Decent for resetting pressure in grounded blockstrings, and can go over some lows that f5b cannot. Fairly decent in RG exchanges.
j214B can be used after j214214A(1) IC to launch the opponent.
|
|
Eternity Specials
236236*
Surface-to-Air Freezer
236236* 236236A 236236A 236236B 236236B 236236C 236236C
|
| Version
|
Damage
|
Proration
|
Juggle
|
Guard
|
Startup ¹ ²
|
Active
|
Recovery
|
Adv Hit
|
Adv Block
|
Cancel
|
| A
|
800 x 3
|
-
|
-
|
Any
|
8
|
72
|
55
|
/
|
-
|
-
|
Nayuki kicks the air so hard that she forms a ball of ice. This can be used as a combo ender to tack extra damage at the end of either a ground or air chain. Level 1 is mostly cheap damage, but comes at the cost of not being hard knockdown and thus techable. Not invulnerable on startup.
|
| B
|
600 x 6
|
-
|
-
|
Any
|
8
|
72
|
55
|
/
|
-
|
-
|
Does more damage and actually DOES lead into hard knockdown. On top of that, this has invulnerability, so it can be used as a costly reversal. Like level 1, this can be used as a combo ender to lead into hard knockdown, and gives more than enough time to setup Snow Bunnies if you want to. It is possible to still hit the opponent while they're in a frozen state, but reaching them is another issue entirely.
|
| C
|
500 x 15
|
-
|
-
|
Any
|
8
|
72
|
55
|
/
|
-
|
-
|
Big damage. This doesn't offer more invulnerability, but if you want to dump your meter to guarantee a round end, go for it.
|
|
j214214*
Super Nayu-chan Kick
j214214* j214214A j214214A j214214B j214214B j214214C j214214C
|
| Version
|
Damage
|
Proration
|
Juggle
|
Guard
|
Startup ¹ ²
|
Active
|
Recovery
|
Adv Hit
|
Adv Block
|
Cancel
|
| A
|
700 x 2
|
-
|
-
|
Any
|
8
|
2 x 2
|
-
|
-
|
-
|
-
|
| -
|
700
|
-
|
-
|
Any
|
12
|
4
|
-
|
-
|
-
|
-
|
Nayuki's primary corner juggle combo finisher. There is no reason to not end with this. Assuming all hits connect on all versions, this leads into hard knockdown.
- Leads into Snowbunnies (641236*) if IC'd after the 3rd hit.
|
| B
|
400 x 5
|
-
|
-
|
Any
|
8
|
2 x 5
|
-
|
-
|
-
|
-
|
| -
|
1000
|
-
|
-
|
Any
|
18
|
4
|
-
|
-
|
-
|
-
|
Level 2 version of Super. Hits 6 times. Use if you think you need extra damage, but don't want to commit to 3 meter. You must be positioned above the opponent to guarantee all 6 hits.
|
| C
|
350 x 5
|
-
|
-
|
Any
|
8
|
1 x 9
|
-
|
-
|
-
|
-
|
| -
|
1500
|
-
|
-
|
Any
|
17
|
2
|
-
|
-
|
-
|
-
|
Level 3 super. Hits 10 times. Use if you REALLY need extra damage and need to kill the opponent. You must be well positioned above the opponent to guarantee all 10 hits.
|
|
641236*
Memories with Snowbunnies
641236*
|
| Damage
|
Proration
|
Juggle
|
Guard
|
Startup ¹ ²
|
Active
|
Recovery
|
Adv Hit
|
Adv Block
|
Cancel
|
| 450 x N
|
-
|
-
|
Any
|
47
|
|
28
|
/
|
-
|
-
|
Nayuki spawns two snow bunnies that rotate around her. Upon contact, the opponent is frozen. If the opponent is hit, they are considered airborne. if the opponent breaks out of the ice, they will be either standing or crouching. A timer appears below Nayuki's health bar that slowly depletes over time, but when any bunnies hit the opponent a large chunk is taken off the timer. Once the timer reaches zero or Nayuki is hit, the super ends. The first super always spawns in the same position, but all subsequent supers start where the last super ended.
Strictly speaking, it is preferential if you want to use this super, as it is not needed for success. Used correctly however, and it bolster your pressure quite a bit! Some positives and negatives:
+ Keeps the opponent locked down, allowing your basic mixups to become slightly more viable.
+ Makes 236A, 236C, and 412B more dangerous mixup options, as one well-timed 236x or 412B will lead to a freeze.
+ Limits some of the opponents' normal use of neutral tools, as Nayuki is still quite fast.
+ Can lead into high damage combos, even from level 1.
+ Preserves IC meter to build up to BIC.
+ Can still build super meter in this state.
- Bunnies offer no form of vertical protection, so you can still be anti-aired or hit by a low.
- Expensive on upkeep, especially considering 214214x ender and usage of IC.
- Gives the opponent another thing to Recoil Guard. Great for those with command grabs.
- Some characters wakeups are still too fast to make proper utilization of it.
- Bunnies can sometimes not freeze if normal and bunny hit on the same frame.
This super can safely be setup after 2C. While it can be setup after 236C or 214214A, the opponent will often recover before you can use any form of meaningful mixup against them. In order to safely setup after both of those moves, you will need IC to cancel both into snow bunnies.
At midscreen, there are several options you can utilize to make the bunnies hit. At the most fundamental level, you can go for a high/low mixup. 236A or 236C will often do the trick, but 412B can be used as well to land a high. Outside of that, you can also go for left/rights by either airdashing over the opponent, or backdashing or backjumping into 412B to crossup.
Conversions from bunny can range from simple to complicated. The most simple conversion you can get from a frozen state is simply pushing the opponent to the corner with the rest of the bunny hits, then using 5C to air juggle into super. If you wish to further optimize, you can use 66a 623a to combo into a refreeze. There is also dash into 2A 5B to launch the opponent to go for an air chain. Ideally, you will want to go into 236B refreeze loops at all levels, and very often you will hit this in the corner. As long as you are cognizant about when bunnies spawn, the loop is rather easy.
Recoil Guard stun does not prevent the bunnies from rotating. They will appear to remain frozen until RG stun ends, and then teleport to their actual position.
|
|
Final Memory
236236S
Move Name
236236S
|
| Damage
|
Proration
|
Juggle
|
Guard
|
Startup ¹ ²
|
Active
|
Recovery
|
Adv Hit
|
Adv Block
|
Cancel
|
|
|
-
|
-
|
Any
|
1 - 183
|
|
78.66
|
/
|
/
|
-
|
|
|
|
Strategy
Combos
| Notation Help
|
Disclaimer: Combos are written by various contributors, some combo notations may deviate slightly from the notation listed below.
For more information, see Controls
|
| IC
|
Input Instant Charge (22C) when you have the right amount of RF Meter.
|
| FIC
|
Input Flicker Instant Charge (22C) when you have the right amount of RF Meter.
|
| {X/Y/Z}
|
Move X or Y or Z can be used.
|
| #*
|
Indicates that any of A, B and C may be used with #. Example: 214*.
|
| [<- X] [-> X]
|
Side switch notation. All inputs grouped by the square brackets are performed facing the arrow's direction. They are still written as if they were done facing right, however.
|
| [X]xN
|
Loop the inputs in the square brackets as many times as N.
|
| c5B
|
Proximity normal only usable while close.
|
| f5B
|
Proximity normal only usable outside of c5B range or when cancelled from another normal. Known as far 5B.
|
| jX
|
Button X is input during your first jump.
|
| djX
|
Button X is input during your double jump.
|
| X(whiff)
|
Indicates that X is intended to whiff.
|
| X(tech trap)
|
Indicates a combo ender intended to catch the opponent's air tech. The most common kind of tech trap is j6C, which will air throw early techs and jC later techs. Executionally identical to X(whiff) but different in purpose.
|
| ~
|
Indicates a followup for moves which have them. Example: 236A~236A.
|
| ..
|
Indicates a short delay.
|
| IAD
|
Indicates an Instant Air Dash.
|
| IABD
|
Indicates an Instant Air Back Dash.
|
| (X)
|
X move is omittable from the combo.
|
| tk.X
|
Indicates the motion "X" is input immediately after leaving the ground. Stands for tiger knee.
|
Basic Combos
No IC
- Anywhere
- 2AA 2B f5B 5C 236A | ~2064 damage
- 2AA 2B f5B 2C 236C | ~2079 damage
- 2AA 2B f5B 2C 641236A | ~1494 damage - Sets up her ice bunny super nicely.
- 2AA 5B 2B 2C 236236A | ~3000 damage
Red IC
- Near Corner
- 2AA 5B 2C 236B(2hits) IC 5B jB j66 jBC land 5C jBC djBC 214214A | ~4509 damage
- Midscreen
- 2AA 5B 2C 236B(2hits) IC 5B jB j66 jBC land 236C | ~3316 damage
- 2AA 5B 2C 236B(2hits) IC 5B jB j66 jBC land 236236A | ~3939 damage
Blue IC
- Near Corner
- 2AA 2B f5B 2C 236B(2hits) IC 5B [jB j66 jBC land]x3 5C jBC djBC 214214A | ~6640 damage
- In Corner
- 2A 2B f5B 2C 236B IC 2142147A [jB j66 jBC land]x3 5C jBC djBC 214214A(3) IC 641236A | ~7336 damage - 2142147A is a a trick to get j214214A as soon as you leave the ground. j2142147A can be character specific and you may need to adjust your timing for the super on some characters.
- Corner to Corner Carry
- 2AA 2B f5B 2C 236B(2hits) IC 5B [j9B j66 jBC land 66]x3 5C jBC djBC 214214A | ~6641 damage - The dashes on the ground are short.
- 2AA 2B f5B 2C 236B(2hits) IC 5B [66B]x4 jB j66 jBC land jB j66 jBC 5C jBC djBC 214214A | ~6629 damage
Advanced Combos
Red IC
- Anywhere
- 236A(2hits) IC 66A 66B jB j66 jBC 66 jB j66 jBC 5C jBC djBC dj214214A | Video - Doesn't work on Rumi, Doppel, Mayu, Makoto or Kano.
- 236B(1hit) IC 66C 236236A | Video
- 623B IC j66 jBC 66 jB j66 jBC 66 jB j66 jBC 5C jB .. jC djABC dj214214A | ~4835 damage - Very character specific timings on Mayu, Sayuri, Kano and Unknown but universal outside of that.
- 623A IC j8 dj66 djBC 66 jB j66 jBC 66 jB j66 jBC 5C jB .. jC djABC dj214214A | ~4835 damage - j8 dj66 required because you cannot instantly airdash out of 623A.
- Midscreen
- Off j214A Okizeme j214A IC 66B IAD jC 66 jB j66 jBC 66B jB j66 jBC 5C jBC djBC dj214214A | Video
- Corner
- 66C IC .. 5C jB j66 jBC 66B jB j66 jBC 5C jBC djBC dj214214A | Video
- 2B 2C 236B(2hits) IC 5B 66B jB j66 jBC 5C jBC djBC dj214214A
Blue IC
- These are designed to maximise damage and also build Red IC back in time to IC the dj214214A into bunny super upon landing.
- From 236C Knockdown in the Corner
- Crossup version: jB 5B 2B 2C 236B(2hits) IC [2] 5C .. 2142147A jC j66 jC 5C jB .. jC land jB j66 jBC 5C jBC djBC dj214214A IC jC(whiff) 641236A | Video
- Same side version: jB 5B 2B 2C 236B(2hits) IC 2142147A jC j66 jC 5C jB .. jC 66B jB j66 jBC 5C jBC djBC dj214214A IC jC(whiff) 641236A | Video
- Close to corner side swap
- 2AA 2B 2C 236B(2hits) IC [2] 5C IAD jC land 2142147A [jB j66 jBC]x2 5C jBC djBC dj214214A IC jC(whiff) 641236A | Video
- Optimal Corner Combo
- 2AA 2B f5B 2C 236B(2hits) IC 2142147A(2hits) jC j66 jC 5C jB .. jC 66B jB j66 jBC 5C jBC djBC dj214214A(3) IC jC(whiff) 641236A | ~7442 damage
- BIC Corner to Corner Carry that builds Red IC
- Which juggle route you use depends on the starter.
- Starters:
- 2B 2C~
- f5B 2C~
- 2AA 5B 2C~
- jB 2A 5B 2C~
- jB 5B 2B 2C~
- jAB 5B 2C~
- ~236B(2hits) IC 5B IAD jC 66B 66B 66B jB .. jC 66B jB j66 jBC 5C jBC djBC j214214A IC 641236A
- Starters:
- 2ABC~
- 5B 2B 2C~
- 2B f5B 2C~
- (jBC/jAC/jAB) 5B 2C~
- ~236B(2hits) IC 5B 66B IAD jC 66B 66B jB .. jC 66B jB j66 jBC 5C jBC djBC dj214214A IC 641236A
- Starter:
- 2C~
- ~236B(2hits) IC 5B 66B IAD jC 66B 66B 66B jB .. jC 66B jB j66 jBC 5C jBC djBC j214214A IC 641236A
- Starter:
- 236B(2hits)~
- ~IC 5B 66B 66B IAD jC 66B 66B jB .. jC 66B jB j66 jBC 5C jBC djBC j214214A IC 641236A
Okizeme
For the most part, Nayuki's okizeme comes down to using safe jump to basic mixups (high/low, empty low, throw) in order to make herself safe from reversals. Her safe jumps can come in many forms, and crossups are possible with them. The more familiar you can be with safe jumps amongst the cast, the better. jB is her most common meaty crossup as it has a nice crossup hitbox. Hitting crossup can be difficult on Mio, Kaori and Mai thanks to their wakeup collision boxes. Converting from a crossup jB usually involes landing and doing 2B 2C.
There are some instances where you can meaty with 5A and make the opponent's reversal whiff, but it largely depends on the reversal. She can also do this with any form of meaty as well, but 5A and 2A might be your safest bet. 2B is excellent for a meaty and checks if the opponent messes up their reversal or not, but generally a plan where you're hoping the opponent messes up is a flawed one. (I also would not consider meaties without other factors okizeme, but to each their own.)
With Snow Bunnies active, you have plenty of options to make the opponent take incoming mixup. However, you want to be aware of RG when doing so. Using Snow Bunnies against characters with command grabs such as Ikumi, Mayu, and Rumi will generally reverse the situation and leaving you with less meter and health. The most basic mixup you can do with Snow Bunnies is with 236A and 236C. Beyond that, you can also air dash into characters to make them take a left/right mixup. Finally, there's throw... but opponents can air tech once frozen, so it's not a good option.
Finally, there's Final Memory, but this comes with a catch: You have to make sure the opponent can stay within the effective area. If the opponent is particularly stuck at the Grandfather Clock's active frames, then you're free to run mixups on them.
Win Quotes
| Japanese
|
English
|
|
う~ん・・・寝不足だと調子が出ないかなぁ
|
Hmmm... not getting enough sleep really stops me from doing my best…
|
|
負けた方がイチゴサンデーおごりの約束 忘れちゃ嫌だよ?
|
We made a promise that the loser has to treat the winner to a strawberry sundae. Don't forget it!
|
|
ん? なんだか今日は新記録が出せる気分だよ~
|
Hm? Somehow, I feel like I can beat my own record today!
|
|
わ こんなところで寝たらダメだよ
|
Hey! You can’t sleep here!
|
|
うにゅぅ~ ちょっと顔がくらくらするよ─
|
Ughh... I’m feeling a little light-headed...
|
|
う~ん もしかして私が勝ったのかな?
|
Erm… Wait, did I win this match?
|
|
こう見えても 陸上部の部長さん 競争なら負けないよ
|
I may not look it, but I'm the captain of the track club. I won't lose in a race!
|
|
凄いそっくりさん お母さんもびっくりするかな?
|
Incredible, you look just like me! That’s gonna be quite the surprise for mom!
|
|
いいなぁ~ 私も羽が欲しいよ
|
Those look so cool... I want wings too...
|
|
さすが香里だね 今日は私の運がよかっただけだよ
|
Nice job, Kaori. But I guess luck was on my side today.
|
|
わ ゴメンお母さん い、急がないと 私遅刻しちゃうから そのパンは今度・・・
|
Whoa...! I’m sorry, mom! I—I better hurry up or I’m gonna be late! I'll have your toast another time…
|
|
ひどいよ~ 私そんなにねぼすけじゃない・・・
|
What a mean thing to say! I'm not that much of a sleepyhead...
|
|
あ、こんなところに お母さんが心配してたよ~
|
Oh, this is where you were. My mom was so worried.
|
|
なんだか私たち気が合いそうな予感がするよ
|
Somehow I have a feeling that we might end up getting along with each other.
|
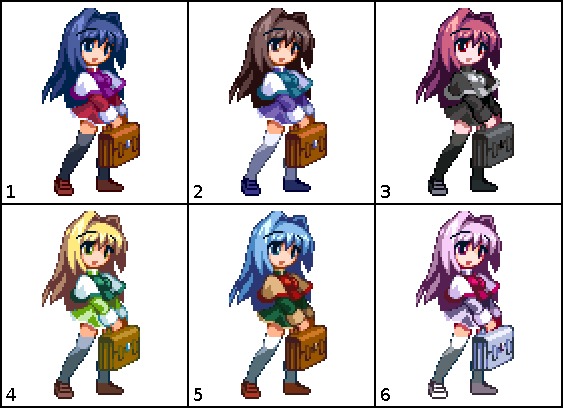
Colors

In-game References
Game References
- Nayuki's "Nayu-chan Twister" move is based on Sakura Kusagano's "Shunpuu Kyaku" move, from the Street Fighter Alpha Series.
Kanon References
- The house in the background is the Minase household, where Nayuki lives.
- The way all of Nayuki's attacks are kicks, and her fast dashing speed, are a reference to her excellent running ability.
- The snow bunnies that Nayuki creates in her "Memories with Snow Bunnies" move is a reference to an event in the past that Yuuichi remembers during the game.
- The alarm clocks Nayuki throws during her "Special Collection" move is a reference to the ridiculously large collection of alarm clocks she uses to wake up every morning.
| General
|
|
| Characters
|
|
| Mechanics
|
|
| Guides
|
|
| Wiki
|
|
