Eternal Fighter Zero/Ikumi Amasawa: Difference between revisions
Pure KouhAi (talk | contribs) (→f5B) |
Pure KouhAi (talk | contribs) (→f5B) |
||
| Line 80: | Line 80: | ||
|property= | |property= | ||
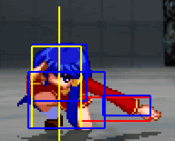
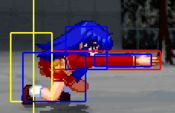
|startup= {{EFZ-SF | |startup= {{EFZ-SF | ||
|9 | |8 / 9 | ||
|8 / 8.33}} | |8 / 8.33}} | ||
|active= 3 | |active= {{EFZ-SF | ||
|3 | |||
|3 / 2.66}} | |||
|recovery= 13 | |recovery= 13 | ||
|advHit= +1 | |advHit= +1 | ||
Revision as of 16:49, 19 June 2021
Introduction
Amasawa Ikumi (天沢 郁未) is a rushdown heavy character, equipped with a very fast dash, command throw, standing overhead, two air dashes, and high priority on many of her moves. With meter, she gains access to clones, which pressure the opponent in various ways, allowing Ikumi to run her mixup game freely. At far ranges, she has access to a blood tornado, allowing her to pressure and keep her opponents at bay; however, the recovery time is long, and using the wrong tornado can lead into an opening for your opponent. Her special feature is a blood meter. All B moves, as well as special moves, will draw blood from your opponent, splattering it on the floor. As Ikumi picks up blood, her specials grow more powerful, but also start to drain the blood meter. At full blood, Ikumi activates Genocide mode, giving her a timed amount of super armor and powering up all her special moves to max.
Ikumi is the protagonist of MOON, a visual novel produced by Tactics in 1997. She followed the recent death of her mother, Miyoko, to an organization known as FARGO. During MOON, Ikumi joins FARGO to discover how and why her mother died, uncover its secrets, and exact a bloody revenge...
Stage: FARGO Research Facilities (FARGO研究施設)
BGM: FARGO
Character-Specific Notes
- Ikumi is able to air jump once, and air dash/backstep twice.
- Ikumi's Medium attacks chain as follows: 5B(c) 5B(f), or 2B 5B(f).
- Ikumi has a "Blood" meter underneath her life gauge, which is split up into 8 bars. Ikumi fills this meter by either letting blood splash on her, or to a lesser extent by running over blood on the ground before it disappears. Many of Ikumi's attacks cause blood to be spilled in various amounts. Based on the blood meter, Ikumi has access to 3 levels of power (which will be called Blood Level or "BL" for the rest of the article):
- Blood Level 1 (0-2 filled bars): Meter is red. Ikumi's initial and weakest state.
- Blood Level 2 (3-5 filled bars): Meter is orange. Many of Ikumi's special moves increase in damage and/or speed. However those moves now consume 1 blood bar each time they are used.
- Blood Level 3 (6-8 filled bars): Meter is yellow. Many of Ikumi's special moves increase in damage and/or speed yet again. They still cost the same amount.
- When Ikumi's Blood gauge is completely filled, Ikumi automatically performs the "Rampage" move, and the blood gauge temporarily turns into a "Genocide" gauge. The genocide gauge acts as the countdown timer for Ikumi's "Rampage". While in this mode, Ikumi gains increased offensive capabilities and recoil armor. Further details on the effects of "Rampage" are listed lower down.
Normal Moves
The notation for the movelists can be found under Controls.
The normal move data table can be found under Ikumi Amasawa/Move Data.
Standing
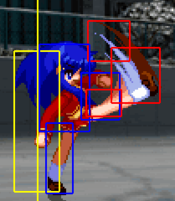
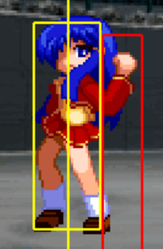
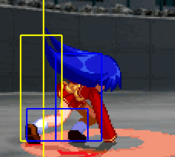
5A
5A
|
|---|
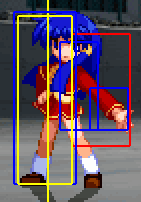
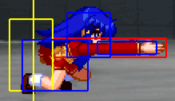
5B
5B
|
|---|
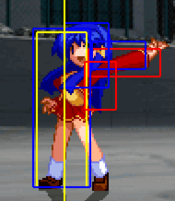
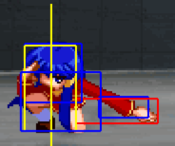
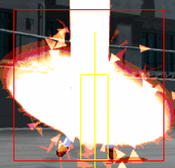
f5B
f5B
|
|---|
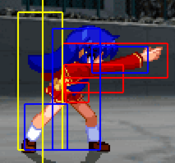
5C
5C
|
|---|
Crouching
2A
2A
|
|---|
2B
2B
|
|---|
2C
2C
|
|---|
Jumping
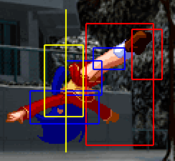
j5A
j5A
|
|---|
j5B
j5B
|
|---|
j5C
j5C
|
|---|
Dashing
66A
66A
|
|---|
66B
66B
|
|---|
66C
66C
|
|---|
662A
662A
|
|---|
662B
662B
|
|---|
662C
662C
|
|---|
Grabs
Close 6C/4C
Ground Grab
Close 6C/4C |
|---|
Close j6C
Air Grab
Close j6C |
|---|
Special Moves
The notation for the movelists can be found under Controls.
The special move data table can be found under Ikumi Amasawa/Move Data.
Red Line of Impulse
(衝動の赤い線)
236* |
|---|
623*
Bloodstained Cross
(血染めの十字架)
623* |
|---|
214*
Skyscraper
(摩天楼)
214* |
|---|
41236C
Feast's Omen
(宴の予兆)
41236C |
|---|
Rampage
Rampage (暴走) Activates automatically when the blood gauge is full Activates automatically when the blood gauge is full
|
|---|
Eternity Specials
4123641236*
Separation
(別離)
4123641236* |
|---|
214236*
Invasion of Blood
(血の侵食)
214236* |
|---|
214214*
Mirror of Lies
(虚言の鏡)
214214* |
|---|
Final Memory
236236C
Sword of Friendship
(絆という名の剣) 236236236C Relative duration of frames not accurate. Relative duration of frames not accurate.
|
|---|
Strategy
Overview
- Ikumi is the classic rushdown character, with extreme mobility. She boasts one of the fastest running dashes in the game, and has two air dashes. Her normals have good angles and ranges, but suffer a little as, other than 5A, they are all minus. This becomes less of a problem as 2B and 5C are both jump cancelable on block. Her dash normals have the same properties as her normals, but with forward momentum. Her 66A becomes +0 on block, so in matchups where you have the faster 2A/5A, you can bully your opponent. Ikumi also has one of the better command throws in the game, but must condition the opponent to expect buttons and then dash in and grab instead.
- Once Ikumi is able to score a combo into a knockdown, she can run her clone summon game, where she shines. Her slightly minus normals no longer matter, and she can easily mix up the opponent with command grabs, lows, or a standing overhead.
- However, once Ikumi's turn is over, or the opponent is able to back off, Ikumi must play a slower neutral game. In some matchups, she can suffer while attempting to close the distance, as long-pokes can stop her dash short and she gains little ground.
Neutral
- Ikumi must play a reserved neutral game. In some matchups, she's free to just dash in on the opponent and wreak havoc, but in others, against characters with excellent pokes, she instead relies on her 214 specials to try to force the opponent to act. Once she's within a certain range, 214 becomes dangerous to use, and she will have to rely on pokes and dash moves.
- 214A/B/C
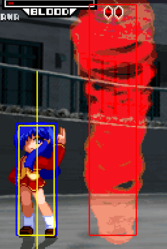
- Depending on the button pressed, Ikumi's tornado will come out at a different distance. It has two hits at BL1, and those hits are spaced far apart. At BL2, the hits become much more active and start acting as a good wall to prevent the opponent from approaching. At BL3, they gain three hits and are extremely active. Be very, very careful on which version you use; Ikumi is extremely vulnerable on a whiffed tornado that goes behind the opponent.
- 66B/662B
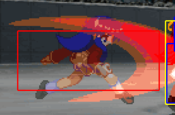
- When Ikumi gets in a certain range of the opponent, she can start to threaten her dash B pokes. These have very good ranges, but lead into nothing (66B 214B works at certain ranges) unless you have IC. If you can confirm a 66B/662B hit into IC, you can then 662C them if you're close to the corner, or 66B 41236C if you're too far. Repeat her neutral steps until the opponent is in the corner.
Rushdown
- Once Ikumi is able to chase down her opponent, she can begin her rushdown game. This consists of her good normals, combined with fast dashes, and moves that are only slightly negative on block. She covers for some of this by having jump cancelable moves on block, and being able to crush pokes with 214 or sometimes 623. If the opponent is afraid to press a button, her command throw becomes an option, and is able to do very respectable damage in the corner.
- Normals
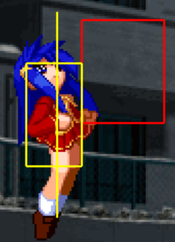
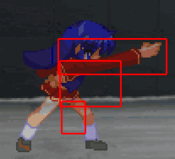
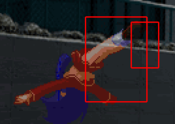
- Ikumi's normals have good hitboxes and decent frame data. For example, her 5A is angled upwards, and is excellent for poking jumping opponents, while her 5B is angled straight forward and is a good poke to check an approaching opponent. Her 2B has fair range, and is jump cancelable on block along with 5C. This jump cancelability allows her to reset her pressure into IADs while being relatively safe. As always, mixup your options and timing to prevent the opponent from getting a read on you.
- Dash Pressure
- Ikumi's normals are bolstered by her dash pressure. Though none of her dash moves are plus on block, she has a fast 5A and 2A and can still win out after a blocked dash move, as well as canceling them into 214 or 623. And while they might not have the best frame advantage, their hitboxes and speed require the opponent to respect them, leaving them open to Ikumi's other option, her command throw.
- Command Throws
- As stated above, the opponent has to respect Ikumi's other buttons. Once they do, she can mix up her pressure with command throws. This leads to 214214A mixups midscreen, and a full combo in the corner. With meter and BIC, even her command throw can result in over 5k damage. Ikumi takes quite a while to recover after a whiffed command throw, so don't get too predictable.
Reversals
- Ikumi's reversals are very lacking, and only become reasonably okay when she starts to gain some blood meter. As she reaches BL3, her 236C becomes a very good reversal with plenty of invulnerability and armor, though she would rather keep that RF meter and blood for combos instead of reversals. If she wishes to spend meter on her 2141236 super, she can keep a pocket reversal on hand to use whenever.
- 623C
- Some startup invulnerability at all blood levels, but takes a while until active and can be mashed out of. Gains armor throughout most of the move and recovery at BL3, so using it as a reversal is perfectly fine.
- 236C
- Ikumi's 236C has some invulnerabilty and armor on BL2, but only the armor lasts long enough to cover her until active frames. She gains extra armor frames at BL3. It is not useful as a reversal at BL1 at all. Ikumi can suffer in some matchups where she needs a reversal but cannot get blood.
- 4123641236C
- Grabs on the frame of superflash, meaning the opponent cannot jump. C version has invulerability until activation, but is very punishable on whiff.
- 2141236 (activation)
- This super is invulnerable on the second cast (activation). Doesn't require her to be at any particular blood level, so in matchups where you absolutely must have a reversal on hand at all times, make sure to spend some meter on this.
Supers
- 214214A/B/C
- Summons a clone that will do a followup attack, either by time or by proximity. Ikumi uses these to stay safe while running her mixup game. This is the sole reason why you play Ikumi. See the Mixups and Okizeme section for usage.
- 2141236
- On first activation, Ikumi will spend meter according to the button pressed, and slam her fist into the ground. This sets the blood fountain, and pressing 2141236 with any button again will set it off. Higher levels have a larger fountain and more damage. This super has invulnerability on activation, and cannot be blocked in the air. One of her few ways to guarantee a reversal due to her blood mechanics.
- 4123641236
- Ikumi's super command grab. Spills a lot of blood on hit. Use whereever you would use a normal command throw.
- There happens to be a period of time during an opponent's jump startup in which they can still be ground thrown (1st frame of jump). By delaying your 4123641236 super, you can hit this frame with some reliability, and reset proration for higher damage. Don't do this if the opponent has a frame 1 invulnerable reversal.
- 236236236C
- Ikumi's Final Memory (FM) is a quick dash across the screen that will do a fair amount of damage on hit. This can be comboed into very easily, just slot it in where you would do 236A/B. You can also command throw straight into FM.
Combos
| Notation Help | |
|---|---|
| Disclaimer: Combos are written by various contributors, some combo notations may deviate slightly from the notation listed below. For more information, see Controls | |
| IC | Input Instant Charge (22C) when you have the right amount of RF Meter. |
| FIC | Input Flicker Instant Charge (22C) when you have the right amount of RF Meter. |
| {X/Y/Z} | Move X or Y or Z can be used. |
| #* | Indicates that any of A, B and C may be used with #. Example: 214*. |
| [<- X] [-> X] | Side switch notation. All inputs grouped by the square brackets are performed facing the arrow's direction. They are still written as if they were done facing right, however. |
| [X]xN | Loop the inputs in the square brackets as many times as N. |
| c5B | Proximity normal only usable while close. |
| f5B | Proximity normal only usable outside of c5B range or when cancelled from another normal. Known as far 5B. |
| jX | Button X is input during your first jump. |
| djX | Button X is input during your double jump. |
| X(whiff) | Indicates that X is intended to whiff. |
| X(tech trap) | Indicates a combo ender intended to catch the opponent's air tech. The most common kind of tech trap is j6C, which will air throw early techs and jC later techs. Executionally identical to X(whiff) but different in purpose. |
| ~ | Indicates a followup for moves which have them. Example: 236A~236A. |
| .. | Indicates a short delay. |
| IAD | Indicates an Instant Air Dash. |
| IABD | Indicates an Instant Air Back Dash. |
| (X) | X move is omittable from the combo. |
| tk.X | Indicates the motion "X" is input immediately after leaving the ground. Stands for tiger knee. |
Replays for these combos can be found here.
No IC
- Midscreen
- 2A 5B 2B 2C 41236C(whiff)
- Very basic gatling combo. The 41236C whiff is used to stop momentum for possible IAD left/right mixups. (1347 DAMAGE) [replay 1-1]
- 2A 5B 2B 2C 41236C(whiff)
- 2A 5B 2B 5C 214B
- Basic BnB for damage. Possible to dash up and jump to try to catch opponent techs. (1727 DAMAGE) [replay 1-1]
- 2A 5B 2B 5C 214B
- BL3-Only: 2A 5BC 236B(3) 5ABC 236B(3) 4123641236C
- Ikumi's BL3 236B will loop into itself. 4123641236C will combo, but using 4123641236A drops the combo. However, with the right timing, the A version becomes unjumpable. Good if the opponent doesn't have meter for invulnerable reversals. (4064 DAMAGE) [replay 1-2]
- BL3-Only: 2A 5BC 236B(3) 5ABC 236B(3) 4123641236C
- 214214A set: 6696644 land 662C IAD jC 5C 79 jC land jB(1) 66 jB(1)C 5BB jAAAAB djA[6]~C
- If you get a chance to set a 214214A clone as oki midscreen, use this combo to confirm off it. You don't have to do the double dash version, but try to make your mixup land outside the corner. The j[6]~C at the end of the combo is a tech trap. (4115 DAMAGE) [replay 1-2]
- 214214A set: 6696644 land 662C IAD jC 5C 79 jC land jB(1) 66 jB(1)C 5BB jAAAAB djA[6]~C
- Corner
- 41236C 5BBC IADB jC(whiff) 9 jC 9 dj[6]~C
- Corner command grab combo. The backwards IAD with jC whiff is to build meter, and the last dj[6]~C is to catch techs. (1592 DAMAGE) [replay 1-1]
- 41236C 5BBC IADB jC(whiff) 9 jC 9 dj[6]~C
- 662C 8 jC 662C 8 jC 5BB jAAAAB djA[6]~C
- If you can punish an opponent in the corner, easy version. Will drop on some characters. (2772 DAMAGE) [replay 1-3]
- 662C 8 jC 662C 8 jC 5BB jAAAAB djA[6]~C
- 662C IAD jC 5C 79 jC 5C 79 jC 5BB jAAAAB djA[6]~C
- If you can punish an opponent in the corner, harder version. Will work on all characters. (3481 DAMAGE) [replay 1-3]
- 662C IAD jC 5C 79 jC 5C 79 jC 5BB jAAAAB djA[6]~C
- 214214B set: ... (214214B third hit) 5C 79 jC 66B jB(1) 66 jB(1)C 5BB jAAAAB djA[6]~C
- Ikumi will be mixing up with 214214B a lot, this is the basic confirm with no extra meter. (4250 DAMAGE) [replay 1-3]
- 214214B set: ... (214214B third hit) 5C 79 jC 66B jB(1) 66 jB(1)C 5BB jAAAAB djA[6]~C
Red IC
- Midscreen
- 2A 5B 2B 5C 236A IC 66B 41236C
- Ikumi's most common BnB. Not much corner carry and just okay damage, but allows her to build blood for better combos. The 41236C must be slightly delayed after the 66B to connect. (2334 DAMAGE) [replay 1-4]
- 2A 5B 2B 5C 236A IC 66B 41236C
- Close to corner: 66B IC 662C IAD jC 5C 79 jC land jB(1) 66 jB(1)C 5BB jAAAAB dj[6]~C
- On a successful 66B poke. This is a fast move and will catch people off guard. (3550 DAMAGE) [replay 1-4]
- Close to corner: 66B IC 662C IAD jC 5C 79 jC land jB(1) 66 jB(1)C 5BB jAAAAB dj[6]~C
- Corner
- 66C IC 662C IAD jC 66B jB(1) 66 jB(1)C 5BB jAAAAB djA[6]~C
- Basic confirm off a raw overhead. (3005 DAMAGE) [replay 1-4]
- 66C IC 662C IAD jC 66B jB(1) 66 jB(1)C 5BB jAAAAB djA[6]~C
- (2AA) 2B 5C 236A IC 662C IAD jC 5BBC IAD jC(whiff) 9 jC 9 dj[6]~C
- 2A starter for decent damage in the corner. You can, at most, add one more 2A at the beginning of the combo, but it becomes very hard to complete. Be thorough with your hitconfirms and go for the single 2A if possible. (3090 DAMAGE) [replay 1-5]
- (2AA) 2B 5C 236A IC 662C IAD jC 5BBC IAD jC(whiff) 9 jC 9 dj[6]~C
- (2AA) 2BB 5C 236A IC 662C IAD jC 5BBC IAD jC(whiff) 9 jC 9 dj[6]~C
- Variation of the combo above. Foregoes some damage to knock down the opponent midscreen to set up the 214214A mixup. (2761 DAMAGE) [replay 1-5]
- (2AA) 2BB 5C 236A IC 662C IAD jC 5BBC IAD jC(whiff) 9 jC 9 dj[6]~C
Blue IC
- Midscreen
- BL2+ only: 2AB 5C 236C IC 66B 66B 662C 9 jC 5C 79 jC land jB(1) 66 jB(1)C 5BB jAAAAB dj[6]~C
- Corner to corner carry, will work on everyone. Requires 3 bars of blood at the very least. The first 66B should be immediate, and the second should be slightly delayed. (5221 DAMAGE) [replay 1-6]
- BL2+ only: 2AB 5C 236C IC 66B 66B 662C 9 jC 5C 79 jC land jB(1) 66 jB(1)C 5BB jAAAAB dj[6]~C
- Corner
- 2AB 5C 236A BIC 662C IAD jC (5C 79 jC)x2 land jB(1) 66 jB(1)C land 5BB jAAAAB dj[6]~C
- Basic BIC corner combo starting from 2A. (5307 DAMAGE) [replay 1-7]
- 2AB 5C 236A BIC 662C IAD jC (5C 79 jC)x2 land jB(1) 66 jB(1)C land 5BB jAAAAB dj[6]~C
- 66C BIC 662C IAD jC (5C 79 jC)x2 land 66B jB(1) 66 jB(1)C land 5BB jAAAAB dj[6]~C
- Basic BIC corner combo starting from 66C. (4906 DAMAGE) [replay 1-7]
- 66C BIC 662C IAD jC (5C 79 jC)x2 land 66B jB(1) 66 jB(1)C land 5BB jAAAAB dj[6]~C
- 41236C 5BC BIC 79jC (5C 79 jC)x2 66B jB(1) 66 jB(1)C 5BB jAAAAB dj[6]~C
- Basic BIC command throw corner combo. (4939 DAMAGE) [replay 1-8]
- 41236C 5BC BIC 79jC (5C 79 jC)x2 66B jB(1) 66 jB(1)C 5BB jAAAAB dj[6]~C
- 214214B set: ...(214214B third hit) (5C 79 jC)x2 5C BIC 7 jC 66 jC land 5C 79 jC 66B jB(1) 66 jB(1)C 5BB jAAAAB dj[6]~C
- Basic BIC combo if B clone hits. (6841 DAMAGE) [replay 1-8]
- 214214B set: ...(214214B third hit) (5C 79 jC)x2 5C BIC 7 jC 66 jC land 5C 79 jC 66B jB(1) 66 jB(1)C 5BB jAAAAB dj[6]~C
- 214214B set: ...(214214B third hit) 5C 79 jC 5BBC BIC 214214B 7 jC 66 jC land (214214 3 hits) 5C 214214B IADB jC 66B 8 jB 8 land (214214B 3 hits) 5BBC IADB jC(whiff) 9 jC 9 dj[6]~C
- Very advanced BIC combo with 3 methods of comboing into and from 214214B. Weave the parts into other combos as needed to increase your damage. (7534 DAMAGE) [replay 1-9]
- 214214B set: ...(214214B third hit) 5C 79 jC 5BBC BIC 214214B 7 jC 66 jC land (214214 3 hits) 5C 214214B IADB jC 66B 8 jB 8 land (214214B 3 hits) 5BBC IADB jC(whiff) 9 jC 9 dj[6]~C
- 41236C 5BC BIC 214214B 7 jC 66 jC land (214214 3 hits) 5C 214214B IADB jC 66B 8 jB 8 land (214214B 3 hits) jAAAAB dj[6]~C
- Advanced command throw combo in the corner, using the pieces from the above combo. Using only one clone is maximum efficiency, but if you need to kill and only have a little left to go, you can use more. (5497 DAMAGE) [replay 2-1]
- 41236C 5BC BIC 214214B 7 jC 66 jC land (214214 3 hits) 5C 214214B IADB jC 66B 8 jB 8 land (214214B 3 hits) jAAAAB dj[6]~C
Mixups & Okizeme
- Midscreen
- 214214A
- Set down the A version midscreen and run a variety of left/right mixups. You can j6644 over them, you can do a late 662C over short characters, or a 97 for uncrossup and a 98 for a crossup, or do a meaty 66C/2A.
- Corner
- 214214B
- Set down the B version in the corner after a knockdown. You can usually fill the time between set and activation with a blockstring, or just by blocking the opponent's mash. Once the summon is attacking, you can do several variations of mixups. You can IAD jAAA/IAD 2A, you can IAD land 66C, you can raw 66C, or you can do 2AA. Any hit can be confirmed easily into a full combo. Note that the third hit of the clone will whiff on certain characters.
- 214214C
- Only really useful if you only need a single hit to finish off your opponent. While the other two versions are useful to combo out of, this one is extremely hard to do so. To make up for that, it hits more often and for longer, meaning you can run multiple mixups on one summon. Run the same mixups as 214214B here.
- 66C
- Ikumi's 66C is an overhead, but requires IC or a clone super to combo off a raw hit. Doing the 66C with no delay makes the startup very hard to see, as it looks very much like Ikumi is standing or doing a 5C. Mix up with a stand into late 2A to combat fuzzy blocking.
Win Quotes
| Japanese | English |
|---|---|
|
あら、あなた |
Oh my, |
|
クッ! |
Agh! |
|
へちょい攻撃ね… |
Your attacks are terrible... |
|
泣けッ! |
Cry! (Ikumi is refering to Iori Yagami from The King of Fighters series.) |
|
さっさと |
Hurry up and |
|
終わりにしない? |
We should end this, you know? |
|
ハイ終了 |
OK, the end! (Ikumi is refering to Kenshiro from Fist of the North Star.) |
|
(To Shiori) |
(To Shiori) |
|
(To Kaori) |
(To Kaori) |
|
(To Ikumi) |
(To Ikumi) |
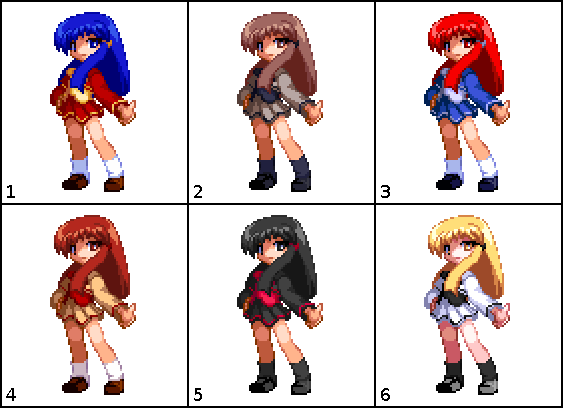
Colors
In-game References
External References
- Ikumi's "Red Line of Impulse" move is based on Leona Heidern's "Ground Saber" move, from The King of Fighters series.
- Ikumi's "Bloodstained Cross" move is based on Leona Heidern's "X-Calibur" move, from The King of Fighters series.
- Ikumi's "Skyscraper" move is based on Leopold Goenitz's "Yonokaze" move, from The King of Fighters series.
- Ikumi's "Seperation" move is based on Leopold Goenitz's "Yamidoukoku" move, from The King of Fighters series.
- Ikumi's "Sword of Friendship" move is based on Captain Commando's "Captain Storm" move, from Marvel vs Capcom 2.
MOON References
- The lab in the background is part of the FARGO Research Facilities, where MOON takes place.
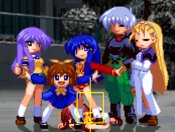
- During Ikumi's "Sword of Friendship" move, four of Ikumi's friends from the game MOON appear, in this order: Haruka, Yui, Youko, Kid.

