Eternal Fighter Zero/Mio Kouzuki: Difference between revisions
m (→Corner Combo Enders: typo) |
Pure KouhAi (talk | contribs) (→LR c5A) |
||
| Line 915: | Line 915: | ||
|guard= Ground | |guard= Ground | ||
|property= | |property= | ||
|startup= 6.33 | |startup= {{EFZ-SF | ||
|7 | |||
|6.33}} | |||
|active= 5 | |active= 5 | ||
|recovery= 4 | |recovery= 4 | ||
Revision as of 06:30, 24 June 2021

Introduction
Kouzuki Mio (上月 澪) is two characters packed into one, and can switch between 2 stances, close range and long range mode. Both stances have their own normals, specials, supers and even movement options. In her close range stance, Mio is an excellent in-fighter, with great normals, fast movement, many mixup options and a large array of reversals. In her long range stance, she becomes arguably the strongest zoner in the game, with ridiculous dhalsim style normals that can chain into each other and space control specials that can even overwhelm the other zoning specialists. The stance switching itself is extremely strong too, being fast to the point where she can gain frame advantage by cancelling moves into it. Her only real weakness is her lack of strong reversal option once she gets cornered in long range mode, which can easily take her from a full life lead to a loss against characters with strong offense. While her lack of zoning moves in close range mode might be a weakness in theory, it only comes up in a handful of scenarios in practice.
Mio is one of the heroines of ONE, a visual novel produced by Tactics in 1998. Mio is a 1st grade student in the same school as Kouhei. She always carries a sketchbook with her since she is mute. Also, her face expresses a lot of emotion, so you can easily tell how she is feeling just from looking. During ONE, Kouhei helps Mio with the theater club, and ends up remembering something that he'd long since forgotten...
Stage: Gymnasium (体育館) BGM: Smiling in innocence (無邪気に笑顔)
Character-Specific Notes
- Mio's current mode is shown right below her health bar. Blue text means that she is in Short Range Mode, and red text means she is in Long Range Mode.
- Mio's Short Range Mode is able to air jump once, and air dash/backstep once.
- Mio's Long Range Mode is able to air jump once, and air dash/backstep twice.
- Mio's Long Range Mode is quite slow and has one of the most floaty jumps in the game.
Normal Moves (Short Range Mode)
The notation for the movelists can be found under Controls.
The normal move table can be found under Mio Kouzuki/Move Data.
Standing
5A
5A  |
|---|
(c)5B
(c)5B  |
|---|
(f)5B
(f)5B  |
|---|
5C
5C  |
|---|
6C
6C  |
|---|
Crouching
2A
2A  |
|---|
2B
2B  |
|---|
2C
2C  |
|---|
Jumping
(j)5A
(j)5A  |
|---|
(j)5B
(j)5B  |
|---|
(j)5C
(j)5C  |
|---|
(j)2C
(j)2C  |
|---|
Dashing
66A
66A  |
|---|
66B
66B  |
|---|
66C
66C  |
|---|
662A
662A  |
|---|
662B
662B  |
|---|
662C
662C  |
|---|
Throws
(c)6C/4C
(c)6C/4C  |
|---|
(j)6C
(j)6C  |
|---|
Special Moves (Short Range Mode)
The special move table can be found under Mio Kouzuki/Move Data.
Specials
5S
Mode Switch 5S  |
|---|
236*
Costume-Adventurer
(衣装・冒険家) 236*  (From top to bottom) 236A/B, 236A/B~236B, 236C (From top to bottom) 236A/B, 236A/B~236B, 236C
|
Mio dresses up as Indiana Jones and whips the opponent. This is Mio's only armor breaking move. |
|---|
623*
Costume-Onmyoji
(衣装・陰陽師) 623* 623A 623A  623B 623B  623C 623C
|
Mio dresses up as Akari Ichijo from the Last Blade series, spins, and rises, hitting the opponent along the way. Mio has a 10F recovery when she lands. Extremely fast reversal that can be easily comboed out of with IC, only being limited by its lack of horizontal range. |
|---|
214*
Costume-Red Hood
(衣装・あかずきん) 214*  |
Mio dresses up as B.B.Hood from Darkstalkers and charges, swinging her knife in a windmill motion. |
|---|
Eternity Specials
236236*
Costume-Cat who wore short boots
(衣装・長くない靴を履いた猫) 236236*  |
Mio dresses up in a cat rain slicker and pulls a string that comes from up high. Pans, spotlights, and weights (in ascending order of damage) begin to fall on the opponent in random amounts. Both the initial hit and all falling objects are untechable launchers. |
|---|
214214*
Costume-Student Soldier
(衣装・学徒兵) 214214*  |
Mio dresses up as a student from Gunparade March and stretches her palm forward, shooting an energy blast. NOT a projectile. All versions are untechable. |
|---|
Final Memory
236*
Costume-Anyway, a lot
(衣装・とにかくたくさん) 641236C~A~B~C~A~B~C~S~236C/623C  |
|---|
Normal Moves (Long Range Mode)
The normal move table can be found under Mio Kouzuki/Move Data.
Standing
LR c5A
(c)5A  |
|---|
LR f5A
(f)5A  |
|---|
LR 5B
5B  |
|---|
LR 4B
Above Hit
(上当て) 4B  |
|---|
LR 5C
5C  |
|---|
Crouching
LR c2A
(c)2A  |
|---|
LR f2A
(f)2A  |
|---|
LR 2B
2B  |
|---|
LR 2C
2C  |
|---|
Jumping
LR j5A
j5A  |
|---|
LR j5B
j5B  |
|---|
LR j2B
Below Hit
(下当て) j2B  |
|---|
LR j5C
j5C  |
|---|
LR j2C
Right Below Hit
(真下当て) j2C  |
|---|
Dashing
LR 66A
66A |
|---|
LR 66B
66B |
|---|
LR 66C
66C  |
|---|
LR 662A
662A |
|---|
LR 662B
662B |
|---|
LR 662C
662C |
|---|
Throws
LR c6C / LR c4C
6C / 4C |
|---|
LR cj6C
(c)j6C |
|---|
Special Moves (Long Range Mode)
The special move table can be found under Mio Kouzuki/Move Data.
Specials
LR 5S
Mode Switch 5S |
|---|
LR j5S
Flight
(飛行) j5S  |
|---|
LR 236*
Costume-Shikigami Tamer
(衣装・式神使い) 236*  |
Cancel window for FIC is right after an arrow is fired. |
|---|
LR 214*
Costume-Card Captor
(衣装・カードキャプター) 214*  Top layer hitboxes not pictured. Top layer hitboxes not pictured.
|
|---|
| ※ | Left | Middle | Right |
|---|---|---|---|
| Top | 41F | 35F | 38F |
| Middle | 43F | 37F | 40F |
| Bottom | 45F | 39F | 42F |
LR 412*
Costume-Little Match Girl
(衣装・マッチ売りの少女) 412*  |
Mio continuously shoots fire from a matchstick which launches the opponent. Great at stuffing out buttons thanks to its large amount of active frames. Can be done on the ground and in the air. |
|---|
Eterny Specials
LR 236236*
Costume-Snow Princess
(衣装・雪女) 236236*  236236A/B 236236A/B  236236C 236236C
|
Mio launches a large ball of ice across the screen, freezing the opponent and knocking them back. Can be done on the ground and in the air. Primary use is as a combo ender. |
|---|
LR 214214*
Costume-Vampire Hunter
(衣装・ヴァンパイアハンター) 214214*  |
Mio, dressed up like Ciel from the visual novel Tsukihime, throws several volleys of launching Black Keys at an upward angle of 30 degrees. Used as a combo ender. All versions are untechable. |
|---|
Final Memory
LR Final Memory*
Costume-Doing many things with a Fake Nanase
(衣装・アレ以外の何か with 偽七瀬) BA2AB  |
|---|
Strategy
- Mio is an open ended character with a lot of combo variety thanks to her two stances.
- Mio's ability to stance switch every ground normal can make many normals with exploitable 5S cancels appealing, but getting RG'd while stance switching as early as possible means Mio can forfeit her ability to RC back.
Neutral
- Notable moves
- SR 2B - Really active and safe move that is annoying to RG thanks to its 8 hits.
- SR 662C - Moves Mio really far forward making it good for punishes. On block you have the common IC cancel, but Mio can also opt to cancel into 623* to catch a button or 5S if they are respecting the DP.
- SR jA - Super disjointed and fast normal, usually needs your double jump to combo from though.
- LR 214* - Quick and large projectile.
- LR 412* - Very active move that covers a lot of space and has a huge FIC window.
- Anti-airs
- SR c5B - Not the best hitbox Mio has but great juggle potential.
- SR 623A/C - Multihit and very easy to juggle after with IC.
- LR 2C - Amazing multihit move with a massive hitbox and multiple conversions.
- Reversals
- SR 623* - Frame 4 meterless reversal with the other aforementioned strengths, but has almost no horizontal reach.
- SR 214C - Slow but travels far across the ground and is plus on block.
- SR 236C - Can be used to fight pressure from moderate distance but on wakeup is weaker than other options.
- SR 214214A/B - Air unblockable, fully invincible, gets a combo with IC and a knockdown without it.
- LR 412C - Lots of iframes but not something to use on wakeup since it's slow and doesn't hit point blank, definitely decent on RG though.
- It's not uncommon to get crossed up and "misinput" 214C when attempting 623C and vice-versa, making some oki options particularly frustrating to attempt on Mio.
Pressure
- Mixup options
- SR j2C - Low crushing frame 19 instant overhead or crossup overhead or delay-landing overhead or a move to mess up anti air timing, all in one move that starts devastating combos and is cancellable on whiff including FIC. Also you don't even need FIC to combo after with Guard Gauge.
- Pressure resets
- SR 662A - Gets in their face and plus on block.
- SR 66C - Moves forward while dodging lows but is minus unless 5S cancelled.
Combos
| Notation Help | |
|---|---|
| Disclaimer: Combos are written by various contributors, some combo notations may deviate slightly from the notation listed below. For more information, see Controls | |
| IC | Input Instant Charge (22C) when you have the right amount of RF Meter. |
| FIC | Input Flicker Instant Charge (22C) when you have the right amount of RF Meter. |
| {X/Y/Z} | Move X or Y or Z can be used. |
| #* | Indicates that any of A, B and C may be used with #. Example: 214*. |
| [<- X] [-> X] | Side switch notation. All inputs grouped by the square brackets are performed facing the arrow's direction. They are still written as if they were done facing right, however. |
| [X]xN | Loop the inputs in the square brackets as many times as N. |
| c5B | Proximity normal only usable while close. |
| f5B | Proximity normal only usable outside of c5B range or when cancelled from another normal. Known as far 5B. |
| jX | Button X is input during your first jump. |
| djX | Button X is input during your double jump. |
| X(whiff) | Indicates that X is intended to whiff. |
| X(tech trap) | Indicates a combo ender intended to catch the opponent's air tech. The most common kind of tech trap is j6C, which will air throw early techs and jC later techs. Executionally identical to X(whiff) but different in purpose. |
| ~ | Indicates a followup for moves which have them. Example: 236A~236A. |
| .. | Indicates a short delay. |
| IAD | Indicates an Instant Air Dash. |
| IABD | Indicates an Instant Air Back Dash. |
| (X) | X move is omittable from the combo. |
| tk.X | Indicates the motion "X" is input immediately after leaving the ground. Stands for tiger knee. |
Basic Concepts
- Mio having access to both Short Range (SR) and Long Range (LR) modes essentially makes her two characters in one, adding the fact she can switch between these modes mid combo means she has many more combo options to choose from than the rest of the cast. Players must be able to choose the correct combo options for the situation without hesitation to prevent dropped combos and less than satisfactory enders, making this a double edged sword.
- Mio players will find themselves making on the spot decisions and improvising combo sections frequently. A major feature of hers is the ability to efficiently carry the opponent to the corner using her stance cancels. Out of the entire cast, Mio is possibly the best suited to EFZ's free-form combo system.
- Rough Combo Flow
- Launch the opponent into the air
- Carry to nearest corner
- Juggle for damage (earning back some IC and super meter in the process)
- Knock down or tech trap
- Mio has the ability to use LR 66C and SR 5C to wallbounce an aerial opponent and further extend her combos. This is an important part of her combos.
- In both modes, Mio's ability to carry the opponent to the corner is very high, any hit can lead to corner carries and you'll likely be using LR 66C or SR 5C at least once to achieve this.
- The features of each mode are as follows:
- Short Range
- Okizeme using j2C, cancellable into specials and supers even on whiff
- Okizeme using 236236A
- 214C, 623* and 214214* are excellent reversal specials
- 662C is an excellent sliding normal, often cancelled into 214214*
- Long Range
- Zoning with her very large normals
- Two air dashes
- j5D to float, giving her an option to stall aerial movement at will
- 412A/C against mashing, also usable in the air
- 236* for fast projectiles
- 214* for zoning lightning pillars
- Okizeme using SR j2C and 236236A need RIC. 236236A also needs 1 super stock. Mio will make a lot of her combo decisions based around whether she has access to RIC in order to followup with this type of okizeme. If she has BIC in stock, Mio also has options to convert into higher damage routes if the player believes they can secure the kill.
Non-Juggle Combos
Non-IC
- (SR) 2A 2A 2B 5C 236B~236A
- Amazingly drains about half BIC gauge.
- (SR) 2A 2B 2C
- (LR) 2A 2B 5C 236236*
Red-IC
- (SR) 2A 2B 5C 236B~236A IC 662C 214214A
- Very easy and useful BnB. Although it lacks in damage for the cost, it works anywhere on every character even on a far hit.
Juggle Starters
Non-IC
- Midscreen
- (SR) j2C (with significant Guard Gauge)
- (SR) 214214A(trade) 66B
- (LR) (2A 2B) 2C 236A 66C
- Corner
- (SR) 66C 5S 66C
- Punish near the corner.
- (SR) 66C 5S 2C(1) 5S 2B(1) 5C
- Very powerful punish for point blank in the corner.
- (LR) 412A 662C(1) 5S 2B(1) 5C
- Uncommon but useful starter.
Red-IC
- Midscreen
- (SR) 2A 2A 2B 5C 236A~236A 623B(1) IC
- Needs a fairly close hit or the 623B will whiff. Consider cancelling 2B early as you don't have much juggle to work with.
- (SR) 2A 2A 2B 2C 214214A(1) IC
- Damaging use of meter and RIC.
- (SR) j2C IC
- (LR) (2A 5B 5C) 412A IC
- Corner
- (SR) 2A 2A 2B 5C 236C
Blue-IC
- Midscreen
- (SR) 2A 2A 2B 5C 236B~236A BIC
- Corner
Midscreen Juggles
- These parts are used to carry the opponent nearer to the corner.
- (SR) jB j66 jBC
- Proration limit: Power needs to be over 75.1% when the first jB hits.
- This is the most useful juggle for Mio, so this should be highest priority to learn. Pay close attention to the proration limit. If you have extra proration to spend, you can do jB j66 jB c5B jB j66 jBC.
- (SR) j66 jABC
- Proration limit: Roughly 70%
- An option for strange combo starters. It's important to consider how you're going to land from this, in some cases a delay between jB and jC may be necessary.
- (SR) jA j9 djB dj66 djBC
- (SR) jA j9 djB djB
- Combos for converting from jA air-to-airs and tech traps. This is an important component to keep in mind to make the most of jA confirms, which is typically hard to combo from. djB djB is a link that opens up better combo options.
- (SR) jC(1or3) j66 jBC
- This is an alternative to jB j66 jBC. Especially useful for situations where jB may not hit or if you need to adjust the opponent's height higher. Against Mai, this version is essential after j2C RIC.
- (LR) [jAB j66]x2 jA .. jB
- Corner carry combo piece for when you're in Long Range mode.
- (SR) j66 jB
- The jB should hit just before landing.
- Allows you to push the opponent with your air dash and use less proration. Carries for a similar distance as jB j66 jBC. While it is mainly used for BIC, it can still be used for certain RIC starters, so keep this option in mind to maximise distance carried and damage.
- (SR) jA .. jB .. jC
- If after a wall bounce the proration is between 70% and 75.1%, you can use this.
- (LR) jB 66 jB 66 jA jB (land) 66C
- May need to omit or replace parts for proration or if opponent is too high or too low.
Corner Juggles
- (SR) j9 (jA) jB jC
- (SR) jB 66 jB jC
- Useful from a 7, 8, or 9 jump.
- (SR) j8 j8 djB djB
- (LR) [<- 662C(1)(back-hit) 5S] [-> 2B(1) 5C (5S) (66)]
- Flashy and proration efficient loopable juggle until around 68%. Not advisable versus Doppel, Makoto, Rumi, Sayuri, or Shiori.
Midscreen Combo Ender
- (1 Super Stock) (LR mode) 214A/214C 214214A
- Use this ender when you think you might not be able to reach the corner. 214214A is untechable, deals decent damage and often stalls time enough to get RIC back. If you think you can secure the kill with a bit more damage, use 214214B/C.
- (1 Super Stock) (SR mode) 214214A
- SR 214214A is also untechable. It may feel wasteful using this as a combo ender considering the cost effectiveness, but it's still much better than allowing your opponent to tech and run away, so it's an important option to remember.
- This ender is also used as a last resort in other combos where the opponent is too high to convert from. One example is the 2B(1) (f5B) 5C juggle described earlier.
- There are still okizeme options for this in SR mode, so let's push the wasteful nature of this ender to the backs of our mind.
- (1 Super Stock) (LR mode) 662C(3~5) 214214A
- This ender is used if the opponent is too low after her typical LR mode corner carry combo: [jA jB j66]x2 jA .. jB
- Mio lands first and raises the opponent's juggle height using 662C allowing her to combo into 214214A. The number of hits of 662C depends on how low the opponent is, as you're trying to position the opponent to be hit optimally by all the projectiles in 214214A.
Tech Trap Ender
- As previously mentioned, Mio has a strong capability to carry to the corner. This means that your combo recipes will center around corner combo ender setups, whether they be tech punish setups or knockdowns.
- SR 236236A and LR 214214A are both untechable. LR j2C is difficult to tech. As long as you remember these combo ender options, you shouldn't have much trouble.
- If there is no other option but to go for a tech trap midscreen, it will be a j6C tech trap like other characters. This option is not recommended due to her other better methods.
Corner Combo Enders
- LR mode - (jA) jB jC (j8/j9) djA dj2B dj2C dj2C(whiff)
- LR ender. One of Mio's easier enders, it is recommended to learn this one first. Hitting the opponent with j2C secures the knockdown, meaning you can choose this option and not worry about a tech trap, but you to want to whiff a second one for meter build. This option is great damage for when you have no supers in stock. This combo ender only works at above approximately 51.5% power. If the power is lower than this, you can skip some normals. For example: jB jC [j8 or j9] jA j2C
- SR mode - 5AxN c5B (8/9) jAAB dj6C(whiff)
- One of Mio's SR enders. This ender is ideal for following up with 236236A okizeme. 5AxN is roughly 5. You're able to adjust the opponent's juggle height by adding delays between these 5As, and from c5B onwards inputting as fast as possible. For the dj6C(whiff) tech trap, you'll want to input it shortly after you start coming down from your double jump. You should be aiming to enter j6C just after the opponent techs. Adjusting the height with 5As is important to ensure this tech trap while also maintaining some damage, giving you more time for the 236236A oki setup, allowing for more items to be summoned.
- SR mode - 2B(3) 6C 236A~236A
- Another SR ender. 236A~236A causes a knockdown with a gap in the corner, opening up more ways to mixup your opponent and allowing for 236236* oki. One downside is the damage is lower than the previous options and there is less time to set up okizeme. This setup is particularly hard on Unknown, her small juggle hurtbox makes height adjustment difficult.
- SR mode - 662C 236A~236A
- An alternate setup for corner gap 236236* oki.
2~3 Stock Super Enders
- (SR mode) 2B(1) (f5B) 5C 5D(LR) walk towards corner slightly jA jB j7 djA dj2B dj236236*
- (SR mode) 236236A IC 2B(1) (f5B) 5C 5D(LR) walk towards corner slightly jA jB j7 djA dj2B dj236236*
- (LR mode) 214C 214214A 66C 214214*
FM Combos
- (SR) 2A 2A 2B 5C 641236C
- Corner ender for 623C followup - (SR) [<- 662A(whiff, pass under the opponent)] [-> 2B(1) 5C 5S jB jC djA dj2B dj2C]
- Same deal if you don't end up in the corner but getting in front of them is less stressful.
- (LR) 2A 2B 5C IC 662B BA2AB
Example Full Combos
- (SR) 5B jB 66 jB jC 2B(1) 5B 5C 5S 214C 214214A -
- Example of a midscreen anti-air juggle.
- (SR) 2A 2B 5C 236C j9 jB jC 2B(1) 5C 5S j7 jA jB jC dj9 djA dj2B dj2C dj2C(whiff) -
- Universal 2A starter corner combo with RIC.
- (SR) j2C FIC jB 66 jB 2B(1) 5C j7 jB 66 jB jC 2B(1) 5C 5S j7 (jA) jB jC dj9 djA dj2B dj2C dj2C(whiff) -
- Universal j2C RIC starter combo.
- (SR) j2C FIC jB 66 jB 2B(1) 5C 5S 66 [<- 662C(1)(back-hit) 5S] [-> 2B(1) 5C .. j9 jB jC 2B(3) 6C 236A~236A 236236A] FIC -
- Relatively advanced (not universal) j2C RIC starter combo.
- (LR) 2A 2B 5C 412A FIC (land) j9 jB 66 jA jB (land) 66C walk/wait j8 jA jB j9 djA dj2B dj236236B -
- This is in a sweet spot to show off the j236236B ender, otherwise this combo should mostly be done when not near the corner. Expect to do the regular LR ender in a match.
Notes
- The adjustment from SR 2B(1) 5C to 5A 2B(1) 5C is often needed or is appreciated for hitting Akiko, Doppel, Kano, Rumi, and Sayuri. While midscreen, 2B(1) 5B 5C can often help with ensuring a wallbounce, or simply 5A 5C against a high opponent or naturally high falling characters.
- Be sure to land the first hit of LR 662C in back-hit combos, the later hits do not give as much juggle time.
- The A version of LR j236236* is techable, so as an ender it is mainly used as a higher damage option to secure kills at the end of matches.
Okizeme
- Meterless
- SR j.C is good at crossing up even while airdashing, and if spaced right has good reward.
- Instant LR j.2C is extremely fast but you can't combo off of it, airdashing away immediately is advised. Great for finishing off opponents.
- LR 412A/B is a low risk way to get some chip and build IC.
- With IC
- Instant SR j.2C FIC gives a full combo and lets you keep your turn on block, you can also do a few 2A's beforehand.
- Non-landing crossup SR j.2C FIC looks very deceptive but can tricky to implement.
- SR j.2C FIC right before landing from a jump is ideal for creating a 4 way mixup as it can be done on either side of the opponent and hits at the same time as a 2A would.
- With Super Meter
- After ending a combo with SR 236236*, Mio can FIC as the opponent wakes up and mix however she pleases. Instant SR j.B becomes amazing during the object rain, being a frame 10 overhead that only whiffs on Ayu, Ikumi, Kano, Mayu, Mio, and Neyu. While landing from a j.B, Mio can again perform her j.2C shenanigans before hitting the ground, as well as airdash to further delay and even go for a double or triple overhead if she wants to with jA (jA) j2C. If the 236236* was preceded by a 236A~236A to get the opponent out of the corner, Mio also gains the freedom to cross up or not before and/or after any attempt at a high. If the opponent is hit while you are facing away from the corner, you can try repositioning yourself with SR 662A. Wakeup time matters for this setup, it will be a lot more effective the slower the wakeup is.
Win Quotes
Japanese English スケッチブックの
使い方
ちょっと
違う気がするの…I don't think
that this is
the correct way to
use a sketchbook.本気で
叩かれたの…
すっごく
痛いの…You hit me
with all your might...
It really
hurts...あのね
練習いっしょに
ありがとうなのHey.
Thank you
for rehearsing with me.衣装汚れたの…
部長さんに
怒られるの…My costume got dirty...
The club president
will be mad at me...い、
痛いの…It...
it hurts...(To Akane)
長い髪の毛
似合うように
なりたいの(To Akane)
I want to
look good with
long hair like you.(To Misaki)
先輩…
もうちょっと早く
気がついて
欲しいの…(To Misaki)
Senpai...
I wish you
would notice me
a little sooner.(To Ayu)
本物の翼
とっても
きれいなの(To Ayu)
They're real feathers.
They're very
pretty.(To Mio)
まねだけじゃ
だめなの(To Mio)
You can't just
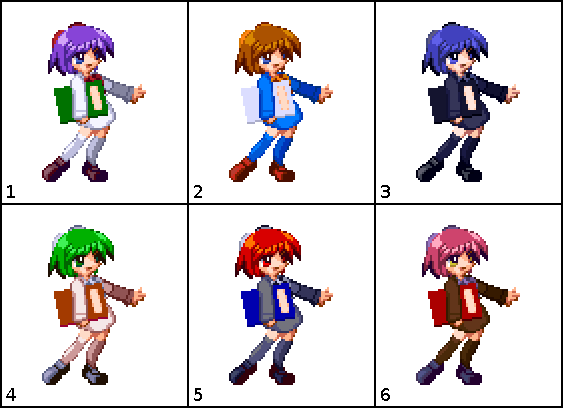
copy others.Colors
In-game References
External References
- Mio's standing throw is based on Sakura Kusagano's "Sailor Strangle" throw, from the Street Fighter series.
- During Short Range Mio's dashing crouch medium move, she dresses up like Sakura Kusagano, from the Street Fighter series.
- Short Range Mio's dashing strong move is based on Kyo Kusanagi's standing fierce kick, from The King of Fighters series.
- Short Range Mio's "Costume-Student Fighter" move is based on Kyo-1's "Kurogami" move, from The King of Fighters series.
- Short Range Mio's "Costume-Tokugawa Aristocrat" move is based on Shinnosuke Kagami's "Kurogami" move, from The Last Blade series.
- Short Range Mio's "Costume-Adventurer" move is based on Dandy-J's "Hissatsu Rope" move, from Waku Waku 7.
- Short Range Mio's "Costume-Onmyoji" move is based on Akari Ichijo's "Tenmon Hoshi No Meguri" move, from The Last Blade series.
- Short Range Mio's "Costume-Red Hood" move is based on the first part of B.B.Hood's "Beautiful Memory" move, from the Darkstalkers series.
- Short Range Mio's "Costume-Student Soldier" is based on some move in the life-simulation Gunparade March.
- The beam finisher for Short Range Mio's "Costume-Anyway, a lot" move is based on Cyclops's "Mega Optic Blast" move, from the Capcom Marvel Series.
- The uppercut finisher for Short Range Mio's "Costume-Anyway, a lot" move is based on Kyo Kusanagi's "Crouching Strong Punch" -> "125 Shiki: Nanase" combo, from The King of Fighters series.
- During Long Range Mio's "Costume-Vampire Hunter" move, she dresses up like Ciel from the visual novel Tsukihime.
ONE References- The many costumes Mio uses in her moves is a reference to her role as a member of the drama club in the visual novel.
- (LR) 2A 2B 5C 412A FIC (land) j9 jB 66 jA jB (land) 66C walk/wait j8 jA jB j9 djA dj2B dj236236B -
- (SR) j2C FIC jB 66 jB 2B(1) 5C 5S 66 [<- 662C(1)(back-hit) 5S] [-> 2B(1) 5C .. j9 jB jC 2B(3) 6C 236A~236A 236236A] FIC -
- (SR) j2C FIC jB 66 jB 2B(1) 5C j7 jB 66 jB jC 2B(1) 5C 5S j7 (jA) jB jC dj9 djA dj2B dj2C dj2C(whiff) -
- (SR) 2A 2B 5C 236C j9 jB jC 2B(1) 5C 5S j7 jA jB jC dj9 djA dj2B dj2C dj2C(whiff) -
- (SR) 5B jB 66 jB jC 2B(1) 5B 5C 5S 214C 214214A -
- (SR) 2A 2B 5C 236B~236A IC 662C 214214A
