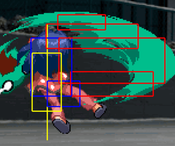
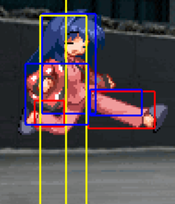
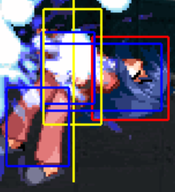
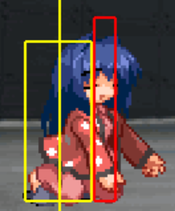
|
|
| Line 402: |
Line 402: |
| |guard=High | | |guard=High |
| |property= | | |property= |
| |startup=9.66 | | |startup={{EFZ-SF |
| | |10 |
| | |9.66}} |
| |active=9 | | |active=9 |
| |recovery=9 | | |recovery=9 |
Revision as of 06:48, 24 June 2021
 Minase Nayuki (asleep)
Introduction
Minase Nayuki (asleep) (水瀬 名雪(寝)) is an oddball character, who uses her sleepy kung fu style of tricky attacks and eccentric movement to fight in an unpredictable manner. Her character specific jam mechanic plays into this, making the options available to her at any given point harder to pin down. During the match, she can consume jam, and level up her jam counter up to a maximum of nine. Conversely, each time she gets knocked down, she loses one jam. As the jam counter increases, her moves gain upgrades, brand new moves are unlocked, and she even gains additional air dashes. If a Neyuki manages to reach level nine, she becomes nigh unstoppable with very strong lockdown and mixups, triple air dashes with hitboxes, multiple escape options and high damage. On the other hand, if she drops all the way down to zero jam she turns into a miserable existence, stripped of many of her crucial moves and left with sluggish attacks, poor movement and pitiful escape options. However even at zero jam you can’t count her out yet, as her Final Memory is one of the best in the game due to its sheer damage output.
Nayuki is one of the heroines of Kanon, a visual novel produced by Key in 1999. She is Yuiichi's cousin, childhood friend, and has always been in love with him. Nayuki is the daughter of Akiko, and is also classmates with her friend Kaori. She is an extremely fast runner and is the captain of the school's track team because of this. On the other hand she is a very heavy sleeper, with a massive collection of alarm clocks that are able to wake up Yuuichi in the adjacent room, but do not seem to work on her at all. Nayuki really enjoys strawberry jam and strawberry sundaes, but is completely terrified at the mere mention of her mother's "special" jam. During Kanon, Yuuichi is warmly supported by Nayuki as he tries to help the people he cares about, but as he starts to remember what happened with Nayuki 7 years ago, things turn for the worse...
Stage: In Front of the Minase House (Day) (水瀬家前(朝))
BGM: 2 Steps Toward
Character-Specific Notes
- Nayuki is able to air jump once, and air dash/backstep one to three times, depending on her jam level. Once Nayuki has air dashed/backstepped, she cannot perform any more air jumps until she lands or air recovers.
- Nayuki's ground dash is actually a long leap off the ground. The first attack she does during her ground dash will be considered a ground attack and can be blocked both high or low, but subsequent attacks will be considered aerial attacks, and must be blocked high.
- Nayuki's air dash/backstep is odd in that it sends her about 45 degrees downwards. Also, if Nayuki does not cancel her air dash/backstep with an attack, she will immediately go into a knockdown state when she lands on the ground.
- Nayuki's Medium attacks chain as follows, given enough jam: 5B(c) 5B(f), or 2B 5B(f).
- There is a number just above Nayuki's SP gauge, indicating her current jam level. This jam level increases by 1 every time Nayuki does her "Strawberry jam is delicious" move (up to a maximum of 9), and decreases by 1 every time Nayuki is knocked down to the floor by the opponent (down to a minimum of 0). To summarize, as Nayuki's jam level increases, she gains new moves, some moves hit more times, other moves come out faster, the number of air dashes/backsteps increase, and her walking speed increases. The exact opposite can be said as Nayuki's jam level decreases.
| Jam increases to...
|
Effect on Nayuki
|
|
Anything
|
- General movement speed increases slightly.
- The startup time on Nayuki's "Keropi is here" move decreases.
- The number of hits dealt by Nayuki's C version "Nayu-chan Kick" move increases, to her jam level + 3.
- The number of hits dealt by Nayuki's C version "Rolling~" move increases, to her jam level + 2.
- The recovery time for Nayuki's C version "Rolling~" move decreases.
|
|
Jam Level 1
|
- Nayuki's "Rolling~" move is unlocked.
|
|
Jam Level 2
|
- Nayuki's j.B gains an extra hit, hitting a total of 3 times.
- The startup time for Nayuki's 2B decreases, making it possible to combo 2A into 2B.
- Nayuki's 2B can be move-cancelled into her 5B (far).
- Nayuki's "Nayuleap" move is unlocked.
- Nayuki's "Nayu-chan Kick" move is unlocked.
|
|
Jam Level 3
|
- Nayuki gains an extra air dash, giving her a total of 2 air dashes.
|
|
Jam Level 4
|
- Nayuki's j.B gains an extra hit, hitting a total of 4 times.
- The startup time for Nayuki's 5B (close) decreases.
- The recovery time for Nayuki's "Rolling~" move decreases.
|
|
Jam Level 5
|
- Nayuki's 5B (far) gains an extra hit, hitting a total of 5 times.
- The second-to-fifth hits of Nayuki's 5B (far) can be move-cancelled into her j.C.
- Nayuki's B version "Nayu-chan Kick" move gains an extra hit, hitting a total of 2 times.
|
|
Jam Level 6
|
- Nayuki's 5B (far) gains an extra hit, hitting a total of 6 times.
- The first hit of Nayuki's 5B (far) can be move-cancelled into 5C.
- 5C gains anti-air property.
|
|
Jam Level 7
|
- Nayuki gains an extra air dash, giving her a total of 3 air dashes.
- Nayuki's 5C can be jump cancelled.
- Nayuki's B version "Nayu-chan Kick" move gains an extra hit, hitting a total of 3 times.
|
|
Jam Level 8
|
- Nayuki's air dash gains attack properties.
|
|
Jam Level 9
|
- Nayuki's A version "Nayu-chan Kick" move gains wallbouncing properties.
|
Normal Moves
The notation for the movelists can be found under Controls.
The normal move table can be found under Nayuki Minase (asleep)/Move Data.
Standing
5A
5A
|
| Damage
|
Proration
|
Juggle
|
Guard
|
Startup ¹ ²
|
Active
|
Recovery
|
Adv Hit
|
Adv Block
|
Cancel
|
| 190
|
-
|
-
|
Ground
|
4
|
2
|
7
|
+2
|
+1
|
N Sp Su J IC R SB
|
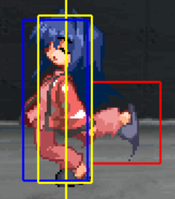
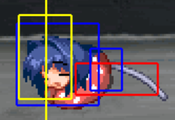
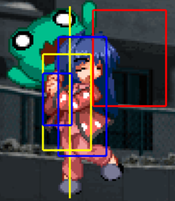
Nayuki turns to her back and brings up her heel, for a quick hit. Spammable and hits middle while being pretty safe on whiff, but has short range.
|
|
5B
5B
|
| Damage
|
Proration
|
Juggle
|
Guard
|
Startup ¹ ²
|
Active
|
Recovery
|
Adv Hit
|
Adv Block
|
Cancel
|
| 450
|
-
|
-
|
Ground
|
5 ~ 7
|
4
|
10
|
+4
|
+2
|
N Sp Su J IC f5B 2B SB ※
|
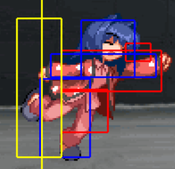
Nayuki leans forward and attacks with a chop. Can be used in succession with proper timing but will cancel into f.5B if B is pushed too soon. Can also be cancelled into 2B, C attacks, or a jump.
Startup time starts at 7 frames and is reduced by 2 frames at jam level 4.
※ Does not cancel into 2B at jam level 0.
|
|
f5B
f5B
|
| Damage
|
Proration
|
Juggle
|
Guard
|
Startup ¹ ²
|
Active
|
Recovery
|
Adv Hit
|
Adv Block
|
Cancel
|
| 200
|
-
|
-
|
Any
|
10
|
2
|
54
|
/
|
/
|
N Sp IC SB ※
|
| 200
|
-
|
-
|
Any
|
12
|
3
|
51
|
/
|
/
|
N IC AD ※
|
| 50 x 3
|
-
|
-
|
Any
|
15
|
3 x 3
|
48
|
-17
|
-19
|
N IC AD ※
|
| 350
|
-
|
-
|
Ground
|
36
|
2
|
28
|
-13
|
-15
|
N Sp Su IC SB ※
|
Nayuki leans her head forward, leaps headfirst in a drilling charge, then lands face down on the ground. Useful to close gaps created by guard push and continue a block string, as the leap causes Nayuki to move forward while allowing her to attack at the same time.
※ The first hitbox of this move, during the initial lean forward, is only active at jam level 6 and above.
※ The middle hitboxes of this move can always be cancelled into arial backdash on hit or block, never forward airdash.
※ At jam level 5 and above, the middle hitboxes of this move can be cancelled into jC during the leap.
※ The last hitbox of this move, when hitting the ground, is only active at jam level 5 and above. You can still cancel out of this hitbox into a special, but the timing window for the cancel differs depending on whether the last hitbox is active or not.
|
|
5C
5C
|
| Damage
|
Proration
|
Juggle
|
Guard
|
Startup ¹ ²
|
Active
|
Recovery
|
Adv Hit
|
Adv Block
|
Cancel
|
| 650
|
-
|
-
|
Ground
|
14
|
1
|
30
|
/
|
-9
|
Sp Su IC SB ※
|
| 650
|
-
|
-
|
Ground
|
15
|
5
|
29
|
-6
|
-8
|
Sp Su IC SB J ※
|
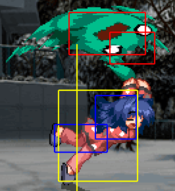
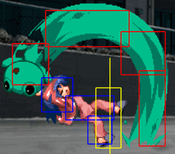
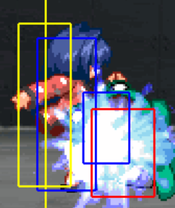
Nayuki pulls Keropi from behind her and slams it into the ground in front of her. Can only cancel into special attacks. Hits a very wide area. If not cancelled into anything Nayuki will flip over Keropi and fly forward completely defenseless, putting her in a bad position directly next to an opponent.
※ At 6 jams or higher, the upper hitbox is active and will knock airborne or tall standing opponents (Akiko, Mai, Misaki, Minagi, and Kanna) to the ground.
※ The second hitbox is jump cancellable starting at jam level 7.
|
|
Crouching
2A
2A
|
| Damage
|
Proration
|
Juggle
|
Guard
|
Startup ¹ ²
|
Active
|
Recovery
|
Adv Hit
|
Adv Block
|
Cancel
|
| 200
|
-
|
-
|
Low
|
4
|
2
|
8
|
+1
|
0
|
N Sp Su J IC R SB
|
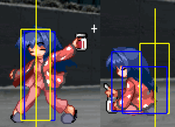
Nayuki will turn away and flick her cat tail forward for a quick hit. Just like 5A, spammable and pretty safe on whiff, but has a slightly longer range.
|
|
2B
2B
|
| Damage
|
Proration
|
Juggle
|
Guard
|
Startup ¹ ²
|
Active
|
Recovery
|
Adv Hit
|
Adv Block
|
Cancel
|
| 450
|
-
|
-
|
Low
|
8 ~ 12
|
10
|
11
|
-4
|
-6
|
N Sp Su J IC f5B SB
|
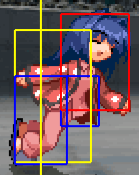
Nayuki collapses forward and stretches both her legs forward and back for a hit. Hits low, and moves Nayuki forward a bit. Very useful to cancel into 2C for an easy launch as f.5B will push the opponent too far for 2C to hit reliably.
Startup time starts at 12 frames and is reduced by 1 frame each at jam levels 1, 2, 4, and 6.
|
|
2C
2C
|
| Damage
|
Proration
|
Juggle
|
Guard
|
Startup ¹ ²
|
Active
|
Recovery
|
Adv Hit
|
Adv Block
|
Cancel
|
| 550
|
-
|
-
|
Ground
|
11 ~ 15
|
2
|
22
|
/
|
-1
|
Sp Su J IC SB
|
Nayuki grabs Keropi's head out from the ground and pulls him upward. Launches on hit and hits a tall vertical area.
Startup time starts at 15 frames and is reduced by 2 frames at jam level 5, then one more frame at jam levels 7 and 8.
|
|
Jumping
j5A
j5A
|
| Damage
|
Proration
|
Juggle
|
Guard
|
Startup ¹ ²
|
Active
|
Recovery
|
Adv Hit
|
Adv Block
|
Cancel
|
| 250
|
-
|
-
|
High
|
6
|
15
|
13
|
/
|
/
|
N J AD IC
|
Nayuki positions herself in a body slam pose and jabs the opponent with her body. Not really a body slam; this move is a quick attack that can be spammed in the air.
|
|
j5B
j5B
|
| Damage
|
Proration
|
Juggle
|
Guard
|
Startup ¹ ²
|
Active
|
Recovery
|
Adv Hit
|
Adv Block
|
Cancel
|
| 150 x (2 ~ 4)
|
-
|
-
|
High
|
6
|
5 x (2 ~ 4)
|
20
|
/
|
/
|
N J AD IC
|
Nayuki spins around in the air, hitting multiple times with her arms and legs. A multi-hit attack with a long active time.
|
|
j5C
j5C
|
| Damage
|
Proration
|
Juggle
|
Guard
|
Startup ¹ ²
|
Active
|
Recovery
|
Adv Hit
|
Adv Block
|
Cancel
|
| 680
|
-
|
-
|
High
|
10 ~ 14
|
2
|
19
|
/
|
/
|
J AD IC
|
Nayuki pulls out Keropi from behind her and swings it quickly in front of her. Hits a wide area, and causes high knockback to aerial opponents.
Startup time starts at 14 frames and is reduced by 1 frame each at jam levels 4, 5, 6, and 7.
|
|
6B
Nayu Leap
6B
|
| Damage
|
Proration
|
Juggle
|
Guard
|
Startup ¹ ²
|
Active
|
Recovery
|
Adv Hit
|
Adv Block
|
Cancel
|
| 440
|
-
|
-
|
High
|
29
|
4
|
18
|
+2
|
0
|
IC
|
Nayuki takes a short but high leap and quickly extending her leg for a kick as she comes down. This move is an overhead so it can break crouch-guard. A pretty slow move, with long delay after a miss. Won't cancel into most attacks, and cannot be jump cancelled. Going for a tick throw is generally safer than using this attack, though this can be IC'd into a higher damage combo than a throw.
|
|
Air Dash
Air Dash
Air Dash at 8/9 Jam
|
| Damage
|
Proration
|
Juggle
|
Guard
|
Startup ¹ ²
|
Active
|
Recovery
|
Adv Hit
|
Adv Block
|
Cancel
|
| 600
|
-
|
-
|
High
|
|
9
|
9
|
/
|
/
|
N IC
|
Nayuki (in the air) gets kicked at a 45 degree angle toward the ground by Keropi. At high levels of jam these dashes gain a hit on them. Use airdashes to cancel jump moves, and to move around the stage quickly. All dashes can cancel into any aerial move. In fact, not canceling the dash before Nayuki hit's the ground will result in Nayuki entering a downed state (does not decrease jam level like a normal knockdown). The dash hit can be used to extend combos or as an overhead attack.
|
|
Grabs
Close 6C/4C
Ground Grab
Close 6C/4C
|
| Damage
|
Proration
|
Juggle
|
Guard
|
Property
|
Startup ¹ ²
|
Active
|
Recovery
|
Adv Hit
|
Adv Block
|
Cancel
|
| 1000
|
-
|
-
|
Grab
|
I: 6-6
|
6
|
1
|
30
|
/
|
/
|
-
|
Nayuki's basic throw. Grabs the opponent's feet and picks them up, throwing them over her head. The opponent lands behind her so if you can tick grab the opponent you can use this to escape the corner.
|
|
Close j6C
Air Grab
Close j6C
|
| Damage
|
Proration
|
Juggle
|
Guard
|
Startup ¹ ²
|
Active
|
Recovery
|
Adv Hit
|
Adv Block
|
Cancel
|
| 1300
|
-
|
-
|
Grab
|
2
|
1
|
/
|
/
|
/
|
-
|
Nayuki's basic air throw. Nayuki grabs the opponent and throws them behind her and down at a 45 degree angle. Use on air-teching opponents to throw them down and possibly back into a corner after a rushdown.
|
|
Special Moves
The notation for the movelists can be found under Controls.
The special move table can be found under Nayuki Minase (asleep)/Move Data.
Specials
5S
Strawberry jam is delicious
5S
|
| Version
|
Damage
|
Proration
|
Juggle
|
Guard
|
Startup ¹ ²
|
Active
|
Recovery
|
Adv Hit
|
Adv Block
|
Cancel
|
| 5S
|
0
|
-
|
-
|
-
|
28
|
0
|
18
|
-
|
-
|
-
|
Nayuki raises a jar of jam above her head with a jingle, sits down with her back toward the opponent, and eats a spoon of jam. At the end of startup, causes the jam level to go up by 1. Very quick move, but leaves you defenseless for that single moment.
|
| 2S
|
0
|
-
|
-
|
-
|
0
|
0
|
24
|
-
|
-
|
-
|
Nayuki raises a jar of jam above her head with a jingle. Very quick fake out move. Does not increase your jam and does not leave you defenseless. Might trick your opponent into thinking you were going to eat a jar of jam and attack you, leaving themselves wide open.
|
|
236*
Keropii is here
236*
|
| Version
|
Damage
|
Proration
|
Juggle
|
Guard
|
Property
|
Startup ¹ ²
|
Active
|
Recovery
|
Adv Hit
|
Adv Block
|
Cancel
|
| A
|
-
|
-
|
-
|
Any
|
/
|
34 ~ 43
|
∞
|
22
|
-
|
-
|
FIC
|
Nayuki drops Keropi in front of her and kicks it directly forward, almost parallel to the ground. This move can be used to keep opponents away, hindering ground advances. The long startup time makes this move less useful than most other character's projectiles.
Startup time for this and all other 236 moves start at 43 frames and are reduced by 1 for every jam level.
|
| B
|
-
|
-
|
-
|
Any
|
/
|
34 ~ 43
|
∞
|
22
|
-
|
-
|
FIC
|
Nayuki drops keropi in front of her and kicks it diagonally forward-up. This move can be used to keep opponents away, hindering aerial advances. It has the same weakness as the A version.
|
| C
|
-
|
-
|
-
|
Any
|
I: 1-(34 ~ 43)
|
34 ~ 43
|
∞
|
22
|
-
|
-
|
FIC
|
Similar to the A version, but travels farther, hits up to 5 times, and has invincibility frames through all of startup. Great for keeping opponents away, this move has enough invincibility frames and hits to be viable to push away the opponent and give you time to jam.
|
| S
|
-
|
-
|
-
|
Any
|
/
|
34 ~ 43
|
0
|
4
|
-
|
-
|
-
|
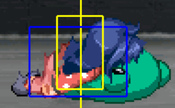
Nayuki drops keropi in front of her but does not kick it, allowing her to act immediately. A fake out move only.
|
|
623*
Nayu-chan Kick
623*
|
| Version
|
Damage
|
Proration
|
Juggle
|
Guard
|
Property
|
Startup ¹ ²
|
Active
|
Recovery
|
Adv Hit
|
Adv Block
|
Cancel
|
| A
|
700 ~ 1000
|
-
|
-
|
Any
|
/
|
5
|
15 ~ 20
|
31 ~ 34
|
/
|
-26 ~ -32
|
IC
|
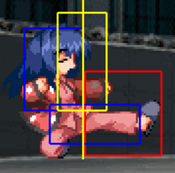
Nayuki leaps forward while kicking. The A version does a single quick kick flying up at around a 40 degree angle, higher jam makes her go further. At 9 jam, causes wall bounce.
Because of differences in trajectory and speed, the recovery time for this move varies. It starts at 34 at jam level 2, is reduced by 3 at jam level 3, increases by 2 at jam level 6, and increases by 1 at jam level 9.
|
| B
|
600
|
-
|
-
|
Any
|
/
|
16
|
3
|
28 ~ 51
|
/
|
-9
|
IC
|
| -
|
550
|
-
|
-
|
Any
|
/
|
26
|
10
|
12 ~ 34
|
/
|
0
|
IC
|
| -
|
350
|
-
|
-
|
Any
|
/
|
49
|
10
|
11
|
/
|
+1
|
IC
|
Nayuki leaps forward while kicking. Does a different amount of kicks depending on jam level. This move has low invuln all throughout startup, so it beats a lot of lows.
- Jam level 2: Does only the first kick. A decent grounded combo ender that knocks down opponents and allows time to eat one jam.
- Jam level 5: Does two kicks. An even better grounded combo ender which allows time to eat one jam, or can be IC'd into 5B in order to eat two.
- Jam level 7: Does three kicks. The worst version of this move. The third hit knocks enemies upward enough to allow them time to tech, which means Nayuki cannot eat jam when ending a combo with this move.
|
| C
|
140 x N
|
-
|
-
|
Any
|
I: 1-(28 ~ 55)
|
12
|
2 x N
|
/
|
/
|
/
|
IC
|
| -
|
650
|
-
|
-
|
Any
|
/
|
48 ~ 120
|
10
|
37 ~ 51
|
/
|
/
|
IC
|
Nayuki leaps forward while kicking rapidly. Slowly floats upward at a 45 degrees angle, kicking N+2 times where N is Nayuki's current jam level, before finishing with a final knockdown kick. Extremely unsafe on block or whiff.
|
|
214*
Zzz~
214*
|
| Version
|
Damage
|
Proration
|
Juggle
|
Guard
|
Property
|
Startup ¹ ²
|
Active
|
Recovery
|
Adv Hit
|
Adv Block
|
Cancel
|
| 214*
|
0
|
-
|
-
|
-
|
I: 1-13
|
16
|
-
|
-
|
-
|
-
|
-
|
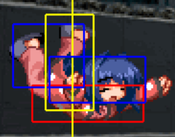
Nayuki falls into a deeper sleep than she already is, lies down head first into Keropi. Looks similar to her downed state, but does not decrease jam level. Nayuki's stance change move, this opens up her other Zzz~ moves. Has invincibility frames from frames 1 through 13, making it useful for baiting wakeups and countering. While in this stance, Nayuki is low to the ground and able to low profile some projectiles. Cancel guard strings with this in an attempt to dodge a possible counter, then roll or counter with a move of your own.
|
| 214*~A
|
700
|
-
|
-
|
Any
|
/
|
13
|
29
|
25
|
/
|
-5 ~ -34
|
IC
|
Nayuki leaps forward in a body slam pose. Flies over a wide area. Unsafe on block.
|
| 214*~B
|
550
|
-
|
-
|
Any
|
/
|
15
|
∞
|
40 ~ 49
|
/
|
/
|
-
|
Nayuki grabs a Keropi out of the ground and flings it upward, as she falls back. The angle of it's ascent/descent can be controlled by holding 4 or 6. Covers a large area and is great for anti air or slowing approaches. You are very vulnerable if it is RG'd due to the long recovery time of the move. Use in tandem with rolling and become a mobile cannon.
Recovery time starts at 49 frames and is reduced by 1 for every jam level.
|
| 214*~C
|
650
|
-
|
-
|
Ground
|
/
|
16 ~ 25
|
5
|
16
|
+1
|
-1
|
Sp Su IC
|
Nayuki does her 5C move. Similar to 5C, but done out of a low position and lacking the antiair hitbox. When used with rolling you can bait the opponent to attack and counter hit them/ hit them out of the air.
Startup time starts at 25 frames and is reduced by 1 for every jam level.
|
| 214*~2C
|
550
|
-
|
-
|
Ground
|
/
|
11
|
2
|
29
|
/
|
-12
|
Sp Su IC SB
|
Nayuki does her 2C move. Similar to 2C, a launcher, but substantially less useful as it cannot be jump cancelled.
|
| 214*~S
|
-
|
-
|
-
|
-
|
/
|
14
|
0
|
30
|
-
|
-
|
-
|
Nayuki eats a spoon of jam. Increases jam level by 1. Because Nayuki does not strike a pose or make a noise, it is faster and less noticable.
|
| 214*~4/6S
|
-
|
-
|
-
|
-
|
/
|
0
|
0
|
55
|
-
|
-
|
-
|
Nayuki rolls forward or backward. This move can be cancelled into any of Nayuki's other grounded specials, including the other 214 stance moves, at any point.
|
|
41236*
Rolling Movement
41236*
|
| Version
|
Damage
|
Proration
|
Juggle
|
Guard
|
Property
|
Startup ¹ ²
|
Active
|
Recovery
|
Adv Hit
|
Adv Block
|
Cancel
|
| A
|
350
|
-
|
-
|
Any
|
/
|
30 ~ 32
|
2
|
17 ~ 28
|
/
|
/
|
IC
|
| -
|
650
|
-
|
-
|
Any
|
/
|
32 ~ 34
|
3
|
14 ~ 25
|
/
|
-13 ~ -2
|
IC
|
Nayuki rolls forward, uncurling her legs for a kick at the end of her roll. Much more useful for positioning than attacking.
Startup time is reduced by 1 frame each at jam levels 3 and 5.
Recovery time is reduced by 1 frame each at jam levels 2 and 3, and reduced by 9 frames at jam level 4.
|
| B
|
350
|
-
|
-
|
Any
|
/
|
30 ~ 32
|
2
|
23 ~ 39
|
/
|
/
|
IC
|
| -
|
650
|
-
|
-
|
Any
|
/
|
32 ~ 34
|
3
|
20 ~ 36
|
/
|
-13 ~ -2
|
IC
|
Nayuki rolls backward, uncurling her legs for a kick at the end of her roll. Much more useful for positioning than attacking.
Startup time is reduced by 1 frame each at jam levels 3 and 5.
Recovery time is reduced by 1 frame each at jam levels 2 and 3, and reduced by 14 frames at jam level 4.
|
| C
|
50 x N
|
-
|
-
|
Any
|
I: 1-(7 ~ 9)
|
8 ~ 10
|
2 x N
|
/
|
/
|
/
|
IC
|
| -
|
350
|
-
|
-
|
Any
|
/
|
28 ~ 30
|
2
|
24 ~ 16
|
/
|
/
|
IC
|
| -
|
650
|
-
|
-
|
Any
|
/
|
30 ~ 32
|
3
|
21 ~ 13
|
/
|
-9 ~ -1
|
IC
|
Nayuki rolls forward, attacking all throughout the roll. The first hitbox of this move is activated every 2 frames after first hit, but only N+1 times where N is Jam.
Startup time is reduced by 1 frame each at jam levels 3 and 5.
Recovery time is reduced by 1 frame for each jam level.
|
|
Eternity Specials
236236*
Black Demon
236236*
|
| Version
|
Damage
|
Proration
|
Juggle
|
Guard
|
Startup ¹ ²
|
Active
|
Recovery
|
Adv Hit
|
Adv Block
|
Cancel
|
| A
|
1700
|
-
|
-
|
Any
|
164
|
1
|
27 ~ 45
|
/
|
/
|
-
|
| B
|
1350 x 2
|
-
|
-
|
Any
|
164
|
1 x 2
|
27 ~ 45
|
/
|
/
|
-
|
| C
|
1400 x 3
|
-
|
-
|
Any
|
164
|
1 x 3
|
27 ~ 45
|
/
|
/
|
-
|
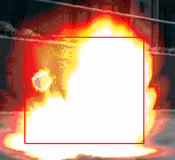
Nayuki drops a black Keropi bomb in front of her, which explodes after a short delay. There is a brief time after the bomb is dropped where Nayuki can act, which allows for mixups to pressure a cornered opponent, but this is not a terribly reliable user of meter.
|
|
214214*
Beam
214214*
|
| Version
|
Damage
|
Proration
|
Juggle
|
Guard
|
Startup ¹ ²
|
Active
|
Recovery
|
Adv Hit
|
Adv Block
|
Cancel
|
| A
|
(425 x 2) x 4
|
-
|
-
|
Any
|
15
|
1 x 4
|
174
|
/
|
/
|
-
|
| B
|
(425 x 2) x 8
|
-
|
-
|
Any
|
15
|
1 x 8
|
246
|
/
|
/
|
-
|
| C
|
(425 x 2) x 16
|
-
|
-
|
Any
|
15
|
1 x 16
|
246
|
/
|
/
|
-
|
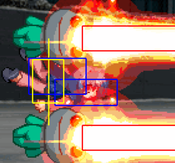
Nayuki switches from playing in a fighting game to shoot 'em up, floating in the air with a Keropi options above and below her, both of them firing lasers periodically. Movement can be fully controlled with the directional buttons, but the number and speed of lasers is based on the level of the super. The lasers knock opponents upward, so a particular rhythm is required to get the most hits out of each level.
- A Version: Hold up and hit with all 4 beams. You can start holding down halfway between the 3rd and 4th hits.
- B Version: Hit with first beam, drop altitude and whiff 2nd, hit with 3rd and 4th, drop and whiff 5th, hit with 6th, 7th, and 8th, then immediately lower altitude.
- C Version: This version is difficult to control and not worth using the meter on.
|
|
Final Memory
C236236
Super Electric Shadow Bullet
C236236
|
| Damage
|
Proration
|
Juggle
|
Guard
|
Property
|
Startup ¹ ²
|
Active
|
Recovery
|
Adv Hit
|
Adv Block
|
Cancel
|
| 50 x 44
|
-
|
-
|
Ground
|
I: Until Recovery
|
5
|
3 x 44
|
/
|
/
|
/
|
-
|
| 200 x N
|
-
|
-
|
Ground
|
I: Until Recovery
|
137
|
3 x N
|
/
|
/
|
/
|
-
|
| 1350 x 2
|
-
|
-
|
Ground
|
I: Until Recovery
|
/
|
1 x 2
|
19
|
/
|
/
|
AD IC
|
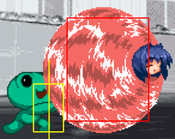
Nayuki gets picked up by Keropi and is spun around at high speeds, taking the form of a giant rotating ball. Keropi then fires the Nayuki-cannonball forward, which drills past anything in her way before exploding on contact with the far wall. After the explosion, Nayuki is blown away from the far wall at a high speed and angle. This move does a crazy high amount of damage when it is comboed into and if positioned properly and is useful from any position. If you are unable to land this move, it will still be hard for your opponent to punish you afterwards since Nayuki is invincible during the entire move, and has full control right after the explosion. You can act immediately after Nayuki is sent flying backwards.
|
|
Strategy
Low Jam
- In general, a Neyuki player will want to eat jam as soon as possible, so at low jams, you will want to play safe, build meter, and look for openings. You need to build meter for the hard knockdown from 214214A, especially if you fall below 2 jams. One strategy is to jC constantly in the air to build meter, and use her airdash to attempt to run from the opponent. Neyuki's airdash is very unique, sending her down at an angle and removing her ability to block or RG, but she can cancel it into an attack at any point in time. Try not to airdash in on an opponent with good antiairs. Once you have some meter or IC, you can mix up your play with 5C IC and confirm into a 5BC 623B knockdown into jam. Once you gain enough jams, 41236C becomes a very good DP option and allows you to jam up as well. Continue your strategy of playing safe until you reach high-jam status (8-9 jams).
High Jam
- Neyuki with 8+ jams rises in the tiers to become a good character, and boasts some of the better frame data, as well as having extremely good mobility, and a hitbox on her airdash. Neyuki can now play a rushdown style of gameplay. Since 5C is jump cancelable even on block, you can continue pressure as long as the opponent does not RG you in bad spots. A blocked 5C into airdash keeps the opponent in hitstun and allows you to mixup with either an empty low or a jB cancel. Continue pressure until you get a hit, or you feel the opponent is going to reversal, at which point you can jump back and avoid it. Both 623C and 41236C are excellent enders to Neyuki's loop combos and allow her to continue pressure afterwards. If you get knocked down, revert to playing safe until you can gain high-jam again.
0 Jam
- 0 Jam Neyuki requires a special type of playstyle to accommodate her lack of pretty much anything. 0 Jam will want to play extremely lame, abusing jC whiffs to build meter and only going in when she has resources. You cannot rely on 623B for a knockdown once you get knocked down twice, so you must have meter in order to start really playing. Despite being objectively worse in most ways, 0 Jam Neyuki players have one advantage over other Low-Jam Neyuki players: they don't have to jam up, so they can spend time on mixups instead. Various mixups you can incorporate include 66jAAB(2) for a 3-hit overhead, 66jAAB(1)C(whiff) 2A for a 2-hit overhead, 66jAAC(whiff)2A for 1-hit overhead into low, or 66jA land throw. When you have the opponent in the corner, you can time your dj 66 jB to be both a safejump, as well as having a varying number of hits. You can also go for jC(whiff) into 2A 5B 2C starter. If ever you run out of meter or don't feel safe you can back out and start your jC spam again.
Zzz~ (214)
- 214 has several frames of full invulnerabilty, as well as bringing Neyuki's hitbox very close to the ground. You can bait several DPs with this, as well as option selecting some slower DPs with j66 j214B, which will whiff on an opponent DP and crouch under it, or will allow the jB to hit and let the 214 fall out of the buffer before you land.
Bombs (236236)
- Bombs are the metered version of Neyuki's mixups. Optimally, you will want to use these to gamble on higher damage to finish off an opponent. However, getting one out is more difficult the lower your jam level is. At higher levels, you can 41236C and drop a bomb immediately. At lower levels, you can use an option select to get one out: 5B jAB(1)C djA[6]~j236C land 236A. The j236C will airthrow the opponent if they tech, and the land 236A will throw a bomb if they don't. Because her second jC is so late coming out, you can only tech trap with an airthrow and not a jC. From here you can do a 66 mixup or 6B or throw, all of which will lead to good damage on a hit.
Combos
| Notation Help
|
Disclaimer: Combos are written by various contributors, some combo notations may deviate slightly from the notation listed below.
For more information, see Controls
|
| IC
|
Input Instant Charge (22C) when you have the right amount of RF Meter.
|
| FIC
|
Input Flicker Instant Charge (22C) when you have the right amount of RF Meter.
|
| {X/Y/Z}
|
Move X or Y or Z can be used.
|
| #*
|
Indicates that any of A, B and C may be used with #. Example: 214*.
|
| [<- X] [-> X]
|
Side switch notation. All inputs grouped by the square brackets are performed facing the arrow's direction. They are still written as if they were done facing right, however.
|
| [X]xN
|
Loop the inputs in the square brackets as many times as N.
|
| c5B
|
Proximity normal only usable while close.
|
| f5B
|
Proximity normal only usable outside of c5B range or when cancelled from another normal. Known as far 5B.
|
| jX
|
Button X is input during your first jump.
|
| djX
|
Button X is input during your double jump.
|
| X(whiff)
|
Indicates that X is intended to whiff.
|
| X(tech trap)
|
Indicates a combo ender intended to catch the opponent's air tech. The most common kind of tech trap is j6C, which will air throw early techs and jC later techs. Executionally identical to X(whiff) but different in purpose.
|
| ~
|
Indicates a followup for moves which have them. Example: 236A~236A.
|
| ..
|
Indicates a short delay.
|
| IAD
|
Indicates an Instant Air Dash.
|
| IABD
|
Indicates an Instant Air Back Dash.
|
| (X)
|
X move is omittable from the combo.
|
| tk.X
|
Indicates the motion "X" is input immediately after leaving the ground. Stands for tiger knee.
|
Replays for these combos can be found here.
No IC
- 0 Jam
- Midscreen: 5/2A 5B 2C j.BC 44 5D
- Very low damage starter with no meter, use the space created to get 1 jam. (1838 DAMAGE) [replay 1-1]
- Midscreen: 5/2A 5BC 214214A
- Meter dump combo. Hold up as soon as 214214A starts, dip down when it's about to end. (2781 DAMAGE) [replay 1-1]
- Note: This will whiff on a crouching Sayuri.
- Corner: 2A 5B 2C jC 66 jB(1)C(whiff) land jAAB(1)C 5B jAB(1)C djA[6]C~C
- Basic corner combo for no IC and no meter. The timing on the airdash part and jAABC will take practice, but is mostly stable. Can do jAAAC instead for slightly easier version. (3340 DAMAGE) [replay 1-1]
- 1 Jam
- Neyu loses DP at 1 jam, but retains her ability to DP from her Zzz move. (1872 DAMAGE) [replay 1-1]
- 2-4 Jam
- Neyu's 623B puts her low enough to be able to jam up once for free. (1913 DAMAGE) [replay 1-1]
- 5-6 Jam
- Neyu can now combo from her f5B for more damage. (2368 DAMAGE) [replay 1-1]
- 8-9 Jam
- 2A 5BC IAD jB(1) 5BC IAD jB(1) 5BBC 214214A
- Basic combo into meter dump. IAD must be very quickly input. (3717 DAMAGE) [replay ?]
Red IC
- 0 Jam
- In corner: 2B IC 2C jC 66 jB(1)C(whiff) jAAB(1)C 5B jAB(1)C djA[6]C~C.
- 2B low profiles a lot of things and will cross under an opponent jumping in. (3223 DAMAGE) [replay 1-2]
- 2-4 Jam
- A little extra damage, still only 1 jam chance. (2729 DAMAGE) [replay 1-2]
- Close to corner 2A 5B 2B 5C 623C
- Can get 2 jams this way, for less damage. (2523 DAMAGE) [replay 1-2]
- 5-6 Jam
- 2A 5B 2B 5C 623B(2) IC 5B 5D 5D
- Using IC here gives you a chance for 2 jams. (2634 DAMAGE) [replay 1-2]
- 7-9 Jam
- Any of the above 7-9 jam combos, but end in 41236C or 623C instead.
Blue IC
- 0 Jam
- Corner:2A 5B 2C jC djC BIC jC land 5B 2C jC djC 66 jB(1)C 5B jAAB(1)C 5B jAB(1) djA[6]C~C.
- Corner low option. (6297 DAMAGE) [replay 1-3]
- Corner:jB(1) 5BC 214214B[*1] 5BC BIC 5B 2C jC djC 66 jB(1)C 5B jAAB(1)C 5B jAB(1) djA[6]C~C.
- Corner high option with meter dump. See strategy section for how to combo 214214B (7522 DAMAGE) [replay 1-3]
- Midscreen:2A 5BC BIC 2BC jB(1) 66 jB(1) land jB(1) 66 jB(1) land 5BC 214214A.
- Difficult combo. Use if you don't want to/don't have meter for 214214B. (4427 DAMAGE) [replay 1-4]
- 2-4 Jam
- In corner: 2A 5B 2C 623A BIC jB(1)C(whiff) land 7 jB(1) 66 jB(1)C(whiff) 2C jC 66 jB(1)C(whiff) land jAAB(1)C land 5B jAB(1)C djA[6]C~C
- Corner switch combo if you have BIC and can get a 2A. Need to be right next to opponent, press the jB after BIC at the height of the opponent's arc. (4754 DAMAGE) [replay 1-5]
- 8-9 Jam
- 2A 5BC IAD jB(1) land 5BC IAD jB(1) 5BC BIC 5BC IAD jB(1) 5BC IAD jB(1) 5BC 214214A
Extended version of non-BIC combo. (6046 DAMAGE) [replay ?]
Notes
Jam Changes
- In general, walking speed and number of hits on multi-hit specials increases as jam goes up, and startups for normals and specials decrease. Notable changes are listed below.
- Level 0: 2AB doesn't combo, 5B 2B doesn't chain, only 236 and 214 are available.
- Level 1: 5B 2B now chains, 214A~623A is available.
- Level 2: 2AB now combos, 623 and 41236 are now available, 41236C does not fully combo.
- Level 3: You can now airdash up to 2 times. 41236C now full combos.
- Level 4: Nothing special.
- Level 5: 623B now hits twice and allows double jam follows as listed in combo section.
- Level 6: 5C gains a hitbox earlier in its animation that cause a hard knockdown on airborne opponents (and Akiko when standing).
- Level 7: 623B now hits 3 times. It is no longer a good move to use. 5C becomes jump cancelable.
- Level 8: Airdash gains a hitbox, can now airdash up to 3 times.
- Level 9: 623A now wallbounces.
Neyuki's Ground Dash
- Neyuki's ground dash is a psuedo hop. She can act during it as she would be able to from a normal jump, but she cannot double jump out of it. The first attack you do from her ground dash gains the MID status, meaning that it is no longer overhead. This persists until you press another button in the chain, so most starters from a ground dash will begin with jA to allow the rest of the hits to be overhead. Once you press a button, you are allowed to double jump.
Win Quotes
| Japanese
|
English
|
|
くー
|
Zzz~
|
|
うにゅ?
|
Unyu?
|
|
うにょ?
|
Unyo?
|
|
痛い…
|
Owiee...
|
|
地震
だおー
|
Earthquake dao~
|
|
イチゴジャム
おいしい…
|
Strawberry jam
is delicious...
|
|
だおー
|
Dao~
|
|
にゅ?
|
Nyu?
|
|
うにゅ?
ねこ…
ねこー
ねこー
|
Unyu?
Kitty...
Kitty~
Kitty~
|
|
(To Ayu)
くー
あゆちゃん
だおー
|
(To Ayu)
Zzz~
Ayu-chan
Dao~
|
Colors

In-game References
External References
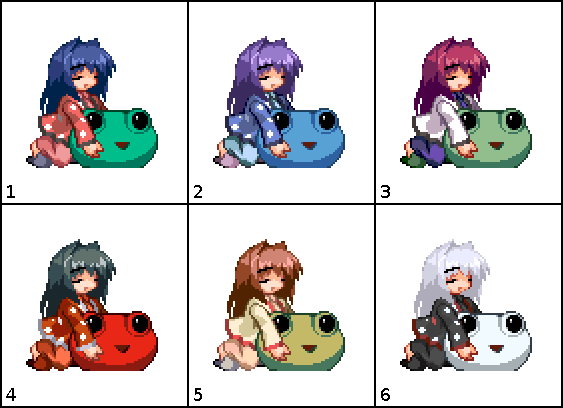
- Nayuki's "Super Electric Shadow Bullet" move (pronounced Choukyuu Daou Deneidan in Japanese) is based on the "Choukyuu Haou Deneidan" technique from the School of the Undefeated of the East, from the anime series Mobile Fighter G Gundam.
Kanon References
- The house in the background is the Minase household, where Nayuki lives.
- The fact Nayuki is dressed in pajamas, and fights while half-asleep, are references to her amazingly heavy sleeping habits.
- The large frog that Nayuki uses is her beloved stuffed frog Keropi.
- The strawberry jam Nayuki eats to increase her powers is one of her favourite foods in the game.
- The fact that Nayuki (asleep) is the only character to try to run away during Akiko's "There is also some that isn't sweet" move is a reference to her overwhelming fear of her mother's "special" jam.
| General
|
|
| Characters
|
|
| Mechanics
|
|
| Guides
|
|
| Wiki
|
|

