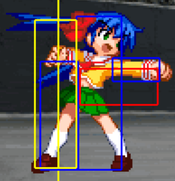
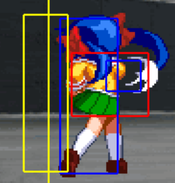
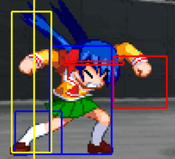
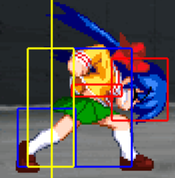
 Nanase Rumi
Introduction
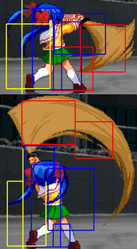
Nanase Rumi (七瀬 留美) is a character inspired by the Samurai Spirits and Last Blade series, with big, slow normals doing huge damage and a shinai that she can lose, leaving her to fight bare handed until she picks it back up. Many of her specials and normals have armor, allowing her to just bully her way through the opponent’s pokes. Her defining special move is her command throw, inspired by Juzoh of the Last Blade 2. It is composed of two parts: the grab itself, and the swing follow up. Depending on the accuracy of the follow up’s timing, the swing may go from completely missing to hitting a homerun for a good 40% of the opponent’s hp. Her dragon punch is also noteworthy, as it is huge, hits on both sides and does good damage, but if it is not IC’d she throws her shinai away in a follow up leaving her bare handed. While barehanded she loses armor, damage, range and most of her specials, but is a lot faster and gains access to a new super. As a grappler, her gameplay style when on the offense is very much rock paper scissors, with some very good damage when she guesses right.
Rumi is one of the heroines of ONE, a visual novel produced by Tactics in 1998. She is a student who recently transfered into Kouhei's school. She met Kouhei on her first day, when they crashed into each other at a turn in the sidewalk. She dreams of becoming a proper "maiden" and tries to act cute and kind, but her acts always fall apart due to Kouhei's tricks. During ONE, Rumi hires Kouhei to act as a bodyguard.
Stage: Park on the Path to School (Night) (通学路の公園(夜))
BGM: A Would-Be Maiden (乙女希望)
Character-Specific Notes
- Rumi is able to air jump once, and air dash/backstep once.
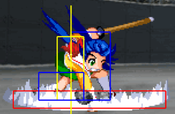
- Some of Rumi's moves involve her throwing away her shinai, leaving her in bare-handed mode. She can recover her shinai at anytime by standing next to it and pressing S.
- If Rumi uses her "Enduring Maiden's Aesthetic" move, a "Kimuchi" gauge appears below her life gauge, indicating the time left before the Kimuchi disappears. While Rumi has Kimuchi, she gains constant recoil armor and receives half the damage than usual. However, she cannot guard or recoil guard during this time.
Normal Moves (With Shinai)
The notation for the movelists can be found under Controls.
Standing
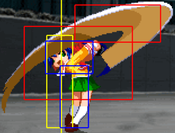
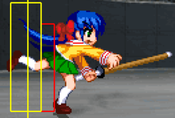
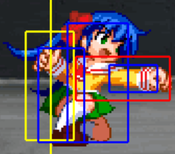
5A
5A
|
| Damage
|
Proration
|
Juggle
|
Guard
|
Startup ¹ ²
|
Active
|
Recovery
|
Adv Hit
|
Adv Block
|
Cancel
|
| 300
|
-
|
-
|
Ground
|
4
|
1
|
10
|
+4
|
+3
|
N Sp Su J IC
|
| 350
|
-
|
-
|
Low
|
5
|
3
|
7
|
+2
|
+1
|
/
|
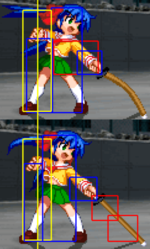
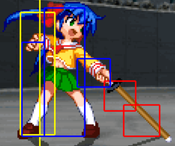
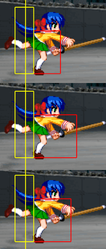
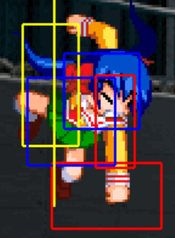
- Mostly used for staggers during pressure.
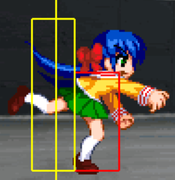
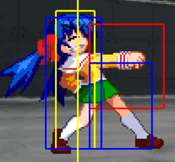
- Due to having 2 hitboxes this move can be used to beat most characters reversals that are only high or low invulnerable.
- The combined range and speed of both hitboxes makes it a solid move to use after Recoil Guarding.
|
|
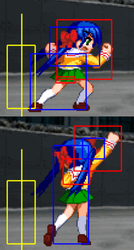
(c)5B
(c)5B
|
| Damage
|
Proration
|
Juggle
|
Guard
|
Property
|
Startup ¹ ²
|
Active
|
Recovery
|
Adv Hit
|
Adv Block
|
Cancel
|
| 560
|
-
|
-
|
Ground
|
A: 1-3
|
8
|
2
|
16
|
-1
|
-2
|
N Sp Su J IC
|
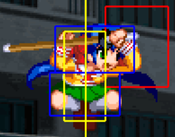
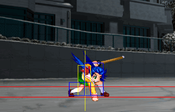
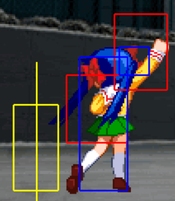
- Fairly useful move after Recoil Guarding a close attack, even including some multi-hit or self-cancelable air normals thanks to it's early armored frames.
|
|
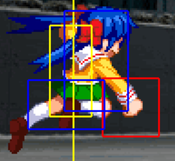
(f)5B
(f)5B
|
| Damage
|
Proration
|
Juggle
|
Guard
|
Property
|
Startup ¹ ²
|
Active
|
Recovery
|
Adv Hit
|
Adv Block
|
Cancel
|
| 700
|
-
|
-
|
Ground
|
A: 3-12
|
13
|
2
|
23
|
-6
|
-8
|
N Sp Su JH IC
|
| 600
|
-
|
-
|
Ground
|
/
|
15
|
2
|
21
|
-4
|
-6
|
/
|
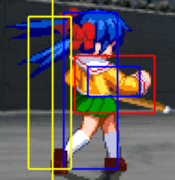
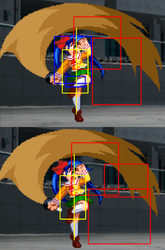
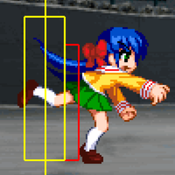
- Highly versatile move with many applications.
- In neutral it provides a good range attack that can beat most grounded enemy approaches (especially dash attacks).
- Against opponents who attempt a jump-in it can function as an anti-air move as long as they do not land too close to Rumi.
- In pressure it can be used to catch an opponent trying to jump out and can beat enemy pokes and many reversals by its decent vertical range or by its long armor duration.
- While on the defense, it can function as a poke against untight medium ranged pressure by using its armor.
|
|
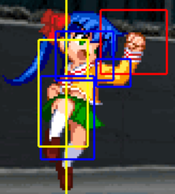
5C
5C The reason you play Rumi The reason you play Rumi
|
| Damage
|
Proration
|
Juggle
|
Guard
|
Property
|
Startup ¹ ²
|
Active
|
Recovery
|
Adv Hit
|
Adv Block
|
Cancel
|
| 2200
|
-
|
-
|
Ground
|
A: 10-24
|
26
|
2
|
30
|
-7
|
-9
|
IC
|
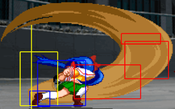
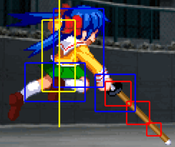
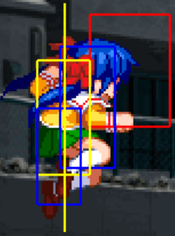
- Not only the highest damaging normal in the game, but also the one with the longest horizontal reach with many armored frames to boot.
- Mostly used in neutral at longer ranges to trade with opponent's bullets or high commitment moves. At it's maximum range it is difficult to punish even on block and can also serve as an anti-air move against jumping or air-dashing opponents.
- This move has one unarmored frame before the hitbox becomes active, making it's intended use somewhat inconsistent (especially against multi-hit moves).
|
|
Crouching
2A
2A
|
| Damage
|
Proration
|
Juggle
|
Guard
|
Startup ¹ ²
|
Active
|
Recovery
|
Adv Hit
|
Adv Block
|
Cancel
|
| 240
|
-
|
-
|
Low
|
7
|
4
|
12
|
+1
|
0
|
N Sp Su J IC R
|
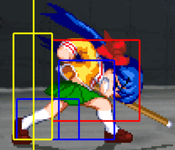
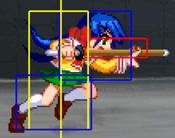
- Exceptional range for a low A-normal at the cost of speed.
- Mostly used for staggers during pressure.
|
|
2B
2B
|
| Damage
|
Proration
|
Juggle
|
Guard
|
Property
|
Startup ¹ ²
|
Active
|
Recovery
|
Adv Hit
|
Adv Block
|
Cancel
|
| 600
|
-
|
-
|
Ground
|
A: 2-9
|
13
|
1
|
30
|
-14
|
-16
|
N Sp Su JH IC
|
| 700
|
-
|
-
|
Ground
|
/
|
14
|
2
|
29
|
/
|
/
|
/
|
- Despite it's good hitboxes, this move is a terrible anti-air option when trying to react to opponents attacking from above due to its extended hurtboxes, slow startup time and suboptimal armor frames.
- It should rather be used preemptively against enemy airdashes and jump-outs during pressure.
- Since the armor starts one frame earlier than (f)5B while also having a sizable horizontal range, it can open up blockstrings that are more difficult for the opponent to disrespect. This also means it can disrespect opponent blockstrings where (f)5B cannot.
|
|
2C
2C
|
| Damage
|
Proration
|
Juggle
|
Guard
|
Property
|
Startup ¹ ²
|
Active
|
Recovery
|
Adv Hit
|
Adv Block
|
Cancel
|
| 1100
|
-
|
-
|
Ground
|
A: 2-16
|
19
|
2
|
|
|
|
Sp Su IC
|
- Mostly used outside of combos to catch opponents at medium ranges.
- With it's armor starting on the second frame and lasting throughout the majority of its startup it can also serve as a tool for disrespecting the opponent's pressure.
- It is very risky to use for various reasons:
- It has barely any vertical reach making it very unlikely to catch jumping opponents.
- It has a massive amount of recovery frames, basically guaranteeing the highest possible damage punish by the opponent on whiff.
- Even on hit, this move provides a huge frame disadvantage, forcing the player to always cancel it into a special (which mitigates risks only slightly).
- This issue is further worsened by the move having a very awkward cancel point.
- Despite these disadvantages the player might prefer using 2C over 5C for it having a faster startup time with earlier armored frames and being cancelable without IC.
|
|
Jumping
j5A
j5A
|
| Damage
|
Proration
|
Juggle
|
Guard
|
Startup ¹ ²
|
Active
|
Recovery
|
Adv Hit
|
Adv Block
|
Cancel
|
| 280
|
-
|
-
|
High
|
8
|
10
|
14
|
/
|
/
|
N Sp J IC
|
- It's many active frames make it a great move for deterring the opponent from jumping while grounded, or from airdashing into Rumi as long as they are not above her.
- It also serves as a solid tech-trap
|
|
j5B
j5B
|
| Damage
|
Proration
|
Juggle
|
Guard
|
Startup ¹ ²
|
Active
|
Recovery
|
Adv Hit
|
Adv Block
|
Cancel
|
| 650
|
-
|
-
|
High
|
8 / 10 / 12
|
6
|
30
|
/
|
/
|
N Sp J IC
|
- A very versatile move that serves as a good air-to-air attack, combo tool, tech-trap and cross-up tool due to it it's many active frames and hit boxes in almost all directions.
|
|
j5C
j5C
|
| Damage
|
Proration
|
Juggle
|
Guard
|
Property
|
Startup ¹ ²
|
Active
|
Recovery
|
Adv Hit
|
Adv Block
|
Cancel
|
| 900
|
-
|
-
|
High
|
A: 1-4
|
18
|
2
|
26
|
/
|
/
|
Sp J IC
|
- In neutral this move functions as a bigger, stronger, but slower alternative to j5A.
- It is very poorly armored which can only rarely be used for air-to-air situations or against opponents anti-air attacks when approaching them from above.
|
|
Dashing
66A
66A
|
| Damage
|
Proration
|
Juggle
|
Guard
|
Startup ¹ ²
|
Active
|
Recovery
|
Adv Hit
|
Adv Block
|
Cancel
|
| 350
|
-
|
-
|
Low
|
8
|
3
|
8
|
+2
|
+1
|
Sp Su IC
|
- Dashing version of 5A.
- Mostly used for resetting pressure.
- It does not have the first hitbox of 5A causing it to whiff when used point blank.
- This can be potentially used to set up grabs.
|
|
66B
66B
|
| Damage
|
Proration
|
Juggle
|
Guard
|
Property
|
Startup ¹ ²
|
Active
|
Recovery
|
Adv Hit
|
Adv Block
|
Cancel
|
| 900
|
-
|
-
|
Ground
|
A: 3-10
|
13
|
4
|
23
|
0
|
-2
|
Sp Su IC
|
- Dashing version of (f)5B.
- Has similar uses to (f)5B.
- However, since it has fewer armor frames and cancel options, it should only be used when the enemy is outside of (f)5B range and 2C/5C seem like too slow options.
|
|
66C
66C
|
| Damage
|
Proration
|
Juggle
|
Guard
|
Property
|
Startup ¹ ²
|
Active
|
Recovery
|
Adv Hit
|
Adv Block
|
Cancel
|
| 900
|
-
|
-
|
Ground
|
A: 6-11
|
14
|
2
|
34
|
/
|
-13
|
IC
|
- This move offers more horizontal momentum and range over Rumi's other dashing moves.
- Since this move the longest startup and fewest armored frames out of her dashing moves, it is rather used as a combo tool than a means of approaching the opponent.
- Wallbounces on hit.
|
|
662A
662A
|
| Damage
|
Proration
|
Juggle
|
Guard
|
Startup ¹ ²
|
Active
|
Recovery
|
Adv Hit
|
Adv Block
|
Cancel
|
| 240
|
-
|
-
|
Low
|
7
|
4
|
9
|
+1
|
0
|
Sp Su IC
|
|
|
|
662B
662B
|
| Damage
|
Proration
|
Juggle
|
Guard
|
Property
|
Startup ¹ ²
|
Active
|
Recovery
|
Adv Hit
|
Adv Block
|
Cancel
|
| 600
|
-
|
-
|
Ground
|
A: 2-9
|
13
|
1
|
30
|
-14
|
-16
|
Sp Su IC
|
| 700
|
-
|
-
|
Ground
|
/
|
14
|
2
|
29
|
/
|
/
|
/
|
- Dashing version of 2B.
- It's nearly identical startup time and armor frames compared to 2B allows it to be used in neutral or pressure against opponents awaiting/baiting 2B to make them misjudge Rumi's attack range.
- As it cannot be jump-canceled, combo options on hit are somewhat limited.
|
|
662C
662C
|
| Damage
|
Proration
|
Juggle
|
Guard
|
Property
|
Startup ¹ ²
|
Active
|
Recovery
|
Adv Hit
|
Adv Block
|
Cancel
|
| 1500
|
-
|
-
|
Ground
|
A: 1-7
|
10
|
2
|
37
|
/
|
-16
|
IC
|
- Excellent anti-air move due to its relatively fast startup while being well armored.
- The hitbox reaching behind Rumi also allows it to counter cross-up attempts.
- Due to its armor starting on the first frame and lasting through most of the move's startup, it makes for a very strong disrespect option as it can be used even in the tiniest gaps of the opponents pressure (sometimes even on wake-up).
- This move does come with downsides as it has high recovery, and offers worse horizontal range and momentum than 66B or 66C.
|
|
Grabs
(c)4C / (c)6C
(c)4C / (c)6C
|
| Damage
|
Proration
|
Juggle
|
Guard
|
Startup ¹ ²
|
Active
|
Recovery
|
Adv Hit
|
Adv Block
|
Cancel
|
| 1200
|
-
|
-
|
Grab
|
5
|
1
|
23
|
/
|
/
|
None
|
- Regular grab.
- Because its range is shorter than her command grab while having the same startup time, it should be only used when the player lacks IC meter and desires a higher guaranteed damage output than the bunt.
|
|
(c)j6C
(c)j6C
|
| Damage
|
Proration
|
Juggle
|
Guard
|
Startup ¹ ²
|
Active
|
Recovery
|
Adv Hit
|
Adv Block
|
Cancel
|
| 1400
|
-
|
-
|
Grab
|
2.33
|
1
|
-
|
/
|
/
|
None
|
- Regular air-grab.
- Mainly used for tech-traps.
|
|
Special Moves (With Shinai)
Standing
236*
Maiden's Fang Assult
(乙女牙突)
236*
|
| Version
|
Damage
|
Proration
|
Juggle
|
Guard
|
Property
|
Startup ¹ ²
|
Active
|
Recovery
|
Adv Hit
|
Adv Block
|
Cancel
|
| A
|
100+1200
|
-
|
-
|
Ground
|
/
|
16
|
24
|
40
|
/
|
|
※ IC
|
- Can be used as frame-trap when the opponent is outside of 214A range.
- Side-swaps.
- If this move hits an airborne opponent, the follow-up animation will not be executed resulting in pitiful damage without an early IC combo
※ These moves can only be canceled into her Maiden Cherry Blossom (4123641236x) Super
|
| B
|
100+1750
|
-
|
-
|
Ground
|
A: 25-73
|
25
|
48
|
75
|
/
|
|
※ IC
|
- Slower startup than 236A, but armored on every active frame. It also travels much faster and for longer.
- Therefore it is used to charge into opponents that use projectiles in neutral when grounded.
|
| C
|
100+800+800
|
-
|
-
|
Ground
|
A: 1-15
|
16
|
24
|
41
|
/
|
|
※ IC
|
- Similar to 236A with an extra attack added at the end that wallbounces on hit.
- It is armored throughout its entire startup making it an excellent move to be used when on the defense (even on wakeup).
|
|
214*
Blasting Iron Fist
(爆砕鉄拳)
214*
|
| Version
|
Damage
|
Proration
|
Juggle
|
Guard
|
Property
|
Startup ¹ ²
|
Active
|
Recovery
|
Adv Hit
|
Adv Block
|
Cancel
|
| A
|
700
|
-
|
-
|
Low
|
/
|
16
|
2
|
37
|
/
|
-6
|
Su IC
|
- Used either as frame-trap after (c)5B and (f)5C or as combo tool as it knocks down or allows for extending the current combo after IC canceling it.
- Armor breaking.
|
| B
|
850
|
-
|
-
|
Low
|
A: 4-32
|
35
|
2
|
33
|
/
|
-2
|
Su IC
|
- This move is extremely slow and can be used at most against enemy slide attacks or as a very risky anti-crossup tool.
|
| C
|
250 * X
|
-
|
-
|
Any
|
/
|
23
|
28~40 * X
|
45
|
/
|
/
|
Su IC
|
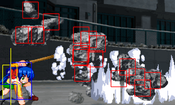
- Randomly spawns rocks from the ground across one screen's length.
- Used in neutral to force the enemy to block at long ranges. Has virtually no use in combos.
- The rocks cancel out nearly all other projectiles in the game on collision.
- Due to its random nature, the opponent will not be able to Recoil Guard the rocks consistently.
|
|
623*
Blood-Red Shinai
(紅蓮竹刀)
623*
|
| Version
|
Damage
|
Proration
|
Juggle
|
Guard
|
Property
|
Startup ¹ ²
|
Active
|
Recovery
|
Adv Hit
|
Adv Block
|
Cancel
|
| A
|
800 + 100 * X + 450
|
-
|
-
|
Any
|
I: 1-8
|
11
|
2
|
45
|
/
|
|
IC FIC ※
|
- A great move to be used in pressure, combos and defense alike.
- Allows for consistent Quake super (214214*) combos on IC.
- When this move gets IC canceled, Rumi is only allowed to airdash backwards. However, she may air jump after which she is also allowed to airdash forwards.
※ All 623* moves can be IC canceled while rising.
※ Furthermore after throwing the shinai, the moves are FIC cancelable as long as the rising attack hit or was blocked.
- After throwing her shinai, Rumi will enter her bare-handed mode.
|
| B
|
800 + 100 * X + 450
|
-
|
-
|
Any
|
I: 1-11
|
11
|
2
|
76
|
/
|
|
IC FIC ※
|
- Rises higher than 623a while being longer invulnerable, therefore it makes for the better defensive move especially against enemies attacking from above.
- Has different combo routes from 623a.
- Rumi is also allowed to air-dash forwards after IC canceling it.
|
| C
|
800 + 100 * X + (450 + 250) * 4
|
-
|
-
|
Any
|
I: 1-29
|
10
|
2
|
76
|
/
|
-
|
IC FIC ※
|
- Almost identical to 623B.
- Since the startup is faster by one frame over the other two versions, all of Rumi's A-moves can combo into it.
|
|
j623*
Blood-Red Shinai
(紅蓮竹刀)
j623*
|
| Version
|
Damage
|
Proration
|
Juggle
|
Guard
|
Property
|
Startup ¹ ²
|
Active
|
Recovery
|
Adv Hit
|
Adv Block
|
Cancel
|
| A
|
100 * X + 450
|
-
|
-
|
Any
|
/
|
10
|
2 * X
|
X + 34
|
/
|
/
|
FIC
|
- A strong projectile useful for catching opponents off-guard (especially at longer ranges).
- After throwing her shinai, Rumi will enter her bare-handed mode.
|
| B
|
100 * X + 450
|
-
|
-
|
Any
|
/
|
10
|
2 * X
|
X + 34
|
/
|
/
|
FIC
|
- Similar to j623A, but with a slightly later FIC cancel point.
|
| C
|
100 * X + (450 +250) * 4
|
-
|
-
|
Any
|
I: 1-10
|
12
|
2 * X
|
X + 34
|
/
|
/
|
FIC
|
- As the hitbox of her shinai appears relatively far away from Rumi, this move should not be used as a reversal when the opponent is at point blank range.
- Upon impact with the ground, the shinai will spawn 4 random 2-hit explosions over a wide area around it.
|
|
41236*
Happy Hell Maiden
(乙女富嶽)
41236*
|
| Version
|
Damage
|
Proration
|
Juggle
|
Guard
|
Property
|
Startup ¹ ²
|
Active
|
Recovery
|
Adv Hit
|
Adv Block
|
Cancel
|
| A
|
/
|
-
|
-
|
Grab
|
I: 1-2 & 4-5
|
5
|
1
|
28
|
/
|
/
|
None
|
- A very fast grab with a good range compared to regular throws. Crucial to Rumis pressure.
- A very strong option after Recoil Guarding (especially against jump-ins or not jump-cancelable attacks) when the enemy is at point blank range.
|
| B
|
/
|
-
|
-
|
Grab
|
I: 1-2 & 28
|
20
|
1
|
28
|
/
|
/
|
None
|
- Has ridiculous range for a grab, useful after making the opponent block one or two close range Attacks or intentionally dropping a combo early prematurely to sneak it in.
- However, its slow startup time makes it very prone to pokes and also becomes a nonviable defensive option.
|
| C
|
/
|
-
|
-
|
Grab
|
I: 1-2 & A: 3-28
|
29
|
1
|
44
|
/
|
/
|
None
|
- While slower and with slightly shorter reach than the B version, this grab is fully armored allowing it to be used defensively against slow and non-jump-cancelable attacks.
- It can also counter opponents expecting the B version and trying to poke out.
For a full explanation on Rumis command grab see About "Happy Hell Maiden".
|
|
Eternity Specials (With Shinai)
214214*
Quit sneaking around!
(ちょこまかすん)
214214*
|
| Version
|
Damage
|
Proration
|
Juggle
|
Guard
|
Property
|
Startup ¹ ²
|
Active
|
Recovery
|
Adv Hit
|
Adv Block
|
Cancel
|
| A
|
2500
|
-
|
-
|
Low
|
A: 1-21
|
22
|
2
|
58
|
/
|
-37
|
IC
|
- A fully armored quake whose hitbox spans across the entire ground.
- Outside of combos, it can be used to catch opponents trying to use projectiles at long range.
- Knocks down on hit.
- Armor breaking.
|
| B
|
2650
|
-
|
-
|
Low
|
A: 1-21
|
22
|
2
|
58
|
/
|
-27
|
IC
|
- Similar to 214214B but launches the opponent higher, allowing to combo afterwards without using IC when Rumi is near the opponent.
|
| C
|
2800
|
-
|
-
|
Low
|
A: 1-21
|
22
|
2
|
58
|
/
|
-27
|
IC
|
- Similar to 214214A/B but freezes the opponent in place for 100 frames providing enough time to combo afterwards even when the opponent is far away from Rumi.
|
|
4123641236*
Maiden Cherry Blossom
(乙女桜)
4123641236*
|
| Version
|
Damage
|
Proration
|
Juggle
|
Guard
|
Startup ¹ ²
|
Active
|
Recovery
|
Adv Hit
|
Adv Block
|
Cancel
|
| A
|
300 x 3 + 1400
|
-
|
-
|
High, Air
|
14
|
11 + 1
|
81
|
/
|
-32
|
None
|
- A multi-hit projectile that spawns an explosion upon reaching the ground.
- Virtually useless outside of combos.
- Knocks down on hit.
- After throwing her shinai, Rumi will enter her bare-handed mode.
|
| B
|
300 x 4 + 2200
|
-
|
-
|
High, Air
|
14
|
16 + 1
|
71
|
/
|
-32
|
None
|
- Similar to 4123641236A but the shinai travels farther and has a bigger explosion hitbox upon impact with the ground.
- Can be used to catch opponents using projectiles at range.
|
| C
|
300 x 9 + 2500
|
-
|
-
|
High, Air
|
14
|
31 + 1
|
76
|
/
|
-22
|
None
|
- Similar to 4123641236B but the shinai travels across the entire screen and spawns even more and much bigger explosion hitboxes.
- When the opponent is positioned near the corner before getting hit by this move, Rumi can continue a combo from it.
|
|
Final Memories
4123641236S
Enduring Maiden's Aesthetic
(耐える乙女の美学)
4123641236S
|
| Damage
|
Proration
|
Juggle
|
Guard
|
Property
|
Startup ¹ ²
|
Active
|
Recovery
|
Adv Hit
|
Adv Block
|
Cancel
|
| 1500
|
-
|
-
|
Any
|
I: 1-10
|
|
6
|
|
/
|
|
None
|
- Can be used any time during pressure or defense or as anti-crossup tool.
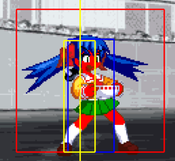
- After the hitbox becomes active Rumi enters a state where she has constant recoil armor and takes halved damage from opponent attacks, but is not allowed to guard any of them.
- A “Kimuchi” gauge will appear below her health bar indicating how much time is left until she reverts to her normal state.
- Very difficult to make use of as most characters in the game can easily stay away from Rumi or have armor breaking moves.
|
|
4123641236S
Big Bang Home Run
(ビッグバン打法)
During Happy Hell Maiden: 236C
|
| Damage
|
Proration
|
Juggle
|
Guard
|
Startup ¹ ²
|
Active
|
Recovery
|
Adv Hit
|
Adv Block
|
Cancel
|
| 0 - 6684
|
-
|
-
|
/
|
/
|
/
|
/
|
/
|
/
|
None
|
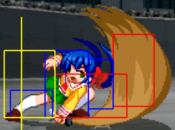
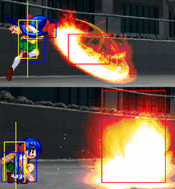
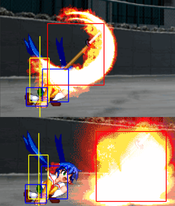
- During Happy Hell Maiden, Rumi swings her shinai in a huge fiery arc. A perfectly timed swing can deal up to a staggering 6684 damage, but the timing for a perfect swing is only 1 frame.
- This move is an incredibly risky way to use up your SP gauge and should only be considered either in near-hopeless do-or-die situations, or for taunting purposes.
See About "Happy Hell Maiden" for details.
|
|
Normal Moves (Bare-Handed)
Standing
5A
5A
|
| Damage
|
Proration
|
Juggle
|
Guard
|
Startup ¹ ²
|
Active
|
Recovery
|
Adv Hit
|
Adv Block
|
Cancel
|
| 220
|
-
|
-
|
Ground
|
4
|
4
|
9
|
+1
|
0
|
N Su J IC R
|
- A standard jab that can cancel into itself.
- Used as poke or for staggers during pressure.
|
|
(c)5B
(c)5B
|
| Damage
|
Proration
|
Juggle
|
Guard
|
Property
|
Startup ¹ ²
|
Active
|
Recovery
|
Adv Hit
|
Adv Block
|
Cancel
|
| 500
|
-
|
-
|
Ground
|
A: 1-3
|
7
|
2
|
13
|
+3
|
+1
|
N f5B 2B Su J IC
|
- Rumi's only armored normal in her bare-handed state.
- Since it's startup is one frame faster than her regular (c)5B she can use it it in a few more situations after Recoil Guarding.
- It also cannot be poked out of when canceled from 5A.
|
|
(f)5B
(f)5B
|
| Damage
|
Proration
|
Juggle
|
Guard
|
Startup ¹ ²
|
Active
|
Recovery
|
Adv Hit
|
Adv Block
|
Cancel
|
| 500
|
-
|
-
|
Ground
|
11
|
1
|
15
|
+1
|
-1
|
N Su JH IC
|
- Knocks down airborne opponents.
- Can be used to beat some characters' reversals which are only high or low invulnerable due to its hitbox placement.
|
|
5C
5C
|
| Damage
|
Proration
|
Juggle
|
Guard
|
Startup ¹ ²
|
Active
|
Recovery
|
Adv Hit
|
Adv Block
|
Cancel
|
| 650
|
-
|
-
|
Ground
|
13
|
2
|
23
|
-2
|
0
|
Su IC
|
- Knocks down airborne opponents.
- Moves Rumi slightly forwards, increasing it's effective range.
|
|
Crouching
2A
2A
|
| Damage
|
Proration
|
Juggle
|
Guard
|
Startup ¹ ²
|
Active
|
Recovery
|
Adv Hit
|
Adv Block
|
Cancel
|
| 200
|
-
|
-
|
Low
|
5
|
4
|
9
|
+1
|
0
|
N Su J IC R
|
- Can cancel into itself.
- Only used for staggers during pressure.
|
|
2B
2B
|
| Damage
|
Proration
|
Juggle
|
Guard
|
Startup ¹ ²
|
Active
|
Recovery
|
Adv Hit
|
Adv Block
|
Cancel
|
| 450
|
-
|
-
|
Low
|
9
|
2
|
18
|
-2
|
-4
|
N Su J IC
|
- A low hitting move with good priority and decent range. Used to beat enemy pokes that hit low when not at point blank range during pressure.
|
|
2C
2C
|
| Damage
|
Proration
|
Juggle
|
Guard
|
Startup ¹ ²
|
Active
|
Recovery
|
Adv Hit
|
Adv Block
|
Cancel
|
| 250
|
-
|
-
|
Ground
|
10
|
2
|
24
|
-1
|
-3
|
Su JH IC
|
| 450
|
-
|
-
|
Ground
|
12
|
2
|
22
|
+1
|
-1
|
/
|
- A relatively weak anti-air move.
- Due to it's second hitbox it can be used in pressure against opponents expecting to Recoil Guard a 5C and trying to poke out after it.
|
|
Jumping
j5A
j5A
|
| Damage
|
Proration
|
Juggle
|
Guard
|
Startup ¹ ²
|
Active
|
Recovery
|
Adv Hit
|
Adv Block
|
Cancel
|
| 220
|
-
|
-
|
High
|
6
|
10
|
11
|
/
|
/
|
N J AD IC R
|
- Best used in Pressure against opponents that lack a fast poke with decent vertical reach.
- Can also deter opponents in neutral from jumping or airdashing into Rumi.
|
|
j5B
j5B
|
| Damage
|
Proration
|
Juggle
|
Guard
|
Startup ¹ ²
|
Active
|
Recovery
|
Adv Hit
|
Adv Block
|
Cancel
|
| 480
|
-
|
-
|
High
|
9
|
10
|
19
|
/
|
/
|
N J AD IC
|
- Used to hit airborne opponents above Rumi.
|
|
j5C
j5C
|
| Damage
|
Proration
|
Juggle
|
Guard
|
Startup ¹ ²
|
Active
|
Recovery
|
Adv Hit
|
Adv Block
|
Cancel
|
| 600
|
-
|
-
|
High
|
10
|
15
|
26
|
/
|
/
|
J AD IC
|
- The hitbox on this move makes it an excellent air-to-ground move.
- Very good for okizeme as it can cross-up opponents while beating most high-invulnerable moves and safejump when properly spaced.
- Applies downwards momentum on airborne opponents on hit which can knock them down.
|
|
Dashing
66A
66A
|
| Damage
|
Proration
|
Juggle
|
Guard
|
Startup ¹ ²
|
Active
|
Recovery
|
Adv Hit
|
Adv Block
|
Cancel
|
| 220
|
-
|
-
|
Ground
|
8
|
4
|
9
|
+1
|
0
|
Su IC
|
- Dashing version of 5a.
- When correctly timed, this move allows for a tick-throw set-up.
|
|
66B
66B
|
| Damage
|
Proration
|
Juggle
|
Guard
|
Startup ¹ ²
|
Active
|
Recovery
|
Adv Hit
|
Adv Block
|
Cancel
|
| 545
|
-
|
-
|
Ground
|
11
|
1
|
12
|
+4
|
+2
|
Su IC
|
- Dashing version of (f)5B.
- Does not knock down airborne targets, but offers a decent frame advantage on block or hit.
|
|
66C
66C
|
| Damage
|
Proration
|
Juggle
|
Guard
|
Startup ¹ ²
|
Active
|
Recovery
|
Adv Hit
|
Adv Block
|
Cancel
|
| 700
|
-
|
-
|
Ground
|
13
|
5
|
23
|
0
|
-2
|
IC
|
- Dashing version of 5C.
- Mostly a combo tool.
- Can be used at best to catch opponents trying to jump when outside the range of Rumis other bare-handed moves.
|
|
662A
662A
|
| Damage
|
Proration
|
Juggle
|
Guard
|
Startup ¹ ²
|
Active
|
Recovery
|
Adv Hit
|
Adv Block
|
Cancel
|
| 220
|
-
|
-
|
Low
|
4
|
4
|
9
|
+1
|
0
|
Su IC
|
- Dashing version of 2A.
- Its extremely fast startup time makes it a great tool to reset pressure.
|
|
662B
662B
|
| Damage
|
Proration
|
Juggle
|
Guard
|
Startup ¹ ²
|
Active
|
Recovery
|
Adv Hit
|
Adv Block
|
Cancel
|
| 450
|
-
|
-
|
Low
|
9
|
2
|
18
|
-2
|
-4
|
Su IC
|
- Dashing version of 2B.
- An excellent move to approach the opponent with in neutral.
|
|
662C
662C
|
| Damage
|
Proration
|
Juggle
|
Guard
|
Startup ¹ ²
|
Active
|
Recovery
|
Adv Hit
|
Adv Block
|
Cancel
|
| 450
|
-
|
-
|
Ground
|
10
|
2
|
28
|
/
|
-7
|
Su J IC
|
- Relatively fast anti-air move.
- Launches the opponent on hit making it a great tool to start or continue combos.
|
|
Grabs
(c)4C / (c)6C
(c)4C / (c)6C
|
| Damage
|
Proration
|
Juggle
|
Guard
|
Startup ¹ ²
|
Active
|
Recovery
|
Adv Hit
|
Adv Block
|
Cancel
|
| 1200
|
-
|
-
|
Grab
|
5
|
1
|
23
|
/
|
/
|
None
|
- Identical to her regular grab with the shinai held.
|
|
(c)j6C
(c)j6C
|
| Damage
|
Proration
|
Juggle
|
Guard
|
Startup ¹ ²
|
Active
|
Recovery
|
Adv Hit
|
Adv Block
|
Cancel
|
| 1400
|
-
|
-
|
Grab
|
2.33
|
1
|
/
|
/
|
/
|
None
|
- Identical to her regular grab with the shinai held.
|
|
Special Moves (Bare Handed)
41236*
Happy Hell Maiden
(乙女富嶽)
|
| Damage
|
Proration
|
Juggle
|
Guard
|
Property
|
Startup ¹ ²
|
Active
|
Recovery
|
Adv Hit
|
Adv Block
|
Cancel
|
| 0
|
-
|
-
|
Grab
|
I: 1-2 & 4-5
|
5
|
1
|
/
|
/
|
/
|
None
|
- Throws the opponent behind her into the air.
- This allows her to start a combo which can offer a chance at recovering her shinai
|
|
5S
Shinai Recovery
(竹刀回収)
4S / 5S / 6S maximum range for the shinai recovery maximum range for the shinai recovery
|
| Damage
|
Proration
|
Juggle
|
Guard
|
Startup ¹ ²
|
Active
|
Recovery
|
Adv Hit
|
Adv Block
|
Cancel
|
| /
|
-
|
-
|
/
|
1
|
/
|
16
|
/
|
/
|
None
|
- Recovers her shinai returning to her normal state.
- This move will not be executed when used within 6 Frames after wake-up.
- Holding the down or up Key while Pressing S will also not execute this move.
|
|
Eternity Special
236236*
True Maiden's Fist
(真の乙女の拳)
236236*
|
| Version
|
Damage
|
Proration
|
Juggle
|
Guard
|
Property
|
Startup ¹ ²
|
Active
|
Recovery
|
Adv Hit
|
Adv Block
|
Cancel
|
| A
|
2300
|
-
|
-
|
High
|
A: 1-32
|
26
|
7
|
62
|
/
|
-20.33
|
IC
|
- Very risky but powerful punch with forwards momentum.
- Fully armored throughout it's entire startup and a few frames afterward.
- It's primary use is to catch opponents attempting to jump or use projectiles at range.
- The armor allows it to be used in pressure to counter pokes from the enemy and any time during defense (even on wake-up).
- Armor breaking.
|
| B
|
3200
|
-
|
-
|
High
|
A: 1-32
|
26
|
7
|
62
|
/
|
-20.33
|
IC
|
- Identical to 236236A but deals more damage.
|
| C
|
4000
|
-
|
-
|
High
|
A: 1-32
|
26
|
7
|
62
|
/
|
-20.33
|
IC
|
- Similar to 236236A/B but wallbounces the opponent, allowing for further combos.
|
|
Strategy
Neutral
Rumi's main plan in neutral is to patiently wait for her IC meter to charge up while deterring her opponent from approaching.
Once she has IC meter ready she can make efficient use of her 623* Series allowing her to go on the offensive.
She can choose to approach the opponent on the ground by dashing close up to them and use 5A/2A/66A/662A to start pressure.
If the opponent seems to use attacks to stop her from getting closer, she can attempt to punish those with using the armored frames on (f)5B, 66B, 2C, 5C or 623*.
If the opponent tries to jump out of her approach, she can try to counter that with the use of 2B, 662B and 662C.
Rumi in general should not attempt to approach the opponent from the air unless heavy reads are involved.
Jumping in neutral should only be considered when projectiles can be avoided with it or to deter opponents from jumping/airdashing into her by making use of the long active frames of j5A.
Pressure
Rumi's pressure follows a basic Rock-Papers-Scissors principle, the basic outline would be following:
- Grabs beat an opponent blocking, but lose to pokes and reversals.
- Blocking beats an opponent reversal, but loses to pokes.
- Reversal (623A/B) beats an opponent poking, but loses to blocking.
She can get the most damage out of grabbing her opponent, however no half-decent player would ever allow this to happen constantly and will start poking and jumping while in pressure.
To discourage this, Rumi can punish those attempts with her 623B.
But 623B will require IC meter to start a high damaging combo as well as let Rumi keep her shinai and avoid a potential punish.
Therefore her pressure can be broken down into two phases:
Without IC meter
During this phase the player should mainly focus on staggering moves like 5A, 2A, (c) 5B and (f)5B until IC meter gets charged up sufficiently or the opponent gets hitconfirmed into a combo.
As 66A is plus Rumi can use it to close in on the opponent and reset the pressure.
It is advised to be wary of enemy reversals and Recoil Guards during this phase. With proper timing of armored moves these two threats can be dealt with.
The first hitbox of 5A offers enough frameadvantage to make 41236A a considerable cancel option as the opponent will not be able to poke out of it.
With IC meter
Once the player has built up enough IC meter it is time to decide between attempting a grab or executing 623B IC depending on what action they expect from the opponent.
To ensure maximum efficiency during this step, You should be at least within 41236B range of the opponent after the previous phase.
Otherwise you will have to dash in prior attempting to grab / 623B, giving the opponent extra time to react.
Rumi's pressure is very prone to enemies jumping out due to relying on slow normals and grabs.
Her only anti-jump moves are 2B, (f)5B and 662B which are often too slow as well as 662C which carries a lot of risk for very little reward.
When an opponent attempts to jumping out of Rumis pressure they will either attempt to attack her while falling down, or double jump / airdash away from her to reset back to neutral.
If you expect the first option, it is recommended to prepare for the attack by buffering 623B or RG.
If you expect the latter, you can attempt to catch them with j5B for a little damage.
Being consistent in landing Homeruns, conversions of most grounded moves and 623* combos is key to get the most out of Rumi's pressure.
For additional information about Rumis pressure see Tony's Theory of Rumi RPS
Defense
Against untight pressure
Due to being fully invulnerable, 623B can be always used against frametraps with little risk.
Her recoil armor allows her to disrespect untight pressure. Which armoured move should be used depends on range and what armoured frames are available.
Especially against longer ranged pressure Rumi can shine with 5C and 2C as options which can lead into high damage combos with a little meter.
Against tight pressure
The only way to deal with tight pressure is to Recoil Guard a move and force a Rock-Paper-Scissors situation by following this principle:
- Blocking beats an opponent using a reversal, but loses to attacks
- 623B (IC) beats an opponent using an attack, but loses to blocking
- Attacking beats an opponent blocking, but loses to reversals
Both players using the same option can have various results depending on matchup, distance, meter, etc.
Having access to Recoil Armor may allow Rumi to attack at otherwise undisrespectable spots, this will most likely lead into a Recoil Counter resetting the situation.
Against jump-ins
Rumi has got 4 main options against opponents trying to attack her from the air:
- Recoil Guard the last hit of the enemy aerial attacks into command grab. If the opponent rejumps to avoid the grab, she can try to use the air-unblockable 5A instead
- When it is unclear how many aerial attacks the enemy is going to execute, Recoil Guard into (c)5B can armor through one attack
- 623B if IC is available
- 662C if the opponent is close to the ground
Against airdash resets
While she does not have a fast jab with good vertical range, she can still beat airdash resets with her 623B, or when IC meter is not available, 662C.
When in bare-handed mode
Rumi is essentially crippled when in bare-handed mode due to losing access to recoil armor, high damaging combos and cancel options.
The main priority therefore is to recover the shinai at all costs.
With a self cancelable j5A and a strong j5C she gains easier access to jump-ins in neutral which allows her to start pressuring the opponent more frequently.
Her bare-handed pressure revolves around staggering with 5A, 2A and resetting with 662A until she gets an opportunity to grab the opponent with her 41236* which gives her enough time to land a combo and/or recover her shinai.
A potent, but difficult way to land the command grab is to set it up prior with a blocked 66A.
Combos
For a comprehensive video about Rumi combos see Tony's Rumi Bread and Butter Combos
- An input in (brackets) indicates it requires Rumi to be closer or farther from the opponent, otherwise it can be skipped.
- Due to the nature of EFZ combos the following list below is far from complete (or even optimized) and has room for many different starters or routes off various hitconfirms.
| Notation Help
|
Disclaimer: Combos are written by various contributors, some combo notations may deviate slightly from the notation listed below.
For more information, see Controls
|
| IC
|
Input Instant Charge (22C) when you have the right amount of RF Meter.
|
| FIC
|
Input Flicker Instant Charge (22C) when you have the right amount of RF Meter.
|
| {X/Y/Z}
|
Move X or Y or Z can be used.
|
| #*
|
Indicates that any of A, B and C may be used with #. Example: 214*.
|
| [<- X] [-> X]
|
Side switch notation. All inputs grouped by the square brackets are performed facing the arrow's direction. They are still written as if they were done facing right, however.
|
| [X]xN
|
Loop the inputs in the square brackets as many times as N.
|
| c5B
|
Proximity normal only usable while close.
|
| f5B
|
Proximity normal only usable outside of c5B range or when cancelled from another normal. Known as far 5B.
|
| jX
|
Button X is input during your first jump.
|
| djX
|
Button X is input during your double jump.
|
| X(whiff)
|
Indicates that X is intended to whiff.
|
| X(tech trap)
|
Indicates a combo ender intended to catch the opponent's air tech. The most common kind of tech trap is j6C, which will air throw early techs and jC later techs. Executionally identical to X(whiff) but different in purpose.
|
| ~
|
Indicates a followup for moves which have them. Example: 236A~236A.
|
| ..
|
Indicates a short delay.
|
| IAD
|
Indicates an Instant Air Dash.
|
| IABD
|
Indicates an Instant Air Back Dash.
|
| (X)
|
X move is omittable from the combo.
|
| tk.X
|
Indicates the motion "X" is input immediately after leaving the ground. Stands for tiger knee.
|
Without IC
- 5a c5B (f5B) 214A ~ 2000 Damage
- Corner: 66C 5A 5B 5C ~ 3000 Damage
- Near corner against airborne enemy: 2B j9 j5C j66 j5C (4 or 6) 5AB 5AB 5AAAAA c5B f5B ~ 4500 Damage
With Red IC
Without Super Meter
- f5B/66B IC 662C ~ 2000 Damage (not recommended)
- 5A c5B (f5B) 214A IC 5A 5B 5C ~ 3800 Damage
- If the enemy is too far for 214a: 5A c5B f5B IC 662C ~ 2600 Damage
- 623B IC j66 j5A 5A 5B 5C ~ 3000 Damage
- 5C IC 662C ~ 3500 Damage
- 41236* 236A IC 5A 5B 5C ~ 3000 Damage
- When Close: 5C IC 2C 236A ~ 4000 Damage
- Near corner: 623B IC j66 j5C (4 or 6) 5AB 5AB 5AAAAA c5B f5B ~ 3700 Damage
- Near corner against airborne opponent: (j5A) j5C j66 j5C 5AB 5AB 5AB 623A IC 5C ~ 4600 Damage
- Near corner against airborne opponent: 662C IC j8 dj9 j5C j66 j5C (4) 5AB 5AB 5AAAA c5B f5B ~ 5000 Damage
With Super Meter
- 2C 214214A IC (6) 5A 5B 5C ~ 5100 Damage
- f5B/66B IC 66B 214214A ~ 3500 Damage
- f5B/66B IC 66B 214214B 662C ~ 4400 Damage
- f5B/66B IC 66B 214214C 5C ~ 4900 Damage
- 5C IC (2C) 214214A ~ 4900 Damage
- 5C IC (2C) 214214B 662C ~ 5700 Damage
- 5C IC (2C) 214214C 5C ~ 6100 Damage
- 5a c5B (f5B) 214A IC 214214A ~ 3700 Damage (not recommended)
- 5a c5B (f5B) 214A IC 214214B 662C ~ 4500 Damage
- 5a c5B (f5B) 214A IC 214214C ~ 5000 Damage
- 5a c5B 236A IC 2C 214214A ~ 4200 Damage
- 5a c5B 236A IC 2C 214214B 662C ~ 4900 Damage
- 5a c5B 236A IC 2C 214214C 5C ~ 5200 Damage
- 623A IC 214214A ~ 2800 Damage*
- 623A IC 214214B 662C ~ 3700 Damage*
- 623A IC 214214C 5C ~ 4200 Damage (not recommended)*
- 623B IC j66 j5C 5AB 5AB 5AB 2C** 4123641236A ~ 4200 Damage
- 623B IC j66 j5C 5AB 5AB 5AB 2C** 4123641236B ~ 4600 Damage
- 623B IC j66 j5C 5AB 5AB 5AB 2C** 4123641236C 66C j9 j5C~ 5200 Damage
With Blue IC
Without Super Meter
- Corner: 5A c5B 214A BIC 662C j9 j5A j5C j9 j5A j5C 5AB 5AB 5AAAAA c5B 623A IC 5C ~ 6600 Damage
- Corner: 623A BIC 662C j9 j5A j5C j9 j5A j5C 5AB 5AB 5AAAAA c5B 623A IC 5C ~ 6700 Damage
- Near corner: 5A c5B (f5B) 214A BIC j9 j5C j66 j5C 5AB 5A 5B 5C ~ 6300 Damage
- Near corner and airborne: 2B j9 j5C j66 j5C 5A 5B 5C BIC 5A 2B j8 j5C j66 j5C 5A 5B 5C ~ 7500 Damage
- Far from the corner: 623B BIC j66 j5B j9 j5A j66 j5A 5A j9 j5A j66 5A 5B 5C ~ 4500 Damage
- Far from the corner: 5A 5B (f5B) 214A BIC j9 j5B j66 j5A j9 j5A j66 5A 5B 5C ~ 5300 Damage
- Midscreen: 66B/f5B IC 66C 66j9 j5C j9 j5C j66 j5C 5A 5B 5C ~ 5400 Damage
- When cornered: 41236* 236A IC (662A whiff) 5A 2B j9 j5C j66 j5C (4) 5AB 5AB 5AAAAA c5B f5B ~ 4900 Damage
With Super Meter
- Midscreen: 66B/f5B IC 66C 66j9 j5C j9 j5C j66 j5C 5AB 5AB 5AB 2C** 4123641236A ~ 6200 Damage
- Midscreen: 66B/f5B IC 66C 66j9 j5C j9 j5C j66 j5C 5AB 5AB 5AB 2C** 4123641236B ~ 6600 Damage
- Midscreen: 66B/f5B IC 66C 66j9 j5C j9 j5C j66 j5C 5AB 5AB 5AB 2C** 4123641236C 66C j9 j5C ~ 7300 Damage
- Near corner against airborne opponent: 2B j9 j5C j66 j5C 5A 5B 5C BIC 5A 2B j9 j5C j66 j5C 5AB 5AB 2C** 4123641236A ~ 8200 Damage
- Near corner against airborne opponent: 2B j9 j5C j66 j5C 5A 5B 5C BIC 5A 2B j9 j5C j66 j5C 5AB 5AB 2C** 4123641236B ~ 8500 Damage
- Near corner against airborne opponent: 2B j9 j5C j66 j5C 5A 5B 5C BIC 5A 2B j9 j5C j66 j5C 5AB 5AB 2C** 4123641236C ~ 9000 Damage
- 41236* 236A IC (662A whiff) 5A 2B j9 j5C j66 j5C 5AB 5AB 5AB 2C** 4123641236A ~ 5600 Damage
- 41236* 236A IC (662A whiff) 5A 2B j9 j5C j66 j5C 5AB 5AB 5AB 2C** 4123641236B ~ 5800 Damage (not recommended)
- 41236* 236A IC (662A whiff) 5A 2B j9 j5C j66 j5C 5AB 5AB 5AB 2C** 4123641236C 66C j9 j5C~ 6800 Damage
- * Quake confirms during juggles do not work against these Characters: Akiko, Kanna, Kaori, Mai, Nayuki(asleep), Sayuri
- ** 2C can work against the above mentioned characters, but the window at which it can work is significantly smaller compared to other characters and is therefore adviced to be skipped against them.
Okizeme
Rumi does not have access to strong and safe jump-in options for okizeme as all her air normals will lose easily to Recoil Guards.
In order to retain her Rock-Papers-Scissors aspect of her Pressure, it is recommended to stay as close as possible to the opponent and attempt a tick throw set-up using 5A 41236A.
To prevent opponents from using RG against the 5A to gain Grab invulnerability, Rumi can start with 2A instead and still be close enough to make the cancel into 5A 41236A work.
If opponents attempts to jump, canceling into c5B or 2B can catch them.
On a midscreen knockdown that leaves the opponent close to Rumi, 668 j5B 5A is a decent left/right mixup.
A third, but very risky okizeme option is the use of j623* to beat Recoil Guard attempts against aerial attacks or using FIC during it to attempt a high/low mixup with j5A or 2A in bare-handed mode.
When done while the opponent is near the corner it may even cross the opponent up and allow a combo which gives you enough time to recover the shinai.
About "Happy Hell Maiden"
After grabing the opponent with her "Happy Hell Maiden" special move while holding the Shinai, Rumi enters an animation where she can follow-up with these moves:
236A: Maiden Bunt (乙女バント)
- During Happy Hell Maiden, Rumi holds her shinai to bunt.
- Because it only does 300 damage, this move is only useful if you need to guarantee a KO against an opponent with very low life.
- You can IC this move for a free and easy air combo, though it is most effective while Rumi is near the corner.
236B: Rapture Full Swing (爆裂フルスイング)
- During Happy Hell Maiden, Rumi swings her shinai as if it was a baseball bat.
- In total, she has a 5 frame window to hit with her shinai, and only 1 of those frames (in rare cases, 2 frames) results in a clean hit. Swinging several frames too early from a clean hit deals decreasing amounts of damage, while swinging 1 frame too late misses completely.
- The usefulness of this move depends entirely on how consistent you are with landing the swing. The timing is always the same but has no visual cues, so spend plenty of time practicing.
236C: Big Bang Home Run (ビッグバン打法)
- Requires 3 Super Meter and Rumi has to be at less than 1/3 HP
- An even stronger version of "Rapture Full Swing"
Hitting the 236B and 236C followups on the correct subframe
EFZ runs at 1/3 frame steps. This directly affects Rumi's homerun swings as their damage varies between every step.
To guarantee a slightly higher damage output from the swings, the player can delay their swings by less than a frame with these actions:
- Buffering the 41236* input during a jump with dash momentum delays the swing by 1/3 frame.
- Buffering the 41236* input during a jump without dash momentum delays the swing by 2/3 frame.
- Tricking the buffer by inputing 63236B/C delays the swing by 2/3 frame.
Furthermore there is a variation in the damage dealt depending on which side the player is on.
These are all the possible damage values (assuming the player has full BIC meter):
Player 1 Side
| 0/3f |
1/3f |
2/3f
|
| 240 |
541 |
843
|
| 1148 |
1454 |
1762
|
| 2073 |
2385 |
2699
|
| 3016 |
3333 |
3654
|
| 3976 |
4300 |
4627
|
Player 2 Side
| 0/3f |
1/3f |
2/3f
|
| 1 |
240 |
541
|
| 843 |
1148 |
1454
|
| 1762 |
2073 |
2385
|
| 2699 |
3016 |
3333
|
| 3654 |
3976 |
4300
|
For reference, see Rumi's Delayed Home Run - A Lecture by @Tony_EFZ
Win Quotes
| Japanese
|
English
|
|
ぐあッ!?
こ、腰がぁ…
|
Gwaaah?!
M, my back...
|
|
ナメないでよね…
七瀬なのよ!
アタシ!!
|
Don't underestimate me…
It's Nanase!
That's me!!
|
|
一撃必殺ッ!
乙女にしか
なせない業よっ!
|
Kill in a Single Blow!
A technique
only maidens can use!
|
|
タダでさえ加減が
わからないんだから
余計な手間は
取らせないで
くれないかしら
|
I already have enough trouble
trying to hold back.
Don't make me
have to work even
harder for this.
|
|
参考までに
言っとくけど
本調子なら
アンタくらい
3秒で沈めるわ
|
Just for reference
I'll let you know.
If I was using my full power,
I'd beat you down
in 3 seconds flat.
|
|
切れ味よりも
破壊力ッ!!
型にはまってるようじゃ
アタシを
退かせられないわよ
|
I choose raw power
over technical skill!!
You won't make me concede
if you're stuck using
unoriginal moves!
|
|
(To Mizuka)
はぁ…
アタシも瑞佳みたく
乙女らしく
戦えないかしら…
|
(To Mizuka)
Sigh...
I wish I could be like Mizuka,
and fight like
a maiden.
|
|
(To Mayu)
でぇい!
寄るなぁッ!!
トホホ…
アタシやっぱり
コイツ苦手よぉ…
|
(To Mayu)
Hrah!
Get away from me!!
Boo-hoo…
I really don't
like this girl…
|
|
(To Doppel Nanase)
ただの猿真似とは
一味違うみたいね
悪のライバル現る
って所かしら
もちろん悪はアンタよ
|
(To Doppel Nanase)
You're a bit different
than the usual riffraff.
I guess this is the appearance
of the evil rival?
You're the evil one, of course.
|
|
(To Rumi)
アタシを真似したい気持ちは
わかるけど
本家の評判に関わる
偽者には
星になってもらうわね
|
(To Rumi)
I understand your feelings
wanting to copy me.
But any fakes who
sully the reputation of the original
will be sent to the stars by me.
|
Colors

In-game References
External References
- Rumi's style of fighting with and without her weapon is similar to how characters act in the Samurai Shodown series.
ONE References
- The "Kimuchi" ramen that Rumi eats during her "Enduring Maiden's Aesthetic" move is a reference to the meal that Kouhei ate with her on a Christmas date in the game.
- Rumi's sword is a reference to how she was a master of kendo in the game.
| General
|
|
| Characters
|
|
| Mechanics
|
|
| Guides
|
|
| Wiki
|
|

