Eternal Fighter Zero/Minagi Tohno: Difference between revisions
Pure KouhAi (talk | contribs) (→Specials: added damage values) |
Pure KouhAi (talk | contribs) |
||
| Line 780: | Line 780: | ||
{{AttackData-EFZ | {{AttackData-EFZ | ||
|version= A | |version= A | ||
|damage= | |damage= 1000 | ||
|guard= | |guard= | ||
|property= | |property= | ||
| Line 794: | Line 794: | ||
|header= no | |header= no | ||
|version= B | |version= B | ||
|damage= | |damage= 1800 | ||
|guard= | |guard= | ||
|property= | |property= | ||
| Line 808: | Line 808: | ||
|header= no | |header= no | ||
|version= C | |version= C | ||
|damage= | |damage= 2500 | ||
|guard= | |guard= | ||
|property= | |property= | ||
| Line 831: | Line 831: | ||
{{AttackData-EFZ | {{AttackData-EFZ | ||
|version= A | |version= A | ||
|damage= | |damage= 200 x N | ||
|guard= | |guard= | ||
|property= | |property= | ||
| Line 845: | Line 845: | ||
|header= no | |header= no | ||
|version= B | |version= B | ||
|damage= | |damage= 200 x N | ||
|guard= | |guard= | ||
|property= | |property= | ||
| Line 859: | Line 859: | ||
|header= no | |header= no | ||
|version= C | |version= C | ||
|damage= | |damage= 200 x N | ||
|guard= | |guard= | ||
|property= | |property= | ||
Revision as of 15:12, 2 November 2021
Introduction
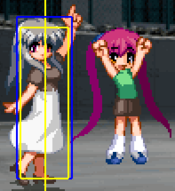
Tohno Minagi (遠野 美凪) is an assist character, utilizing Michiru to help lock down her opponents. Minagi has very few special moves herself, as most of her special inputs direct Michiru to perform an action. She may also press the special button to move Michiru left or right (4S or 6S) or to change her stance (5S). Normally, Michiru will follow Minagi around the screen, but when in her other stance, she stands in place, ready to perform upgraded specials. The combination of long lasting Michiru moves and Minagi’s normals allow the pair to safely mix up the opponent. Minagi has many drawbacks, including losing her assist character for 3 seconds if Michiru is hit, weak A and B normals, and lacking reversals without meter.
Minagi is one of the heroines of AIR, a visual novel produced by Key in 2000. She is a top student of the school in the town where the story takes place. Her lack of expression gives people an enigmatic impression, though in reality, she is warm and loving. Minagi enjoys blowing bubbles, eating rice, and is the president of the astronomy club at school. Her best friend is Michiru, a bright and energetic girl who sees Yukito as a "rival" and usually greets him with a kick. During AIR, Yukito discovers Minagi's secret concerning her mother, and also learns the truth behind Michiru...
Stage: Abandoned Station (Day) (廃駅(昼))
BGM: Prism (虹)
Character-Specific Notes
- Minagi is able to air jump once, and air dash/backstep once.
- If Michiru starts to go off screen, Michiru will automatically run back to near where Minagi is.
- Once Michiru starts attacking the opponent, Michiru becomes vulnerable to attack herself. If Michiru is hit, she will fall to the floor for several seconds, and will be unable to take any commands from Minagi during this time.
Normal Moves
The notation for the movelists can be found under Controls.
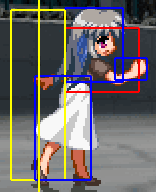
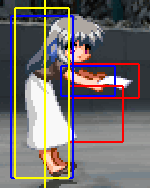
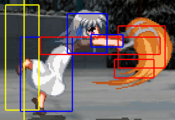
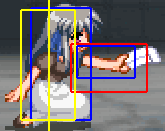
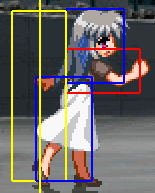
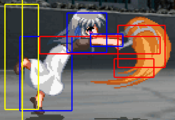
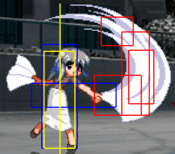
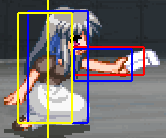
The normal move table can be found under Minagi Tohno/Move Data.
Standing
5A
5A
|
|---|
(c)5B
(c)5B
|
|---|
(f)5B
(f)5B
|
|---|
5C
5C
|
|---|
Crouching
2A
2A
|
|---|
2B
2B
|
|---|
2C
2C
|
|---|
Jumping
j5A
j5A
|
|---|
j5B
j5B
|
|---|
j5C
j5C
|
|---|
Dashing
66A
66A
|
|---|
66B
66B
|
|---|
66C
66C
|
|---|
662A
662A
|
|---|
662B
662B
|
|---|
662C
662C
|
|---|
Grabs
(c)4C / (c)6C
(c)4C / (c)6C
|
|---|
(c)j6C
(c)j6C
|
|---|
Special Moves
The notation for the movelists can be found under Controls.
The special move table can be found under Minagi Tohno/Move Data.
Specials
*S
Move Name
*S |
|---|
236*
Chiruchiru Kick
(ちるちるキック)
236* |
|---|
623*
Chiruchiru Drilling Bow Thigh
(ちるちる穿弓腿)
623* |
|---|
421*
Chiruchiru Iron Head Merit
(ちるちる鉄頭功)
421* |
|---|
214*
Chiruchiru Whirlwind Leg
(ちるちる旋風脚)
214* |
|---|
41236*
Rice Ticket Presentation
(お米券進呈)
41236* |
|---|
Eternity Specials
236236*
Chiruchiru Kick Festival
(ちるちるキック祭り)
236236* |
|---|
214214*
Chiruchiru Solar Plexus Break
(ちるちる鳩尾ブレイク)
214214* |
|---|
214236*
Soap Bubbles
(しゃぼん玉)
214236* |
|---|
Final Memory
222S
Star Sand
(星の砂)
222S |
|---|
Strategy
- A fair number of Minagi's normals actually have really good frame data, but due to their short reach or awkward hitboxes, are not as useful as they could be. You'll have to play around these shortcomings by using stance cancels and Michiru specials to lock down the opponent and run your mixup game. Michiru's positioning will also become extremely important during the course of the match. :Finally, Minagi's mixups are quite good and fairly safe due to Minagi's ability to block during Michiru's attacks. A short insight on each of these items is presented below.
Stance Cancels
- Minagi can make use of Michiru's ready/unready ability to effectively stance cancel her normals. This both changes Michiru's state as well as cutting the recovery of her normals to 17f, the recovery from readying Michiru. This makes a blocked 5C(1), 2C, or 662C safe while still applying pressure. This becomes unsafe if the button before stance canceling is RGed, so varying your timing and which normal you stance cancel on will become extremely important to surviving and keeping your lockdown going.
Lockdown
- By abusing Minagi's ability to stance cancel, and the great frame data on Michiru's specials, you can keep the opponent locked down for an extended amount of time. For example, you can 662BD 5C(1) D 662CD 5C(1) 236B IAD jAAAA... and continue on pressuring even further. Learn how to vary whether to stance cancel and use a Michiru special to keep the opponent guessing and preventing them from escaping your lockdown. It is also best if you learn how to convert off the random hits you may get during lockdown. There is no timer, so keeping the opponent blocking is only so helpful; you must get damage in somewhere to win the game.
Michiru's Positioning
- A good Minagi can work around any of Michiru's positionings, but a great Minagi will be able to manipulate her position with far less effort. Knowing how far 236 and 214 will move Michiru, where she likes to position herself after correcting for long distances, and how far 4D and 6D move her will allow you to choose the correct positioning for the situation.
- Against characters with better normals, reach, or positioning, you will ideally want to place Michiru further away from you, and allow the opponent to close the distance. Since Michiru cannot be hit until she performs a special, the opponent will have to pass her and be vulnerable to any moves from behind. Ready her up at a good distance and either 236B or 236C when the opponent aproaches. 236C will give you plenty of time to confirm a hit, even if the opponent hit you first. From here you are free to set up Michiru for okizeme.
- If the opponent must approach from the air (Akiko, Ayu, Neyu) you can place Michiru closer, ready her, and use 421 as a homing antiair that you can combo from. Minagi does not have any good normals for antiairs other than 662C, so either moving around to avoid air approaches or using Michiru are your only good/safe options.
- Michiru's distance from the corner dictates what oki you can use, and whether or not it will be safe. Anything outside of the corner, and 236 will be ideal (with the occasional 421 for catching jump outs). Close to the corner, and 214 will be ideal. If you wish to burn super for unconstestable oki, 236236A outside of the corner is an excellent choice.
Combos
| Notation Help | |
|---|---|
| Disclaimer: Combos are written by various contributors, some combo notations may deviate slightly from the notation listed below. For more information, see Controls | |
| IC | Input Instant Charge (22C) when you have the right amount of RF Meter. |
| FIC | Input Flicker Instant Charge (22C) when you have the right amount of RF Meter. |
| {X/Y/Z} | Move X or Y or Z can be used. |
| #* | Indicates that any of A, B and C may be used with #. Example: 214*. |
| [<- X] [-> X] | Side switch notation. All inputs grouped by the square brackets are performed facing the arrow's direction. They are still written as if they were done facing right, however. |
| [X]xN | Loop the inputs in the square brackets as many times as N. |
| c5B | Proximity normal only usable while close. |
| f5B | Proximity normal only usable outside of c5B range or when cancelled from another normal. Known as far 5B. |
| jX | Button X is input during your first jump. |
| djX | Button X is input during your double jump. |
| X(whiff) | Indicates that X is intended to whiff. |
| X(tech trap) | Indicates a combo ender intended to catch the opponent's air tech. The most common kind of tech trap is j6C, which will air throw early techs and jC later techs. Executionally identical to X(whiff) but different in purpose. |
| ~ | Indicates a followup for moves which have them. Example: 236A~236A. |
| .. | Indicates a short delay. |
| IAD | Indicates an Instant Air Dash. |
| IABD | Indicates an Instant Air Back Dash. |
| (X) | X move is omittable from the combo. |
| tk.X | Indicates the motion "X" is input immediately after leaving the ground. Stands for tiger knee. |
- Replays for these combos can be found here.
No IC
- No Michiru
- 2AAAACD
- Extremely basic combo when you can't get 5C to combo. Use Michiru set up to oki afterwards. (1136 DAMAGE) [replay 1-1]
- 2A 5C jB 66 jAB 66A xN (to corner) 5ABBC(1) 41236A
- Basic launcher into corner carry. Number of 66As varies. Can stop early into 5AC 41236A into an IAD mixup. (3021 DAMAGE) [replay 1-1] show video example
- 2A 5C jB 66 jAB 66A xN (to corner) 5ABBC(1) 41236A
- Near corner: 2A/B 5C jB 66 jAB land j.AAB~C land 5ABBC(1) 41236A
- When just outside of corner. 41236A ender is hard knockdown and allows plenty of time to set up Michiru for mixups. (3386 DAMAGE)
- Near corner: 2A/B 5C jB 66 jAB land j.AAB~C land 5ABBC(1) 41236A
- Corner: 2B 5C jB~C land jAABC land 5ABBC jBC djA[6]C
- Corner combo showing off her jAABC extender and alternate ender. (3758 DAMAGE) [replay 1-1] show video example
- Corner: 2B 5C jB~C land jAABC land 5ABBC jBC djA[6]C
- With Michiru
- Midscreen, on readied 214B hit: 662C jB 66 jAB 66A xN (to corner) 5ABBC(1) 41236A
- On successful mixup from Michiru spinkick. (3169 DAMAGE) [replay 1-2]
- Corner, on readied 214B hit: 2A 5C jB~C land jAABC land 5ABBC(1) 41236A
- On successful mixup from Michiru spinkick in corner. (3558 DAMAGE) [replay 1-2] show video example
- Corner, on readied 214B hit: 2A 5C jB~C land jAABC land 5ABBC(1) 41236A
- Corner, on readied 236 hit: 5BC jB~C land jAABC land 5ABBC(1) 41236A
- You'll use 236 if Michiru is readied outside the corner, or to punish mash. (3884 DAMAGE) [replay 1-2] show video example
- Corner, on readied 236 hit: 5BC jB~C land jAABC land 5ABBC(1) 41236A
- Corner, Michiru close, not readied: 2B 5C jBC j214214A jB j236A jBC 5ABC(1) 8 jABC j236A j[6]C
- Fancy metered combo that loops back into the same Michiru state it started in. The j[6]C at the end is to catch techs. (4139 DAMAGE) [replay 1-3]
- Corner, Michiru close, (un)readied: 2B 5C(1) 214214A 662C jB~C land jAABC land 5ABBC(1) 41236A
- Meter dump off a successful hit into 5C(1). (4200 DAMAGE) [replay 1-3] show video example
- Corner, Michiru close, (un)readied: 2B 5C(1) 214214A 662C jB~C land jAABC land 5ABBC(1) 41236A
- Corner, Michiru near corner: ... 2C 2141236A jB~C land 5ABBC(1) 41236A
- Damage and combo viability varies greatly on bubble RNG. You get good damage even if you can't follow up with 5B or jB. (3-4000 DAMAGE) [replay 1-4]
- Corner, Michiru near corner: ... 2C 2141236A jB~C land 5ABBC(1) 41236A
Red IC
- No Michiru
- 2AA 5C(1) IC 662C jB 66 jAB land 66A xN (to corner) 5ABBC(1) 41236A
- If you can't confirm a low number of hits into 5C, or are too far, this is your go to to confirm into a better combo. (2991 DAMAGE) [replay 1-5]
- 2AA 5C (1) IC 662C jB 66 jA~B Land 662C jB~C djAABC 236A j6C
- This will work in at all ranges except from your own corner, so 3/4 and closer to the opposite corner. Does more damage and generally gives better Oki. To make 662C easier to land, make Sure you delay the j.B after 66 j.A to land as quickly as possible and get as much hitstun as you can. The j6C at the end is to catch techs. (3101 DAMAGE)
- 2AA 5C (1) IC 662C jB 66 jA~B Land 662C jB~C djAABC 236A j6C
- 2AA 5C (1) IC 662C jB 66 jA~B Land 5BB 5C jB~C djAABC 236A j6C
- This only works midscreen or closer to the corner. On midscreen, you'll need to skip the c.B since it whiffs. A tiny microstep backwards into f.B works. It's more specific than the combo above, but it let's you deal more damage and retains the better Oki than 41236A. The j6C at the end is to catch techs. (3492 DAMAGE)
- 2AA 5C (1) IC 662C jB 66 jA~B Land 5BB 5C jB~C djAABC 236A j6C
- 66C IC 662C jB 66 jAB land 66A xN (to corner) 5ABBC(1) 41236A
- Carry combo off raw overhead. (3173 DAMAGE) [replay 1-5] show video example
- 66C IC 662C jB 66 jAB land 66A xN (to corner) 5ABBC(1) 41236A
- With Michiru
- Near corner, Michiru not readied: 236C jB 66 jBC 5ABBC(1) 41236A
- Confirm off the wallbounce from 236C. Can be used if you're in the corner as well. (2651 DAMAGE) [replay 1-6] show video example
- Near corner, Michiru not readied: 236C jB 66 jBC 5ABBC(1) 41236A
- Michiru readied: 236C (5) 662C jB 66 jAB 66A xN (to corner) 5ABBC(1) 41236A
- Michiru can be on either side of opponent. Most useful when opponent is sandwiched. (2932 DAMAGE) [replay 1-6]
Blue IC
- No Michiru
- In corner: 2BB 5C(1) BIC 662C IAD jB 662C jB 66 jAB 662C jB~C land 5ABBC(1) 41236A
- Corner to corner carry, the IAD jB needs practice to land consistently. (4836 DAMAGE) [replay 1-7]
- Corner: 2B 5C jB~C land 5BC jBC BIC jBC 5BC jB~C 5ABBC(1) 41236A
- Very basic BIC combo in the corner. Easy and reasonable damage. (6059 DAMAGE) [replay 1-8]
- With Michiru
- Corner: throw BIC 2141236A 5BC jB~C land jAABC land 5ABBC(1) 41236A
- Most corner combos can go into a BIC 2141236A route. Bubble RNG plays a big role in damage numbers here. (6454 DAMAGE) [replay 1-8]
- Corner: throw BIC 2141236A 5BC jB~C land jAABC land 5ABBC(1) 41236A
- Corner, Michiru near corner, readied 214B hit: 662C jB~C land 5BC(1) BIC 2141236A 5BC jB~C land jAABC land 5ABBC(1) 41236A
- Example of adding bubble super into a normal combo for a big damage upgrade. (6500-7200 DAMAGE) [replay 1-9]
- Corner, Michiru near corner, readied 214B hit: 662C jB~C land 5BC(1) BIC 2141236A 5BC jB~C land jAABC land 5ABBC(1) 41236A
Okizeme
236
- Corner
- For the most part, 236 will be your go to oki when you expect the opponent to mash or reversal, as it allows you to be block while Michiru will usually trade with the opponent and let you combo afterward. You can also use j236 on oki to go for a high low with jA/B or land 2B.
Readied 214
- Midscreen
- After a 2CD midscreen, you can 214B and go for a left/right mixup by jumping over the opponent. Airdash back over for a non-crossup. Both options allow you plenty of time to confirm a 662C followup. You can also do a late IAD over the opponent for a crossup.
- There is also the option for a high/low mixup with 662B/2B or 66C. If done early enough in the spinkick, you can confirm into 662C. If late, IC to get the 662C followup.
- Corner
- You can use the same j214 trick in the 236 section to do a high/low mixup. Since 214 lasts so long, you can also get a 66C or 2B mixup. If blocked, you can do it again and IC the overhead/low to confirm into a combo. Readied 214 in the corner will pull the opponent outside of the corner, allowing mixups following the spinkick. Due to crossup protection during consecutive guard, crossing up in the middle of spinkick will do nothing.
Non-readied 214B
- Corner
- Non-readied 214B will stay in place and make Michiru spin slightly higher. Due to the higher kicks, most characters will duck underneath Michiru's hitboxes during the middle of the spinkick. With good timing you can throw the opponent while they are not in blockstun. The best way for the opponent to avoid this is to stand block Michiru to prevent a throw. Mix up with 2B to crush this tactic.
Win Quotes
Japanese English ハイカマーン…
(パンパンYes, come on...
(pat pat)(くいくい
(くいくい
あ、ジェスチャーで
なくても分かりますか?
それは大変
失礼いたしました…*tug tug*
*tug tug*
Oh, you could tell
what I wanted without the gestures?
Well, you'll have
to excuse my behavior.今日も元気だ
ご飯が美味い…You're spirited today too.
This rice is delicious...……ガッツ…
.......GUTS...
進呈…
結構痛かったで賞…I present, to you...
A prize for a wonderful beating...進呈…
よく頑張ったで賞…I present, to you...
A prize for trying very hard...進呈…
リバーサル練習しま賞…I present, to you...
The "Let's Work On Reversals" award...進呈…
惜しかったで賞…I present, to you...
A prize for coming so close...…日本人は手篭め族
…ポ[TRANSLATION NEEDED]
(To UNKNOWN)
永遠ですか…?
…一言で言うと
摩訶不思議空間?
違いますか…
進呈…
ガッカリしたで賞…(To UNKNOWN)
What is eternity...?
... If I had to keep it short,
a "profoundly mysterious space"?
No...?
I present...
The award for disappointment...(To Mai)
牛丼族もお米族…
人類兄弟
皆仲間…
進呈…(To Mai)
The beef bowlers and the ricers...
Siblings of humanity.
Everyone is a friend to each other...
I present...(To Rumi)
…世界オトメ発見?(To Rumi)
...A world-class maiden discovery?(To Minagi)
生き別れの双子
感動の再開…
ぱちぱちぱち…
……進呈…(To Minagi)
Twins, separated at birth.
Their emotional reunion...
*clapclapclap*
... I present...(To Kanna)
貴方の翼は
希望を託すことも
誰かを救うことも
できるんです
私が
そうでしたから…(To Kanna)
Your wings
are those to give hope to others.
And to be able to
save someone's life.
Like they did
for me...
(To Kanna)
貴方の翼は
風を感じてますか…?
だったら大丈夫です
何故かと言われると
分かりませんが
大丈夫です…(To Kanna)
Can your wings
still feel the breeze...?
Then you'll be okay.
I don't know why
I know that,
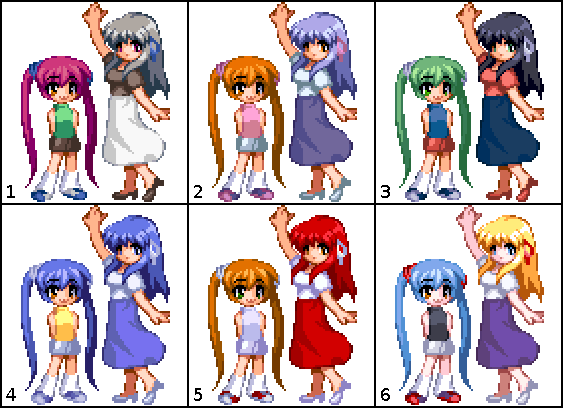
but I know you'll be fine.Colors
In-game References
AIR References
- The train station in the background is where Minagi and Michiru usually hang out during AIR.
- The pieces of paper and and envelopes that Minagi constantly uses in her attacks are rice tickets. In AIR, she always hands out rice tickets to Yukito, and always carries at least 80 around.
- Minagi's "Soap Bubbles" move is a reference to her and Michiru's hobby of blowing soap bubbles in the game.
- Miangi's "Star Sand" move is a reference to the star sand that she gave to Michiru and Yukito during the game. It is one of her most treasured items.
- Very basic BIC combo in the corner. Easy and reasonable damage. (6059 DAMAGE) [replay 1-8]
- Corner: 2B 5C jB~C land 5BC jBC BIC jBC 5BC jB~C 5ABBC(1) 41236A
- Corner to corner carry, the IAD jB needs practice to land consistently. (4836 DAMAGE) [replay 1-7]
- In corner: 2BB 5C(1) BIC 662C IAD jB 662C jB 66 jAB 662C jB~C land 5ABBC(1) 41236A
- Michiru can be on either side of opponent. Most useful when opponent is sandwiched. (2932 DAMAGE) [replay 1-6]
- Michiru readied: 236C (5) 662C jB 66 jAB 66A xN (to corner) 5ABBC(1) 41236A
- If you can't confirm a low number of hits into 5C, or are too far, this is your go to to confirm into a better combo. (2991 DAMAGE) [replay 1-5]
- 2AA 5C(1) IC 662C jB 66 jAB land 66A xN (to corner) 5ABBC(1) 41236A
- Fancy metered combo that loops back into the same Michiru state it started in. The j[6]C at the end is to catch techs. (4139 DAMAGE) [replay 1-3]
- Corner, Michiru close, not readied: 2B 5C jBC j214214A jB j236A jBC 5ABC(1) 8 jABC j236A j[6]C
- On successful mixup from Michiru spinkick. (3169 DAMAGE) [replay 1-2]
- Midscreen, on readied 214B hit: 662C jB 66 jAB 66A xN (to corner) 5ABBC(1) 41236A
- Extremely basic combo when you can't get 5C to combo. Use Michiru set up to oki afterwards. (1136 DAMAGE) [replay 1-1]
- 2AAAACD

