Introduction
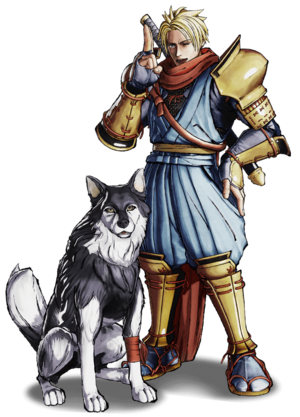
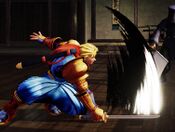
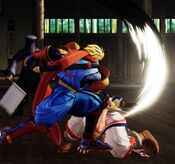
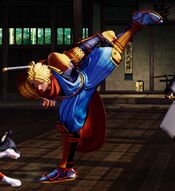
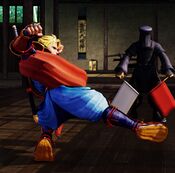
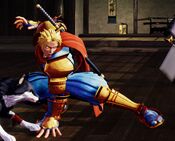
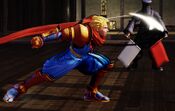
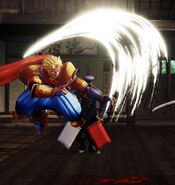
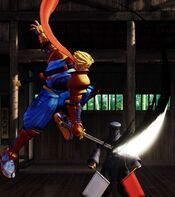
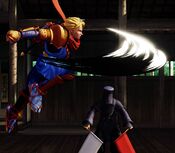
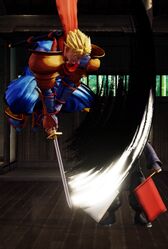
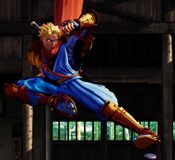
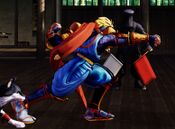
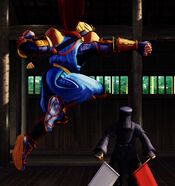
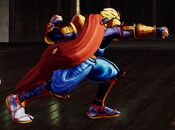
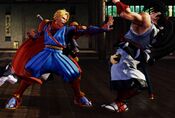
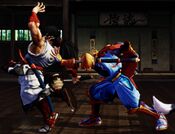
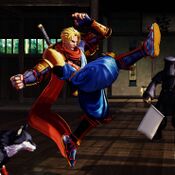
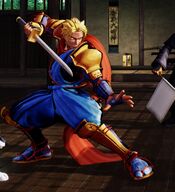
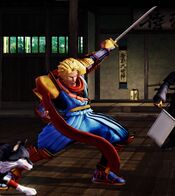
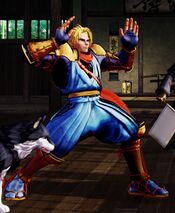
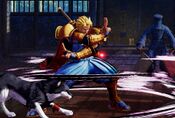
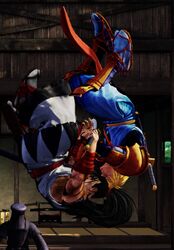
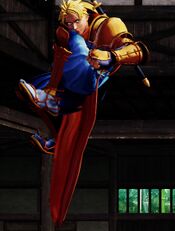
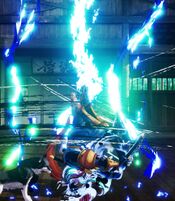
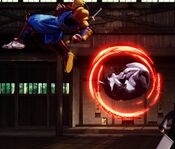
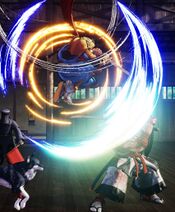
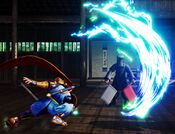
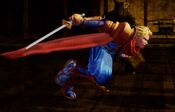
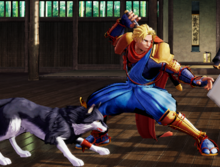
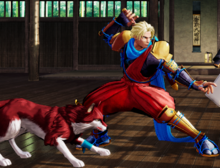
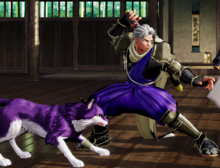
An american-born ninja and self-declared superhero of justice, Galford fights alongside his dog Poppy to create a signature blend of rushdown and keepout gameplay.
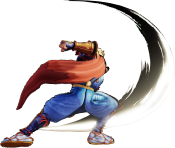
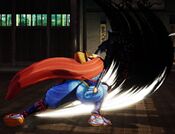
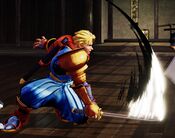
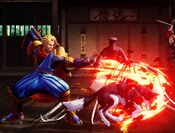
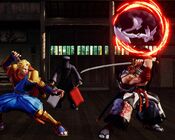
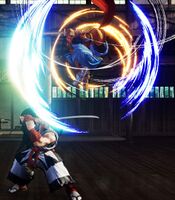
Being a real ninja and all, he has access to most of Hanzo’s toolkit including fast run speed, a wall-jump, teleports out of hitstun, a fireball and a command grab. Don’t get confused though, because Poppy’s the real star of the show. Galford can command the dog in one of four ways, with two of them hitting in a horizontal line and two hitting from above. You can use these specials to set up your mixups or keep the opponent from approaching, so both an offensive and a defensive playstyle are equally viable.
Galford’s damage is on the lower end of the cast and while his vortex is powerful, it is not quite as scary as Hanzo’s. Galford also prefers to have a bit of distance between him and his opponent when setting up, which makes him vulnerable to being pressured.
Playstyle
 Galford is a hybrid zoner/rushdown character who uses his dog Poppy to create opportunities for himself. Galford is a hybrid zoner/rushdown character who uses his dog Poppy to create opportunities for himself.
|
| Strengths |
Weaknesses
|
- Strong setplay: Galford can use his dog projectiles to lock the opponent in place and create mixup opportunities. This is complimented by his excellent 50/50 game and a threatening command grab.
- Great zoning: Plasma Blade is a fast projectile that knocks down on hit which can be mixed in with the lower-recovery dog projectiles to create a tricky zoning game that is dangerous to maneuver around.
- Good footsies: Galford's 5B and 2C both have great range. His excellent 66A is good for harassing opponents and his 2C low is also great for whiff punishment.
- Excellent mobility: Galford has an excellent run speed that keeps opponents on their toes and his unique cancellable backdash makes him hard to pin down.
- Good WFT: Galford's long-ranged projectile WFT works great as a raw punish or an anti-air against escapes.
- Decent while Disarmed: Retains most of his tools when disarmed.
|
- Bad air game: Galford is extremely floaty and has uniformly poor air normals. This makes air-to-air exchanges and jumping approaches very difficult. It also makes him very easy to cross-under anti-air.
- Unsafe zoning: Plasma Blade is one of the most unsafe projectiles in the game and Galford can open himself up to huge damage if he spaces his fireballs poorly.
- Poppy is vulnerable: Poppy can be temporarily removed from action by pokes with disjointed hitboxes and high-profile moves such as most B+Cs. This can make Galford's best zoning and mixup tool as well as his SSM unavailable for extended periods.
|
Data
- Damage Taken: 100%
- Rage Factor: 0.26
- Rage Duration: 10 seconds
- Jump: 49 frames (Slow)
- Forward Walk Speed: 0.3 (Average)
- Back Walk Speed: 0.23 (Average)
- Dash Speed: 1.3 (Fast)
- Back Dash: 40 frames (Cancelable from frame 12)
- Weapon Pickup / Drop: 40 / 55 frames
Gameplan
Neutral and Defense
Back Dash Canceling
Galford's back dash has two parts. First, he flips back and lands on his hands, then he finishes the flip and lands on his feet. When Galford lands, he can use any of his specials (Poppy specials require her to be behind and close to Galford.)
This is a big part of how Galford is able to move around the screen and use his projectiles to give and then take away space in a mostly safe way!
Poppy! - Galford's Best Friend
Specials
Poppy is used as a projectile to lock down opponents. The grounded Poppy specials work in contrast to Plasma Blade,as these specials are slower to start up, but give Galford frame advantage. All Poppy specials are available Armed and Disarmed.
Both Rush Dog (214A) and Machine Gun Dog (214B) have Poppy run along the ground and strike the opponent.
Both moves are + on block, Machine Gun Dog more so, and do different actions on hit.
On hit, Rush Dog knocks the opponent down or will do a special hit grab animation when in Rage.
Machine Gun Dog on hit will grab the opponent, allowing Galford to do just about any follow up that he wants.
These are both important ways for Galford to score knockdowns.
The other two Poppy specials are Replica Dog (214C) and Overhead Crash (214K).
Replica Dog teleports Poppy above the opponent and then drops down hitting mid. This is one of the primary tools to set up Galford's okizeme.
Overhead Crash causes both Poppy and Galford to jump and then shoot Poppy at an angle downward.
Interactions and Movement
It is important to know how Poppy moves and how she interacts with opponents attacks because those interactions affect whether or not you can use Poppy specials. Poppy needs to be behind and near to Galford and not knocked down to be available for attack.
Moves that hit near the ground will cause Poppy to yelp and and be knocked down. This leaves Galford without Poppy for several seconds.
Poppy's movement mostly mirrors Galford's movement. She will walk slowly forward or backward, matching the direction that Galford moves. Poppy will run after a slight delay, when Galford runs.
Poppy will do a back flip anytime Galford's center passes behind her head. Actions that trigger this movement include walking back (Poppy walks slower than Galford which causes the overlap), dashing back, jumping back, whiffing 5C, hitting 5B or 5C, and Imitate Replica on block and hit.
During the initial run, or during Poppy's backflip, Poppy specials are not available.
Mitigating Poppy Unavailability
There are ways that you can avoid not having Poppy specials in certain situations.
Back dashing, jumping back, landing after imitate replica in the corner will stop Poppy from doing her back flip.
You can also intentionally use attacks or movement that lock Poppy into a back flip animation to set up back dash cancels.
For example, Galford can back dash first, putting Poppy into her back flip animation, run forward, and then back dash again. The second back dash, you will be able to cancel into a Poppy special.
Dealing with Jump-ins
Galford does not have a dragon punch to anti-air or a big obvious anti-air button like some characters in this game.
Instead he has to use a handful of different tools to deal with jump-ins.
5K is his most obvious anti-air. Galford does an upwards angled kick, this is useful for anti airing deep jump in attacks.
Opponents may start to do earlier jump in attacks to call out certain anti-airs, which will beat 5K.
Arguably the strongest way to deal with jump in attacks by Galford is to dash away. Galford can re-position himself when his opponent jumps by dashing under them or back dashing.
Canceling back dash with a fire ball can even anti air a jumping opponent.
Air to Air attacks are another option that Galford has for anti-airs, with jump back j.C and j.D being notable examples that hit below and in front.
Imitate Replica Attack
NOTE: Since version 1.11, this move cannot punish multi-hit attacks, make it not useful in most cases.
Even while being hit, you may have a way out! Imitate Replica Attack is a counter-style move that only works while Galford is in knockback state (after he gets hit). This move will punish certain attacks and combos, check out the specifics in Special Moves. So if you over extended yourself, make sure you know which characters you can punish for punishing you!
NOTE: If you are backturned, you can not Imitate Replica. This is especially notable after back throw.
Okizeme & Other Offensive Situations
Galford's okizeme and mixup is based around setting up Replica Dog (214C) either after a knock down or in neutral. Replica dog hits as a mid, catches characters mid-air, and also tracks forward/backward rolls, making it your go-to lock down move in most situations. Be wary, there are many ways to escape this move. Make sure you play with timings when calling Replica Dog, and mix in your other Poppy specials to make sure they respect you on the ground as well! After setting up Replica Dog, Galford has numerous mix up options. These include:
Strike Heads (Command Throw) / Throw
Galford has two throw options: Strike Heads (623S) and the standard throw. Strike Heads has less recovery, more active frames than a standard throw, and gives you the most damage with a knock down from a throw type move. The standard throw lets you combo into different knock downs, 66B/66D/2C, or more damage, back throw 5C or 2B WFT.
Replica Attack (63214A+D/B+D)
Galford can cross up his opponent with Replica attack. This mix-up becomes harder to react to when used in conjunction with replica dog, as replica dog will hit sooner than galford, but will still force the opponent to block cross-up if you change sides. This can be punished by dash throw/attack at a minimum, use with caution.
High / Low / Throw Mixup
Galford can also apply a basic mixup game supported by Poppy.
The more damaging and rewarding options are very high commitment options that will lead to severe punishes if they are blocked.
You will most like to use them sparingly or mainly use relatively safe 2D pokes.
High Options - j.C , B+C, 66C
Low Options - 6D / 3D / 2D / 66D / 2C / 66B , empty jump in > low
Throw Options - CD / 623S
Normal Moves
Far Slashes
5A
5A
|
| Damage
|
Guard
|
Startup
|
Active
|
Recovery
|
Total
|
Hit Adv
|
Block Adv
|
Guard Dmg
|
Cancel
|
Recoil
|
Deflectable
|
Unarmed
|
| 40
|
Mid
|
9
|
-
|
-
|
25
|
-4
|
-5 [-7]
|
5
|
Yes
|
Yes
|
Yes
|
No
|
|
5B
5B
|
| Damage
|
Guard
|
Startup
|
Active
|
Recovery
|
Total
|
Hit Adv
|
Block Adv
|
Guard Dmg
|
Cancel
|
Recoil
|
Deflectable
|
Unarmed
|
| 110
|
Mid
|
13
|
-
|
-
|
41
|
-8
|
-12 [-12]
|
10
|
No
|
Yes
|
Yes
|
No
|
|
5C
5C
|
| Damage
|
Guard
|
Startup
|
Active
|
Recovery
|
Total
|
Hit Adv
|
Block Adv
|
Guard Dmg
|
Cancel
|
Recoil
|
Deflectable
|
Unarmed
|
| 250
|
Mid
|
24
|
-
|
-
|
62
|
-7
|
-28 [-15]
|
25
|
No
|
Yes
|
Disarm
|
No
|
|
2A
2A
|
| Damage
|
Guard
|
Startup
|
Active
|
Recovery
|
Total
|
Hit Adv
|
Block Adv
|
Guard Dmg
|
Cancel
|
Recoil
|
Deflectable
|
Unarmed
|
| 30
|
Mid
|
8
|
-
|
-
|
23
|
-3
|
-5 [-6]
|
5
|
Yes
|
Yes
|
Yes
|
No
|
|
2B
2B
|
| Damage
|
Guard
|
Startup
|
Active
|
Recovery
|
Total
|
Hit Adv
|
Block Adv
|
Guard Dmg
|
Cancel
|
Recoil
|
Deflectable
|
Unarmed
|
| 90
|
Mid
|
12
|
-
|
-
|
37
|
-5
|
-12 [-9]
|
10
|
Yes
|
Yes
|
Yes
|
No
|
Mid range combo tool, always connects 236C and WFT.
|
|
2C
2C
|
| Damage
|
Guard
|
Startup
|
Active
|
Recovery
|
Total
|
Hit Adv
|
Block Adv
|
Guard Dmg
|
Cancel
|
Recoil
|
Deflectable
|
Unarmed
|
| 180
|
Low
|
18
|
-
|
-
|
54
|
KD(+88)
|
-28 [-13]
|
25
|
No
|
Yes
|
No
|
No
|
|
Near Slashes
n.5A
n.5A
|
| Damage
|
Guard
|
Startup
|
Active
|
Recovery
|
Total
|
Hit Adv
|
Block Adv
|
Guard Dmg
|
Cancel
|
Recoil
|
Deflectable
|
Unarmed
|
| 30
|
Mid
|
5
|
-
|
-
|
16
|
+1
|
-5 [-2]
|
5
|
Yes
|
Yes
|
Yes
|
No
|
Fast close slash, plus frame on hit.
|
|
n.5B
n.5B
|
| Damage
|
Guard
|
Startup
|
Active
|
Recovery
|
Total
|
Hit Adv
|
Block Adv
|
Guard Dmg
|
Cancel
|
Recoil
|
Deflectable
|
Unarmed
|
| 80
|
Mid
|
8
|
-
|
-
|
29
|
-1
|
-12 [-5]
|
10
|
Yes
|
Yes
|
Yes
|
No
|
|
|
|
n.5C
n.5C
|
| Damage
|
Guard
|
Startup
|
Active
|
Recovery
|
Total
|
Hit Adv
|
Block Adv
|
Guard Dmg
|
Cancel
|
Recoil
|
Deflectable
|
Unarmed
|
| 200
|
Mid
|
14
|
-
|
-
|
45
|
-4
|
-28 [-8]
|
25
|
No
|
Yes
|
Disarm
|
No
|
|
|
|
Kicks
5D
5D
|
| Damage
|
Guard
|
Startup
|
Active
|
Recovery
|
Total
|
Hit Adv
|
Block Adv
|
Guard Dmg
|
Cancel
|
Recoil
|
Deflectable
|
Unarmed
|
| 50
|
Mid
|
13
|
-
|
-
|
28
|
-3
|
-6
|
5
|
Yes
|
No
|
No
|
Yes
|
Only hits air opponents and Earthquake (standing & crouching). Can be use for anti air and empty cancel.
|
|
6D
6D
|
| Damage
|
Guard
|
Startup
|
Active
|
Recovery
|
Total
|
Hit Adv
|
Block Adv
|
Guard Dmg
|
Cancel
|
Recoil
|
Deflectable
|
Unarmed
|
| 40
|
Low
|
9
|
4
|
-
|
28
|
-4~-1
|
-10~-7
|
5
|
Yes
|
No
|
No
|
Yes
|
In version 1.70 it becomes cancellable, makes it good tool for mixup combos.
|
|
2D
2D
|
| Damage
|
Guard
|
Startup
|
Active
|
Recovery
|
Total
|
Hit Adv
|
Block Adv
|
Guard Dmg
|
Cancel
|
Recoil
|
Deflectable
|
Unarmed
|
| 20
|
Low
|
5
|
-
|
-
|
17
|
0
|
-3
|
5
|
No
|
No
|
No
|
Yes
|
|
3D
3D
|
| Damage
|
Guard
|
Startup
|
Active
|
Recovery
|
Total
|
Hit Adv
|
Block Adv
|
Guard Dmg
|
Cancel
|
Recoil
|
Deflectable
|
Unarmed
|
| 70
|
Low
|
12~14
|
3
|
-
|
44
|
KD
|
-10~-8
|
5
|
Yes
|
No
|
No
|
Yes
|
Slow start up and very punishable on block. Since version 2.10, it is now less minus on block and it can be cancelled, into 214A is a good block string setup.
|
|
Dash Normals
66A
66A
|
| Damage
|
Guard
|
Startup
|
Active
|
Recovery
|
Total
|
Hit Adv
|
Block Adv
|
Guard Dmg
|
Cancel
|
Recoil
|
Deflectable
|
Unarmed
|
| 30
|
Mid
|
6
|
-
|
-
|
20
|
-2
|
-19 [-5]
|
5
|
Yes
|
Yes
|
Yes
|
No
|
It's -8 frames on recoil cancel.
|
|
66B
66B
|
| Damage
|
Guard
|
Startup
|
Active
|
Recovery
|
Total
|
Hit Adv
|
Block Adv
|
Guard Dmg
|
Cancel
|
Recoil
|
Deflectable
|
Unarmed
|
| 140
|
Low
|
15
|
-
|
-
|
36
|
KD
|
-35 [-5]
|
10
|
No
|
Yes
|
No
|
No
|
It's -8 frames on recoil cancel.
|
|
66C
66C
|
| Damage
|
Guard
|
Startup
|
Active
|
Recovery
|
Total
|
Hit Adv
|
Block Adv
|
Guard Dmg
|
Cancel
|
Recoil
|
Deflectable
|
Unarmed
|
| 150
|
High
|
23
|
-
|
-
|
67
|
KD
|
-22
|
20
|
No
|
No
|
No
|
No
|
Overhead attack with long reach, it covers 3/4 screen and able to jump over low projectiles.
|
|
66D
66D
|
| Damage
|
Guard
|
Startup
|
Active
|
Recovery
|
Total
|
Hit Adv
|
Block Adv
|
Guard Dmg
|
Cancel
|
Recoil
|
Deflectable
|
Unarmed
|
| 70
|
Low
|
9~21
|
13
|
-
|
44
|
KD
|
-19~-7
|
5
|
No
|
No
|
No
|
Yes
|
|
Air Normals
j.A
j.A
|
| Damage
|
Guard
|
Startup
|
Active
|
Recovery
|
Total
|
Hit Adv
|
Block Adv
|
Guard Dmg
|
Cancel
|
Recoil
|
Deflectable
|
Unarmed
|
| 40
|
High
|
9
|
-
|
-
|
-
|
-
|
-
|
5
|
No
|
No
|
No
|
No
|
|
j.B
j.B
|
| Damage
|
Guard
|
Startup
|
Active
|
Recovery
|
Total
|
Hit Adv
|
Block Adv
|
Guard Dmg
|
Cancel
|
Recoil
|
Deflectable
|
Unarmed
|
| 100
|
High
|
11
|
-
|
-
|
-
|
-
|
-
|
10
|
No
|
No
|
No
|
No
|
|
j.C
j.C
|
| Damage
|
Guard
|
Startup
|
Active
|
Recovery
|
Total
|
Hit Adv
|
Block Adv
|
Guard Dmg
|
Cancel
|
Recoil
|
Deflectable
|
Unarmed
|
| 150
|
High
|
13
|
-
|
-
|
-
|
-
|
-
|
20
|
No
|
No
|
No
|
No
|
In version 1.70, jump C becomes easier to land deep hit.
|
|
j.D
j.D
|
| Damage
|
Guard
|
Startup
|
Active
|
Recovery
|
Total
|
Hit Adv
|
Block Adv
|
Guard Dmg
|
Cancel
|
Recoil
|
Deflectable
|
Unarmed
|
| 30
|
High
|
7
|
-
|
-
|
-
|
-
|
-
|
5
|
No
|
No
|
No
|
Yes
|
NOTE: It does NOT hit cross up like Hanzo's jump D.
|
|
Unarmed Normals
u.5S
u.5S
|
| Damage
|
Guard
|
Startup
|
Active
|
Recovery
|
Total
|
Hit Adv
|
Block Adv
|
Guard Dmg
|
Cancel
|
Recoil
|
Deflectable
|
Unarmed
|
| 50
|
Mid
|
8
|
-
|
-
|
26
|
+2
|
-3
|
5
|
No
|
No
|
No
|
Only
|
|
u.2S
u.2S
|
| Damage
|
Guard
|
Startup
|
Active
|
Recovery
|
Total
|
Hit Adv
|
Block Adv
|
Guard Dmg
|
Cancel
|
Recoil
|
Deflectable
|
Unarmed
|
| 50
|
Mid
|
9
|
-
|
-
|
31
|
-2
|
-7
|
5
|
No
|
No
|
No
|
Only
|
|
ju.S
ju.S
|
| Damage
|
Guard
|
Startup
|
Active
|
Recovery
|
Total
|
Hit Adv
|
Block Adv
|
Guard Dmg
|
Cancel
|
Recoil
|
Deflectable
|
Unarmed
|
| 50
|
High
|
8
|
-
|
-
|
-
|
-
|
-
|
5
|
No
|
No
|
No
|
Only
|
|
u.66S
u.66S
|
| Damage
|
Guard
|
Startup
|
Active
|
Recovery
|
Total
|
Hit Adv
|
Block Adv
|
Guard Dmg
|
Cancel
|
Recoil
|
Deflectable
|
Unarmed
|
| 50
|
Mid
|
7
|
-
|
-
|
30
|
KD
|
-8
|
5
|
No
|
No
|
No
|
Only
|
|
Universal Mechanics
Guard Break
Guard Break (Throw)
4/5/6C+D Neutral / Forward Throw Neutral / Forward Throw Back Throw Back Throw
|
| Version
|
Damage
|
Guard
|
Startup
|
Active
|
Recovery
|
Total
|
Hit Adv
|
Block Adv
|
Guard Dmg
|
Cancel
|
Recoil
|
Deflectable
|
Unarmed
|
| Neutral / Forward
|
0
|
No
|
3
|
-
|
71
|
74
|
+20
|
-
|
-
|
-
|
-
|
-
|
Yes
|
| Back
|
0
|
No
|
5
|
-
|
69
|
74
|
+25
|
-
|
-
|
-
|
-
|
-
|
Yes
|
Universal throw. Can be followed up with combos. Back throw has slower start up but it has extra frame advantage.
|
|
Surprise Attack
Surprise Attack (Overhead)
5B+C
|
| Damage
|
Guard
|
Startup
|
Active
|
Recovery
|
Total
|
Hit Adv
|
Block Adv
|
Guard Dmg
|
Cancel
|
Recoil
|
Deflectable
|
Unarmed
|
| 60
|
High
|
18
|
-
|
-
|
46
|
+1
|
-16
|
10
|
No
|
No
|
No
|
Yes
|
Universal overhead. It stays the same while disarmed.
|
|
Dodge
Dodge
5A+B
|
| Damage
|
Guard
|
Startup
|
Active
|
Recovery
|
Total
|
Hit Adv
|
Block Adv
|
Guard Dmg
|
Cancel
|
Recoil
|
Deflectable
|
Unarmed
|
| 0
|
N/A
|
1
|
16
|
22
|
38
|
N/A
|
-
|
-
|
-
|
-
|
-
|
Yes
|
Universal dodge. Avoids all attacks for a brief moment, and is mainly used to avoid throws.
Complete invincibility from frames 1 to 10. Strike invincibility from frames 11 to 16.
|
|
Stance Break
Stance Break
A+B during Just Defense
|
| Damage
|
Guard
|
Startup
|
Active
|
Recovery
|
Total
|
Hit Adv
|
Block Adv
|
Guard Dmg
|
Cancel
|
Recoil
|
Deflectable
|
Unarmed
|
| 0
|
Mid
|
5
|
-
|
-
|
55
|
KD
|
-24
|
-
|
No
|
-
|
-
|
Yes
|
|
|
|
Counter / Blade Catch
Counter / Blade Catch
236A+B Counter Counter Blade Catch Blade Catch
|
| Version
|
Damage
|
Guard
|
Startup
|
Active
|
Recovery
|
Total
|
Hit Adv
|
Block Adv
|
Guard Dmg
|
Cancel
|
Recoil
|
Deflectable
|
Unarmed
|
| Armed
|
0
|
N/A
|
2
|
11
|
34
|
46
|
+35~+59
|
-
|
-
|
-
|
-
|
-
|
No
|
Universal counter. Allows you to follow up with a guaranteed attack of your own. The amount of time you have to followup depends on the strength of the attack you counter, with heavy attacks staggering the opponent for the longest amount of time. Additionally, if you counter a heavy slash or a running slash, your opponent will be disarmed.
|
| Unarmed
|
0
|
N/A
|
2
|
12
|
9
|
22
|
KD
|
-
|
-
|
-
|
-
|
-
|
Only
|
Universal counter. While disarmed, your counter will disarm and knock away your opponent regardless of slash level countered.
|
|
Rage Explosion
Rage Explosion
5A+B+C
|
| Damage
|
Guard
|
Startup
|
Active
|
Recovery
|
Total
|
Hit Adv
|
Block Adv
|
Guard Dmg
|
Cancel
|
Recoil
|
Deflectable
|
Unarmed
|
| 0
|
No
|
21
|
1
|
-
|
58
|
0
|
-
|
-
|
-
|
-
|
-
|
No
|
Unblockable pushback attack.
|
|
Lightning Blade
Lightning Blade (Issen)
5A+B+C during Rage Explosion
|
| Damage
|
Guard
|
Startup
|
Active
|
Recovery
|
Total
|
Hit Adv
|
Block Adv
|
Guard Dmg
|
Cancel
|
Recoil
|
Deflectable
|
Unarmed
|
| 300~709
|
Mid
|
9
|
-
|
-
|
-
|
KD
|
-44
|
-
|
-
|
-
|
No
|
No
|
Has full invulnerability all the way through. Can be used as an anti-air. Damage scales based on remaining Rage Explosion Gauge.
|
|
Command Moves
Stardust Drop
Stardust Drop
(close)j.6D Stardust Drop Stardust Drop
|
| Damage
|
Guard
|
Startup
|
Active
|
Recovery
|
Total
|
Hit Adv
|
Block Adv
|
Guard Dmg
|
Cancel
|
Recoil
|
Deflectable
|
Unarmed
|
| 112
|
No
|
4
|
-
|
-
|
-
|
KD
|
-
|
-
|
-
|
-
|
-
|
Yes
|
Air throw, an excellent air to air option.
|
|
Wall Jump
Wall Jump
(near wall)9 Wall Jump Wall Jump
|
| Damage
|
Guard
|
Startup
|
Active
|
Recovery
|
Total
|
Hit Adv
|
Block Adv
|
Guard Dmg
|
Cancel
|
Recoil
|
Deflectable
|
Unarmed
|
| -
|
-
|
-
|
-
|
-
|
-
|
-
|
-
|
-
|
-
|
-
|
-
|
Yes
|
Galford can jump near walls.
|
|
Special Moves
Strike Heads
Strike Heads
(close)623S
|
| Damage
|
Guard
|
Startup
|
Active
|
Recovery
|
Total
|
Hit Adv
|
Block Adv
|
Guard Dmg
|
Cancel
|
Recoil
|
Deflectable
|
Unarmed
|
| 170
|
No
|
10
|
-
|
-
|
53
|
KD(+67)
|
-
|
-
|
-
|
-
|
-
|
Yes
|
Galford's izuna drop style command grab. It's the same for all 3 slash buttons. Upon success grab, Galford and Poppy will both do back flip, makes Poppy special moves unavailable for a couple seconds.
|
|
Plasma Blade
Plasma Blade
236S
|
| Version
|
Damage
|
Guard
|
Startup
|
Active
|
Recovery
|
Total
|
Hit Adv
|
Block Adv
|
Guard Dmg
|
Cancel
|
Recoil
|
Deflectable
|
Unarmed
|
| A
|
60
|
Mid
|
13
|
-
|
-
|
61
|
KD
|
-21
|
5
|
-
|
-
|
-
|
Yes
|
| B
|
60
|
Mid
|
13
|
-
|
-
|
64
|
KD
|
-24
|
5
|
-
|
-
|
-
|
Yes
|
| C
|
60
|
Mid
|
13
|
-
|
-
|
67
|
KD
|
-27
|
5
|
-
|
-
|
-
|
Yes
|
Galford throws out a lightning projectile, it has long recovery so space it wisely. Can be perform during backdash to catch jump in and dash opponents.
|
|
Rush Dog
Rush Dog
214A
|
| Version
|
Damage
|
Guard
|
Startup
|
Active
|
Recovery
|
Total
|
Hit Adv
|
Block Adv
|
Guard Dmg
|
Cancel
|
Recoil
|
Deflectable
|
Unarmed
|
| Normal
|
90
|
Mid
|
27~51
|
-
|
-
|
55
|
KD
|
+2~+26
|
5
|
-
|
-
|
-
|
Yes
|
| Rage
|
204 (60, 144)
|
Mid
|
27~51
|
-
|
-
|
55
|
KD
|
+5~+29
|
5
|
-
|
-
|
-
|
Yes
|
Quickly send Poppy to strike the opponent. All the Poppy special moves requires it at the ready position behind Galford, usually when it lands from back flip. In the Rage version, Poppy catches the opponent and performs izuna drop. Poppy block stun is 30 frames.
|
|
Machine Gun Dog
Machine Gun Dog
214B
|
| Damage
|
Guard
|
Startup
|
Active
|
Recovery
|
Total
|
Hit Adv
|
Block Adv
|
Guard Dmg
|
Cancel
|
Recoil
|
Deflectable
|
Unarmed
|
| 40 (10,30)
|
Mid
|
36~59
|
-
|
-
|
59
|
KD
|
+5
|
5
|
-
|
-
|
-
|
Yes
|
Poppy dashes forward and begins to tear your opponent, Galford can follow up with any attack except throws, SSM and other Poppy moves. If follow up attack hits , Poppy will release the opponent, otherwise it will perform the 2nd hit to knockdown. Poppy block stun is 30 frames.
|
|
Replica Dog
Replica Dog
214C
|
| Damage
|
Guard
|
Startup
|
Active
|
Recovery
|
Total
|
Hit Adv
|
Block Adv
|
Guard Dmg
|
Cancel
|
Recoil
|
Deflectable
|
Unarmed
|
| 80
|
Mid
|
89
|
-
|
-
|
63
|
KD
|
27
|
5
|
-
|
-
|
-
|
Yes
|
Poppy teleports and comes falling on your opponent while in a spinning ball, it's not an overhead. Think Sonic the Hedgehog. Galford can follow up attacks.
|
|
Overhead Crash
Overhead Crash
214D
|
| Damage
|
Guard
|
Startup
|
Active
|
Recovery
|
Total
|
Hit Adv
|
Block Adv
|
Guard Dmg
|
Cancel
|
Recoil
|
Deflectable
|
Unarmed
|
| 120
|
Mid
|
34
|
-
|
-
|
98
|
KD
|
-25
|
10
|
-
|
-
|
-
|
Yes
|
Galford jumps backward and throws poppy like a volley ball. It's a good thing this game is based around a time long before Animal Security came around. From version 1.70 he can adjust the angle of poppy by holding forward or back.
|
|
Replica Attack (head)
Replica Attack (head)
63214A+D
|
| Damage
|
Guard
|
Startup
|
Active
|
Recovery
|
Total
|
Hit Adv
|
Block Adv
|
Guard Dmg
|
Cancel
|
Recoil
|
Deflectable
|
Unarmed
|
| 120
|
High
|
51
|
-
|
-
|
-
|
KD
|
-48
|
10
|
-
|
-
|
-
|
Yes
|
Galford teleports and comes falling down slashing in front of his opponent, very punishable on block. Its damage becomes 100 while unarmed.
|
|
Replica Attack (rear)
Replica Attack (rear)
63214B+D
|
| Damage
|
Guard
|
Startup
|
Active
|
Recovery
|
Total
|
Hit Adv
|
Block Adv
|
Guard Dmg
|
Cancel
|
Recoil
|
Deflectable
|
Unarmed
|
| 120
|
High
|
60
|
-
|
-
|
-
|
KD
|
-48
|
10
|
-
|
-
|
-
|
Yes
|
Galford teleports and comes falling down slashing his opponent from behind, it's slower than the front version. It doesn't hit cross up against opponents in the corner (same as all the other cross up moves), but it lands into the corner. Its damage becomes 100 while unarmed.
|
|
Imitate Replica (head)
Imitate Replica (head)
63214x2A+D While knocked back While knocked back
|
| Damage
|
Guard
|
Startup
|
Active
|
Recovery
|
Total
|
Hit Adv
|
Block Adv
|
Guard Dmg
|
Cancel
|
Recoil
|
Deflectable
|
Unarmed
|
| 120
|
High
|
43
|
-
|
-
|
-
|
KD
|
-48
|
10
|
-
|
-
|
-
|
Yes
|
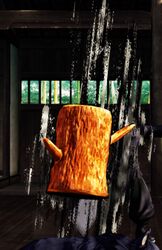
A counter move that can be done when Galford is knocked back in hitstun. Galford teleports and leaves behind a log, and then goes through the same animation as Replica Attack. However, if Galford is knocked down or got hit in the back (back turned / back hit) he will not be able to teleport out. That is most commonly seen after Galford gets back thrown. This move used to punish multi-hit moves and avoid combos, however in version 1.11 it got nerfed a lot, now the timing of cancel is very late, making it not useful in most situations.
|
|
Imitate Replica (rear)
Imitate Replica (rear)
63214x2B+D While knocked back While knocked back
|
| Damage
|
Guard
|
Startup
|
Active
|
Recovery
|
Total
|
Hit Adv
|
Block Adv
|
Guard Dmg
|
Cancel
|
Recoil
|
Deflectable
|
Unarmed
|
| 120
|
High
|
43
|
-
|
-
|
-
|
KD
|
-48
|
10
|
-
|
-
|
-
|
Yes
|
The back version of Imitate Replica, also not useful after the nerf.
|
|
Supers
Weapon Flipping Technique
Mega Plasma Factor
236B+C
|
| Damage
|
Guard
|
Startup
|
Active
|
Recovery
|
Total
|
Hit Adv
|
Block Adv
|
Guard Dmg
|
Cancel
|
Recoil
|
Deflectable
|
Unarmed
|
| 360(420)
|
Mid
|
1+14~28
|
15
|
-
|
-
|
KD
|
-78~-64
|
-
|
-
|
-
|
-
|
No
|
Available only during Max Rage or Rage Explosion. Disarms on hit. A huge projectile which covers a lot of distance.
NOTE: It doesn't hit crouching opponent at point-blank range in the corner.
|
|
Super Special Move
Justice Impulse X
641236C+D
|
| Damage
|
Guard
|
Startup
|
Active
|
Recovery
|
Total
|
Hit Adv
|
Block Adv
|
Guard Dmg
|
Cancel
|
Recoil
|
Deflectable
|
Unarmed
|
| 660
|
Mid
|
10+19
|
-
|
-
|
-
|
KD
|
-49
|
-
|
-
|
-
|
-
|
No
|
Available only once per match. Full invincible from frame 1~10. Run full screen to slash the opponent. It follow the same rule as poppy special moves.
|
|
Combos
Midscreen
2B does 10 more damage than n.5B.
- (n.5B / 2B) xx 236C
Punish combo.
- (n.5B / 2B) xx WFT
WFT Punish combo.
- 6D xx 236C
One of the few low attack combos, only connects at close range, and the input is tricky.
- 6D xx WFT
WFT must be cancelled immediately after 6D. High risk high reward combo.
- (5CD / 4CD)...
- 2C
Standard follow up after throw, but command throw has better risk reward ratio.
- 2B xx 236C / WFT
WFT combo after throw. If back throw Ruixiang, Galford needs to micro walk to connect 2B.
- 5C
Only after back throw.
- 5CD 2B xx 236C
Only connects after forward throw, less damage than 2C but knocks opponent further away.
- 4CD 5C
Good damage after back throw, but the timing is tight.
- (j.C / j.B / j.D Deep Hit)...
- (n.5B / 2B) xx 236C
Deep hit combo.
- (n.5B / 2B) xx WFT
Deep hit WFT combo.
- n.5C / 2C / Lighting Blade
Deep hit normal combos.
- 214B...
- 2C
Knock down.
- 5C
Mid range 5C for max damage.
- WFT
WFT.
- Lighting Blade
Issen Combo.
- j.B / j.C...
- (n.5B / 2B) xx 236C / WFT
Max damage from j.C.
- 214C...
- 2D (Poppy Hits) n.5A / n.5B
Low mixup combo at close range.
- 2D (Poppy Hits) 236A / Lighting Blade
Low mixup combo #2, the timing is very tight.
- 6D (Poppy Hits) 236C / WFT
Low mixup combo #3.
- BC (Poppy Hits)
Overhead mixup, almost same damage as 66C but much safer.
- Rage Explosion (Poppy Hits)
Unblockable set up at close range.
- 236S
Zoning combo, works at all range.
- Lighting Blade
If the opponent blocks Issen first, Poppy will hit as cross up.
Corner
- (4CD / 5CD) n.5C
More damage than 2C at the corner.
Guard Crush
- n.5C
After recovery...
- SSM
SSM follow up, poppy has to be available. (Be careful with opponent bursting to avoid it)
- The only reason to not cancel the recovery is for SSM, or else go for the one below for optimal damage.
- n.5C / 5C...
Cancel recovery...
- Lighting Blade
Universal Issen combo.
- 214B
Machine Gun Poppy...
- j.B / j.C...
- (n.5B / 2B) xx 236C / WFT
Max damage.
- Any follow up for poppy would work.
Videos
Galford tutorial and combos by LegendaryWolf Shirou
RoyalPsycho vs BaronVonAwesomeV at Frosty Faustings XIV
Colors
External Links
