|
|
| Line 571: |
Line 571: |
| |deflect=No | | |deflect=No |
| |unarmed=Yes | | |unarmed=Yes |
| |description=Fast Air to air. | | |description=Fast Air to air. Can crossup. |
| }} | | }} |
| }} | | }} |
Revision as of 05:13, 28 January 2023
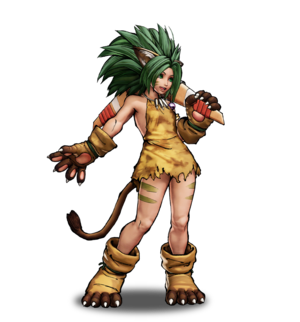
Cham Cham
チャムチャム, Chamu Chamu Introduction
Cham Cham is yet to be explored to her full potential, but as a returning character from Samsho 2, her overall move sets have returned to the fans. Leading season 3, this cat girl with a boomerang has brought us yet more excitement and energy.
Cham Cham can be played in many ways. She has quite some good buttons, such as her long reaching mediums and heavies. That being said, she has longer range compared to most of the characters in the cast. She also has some tricks so she can approach in a few different ways, and make some adjustments in her game plan.
She is a fun character that is not the best, but definitely something new to hype your day.
Playstyle
 Cham Cham is a flexible rushdown-character who can pester the opponent from afar or up-close. Cham Cham is a flexible rushdown-character who can pester the opponent from afar or up-close.
|
| Strengths |
Weaknesses
|
- Good close and midrange presence: Cham Cham has undeflectable A normals with good speed and range, active D buttons that are good for stuffing pokes and solid B normals that cover the close-to-midscreen space. Her 2B can also be cancelled into her 236D for some extra damage off of pokes and whiff punishes.
- Good anti-air: Thanks to her high-reaching air-to-airs as well as her n.5C, WFT and anti-air fireballs, Cham Cham has a variety of effective anti-air options.
- Solid anti-fireball: Cham Cham's fireball is unique in that it does not destroy other fireballs when colliding, allowing her to knock down the opposing character in fireball exchanges. Her "demon flip" is also good for jumping over fireballs on a hard read.
- Full-screen SSM
|
- Bad heavies: Cham's C normals have slow startup and huge recovery. They are also easy to jump over and do not recoil on block, making them unambiguously punishable.
- Bad zoning: Cham's fireballs have poor range and startup as well as enormous recovery. It is very hard for her to win fireball wars and her zoning can easily be disrespected and punished.
- Shallow jump normals: Cham Cham's floaty jump arc combined with the poor depth of her jump normals make airborne offense difficult.
- Bad running normals: Cham Cham's running normals are uniformly terrible and make it hard for her to establish a strike/throw game.
- Gimmicky mix-up: Cham Cham's "demon flip" special is easy to react to and hard to set up off of knockdowns, reducing its viability as a true mix-up option. Her other mixup tools such as her 66B and 66C have very slow startup and are easy to fuzzy guard.
- One of lowest-damaging SSM's
|
Data
- Damage Taken: 100%
- Rage Factor: 0.24
- Rage Duration: 10 seconds
- Jump: 46 frames (Average)
- Forward Walk Speed: 0.3 (Average)
- Back Walk Speed: 0.23 (Average)
- Dash Speed: 1.35 (Very Fast)
- Back Dash: 27 frames
- Weapon Pickup / Drop: 51 / 40 frames
Gameplan
Cham Cham, as one of the newest characters, still has some good tools for a game plan. Her potential isn't fully discovered yet so let's go through a few.
Neutral
Her mediums make a great poke as they go for decent range. Her 2C is pretty fast to stop a dash and its range is almost half screen. Her 236D is pretty far to make a good punish, and can jump over some ground stuff such as Wu's trap. Her fireballs with her boomerang making a pretty solid anti-air but she can't really zone people with it as people can just dash-in and avoid the boomerang by not jumping too much. Her dashing normals do not have a long range compared to her standing ones. But her 66C is good to catch a jump and it can cross up if it's used at the right range.
Her air buttons are decent with her heavy hitting up, which can catch opponents with high jumps, and medium hitting down, which is good to use for jump-in mostly.
Her flips can follow up with a low for mix up, but just flipping without using any command is a little unsafe but it can get her out of corner. Using the B follow up after flip makes a good air to air and can make her flips a little safer.
Okizeme
Cham Cham can do a solid Oki with just her two moves: 66B and 3D. Her 66B even though has a short range but it's not too bad on block, serves as a good overhead. Her 3D with the same animation as her 66D but knocks down, makes it one of the best slide out of the ones left that knocks down.
Her flip can help her to do some Oki as well. Especially in corner, you can try to use the A or C follow up for a command grab. Though you need to be pressing the button when you are almost at your opponent for it to work, so requires some practice. But the corner can solve the problem of hard to aim. She can also flip over her opponent and do a quick left and right mix up. Pretty safe on block so she can set up for a deflect sometimes.
Normal Moves
Far Slashes
5A
5A
|
| Damage
|
Guard
|
Startup
|
Active
|
Recovery
|
Total
|
Hit Adv
|
Block Adv
|
Guard Dmg
|
Cancel
|
Recoil
|
Deflectable
|
Unarmed
|
| 30
|
Mid
|
5
|
-
|
-
|
16
|
+1
|
-2
|
5
|
Yes
|
No
|
No
|
No
|
Cancellable scratch though no real combo potential.
|
|
5B
5B
|
| Damage
|
Guard
|
Startup
|
Active
|
Recovery
|
Total
|
Hit Adv
|
Block Adv
|
Guard Dmg
|
Cancel
|
Recoil
|
Deflectable
|
Unarmed
|
| 100
|
Mid
|
11
|
-
|
-
|
34
|
-3
|
-12
|
10
|
No
|
Yes
|
Yes
|
No
|
Poke with decent range but no cancel.
|
|
5C
5C
|
| Damage
|
Guard
|
Startup
|
Active
|
Recovery
|
Total
|
Hit Adv
|
Block Adv
|
Guard Dmg
|
Cancel
|
Recoil
|
Deflectable
|
Unarmed
|
| 240
|
Mid
|
26
|
11
|
-
|
64
|
+1~+11
|
-15~-5
|
25
|
No
|
No
|
Disarm
|
No
|
Long range heavy, no recoil on block, quite safe if spaced right.
|
|
2A
2A
|
| Damage
|
Guard
|
Startup
|
Active
|
Recovery
|
Total
|
Hit Adv
|
Block Adv
|
Guard Dmg
|
Cancel
|
Recoil
|
Deflectable
|
Unarmed
|
| 30
|
Mid
|
5
|
-
|
-
|
18
|
-1
|
-4
|
5
|
Yes
|
No
|
No
|
No
|
Another cancellable scratch, no real combo potential.
|
|
2B
2B
|
| Damage
|
Guard
|
Startup
|
Active
|
Recovery
|
Total
|
Hit Adv
|
Block Adv
|
Guard Dmg
|
Cancel
|
Recoil
|
Deflectable
|
Unarmed
|
| 90
|
Mid
|
13
|
-
|
-
|
32
|
+1
|
-12
|
10
|
Yes
|
Yes
|
Yes
|
No
|
Her main combo tool at mid range, 236D or WFT always connects after.
|
|
2C
2C
|
| Damage
|
Guard
|
Startup
|
Active
|
Recovery
|
Total
|
Hit Adv
|
Block Adv
|
Guard Dmg
|
Cancel
|
Recoil
|
Deflectable
|
Unarmed
|
| 150
|
Mid
|
22
|
8
|
-
|
60
|
-11~-4
|
-15~-8
|
25
|
No
|
No
|
Disarm
|
No
|
Similar to her 5C but faster startup, though more negative on block.
|
|
Near Slashes
n.5B
n.5B
|
| Damage
|
Guard
|
Startup
|
Active
|
Recovery
|
Total
|
Hit Adv
|
Block Adv
|
Guard Dmg
|
Cancel
|
Recoil
|
Deflectable
|
Unarmed
|
| 80
|
Mid
|
8
|
-
|
-
|
29
|
-1
|
-12
|
10
|
Yes
|
Yes
|
Yes
|
No
|
Another main combo tool, also connects to 214S.
|
|
n.5C
n.5C
|
| Damage
|
Guard
|
Startup
|
Active
|
Recovery
|
Total
|
Hit Adv
|
Block Adv
|
Guard Dmg
|
Cancel
|
Recoil
|
Deflectable
|
Unarmed
|
| 220
|
Mid
|
15
|
-
|
-
|
45
|
-3
|
-28
|
25
|
No
|
Yes
|
Disarm
|
No
|
Boomerang attack with upward hitbox, can be used as a situational Anti-Air, it has heavy push back that after guard crush, a flip is needed for n.2C to connect.
|
|
n.2B
n.2B
|
| Damage
|
Guard
|
Startup
|
Active
|
Recovery
|
Total
|
Hit Adv
|
Block Adv
|
Guard Dmg
|
Cancel
|
Recoil
|
Deflectable
|
Unarmed
|
| 80
|
Mid
|
6
|
-
|
-
|
29
|
0
|
-12
|
10
|
Yes
|
Yes
|
Yes
|
No
|
Has a similar property as n.5B.
|
|
n.2C
n.2C
|
| Damage
|
Guard
|
Startup
|
Active
|
Recovery
|
Total
|
Hit Adv
|
Block Adv
|
Guard Dmg
|
Cancel
|
Recoil
|
Deflectable
|
Unarmed
|
| 150
|
Mid
|
19
|
-
|
-
|
50
|
-4
|
-28
|
25
|
Yes
|
Yes
|
Disarm
|
No
|
|
|
|
Kicks
5D
5D
|
| Damage
|
Guard
|
Startup
|
Active
|
Recovery
|
Total
|
Hit Adv
|
Block Adv
|
Guard Dmg
|
Cancel
|
Recoil
|
Deflectable
|
Unarmed
|
| 50
|
Mid
|
10
|
-
|
-
|
22
|
0
|
-3
|
5
|
No
|
No
|
No
|
Yes
|
|
|
|
6D
6D
|
| Damage
|
Guard
|
Startup
|
Active
|
Recovery
|
Total
|
Hit Adv
|
Block Adv
|
Guard Dmg
|
Cancel
|
Recoil
|
Deflectable
|
Unarmed
|
| 30
|
Mid
|
10
|
8
|
7~1
|
23
|
-1~+6
|
-6~+1
|
5
|
No
|
No
|
No
|
Yes
|
A push that can be plus if hit meaty, set up for block string.
|
|
2D
2D
|
| Damage
|
Guard
|
Startup
|
Active
|
Recovery
|
Total
|
Hit Adv
|
Block Adv
|
Guard Dmg
|
Cancel
|
Recoil
|
Deflectable
|
Unarmed
|
| 20
|
Low
|
6
|
-
|
-
|
19
|
-1
|
-4
|
5
|
No
|
No
|
No
|
Yes
|
|
|
|
3D
3D
|
| Damage
|
Guard
|
Startup
|
Active
|
Recovery
|
Total
|
Hit Adv
|
Block Adv
|
Guard Dmg
|
Cancel
|
Recoil
|
Deflectable
|
Unarmed
|
| 70
|
Low
|
12
|
9
|
16~8
|
35
|
KD
|
-7~+1
|
5
|
No
|
No
|
No
|
Yes
|
Great slide, good and efficient mix up combined with 66B.
|
|
Dash Normals
66A
66A
|
| Damage
|
Guard
|
Startup
|
Active
|
Recovery
|
Total
|
Hit Adv
|
Block Adv
|
Guard Dmg
|
Cancel
|
Recoil
|
Deflectable
|
Unarmed
|
| 50
|
Mid
|
8
|
3
|
26~24
|
35
|
-5~-3
|
-8~-6
|
5
|
Yes
|
No
|
No
|
No
|
Lack range but good punish tool by its ability to combo (even into WFT, will always connect if 66A hits).
|
|
66B
66B
|
| Damage
|
Guard
|
Startup
|
Active
|
Recovery
|
Total
|
Hit Adv
|
Block Adv
|
Guard Dmg
|
Cancel
|
Recoil
|
Deflectable
|
Unarmed
|
| 80
|
High
|
22
|
-
|
-
|
43
|
KD(+81)
|
-11
|
10
|
No
|
No
|
No
|
No
|
Dashing headbutt. Hits overhead, but does not have the fastest startup.
|
|
66C
66C
|
| Damage
|
Guard
|
Startup
|
Active
|
Recovery
|
Total
|
Hit Adv
|
Block Adv
|
Guard Dmg
|
Cancel
|
Recoil
|
Deflectable
|
Unarmed
|
| 140
|
Mid
|
28
|
2
|
40~39
|
69
|
KD
|
-25~-24
|
20
|
No
|
No
|
Disarm
|
No
|
Can cross up if used close to the opponent but unlike Hanzo's 66C it's not an overhead, also makes for a pretty good anti air.
|
|
66D
66D
|
| Damage
|
Guard
|
Startup
|
Active
|
Recovery
|
Total
|
Hit Adv
|
Block Adv
|
Guard Dmg
|
Cancel
|
Recoil
|
Deflectable
|
Unarmed
|
| 70
|
Low
|
10
|
11
|
15~5
|
34
|
-8~+2
|
-12~-2
|
5
|
No
|
No
|
No
|
Yes
|
Not a useful move compared to 3D.
|
|
Air Normals
j.A
j.A
|
| Damage
|
Guard
|
Startup
|
Active
|
Recovery
|
Total
|
Hit Adv
|
Block Adv
|
Guard Dmg
|
Cancel
|
Recoil
|
Deflectable
|
Unarmed
|
| 50
|
High
|
6
|
-
|
-
|
-
|
-
|
-
|
5
|
No
|
No
|
No
|
No
|
Scratch for a fast air to air.
|
|
j.B
j.B
|
| Damage
|
Guard
|
Startup
|
Active
|
Recovery
|
Total
|
Hit Adv
|
Block Adv
|
Guard Dmg
|
Cancel
|
Recoil
|
Deflectable
|
Unarmed
|
| 100
|
High
|
11
|
-
|
-
|
-
|
-
|
-
|
10
|
No
|
No
|
No
|
No
|
Air normal hits downward good for jump in. Can crossup.
|
|
j.C
j.C
|
| Damage
|
Guard
|
Startup
|
Active
|
Recovery
|
Total
|
Hit Adv
|
Block Adv
|
Guard Dmg
|
Cancel
|
Recoil
|
Deflectable
|
Unarmed
|
| 160
|
High
|
14
|
-
|
-
|
-
|
-
|
-
|
20
|
No
|
No
|
No
|
No
|
Air normal slashes from down up.
|
|
j.D
j.D
|
| Damage
|
Guard
|
Startup
|
Active
|
Recovery
|
Total
|
Hit Adv
|
Block Adv
|
Guard Dmg
|
Cancel
|
Recoil
|
Deflectable
|
Unarmed
|
| 30
|
High
|
8
|
-
|
-
|
-
|
-
|
-
|
5
|
No
|
No
|
No
|
Yes
|
Fast Air to air. Can crossup.
|
|
Unarmed Normals
u.5S
u.5S
|
| Damage
|
Guard
|
Startup
|
Active
|
Recovery
|
Total
|
Hit Adv
|
Block Adv
|
Guard Dmg
|
Cancel
|
Recoil
|
Deflectable
|
Unarmed
|
| 50
|
Mid
|
5
|
-
|
-
|
24
|
+1
|
-4
|
5
|
No
|
No
|
No
|
Only
|
|
|
|
u.2S
u.2S
|
| Damage
|
Guard
|
Startup
|
Active
|
Recovery
|
Total
|
Hit Adv
|
Block Adv
|
Guard Dmg
|
Cancel
|
Recoil
|
Deflectable
|
Unarmed
|
| 50
|
Mid
|
5
|
-
|
-
|
27
|
-2
|
-7
|
5
|
No
|
No
|
No
|
Only
|
|
|
|
ju.S
ju.S
|
| Damage
|
Guard
|
Startup
|
Active
|
Recovery
|
Total
|
Hit Adv
|
Block Adv
|
Guard Dmg
|
Cancel
|
Recoil
|
Deflectable
|
Unarmed
|
| 50
|
High
|
6
|
-
|
-
|
-
|
-
|
-
|
5
|
No
|
No
|
No
|
Only
|
|
|
|
u.66S
u.66S
|
| Damage
|
Guard
|
Startup
|
Active
|
Recovery
|
Total
|
Hit Adv
|
Block Adv
|
Guard Dmg
|
Cancel
|
Recoil
|
Deflectable
|
Unarmed
|
| 50
|
Mid
|
5
|
-
|
-
|
30
|
KD(+102)
|
-10
|
5
|
No
|
No
|
No
|
Only
|
Harsh Scratch that knocks down the opponent.
|
|
Universal Mechanics
Guard Break
Guard Break (Throw)
5/6C+D / 4C+D Neutral / Forward Throw Neutral / Forward Throw Back Throw Back Throw
|
| Version
|
Damage
|
Guard
|
Startup
|
Active
|
Recovery
|
Total
|
Hit Adv
|
Block Adv
|
Guard Dmg
|
Cancel
|
Recoil
|
Deflectable
|
Unarmed
|
| Neutral / Forward
|
0
|
Throw
|
3
|
-
|
71
|
74
|
+20
|
N/A
|
-
|
No
|
No
|
No
|
Yes
|
Universal throw. Can be followed up with an attack.
|
| Back
|
0
|
Throw
|
5
|
-
|
69
|
74
|
+25
|
N/A
|
-
|
No
|
No
|
No
|
Yes
|
Universal throw. Can be followed up with an attack.
|
|
Surprise Attack
Surprise Attack (Overhead)
5B+C Armed overhead Armed overhead Unarmed overhead Unarmed overhead
|
| Version
|
Damage
|
Guard
|
Startup
|
Active
|
Recovery
|
Total
|
Hit Adv
|
Block Adv
|
Guard Dmg
|
Cancel
|
Recoil
|
Deflectable
|
Unarmed
|
| Armed
|
70
|
High
|
20
|
-
|
-
|
-
|
+2
|
-11
|
10
|
No
|
No
|
No
|
No
|
|
|
| Unarmed
|
70
|
High
|
20
|
-
|
-
|
43
|
KD(+100)
|
-11
|
10
|
No
|
No
|
No
|
Only
|
Universal unarmed overhead.
|
|
Dodge
Dodge
5A+B
|
| Damage
|
Guard
|
Startup
|
Active
|
Recovery
|
Total
|
Hit Adv
|
Block Adv
|
Guard Dmg
|
Cancel
|
Recoil
|
Deflectable
|
Unarmed
|
| 0
|
N/A
|
1
|
16
|
22
|
38
|
N/A
|
N/A
|
-
|
N/A
|
-
|
N/A
|
Yes
|
Universal dodge. Avoids all attacks for a brief moment, and is mainly used to avoid throws.
Complete invincibility from frames 1 to 10. Strike invincibility from frames 11 to 16.
|
|
Stance Break
Stance Break
A+B during Just Defense
|
| Damage
|
Guard
|
Startup
|
Active
|
Recovery
|
Total
|
Hit Adv
|
Block Adv
|
Guard Dmg
|
Cancel
|
Recoil
|
Deflectable
|
Unarmed
|
| 0
|
Mid
|
5
|
-
|
-
|
52
|
KD
|
-24
|
-
|
-
|
-
|
-
|
Yes
|
|
|
|
Counter / Blade Catch
Counter / Blade Catch
236A+B Counter Counter Blade Catch Blade Catch
|
| Version
|
Damage
|
Guard
|
Startup
|
Active
|
Recovery
|
Total
|
Hit Adv
|
Block Adv
|
Guard Dmg
|
Cancel
|
Recoil
|
Deflectable
|
Unarmed
|
| Armed
|
0
|
N/A
|
2
|
11
|
34
|
46
|
+35~+59
|
N/A
|
-
|
N/A
|
-
|
N/A
|
No
|
Universal counter. Allows you to follow up with a guaranteed attack of your own. The amount of time you have to follow up depends on the strength of the attack you counter, with heavy attacks staggering the opponent for the longest amount of time. Additionally, if you counter a heavy slash or a running slash, your opponent will be disarmed.
|
| Disarmed
|
0
|
N/A
|
2
|
12
|
9
|
22
|
KD
|
N/A
|
-
|
N/A
|
-
|
N/A
|
Only
|
Universal counter. While disarmed, your counter will disarm and knock away your opponent regardless of slash level countered.
|
|
Rage Explosion
Rage Explosion
5A+B+C
|
| Damage
|
Guard
|
Startup
|
Active
|
Recovery
|
Total
|
Hit Adv
|
Block Adv
|
Guard Dmg
|
Cancel
|
Recoil
|
Deflectable
|
Unarmed
|
| 0
|
Unblockable
|
21
|
1
|
-
|
58
|
0
|
-
|
-
|
-
|
-
|
-
|
No
|
Unblockable pushback attack.
|
|
Lightning Blade
Lightning Blade (Issen)
5A+B+C during Rage Explosion
|
| Damage
|
Guard
|
Startup
|
Active
|
Recovery
|
Total
|
Hit Adv
|
Block Adv
|
Guard Dmg
|
Cancel
|
Recoil
|
Deflectable
|
Unarmed
|
| 300~709
|
Mid
|
9
|
-
|
-
|
-
|
KD
|
-44
|
-
|
No
|
No
|
No
|
No
|
Has full invincibility and can anti-air. Damage scales up based on remaining health.
|
|
Command Moves
Wall Jump
Wall Jump
9 (near wall) Wall Jump Wall Jump
|
| Damage
|
Guard
|
Startup
|
Active
|
Recovery
|
Total
|
Hit Adv
|
Block Adv
|
Guard Dmg
|
Cancel
|
Recoil
|
Deflectable
|
Unarmed
|
| -
|
-
|
-
|
-
|
-
|
-
|
-
|
-
|
-
|
-
|
-
|
-
|
Yes
|
|
Special Moves
Sideway Thrown Out!
Sideway Thrown Out!
236S
|
| Version
|
Damage
|
Guard
|
Startup
|
Active
|
Recovery
|
Total
|
Hit Adv
|
Block Adv
|
Guard Dmg
|
Cancel
|
Recoil
|
Deflectable
|
Unarmed
|
| A
|
60
|
Mid
|
21
|
29
|
-
|
56
|
-15~+13
|
-22
|
5
|
No
|
No
|
No
|
No
|
| B
|
80
|
Mid
|
24
|
30
|
-
|
66
|
-22~+7
|
-29
|
5
|
No
|
No
|
No
|
No
|
| C
|
150
|
Mid
|
27
|
-
|
-
|
102
|
KD(+49)
|
-52
|
9
|
No
|
No
|
No
|
No
|
| Rage
|
180
|
Mid
|
27
|
29
|
-
|
102
|
KD(+92)
|
-53
|
15
|
No
|
No
|
No
|
No
|
Rage enhanced version of 236C deals more damage, gives better knockdown and can't be reflected.
|
|
Upper Thrown Out!
Upper Thrown Out!
214S
|
| Version
|
Damage
|
Guard
|
Startup
|
Active
|
Recovery
|
Total
|
Hit Adv
|
Block Adv
|
Guard Dmg
|
Cancel
|
Recoil
|
Deflectable
|
Unarmed
|
| A
|
60
|
Mid
|
21
|
-
|
-
|
58
|
KD(+86)
|
-24
|
5
|
No
|
No
|
No
|
No
|
| B
|
80
|
Mid
|
24
|
-
|
-
|
66
|
KD(+81)
|
-29
|
5
|
No
|
No
|
No
|
No
|
| C
|
150
|
Mid
|
14
|
-
|
-
|
89
|
KD(+49)
|
-52
|
9
|
No
|
No
|
No
|
No
|
| Rage
|
180
|
Mid
|
14
|
-
|
-
|
89
|
KD(+92)
|
-53
|
15
|
No
|
No
|
No
|
No
|
Rage enhanced version of 214C, deals more damage, gives better knockdown and can't be reflected.
|
|
Caught!
Caught!
623S
|
| Version
|
Damage
|
Guard
|
Startup
|
Active
|
Recovery
|
Total
|
Hit Adv
|
Block Adv
|
Guard Dmg
|
Cancel
|
Recoil
|
Deflectable
|
Unarmed
|
| A
|
-
|
-
|
23
|
-
|
10(Landing)
|
52
|
-
|
-
|
-
|
-
|
-
|
-
|
Yes
|
| B
|
-
|
-
|
24
|
-
|
10(Landing)
|
63
|
-
|
-
|
-
|
-
|
-
|
-
|
Yes
|
| C
|
-
|
-
|
28
|
-
|
10(Landing)
|
67
|
-
|
-
|
-
|
-
|
-
|
-
|
Yes
|
|
Scratches Face!
Scratches Face!
During 623S, A/C
|
| Damage
|
Guard
|
Startup
|
Active
|
Recovery
|
Total
|
Hit Adv
|
Block Adv
|
Guard Dmg
|
Cancel
|
Recoil
|
Deflectable
|
Unarmed
|
| 180
|
Throw
|
6
|
2
|
57(Landing)
|
-
|
KD(+36)
|
-
|
-
|
-
|
-
|
-
|
Yes
|
|
Scratches Back!
Scratches Back!
During Caught!, D
|
| Damage
|
Guard
|
Startup
|
Active
|
Recovery
|
Total
|
Hit Adv
|
Block Adv
|
Guard Dmg
|
Cancel
|
Recoil
|
Deflectable
|
Unarmed
|
| 140
|
Low
|
9
|
-
|
45(Landing)
|
-
|
KD(+77)
|
-12~-4
|
5
|
No
|
No
|
No
|
Yes
|
|
Surprise Bop!
Surprise Bop!
During Caught!, B Armed Armed Unarmed Unarmed
|
| Version
|
Damage
|
Guard
|
Startup
|
Active
|
Recovery
|
Total
|
Hit Adv
|
Block Adv
|
Guard Dmg
|
Cancel
|
Recoil
|
Deflectable
|
Unarmed
|
| Armed
|
100
|
High
|
11
|
-
|
19(Landing)
|
-
|
KD
|
-9~-2
|
10
|
No
|
No
|
No
|
No
|
| Unarmed
|
50
|
High
|
-
|
-
|
-
|
-
|
-
|
-
|
-
|
No
|
No
|
No
|
Only
|
|
Paw-erful Pounce!
Paw-erful Pounce!
236D
|
| Damage
|
Guard
|
Startup
|
Active
|
Recovery
|
Total
|
Hit Adv
|
Block Adv
|
Guard Dmg
|
Cancel
|
Recoil
|
Deflectable
|
Unarmed
|
| 120
|
Mid
|
17
|
16
|
-
|
49~64
|
KD(+98)
|
-15
|
13
|
No
|
No
|
No
|
Yes
|
|
Supers
Weapon Flipping Technique
No More Forgiveness
236B+C
|
| Damage
|
Guard
|
Startup
|
Active
|
Recovery
|
Total
|
Hit Adv
|
Block Adv
|
Guard Dmg
|
Cancel
|
Recoil
|
Deflectable
|
Unarmed
|
| 420(490)
|
Mid
|
1+15
|
16
|
-
|
102
|
KD
|
-38
|
-
|
No
|
No
|
No
|
No
|
Available only during Max Rage or Rage Explosion. Disarms on hit. The mighty big boomerang of (Green) Hell. Makes for a superb anti air.
|
|
Super Special Move
It's the End, My Fur-end!
641236C+D
|
| Damage
|
Guard
|
Startup
|
Active
|
Recovery
|
Total
|
Hit Adv
|
Block Adv
|
Guard Dmg
|
Cancel
|
Recoil
|
Deflectable
|
Unarmed
|
| 650[100,100,450]
|
Mid
|
10+18
|
26
|
-
|
93~118
|
KD
|
-30
|
-
|
No
|
No
|
No
|
No
|
Available only once per match. Fully invincible frames 1~10. Travels fullscreen (distance is fixed so it won't stop when reaching a wall) at a quick pace.
|
|
Combos
List combos, use numpad notation.
Midscreen
- 66A xx 236D / 214C / WFT
Long range punish combo, need to run in quite close for 66A to hit.
- 2B xx 236D / WFT
Mid range punish combo.
- (n.5B / n.2B) xx 236D / 214C / WFT
Close range punish combo, same damage for both medium.
- (5CD/4CD)...
- 2B xx 236D / WFT
Normal throw combo.
Corner
- (5CD/4CD)...
- n.2C xx 236D / 214C / WFT
Corner throw combo for most damage.
Guard Crush
- n.5C / 5C...
After recovery...
- SSM
SSM follow up. (Be careful with opponent bursting to avoid it)
- 2B xx 236D / WFT
Need to run up at far range.
- n.5C / 5C...
Cancel recovery...
- Lighting Blade
Universal Issen combo.
Videos
CHAM CHAM Tutorial and Combos by LegendaryWolf Shirou (2021)
Colors
External Links
Link to docs hosted in other sites.


