|
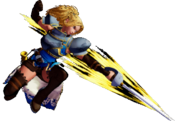
|
| Line 820: |
Line 820: |
| |data= | | |data= |
| {{AttackData-SS2019 | | {{AttackData-SS2019 |
| |version= | | |version=0 |
| |damage= | | |damage=N/A |
| |guard= | | |guard=N/A |
| |startup=1 | | |startup=1 |
| |active=16 | | |active=16 |
| |recovery=38 | | |recovery=22 |
| |hitAdv= | | |hitAdv=N/A |
| |backhitAdv=
| | |blockAdv=N/A |
| |blockAdv= | | |cancel=N/A |
| |cancel= | | |clash=N/A |
| |clash= | | |deflect=N/A |
| |deflect= | | |unarmed=Yes |
| |unarmed= | | |description=Universal dodge. Avoids all attacks for a brief moment, and is mainly used to avoid throws.<br><br>''Complete invincibility from frames 1 to 10. Strike invincibility from frames 11 to 16.'' |
| |description=Universal dodge, the first 10F has full invulnerability and the rest are strike invulnerability. | |
| }} | | }} |
| }} | | }} |
Revision as of 12:43, 14 May 2020

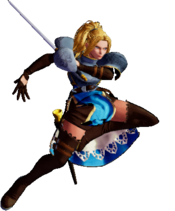
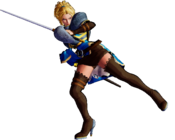
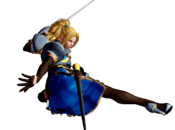
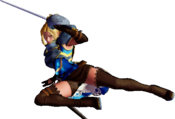
Charlotte
シャルロット, Sharurotto Introduction
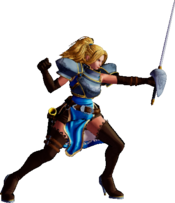
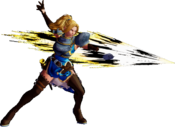
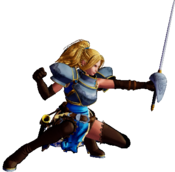
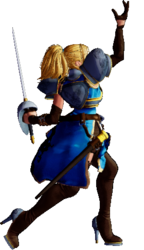
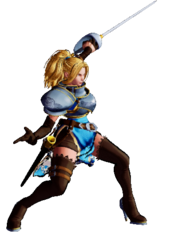
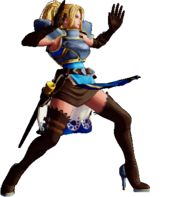
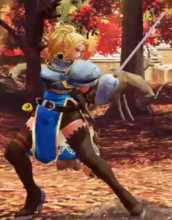
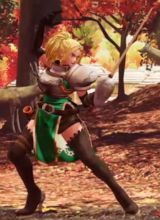
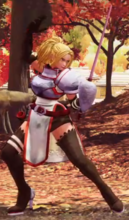
Charlotte plays a very effective low-risk poking game from half-screen, relying mainly on her 5B and 2B as well as her Bayonet Thrust and Tri-Slash special moves to chip away at, and frustrate the opponent. Once they try to jump, her invincible Power Gradation DP is sure to take them out of the skies with style. Tri-Slash can also be delayed to cause people who try to jump it on reaction to land in the projectile’s hitbox instead.
She’s extremely good at sitting on a life-lead and acting as a defensive wall, as trades generally go in her favour, damage-wise. And while she doesn’t have any scary mixups to speak of, she can take a lot of damage off the opponent just by playing the neutral game solidly. Charlotte’s mobility is not the best so she has to rely on her buttons to keep the opponent off of her. This means that she is more prone to getting her weapon deflected than other characters, and with so much of her game centering around having great pokes, being disarmed is quite a price to pay.
| Strengths |
Weaknesses
|
- Amazing pokes
- Rock-solid defense
- Great keepout
|
- Struggles at close-range
- Below-average mobility
- Gets deflected easily if you’re too predictable
|
Data
- Damage Taken: 100%
- Rage Factor: 0.30
- Rage Duration: 12 seconds
- Jump: 42 frames (Very Fast)
- Forward Walk Speed: 0.3 (Average)
- Back Walk Speed: 0.23 (Average)
- Dash Speed: 1.05 (Slower)
- Back Dash: 28 frames
- Weapon Pickup / Drop: 50 / 32 frames
Gameplan
Charlotte wants to use her great normals to force opponents to take risks and punish them for it. She doesn't have any gimmicks, so basically play solid and let her kit do the work.
Neutral
Depending on the opponent, you'll want to use well-placed pokes such as 5b and 2b to annoy the opponent and force them into a bad situation. If opponents don't have amazing projectiles, you can throw trislash to make your opponent want to jump which you can antiair with several moves listed below. You can use 5d to advance without committing to a dash and it's able to hop over some grounded projectiles as well. Use 623A, j.d or j.b to antiair opponents close to you and 5c for further away.
Okizeme
Upon knockdown in the corner, you can position yourself to catch rolls with j.C or stand in a range that covers both getup options with 5b. she also gets to mixup with overheads, empty hops, and grabs. No gimmicks, just good old fashioned mixups.
Corner Safejump Setups vs: Stationary Getup
Note: Safejump setups involving deflect as a framekill setup no longer work after Patch 1.11 due to increased recovery on deflect.
L.DP>back hop>whiff lp>uf J.C (can follow up on landed j.c with L.DP>back hop>repeat safejump)
L.Bayonet Lunge>whiff H.Bayonet Lunge> uf J.C
66C>back hop>whiff L>uf J.C
H.DP>whiff M.Bayonet Lunge>uf J.C (only can stuff dps)
236K to corner>whiff c.M>uf. JC
L.DP from any distance>whiff L.Bayonet Lunge>uf J.C
Corner Safejump Setups vs: Backroll Getup
M.DP>whiff reflect>uf.JC
H.DP>whiff M.Bayonet Lunge>uf.JC (gets you behind dp)
Grab>/dash H>back hop>whiff L>uf J.C
Corner Safejump Setup vs: Forwardroll Getup
M.DP>whiff reflect>uf.JC (can follow up with nj.C, jb.C safejumps endlessly vs fwd rolls and is a left/right)
Midscreen Safejump Setup and Backroll Chase
Grab>66C>run to body and 66K>uf J.C
Normal Moves
Far Slashes
5A
5A
|
| Damage
|
Guard
|
Startup
|
Active
|
Recovery
|
Total
|
Hit Adv
|
Block Adv
|
Guard Dmg
|
Cancel
|
Recoil
|
Deflectable
|
Unarmed
|
| 40
|
Mid
|
10
|
-
|
24
|
-
|
-2
|
-5
|
-
|
No
|
-
|
Yes
|
No
|
A quick, low risk low reward poke to test waters and stop people from approaching. Recovers fast enough to antiair jumpers. Beware of deflect though.
|
|
5B
5B
|
| Damage
|
Guard
|
Startup
|
Active
|
Recovery
|
Total
|
Hit Adv
|
Block Adv
|
Guard Dmg
|
Cancel
|
Recoil
|
Deflectable
|
Unarmed
|
| 100
|
Mid
|
13
|
-
|
36
|
-
|
-3
|
-12
|
-
|
No
|
-
|
Yes
|
No
|
Similar to 5A, but with slightly more range, damage and recovery.
Block adv. It's -7F on block while the opponent is disarmed.
|
|
5C
5C
|
| Damage
|
Guard
|
Startup
|
Active
|
Recovery
|
Total
|
Hit Adv
|
Block Adv
|
Guard Dmg
|
Cancel
|
Recoil
|
Deflectable
|
Unarmed
|
| 120,80
|
Mid
|
14,18
|
-
|
58
|
-
|
-9
|
-28
|
-
|
No
|
-
|
Disarm
|
No
|
Does less damage than 2C and has less range, however in some matchups it's a useful situational preemptive antiair. It's -13F on block while the opponent is disarmed.
|
|
2A
2A
|
| Damage
|
Guard
|
Startup
|
Active
|
Recovery
|
Total
|
Hit Adv
|
Block Adv
|
Guard Dmg
|
Cancel
|
Recoil
|
Deflectable
|
Unarmed
|
| 40
|
Mid
|
9
|
-
|
26
|
-
|
+3
|
-5
|
-
|
No
|
-
|
Yes
|
No
|
Pretty much the same button as 5A, except slightly lower to the ground. Does not hit low.
It's -9F on block while the opponent is disarmed. More disadvantageous due to not recoiling against disarmed opponents.
|
|
2B
2B
|
| Damage
|
Guard
|
Startup
|
Active
|
Recovery
|
Total
|
Hit Adv
|
Block Adv
|
Guard Dmg
|
Cancel
|
Recoil
|
Deflectable
|
Unarmed
|
| 90
|
Mid
|
12
|
-
|
32
|
-
|
0
|
-12
|
-
|
No
|
-
|
Yes
|
No
|
This is overall Charlotte's best button. It's faster, has more range AND is better on hit than 5B. The money spacing with Charlotte is when you're at tip range of 2B, so that 5B will whiff (and hit people trying to approach). Use this a lot. It's +-0F on block while the opponent is disarmed.
|
|
2C
2C
|
| Damage
|
Guard
|
Startup
|
Active
|
Recovery
|
Total
|
Hit Adv
|
Block Adv
|
Guard Dmg
|
Cancel
|
Recoil
|
Deflectable
|
Unarmed
|
| 100,90
|
Mid
|
17
|
-
|
58
|
-
|
-5
|
-28
|
-
|
No
|
-
|
Disarm
|
No
|
Has more range than 5C, making this the heavy slash of choice. Despite the animation, this doesn't antiair at all.
It's -9F on block while the opponent is disarmed.
|
|
Near Slashes
n.5A
n.5A
|
| Damage
|
Guard
|
Startup
|
Active
|
Recovery
|
Total
|
Hit Adv
|
Block Adv
|
Guard Dmg
|
Cancel
|
Recoil
|
Deflectable
|
Unarmed
|
| 30
|
Mid
|
6
|
-
|
17
|
-
|
1
|
-2
|
-
|
Yes
|
-
|
Yes
|
No
|
A quick jab, nothing special. Can be used for tick grabs.
|
|
n.5B
n.5B
|
| Damage
|
Guard
|
Startup
|
Active
|
Recovery
|
Total
|
Hit Adv
|
Block Adv
|
Guard Dmg
|
Cancel
|
Recoil
|
Deflectable
|
Unarmed
|
| 80
|
Mid
|
12
|
-
|
33
|
-
|
-1
|
-12
|
-
|
Yes
|
-
|
Yes
|
No
|
Your button of choice to combo into or punish the opponent with, if possible. Does more damage than n.2B and comboes into heavy DP. It's -5F on block while the opponent is disarmed.
|
|
n.5C
n.5C
|
| Damage
|
Guard
|
Startup
|
Active
|
Recovery
|
Total
|
Hit Adv
|
Block Adv
|
Guard Dmg
|
Cancel
|
Recoil
|
Deflectable
|
Unarmed
|
| 140,60
|
Mid
|
20
|
-
|
56
|
-
|
-4
|
-28
|
-
|
No
|
-
|
Disarm
|
No
|
Worthless as a punish, since n.5B starts faster and leads to more damage. Pretty much no reason to use this ever. It's -8F on block while the opponent is disarmed.
|
|
n.2A
n.2A
|
| Damage
|
Guard
|
Startup
|
Active
|
Recovery
|
Total
|
Hit Adv
|
Block Adv
|
Guard Dmg
|
Cancel
|
Recoil
|
Deflectable
|
Unarmed
|
| 30
|
Mid
|
7
|
-
|
17
|
-
|
2
|
-1
|
-
|
Yes
|
-
|
Yes
|
No
|
Similar to n.5A, slightly slower but also better on block.
|
|
n.2B
n.2B
|
| Damage
|
Guard
|
Startup
|
Active
|
Recovery
|
Total
|
Hit Adv
|
Block Adv
|
Guard Dmg
|
Cancel
|
Recoil
|
Deflectable
|
Unarmed
|
| 80
|
Mid
|
10
|
-
|
30
|
-
|
0
|
-12
|
-
|
Yes
|
-
|
Yes
|
No
|
This move leads to less damage than n.5B but it's also faster, making it crucial in certain punish situations. It's -4F on block while the opponent is disarmed.
|
|
Kicks
5D
5D
|
| Damage
|
Guard
|
Startup
|
Active
|
Recovery
|
Total
|
Hit Adv
|
Block Adv
|
Guard Dmg
|
Cancel
|
Recoil
|
Deflectable
|
Unarmed
|
| 40
|
Mid
|
7
|
9
|
24
|
-
|
-8~+-0
|
-5~+3
|
-
|
No
|
-
|
No
|
Yes
|
A very useful hopkick style move. Can be used as a pressure tool (spaced it's up to +3 on block) or to move forward without committing to a dash. Hops over certain lows and grounded Reppuken-style projectiles. However it's punishable up close, so mind your spacing.
|
|
6D
6D
|
| Damage
|
Guard
|
Startup
|
Active
|
Recovery
|
Total
|
Hit Adv
|
Block Adv
|
Guard Dmg
|
Cancel
|
Recoil
|
Deflectable
|
Unarmed
|
| 60
|
Low
|
11
|
8
|
35
|
-
|
KD(+101)
|
-15~-8
|
-
|
Yes
|
-
|
No
|
Yes
|
A knockdown low which is horribly slow and punishable on block. Most useful for its special-cancelability, which can be used to whiff cancel into Splash Fount to chip people out.
|
|
2D
2D
|
| Damage
|
Guard
|
Startup
|
Active
|
Recovery
|
Total
|
Hit Adv
|
Block Adv
|
Guard Dmg
|
Cancel
|
Recoil
|
Deflectable
|
Unarmed
|
| 20
|
Low
|
5
|
-
|
20
|
-
|
-3
|
-6
|
-
|
No
|
-
|
No
|
Yes
|
A quick harrassment low with very good range for a kick button. Good to stop people from doing dash in throw without being vulnerable to a deflect.
|
|
3D
3D
|
| Damage
|
Guard
|
Startup
|
Active
|
Recovery
|
Total
|
Hit Adv
|
Block Adv
|
Guard Dmg
|
Cancel
|
Recoil
|
Deflectable
|
Unarmed
|
| 60
|
Low
|
7
|
10
|
38
|
-
|
-8~+1
|
-15~-6
|
-
|
No
|
-
|
No
|
Yes
|
Charlotte's best low attack overall, comes out quick and covers a decent amount of space. Can be spaced to be -6 on block.
|
|
Dash Normals
66A
66A
|
| Damage
|
Guard
|
Startup
|
Active
|
Recovery
|
Total
|
Hit Adv
|
Block Adv
|
Guard Dmg
|
Cancel
|
Recoil
|
Deflectable
|
Unarmed
|
| 40
|
Mid
|
5
|
-
|
22
|
-
|
-5
|
-8
|
-
|
No
|
-
|
No
|
No
|
Very short horizontal range makes this useless as a ground poke, but it hits very high up, making this a useful situational antiair, especially against people trying to cross you up.
|
|
66B
66B
|
| Damage
|
Guard
|
Startup
|
Active
|
Recovery
|
Total
|
Hit Adv
|
Block Adv
|
Guard Dmg
|
Cancel
|
Recoil
|
Deflectable
|
Unarmed
|
| 90
|
Mid
|
9
|
-
|
33
|
-
|
-4
|
-35
|
-
|
No
|
-
|
Disarm
|
No
|
Pretty much like a quicker but horribly unsafe 5B. Use sparingly. It's -8F on block while the opponent is disarmed.
|
|
66C
66C
|
| Damage
|
Guard
|
Startup
|
Active
|
Recovery
|
Total
|
Hit Adv
|
Block Adv
|
Guard Dmg
|
Cancel
|
Recoil
|
Deflectable
|
Unarmed
|
| 90,50
|
Mid
|
15
|
-
|
53
|
-
|
KD
|
-10
|
-
|
No
|
-
|
Disarm
|
No
|
Comes out decently quick and doesn't recoil on block, can be surprisingly hard to punish due to only being -10 on block.
|
|
66D
66D
|
| Damage
|
Guard
|
Startup
|
Active
|
Recovery
|
Total
|
Hit Adv
|
Block Adv
|
Guard Dmg
|
Cancel
|
Recoil
|
Deflectable
|
Unarmed
|
| 60
|
Low
|
8
|
8
|
38
|
-
|
KD
|
-14~-7
|
-
|
No
|
-
|
No
|
Yes
|
Similar to 3D, except out of a run. Can be spaced to be -7 on block.
|
|
Air Normals
j.A
j.A
|
| Damage
|
Guard
|
Startup
|
Active
|
Recovery
|
Total
|
Hit Adv
|
Block Adv
|
Guard Dmg
|
Cancel
|
Recoil
|
Deflectable
|
Unarmed
|
| 30
|
High
|
8
|
-
|
-
|
-
|
-
|
-
|
-
|
No
|
-
|
NO
|
No
|
Quick aerial stab, limited usefulness due to low damage while still not being her fastest aerial.
|
|
j.B
j.B
|
| Damage
|
Guard
|
Startup
|
Active
|
Recovery
|
Total
|
Hit Adv
|
Block Adv
|
Guard Dmg
|
Cancel
|
Recoil
|
Deflectable
|
Unarmed
|
| 90
|
High
|
10
|
-
|
-
|
-
|
-
|
-
|
-
|
No
|
-
|
No
|
No
|
A great button to space with, hard to beat out and reaches reasonably far.
|
|
j.C
j.C
|
| Damage
|
Guard
|
Startup
|
Active
|
Recovery
|
Total
|
Hit Adv
|
Block Adv
|
Guard Dmg
|
Cancel
|
Recoil
|
Deflectable
|
Unarmed
|
| 140
|
High
|
13
|
-
|
-
|
-
|
-
|
-
|
-
|
No
|
-
|
No
|
No
|
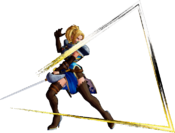
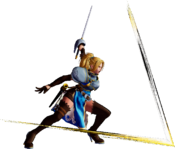
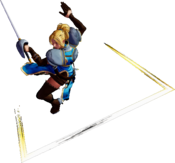
The infamous triangle and the reason everyone hates this character. Has a great hitbox both in front of and behind Charlotte for ambiguous left/right mixups, combined with her amazing jump arc this makes it one of her most threatening attacks. You absolutely have to learn how to deep-hit this attack to combo out of it. It's 15F start up for cross-up.
|
|
j.D
j.D
|
| Damage
|
Guard
|
Startup
|
Active
|
Recovery
|
Total
|
Hit Adv
|
Block Adv
|
Guard Dmg
|
Cancel
|
Recoil
|
Deflectable
|
Unarmed
|
| 30
|
High
|
8
|
-
|
-
|
-
|
-
|
-
|
-
|
No
|
-
|
No
|
Yes
|
Low damage, but good horizontal range and her fastest aerial attack. For when you absolutely need the speed to beat someone air-to-air.
|
|
Unarmed Normals
u.5S
u.5S
|
| Damage
|
Guard
|
Startup
|
Active
|
Recovery
|
Total
|
Hit Adv
|
Block Adv
|
Guard Dmg
|
Cancel
|
Recoil
|
Deflectable
|
Unarmed
|
| 50
|
Mid
|
6
|
-
|
23
|
-
|
3
|
-3
|
-
|
No
|
-
|
No
|
Only
|
Punches you. En français!
|
|
u.2S
u.2S
|
| Damage
|
Guard
|
Startup
|
Active
|
Recovery
|
Total
|
Hit Adv
|
Block Adv
|
Guard Dmg
|
Cancel
|
Recoil
|
Deflectable
|
Unarmed
|
| 50
|
Mid
|
6
|
-
|
28
|
-
|
-2
|
-7
|
-
|
No
|
-
|
No
|
Only
|
|
|
|
ju.S
ju.S
|
| Damage
|
Guard
|
Startup
|
Active
|
Recovery
|
Total
|
Hit Adv
|
Block Adv
|
Guard Dmg
|
Cancel
|
Recoil
|
Deflectable
|
Unarmed
|
| 50
|
High
|
6
|
-
|
-
|
-
|
-
|
-
|
-
|
No
|
-
|
No
|
Only
|
Jumping punch with long hit stun, combo into 6D to knock down the opponent.
|
|
u.66S
u.66S
|
| Damage
|
Guard
|
Startup
|
Active
|
Recovery
|
Total
|
Hit Adv
|
Block Adv
|
Guard Dmg
|
Cancel
|
Recoil
|
Deflectable
|
Unarmed
|
| 50
|
Mid
|
5
|
-
|
30
|
-
|
KD
|
-10
|
-
|
No
|
-
|
No
|
Only
|
Similar to armed 66A, except it now knocks down on ground hit and is slightly more unsafe on block.
|
|
u.66D
u.66D
|
| Damage
|
Guard
|
Startup
|
Active
|
Recovery
|
Total
|
Hit Adv
|
Block Adv
|
Guard Dmg
|
Cancel
|
Recoil
|
Deflectable
|
Unarmed
|
| 70(30,40)
|
High
|
16
|
-
|
?
|
-
|
KD
|
-14
|
-
|
No
|
-
|
No
|
Only
|
While disarmed, Charlotte's 66D turns from a slide into a 2-hit somersault attack. In version 1.70 it becomes an overhead that knocks down the opponent, making it a great tool for high-low mixup.
|
|
Universal Mechanics
Guard Break
Guard Break (Throw)
4/6C+D Forward Throw Forward Throw Back Throw Back Throw
|
| Version
|
Damage
|
Guard
|
Startup
|
Active
|
Recovery
|
Total
|
Hit Adv
|
Block Adv
|
Guard Dmg
|
Cancel
|
Recoil
|
Deflectable
|
Unarmed
|
| Forward
|
0
|
No
|
3
|
-
|
74
|
-
|
20
|
-
|
-
|
-
|
-
|
-
|
-
|
Universal throw. Can be followed up with an attack.
|
| Back
|
0
|
No
|
5
|
-
|
74
|
-
|
25
|
-
|
-
|
-
|
-
|
-
|
-
|
Universal throw. Can be followed up with an attack.
|
|
Surprise Attack
Surprise Attack (Overhead)
5B+C
|
| Damage
|
Guard
|
Startup
|
Active
|
Recovery
|
Total
|
Hit Adv
|
Block Adv
|
Guard Dmg
|
Cancel
|
Recoil
|
Deflectable
|
Unarmed
|
| 60
|
High
|
20
|
-
|
44
|
-
|
1
|
-12
|
-
|
No
|
-
|
No
|
No
|
Universal overhead. Doesn't knock down since 1.70 version.
|
|
Unarmed Surprise Attack (Overhead)
u.5B+C
|
| Damage
|
Guard
|
Startup
|
Active
|
Recovery
|
Total
|
Hit Adv
|
Block Adv
|
Guard Dmg
|
Cancel
|
Recoil
|
Deflectable
|
Unarmed
|
| 60
|
High
|
24
|
-
|
48
|
-
|
KD
|
-12
|
-
|
No
|
-
|
No
|
Only
|
Universal unarmed overhead. Hop kick that knocks down the opponent.
|
|
Dodge
Dodge
5A+B
|
| Version
|
Damage
|
Guard
|
Startup
|
Active
|
Recovery
|
Total
|
Hit Adv
|
Block Adv
|
Guard Dmg
|
Cancel
|
Recoil
|
Deflectable
|
Unarmed
|
| 0
|
N/A
|
N/A
|
1
|
16
|
22
|
-
|
N/A
|
N/A
|
-
|
N/A
|
-
|
N/A
|
Yes
|
Universal dodge. Avoids all attacks for a brief moment, and is mainly used to avoid throws.
Complete invincibility from frames 1 to 10. Strike invincibility from frames 11 to 16.
|
|
Counter / Blade Catch
Counter / Blade Catch
236A+B Counter Counter Blade Catch Blade Catch
|
| Version
|
Damage
|
Guard
|
Startup
|
Active
|
Recovery
|
Total
|
Hit Adv
|
Block Adv
|
Guard Dmg
|
Cancel
|
Recoil
|
Deflectable
|
Unarmed
|
| Armed
|
0
|
N/A
|
2
|
11
|
34
|
-
|
+35~+59
|
N/A
|
-
|
N/A
|
-
|
N/A
|
No
|
Universal counter. Allows you to follow up with a guaranteed attack of your own. The amount of time you have to followup depends on the strength of the attack you counter, with heavy attacks staggering the opponent for the longest amount of time. Additionally you counter a heavy slash or a running slash, your opponent will be disarmed.
|
| Disarmed
|
0
|
N/A
|
2
|
12
|
22
|
-
|
KD
|
N/A
|
-
|
N/A
|
-
|
N/A
|
Yes
|
Universal counter. While disarmed, your counter will disarm and knock away your opponent regardless of slash level countered.
|
|
Rage Explosion
Rage Explosion
5A+B+C
|
| Damage
|
Guard
|
Startup
|
Active
|
Recovery
|
Total
|
Hit Adv
|
Block Adv
|
Guard Dmg
|
Cancel
|
Recoil
|
Deflectable
|
Unarmed
|
| 0
|
No
|
21
|
1
|
58
|
-
|
0
|
-
|
-
|
-
|
-
|
No
|
No
|
Unblockable pushback attack.
|
|
Lightning Blade
Lightning Blade (Issen)
5A+B+C during Rage Explosion
|
| Damage
|
Guard
|
Startup
|
Active
|
Recovery
|
Total
|
Hit Adv
|
Block Adv
|
Guard Dmg
|
Cancel
|
Recoil
|
Deflectable
|
Unarmed
|
| 300~709
|
Mid
|
9
|
-
|
-
|
-
|
-
|
-44
|
-
|
-
|
-
|
No
|
No
|
Has full invulnerability all the way through. Can be used as an anti-air. Damage scales based on remaining Rage Explosion Gauge.
|
|
Special Moves
Power Gradation
Power Gradation
623S
|
| Version
|
Damage
|
Guard
|
Startup
|
Active
|
Recovery
|
Total
|
Hit Adv
|
Block Adv
|
Guard Dmg
|
Cancel
|
Recoil
|
Deflectable
|
Unarmed
|
| A
|
100
|
Mid
|
6
|
-
|
58
|
-
|
KD
|
-37
|
-
|
-
|
-
|
-
|
No
|
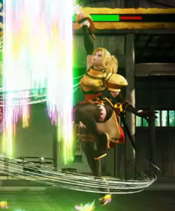
This is a decent anti air and punish tool due to its lightning quick 6f startup. Does not have any kind of invincibility as of patch 1.11.
|
| B
|
120
|
Mid
|
11
|
-
|
75
|
-
|
KD
|
-52
|
-
|
-
|
-
|
-
|
No
|
As of Patch 1.11, this is now her go to antiair as it has gotten invincibilty against jumping attacks.
|
| C
|
160
|
Mid
|
14
|
-
|
92
|
-
|
KD
|
-63
|
-
|
-
|
-
|
-
|
No
|
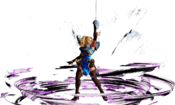
A Combo breaker/Callout button. Has startup invincibility from 1~19F.
|
|
Splash Fount
Splash Fount
6S (repeatedly)
|
| Version
|
Damage
|
Guard
|
Startup
|
Active
|
Recovery
|
Total
|
Hit Adv
|
Block Adv
|
Guard Dmg
|
Cancel
|
Recoil
|
Deflectable
|
Unarmed
|
| A
|
100(15x5,25)
|
Mid
|
26
|
-
|
72
|
-
|
KD
|
-14
|
-
|
-
|
-
|
-
|
No
|
Needs 4 slash inputs (A, B or C) to activate. The last button press determines the version. All versions are punishable on block. Outside of chipping people out, this special has incredibly limited usefulness.
|
| B
|
130(15x7,25)
|
Mid
|
30
|
-
|
86
|
-
|
KD
|
-21
|
-
|
-
|
-
|
-
|
No
|
| C
|
160(15x9,25)
|
Mid
|
34
|
-
|
97
|
-
|
KD
|
-26
|
-
|
-
|
-
|
-
|
No
|
|
Tri-Slash
Tri-Slash
236S
|
| Version
|
Damage
|
Guard
|
Startup
|
Active
|
Recovery
|
Total
|
Hit Adv
|
Block Adv
|
Guard Dmg
|
Cancel
|
Recoil
|
Deflectable
|
Unarmed
|
| A
|
50
|
Mid
|
40
|
-
|
67
|
-
|
KD
|
-8
|
-
|
-
|
-
|
-
|
No
|
Quickest startup and slowest travel, but also stops after approximately half a screen. Best used to fake people out who got used to the other two versions. If you hold it, you can antiair people with it who try to jump over it by releasing.
Can be held up to 67f.
|
| B
|
50
|
Mid
|
46
|
-
|
75
|
-
|
KD
|
-10
|
-
|
-
|
-
|
-
|
No
|
Travels almost fullscreen but not quite, medium travel speed.
Can be held up to 67f.
|
| C
|
50
|
Mid
|
45
|
-
|
77
|
-
|
KD
|
-13
|
-
|
-
|
-
|
-
|
No
|
This move travels fullscreen and travels the furthest. Most useful for when you directly want to hit the opponent instead of just pretending to.
Can be held up to 67f.
|
| Rage
|
60(20x3)
|
Mid
|
45
|
-
|
77
|
-
|
KD
|
-3
|
-
|
-
|
-
|
-
|
No
|
Heavy version during rage becomes a 3-hit projectile. Limited utility is added from rage, however during Rage Explosion, if the opponent gets hit from a distance, you can link an Issen after the third hit before the attack launches the opponent into the air.
Can be held up to 67f.
|
|
Bayonet Lunge
Bayonet Lunge
214S
|
| Version
|
Damage
|
Guard
|
Startup
|
Active
|
Recovery
|
Total
|
Hit Adv
|
Block Adv
|
Guard Dmg
|
Cancel
|
Recoil
|
Deflectable
|
Unarmed
|
| A
|
110
|
Mid
|
23
|
-
|
49
|
-
|
KD
|
-20
|
-
|
-
|
-
|
-
|
No
|
A very useful long range poke which cannot be deflected, good to throw out once in a while or to punish people for certain attacks. Due to the deceptively short blockstun (in relation to the animation), people unfamiliar with the character will never punish this.
|
| B
|
110
|
Mid
|
30
|
-
|
56
|
-
|
KD
|
-20
|
-
|
-
|
-
|
-
|
No
|
Slower and more range than 214A, same frames on block.
|
| C
|
110
|
Mid
|
35
|
-
|
66
|
-
|
KD
|
-25
|
-
|
-
|
-
|
-
|
No
|
Almost hits fullscreen but is horribly slow and more negative on block. Best used in guaranteed fullscreen punishment scenarios (e.g. Jubei whiffing WFT for whatever reason while you're chilling fullscreen).
|
|
Lance De Lion
Lance De Lion
236D
|
| Damage
|
Guard
|
Startup
|
Active
|
Recovery
|
Total
|
Hit Adv
|
Block Adv
|
Guard Dmg
|
Cancel
|
Recoil
|
Deflectable
|
Unarmed
|
| 120(50,70)
|
Low
|
18
|
6
|
53
|
-
|
KD
|
-20~-11
|
-
|
-
|
-
|
-
|
Yes
|
Side switching low, cannot be bursted on hit. Can be spaced to be -11 on block.
|
|
Supers
Weapon Flipping Technique
Splash Gradation
236B+C
|
| Damage
|
Guard
|
Startup
|
Active
|
Recovery
|
Total
|
Hit Adv
|
Block Adv
|
Guard Dmg
|
Cancel
|
Recoil
|
Deflectable
|
Unarmed
|
| 310(372,434)
|
Mid
|
1+7
|
-
|
106
|
-
|
KD
|
-48
|
-
|
-
|
-
|
-
|
No
|
One of the better WFTs in the game. Short range but comes out very quick and can be used as an antiair. Doesn't disarm on trade however. Available only during Max Rage or Rage Explosion. Disarms on hit.
|
|
Super Special Move
La Danse De La Rose
641236C+D
|
| Damage
|
Guard
|
Startup
|
Active
|
Recovery
|
Total
|
Hit Adv
|
Block Adv
|
Guard Dmg
|
Cancel
|
Recoil
|
Deflectable
|
Unarmed
|
| 650
|
Mid
|
10+19
|
-
|
135
|
-
|
KD
|
-45
|
-
|
-
|
-
|
-
|
No
|
A pretty standard SSM, nothing too special about this. Best used in guaranteed punishment situations or after deflecting the opponent. Available only once per match.
|
|
Combos
List combos, use numpad notation.
Midscreen
- Near 5A or Near 2A ...
- 623A/B
- WFT - Fast 6 frames punish combo starts with Near 5A
- Near 5B / Near 2B ...
- 623A/B/C / WFT - the most damaging basic / WFT punish combo.
- 236D - Switch side combo. Throws the opponent far away, useful to defend dropped weapon.
- Jump B / Jump C (Deep hit) ...
- Near 5B/2B xx 623C / WFT - the most damaging basic / WTF combo, but 5B only connects WFT from cross up deep hit or at point-blank range from forward jump.
- 236D - Deep hit combo with long reach, Jump B needs to be quite deep to connect 236D.
- Far 5B / Far 2B / All kicks - Less risky follow up.
- 5C/2C - Almost useless, both slashes don't knocks down the opponent, except 5c from cross up deep hit.
- Forward throw ...
- 5C/2C - 2C deals a little less damage but quicker.
- (dash) WFT - Some characters whiff or only land 6 hits instead of 7 without the dash.
- Back throw ...
- 5C/2C - 2C deals a little less damage but quicker.
- (dash) WFT - Must dash to connect WFT from back throw.
- Unarmed jump A/B/C
- 3D - hits low.
- 6D - hits low and knocks down.
- Jump D (Deep hit)
- 236D - Useful combo while unarmed.
- Tri-Slash (Rage) > Lightning Blade - Connects before the opponent knocked into the air (max of total 4 hits), works beyond the range of light Bayonet Lunge.
Corner
- Forward Throw / Back Throw ...
- Near 5B xx 623C / WFT - Best combo when throws the opponent into the corner.
Videos
Colors
External Links


