Samurai Shodown/Galford: Difference between revisions
| Line 702: | Line 702: | ||
{{MoveData | {{MoveData | ||
|image=SS_Galford_5CD.png | |image=SS_Galford_5CD.png | ||
|caption=Neutral Throw | |caption=Neutral / Forward Throw | ||
|image2 | |image2=SS_Galford_6CD.png | ||
|caption3=Back Throw | |caption3=Back Throw | ||
|name=Guard Break (Throw) | |name=Guard Break (Throw) | ||
| Line 711: | Line 709: | ||
|data= | |data= | ||
{{AttackData-SS2019 | {{AttackData-SS2019 | ||
|version=Neutral | |version=Neutral / Forward | ||
|damage= | |damage= | ||
|guard= | |guard= | ||
| Line 729: | Line 727: | ||
|header=no | |header=no | ||
|version=Back | |version=Back | ||
|damage= | |damage= | ||
|guard= | |guard= | ||
| Line 796: | Line 777: | ||
{{AttackData-SS2019 | {{AttackData-SS2019 | ||
|version= | |version= | ||
|damage= | |damage=0 | ||
|guard= | |guard=N/A | ||
|startup= | |startup=1 | ||
|active= | |active=16 | ||
|recovery= | |recovery=22 | ||
|hitAdv= | |hitAdv=N/A | ||
|blockAdv=N/A | |||
|blockAdv= | |cancel=N/A | ||
|cancel= | |clash=N/A | ||
|clash= | |deflect=N/A | ||
|deflect= | |unarmed=Yes | ||
|unarmed= | |description=Universal dodge. Avoids all attacks for a brief moment, and is mainly used to avoid throws.<br><br>''Complete invincibility from frames 1 to 10. Strike invincibility from frames 11 to 16.'' | ||
|description=Universal dodge. | |||
}} | }} | ||
}} | }} | ||
| Line 834: | Line 814: | ||
|deflect=N/A | |deflect=N/A | ||
|unarmed=No | |unarmed=No | ||
|description=Universal counter. Allows you to follow up with a guaranteed attack of your own. The amount of time you have to followup depends on the strength of the attack you counter, with heavy attacks staggering the opponent for the longest amount of time. Additionally you counter a heavy slash or a running slash, your opponent will be disarmed. | |description=Universal counter. Allows you to follow up with a guaranteed attack of your own. The amount of time you have to followup depends on the strength of the attack you counter, with heavy attacks staggering the opponent for the longest amount of time. Additionally, if you counter a heavy slash or a running slash, your opponent will be disarmed. | ||
}} | }} | ||
{{AttackData-SS2019 | {{AttackData-SS2019 | ||
Revision as of 12:48, 14 May 2020
Introduction
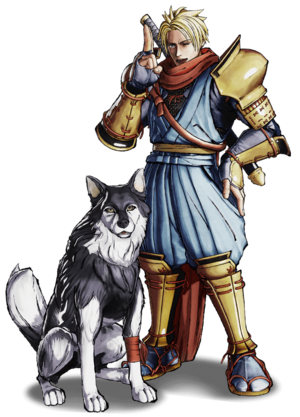
An american-born ninja and self-declared superhero of justice, Galford fights alongside his dog Poppy to create a signature blend of rushdown and keepout gameplay.
Being a real ninja and all, he has access to most of Hanzo’s toolkit including fast run speed, a wall-jump, teleports out of hitstun, a fireball and a command grab. Don’t get confused though, because Poppy’s the real star of the show. Galford can command the dog in one of four ways, with two of them hitting in a horizontal line and two hitting from above. You can use these specials to set up your mixups or keep the opponent from approaching, so both an offensive and a defensive playstyle are equally viable.
Galford’s damage is on the lower end of the cast and while his vortex is powerful, it is not quite as scary as Hanzo’s. Galford also prefers to have a bit of distance between him and his opponent when setting up, which makes him vulnerable to being pressured.
| Strengths | Weaknesses |
|---|---|
|
|
Data
- Damage Taken: 100%
- Rage Factor: 0.26
- Rage Duration: 10 seconds
- Jump: 49 frames (Slow)
- Forward Walk Speed: 0.3 (Average)
- Back Walk Speed: 0.23 (Average)
- Dash Speed: 1.3 (Fast)
- Back Dash: 40 frames (Cancelable from frame 12)
- Weapon Pickup / Drop: 40 / 55 frames
Gameplan
Neutral and Defense
Back Dash Canceling
Galford's back dash has two parts. First, he flips back and lands on his hands, then he finishes the flip and lands on his feet. When Galford lands, he can use any of his specials (Poppy specials require her to be behind and close to Galford.) This is a big part of how Galford is able to move around the screen and use his projectiles to give and then take away space in a mostly safe way!
Poppy! - Galford's Best Friend
Specials
Poppy is used as a projectile to lock down opponents. The grounded Poppy specials work in contrast to Plasma Blade,as these specials are slower to start up, but give Galford frame advantage. All Poppy specials are available Armed and Disarmed.
Both Rush Dog (214A) and Machine Gun Dog (214B) have Poppy run along the ground and strike the opponent. Both moves are + on block, Machine Gun Dog more so, and do different actions on hit. On hit, Rush Dog knocks the opponent down or will do a special hit grab animation when in Rage. Machine Gun Dog on hit will grab the opponent, allowing Galford to do just about any follow up that he wants.
These are both important ways for Galford to score knockdowns.
The other two Poppy specials are Replica Dog (214C) and Overhead Crash (214K). Replica Dog teleports Poppy above the opponent and then drops down hitting mid. This is one of the primary tools to set up Galford's okizeme. Overhead Crash causes both Poppy and Galford to jump and then shoot Poppy at an angle downward.
Interactions and Movement
It is important to know how Poppy moves and how she interacts with opponents attacks because those interactions affect whether or not you can use Poppy specials. Poppy needs to be behind and near to Galford and not knocked down to be available for attack.
Moves that hit near the ground will cause Poppy to yelp and and be knocked down. This leaves Galford without Poppy for several seconds.
Poppy's movement mostly mirrors Galford's movement. She will walk slowly forward or backward, matching the direction that Galford moves. Poppy will run after a slight delay, when Galford runs.
Poppy will do a back flip anytime Galford's center passes behind her head. Actions that trigger this movement include walking back (Poppy walks slower than Galford which causes the overlap), dashing back, jumping back, whiffing 5C, hitting 5B or 5C, and Imitate Replica on block and hit.
During the initial run, or during Poppy's backflip, Poppy specials are not available.
Mitigating Poppy Unavailability
There are ways that you can avoid not having Poppy specials in certain situations.
Back dashing, jumping back, landing after imitate replica in the corner will stop Poppy from doing her back flip.
You can also intentionally use attacks or movement that lock Poppy into a back flip animation to set up back dash cancels.
For example, Galford can back dash first, putting Poppy into her back flip animation, run forward, and then back dash again. The second back dash, you will be able to cancel into a Poppy special.
Dealing with Jump-ins
Galford does not have a dragon punch to anti-air or a big obvious anti-air button like some characters in this game. Instead he has to use a handful of different tools to deal with jump-ins.
5K is his most obvious anti-air. Galford does an upwards angled kick, this is useful for anti airing deep jump in attacks.
Opponents may start to do earlier jump in attacks to call out certain anti-airs, which will beat 5K.
Arguably the strongest way to deal with jump in attacks by Galford is to dash away. Galford can re-position himself when his opponent jumps by dashing under them or back dashing.
Canceling back dash with a fire ball can even anti air a jumping opponent.
Air to Air attacks are another option that Galford has for anti-airs, with jump back j.C and j.D being notable examples that hit below and in front.
Imitate Replica Attack
Even while being hit, you may have a way out! Imitate Replica Attack is a counter-style move that only works while Galford is in knockback state (after he gets hit). This move will punish certain attacks and combos, check out the specifics in Special Moves. So if you over extended yourself, make sure you know which characters you can punish for punishing you!
NOTE: If you are backturned, you can not Imitate Replica. This is especially notable after back throw.
Okizeme & Other Offensive Situations
Galford's okizeme and mixup is based around setting up Replica Dog (214C) either after a knock down or in neutral. Replica dog hits as a mid, catches characters mid-air, and also tracks forward/backward rolls, making it your go-to lock down move in most situations. Be wary, there are many ways to escape this move. Make sure you play with timings when calling Replica Dog, and mix in your other Poppy specials to make sure they respect you on the ground as well! After setting up Replica Dog, Galford has numerous mix up options. These include:
Strike Heads (Command Throw) / Throw
Galford has two throw options: Strike Heads (623S) and the standard throw. Strike Heads has less recovery, more active frames than a standard throw, and gives you the most damage with a knock down from a throw type move. The standard throw lets you combo into different knock downs, 66B/66D/2C, or more damage, back throw 5C or 2B WFT.
Replica Attack (63214A+D/B+D)
Galford can cross up his opponent with Replica attack. This mix-up becomes harder to react to when used in conjunction with replica dog, as replica dog will hit sooner than galford, but will still force the opponent to block cross-up if you change sides. This can be punished by dash throw/attack at a minimum, use with caution.
High / Low
Galford can also apply a basic high low game supported by Poppy. The more damaging and rewarding options are very high commitment options that will lead to severe punishes if they are blocked. You will most like use them sparingly, or mainly use relatively safe 2D pokes.
High Options - j.C , A+B, 66C
Low Options - Low Kicks, 66B/D, empty/whiff jump in > low
Normal Moves
Far Slashes
5A
5A
|
|---|
5B
5B
|
|---|
5C
5C
|
|---|
2A
2A
|
|---|
2B
2B
|
|---|
2C
2C
|
|---|
Near Slashes
n.5A
n.5A
|
|---|
n.5B
n.5B
|
|---|
n.5C
n.5C
|
|---|
Kicks
5D
5D
|
|---|
6D
6D
|
|---|
2D
2D
|
|---|
3D
3D
|
|---|
Dash Normals
66A
66A
|
|---|
66B
66B
|
|---|
66C
66C
|
|---|
66D
66D
|
|---|
Air Normals
j.A
j.A
|
|---|
j.B
j.B
|
|---|
j.C
j.C
|
|---|
j.D
j.D
|
|---|
Unarmed Normals
u.5S
u.5S
|
|---|
u.2S
u.2S
|
|---|
ju.S
ju.S
|
|---|
u.66S
u.66S
|
|---|
Universal Mechanics
Guard Break
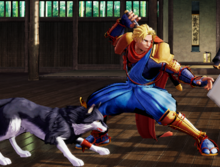
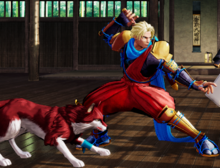
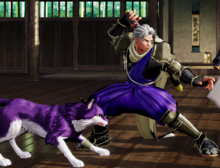
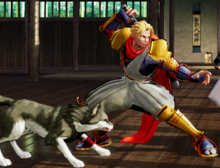
Guard Break (Throw) 4/5/6C+D Neutral / Forward Throw Neutral / Forward Throw Back Throw Back Throw
|
|---|
Surprise Attack
Surprise Attack (Overhead)
5B+C |
|---|
Dodge
Dodge
5A+B |
|---|
Counter / Blade Catch
Counter / Blade Catch 236A+B Counter Counter Blade Catch Blade Catch
|
|---|
Rage Explosion
Rage Explosion
5A+B+C |
|---|
Lightning Blade
Lightning Blade (Issen)
5A+B+C during Rage Explosion |
|---|
Command Moves
Stardust Drop
Stardust Drop (close)j.6K Stardust Drop Stardust Drop
|
|---|
Wall Jump
Wall Jump (near wall)9 Wall Jump Wall Jump
|
|---|
Special Moves
Strike Heads
Strike Heads (close)623S Strike Heads Strike Heads
|
|---|
Plasma Blade
Plasma Blade 236S Plasma Blade Plasma Blade
|
|---|
Replica Attack (head)
Replica Attack (head) 63214LS+K Replica Attack (head) Replica Attack (head)
|
|---|
Replica Attack (rear)
Replica Attack (rear) 63214MS+K Replica Attack (rear) Replica Attack (rear)
|
|---|
Rush Dog
Rush Dog 214LS Rush Dog Rush Dog
|
|---|
Machine Gun Dog
Machine Gun Dog 214MS Machine Gun Dog Machine Gun Dog
|
|---|
Replica Dog
Replica Dog 214HS Replica Dog Replica Dog
|
|---|
Overhead Crash
Overhead Crash 214K Overhead Crash Overhead Crash
|
|---|
Overhead Crash
Overhead Crash 214K Overhead Crash Overhead Crash
|
|---|
Imitate Replica (head)
Imitate Replica (head) 6321463214LS+K While knocked back While knocked back
|
|---|
Imitate Replica (rear)
Imitate Replica (rear) 6321463214MS+K While knocked back While knocked back
|
|---|
Supers
Weapon Flipping Technique
Mega Plasma Factor
236B+C |
|---|
Super Special Move
Justice Impulse X
641236C+D |
|---|
Combos
List combos, use numpad notation.
Throws
5C+D > 66B / 2C / 2B xx WFT
4C+D > 66B / 2C / 5C / 2B xx WFT
- Microwalk 2B necessary for some characters
Corner
4C+D or 5C+D > 66B / 2C / 2B xx 236C / 2B xx WFT
- Throws into the corner
Normal
n.5B/n.2B/2B xx 236S
214B > Anything
- j.C > 5B xx 236S
2B/n.5B xx WFT
- WFT will whiff, if done point blank on crouching opponents in the corner.
Special Cases
2A > 236C
- Point Blank...Back hit...
214C > 63214A+D/B+D
- Crouching / Meaty only
Matchups
Videos
Link to Galford videos and specify year it was produced or patch version in brackets.
Example: Galford combo video by "name of content creator" (2019).
Visual examples of Galford combos and some tech by Conchobar (2019)
Colors
External Links
- Twitter hashtag: #SS_GA
- Galford frame data
- Galford frame data 2
