|
|
| Line 1,046: |
Line 1,046: |
|
| |
|
| <u>How to BD Tsubame:</u> | | <u>How to BD Tsubame:</u> |
| Backdash Tsubame has two uses, to reflect projectiles while staying close to the ground, and to make his overhead safer on block at the cost of less range. There are two ways to input this, the first is the simpler way with 441236S. Essentially just backdash then input the Tsubame while you are airborne during the backdash. The more difficult but faster method is 412364S. Here we mask the Tsubame input between the two back inputs of the backdash. | | Backdash Tsubame has two uses, to reflect projectiles while staying close to the ground, and to make his overhead safer on block at the cost of less range. To input this, perform the input 441236S. Essentially, just backdash then input the Tsubame while you are airborne during the backdash. |
|
| |
|
| [https://www.youtube.com/watch?v=X-JTfLnQlUY Video guide on Tsubame Gaeshi inputs] | | [https://www.youtube.com/watch?v=X-JTfLnQlUY Video guide on Tsubame Gaeshi inputs] |
Revision as of 12:50, 17 May 2020
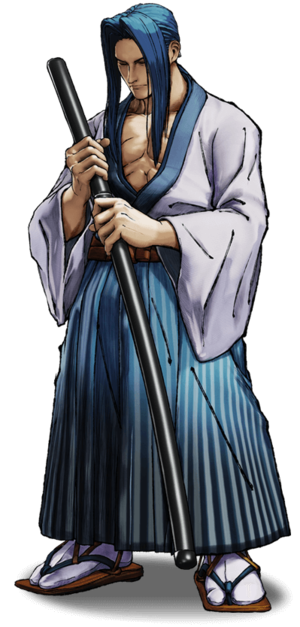
Ukyo Tachibana
橘 右京, Tachibana Ukyō Introduction
Ukyo has everything you could ask for in a character: Fast movement, long reach, damaging punishes, reliable anti-airs, great mixups, you name it. He specializes in harassing the opponent from mid-screen with fast, high priority normals and punishing mistakes with his far-reaching strikes or a quickly executed TK Tsubame. Once Ukyo has scored a knockdown, he can employ his deadly mixup-game, which include an instant overhead and a grounded cross-up.
While Tsubame is nowhere near the terror it was in previous games (most notably Samsho 2), it comes out in only 5 frames, granting him near unrivaled control over the airspace and making up for his unusually floaty jump. On the ground, 2B is fast and covers the space directly above your head, so jumping is almost always a bad idea against Ukyo. Like Haohmaru, he can also “fake” his Hiken Sasameyuki special to make the opponent commit to something stupid.
If you want a character who’s basically guaranteed to be strong in one way or another, look no further than Ukyo. Play him if you like simple effective playstyles, good neutral, mixups, long blue hair, or want to raise awareness for tuberculosis.
| Strengths |
Weaknesses
|
- Great punishment
- Strong mix-ups due to good lows and access to an instant overhead (Tsubame Gaeshi).
- Ironclad grip over the airspace.
- One of the most versatile moves in existence in Tsubame Gaeshi, which covers all points above.
- Longest rage duration in the game.
|
- Floaty jump.
- Lacks a traditional projectile.
- Bad frame data on heavy slashes.
- WFT that is extremely situational to land.
- Slowest rage gain in the game.
- Below average health.
|
Data
- Damage Taken: 105%
- Rage Factor: 0.12 (Worst Rage Gain)
- Rage Duration: 20 seconds (Longest Duration)
- Jump: 61 frames (Extremely Slow)
- Forward Walk Speed: 0.3 (Average)
- Back Walk Speed: 0.23 (Average)
- Dash Speed: 1.25 (Average)
- Back Dash: 27 frames (Cancelable from frame 9)
- Weapon Pickup / Drop: 40 / 79 frames
Gameplan
Ukyo is best thought of as a hit-and-run character. Due to his variety of strengths, he can be played in a multitude of ways. You can play a defensive game of maintaining neutral and punishing the opponent’s mistakes, or a rushdown style with high and low mix-ups abusing Tsubame Gaeshi. None of these strategies are set in stone, you can implement different parts of his toolset in different amounts into your own playstyle. Ukyo is a character that is scary both when up close in the opponent’s face, and when down backing at full screen with a life lead.
Neutral
Generally you want to control space and harass with 5B as your primary grounded poke. Recoil cancel on block into 236S if you read they will press a button. Look for whiffs from the opponent and capitalize on them with 2C, 6K, 66K, Tsubame, or aforementioned 5B. Shut down their jump-ins with Tsubame, 2B, and air-to-air j.C. Counter projectile zoning with backdash Tsubame reflect. Score a knockdown from his punishment tools or his fast dash into throw, and use the momentum to either regain space or go in to apply his mixups.
Okizeme
Normal Moves
Far Slashes
5A
5A
|
| Damage
|
Guard
|
Startup
|
Active
|
Recovery
|
Total
|
Hit Adv
|
Block Adv
|
Guard Dmg
|
Cancel
|
Recoil
|
Deflectable
|
Unarmed
|
| 50
|
Mid
|
8
|
-
|
-
|
-
|
-5
|
-5
|
-
|
Yes
|
-
|
Yes
|
No
|
Same range as 5B, 1 frame faster but less damage. Overall outclassed by 5B.
|
|
5B
5B
|
| Damage
|
Guard
|
Startup
|
Active
|
Recovery
|
Total
|
Hit Adv
|
Block Adv
|
Guard Dmg
|
Cancel
|
Recoil
|
Deflectable
|
Unarmed
|
| 80
|
Mid
|
9
|
-
|
-
|
-
|
-6
|
-12
|
-
|
Yes
|
-
|
Yes
|
No
|
This is your go-to poke in neutral, combo starter, essentially one of the buttons you will be pressing a lot. Relatively fast for a far B normal. Whiff canceling into 214D reduces its recovery. On block, you can recoil cancel into 236S to catch counterattacks, though this is unsafe if they keep blocking. Combos into all versions of 236S on hit if close enough.
|
|
5C
5C
|
| Damage
|
Guard
|
Startup
|
Active
|
Recovery
|
Total
|
Hit Adv
|
Block Adv
|
Guard Dmg
|
Cancel
|
Recoil
|
Deflectable
|
Unarmed
|
| 160+180
|
Mid
|
12
|
-
|
-
|
-
|
-9
|
-28
|
-
|
No
|
-
|
Yes
|
No
|
Changed to his close AB from V Special (RIP old 5AB). Minus on hit, and can't be recoil canceled, thus only use as a guaranteed punish. Even then, 5B xx 236 deals more damage, so ignore this normal.
|
|
2A
2A
|
| Damage
|
Guard
|
Startup
|
Active
|
Recovery
|
Total
|
Hit Adv
|
Block Adv
|
Guard Dmg
|
Cancel
|
Recoil
|
Deflectable
|
Unarmed
|
| 40
|
Mid
|
5
|
-
|
-
|
-
|
-2
|
-5
|
-
|
Yes
|
-
|
Yes
|
No
|
Fastest far slash normal. Good poke with less range than 5B but better speed. Relatively safe on block.
|
|
2B
2B
|
| Damage
|
Guard
|
Startup
|
Active
|
Recovery
|
Total
|
Hit Adv
|
Block Adv
|
Guard Dmg
|
Cancel
|
Recoil
|
Deflectable
|
Unarmed
|
| 100
|
Mid
|
10
|
-
|
-
|
-
|
-9
|
-12
|
-
|
No
|
-
|
Yes
|
No
|
Useful anti-air, though finicky to time against many jump ins. Be aware of spacing to not get n.2B instead. Very strong at protecting the space near and above his head, in the few situations where Tsubame won't work.
|
|
2C
2C
|
| Damage
|
Guard
|
Startup
|
Active
|
Recovery
|
Total
|
Hit Adv
|
Block Adv
|
Guard Dmg
|
Cancel
|
Recoil
|
Deflectable
|
Unarmed
|
| 200
|
Mid
|
12
|
-
|
-
|
-
|
-6
|
-10
|
-
|
No
|
-
|
Yes (disarm)
|
No
|
Long range punisher and one of your best moves for whiff punishing. Unsafe on block so be careful about throwing it out in neutral outside of punishing. Negative frame advantage on hit making it punishable on hit by certain characters.
|
|
Near Slashes
n.5A
n.5A
|
| Damage
|
Guard
|
Startup
|
Active
|
Recovery
|
Total
|
Hit Adv
|
Block Adv
|
Guard Dmg
|
Cancel
|
Recoil
|
Deflectable
|
Unarmed
|
| 30
|
Mid
|
5
|
-
|
-
|
-
|
1
|
-2
|
-
|
Yes
|
-
|
Yes
|
No
|
No recoil animation. Use as an up-close defensive button in scramble situations.
|
|
n.5B
n.5B
|
| Damage
|
Guard
|
Startup
|
Active
|
Recovery
|
Total
|
Hit Adv
|
Block Adv
|
Guard Dmg
|
Cancel
|
Recoil
|
Deflectable
|
Unarmed
|
| 90
|
Mid
|
8
|
-
|
-
|
-
|
-3
|
-12
|
-
|
Yes
|
-
|
Yes
|
No
|
No longer combos into WFT like in V Special. Still combos into 236S for damage and knockdown. Use as a close range punisher.
|
|
n.2A
n.2A
|
| Damage
|
Guard
|
Startup
|
Active
|
Recovery
|
Total
|
Hit Adv
|
Block Adv
|
Guard Dmg
|
Cancel
|
Recoil
|
Deflectable
|
Unarmed
|
| 30
|
Mid
|
5
|
-
|
-
|
-
|
1
|
-2
|
-
|
Yes
|
-
|
Yes
|
No
|
No recoil animation. Similar in use to n.5A.
|
|
n.2B
n.2B
|
| Damage
|
Guard
|
Startup
|
Active
|
Recovery
|
Total
|
Hit Adv
|
Block Adv
|
Guard Dmg
|
Cancel
|
Recoil
|
Deflectable
|
Unarmed
|
| 80
|
Mid
|
6
|
-
|
-
|
-
|
3
|
-2
|
-
|
Yes
|
-
|
Yes
|
No
|
No recoil animation. Fastest attack that leads to a combo. Good frame advantage on hit and many active frames, can be up to +8 on hit if it lands meaty allowing a n.5B xx 236S to combo.
|
|
n.2C
n.2C
|
| Damage
|
Guard
|
Startup
|
Active
|
Recovery
|
Total
|
Hit Adv
|
Block Adv
|
Guard Dmg
|
Cancel
|
Recoil
|
Deflectable
|
Unarmed
|
| 150+70
|
Mid
|
15
|
-
|
-
|
-
|
-2
|
-28
|
-
|
No
|
-
|
Yes (disarm)
|
No
|
Does less damage than 5C but less negative on hit. Outclassed by other normals.
|
|
Kicks
5D
5D
|
| Damage
|
Guard
|
Startup
|
Active
|
Recovery
|
Total
|
Hit Adv
|
Block Adv
|
Guard Dmg
|
Cancel
|
Recoil
|
Deflectable
|
Unarmed
|
| 50
|
Mid
|
8
|
-
|
-
|
-
|
-6
|
-9
|
-
|
No
|
-
|
No
|
Yes
|
Solid keepout kick with a nice hitbox.
|
|
6D
6D
|
| Damage
|
Guard
|
Startup
|
Active
|
Recovery
|
Total
|
Hit Adv
|
Block Adv
|
Guard Dmg
|
Cancel
|
Recoil
|
Deflectable
|
Unarmed
|
| 40
|
Low
|
5
|
-
|
-
|
-
|
Knockdown
|
-20
|
-
|
No
|
-
|
No
|
Yes
|
Long range low slide that knocks down. Fantastic for long range punishing, stuffing dash in attempts, and catching people who stand block midscreen in fear of Tsubame. Unsafe on block unless spaced to tip range. Very useful normal when unarmed.
|
|
2D
2D
|
| Damage
|
Guard
|
Startup
|
Active
|
Recovery
|
Total
|
Hit Adv
|
Block Adv
|
Guard Dmg
|
Cancel
|
Recoil
|
Deflectable
|
Unarmed
|
| 20
|
Low
|
6
|
-
|
-
|
-
|
1
|
-2
|
-
|
No
|
-
|
No
|
Yes
|
Still a good button but much weaker frames than V Special. No longer combos into Tsubame on hit, no longer +0 on block. Solid low check, close range poke and pressure tool. Use to stagger into Tsubame or tick throw.
|
|
3D
3D
|
| Damage
|
Guard
|
Startup
|
Active
|
Recovery
|
Total
|
Hit Adv
|
Block Adv
|
Guard Dmg
|
Cancel
|
Recoil
|
Deflectable
|
Unarmed
|
| 70
|
Low
|
5
|
-
|
-
|
-
|
Knockdown
|
-7
|
-
|
-
|
-
|
-
|
-
|
Fast sweep with a good hitbox. This is your low mix-up with IOH Tsubame. One of your best moves to meaty with because since it's fast, active for a long time, hits low, safe on block (when meatied), and sets up 50/50 guessing situations for the opponent on their wake-up.
|
|
Dash Normals
66A
66A
|
| Damage
|
Guard
|
Startup
|
Active
|
Recovery
|
Total
|
Hit Adv
|
Block Adv
|
Guard Dmg
|
Cancel
|
Recoil
|
Deflectable
|
Unarmed
|
| 40
|
Mid
|
11
|
-
|
-
|
-
|
-3
|
-42
|
-
|
No
|
-
|
Yes (disarm)
|
No
|
Very unsafe on block and little reward on hit. Best use is as a crossunder anti-air.
|
|
66B
66B
|
| Damage
|
Guard
|
Startup
|
Active
|
Recovery
|
Total
|
Hit Adv
|
Block Adv
|
Guard Dmg
|
Cancel
|
Recoil
|
Deflectable
|
Unarmed
|
| 110
|
Mid
|
27
|
-
|
-
|
-
|
Knockdown
|
-29
|
-
|
No
|
-
|
Yes
|
No
|
Crosses up when performed closer in. Can mixup with same-side dashing C. Chases side rolls and autocorrects, can be confusing for the opponent to deal with on wakeup. Unsafe on block and throwable startup, so don't overly abuse.
|
|
66C
66C
|
| Damage
|
Guard
|
Startup
|
Active
|
Recovery
|
Total
|
Hit Adv
|
Block Adv
|
Guard Dmg
|
Cancel
|
Recoil
|
Deflectable
|
Unarmed
|
| 150
|
Mid
|
11
|
-
|
-
|
-
|
Knockdown
|
-14
|
-
|
No
|
-
|
Yes
|
No
|
Essentially running 2C. Highest damage long-range punisher if you need to close out a round.
|
|
66D
66D
|
| Damage
|
Guard
|
Startup
|
Active
|
Recovery
|
Total
|
Hit Adv
|
Block Adv
|
Guard Dmg
|
Cancel
|
Recoil
|
Deflectable
|
Unarmed
|
| 40
|
Low
|
6
|
-
|
-
|
-
|
Knockdown
|
-10
|
-
|
No
|
-
|
No
|
Yes
|
Essentially running 6D, but much safer on block. Good long range block punish, whiff punish, and mixup tool with 66B.
|
|
Air Normals
j.A
j.A
|
| Damage
|
Guard
|
Startup
|
Active
|
Recovery
|
Total
|
Hit Adv
|
Block Adv
|
Guard Dmg
|
Cancel
|
Recoil
|
Deflectable
|
Unarmed
|
| -
|
High
|
7
|
-
|
-
|
-
|
-
|
-
|
-
|
-
|
-
|
No
|
No
|
Generally outclassed by other jump normals.
|
|
j.B
j.B
|
| Damage
|
Guard
|
Startup
|
Active
|
Recovery
|
Total
|
Hit Adv
|
Block Adv
|
Guard Dmg
|
Cancel
|
Recoil
|
Deflectable
|
Unarmed
|
| -
|
High
|
6
|
-
|
-
|
-
|
-
|
-
|
-
|
-
|
-
|
No
|
No
|
Decent air-to-air. Can be used as instant overhead or cross up. Instant overhead is very punishable on block and hit, and no more VSP time slow confirms reduces its effectiveness. Use to close out a round.
|
|
j.8C
j.8C
|
| Damage
|
Guard
|
Startup
|
Active
|
Recovery
|
Total
|
Hit Adv
|
Block Adv
|
Guard Dmg
|
Cancel
|
Recoil
|
Deflectable
|
Unarmed
|
| -
|
High
|
10
|
-
|
-
|
-
|
-
|
-
|
-
|
-
|
-
|
No
|
No
|
Strong horizontal air-to-air with very good range.
|
|
j.7/9C
j.7/9C
|
| Damage
|
Guard
|
Startup
|
Active
|
Recovery
|
Total
|
Hit Adv
|
Block Adv
|
Guard Dmg
|
Cancel
|
Recoil
|
Deflectable
|
Unarmed
|
| -
|
High
|
11
|
-
|
-
|
-
|
-
|
-
|
-
|
-
|
-
|
No
|
No
|
General air-to-air, similar in use to anti-air Tsubame. Off of a forward jump air-to-air, you can take advantage of the air reset situation to dash to the opponent's landing and apply a mixup. Best air-to-ground button as well, though you won't be jumping in as often with Ukyo outside of punish situations.
|
|
j.D
j.D
|
| Damage
|
Guard
|
Startup
|
Active
|
Recovery
|
Total
|
Hit Adv
|
Block Adv
|
Guard Dmg
|
Cancel
|
Recoil
|
Deflectable
|
Unarmed
|
| -
|
High
|
5
|
-
|
-
|
-
|
-
|
-
|
-
|
-
|
-
|
No
|
Yes
|
Fast jump kick. Use if you find yourself needing a quick air-to-air, or when unarmed.
|
|
Unarmed Normals
u.5S
u.5S
|
| Damage
|
Guard
|
Startup
|
Active
|
Recovery
|
Total
|
Hit Adv
|
Block Adv
|
Guard Dmg
|
Cancel
|
Recoil
|
Deflectable
|
Unarmed
|
| 50
|
Mid
|
5
|
-
|
-
|
-
|
2
|
-3
|
-
|
-
|
-
|
-
|
Yes
|
|
u.2S
u.2S
|
| Damage
|
Guard
|
Startup
|
Active
|
Recovery
|
Total
|
Hit Adv
|
Block Adv
|
Guard Dmg
|
Cancel
|
Recoil
|
Deflectable
|
Unarmed
|
| 50
|
Mid
|
6
|
-
|
-
|
-
|
2
|
-3
|
-
|
-
|
-
|
-
|
Yes
|
|
ju.S
ju.S
|
| Damage
|
Guard
|
Startup
|
Active
|
Recovery
|
Total
|
Hit Adv
|
Block Adv
|
Guard Dmg
|
Cancel
|
Recoil
|
Deflectable
|
Unarmed
|
| 50
|
High
|
9
|
-
|
-
|
-
|
-
|
-
|
-
|
-
|
-
|
-
|
Yes
|
|
u.66S
u.66S
|
| Damage
|
Guard
|
Startup
|
Active
|
Recovery
|
Total
|
Hit Adv
|
Block Adv
|
Guard Dmg
|
Cancel
|
Recoil
|
Deflectable
|
Unarmed
|
| -
|
-
|
-
|
-
|
-
|
-
|
-
|
-
|
-
|
-
|
-
|
-
|
Yes
|
|
Universal Mechanics
Guard Break
Guard Break (Throw)
4/5/6C+D Forward Throw Forward Throw Back Throw Back Throw
|
| Version
|
Damage
|
Guard
|
Startup
|
Active
|
Recovery
|
Total
|
Hit Adv
|
Block Adv
|
Guard Dmg
|
Cancel
|
Recoil
|
Deflectable
|
Unarmed
|
| Back
|
-
|
-
|
-
|
-
|
-
|
-
|
20
|
20
|
-
|
-
|
-
|
-
|
-
|
Universal throw. Can be followed up with an attack. (See below for combos)
|
| Back
|
-
|
-
|
-
|
-
|
-
|
-
|
25
|
25
|
-
|
-
|
-
|
-
|
-
|
Universal throw. Can be followed up with an attack. (See below for combos)
|
|
Surprise Attack
Surprise Attack (Overhead)
5B+C
|
| Version
|
Damage
|
Guard
|
Startup
|
Active
|
Recovery
|
Total
|
Hit Adv
|
Block Adv
|
Guard Dmg
|
Cancel
|
Recoil
|
Deflectable
|
Unarmed
|
| Armed
|
-
|
-
|
19
|
-
|
-
|
-
|
-1
|
-14
|
-
|
-
|
-
|
-
|
-
|
Universal overhead. No longer knocks down or hops backwards like in V Special. Minus on hit and hops forward. Useful for avoiding lows and throws, but as a mixup is outclassed by Tsubame though it is much safer on block. Blockstun ends nearly immediately and Ukyo nearly recovers by the time he touches the ground.
|
| Unarmed
|
-
|
-
|
20
|
-
|
-
|
-
|
0
|
-13
|
-
|
-
|
-
|
-
|
-
|
|
Dodge
Dodge
5A+B
|
| Damage
|
Guard
|
Startup
|
Active
|
Recovery
|
Total
|
Hit Adv
|
Block Adv
|
Guard Dmg
|
Cancel
|
Recoil
|
Deflectable
|
Unarmed
|
| -
|
-
|
-
|
-
|
-
|
-
|
-
|
-
|
-
|
-
|
-
|
-
|
-
|
|
|
|
Counter / Blade Catch
Counter / Blade Catch
236A+B Counter Counter Blade Catch Blade Catch
|
| Version
|
Damage
|
Guard
|
Startup
|
Active
|
Recovery
|
Total
|
Hit Adv
|
Block Adv
|
Guard Dmg
|
Cancel
|
Recoil
|
Deflectable
|
Unarmed
|
| Armed
|
-
|
-
|
-
|
-
|
-
|
-
|
-
|
-
|
-
|
-
|
-
|
-
|
-
|
Universal counter. Allows you to follow up with a guaranteed attack of your own. The follow up depends on the strength of the attack you counter. If you counter a heavy slash, your opponent will be disarmed.
|
| Disarmed
|
-
|
-
|
-
|
-
|
-
|
-
|
-
|
-
|
-
|
-
|
-
|
-
|
-
|
Universal counter. While disarmed, your counter will disarm and knock away your opponent regardless of slash level used.
|
|
Rage Explosion
Rage Explosion
5A+B+C
|
| Damage
|
Guard
|
Startup
|
Active
|
Recovery
|
Total
|
Hit Adv
|
Block Adv
|
Guard Dmg
|
Cancel
|
Recoil
|
Deflectable
|
Unarmed
|
| 0
|
-
|
-
|
-
|
-
|
-
|
-
|
-
|
-
|
-
|
-
|
-
|
-
|
Unblockable pushback attack.
|
|
Lightning Blade
Lightning Blade (Issen)
5A+B+C during Rage Explosion
|
| Damage
|
Guard
|
Startup
|
Active
|
Recovery
|
Total
|
Hit Adv
|
Block Adv
|
Guard Dmg
|
Cancel
|
Recoil
|
Deflectable
|
Unarmed
|
| -
|
-
|
-
|
-
|
-
|
-
|
-
|
-
|
-
|
-
|
-
|
-
|
-
|
Has projectile invulnerability and anti-airs. Damage scales up based on remaining health.
|
|
Special Moves
Concealed Sabre Snowfall Slash
Concealed Sabre Snowfall Slash
214S Hiken Sasameyuki Hiken Sasameyuki
|
| Version
|
Damage
|
Guard
|
Startup
|
Active
|
Recovery
|
Total
|
Hit Adv
|
Block Adv
|
Guard Dmg
|
Cancel
|
Recoil
|
Deflectable
|
Unarmed
|
| Light
|
100
|
Mid
|
19
|
-
|
-
|
-
|
+5
|
-2
|
-
|
-
|
-
|
-
|
No
|
| Medium
|
120
|
Mid
|
19
|
-
|
-
|
-
|
-7
|
-21
|
-
|
-
|
-
|
-
|
No
|
| Heavy
|
140
|
Mid
|
22
|
-
|
-
|
-
|
-17
|
-50
|
-
|
-
|
-
|
-
|
No
|
Essentially the same as VSP. Strength of the button determines amount of slashes. Useful on block for chip kills. Not recommended as a recoil cancel or combo tool since 236S is faster and grants a knockdown. When hit at tip range, followup slashes will whiff making this punishable on hit at bad ranges. Inexperienced players will run into this move when they misjudge when it's over. Overall a bit of a gimmick move but can work against reckless opponents.
|
|
Swordless Sabre Snowfall Slash
Swordless Sabre Snowfall Slash
214K Hiken Sasameyuki Hiken Sasameyuki
|
| Damage
|
Guard
|
Startup
|
Active
|
Recovery
|
Total
|
Hit Adv
|
Block Adv
|
Guard Dmg
|
Cancel
|
Recoil
|
Deflectable
|
Unarmed
|
| -
|
-
|
-
|
-
|
-
|
-
|
-
|
-
|
-
|
-
|
-
|
-
|
Yes
|
To be an Ukyo main, you must throw at least 20 apples per round. Fakes his 214S series and only throws the apple. Best use is as a whiff cancel to shorten the recovery of normals. One tactic with this move is to scare the opponent from approaching out of fear of the slash followup, then commit to 214A/B/C when you read that they will overextend.
|
|
Concealed Sabre Swallow Swipe
Concealed Sabre Swallow Swipe
j.1236S Tsubame Gaeshi Tsubame Gaeshi
|
| Version
|
Damage
|
Guard
|
Startup
|
Active
|
Recovery
|
Total
|
Hit Adv
|
Block Adv
|
Guard Dmg
|
Cancel
|
Recoil
|
Deflectable
|
Unarmed
|
| Light
|
140
|
High
|
5
|
-
|
-
|
-
|
Knockdown
|
-34
|
-
|
-
|
-
|
-
|
No
|
| Medium
|
160
|
High
|
5
|
-
|
-
|
-
|
Knockdown
|
-41
|
-
|
-
|
-
|
-
|
No
|
| Heavy
|
180
|
High
|
10
|
-
|
-
|
-
|
Knockdown
|
-64
|
-
|
-
|
-
|
-
|
No
|
The classic. Far reaching and unreactable overhead that knocks down and is also an anti-air and also a block punisher and also reflects projectiles. Tell your opponent when they complain about this move, they’re more than 20 years too late.
Horizontal hitbox has been nerfed from V Special, no longer combos from 2K, and heavy version does not hit crouching opponents consistently. B version is still amazing as a mixup tool, and the move still functions great as an anti-air and punish tool. Some characters can crouch under B version up close, *needs testing.
How to TK Tsubame:
This deserves its own section since it’s the first thing people learn with Ukyo. Perform as an instant overhead with 12369B. If you get his standing 236B instead, you pressed the button too early (you need to put a slight delay between hitting diagonal and hitting the button, the timing is slower than VSP). If you get a jumping normal, you pressed the button too late.
How to BD Tsubame:
Backdash Tsubame has two uses, to reflect projectiles while staying close to the ground, and to make his overhead safer on block at the cost of less range. To input this, perform the input 441236S. Essentially, just backdash then input the Tsubame while you are airborne during the backdash.
Video guide on Tsubame Gaeshi inputs
Projectile reflect interactions
|
| Version
|
Damage
|
Guard
|
Startup
|
Active
|
Recovery
|
Total
|
Hit Adv
|
Block Adv
|
Guard Dmg
|
Cancel
|
Recoil
|
Deflectable
|
Unarmed
|
| Rage
|
-
|
-
|
-
|
-
|
-
|
-
|
-
|
-
|
-
|
-
|
-
|
-
|
No
|
|
|
|
Concealed Sabre Phantom Strike
Concealed Sabre Phantom Strike
236S Zanzou Fumikomi Giri Zanzou Fumikomi Giri
|
| Version
|
Damage
|
Guard
|
Startup
|
Active
|
Recovery
|
Total
|
Hit Adv
|
Block Adv
|
Guard Dmg
|
Cancel
|
Recoil
|
Deflectable
|
Unarmed
|
| Light
|
100
|
Mid
|
16
|
-
|
-
|
-
|
Knockdown
|
-20
|
-
|
-
|
-
|
-
|
No
|
| Medium
|
20+100
|
Mid
|
15
|
-
|
-
|
-
|
Knockdown
|
-25
|
-
|
-
|
-
|
-
|
No
|
| Heavy
|
20+40+100
|
Mid
|
15
|
-
|
-
|
-
|
Knockdown
|
-39
|
-
|
-
|
-
|
-
|
No
|
Pseudo-rekka that has Ukyo send afterimages to slice you. Strength determines range and amount of slashes. Combos off of throw and most normals for solid damage, and more importantly a knockdown. Outside of combos, it is generally best to use this as a recoil cancel on blocked normals to dissuade the opponent from trying to press buttons. All versions are unsafe on block, but mixing up the amount of hits will make the opponent second guess when they can press a button and potentially miss their punish.
|
|
Supers
Weapon Flipping Technique
6 Swallow Flash
236B+C
|
| Damage
|
Guard
|
Startup
|
Active
|
Recovery
|
Total
|
Hit Adv
|
Block Adv
|
Guard Dmg
|
Cancel
|
Recoil
|
Deflectable
|
Unarmed
|
| 384
|
High
|
22 ground 21 air
|
-
|
-
|
-
|
Knockdown
|
-57
|
-
|
-
|
-
|
-
|
-
|
Available only during Max Rage or Rage Explosion. Disarms on hit. Projectile invulnerable on startup. Still kind of bad and not used often. Its best use is as an early anti-air. Has no strike invulnerability, slow startup, and cannot combo off of throw midscreen. Ukyo is strong in Max Rage, and his lasts for a long time. It's better to keep your rage and utilize its damage boost and Tsubame buff rather than focus on landing his WFT.
|
|
Super Special Move
Eightfold Path of Gloom
641236C+D
|
| Damage
|
Guard
|
Startup
|
Active
|
Recovery
|
Total
|
Hit Adv
|
Block Adv
|
Guard Dmg
|
Cancel
|
Recoil
|
Deflectable
|
Unarmed
|
| 680
|
Mid
|
31
|
-
|
-
|
-
|
Knockdown
|
-39
|
-
|
-
|
-
|
-
|
-
|
Available only once per match. Very powerful as a situational punish tool. Can punish Tam Tam's j.C on block and stand hit.
Poem translation:
"Tasogare ya
Ryou no te ni saku
Manjushage"
"Twilight
Blooming in both hands
Red spider lily"
|
|
Combos
Midscreen
- n.5B xx 236C
250 damage. Very consistent when not spaced far. Go-to combo for close range punishes.
- 6CD...
- 5B xx 236A
144 damage. Very consistent combo.
- microwalk, 5B xx 236C
192 damage. Optimal conversion from forward throw, now works on every character. No microwalk required on Earthquake.
- 4CD...
- microwalk, 5B xx 236C
192 damage.
Corner
- 6CD, n.5B xx 236A
200 damage. Very consistent and grants good okizeme options.
- 4CD (back throw them into the corner), WFT
231 damage. In the chance you get a defensive throw when cornered, take away their weapon.
Videos
Colors
External Links


