 Shiina Mayu
Introduction
Shiina Mayu (椎名 繭) is a close range, highly mobile rushdown character with a hop instead of a dash. Once Mayu has the opponent cornered, she can run high/low mixups all day, while threatening with her assortment of command grabs. Mayu’s weakest when she is not in the opponent’s face, but she does have an incredible amount of ways to force herself in. Mayu has quite possibly the most frustrating hurtbox in the game. Her normals are also extremely frustrating, as they have upper/lower body invulnerability, and are very hard to beat or punish.
Mayu is one of the heroines of ONE, a visual novel produced by Tactics in 1998. Mayu first met Kouhei soon after losing her only friend, her ferret Myu. She quickly becomes attached to Kouhei, but acts on instinct all of the time. Mayu becomes a problem child who starts to say the name of her ferret all the time. However, Kouhei believes that Mayu will eventually learn to cope with her loss. Although Myu died, Mayu's journey to adulthood started from that point. During ONE, Kouhei starts to "look after" Mayu before he realizes it, to at least prevent her from getting into trouble...
Stage: Behind the School (学校裏)
BGM: White as the snow (雪のように白く)
Character-Specific Notes
- Mayu is able to air jump once, and air dash/backstep once.
- Mayu's ground dash is actually a long leap off the ground. The length of the leap can be shortened by pressing back. Mayu can only dash-attack during a shortened leap.
- Mayu's neutral stance and crouch are one of the shortest in the entire game. This allows her to avoid many attacks that would normally connect against other characters.
Normal Moves
The notation for the movelists can be found under Controls.
The normal move data table can be found under Mayu Shiina/Move Data.
Standing
5A
5A
|
| Damage
|
Proration
|
Juggle
|
Guard
|
Startup ¹ ²
|
Active
|
Recovery
|
Adv Hit
|
Adv Block
|
Cancel
|
| 170
|
-
|
-
|
Ground
|
4
|
5
|
2
|
+3
|
+2
|
N Sp Su J IC R
|
Mayu does a short punch to the opponent's midsection. This is a pretty standard spammable jab. It's a bit low due to Mayu's height so it won't miss short crouching characters, but it will have a harder time acting as an anti-air.
|
|
5B
c5B
|
| Damage
|
Proration
|
Juggle
|
Guard
|
Startup ¹ ²
|
Active
|
Recovery
|
Adv Hit
|
Adv Block
|
Cancel
|
| 370
|
-
|
-
|
Ground
|
7
|
7
|
6
|
+3
|
+1
|
N Sp Su J IC 2B f5B
|
Mayu stretches her arms out above and in front of her. This move is the core launching move of Mayu's combos. When it hits an aerial opponent, the opponent will be sent forward-up, at the perfect velocity for Mayu to follow with a forward jump. This is a fantastic anti-air.
|
|
f5B
f5B
|
| Damage
|
Proration
|
Juggle
|
Guard
|
Startup ¹ ²
|
Active
|
Recovery
|
Adv Hit
|
Adv Block
|
Cancel
|
| 370 (3~7F=330)
|
-
|
-
|
Any
|
7
|
7
|
7
|
+2
|
+0
|
N Sp Su IC
|
Mayu turns around and does a backflip, advancing forward while heel-drop kicking in an arc in front of her. This is a decent move to help keep an opponent under pressure, since it both attacks and moves forward. Good for punishing opponent's low pokes or low mash.
|
|
6B
6B
|
| Damage
|
Proration
|
Juggle
|
Guard
|
Startup ¹ ²
|
Active
|
Recovery
|
Adv Hit
|
Adv Block
|
Cancel
|
| 370 (3~7F=330)
|
-
|
-
|
Any
|
15
|
7
|
8
|
-
|
-1
|
Sp IC
|
Mayu does a variation of her 5B(f), where she hops about one body-height up and forwards while doing her back-flip heel-drop. Can catch the opponent of guard. Use this sparingly.
|
|
5C
5C
|
| Damage
|
Proration
|
Juggle
|
Guard
|
Startup ¹ ²
|
Active
|
Recovery
|
Adv Hit
|
Adv Block
|
Cancel
|
| 570
|
-
|
-
|
Ground
|
11
|
8
|
17
|
-2
|
-4
|
Sp Su IC
|
Mayu is lifted off the ground by her ferret as she does a powerful dual-leg kick at the opponent's chest. Interestingly enough, the ferret on the ground is not part of Mayu's hitbox, so this move can cleanly counter attacks with very low hitboxes such as Misaki's 2C or Ikumi's 2C. Can be very good at preemptively catching low air approaches.
|
|
Crouching
2A
2A
|
| Damage
|
Proration
|
Juggle
|
Guard
|
Startup ¹ ²
|
Active
|
Recovery
|
Adv Hit
|
Adv Block
|
Cancel
|
| 175
|
-
|
-
|
Low
|
4
|
5
|
1
|
+4
|
+3
|
N Sp Su J IC R
|
Mayu does a short punch at the opponent's feet. This move is simple to land and start combos with. However, the low and small hitbox means that it's quite vulnerable to overheads and small-hopping attacks.
|
|
2B
2B
|
| Damage
|
Proration
|
Juggle
|
Guard
|
Startup ¹ ²
|
Active
|
Recovery
|
Adv Hit
|
Adv Block
|
Cancel
|
| 360
|
-
|
-
|
Low
|
8
|
9
|
8
|
-1
|
-3
|
N Sp Su J IC
|
Mayu slides forward feet first as a kick, moving a small distance forward. Aside from combos, this move can be used as another way to continue pressure on an opponent as part of a blockstring.
|
|
1B
1B
|
| Damage
|
Proration
|
Juggle
|
Guard
|
Startup ¹ ²
|
Active
|
Recovery
|
Adv Hit
|
Adv Block
|
Cancel
|
| 360
|
-
|
-
|
Low
|
6
|
6
|
7
|
+3
|
+1
|
N Sp Su J IC 2B f5B
|
Mayu does a short kick, similar to her 2B, but without sliding. It's short enough that it doesn't leave you as committed to an attack as a 2B would. Still, not much range. Used in BnBs.
|
|
2C
2C
|
| Damage
|
Proration
|
Juggle
|
Guard
|
Startup ¹ ²
|
Active
|
Recovery
|
Adv Hit
|
Adv Block
|
Cancel
|
| 550
|
-
|
-
|
Low
|
9
|
20
|
13
|
-
|
-12
|
Sp Su IC
|
Mayu slides on the ground arms first, moving forwards a fair distance while attacking the opponent's feet. This move will launch a grounded opponent slightly off the ground, but they will be unable to recover in time before they land. This move is not exactly something that should be used outside of combos very often unless at a certain range. If you let it get blocked, your opponent will have the option of attacking or waiting to see if you cancel it. Without an instant charge, all of the specials at Mayu's disposal are either non-effective against an opponent who is already defending, or wall jump moves that let Mayu retreat, but in turn give up the offensive pressure. However, if space so it hits just at the tip of the attack, it can be a much safer tool. The cancel frames for this attack are very long, so to catch your opponent off guard you can late cancel into 623A if they delay their counter as well.
|
|
Jumping
j5A
j5A
|
| Damage
|
Proration
|
Juggle
|
Guard
|
Startup ¹ ²
|
Active
|
Recovery
|
Adv Hit
|
Adv Block
|
Cancel
|
| 190
|
-
|
-
|
High/Air
|
6
|
6
|
4
|
-
|
-
|
N Sp J AD IC R
|
Mayu does a small kick. This move should only be used either as a spammed jump-in approach or within a combo to extend it. In very specific matchups, it can be used as an instant overhead.
|
|
j5B
j5B
|
| Damage
|
Proration
|
Juggle
|
Guard
|
Startup ¹ ²
|
Active
|
Recovery
|
Adv Hit
|
Adv Block
|
Cancel
|
| 350
|
-
|
-
|
High/Air
|
7
|
7
|
10
|
-
|
-
|
N Sp J AD IC
|
Mayu does a decent kick forwards, covering an area around the lower half of herself, including slightly behind her as well. This is Mayu's aerial-crossup attack. The spacing needed is tighter than other characters, but you can still hit and directly lead into your basic combo setups. This move is also good for close-in aerial engagements, where j.C might be too slow to hit in time.
|
|
j5C
j5C
|
| Damage
|
Proration
|
Juggle
|
Guard
|
Startup ¹ ²
|
Active
|
Recovery
|
Adv Hit
|
Adv Block
|
Cancel
|
| 540
|
-
|
-
|
High/Air
|
8
|
7
|
18
|
-
|
-
|
N Sp J AD IC
|
Mayu does a frontal air kick directly in front of her. This is Mayu's longest-range option in the air, and the main damage dealer of her corner loop. It's good for dealing with aerial attacks, but if the enemy is below you, it might be better to use j.B instead.
|
|
Hopping
664A
664A
|
| Damage
|
Proration
|
Juggle
|
Guard
|
Startup ¹ ²
|
Active
|
Recovery
|
Adv Hit
|
Adv Block
|
Cancel
|
| 150
|
-
|
-
|
Any
|
5
|
6
|
2
|
+2
|
+1
|
J IC
|
Mayu leaps forward and does a j.A close to the ground. This move can't be comboed from or into, it can be blocked in any stance, and it does too little damage to be used as an effective counter for a low attack. However, it's speed and quick recovery makes it a decent approach attack to get in close again during a blockstring routine.
|
|
664B
664B
|
| Damage
|
Proration
|
Juggle
|
Guard
|
Startup ¹ ²
|
Active
|
Recovery
|
Adv Hit
|
Adv Block
|
Cancel
|
| 400
|
-
|
-
|
Any
|
8
|
7
|
2
|
+7
|
+5
|
J IC
|
Mayu leaps forward and does a j.B close to the ground. Slightly slower than the A version for use in a pressure blockstring. This move can be linked into the basic combo if timed late.
|
|
664C
664C
|
| Damage
|
Proration
|
Juggle
|
Guard
|
Startup ¹ ²
|
Active
|
Recovery
|
Adv Hit
|
Adv Block
|
Cancel
|
| 550
|
-
|
-
|
Any
|
7
|
7
|
3
|
+6
|
+4
|
J IC
|
Mayu leaps forward and does a j.C close to the ground. This is the fastest way outside of using RF special moves to approach the opponent while attacking. It's got the range of Mayu's normal j.C so even on block, you can be far away enough to not fear direct reprisal.
|
|
Special Moves
The notation for the movelists can be found under Controls.
The special move data table can be found under Mayu Shiina/Move Data.
Specials
236*
Roll Roll Roll
236* 236A 236A 236B 236B 236C 236C Ferret Uppercut Ferret Uppercut Slash Down Kick Slash Down Kick
|
| Version
|
Damage
|
Proration
|
Juggle
|
Guard
|
Startup ¹ ²
|
Active
|
Recovery
|
Adv Hit
|
Adv Block
|
Cancel
|
| A
|
700
|
-
|
-
|
Any
|
17
|
32
|
11
|
-
|
-22
|
IC Rekka
|
Mayu rolls across the ground in a ball. On hit, will launch the opponent. Can be cancelled into Roll Roll Hop. This is the move you will be using most in BnB combos, both metered and unmetered.
|
| B
|
700
|
-
|
-
|
Any
|
8
|
28
|
14
|
-
|
-21
|
IC Rekka
|
Mayu launches herself into the the air in a ball. Can be cancelled into Slash Down Kick. Used in a few combos, but mostly used in blockstrings and pressure. It can crossup quite easily and can be used to start a high/low mixup with use of an Instant Charge - IC immediately after it is blocked allows the player to either immediately drop and go for a low (which is a safejump), or go for an aerial attack. The same applies for Roll Roll Hop.
|
| C
|
1000
|
-
|
-
|
Any
|
5
|
-
|
-
|
-
|
-
|
IC
|
Mayu launches herself quickly across the screen in a ball. On hit, the opponent will be sent flying back a good distance, and will wallbounce if they reach the wall before hitting the floor. On block, Mayu will slowly bounce back from the impact and land 1/3 of a screen away. This move is great for punishing the opponent when they are vulnerable. Because this version acts so quickly, the opponent will have little time to act if they were in the process of dashing towards you or setting up some trap or special. Also, the additional wallbounce property gives you a chance to deal extra damage for their mistake.
|
| [236A~A] or [236B~(land)236A]
|
150x3
|
-
|
-
|
High/Air
|
7
|
19
|
25+20+n+10
|
-
|
-
|
IC
|
Linked from Roll Roll Roll A or B version. If done from 236B, Mayu must land before 236A can be input. Mayu will perform a jumping multi-hit uppercut towards the opponent. On hit, it will launch the opponent into the air. This is not a great move to rely on. If the opponent has blocked the initial approach attack, then they will almost certainly block the Ferret Uppercut follow-up if you use it, which will lead to a painful counterattack during your lengthy recovery. If you manage to hit with the Roll Roll Roll move, say in the middle of a combo, the Roll Roll Hop follow-up is still better at dealing more damage, and at keeping the opponent within reach in case they try to air-tech. The real value of this move is when your opponent RGs your Roll Roll Roll: this uppercut is fully invulnerable from frames 1-12, allowing you to beat all sorts of retaliation attempts!
|
| 236A~B
|
450
|
-
|
-
|
Any
|
6
|
28
|
12
|
-19
|
-21
|
IC Rekka
|
Linked from Roll Roll Roll. The B followup to 236A - Mayu launches herself into the air, the same as Roll Roll Roll version B. This move is your IC point for various combos, as it is the perfect height to go into her air loop. Same as Roll Roll Roll B, this move can be used in blockstrings and as a mixup starter. It is, however, with greater risk as the opponent has a chance to RG Roll Roll Roll version A and punish you.
|
| 236A~B~jA
|
550
|
-
|
-
|
High/Air
|
13
|
Until ground
|
-
|
-
|
-
|
IC
|
Linked from Roll Roll Hop or Roll Roll Roll B version. The A followup to 236AB and 236B - Mayu does a divekick at a fixed angle. This is your meterless BnB combo ender. In the corner, you can almost always get it to connect depending on proration, elsewhere it can be spacing and timing dependent.
|
|
623*
Astro Flying Knee
623* 623A 623A 623B 623B
|
| Version
|
Damage
|
Proration
|
Juggle
|
Guard
|
Startup ¹ ²
|
Active
|
Recovery
|
Adv Hit
|
Adv Block
|
Cancel
|
| A
|
600
|
-
|
-
|
Ground
|
9
|
4
|
29
|
-
|
-12
|
IC
|
Mayu launches herself knee first into the air, moving about 1/4 of the screen forwards and 1/2 the screen up. Air-unblockable. Low-body invulnerable. If you want to IC it, the only the 4 active frames of it can be IC'd (i.e. so you can input the IC during hitstop, but you cannot IC once Mayu enters recovery).
|
| B
|
600
|
-
|
-
|
Ground
|
5
|
4
|
36
|
-
|
-15
|
IC
|
An even higher version of A. Excellent anti-air and extremely hard to punish. High-body invulnerable.
|
| C
|
1300
|
-
|
-
|
Ground
|
10
|
4
|
35
|
-
|
-19
|
IC
|
This version of the Astro Flying Knee is Mayu's full body invulnerable special move. However, it's vulnerable on block like any other wakeup DP option, so either have additional RF meter to IC it and retreat. Unlike the A and B versions, the C version can be IC'd at any time after it connects!
|
|
214*
Big Jump
214* Wall grab Wall grab 214B 214B 214*~*C 214*~*C
|
| Version
|
Damage
|
Proration
|
Juggle
|
Guard
|
Startup ¹ ²
|
Active
|
Recovery
|
Adv Hit
|
Adv Block
|
Cancel
|
| A
|
-
|
-
|
-
|
-
|
18
|
40
|
-
|
-
|
-
|
Rekka
|
Mayu leaps for the wall in front of her, and then wall-jumps back in a high arc. At this point, Mayu can input A/B for a Slash Down Kick which must be blocked high, or C for an air unblockable ball attack.
|
| B
|
-
|
-
|
-
|
-
|
-
|
-
|
-
|
-
|
-
|
IC
|
Mayu leaps for the wall behind her, and then does a fast flying kick towards the opponent. Mayu will automatically choose the best downward angle based on the position of the opponent. On hit, the opponent will be launched backwards. On hit or block, Mayu will bounce back from the impact a small distance. This is one way for Mayu to quickly close in on the opponent's position. Due to the danger of an badly-positioned kick being blocked and leaving Mayu at the opponent's mercy during recovery, it might be a good idea to IC the attack so that you can immediately continue into blockstrings
|
| C
|
-
|
-
|
-
|
-
|
-
|
-
|
-
|
-
|
-
|
Rekka
|
Mayu leaps for the wall in front of her, and then wall-jumps back in a high arc. At this point, Mayu can input A/B for a Slash Down Kick which must now be blocked high, or C for an air unblockable ball attack.
|
| S
|
-
|
-
|
-
|
Grab
|
-
|
-
|
-
|
-
|
-
|
None
|
Mayu leaps for the wall behind her, and then leaps back in a slow arc, arms outstreched. If the opponent is on the ground when Mayu reaches her, she will grab on to the opponent, and slam them to the ground to a downed state. This move is most when viable when Mayu herself is trapped in the corner but is trying to escape. If Mayu is able to start a blockstring, she could use this version to surprise the opponent, where the time between Mayu-to-wall-to-opponent is at the shortest. Use it sparingly or not at all, since this setup can easily be spammed out of. Also, using this move at any other situation and range is just asking for a combo to the face.
|
|
j236*
Chain Trampling
j236* j236A j236A j236C j236C
|
| Version
|
Damage
|
Proration
|
Juggle
|
Guard
|
Startup ¹ ²
|
Active
|
Recovery
|
Adv Hit
|
Adv Block
|
Cancel
|
| A/B
|
-
|
-
|
-
|
Any
|
16
|
Until ground
|
-
|
-
|
-
|
IC
|
Mayu pauses in the air, and then drops down at an angle towards the opponent. The A version does a more vertical drop, while the B version drops at a 45-degree angle. If it connects, Mayu kicks the opponent in the face multiple times and then slams them immedately to a downed state. This move has a few good uses. You can link it from a blocked 6B to continue your blockstring pressure without losing too much initiative. You can use it as a crossup move where at just the right height you can hit the opponent from the front and still land behind them, causing any attempt at RG-counter attacks to attack the wrong direction. Finally, you can use it as a wall combo ender or air-recovery punisher, so that the opponent is forced to fall down in the corner where you can continue your pressure.
|
| C
|
100xN
|
-
|
-
|
Any
|
16
|
Until ground
|
-
|
-
|
-
|
IC
|
Mayu immediately drops down at a 45-degree angle towards the opponent, kicking all the way down until she reaches the ground. This will not force the opponent to a down state on hit, however it can be easily linked to a ground combo. This move is used to give Mayu an almost un-punishable approach at the opponent, as on block Mayu still has the initiative. However, if RG'd it will become a one hit move and can be very easily punished. Fully invulnerable from frames 1-15, but it is NOT invulnerable on first active frame! Still, it gives you a terrific option for beating opponent reversals or challenging your opponent in the air.
|
|
41236*
Myu~
41236* A/B/C A/B/C D D
|
| Version
|
Damage
|
Proration
|
Juggle
|
Guard
|
Startup ¹ ²
|
Active
|
Recovery
|
Adv Hit
|
Adv Block
|
Cancel
|
| A
|
500
|
-
|
-
|
Grab
|
21
|
48
|
21
|
-
|
-
|
None
|
Mayu pauses a bit with her hands held up, and then runs along the ground towards the opponent for about 2/3 of the screen. If the grab connects Mayu then launches the opponent into the air in an untechable state. This move should not be used at any range other than close range, given how slow the travel time is. Probably the best use would be unexpectedly in the middle of your usual blockstring, while you are both close to your opponent and your opponent has gotten used to blocking for a while.
|
| B
|
500
|
-
|
-
|
Grab
|
27
|
48
|
21
|
-
|
-
|
None
|
Mayu pauses a bit with her hands held up, and then runs along the ground very quickly towards the opponent for about 1 1/2 screen lengths. If the grab connects Mayu then launches the opponent into the air in an untechable state. The added speed and range makes it a better choice at long range, which is still as terrible an idea as before. This move should be used for the same situations as the A version.
|
| C
|
1000
|
-
|
-
|
Grab
|
21
|
48
|
21
|
-
|
-
|
None
|
Mayu pauses briefly with her hands held up, and then runs along the ground like an animal towards the opponent for about 2/3 of the screen. If the grab connects Mayu then wallbounces the opponent against the wall behind her. This version will connect against an opponent at point-blank range much faster than either of the non-RF versions, gives a longer juggle meter once you start comboing, and deals less proration.
|
| D
|
-
|
-
|
-
|
Grab
|
5
|
1
|
30
|
-
|
-
|
None
|
Very fast command grab that puts the opponent into a long hitstun while keeping them grounded. Will whiff against an opponent in hitstun. The recovery value listed is when the move whiffs. -25% Power when it connects, so your juggles will be more limited following this.
|
|
Eternity Specials
2141236*
Multiple Punch
2141236*
|
| Version
|
Damage
|
Proration
|
Juggle
|
Guard
|
Startup ¹ ²
|
Active
|
Recovery
|
Adv Hit
|
Adv Block
|
Cancel
|
| A
|
-
|
-
|
-
|
-
|
-
|
-
|
-
|
-
|
-
|
IC
|
Mayu curls into a ball and rolls into the opponent. If it connects, Mayu punches the opponent multiple times and ends with a number of uppercuts that launch the opponent into the air. This super should never be used outside of combos. That said, this is a great super for comboing purposes. It allows you to push the opponent a great distance across the screen, and most likely right into the corner. Also, this super can be IC'd just before the uppercuts finish for additional combo possibilities after most of the damage is dealt.
|
| B
|
-
|
-
|
-
|
-
|
-
|
-
|
-
|
-
|
-
|
IC
|
| C
|
-
|
-
|
-
|
-
|
-
|
-
|
-
|
-
|
-
|
IC
|
|
214214*
Myu Myu Hurricane
214214*
|
| Version
|
Damage
|
Proration
|
Juggle
|
Guard
|
Startup ¹ ²
|
Active
|
Recovery
|
Adv Hit
|
Adv Block
|
Cancel
|
| A
|
-
|
-
|
-
|
-
|
-
|
-
|
-
|
-
|
-
|
IC
|
Mayu spins around like a top while holding her ferret out, smacking people in the face with it. Vulnerable startup, but becomes fully invulnerable during the superflash until the final active frame. You have some control over movement, allowing you to move while spinning.
|
| B
|
-
|
-
|
-
|
-
|
-
|
-
|
-
|
-
|
-
|
IC
|
| C
|
-
|
-
|
-
|
-
|
-
|
-
|
-
|
-
|
-
|
IC
|
|
641236*
Myuuuuuuu
641236*
|
| Version
|
Damage
|
Proration
|
Juggle
|
Guard
|
Startup ¹ ²
|
Active
|
Recovery
|
Adv Hit
|
Adv Block
|
Cancel
|
| A
|
-
|
-
|
-
|
-
|
7
|
8
|
-
|
-
|
-
|
None
|
Mayu quickly leaps up into the air at a 45 degree angle, trying to grab her opponent. If successful, she will body-slam the opponent into the ground. Level 1 is mostly a combo finisher. Desperation reversal that is fully invulnerable for first 2 active frames, but you've got to be really desperate. The slow startup and limited total active frames hinders the usefulness of this version outside of combos.
|
| B
|
-
|
-
|
-
|
-
|
4
|
16
|
-
|
-
|
-
|
None
|
Good anti air option. Invulnerable on frames 1-8, so also usable as a reversal. In combos it doesn't give good value in terms of damage for the meter cost, but the greater active frames and the greater speed with which it travels can make it connect more reliably.
|
| C
|
-
|
-
|
-
|
-
|
3
|
24
|
-
|
-
|
-
|
None
|
This is one of Mayu's most powerful options for discouraging aerial approaches from the opponent. It moves fast, can't be blocked or RG'd in the air, and only a few aerial attacks like Akiko's j.C can reliably stuff it after it is activated. That being said, it is very much a all-or-nothing affair. If the opponent baits it out by moving directly above you, dashing back suddenly, or landing before you expected, then the opponent will be able to punish you quite easily as you fall back to Earth. Invulnerable on frames 1-8, with very fast startup at 3F, making this a strong reversal option. The huge distance it travels very quickly can let you snatch people out of the air, but if the opponent is very far from where it starts they can get away with air dash or other movement.
|
|
Final Memory
23693S
I'm Not Alone
23693S
|
| Damage
|
Proration
|
Juggle
|
Guard
|
Startup ¹ ²
|
Active
|
Recovery
|
Adv Hit
|
Adv Block
|
Cancel
|
| -
|
-
|
-
|
-
|
-
|
-
|
-
|
-
|
-
|
None
|
If the opponent is within about twice the normal ground throw distance, Mayu will attempt to grab immediately. If the opponent is outside of that range, Mayu will take a slow leap forwards 1/3 of the screen to try to connect with the opponent. If the grab is successful, Mayu flip-slams the opponent to the ground, and then she and two other friends start jumping on the opponent for a good amount of damage. This Final Memory is a nice wakeup option against opponents who crowd around your player a little too much, since it's easy to input that odd "23693" motion while knocked down and unable to jump. Having this threat in your arsenal should force opponents to think twice about standing too close to you on wakeup, or relying solely on aerial approaches, which Mayu already has ample ways to counter.
Extremely strong if you can learn to cover the "9" direction during pressure. An example: f5B 2369[6]3S - this allows you to input 2369 during the f5B animation, you then have time to walk forward a bit with [6] before inputting 3S and activating the super. There are all sorts of creative ways to cover the 9. Learning just how much time you have to complete the super input is crucial for making effective use of this super. Some visual examples can be found in this Twitter thread.
|
|
Strategy
- As Mayu, your main goal is to brute force yourself into your opponents face and stay there as long as possible. What you lack in a standing overhead you gain in lots of normals that move you forward, exceptionally silly invincibility on various normals and a low invincible hop dash to stay in your opponents face. Even outside of pressuring your opponent, you have moves like 5C that act as a surprisingly effective preemptive poke, 3 different low risk anti airs with f.5B, 5B and 6B, a nigh impossible to punish air unblockable meterless DP - the list goes on. All in all, Mayu players will be looking to abuse fantastic normals and exceptional mobility to frustrate the opponent to no end!
Combos
| Notation Help
|
Disclaimer: Combos are written by various contributors, some combo notations may deviate slightly from the notation listed below.
For more information, see Controls
|
| IC
|
Input Instant Charge (22C) when you have the right amount of RF Meter.
|
| FIC
|
Input Flicker Instant Charge (22C) when you have the right amount of RF Meter.
|
| {X/Y/Z}
|
Move X or Y or Z can be used.
|
| #*
|
Indicates that any of A, B and C may be used with #. Example: 214*.
|
| [<- X] [-> X]
|
Side switch notation. All inputs grouped by the square brackets are performed facing the arrow's direction. They are still written as if they were done facing right, however.
|
| [X]xN
|
Loop the inputs in the square brackets as many times as N.
|
| c5B
|
Proximity normal only usable while close.
|
| f5B
|
Proximity normal only usable outside of c5B range or when cancelled from another normal. Known as far 5B.
|
| jX
|
Button X is input during your first jump.
|
| djX
|
Button X is input during your double jump.
|
| X(whiff)
|
Indicates that X is intended to whiff.
|
| X(tech trap)
|
Indicates a combo ender intended to catch the opponent's air tech. The most common kind of tech trap is j6C, which will air throw early techs and jC later techs. Executionally identical to X(whiff) but different in purpose.
|
| ~
|
Indicates a followup for moves which have them. Example: 236A~236A.
|
| ..
|
Indicates a short delay.
|
| IAD
|
Indicates an Instant Air Dash.
|
| IABD
|
Indicates an Instant Air Back Dash.
|
| (X)
|
X move is omittable from the combo.
|
| tk.X
|
Indicates the motion "X" is input immediately after leaving the ground. Stands for tiger knee.
|
Basic Combos
Meterless
- Anywhere
- 1ABBC 236A-B-A | Anywhere. Your basic BnB. Can whiff on Misuzu unless you start the combo right in her face.
- Red IC Combos
Corner
- 1ABBC 236A-B IC jB .. jC land jABC 641236A Video
- 623A IC jC djC dj66 djBC land jABC land jABC 641236A Video
- 5C 236C 5B jC j66 jBC djABC 5AC 641236A Video
- 2C IC c5B jC j66 jBC djABC jABC c5B jBC djABC dj236B(whiff) Video
- (anti air) c5B jC j66 jBC c5B jB .. jC jABC 5AB 641236A Video
- 41236B 664 c5B jB .. jC .. djB .. djC 5AB jBC djABC dj236B Video
- Midscreen
- j214B IC j66 jB c5B jC j66 jBC djABC 5AB jBC djABC dj236B(whiff) Video
- 41236C jC j66 jBC djABC 5AC 41236A Video
Blue IC
- Anywhere
- 1ABBC 2141236C IC j66 jC 5B jC j66 jBC djB .. djC 5B jBC djABC dj236B Video
- Corner
- 1ABBC 2141236A IC jC djC dj66 djBC land jC j66 jBC djABC 5AC 641236A Video
- 1ABBC 236A-B IC jC j66 jBC 5B jC j66 jBC djABC 5AC 641236 Video
- 623A IC jC land jC j66 jBC c5B jC j66 jBC djB .. djC 5A jABC 5AB jBC djABC dj236B Video
- 5C .. 623A IC jC land jC j66 jBC c5B jC j66 jBC land jABC c5B jBC djABC dj236B(whiff) Video
- Near Corner
- 5C 236C j9 djC dj66 djBC land 236B IC jC djC dj66 djBC c5B jB .. jC djABC land 5AB jBC djABC dj236B Video
- (anti air) c5B jC j66 jBC 5AC 2141236A IC jC djC dj66 djBC land jC j66 jBC land jABC 5AB jBC djABC dj236B(whiff) Video
- Midscreen
- 1ABBC 236A-B IC jB j66 jAB 5B jB j66 jBC land jABC 5B jBC djABC dj236B Video
- 1ABBC 2141236A IC jB djB dj66 djABC land jABC land jABC 5AC 641236A Video
- 623A IC jB land jB j66 jBC c5B jC j66 jBC djABC 5AC 641236A
Okizeme
- j9 jA(whiff) jB Which Way
- One of Mayu's simplest setups. Doing any normal immediately after jumping makes Mayu's jump arc slightly lower, making the jB which way safer and harder to see.
- ~2C j9 j8 Which Way
- From a 2C knockdown that leaves you right next to the opponent, you have enough time to j9 j8 right above the opponent and do a 4-way high/low left/right mixup. Making use of normals on the way down from the j8 to help mask which side you'll land and whether you'll hit high or land into low is crucial.
- Corner j9 dj9 High/Low/Grab/j236C Safe Jump
- Works on characters who do not have fast wakeup. This safe jump setup is brutal due to j236C which delays Mayu's landing and has a small amount of invulnerability beating delayed mash and a fair few reversals.
- Corner Crossups
- Mayu is one of the few characters capable of crossing up opponents who are directly in the corner with no gap. A correctly timed 214C wall grab as the opponent is waking up will force the opponent out of the corner slightly, allowing Mayu to do the A divekick followup for a left/right. This setup also frequently stuffs reversals. The only requirement is red IC to capitalise on a hit or to make it safe if blocked.
Mid Pressure Mixups
- Mayu has a surprising amount of layers to her pressure for a character who seems fairly straight forward at first glance. A lot of Mayu's strength comes from how obnoxious her pressure is, how she has high/low profiling on a lot of normals, and how on top of this she can create mixups after extremely common pressure string pieces.
- On 2C 623A
- 2C has an insanely long cancel window. You can abuse this by mixing up when you cancel into the low invulnerable 623A, which will catch any punish attempts if timed correctly or allow you to IC and into a mixup if not. You'll only ever do this if you have red IC for a conversion or to make it safe, even if 623A can be hard to punish you'll likely lose your turn without IC.
- 623A IC High/Low
- 623A, when IC'd, keeps some of the 623A momentum and makes Mayu land quite quickly if you don't press any normals or air dash. This is where the mixup comes in. You can 623A IC into air normals (like jAAB), do nothing and immediately land and 2A, air dash and jBC, late air dash (although it's only a slight delay) to make them think you're going low but stay high... honestly this setup is disgusting. Not only do you use a low invulnerable, air unblockable, 9F startup move that easily converts into high damage off IC, you also get a mixup if it's blocked and you have IC in stock (which you always will if you use this).
- 236A~B IC High/Low
- Same idea as 623A IC, except this plays off whether you use the divekick ~A followup from 236A~B or not. This divekick can be significantly delayed and can work as a frame trap, made especially more potent with IC to make it safe or to convert into juggles. Once you've conditioned your opponent to respect this option, you can create a mix up opportunity by ICing the 236A~B ball bounce into jump normals, landing low, immediate airdash high, immediate airdash land low, delayed airdash high, delayed airdash low... and this all works because the opponent WILL over respect Mayu's pressure. She gets far too much mileage if they don't.
Win Quotes
| Japanese
|
English
|
|
みゅ?
|
Myu?
|
|
みゅーっ!
|
Myuu-!
|
|
みゅ
みゅぅぅぅ…
|
Myu!
Myuuuu...
|
|
みゅ~♪
勝ったらてりやき
てりやきぃ♪
|
Myu~♪
If I win, teriyaki, teriyaki♪
|
|
これもみゅーっ
わーいっ♪
(ぐいぐい
|
This is also Myu-
Yaay♪
(grab grab)
|
|
はぇー…
|
Haee...
|
|
(To Rumi)
ななせーっ!
みゅーっ!!
(ぐいぐい
|
(To Rumi)
Nanase-!
Myu-!!
(grab grab)
|
|
(To Mizuka)
みずかーっ!
みゅーっ!!
|
(To Mizuka)
Mizuka-!
Myu-!!
|
|
(To Akane)
みゅ……
ちょっと
ちがう…
|
(To Akane)
Myu......
Wait,
that's not right...
|
|
(To Mayu)
わーいっ!
そっくり
そっくり
そっくりーっ!
みゅぅぅぅ~♪
|
(To Mayu)
Waai!
You're like me
You're like me
You're like meee!
Myuuuu~♪
|
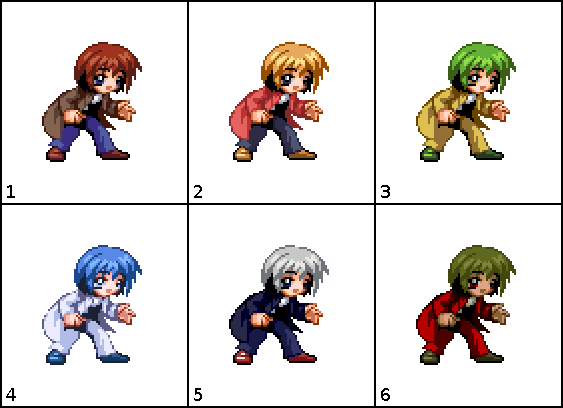
Colors
In-game References
ONE References
- The ferret that can be seen in some of Mayu's moves is a reference to the ferret that Mayu used to own in the game.
- The word "Myu" that is used in many of Mayu's movenames and winquotes is a reference to her ferret's name.
| General
|
|
| Characters
|
|
| Mechanics
|
|
| Guides
|
|
| Wiki
|
|


