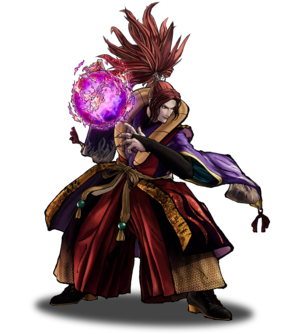
Shiro Tokisada Amakusa
天草四郎時貞 Introduction
Short Amakusa intro, can be serious or a meme one, up to the editor. If you go for the latter, limit the jokes to this section only.
| Strengths |
Weaknesses
|
- Long range normals w/ good damage
- No hurtboxes on far heavy normals
- Strong zoning game
- Long range high/low mixup
- Damaging heavy punishes upclose
|
- Slow normals
- Weak antiairs
- No recoil on almost all far normals
- Far normals with deadzones upclose
- Floaty jump
|
Data
- Damage Taken: 105%
- Rage Factor: 0.32
- Rage Duration: 8 seconds
- Jump: 61 frames (Extremely Slow)
- Forward Walk Speed: 0.3 (Average)
- Back Walk Speed: 0.23 (Average)
- Dash Speed: 1.0 (Very Slow)
- Back Dash: 27 frames
- Weapon Pickup / Drop: 40 / 57 frames
Gameplan
Similar to the Strategy section of the 5sp wiki pages. List Amakusa's archetype, strengths, weaknesses, etc. Sample subsections could include Neutral, Okizeme, etc.
Neutral
Okizeme
Normal Moves
Far Slashes
5A
5A
|
| Damage
|
Guard
|
Startup
|
Active
|
Recovery
|
Total
|
Hit Adv
|
Block Adv
|
Guard Dmg
|
Cancel
|
Recoil
|
Deflectable
|
Unarmed
|
| 30
|
Mid
|
9
|
-
|
-
|
25
|
-4
|
-7
|
5
|
No
|
Yes
|
Yes
|
-
|
|
5B
5B
|
| Damage
|
Guard
|
Startup
|
Active
|
Recovery
|
Total
|
Hit Adv
|
Block Adv
|
Guard Dmg
|
Cancel
|
Recoil
|
Deflectable
|
Unarmed
|
| 100
|
Mid
|
19~24
|
-
|
-
|
50
|
-11~-6
|
-16~-11
|
10
|
No
|
Yes
|
Yes
|
-
|
Extrememely long ranged button that can also hit high enough to antiair people from afar, and also hits on the way back.
It is also notable for having a huge extended hurtbox which makes it a huge risk to whiff this attack, specially against characters with fireballs or long ranged attacks without extended hurtboxes (eg: basara's far 5C)
|
|
5C
5C
|
| Damage
|
Guard
|
Startup
|
Active
|
Recovery
|
Total
|
Hit Adv
|
Block Adv
|
Guard Dmg
|
Cancel
|
Recoil
|
Deflectable
|
Unarmed
|
| 240
|
Mid
|
25
|
-
|
-
|
70
|
-6~-4
|
-16
|
25
|
No
|
Yes
|
Disarm
|
-
|
His hardest hitting long range normal. No extended hurtbox and a very important button since Amakusa lacks a cancellable running normal to punish, yet its startup is just slow enough that he might not be able to punish certain moves on situations where other characters would be able to. Seems to be active enough to land it meaty without much trouble so you wont risk falling for a deflect on wakeup.
This also the only normal to give him safe recoil cancel options.
|
|
2A
2A
|
| Damage
|
Guard
|
Startup
|
Active
|
Recovery
|
Total
|
Hit Adv
|
Block Adv
|
Guard Dmg
|
Cancel
|
Recoil
|
Deflectable
|
Unarmed
|
| 30
|
Low
|
8~9
|
-
|
-
|
29
|
-9~-8
|
-12~-11
|
5
|
No
|
Yes
|
No
|
-
|
|
2B
2B
|
| Damage
|
Guard
|
Startup
|
Active
|
Recovery
|
Total
|
Hit Adv
|
Block Adv
|
Guard Dmg
|
Cancel
|
Recoil
|
Deflectable
|
Unarmed
|
| 90
|
Mid
|
15~17
|
-
|
-
|
43
|
-8~-6
|
-13~-11
|
10
|
No
|
Yes
|
Yes
|
-
|
Another great attack for long pokes next to Far 5B. While it has a hurtbox just as big as Far 5B, its much harder to hit and also comes out faster which makes him his main B attack for punishes, however all this comes with the risk of being a crouching normal so if they get a good read and jump on you its going to hurt, so its best to not spam it mindlessly and use in conjuction with far 5B if you think they might try to jump.
|
|
2C
2C
|
| Damage
|
Guard
|
Startup
|
Active
|
Recovery
|
Total
|
Hit Adv
|
Block Adv
|
Guard Dmg
|
Cancel
|
Recoil
|
Deflectable
|
Unarmed
|
| 150
|
Low
|
20~25
|
-
|
-
|
59
|
KD(+86~+84)
|
-16~-11
|
25
|
No
|
No
|
No
|
-
|
Just like Far 5C it has no extended hurtboxes, but this one is a crouch normal, hits low and causes a knockdown. Good punish button for when far 5C is too slow for the job.
|
|
Near Slashes
n.5A
n.5A
|
| Damage
|
Guard
|
Startup
|
Active
|
Recovery
|
Total
|
Hit Adv
|
Block Adv
|
Guard Dmg
|
Cancel
|
Recoil
|
Deflectable
|
Unarmed
|
| 30
|
Mid
|
5
|
-
|
-
|
19
|
-2
|
-5
|
5
|
Yes
|
No
|
No
|
-
|
|
n.5B
n.5B
|
| Damage
|
Guard
|
Startup
|
Active
|
Recovery
|
Total
|
Hit Adv
|
Block Adv
|
Guard Dmg
|
Cancel
|
Recoil
|
Deflectable
|
Unarmed
|
| 80
|
Mid
|
8
|
-
|
-
|
29
|
-2~-1
|
-13
|
10
|
Yes
|
Yes
|
Yes
|
-
|
|
n.5C
n.5C
|
| Damage
|
Guard
|
Startup
|
Active
|
Recovery
|
Total
|
Hit Adv
|
Block Adv
|
Guard Dmg
|
Cancel
|
Recoil
|
Deflectable
|
Unarmed
|
| 200
|
Mid
|
15
|
-
|
-
|
44
|
-2
|
-28
|
25
|
No
|
Yes
|
Disarm
|
-
|
While its not his best antiair by far (slow and doesnt reach really high) it is the most damaging, which can deter opponents from jumping from too close. Best used against characters with jump attacks that dont cover alot of area below them.
|
|
n.2A
n.2A
|
| Damage
|
Guard
|
Startup
|
Active
|
Recovery
|
Total
|
Hit Adv
|
Block Adv
|
Guard Dmg
|
Cancel
|
Recoil
|
Deflectable
|
Unarmed
|
| 30
|
Mid
|
5
|
-
|
-
|
18
|
-2~-1
|
-4
|
5
|
Yes
|
No
|
No
|
-
|
|
n.2B
n.2B
|
| Damage
|
Guard
|
Startup
|
Active
|
Recovery
|
Total
|
Hit Adv
|
Block Adv
|
Guard Dmg
|
Cancel
|
Recoil
|
Deflectable
|
Unarmed
|
| 80
|
Mid
|
7
|
-
|
-
|
28
|
-1
|
-13
|
10
|
Yes
|
Yes
|
Yes
|
-
|
|
n.2C
n.2C
|
| Damage
|
Guard
|
Startup
|
Active
|
Recovery
|
Total
|
Hit Adv
|
Block Adv
|
Guard Dmg
|
Cancel
|
Recoil
|
Deflectable
|
Unarmed
|
| 150
|
Mid
|
19
|
-
|
-
|
51
|
-5
|
-28
|
25
|
Yes
|
Yes
|
Disarm
|
-
|
quite slow but its a cancellable C button, which leads to extremely damaging punishes if you can land it.
|
|
Kicks
5D
5D
|
| Damage
|
Guard
|
Startup
|
Active
|
Recovery
|
Total
|
Hit Adv
|
Block Adv
|
Guard Dmg
|
Cancel
|
Recoil
|
Deflectable
|
Unarmed
|
| 50
|
Mid
|
12
|
-
|
-
|
29
|
-5
|
-8
|
5
|
No
|
-
|
-
|
Yes
|
Great for crossing under opponents who are jumping at you, much faster than doing it by running and a decent button to check people running at you while you are backing away. Despite how it looks, Amakusa is not airborne during the attack.
|
|
6D
6D
|
| Damage
|
Guard
|
Startup
|
Active
|
Recovery
|
Total
|
Hit Adv
|
Block Adv
|
Guard Dmg
|
Cancel
|
Recoil
|
Deflectable
|
Unarmed
|
| 30
|
Low
|
7
|
-
|
-
|
23
|
-4
|
-7
|
5
|
No
|
-
|
-
|
Yes
|
good ranged low that creates alot of space between both players. For some reason it still pushes Amakusa away a little when using it near a knocked down opponent.
|
|
2D
2D
|
| Damage
|
Guard
|
Startup
|
Active
|
Recovery
|
Total
|
Hit Adv
|
Block Adv
|
Guard Dmg
|
Cancel
|
Recoil
|
Deflectable
|
Unarmed
|
| 20
|
Low
|
4
|
-
|
-
|
17
|
0
|
-3
|
5
|
No
|
-
|
-
|
Yes
|
|
3D
3D
|
| Damage
|
Guard
|
Startup
|
Active
|
Recovery
|
Total
|
Hit Adv
|
Block Adv
|
Guard Dmg
|
Cancel
|
Recoil
|
Deflectable
|
Unarmed
|
| 70
|
Low
|
12~19
|
-
|
-
|
52
|
KD(+84)
|
-18~-11
|
5
|
No
|
-
|
-
|
Yes
|
|
Dash Normals
66A
66A
|
| Damage
|
Guard
|
Startup
|
Active
|
Recovery
|
Total
|
Hit Adv
|
Block Adv
|
Guard Dmg
|
Cancel
|
Recoil
|
Deflectable
|
Unarmed
|
| 50
|
Mid
|
5
|
-
|
-
|
28
|
-1
|
-8
|
5
|
No
|
No
|
No
|
-
|
Very fast and hits extremely high in the air.
|
|
66B
66B
|
| Damage
|
Guard
|
Startup
|
Active
|
Recovery
|
Total
|
Hit Adv
|
Block Adv
|
Guard Dmg
|
Cancel
|
Recoil
|
Deflectable
|
Unarmed
|
| 80
|
High
|
15
|
-
|
-
|
45
|
KD(+71)
|
-14
|
10
|
No
|
No
|
Disarm
|
-
|
Running overhead that causes a knockdown, and spikes airborne opponents.
|
|
66C
66C
|
| Damage
|
Guard
|
Startup
|
Active
|
Recovery
|
Total
|
Hit Adv
|
Block Adv
|
Guard Dmg
|
Cancel
|
Recoil
|
Deflectable
|
Unarmed
|
| 140
|
Mid
|
20
|
-
|
-
|
57
|
KD(+90)
|
-19
|
20
|
No
|
No
|
Disarm
|
-
|
Really short range, but it can crossup if you do it right next to the opponent.
|
|
66D
66D
|
| Damage
|
Guard
|
Startup
|
Active
|
Recovery
|
Total
|
Hit Adv
|
Block Adv
|
Guard Dmg
|
Cancel
|
Recoil
|
Deflectable
|
Unarmed
|
| 70
|
Low
|
10~20
|
-
|
-
|
41
|
-9~+1
|
-13~-3
|
5
|
No
|
-
|
-
|
Yes
|
|
Air Normals
j.A
j8.A
|
| Damage
|
Guard
|
Startup
|
Active
|
Recovery
|
Total
|
Hit Adv
|
Block Adv
|
Guard Dmg
|
Cancel
|
Recoil
|
Deflectable
|
Unarmed
|
| 50
|
High
|
10
|
-
|
-
|
-
|
-
|
-
|
5
|
-
|
-
|
-
|
-
|
|
j.A
j7/9.A
|
| Damage
|
Guard
|
Startup
|
Active
|
Recovery
|
Total
|
Hit Adv
|
Block Adv
|
Guard Dmg
|
Cancel
|
Recoil
|
Deflectable
|
Unarmed
|
| 50
|
High
|
8
|
-
|
-
|
-
|
-
|
-
|
5
|
-
|
-
|
-
|
-
|
great button for when the opponent tries to jump on you from very close
|
|
j.B
j.B
|
| Damage
|
Guard
|
Startup
|
Active
|
Recovery
|
Total
|
Hit Adv
|
Block Adv
|
Guard Dmg
|
Cancel
|
Recoil
|
Deflectable
|
Unarmed
|
| 100
|
High
|
11
|
-
|
-
|
-
|
-
|
-
|
10
|
-
|
-
|
-
|
-
|
If you ever decide to jump in on the opponent from very close, this the the normal to use since j.C will never hit people right next to you.
|
|
j.C
j.C
|
| Damage
|
Guard
|
Startup
|
Active
|
Recovery
|
Total
|
Hit Adv
|
Block Adv
|
Guard Dmg
|
Cancel
|
Recoil
|
Deflectable
|
Unarmed
|
| 160
|
High
|
15~18
|
-
|
-
|
-
|
-
|
-
|
20
|
-
|
-
|
-
|
-
|
Huge range and good damage makes it a great button for catching people trying to close the distance from far away wethever it is by ground or air, however it wont hit the opponent when very close.
|
|
j.D
j.D
|
| Damage
|
Guard
|
Startup
|
Active
|
Recovery
|
Total
|
Hit Adv
|
Block Adv
|
Guard Dmg
|
Cancel
|
Recoil
|
Deflectable
|
Unarmed
|
| 30
|
High
|
8
|
-
|
-
|
-
|
-
|
-
|
5
|
-
|
-
|
-
|
-
|
|
Unarmed Normals
u.5S
u.5S
|
| Damage
|
Guard
|
Startup
|
Active
|
Recovery
|
Total
|
Hit Adv
|
Block Adv
|
Guard Dmg
|
Cancel
|
Recoil
|
Deflectable
|
Unarmed
|
| 50[25,25]
|
Mid
|
6
|
-
|
-
|
34
|
+2
|
-3
|
5[3,2]
|
No
|
-
|
-
|
Only
|
|
u.2S
u.2S
|
| Damage
|
Guard
|
Startup
|
Active
|
Recovery
|
Total
|
Hit Adv
|
Block Adv
|
Guard Dmg
|
Cancel
|
Recoil
|
Deflectable
|
Unarmed
|
| 50[25,25]
|
Mid
|
6
|
-
|
-
|
34
|
0
|
-6
|
5[3,2]
|
No
|
-
|
-
|
Only
|
|
ju.S
ju.S
|
| Damage
|
Guard
|
Startup
|
Active
|
Recovery
|
Total
|
Hit Adv
|
Block Adv
|
Guard Dmg
|
Cancel
|
Recoil
|
Deflectable
|
Unarmed
|
| 50
|
High
|
5
|
-
|
-
|
-
|
-
|
-
|
5
|
-
|
-
|
-
|
Only
|
|
u.66S
u.66S
|
| Damage
|
Guard
|
Startup
|
Active
|
Recovery
|
Total
|
Hit Adv
|
Block Adv
|
Guard Dmg
|
Cancel
|
Recoil
|
Deflectable
|
Unarmed
|
| 50
|
Mid
|
5
|
-
|
-
|
-
|
KD(+104)
|
-8
|
5
|
No
|
-
|
-
|
Only
|
|
Universal Mechanics
Guard Break
Guard Break (Throw)
5/6C+D / 4C+D Neutral / Forward Throw Neutral / Forward Throw Back Throw Back Throw
|
| Version
|
Damage
|
Guard
|
Startup
|
Active
|
Recovery
|
Total
|
Hit Adv
|
Block Adv
|
Guard Dmg
|
Cancel
|
Recoil
|
Deflectable
|
Unarmed
|
| Neutral / Forward
|
0
|
Throw
|
3
|
-
|
71
|
74
|
+20
|
N/A
|
N/A
|
No
|
No
|
No
|
Yes
|
Universal throw. Can be followed up with an attack.
|
| Back
|
0
|
Throw
|
5
|
-
|
69
|
74
|
+25
|
N/A
|
N/A
|
No
|
No
|
No
|
Yes
|
Universal throw. Can be followed up with an attack.
|
|
Surprise Attack
Surprise Attack (Overhead)
5B+C Armed Armed Unarmed Unarmed
|
| Version
|
Damage
|
Guard
|
Startup
|
Active
|
Recovery
|
Total
|
Hit Adv
|
Block Adv
|
Guard Dmg
|
Cancel
|
Recoil
|
Deflectable
|
Unarmed
|
| Armed
|
70
|
High
|
21
|
-
|
-
|
45
|
+1
|
-12
|
10
|
-
|
-
|
-
|
No
|
|
|
| Unarmed
|
70
|
High
|
21
|
-
|
-
|
40
|
KD(+104)
|
-7
|
10
|
-
|
-
|
-
|
Only
|
|
|
|
Dodge
Dodge
5A+B
|
| Damage
|
Guard
|
Startup
|
Active
|
Recovery
|
Total
|
Hit Adv
|
Block Adv
|
Guard Dmg
|
Cancel
|
Recoil
|
Deflectable
|
Unarmed
|
| 0
|
N/A
|
1
|
16
|
22
|
38
|
N/A
|
N/A
|
-
|
N/A
|
-
|
N/A
|
Yes
|
Universal dodge. Avoids all attacks for a brief moment, and is mainly used to avoid throws.
Complete invincibility from frames 1 to 10. Strike invincibility from frames 11 to 16.
|
|
Stance Break
Stance Break
A+B during Just Defense
|
| Damage
|
Guard
|
Startup
|
Active
|
Recovery
|
Total
|
Hit Adv
|
Block Adv
|
Guard Dmg
|
Cancel
|
Recoil
|
Deflectable
|
Unarmed
|
| 0
|
Mid
|
5
|
-
|
-
|
52
|
KD
|
-24
|
-
|
No
|
-
|
-
|
Yes
|
Universal Stance Break. Very short range
|
|
Counter / Blade Catch
Counter / Blade Catch
236A+B Counter Counter Blade Catch Blade Catch
|
| Version
|
Damage
|
Guard
|
Startup
|
Active
|
Recovery
|
Total
|
Hit Adv
|
Block Adv
|
Guard Dmg
|
Cancel
|
Recoil
|
Deflectable
|
Unarmed
|
| Armed
|
0
|
N/A
|
2
|
11
|
34
|
46
|
+35~+59
|
N/A
|
N/A
|
N/A
|
N/A
|
N/A
|
No
|
Universal counter. Allows you to follow up with a guaranteed attack of your own. The amount of time you have to followup depends on the strength of the attack you counter, with heavy attacks staggering the opponent for the longest amount of time. Additionally, if you counter a heavy slash or a running slash, your opponent will be disarmed.
|
| Disarmed
|
0
|
N/A
|
2
|
12
|
9
|
22
|
KD
|
N/A
|
N/A
|
N/A
|
N/A
|
N/A
|
Yes
|
Universal counter. While disarmed, your counter will disarm and knock away your opponent regardless of slash level countered.
|
|
Rage Explosion
Rage Explosion
5A+B+C
|
| Damage
|
Guard
|
Startup
|
Active
|
Recovery
|
Total
|
Hit Adv
|
Block Adv
|
Guard Dmg
|
Cancel
|
Recoil
|
Deflectable
|
Unarmed
|
| 0
|
Unblockable
|
21
|
1
|
-
|
58
|
0
|
-
|
-
|
-
|
-
|
-
|
-
|
Unblockable pushback attack.
|
|
Lightning Blade
Lightning Blade (Issen)
5A+B+C during Rage Explosion
|
| Damage
|
Guard
|
Startup
|
Active
|
Recovery
|
Total
|
Hit Adv
|
Block Adv
|
Guard Dmg
|
Cancel
|
Recoil
|
Deflectable
|
Unarmed
|
| 300~709
|
Mid
|
9
|
-
|
-
|
-
|
KD
|
-44
|
-
|
No
|
No
|
No
|
No
|
Has full invincibility and can anti-air. Damage scales up based on remaining health.
|
|
Command Moves
Wall Jump
Wall Jump
9 (near wall) Wall Jump Wall Jump
|
| Damage
|
Guard
|
Startup
|
Active
|
Recovery
|
Total
|
Hit Adv
|
Block Adv
|
Guard Dmg
|
Cancel
|
Recoil
|
Deflectable
|
Unarmed
|
| -
|
-
|
-
|
-
|
-
|
-
|
-
|
-
|
-
|
-
|
-
|
-
|
Yes
|
|
Special Moves
Holy Spirit Slicer
Holy Spirit Slicer
236S
|
| Version
|
Damage
|
Guard
|
Startup
|
Active
|
Recovery
|
Total
|
Hit Adv
|
Block Adv
|
Guard Dmg
|
Cancel
|
Recoil
|
Deflectable
|
Unarmed
|
| A
|
60
|
Mid
|
15
|
-
|
-
|
62
|
KD(+84)
|
-19
|
5
|
-
|
-
|
-
|
No
|
| B
|
60
|
Mid
|
18
|
-
|
-
|
62
|
KD(+87)
|
-16
|
5
|
-
|
-
|
-
|
No
|
| C
|
60
|
Mid
|
26
|
-
|
-
|
62
|
KD(+95)
|
-8
|
5
|
-
|
-
|
-
|
No
|
| Rage
|
102[119](12[14]*6, 30[35])
|
Mid
|
27
|
-
|
-
|
62
|
KD(+120)
|
-18
|
8
|
Yes*
|
-
|
-
|
No
|
Can link to WFT and Issen. Bracketed is Rage Explosion.
|
|
Phoenix Flash
Phoenix Flash
214S
|
| Version
|
Damage
|
Guard
|
Startup
|
Active
|
Recovery
|
Total
|
Hit Adv
|
Block Adv
|
Guard Dmg
|
Cancel
|
Recoil
|
Deflectable
|
Unarmed
|
| A
|
110[10,100]
|
High
|
24
|
-
|
-
|
56
|
KD(+91)
|
-14
|
5
|
-
|
-
|
-
|
No
|
| B
|
110[10,100]
|
High
|
24
|
-
|
-
|
56
|
KD(+91)
|
-14
|
5
|
-
|
-
|
-
|
No
|
| C
|
130[30,100]
|
Low
|
17
|
-
|
-
|
56
|
KD(+91)
|
-21
|
5
|
-
|
-
|
-
|
No
|
|
Evil Hornet Gouger
Evil Hornet Gouger
236D/214D
|
| Damage
|
Guard
|
Startup
|
Active
|
Recovery
|
Total
|
Hit Adv
|
Block Adv
|
Guard Dmg
|
Cancel
|
Recoil
|
Deflectable
|
Unarmed
|
| -
|
-
|
-
|
-
|
-
|
58
|
-
|
-
|
-
|
-
|
-
|
-
|
Yes
|
Only upper body invulnerable during the dashing part.
|
|
Judgement Blow
Judgement Blow
623D
|
| Damage
|
Guard
|
Startup
|
Active
|
Recovery
|
Total
|
Hit Adv
|
Block Adv
|
Guard Dmg
|
Cancel
|
Recoil
|
Deflectable
|
Unarmed
|
| 170[10,5*20,60]
|
Mid
|
10
|
-
|
-
|
70
|
KD(+93)
|
-15
|
8[2*4]
|
-
|
-
|
-
|
Yes
|
|
Dark Destroyer
Dark Destroyer
623S
|
| Damage
|
Guard
|
Startup
|
Active
|
Recovery
|
Total
|
Hit Adv
|
Block Adv
|
Guard Dmg
|
Cancel
|
Recoil
|
Deflectable
|
Unarmed
|
| 100
|
-
|
24
|
-
|
-
|
-
|
KD
|
-
|
-
|
-
|
-
|
-
|
No
|
Different slashes determine the position. Light goes straight up, medium goes a quarter of the screen, heavy goes half screen. Can attack by pressing slash or cancel by pressing kick. Pressing nothing it will go for attack to where the opponent is.
The hitbox is smaller that it looks and can be hit out of the air if you react fast enough.
|
|
Judgement Blow (Attack)
Judgement Blow (Attack)
During 623S, S
|
| Damage
|
Guard
|
Startup
|
Active
|
Recovery
|
Total
|
Hit Adv
|
Block Adv
|
Guard Dmg
|
Cancel
|
Recoil
|
Deflectable
|
Unarmed
|
| 100
|
Mid
|
9
|
-
|
39(landing)
|
-
|
KD(+85)
|
-17
|
10
|
-
|
-
|
-
|
No
|
Different slashes determine the distance traveled. Light goes diagonally down a quarter of the screen, medium goes diagonally down half of the screen, heavy goes to where the opponent is. You can also crossup with it.
This move also deals a decent amount of chip damage, making it ideal for closing the round if the opponent is within chip kill range.
|
|
Judgement Blow (Descent)
Judgement Blow (Descent)
During 623S, D
|
| Damage
|
Guard
|
Startup
|
Active
|
Recovery
|
Total
|
Hit Adv
|
Block Adv
|
Guard Dmg
|
Cancel
|
Recoil
|
Deflectable
|
Unarmed
|
| -
|
-
|
-
|
-
|
14(landing)
|
40
|
-
|
-
|
-
|
-
|
-
|
-
|
-
|
Falling straight down without attacking.
|
|
Supers
Weapon Flipping Technique
Repent for your sins! But Ask Me Not For Forgiveness
236B+C
|
| Damage
|
Guard
|
Startup
|
Active
|
Recovery
|
Total
|
Hit Adv
|
Block Adv
|
Guard Dmg
|
Cancel
|
Recoil
|
Deflectable
|
Unarmed
|
| 350(420,470)
|
Mid
|
1+15
|
-
|
-
|
70
|
KD(+41)
|
-24
|
-
|
-
|
-
|
-
|
-
|
Available only during Max Rage or Rage Explosion. Disarms on hit. Not half bad at antiairing opponents trying to jump away, and has no extended hurtbox.
|
|
Super Special Move
Atonement for your sins! But Ask Me Not For Forgiveness
641236C+D
|
| Damage
|
Guard
|
Startup
|
Active
|
Recovery
|
Total
|
Hit Adv
|
Block Adv
|
Guard Dmg
|
Cancel
|
Recoil
|
Deflectable
|
Unarmed
|
| 650
|
Low
|
10+18
|
-
|
-
|
103
|
KD(+88)
|
-43
|
-
|
-
|
-
|
-
|
-
|
Available only once per match.
|
|
Combos
List combos, use numpad notation.
Midscreen
- (n.5A / n.2A) xx 623D
Quick close range combo.
- (n.5B / n.2B) xx 236S / 214C / 623D / WFT
Has to be very close or 623D will whiff.
- n.2C xx 236S / 214C / 623D / WFT
Close range combo.
- 5CD...
- (n.5B / n.2B) xx 236S / 214C / WFT
Microwalk in order to get the close version.
- 2C
Easy follow up for knock down.
- 4CD...
- (n.5B / n.2B) xx 236S / 214C / 623D / WFT
Has to walk quite a bit for 623D to connect..
- 2C
Easy follow up for knock down.
Corner
- (5CD/4CD)...
- n.2C xx 236S / 214C / 623D / WFT
Corner throw combo for the most damage.
Guard Crush
- n.5C...
After recovery...
- SSM
SSM follow up. (Be careful with opponent bursting to avoid it)
- (n.5B / n.2B) xx 236S / 214C / 623D / WFT
Has to be very close or 623D will whiff.
- n.5C / 5C...
Cancel recovery...
- Lighting Blade
Universal Issen combo.
Videos
Link to Amakusa videos and specify year it was produced or patch version in brackets.
Example: Amakusa combo video by "name of content creator" (2019).
Colors
External Links
Link to docs hosted in other sites.


