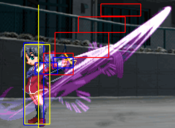
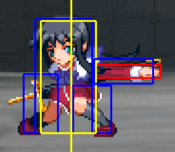
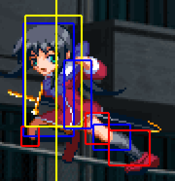
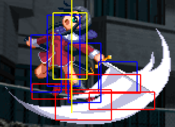
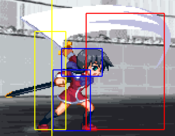
 Kawasumi Mai
Introduction
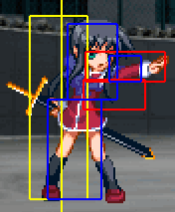
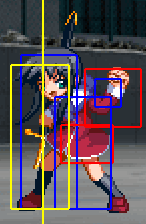
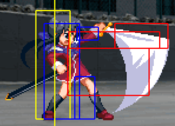
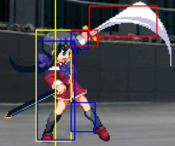
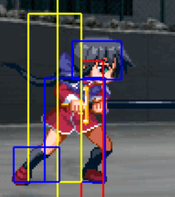
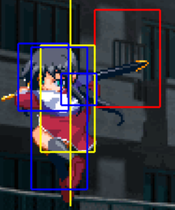
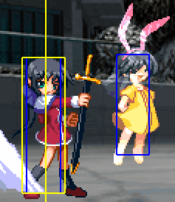
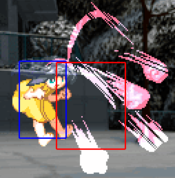
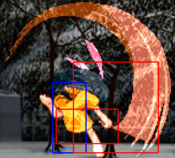
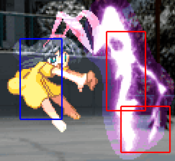
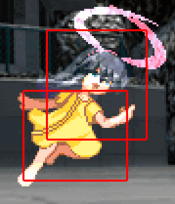
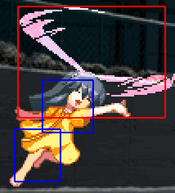
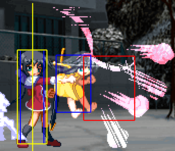
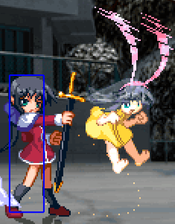
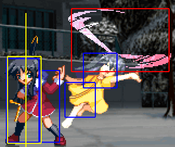
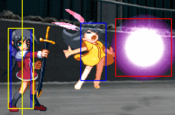
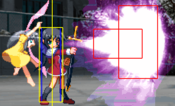
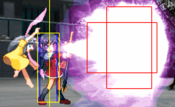
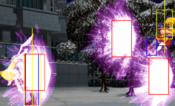
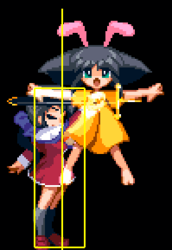
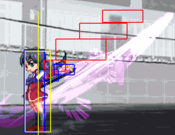
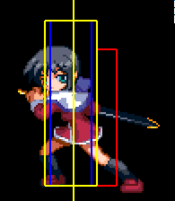
Kawasumi Mai (川澄 舞) is a sword character with a ghost assist, a mix between Eddie and Johnny from Guilty Gear. She has very strong lockdown and control over the match once she gains momentum; Mai will utilise the ghost assists to zone, to cover gaps in blockstrings, and to create mixup opportunities. This ghost has a cool down below Mai’s health bar and needs time to regenerate. If the ghost is hit by the opponent, the regeneration takes longer. Most of Mai’s sword moves have a hurtbox and terrible recovery on whiff, so she is a lot weaker without the ghost covering her.
Mai is one of the heroines of Kanon, a visual novel produced by Key in 1999. She is close friends with Sayuri Kurata.
Stage: Courtyard of the Full Moon (満月の中庭)
BGM: Girl's Prison (少女の檻)
Character-Specific Notes
- Mai is able to air jump once, and air dash/backstep once. Once Mai has air dashed/backstepped, she cannot perform any more air jumps until she lands or air recovers.
- Mai's ground dash is actually a fast jump forward. She cannot cancel this "dash", and does not have any dash attacks.
- Mai can summon a ghostly bunny-girl to assist her. While Mai's ghost is floating idle, a "Time" gauge will appear underneath her life gauge, displaying the amount of time left before it is automatically recalled. Mai's ghost can also be manually recalled by certain moves, or forcibally recalled by the opponent hitting either Mai or the ghost. After the ghost is recalled, a "Charge" gauge will appear underneath her life gauge, indicating the amount of time left before the ghost can be summoned again.
- If Mai uses her "Awakening" move, a "Time" gauge will appear underneath her life gauge, displaying the amount of time left before she turns back to normal.
Normal Moves
The notation for the movelists can be found under Controls.
The normal move table can be found under Mai Kawasumi/Move Data.
Standing
66
66
|
| Damage
|
Proration
|
Juggle
|
Guard
|
Startup ¹ ²
|
Active
|
Recovery
|
Adv Hit
|
Adv Block
|
Cancel
|
| -
|
-
|
-
|
-
|
-
|
-
|
-
|
-
|
-
|
None
|
- Unlike most characters, Mai performs a forward step instead of a dash.
- Steps in a fixed distance and sometimes makes it hard for Mai to adjust distance between the opponent.
- May result in a full air combo by the opponent if hit by 5A or 2A. Be careful to perform this move when close to the opponent.
- Allows buffering of normals.
|
|
44
44
|
| Damage
|
Proration
|
Juggle
|
Guard
|
Startup ¹ ²
|
Active
|
Recovery
|
Adv Hit
|
Adv Block
|
Cancel
|
| -
|
-
|
-
|
-
|
-
|
-
|
-
|
-
|
-
|
None
|
- A normal back step.
- May result in a full air combo by the opponent when trying to do RG in corner but this move accidently comes out.
|
|
5A
5A
|
| Damage
|
Proration
|
Juggle
|
Guard
|
Startup ¹ ²
|
Active
|
Recovery
|
Adv Hit
|
Adv Block
|
Cancel
|
| 180
|
-
|
-
|
Ground
|
4
|
5
|
6
|
0
|
-1
|
N Sp Su J IC R SB
|
- Pretty standard jab, can be used as an anti air or to initiate pressure, whiffs on some crouching characters and dps.
- Thanks to the high hitboxes and fast startup, it's worth using it as a combo starter when confirmed a IAD(instant air dash) or RGed jump normals(usually a 5/6F startup JA).
- Also can be used to counter standing normals(usually B/C with more than 7F startup) after RG.
- 2A may do the same thing but 5F startup makes it much harder or impossible.
- Sometimes RG 5A will not allow for a full combo if it hits, but will surely break the opponent's blockstrings in these circumstances.
- Rare but helpful to adjust height in combos when the opponent goes too high for 5B to hit.
|
|
5B
c5B
|
| Damage
|
Proration
|
Juggle
|
Guard
|
Startup ¹ ²
|
Active
|
Recovery
|
Adv Hit
|
Adv Block
|
Cancel
|
| 380
|
-
|
-
|
Ground
|
5
|
3
|
10
|
+10
|
+8
|
N Sp Su J IC f5B SB
|
- An incredible move with a very fast startup (close to 5A/2As), fantastic frame advantage, and special hitstop for easy hitconfirms. It is also jump cancellable and links into itself on hit for even easier confirms.
- Can be used in many, many ways including as an anti air, to blow up both A/B dps on oki and to set up her tk j623A overhead. Due to its speed and hitbox, can be better to mash than 5A/2A on defense. But be aware that you won't have any quick startup normal to do if 5B is RGed.
- Its biggest weakness is its tendency to come out when you want a f5B, at ranges where it cleanly whiffs. And also sometimes whiffs in combo like 5A5B if not close enough to the opponent.
|
|
f5B
f5B
|
| Damage
|
Proration
|
Juggle
|
Guard
|
Startup ¹ ²
|
Active
|
Recovery
|
Adv Hit
|
Adv Block
|
Cancel
|
| 400
|
-
|
-
|
Ground
|
9
|
2
|
18
|
-3
|
-5
|
N Sp Su JH IC SB
|
- Mai's best normal hit/hurtbox wise, best used as a poke for the opponent to run into, or to interrupt their action, or a choice of anti air with distance.
- Its main followups on a ground hit are 6B (watch out the opponent can tech), 6C, or a full combo if you have Mini Mai summoned with the right spacing.
- Also functions as a combo part when there is some distance to reach corner to do c5B.
|
|
5C
5C
|
| Damage
|
Proration
|
Juggle
|
Guard
|
Startup ¹ ²
|
Active
|
Recovery
|
Adv Hit
|
Adv Block
|
Cancel
|
| 600
|
-
|
-
|
Ground
|
11
|
3
|
30
|
-9
|
-11
|
N Sp Su IC SB
|
- Very bad on whiff, and a decent, but hard to use anti air due to its hurtbox (which extends before the move becomes active) and single anti air active frame.
- Leads to very strong combos when it catches someone trying to escape the corner by jumping. Also can be followed by 623C when succeeded in doing an anti air in neutral.
- If the opponent RGs your anti air attempt, the long recovery makes it difficult to counter RG, especially when the opponent is doing a forward air dash. IC or 412C can be used if the counter RG timing is missed.
|
|
4C
4C
|
| Damage
|
Proration
|
Juggle
|
Guard
|
Startup ¹ ²
|
Active
|
Recovery
|
Adv Hit
|
Adv Block
|
Cancel
|
| 600
|
-
|
-
|
Ground
|
9
|
8
|
20
|
/
|
-6
|
Sp Su IC 6A/6B SB
|
- Mai's only real knockdown normal (6A also knocks down, but will whiff outside of point blank range on a grounded opponent).
- Can link from a close B (1F link, her only meterless knockdown off a chain combo). Strong hitbox, moves Mai forward, generally advantageous on trade and makes for a good move to throw out as a frame trap.
- It also moves her collision box forward, giving her a left/right teleport mixup midscreen.
- A good combo and pressure starter in corner. Example: 4C 236A.
- The move's main weakness is how bad it is when the opponent RGs it.
|
|
6A
6A
(霧散・上段)
|
| Damage
|
Proration
|
Juggle
|
Guard
|
Startup ¹ ²
|
Active
|
Recovery
|
Adv Hit
|
Adv Block
|
Cancel
|
| 650
|
-
|
-
|
Any
|
12
|
2
|
25
|
/
|
-5
|
JH IC
|
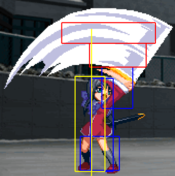
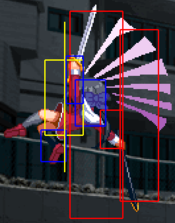
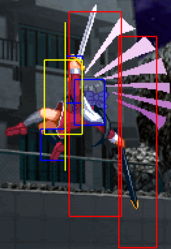
- Anti air slash, does not extend Mai's hurtbox, is jump cancellable. A strong anti air with a slow startup, and the cornerstone of her corner loop. Good at knocking down and producing a mixup chance in midscreen by 412AS.
- Be careful of the opponent's RG as this move has long recovery.
|
|
6B
6B
(霧散・中段)
|
| Damage
|
Proration
|
Juggle
|
Guard
|
Startup ¹ ²
|
Active
|
Recovery
|
Adv Hit
|
Adv Block
|
Cancel
|
| 650
|
-
|
-
|
Any
|
14
|
2
|
28
|
/
|
-8
|
IC
|
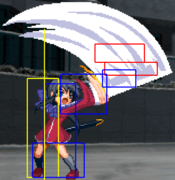
- Horizontal slash, does not extend Mai's hurtbox. Strong but slow poke, cannot be cancelled without using an IC.
- Can be crouched by most of the cast. Can also be air teched, even as a single hit.
- Commonly used as a launcher with red IC (into 6A midscreen for a carry + knockdown, or 665B to a midscreen combo for example), or with Mini Mai instead of IC.
|
|
6C
6C
(霧散・下段)
|
| Damage
|
Proration
|
Juggle
|
Guard
|
Startup ¹ ²
|
Active
|
Recovery
|
Adv Hit
|
Adv Block
|
Cancel
|
| 650
|
-
|
-
|
Low
|
12
|
2
|
35
|
-11
|
-13
|
Sp Su IC SB
|
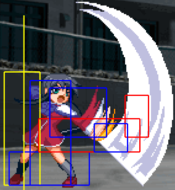
- Low slash, hits low, can be cancelled into any of her specials/supers.
- Very common ender to her blockstrings as it allows her to safely summon and continue pressuring, or to teleport to safety.
- Be aware that some characters with quick ground dash can run into your face if it's cancelled into 623A/412B. Sometimes it's needed to do S to keep frame advantage.
- Think twice before using it when Mini Mai is not summoned. Keep a lookout for the opponent's forward IAD.
- Also be aware that if RGed, cancel timing is quite different from normal block(needs to input the command after RG occurs). While this is the same for other normals too, 6C can only be cancelled into specials or supers, making the cancel harder to input.
|
|
Crouching
2A
2A
|
| Damage
|
Proration
|
Juggle
|
Guard
|
Startup ¹ ²
|
Active
|
Recovery
|
Adv Hit
|
Adv Block
|
Cancel
|
| 170
|
-
|
-
|
Low
|
5
|
3
|
8
|
0
|
-1
|
N Sp Su J IC R SB
|
- Standard 2A, hits low, can actually be low profiled (!!!) by some moves.
|
|
2B
2B
|
| Damage
|
Proration
|
Juggle
|
Guard
|
Startup ¹ ²
|
Active
|
Recovery
|
Adv Hit
|
Adv Block
|
Cancel
|
| 400
|
-
|
-
|
Low
|
10
|
4
|
13
|
0
|
-2
|
N Sp Su JH IC SB
|
- Hits low with an ok range, easily loses to other character's normals, especially trying to do this after A or 2A is RGed. Pretty good combo starter if you have an IC on deck.
- Dash 2B(usually after 214S) is fairly good at catching opponents who just stand/hold back at mid range in neutral or pressure (her other long ranged low, 6C does minimal damage by itself and cannot combo at range).
|
|
2C
2C
|
| Damage
|
Proration
|
Juggle
|
Guard
|
Startup ¹ ²
|
Active
|
Recovery
|
Adv Hit
|
Adv Block
|
Cancel
|
| 600
|
-
|
-
|
Ground
|
13
|
2
|
29
|
-7
|
-9
|
N Sp Su JH IC SB
|
- Mai's longest range normal, fairly slow and extends the hurtbox before its active frames appear, meaning it will lose to many 2Bs.
- Not really used in neutral, more to push the opponent out during blockstrings and in some advanced combos.
|
|
Jumping
j5A
j5A
|
| Damage
|
Proration
|
Juggle
|
Guard
|
Startup ¹ ²
|
Active
|
Recovery
|
Adv Hit
|
Adv Block
|
Cancel
|
| 250
|
-
|
-
|
High
|
6
|
6
|
6
|
/
|
/
|
N Sp J AD IC R
|
- A pretty standard jA angled downwards, good air to ground, can crossup, dubious air to air.
- It's dangerous to mash JA in IAD because of its slow startup and how easily it can be countered by 4F startup 5A or dps after being RGed. Although technical, it is possible to adjust your height to make the opponent's 5A whiff.
|
|
j5B
j5B
|
| Damage
|
Proration
|
Juggle
|
Guard
|
Startup ¹ ²
|
Active
|
Recovery
|
Adv Hit
|
Adv Block
|
Cancel
|
| 410
|
-
|
-
|
High
|
8
|
2
|
23
|
/
|
/
|
N Sp J AD IC
|
- Odd move with fast startup, good hitbox, decent range, but with a really awkward angle, bad recovery on whiff, and sends the opponent further up on hit making full combo conversions extremely finnicky.
- With that said full corner conversions off this move are really damaging.
- Also used situationally as a combo part depending on spacing.
- IAD to jB will whiff on crouching, which can conversely be used to create mixups like IAD jA/jB(whiff) landing 2A or grab or tk623A.
|
|
j5C
j5C
|
| Damage
|
Proration
|
Juggle
|
Guard
|
Startup ¹ ²
|
Active
|
Recovery
|
Adv Hit
|
Adv Block
|
Cancel
|
| 580
|
-
|
-
|
High
|
9
|
2
|
22
|
/
|
/
|
Sp J AD IC
|
- A weak air to ground move when used as a standalone jump in, very good at crossing up however.
- Mostly used in her crossup mixups and in combos.
|
|
Grabs
Close 6C/4C
Ground Grab
Close 6C/4C
|
| Damage
|
Proration
|
Juggle
|
Guard
|
Startup ¹ ²
|
Active
|
Recovery
|
Adv Hit
|
Adv Block
|
Cancel
|
| 1200
|
-
|
-
|
Grab
|
5
|
1
|
15
|
/
|
/
|
IC
|
- Excellent unblockable combo starter with BIC or Mini Mai. Mini Mai or pressure is needed to create a chance to use this due to Mai's slow walking speed(236A on oki for example).
|
|
Close j6C
Air Grab
Close j6C
|
| Damage
|
Proration
|
Juggle
|
Guard
|
Startup ¹ ²
|
Active
|
Recovery
|
Adv Hit
|
Adv Block
|
Cancel
|
| 1300
|
-
|
-
|
Grab
|
2
|
1
|
/
|
/
|
/
|
None
|
- A quick throw from direction 9 to direction 1. It's not recommended as a tech trap at the end of combos since it throws the opponent out of corner and Mai won't get enough time to set Mini Mai for oki (412A 6S for example).
|
|
Special Moves
The notation for the movelists can be found under Controls.
The special move table can be found under Mai Kawasumi/Move Data.
Specials
5S
Set and Recover Mai
(まい設置&回収)
5S
|
| Damage
|
Proration
|
Juggle
|
Guard
|
Startup ¹ ²
|
Active
|
Recovery
|
Adv Hit
|
Adv Block
|
Cancel
|
| -
|
-
|
-
|
-
|
-
|
-
|
-
|
-
|
-
|
None
|
- If Mini Mai is not summoned and the Charge Gauge is full, 4/5/6S respectively summons her behind/on top/in front of Mai.
- Notice that 1/2/3S will not do the work so it will require accurate input in blockstrings and combos (2C 6C instead of 2C 3C for example)
- If she is already summoned, unsummons her. This lets her Charge Gauge recover very fast.
- Any move that is special cancellable can be cancelled into Set/Recover Mai. The summon/unsummon animation lasts 18 frames, allowing Mai to be + on cancelling her C normals.
- Unlike most special moves, Set/Recover Mai CANNOT BE BUFFERED. It must be manually timed, similarly to a link.
- On summon, Mini Mai actually can act before Mai has recovered from the summoning animation, allowing for some really strong combos and pressure.
- As explained in 6C section, sometimes it will be a better choice to cancel into this instead of other Mini Mai attacks to keep frame advantage if the opponent has a quick ground dash.
- Mini Mai can not absorb any hit in her neutral state.
|
|
236S
Manipulation of Power ・ Combination
(力の行使・連撃)
236S Only available on summoned Mini Mai as long as Mai is not blocking. Only available on summoned Mini Mai as long as Mai is not blocking.
|
| Damage
|
Proration
|
Juggle
|
Guard
|
Startup ¹ ²
|
Active
|
Recovery
|
Adv Hit
|
Adv Block
|
Cancel
|
| -
|
-
|
-
|
-
|
-
|
-
|
-
|
-
|
-
|
None
|
- Can be activated as long as Mai is not blocking (it doesn't matter if she's on the ground, in the air, doing another move, etc...)
- Mini Mai will disappear once the move is done, has a long charge recovery.
- Similar to her 236A, great move to lock down the opponent, also used in combos (for example to easily combo into her 236236 supers).
- Also can be used to build Guard Gauge. 236B 5BC 236S can easily build enough Guard Gauge for tk623C if the opponent doesn't do any RG.
- Mini Mai can not absorb any hit during this move.
|
|
214S
Manipulation of Power ・ Rush
(力の操作・突進)
214S Only available on summoned Mini Mai as long as Mai is not blocking. Only available on summoned Mini Mai as long as Mai is not blocking.
|
| Damage
|
Proration
|
Juggle
|
Guard
|
Startup ¹ ²
|
Active
|
Recovery
|
Adv Hit
|
Adv Block
|
Cancel
|
| -
|
-
|
-
|
-
|
-
|
-
|
-
|
-
|
-
|
None
|
- Mini Mai will disappear once the move is done, has a long charge recovery.
- Fast, Mini Mai will travel a very long distance (more than half the stage). Mostly used to snipe in neutral, and to combo off her j623A without spending IC. Also has its uses in advanced combos.
- Although it has a great hitbox, it may be defeated by attacks close enough to Mini Mai since she has to travel a bit before the hitbox becomes active.
- Mini Mai can absorb one hit during this move, which completely negates most reversals. The same as other Mini Mai moves that can absorb one hit.
|
|
412S
Manipulation of Power ・ Blitz
(力の操作・電撃)
412S Only available on summoned Mini Mai as long as Mai is not blocking. Only available on summoned Mini Mai as long as Mai is not blocking.
|
| Damage
|
Proration
|
Juggle
|
Guard
|
Startup ¹ ²
|
Active
|
Recovery
|
Adv Hit
|
Adv Block
|
Cancel
|
| -
|
-
|
-
|
-
|
-
|
-
|
-
|
-
|
-
|
None
|
- Mini Mai will disappear once the move is done, has a short charge recovery.
- Electric attack and launcher, fantastic to bait mash and reversals (4S12S2 set Mini Mai behind you, buffer the attack and block). Also used in some midscreen oki setups.
- Mini Mai can not absorb any hit during the move.
|
|
22S
Manipulation of Power ・ Tornado (力の操作・竜巻)
22S Only available on summoned Mini Mai as long as Mai is not blocking. Only available on summoned Mini Mai as long as Mai is not blocking.
|
| Damage
|
Proration
|
Juggle
|
Guard
|
Startup ¹ ²
|
Active
|
Recovery
|
Adv Hit
|
Adv Block
|
Cancel
|
| -
|
-
|
-
|
-
|
-
|
-
|
-
|
-
|
-
|
None
|
- Mini Mai will disappear once the move is done, has a long charge recovery.
- Unlike her unsummoned 214*, hits crouching opponents.
- Excellent invincible (for Mini Mai) move with very fast startup (4F), used as an anti air, to combo off her j623A with no IC in the corner, and for oki. 6S 22S also links off her c5B, 5C, 6C and 2C, leading to fantastic meterless damage. Extremely hard to do, see combo section.
- When Mini Mai is in the opponent's face, being able to confirm any the opponent's RG and do 22S will cover any attempts to mash out.
- Mini Mai can absorb one hit during this move.
|
|
236*
Wielding of Power ・ Combination
(力の行使・連撃)
236* Only available on unsummoned Mini Mai, and full Charge Gauge. Only available on unsummoned Mini Mai, and full Charge Gauge. Mini Mai is invincible before the hitbox appears in version C. Mini Mai is invincible before the hitbox appears in version C.
|
| Version
|
Damage
|
Proration
|
Juggle
|
Guard
|
Startup ¹ ²
|
Active
|
Recovery
|
Adv Hit
|
Adv Block
|
Cancel
|
| A
|
150*4
|
-
|
-
|
-
|
-
|
-
|
-
|
-
|
-
|
FIC
|
- Comes out very fast (enough to combo off her 5B/5C/2C), grants enough frame advantage in the corner that you can dash 2A after it and have it be airtight (RG notwithstanding, although it is hard to RG the last hit since it has 4 hits). Once Mini Mai is done with the attack she disappears, the Charge Gauge recovers very fast.
- Useful as a frame trap, or to lock the opponent down when you need a bit of time to build IC/BIC.
- It makes it easy for Mai to set up a grab if the opponent doesn't do any RG, and the opponent will get hit by Mini Mai if he tries to mash (2A for example) to escape from the grab, resulting in a powerful tick throw when Mai has BIC or at the end of a round.
- Mini Mai can absorb one hit during the move. Be careful not to use it as oki when Mai is close to the opponent with multi hits invincible moves. This is the same for other Mini Mai moves.
|
| B
|
150*4
|
-
|
-
|
-
|
-
|
-
|
-
|
-
|
-
|
FIC
|
- Comes out slower than the A version, and with less frame advantage afterwards (you'll be minus if you dash in afterwards).
- Mini Mai will not disappear after the attack is done however, and will stay summoned on the field for followup attacks.
- Hard to RG the last hit as it has 4 hits and can be used in some advanced combos.
- Mini Mai can absorb one hit during the move.
|
| C
|
150*16
|
-
|
-
|
-
|
-
|
-
|
-
|
-
|
-
|
FIC
|
- Comes out at a speed between the A and B versions, gives massive frame advantage, especially in the corner (enough to easily combo into super) and Mini Mai stays summoned afterwards.
- Builds tons of Guard Gauge on block if you're aiming for the instant overhead j623C combo.
- Hard to RG the last hit as it has 16 hits.
- Mini Mai can absorb one hit during the move, but it's not as reliable as A/B version since her hurtbox appears after her hitbox becomes active in C version, which makes Mai more likely to get hit before being absorbed by Mini Mai.
|
|
214*
Wielding of Power ・ Tornado
(力の行使・竜巻)
214* Only available on unsummoned Mini Mai, and full Charge Gauge. Only available on unsummoned Mini Mai, and full Charge Gauge.
|
| Any
|
-
|
-
|
-
|
-
|
-
|
-
|
-
|
-
|
-
|
FIC
|
- Only available on unsummoned Mini Mai, and full Charge Gauge.
- A/B/C version differ on where Mini Mai is summoned. A makes her attack in front of Mai, B at mid range, C at full screen. Once Mini Mai is done with the attack she disappears, the Charge Gauge recovers very fast.
- Whiffs on crouching characters.
- A tad slow, but still a decent sniping move in neutral, mostly for when the opponent is trying do stuff at full screen, or as a tech trap. Should be followed up by 412A to get in for a combo. Excellent combo starter (4000+ damage) if the opponent is hit on or close to the ground.
- Be careful that advanced players would always RG the first hit and do 5A to kill Mini Mai, which will result in a long Charge Gauge recovery time.
|
|
623*
Wielding of Power ・ Explosion
(力の行使・爆発)
623* Only available on unsummoned Mini Mai, and full Charge Gauge. Only available on unsummoned Mini Mai, and full Charge Gauge.
|
| Any
|
-
|
-
|
-
|
-
|
-
|
-
|
-
|
-
|
-
|
FIC
|
- Only available on unsummoned Mini Mai, and full Charge Gauge.
- A/B/C versions differ on where Mini Mai is summoned. A is in front of Mai, B is at mid range, C at long range.
- An excellent tool, whether in neutral, in blockstrings or on oki. Mini Mai stays summoned after the attack is done.
- In Neutral, behaves as a move with tons of active frames that can reach the opponent no matter where he is on the ground. Gives a large frame advantage on block, allowing Mai to dash in or teleport covered by Mini Mai, who is still summoned and ready to attack.
- In pressure, is one of the most common followups to 6C. Lets Mai keep the initiative due to the + frames, and keeps Mini Mai on screen as backup.
- Even stronger on oki:
- Has 2 hits, making it hard to wake up RG (if the opponent RGs the first hit they cannot RG the second). But Mini Mai will be easily killed by 5A after RGing the second hit if she's right in the opponent's face. It is worth trying to adjust the distance against advanced players to make 5A whiff.
- Mini Mai can absorb one hit during this move.
- A meaty 623A gives Mai access to some unique and nasty mixups.
- Mini Mai is still on top of them should your initial mixup fail.
- As mentioned in 6C section, be aware that some characters with quick ground dash can run into your face if you cancel 6C into this. Sometimes it's needed to do S to keep frame advantage.
- Whiffs on a few crouching characters in the corner.
|
|
j623*
Crescent Moon
(弧月)
j623*
|
| Version
|
Damage
|
Proration
|
Juggle
|
Guard
|
Startup ¹ ²
|
Active
|
Recovery
|
Adv Hit
|
Adv Block
|
Cancel
|
| A
|
620
|
-
|
-
|
High, Air
|
16
|
2
|
-
|
-
|
-
|
IC
|
- Overhead, can combo with IC or a summoned Mini Mai, unsafe on block.
- A cornerstone of Mai's close range pressure, the tk version (6239A) is a fast overhead from grounded that will also crush low mashing.
- Has a low hitbox but still loses to some anti airs.
- Has some i-frames on startup, but not reliable.
- Whiffs on crouching characters with low hurtbox when not close enough to the opponent.
|
| B
|
620
|
-
|
-
|
Any
|
14
|
2
|
-
|
-
|
-
|
IC
|
- Faster and safer on block than the A version, not an overhead. Can start a combo by itself, although it will be less damaging than with j623A IC/Mini Mai.
- Visually very similar to the A version, will still crush lows and does not require an IC to combo or to stay safe. Has a great hitbox (beats some anti airs), which can surprise players expecting attacks with Mai's underwhelming air normals.
- Has some i-frames on startup, but not reliable.
- An offensive choice during a backward air dash if the opponent is performing a ground attack to catch Mai (usually without summoned Mini Mai).
|
| C
|
650*2
|
-
|
-
|
High, Air
|
12
|
2
|
-
|
-
|
-
|
None
|
- Very fast, invincible, overhead. Launches the opponent very high up.
- Will blow up almost all anti air options. Used as an overhead it is extremely fast, basically unreactable. Since it launches the opponent straight up, you can only combo off it after having built up the opponent's Guard Gauge.
- Also has a gimmick where if you manage to hit with the last active frame only, it will launch in a similar manner to the B version.
|
|
412*
Closing Ground
(縮地)
412*
|
| Version
|
Damage
|
Proration
|
Juggle
|
Guard
|
Startup ¹ ²
|
Active
|
Recovery
|
Adv Hit
|
Adv Block
|
Cancel
|
| A & B (tap)
|
-
|
-
|
-
|
-
|
-
|
-
|
-
|
-
|
-
|
FIC
|
- Mai teleports on the ground, A leaves her next to the opponent, B leaves her at mid range.
- Very useful to cancel option at the end of her pressure strings, from 6C or 4C mostly.
- Can be beaten by characters with quick ground dash or moves with quick travel. Sometimes it's needed to cancel into S instead of 412* to keep frame advantage.
|
| A (hold)
|
850
|
-
|
-
|
-
|
-
|
-
|
-
|
-
|
-
|
IC
|
Closing Ground Followup Kick - (縮地追蹴)
- Mai reappears a bit in front of where she started the teleport, with a low sliding kick.
- Not a terrible move, but not easy to master. Hits low, and can combo with IC or Mini Mai.
- Can be used to pressure in the corner if the opponent is considering dealing with an incoming throw or overhead, or the opponent tends to jump but has Mini Mai in his face.
- A mixup option midscreen started by 4C and Mini Mai in the opponent's face, or mixup in the corner started by 623A 66.
- Since Mai disappears from the screen and becomes invincible for a while during move, it can be used to deal with moves having strong hitboxes and long recovery.
- Unfortunately, the hurtbox appears 4 frames before the hitbox so it's not reliable enough to use frequently.
|
| B (hold)
|
850
|
-
|
-
|
-
|
-
|
-
|
-
|
-
|
-
|
IC
|
Closing Ground Followup Cut - (縮地追斬)
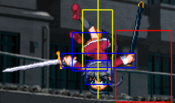
- Mai reappears above the opponent with a downwards slash. Air unblockable, not an overhead, punishable on block.
- Tracks the opponent's position, very good to cancel into when you read that the opponent will jump at the end of your pressure string, when trying to escape the corner for example. If you hit them in the air you get a combo on IC. Despite its look does NOT hit behind her.
- Unfortunately, the hurtbox appears 12 frames before the hitbox so it's not reliable enough to be frequently used. It can be easily beaten and give the opponent a full air combo chance, which is worse than the A version.
|
| C
|
1000
|
-
|
-
|
-
|
-
|
-
|
-
|
-
|
-
|
IC
|
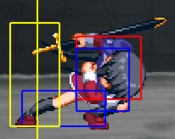
- Very different from the previous versions, not a teleport, more of a dash with a hitbox. Mai's main reversal due to its invincible startup (not full invul, can trade). OTG combos are possible on trade.
- Also used to knockdown off a chain combo, but be careful that it will whiff if the chain pushes the opponent too far away, and the opponent will be able to tech if you chain 4 times or above before this move.
- Notice that the hitbox goes ahead horizontally but the hurtbox goes ahead vertically, making it strong in ground moves but weak in jumping moves (jA without IAD for example).
|
|
Eternity Specials
236236*
Cutting the Chaff
(麦穂薙)
236236*
|
| Version
|
Damage
|
Proration
|
Juggle
|
Guard
|
Startup ¹ ²
|
Active
|
Recovery
|
Adv Hit
|
Adv Block
|
Cancel
|
| A
|
-
|
-
|
-
|
-
|
-
|
-
|
-
|
-
|
-
|
None
|
| B
|
-
|
-
|
-
|
-
|
-
|
-
|
-
|
-
|
-
|
None
|
| C
|
-
|
-
|
-
|
-
|
-
|
-
|
-
|
-
|
-
|
None
|
- Mai teleports forward, the hitbox follows behind her once she has teleported.
- One of Mai's few reversals, not that great due to its slow startup, and punishable by 5A/2A after normal block or grab after RG.
- The higher the level, the slower the startup and the longer the distance traveled.
- The long invincibility makes it an extremely useful reversal to most ground supers. Also an option to punish the opponent's normals like 2B or 2C after Mai's normals are RGed. Better to prepare Mini Mai in case it is blocked.
- Can hardly be combo'd into from simple chains(except for fastest chain from 5B or 5C close enough to the opponent for example), needs IC or Mini Mai.
- A good combo ender to build IC and Charge Gauge. And can be used to gain big damage in midscreen where not easy for Mai to do combo, especially at the end of a round.
- The hitbox extends pretty far behind her starting position allowing it to crossup against jump ins or as oki. Also better to keep Mini Mai summoned as a backup as mentioned previously.
- Whiffs on some ground moves due to the narrow vertical hitbox.
- Will not cause any damage when it hits armor and move to the whiff motion.
|
|
214214*
Wielding of Power ・ Destruction (力の行使・破壊)
214214*
|
| Version
|
Damage
|
Proration
|
Juggle
|
Guard
|
Startup ¹ ²
|
Active
|
Recovery
|
Adv Hit
|
Adv Block
|
Cancel
|
| A
|
-
|
-
|
-
|
-
|
-
|
-
|
-
|
-
|
-
|
None
|
| B
|
-
|
-
|
-
|
-
|
-
|
-
|
-
|
-
|
-
|
None
|
| C
|
-
|
-
|
-
|
-
|
-
|
-
|
-
|
-
|
-
|
None
|
- Only available on unsummoned Mini Mai.
- The higher the level, the larger the fireball and the more hits and damage they do.
- Mini Mai will disappear once the move is done, has a long charge recovery.
- Mostly used with its C version along with BIC in her maximum damage combos, and can also be used to give great damage to armored characters.
- Version B can also do the same job as version C in BIC if there's not enough meter, but requires higher Power.
- Mini Mai is invincible during the move in all versions.
|
| Summoned
|
-
|
-
|
-
|
-
|
-
|
-
|
-
|
-
|
-
|
None
|
- Only available on summoned Mini Mai.
- Mini Mai will disappear once the move is done, has a long charge recovery.
- Mini Mai will fire multiple, slow moving single hit fireballs. The higher the level the more she fires.
- Each fireball's vertical position is random, making it somewhat unreliable in combos. But there are a few stable combos using version A or B (especially A).
- Great way to lock the opponent down in the corner (especially at level 3), or to force an advantageous situation in neutral. Blocking all fireballs will build a long Guard Gauge and Mai can easily move to combo using tk623C.
- Mini Mai is invincible during the move in all versions.
|
|
Final Memory
236236S
Awakening - (覚醒)
236236S Only available on unsummoned Mini Mai, less than 1/3rd of HP remaining and 3 super meters. Only available on unsummoned Mini Mai, less than 1/3rd of HP remaining and 3 super meters.
|
| Damage
|
Proration
|
Juggle
|
Guard
|
Startup ¹ ²
|
Active
|
Recovery
|
Adv Hit
|
Adv Block
|
Cancel
|
| -
|
-
|
-
|
-
|
-
|
-
|
-
|
-
|
-
|
None
|
- Activation has no startup invul, although it is invul during the flash.
- Charge Gauge will recover very slowly on coming out of Awakening.
- Awakened Mai plays fairly differently from normal Mai:
- A Time gauge appears that slowly drains. Mai will stay in awakened mode as long as Time is left (even on winning/losing a round).
- Mai loses access to all Mini Mai moves.
- RF moves no longer cost RF meter, instead they cost about 10% of the Time gauge.
- Mai's dash becomes extremely fast, lasting only 10F before she can cancel it into block/special/super.
- Mai gains access to moves listed below.
- Only invincible before active and is able to be hit before Mai can act, so it can't be used as a reversal (except for a few particular superflash reversals).
|
|
6*
Scattering Zero Style
(霧散零式)
6* Replace her Scattering attacks in Awakened mode. Replace her Scattering attacks in Awakened mode.
|
| Version
|
Damage
|
Proration
|
Juggle
|
Guard
|
Startup ¹ ²
|
Active
|
Recovery
|
Adv Hit
|
Adv Block
|
Cancel
|
| A
|
-
|
-
|
-
|
-
|
-
|
-
|
-
|
-
|
-
|
J IC
|
| B
|
-
|
-
|
-
|
-
|
-
|
-
|
-
|
-
|
-
|
J IC
|
| C
|
-
|
-
|
-
|
-
|
-
|
-
|
-
|
-
|
-
|
J IC
|
- Costs about 10% Time Gauge.
- Each slash becomes jump cancellable, untechable, advantageous on block (+3~+4) and has massively improved recovery and startup (6F startup).
- 6C cannot be cancelled into specials anymore, and launches on hit.
- 412* can be cancelled into this move, making it almost no risk to do 412C 6C as a reversal without comsuming RF gauge(412C will consume Time Guage instead).
- Any hit into a Scattering Zero Style leads to a very easy 6B x N loop.
- Not frequently used but 412A(hold) 6B can also lead to a combo without IC.
|
|
214*
Closing Cut Zero Style
(暮薙零式)
214* New move exclusive to Awakened mode. New move exclusive to Awakened mode.
|
| Version
|
Damage
|
Proration
|
Juggle
|
Guard
|
Startup ¹ ²
|
Active
|
Recovery
|
Adv Hit
|
Adv Block
|
Cancel
|
| Any
|
-
|
-
|
-
|
-
|
-
|
-
|
-
|
-
|
-
|
FIC
|
- Costs about 10% Time Gauge.
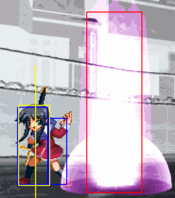
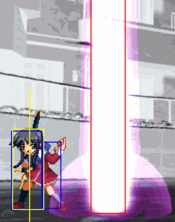
- Very fast, creates an air unblockable, untechable pillar of light whose position is determined by the button used.
- Extremely good at sniping the opponent when they try to run away, meanwhile can hardly lead to any combo though it can be FICed.
|
|
236236S
The Heart That Has Accepted It All
(全てを受け入れた心)
236236S New move exclusive to Awakened mode. New move exclusive to Awakened mode.
|
| Damage
|
Proration
|
Juggle
|
Guard
|
Startup ¹ ²
|
Active
|
Recovery
|
Adv Hit
|
Adv Block
|
Cancel
|
| -
|
-
|
-
|
-
|
-
|
-
|
-
|
-
|
-
|
IC
|
- Consumes the entire remaining Time Gauge.
- Can do two different attacks:
- When point blank, does a command throw (comboable!) which does damage in proportion to the Time Gauge consumed (about 3500 to 5000 damage).
- If the throw whiffs, then does a slash that does about 1750 to 2500 damage.
- Damage depends on remaining Time Gauge, the more gauge left the more damage.
|
|
Strategy
Overview
Mai's moves have big hitboxes in both vertical and horizontal directions, which makes her able to outrange most attacks. However, her moves also have big hurtboxes and long recovery, which forces Mai into a tight corner if the moves are RGed or read by the opponent.
Mini Mai can also act when Mai is not blocking and her moves also have big hitboxes, but can be easily killed without considering the position and timing to summon her.
Without exaggeration, it will be the most important task for the Mai player to complement each other to control the match, including neutral and corner.
Mai has to play defensively in many cases if Charge Gauge is cooling down, even with Red IC.
Neutral
Close Range
Distance close enough to hit the opponent with 5A is considered close range.
Ground to Ground
- 5A is generally a safe option because of its 4F startup and wide horizontal hitbox. But be careful, as it will always whiff on crouching Mayu and sometimes whiff on crouching Ikumi and Nayuki (asleep). Use 2A or c5B instead.
- It's also generally safe and worth doing a second 5A or 5B after the first 5A being RGed if the opponent does not have any resources to do a reversal leading to a combo. Watch out for moves listed below when 5A is RGed or you are trying to do a frame trap:
- Full or partial invincible DPs: Rumi's 623A/B, Mishio's 623A/B, Unknown's 623A/B
- High invincible DPs: Mizuka's 623B, Mio's 623A
- Quick startup or grab supers: Mio's 214214*, Sayuri's 6321463214B/C, Ikumi's 4123641236C, Kaori's 236236* (only for advanced opponent)
- If you want to improve your hit confirms, it is worth trying to push the A button deliberately instead of mashing 5A, which will prevent you from getting hit by slow invincible moves, examples of which are:
- Sayuri's 41236C, Misuzu's 623C, Ikumi's 236C (Blood Level 2/3), Mishio's 623Bm (without element)
- cl.5B is also a good option because of its 5F startup and wide vertical hitbox. cl.5B for oki or after 5A being RGed will beat most high/low invincible DPs, which usually can be done by the same characters with 623A/B.
- It's important to note, however, that abuse of cl. 5B is also not recommended because there is no safe attack option for Mai if it's RGed (especially when Mini Mai is not summoned). The options would be:
- Try RG counter for incoming 2A or other moves.
- If you have Mini Mai summoned, do 22S or 214S and try a RG counter.
- If have BIC or Red IC with Mini Mai summoned, try 412C.
- Do 236236* if the opponent does most supers(except for few supers like Mizuka's 236236B/C, Mai's 236236*, Mio's 236236*, Makoto's 632146C, Ayu's 632146C). It's mostly better to do it during the super flash's time stop instead of after RGing the opponent's supers, since the opponent will be able to RG counter.
- Try tk623A/B. It is an offensive option that can beat 2As, but might be hit by DPs and is difficult to input.
- Other normals are too slow to be listed as an option and will easily be beaten by most 5A/2As if you continue to chain attacks after c5B is RGed.
- Summoning Mini Mai behind the opponent with 6S after 5B is a good starter for pressure if 5B is not RGed.
Ground to Air
- This mostly means dealing with the opponent's IAD.
- If the opponent starts dashing at this range, it's a good chance to confirm and start an air combo with 5A to tell them that's dangerous since they can't act immediately once they reach Mai. Consequentially, the same applies for Mai if the opponent has a 5A with middle or high hitbox.
- It is also possible to beat characters with hover dash, but it is much harder since the opponent can act much earlier.
- If the opponent starts dashing with enough distance to act when they reach Mai, the following actions can be considered:
- Try to RG the incoming jA. It's possible to do 5A after RGing a 5F or 6F startup jA but not very easy since the input can not be buffered. Also notice that the opponent may just land without doing anything to do 2A or grab.
- 412C to aim for a knock down or trade. For the most part, Mai can do a full combo if a trade occurs.
- If the opponent just does a neutral jump, S 22S may shoot him down. And it's also worth doing 66 and 44 to create a front/back mixup to make it harder for the opponent to block. Stepping forward and performing 5B or 5C may also work.
Air to Ground
- This mostly means doing IAD.
- Read the opponent's action in #Ground to Air section, including what you should and should not do.
- jB will whiff on crouching characters and can be used to create mixups like IAD j.A/j.B(whiff) landing 2A or grab or tk623A.
- When doing jC after a neutral jump and the opponent RGs it, an offensive option is to do j6239B (tk623B with second jump) to beat any mashing with normals, but may be defeated by some DPs and can punished if blocked. You either need Mini Mai to cover the recovery, or only use it as a surprise attack.
Air to Air
- Mai is not good at these situations due to her 6F startup jA. Being higher than the opponent might make jA work out, but it's better to stay on ground.
- Air throw may also be an option, but remember that Mai will not get enough time to prepare Mini Mai for oki.
Middle Range
Distance close enough to hit the opponent with f5B/2B/5C is considered as middle range.
Ground to Ground
- Actually not a good range for Mai since Mai's B/C normals have slow startup and large hurtboxes. Even worse, the hurtbox usually appears before hitbox, making Mai difficult to win versus the opponent's 5B/2B and even their 2As.
- If the opponent has long range normals like Mishio or Mio, only summon Mini Mai by chain or after RG. Mai will easily be hit by the opponent when doing 4/5/6S directly.
- f.5B is relatively the most safe option because of its small hurtbox and normal recovery. 4C could also work and can be cancelled into 412A/B to start oki if it hits the opponent successfully, but it will be harder to do RG counter than f5B and has a longer recovery than f5B if it whiffs. It will be easier for the opponent to counter because of its forward momentum.
- 6B/C could also be an option, but it's better to keep Mini Mai summoned since the recovery is long enough for the opponent to perform an IAD or forward jump if it whiffs.
- If you have Mini Mai summoned in the opponent's face, tk623A will also be a good option at this range, which is usually thought to whiff because the distance tk623A gained is likely to be negated. Unfortunately, it will still whiff on crouching Ikumi and needs to be a little closer to hit crouching Mayu.
- When 5C/6C is RGed, the opponent tends to counter with 5B/5C, which makes it possible for Mai to do 236236*/412A(hold) to perform a surprise attack. Don't use this frequently, however, since it may be easily punished if seen often.
Ground to Air
- S and be ready for 22S. Or 214A/B to shoot the opponent down.
- If you already have Mini Mai summoned, try using 5C/6A and see if you need Mini Mai to take cover from RG.
Air to Ground
- Relatively safe to do 623B to beat ground dash attacks.
- Mai will usually have Charge Gauge cooling down in this situation. It's better to play defensively.
- Be careful when performing a forward dash since the opponent may also create a front/back mixup by adjusting his position.
Air to Air
- jB is usable, but can't lead to any combos. Not a good place for Mai, especially when the opponent has long range air normals like Mio and Mishio. In the first place, jumping is not a good choice for Mai to deal with such characters at middle and long ranges.
Long Range
Distance close enough to hit the opponent with 2C/6* is considered long range.
Ground to Ground
- Mai's best range against most characters where Mai can perform attacks that outrange the opponent with little risk.
- It's usually safe to do 623A/B after 6C/2C to get Mini Mai summoned and 66 or 412A/B to start pressure.
- 236B/S may also be a defensive option to watch out for characters with quick ground dash or travel moves like:
- Mio's 662C, Makoto's 662C, Ikumi's 66B, Nayuki's 66C
- Misuzu's tk623C, Doppel's 623A/B and 236236C
- When summoning Mini Mai with 4/5/6S, it's worth trying to protect her from being killed by projectiles with 4S or 6S 66 like:
- Sayuri's 236*, Misuzu's 41236*, Minagi's 41236*, Kano's 214*, Unknown's 41236A/B
- Note that Mini Mai will still be killed by projectiles with horizontal full screen hitboxes even if you put her behind Mai like Shiori's 236* and Nayuki (asleep)'s 214214*.
- Try to stay at long range until either...
- You knock down the opponent.
- The opponent loses their patience and tries to catch you by either dashing or air dashing.
- You have Mini Mai summoned and want to do tk623A/C mixup forcibly by 412A followed by 214S.
- Take Misuzu as an example, 6B will hit Misuzu during most moves if Mai stays at a suitable range, including 5C/236*/214*/41236*(41236C is better to jump though). Misuzu will not be able to tech if there is any Guard Gauge remaining, meaning Mai can move to oki with 412A.
- 6B will whiff on some crouching characters. Be careful of quick travel moves at this range, such as:
- Nayuki (asleep)'s 41236C, Mayu's 236C, Doppel's 623A/B, Sayuri's 41236C, Mio's SR 214C
Ground to Air
- S and prepare to 66 to do a mixup using 22S if the opponent tries to perform a forward dash.
- Pay attention to Ayu's j623C, which can lead to a full combo with BIC.
Air to Ground
Air to Air
- Be careful of Shiori's 236A/B.
Out of range
Distance too far to hit the opponent with 2C/6* is considered out of range.
- Use 214C to snipe the opponent and 412A to start a full air combo. There will be a chance if the opponent tends to jump or uses his projectiles.
- 236B/623*/S to set Mini Mai to wait for the opponent or 412A 214S to approach the opponent.
- If you have nothing to do, whiff jC to gain Super Meter. You can do one when going up and one going down.
Corner
- Almost the same as #Close Range in Neutral section.
- When pressuring, the key is to keep Mini Mai summoned in the opponent's face or the place where the opponent's 5A can't kill her. The latter one can be simply done with 412B (walk forward a little) 6C 623A for example.
- When being pressured, Mai has some reversals, but all of them are not good enough to mash without thinking. Mai can't rely on Mini Mai when waking up, so it is worth practicing blocking overheads in the opponent's oki to live longer.
Other
More Pressure than a Honey Bear
When Mai has the initiative, you can go for her high-low mixup, which mainly consists of her 2A for low attacks, and her Tiger Knee'd "Lonely Moon" move (6239A) for a high attack. The Lonely Moon has a lot of recovery if blocked, but you can hinder the opponent from taking advantage by either using Mini Mai to cover you, or with an IC. After an IC, you can continue your mind games by either immediately attacking with jA a high attack, wait for your character to land before using 2A for a low attack, air dashing forward for a split-second before using jA, or landing and throwing the opponent.
The Stylish Final Technique
Because Mai's pressure increases so much while she has Awakened, the opponent may tend to block a lot more. If you sense the pressure invading the opponent's mind, you can try quickly teleporting in with a normal Ground Fold, then going straight into the "Heart that accepted everything"-grab FM.
Combos
| Notation Help
|
Disclaimer: Combos are written by various contributors, some combo notations may deviate slightly from the notation listed below.
For more information, see Controls
|
| IC
|
Input Instant Charge (22C) when you have the right amount of RF Meter.
|
| FIC
|
Input Flicker Instant Charge (22C) when you have the right amount of RF Meter.
|
| {X/Y/Z}
|
Move X or Y or Z can be used.
|
| #*
|
Indicates that any of A, B and C may be used with #. Example: 214*.
|
| [<- X] [-> X]
|
Side switch notation. All inputs grouped by the square brackets are performed facing the arrow's direction. They are still written as if they were done facing right, however.
|
| [X]xN
|
Loop the inputs in the square brackets as many times as N.
|
| c5B
|
Proximity normal only usable while close.
|
| f5B
|
Proximity normal only usable outside of c5B range or when cancelled from another normal. Known as far 5B.
|
| jX
|
Button X is input during your first jump.
|
| djX
|
Button X is input during your double jump.
|
| X(whiff)
|
Indicates that X is intended to whiff.
|
| X(tech trap)
|
Indicates a combo ender intended to catch the opponent's air tech. The most common kind of tech trap is j6C, which will air throw early techs and jC later techs. Executionally identical to X(whiff) but different in purpose.
|
| ~
|
Indicates a followup for moves which have them. Example: 236A~236A.
|
| ..
|
Indicates a short delay.
|
| IAD
|
Indicates an Instant Air Dash.
|
| IABD
|
Indicates an Instant Air Back Dash.
|
| (X)
|
X move is omittable from the combo.
|
| tk.X
|
Indicates the motion "X" is input immediately after leaving the ground. Stands for tiger knee.
|
Midscreen
No RF Meter
- 5A/2A x N 5BBC 6B
- Watch out for the enemy tech after the 6B. Whiffs on a lot of crouching characters.
- 5A/2A x N 5BBC 6C (into 4S/6S or 623A/B for example)
- When you want to get your summon on the field and continue pressure.
- 5A/2A x N close B 4C
- 1F link, Mai's only guaranteed meterless knockdown for no resources.
- 214C 412A (teleport in) jump fwd jC j66 (long air dash) jAC land c5BB 6A iad jAC land c5B 5C 6A jC delayed j623B for the tech trap
- Great damage again, used to snipe people trying to set stuff up at full screen
- If the 214C hits them while they're in the air, the combo might not be possible/might need adjustments depending on height.
Red RF Meter
- 5A/2A 5BBC 412C
- Mai's easiest knockdown, works against everyone. Switches sides. 412C whiffs if the opponent has been pushed too far away.
- 5A/2A x N 5BBC 6B IC 6A
- Knockdown + corner carry, Mai has time to teleport or dash in for the oki.
- 6B whiffs on a lot of crouching characters
- tk j623A IC, jC j66 jAC land c5BB 6A (iad jAC etc if near corner)
- Overhead starter, also crushes lows, good corner carry too.
Blue RF Meter
- Anything into 412C IC 236236 A/B/C
- Easy combo into super.
- Also works off reversal 412C IC.
- Anything into 412C IC c5B jC j66 jAC land c5BB 6A
- The usual combo, using 412C IC as a launcher
- tk j623A IC, jC j66 jAC land c5B jC j66 jAC land c5BB 6A (iad jAC etc if near corner)
- Similar to the red IC combo, extended a bit for better corner carry.
Corner
No RF Meter
- 4C 236A 2BB 6A iad jAC land cB 5C 6A jC delayed j623B for the tech trap
- Used off a 4C frame trap, requires Mini Mai to be available and unsummoned.
- 5A/2A 5BC 236B fB 236S 236236A/B/C
- Confirm off an A if you have Mini Mai available and unsummoned. Mai is pretty much always sitting on super meter.
- 623A c5B 5C 6A iad jAC land c5B 5C 6A jC delayed j623B for the tech trap
- Usually off a meaty 623A on oki.
- With Mini Mai summoned with right spacing:
- 412S wait until opponent at max height, c5B 6A iad jAC land c5B 5C 6A jC delayed j623B for the tech trap
- fantastic oki to bait reversals, dash in after a knockdown, 4S to set Mini Mai behind, you and 4121S to do the move and block in case they reversal.
- tk j623A 22S land jC j66 jAC land c5B 6A iad jAC land c5B 5C 6A jC delayed j623B for the tech trap
- Overhead starter, Mini Mai needs to be either summoned with 6S/5S or 623* when Mai is facing the corner on top of the opponent.
- tk j623A 214S land c5B 5C 6A iad jAC land c5B 5C 6A jC delayed j623B for the tech trap
- Overhead starter, not too dependent on the location of Mini Mai. Easier but less damage than the previous combo.
Advanced Combos
Midscreen, No RF
- 5A/2A close B 6S 22S dash x 2 jC j66 jAC land c5B 6A iad jAC land c5B 5C jC delayed j623B for the tech trap .
- Really hard to the point where it's not used even by top players, once again a 1F link, does great damage (about 4000) and Mini Mai regenerates in time for your oki.
- Input tip: input 6S 22S using 236S 2S.
Corner, No RF
- 5A/2A cB 6S 22S 5C 6A iad jAB land 6A iad jAC land cB 5C 6A jC delayed j623B for the tech trap
- Not much to say, same as the midscreen one in terms of difficulty and damage
Old Combo Replays
Download here
Okizeme
- All(Neutral or Corner)
- 5B(whiff) 2A5B/tk623A -> high/low mixup. Conversely whiff 5B to hide what you want to do next.
- 4/6S 2A5B/tk623A -> high/low mixup.Simple and easy if you have enough time to set Mini Mai.
- Neutral
- 6S 4C 412A 22S -> front/back mixup. Mai will go to another side during 412A for a while and return back to front. The timing of 22S can be decided by Mai and can hardly be reacted to. Notice that if 4C is RGed, do 22S directly to prevent the opponent from mashing anything.
- 6S (9jA/8jA/9 44) 22S -> front/back mixup. Also hard to block because Mai can do 22S anytime. Be careful for anti air DPs and characters whose 236C and 214C are both reversals (Mizuka and Mio for example).
- S IAD 236S -> front/back mixup.
- 4S IAD 412S -> front/back mixup.
- Corner
- 236B 2A5B/tk623A 22S -> high/low mixup. Mini Mai will absorb one hit if the opponent is doing a wake-up mashing. Be careful of the moves below :
- Multi hits moves with quick startup: Mio's 214214B, Ayu's 641236B/C and 236236B/C, Misuzu's 641236C, Doppel's 623C
- Quick startup or grab supers in close range: Sayuri's 6321463214B/C, Ikumi's 4123641236C, Kano's FM
- Sometimes it's necessary to add a back step at first to keep safe.
- 623A (2A5B/tk623A) 22S -> high/low mixup like 236B
- 623A 66 (grab/412A) 22S -> front/back/throw mixup. If the second hit of 623A is not RGed, Mai can 66 to step into corner and push the opponent out, which is the same for 214S. 412A makes Mai disappear in the corner and appear in front of the opponent(out of corner).
- 4C 236A 66 2A/tk623A/grab -> high/low/throw mixup.
Win Quotes
| Japanese
|
English
|
|
遅い
当たらない攻撃に
意味は無い…
|
Too slow.
An attack that doesn't hit
has no meaning...
|
|
単純…
それでは勝てない…
|
Too simple...
You can't win like that...
|
|
ラスボスと
主人公のタッグに
勝てると思った?
…何の話?
|
You thought you could
beat the tag team of
the final boss and the heroine?
...What were we talking about?
|
|
(To Rumi)
凄い破壊力…
でも受け流せば
どうという事は無い
|
(To Rumi)
Amazing destructive power...
But by deflecting the attack,
that destructive force becomes nothing.
|
|
(To Sayuri)
佐祐理…
危険だから
これ以上は
関わらないで…
私が全て
片付けるから
|
(To Sayuri)
Sayuri...
Anything more than this
is too dangerous.
Please, don't get involved...
I will
take care of everything.
|
|
(To Ayu)
逃げないで
どんな力も
授かったことに
意味は有る…
|
(To Ayu)
Don't run.
Just the fact that
this power was given to you
has meaning...
|
|
(To Mai)
まだいくつか半身が
残ってるみたいだね
私が撒いた種…
全て
片付ける…
|
(To Mai)
There seems to be some of my copies
left around yet.
I sowed these seeds...
And I will
take care of them all...
|
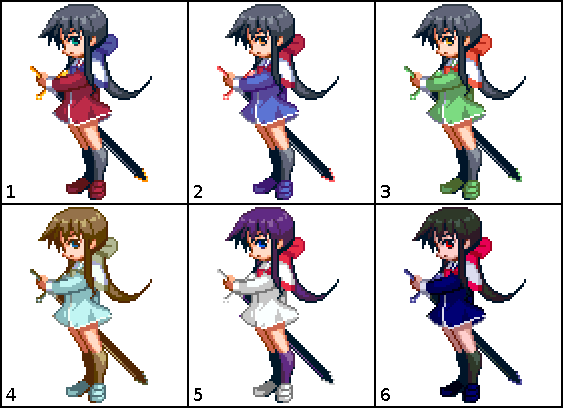
Colors

In-game References
External References
- The ghost that Mai summons in many of her attacks is a reference to the Stand system in Jojo's Bizarre Adventure.
- Mai's "Iron Breaker" move is based on Seth's "Tackle" move, from the King of Fighters series.
- Mai's "Lonely Moon" move is based on Baiken's "Youzansen" move, from the Guilty Gear series.
- Mai's "Dispersing" and "Dispersing Zero Type" moves are based on Johnny's "Mist Finer" move, from the Guilty Gear series.
- Mai's "Using Assist-Combo" and "Controlling Assist-Combo" moves are based on both Jotaro Kujo's Stand's "Ora-Ora" move, and Dio's Stand's "Muda-Muda" move, from Jojo's Bizarre Adventure.
- Mai's "Controlling Assist-Assault" move is based on both Jotaro Kujo's Stand's "Oratsu!" move, and Dio's Stand's "Mudaatsu!" move, from Jojo's Bizarre Adventure.
Kanon References
- The sword that Mai uses to fight is the same one she uses to hunt demons within the school during the events of Kanon.
| General
|
|
| Characters
|
|
| Mechanics
|
|
| Guides
|
|
| Wiki
|
|

