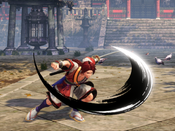
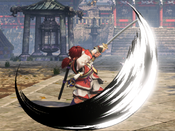
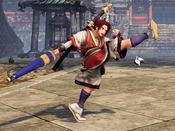
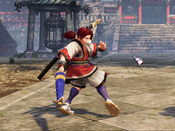
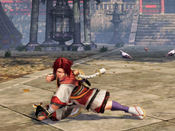
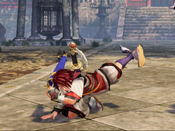
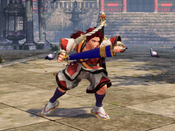
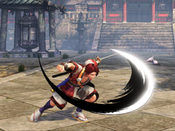
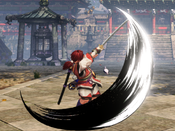
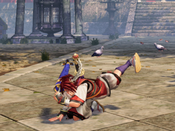
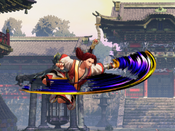
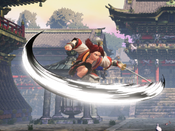
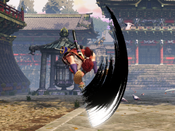
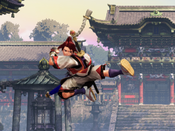
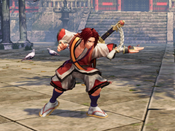
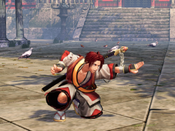
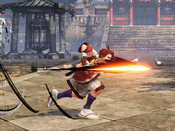
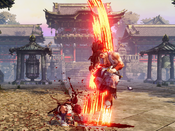
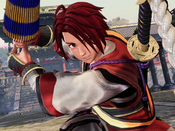
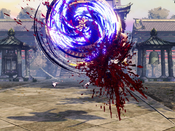
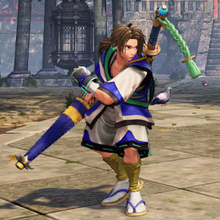
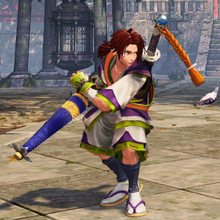
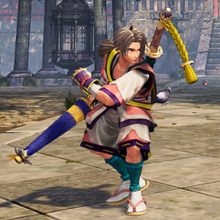
Samurai Shodown/Shizumaru Hisame

From Mizuumi Wiki
Jump to navigation Jump to search
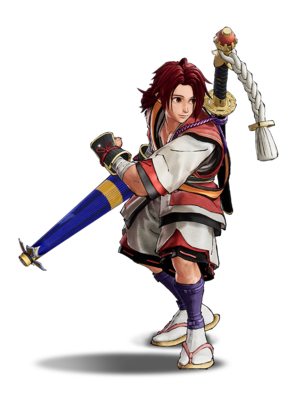
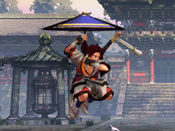
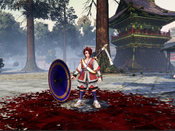
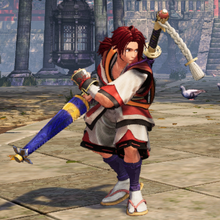
Shizumaru Hisame
緋雨 閑丸, Hisame Shizumaru

Introduction

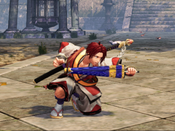
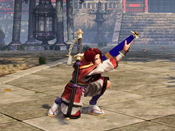
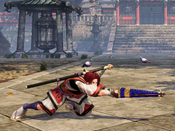
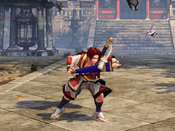
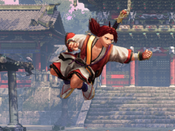
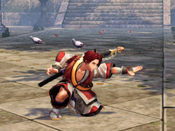
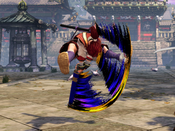
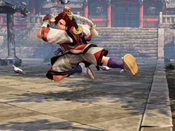
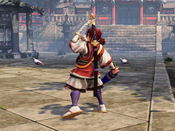
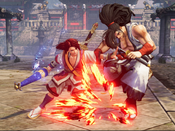
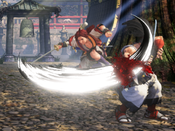
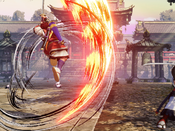
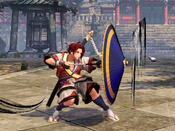
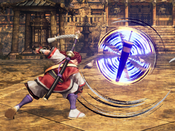
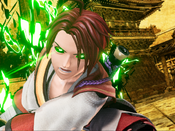
Shizumaru is a well-rounded, technical fighter who can play offense and defense equally well. His range is slightly shorter than most of the other characters, but he makes it up with high damage, great mobility and strong defense. While Shizu can be played at any level and do well, he has arguably one of the highest skill ceilings out of any character in the game due to his instant overhead setup and Crazy Downpour special move (also called Kyourakuzan or KRZ, or TAP as a reference to the signature move from Boxer from the Street Fighter Series, the Turn-Around Punch). Holding down any slash button (A, B, C) will charge the attack, with the strongest version taking a full 80 seconds to charge up. Experienced players will switch which button is held down regularly. Reading the situation correctly and changing your buttons on the fly is a big part of Shizu’s execution requirement. But the reward of landing KRZ is massive, and it makes his damage potential some of the highest in the entire game after the first round. He may feel a little outmatched on the ground sometimes, but if you slip up once, Shizu might just take the round from a single small mistake.

Strengths Weaknesses
  • Strong rushdown: Shizu has great options for aggressive rushdown engagements. His slide is very active and has a great hitbox while being semi-safe and his cancellable 66B is great for converting whiff punishes into his DP or WFT. His close-to-mid-range normals are quite strong in general and his B+C is great for high-profiling defensive lows. Finally, Shizu has great options for punishing throw escapes such as his TAP, 623S, cl.5C and 66C.
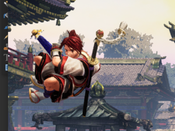
  • Amazing air control: Shizu has some of the best jumping buttons in the game and it is very hard for most characters to contend with his j.C and j.B, but the icing on the cake is easily his j.8S "float" special. This move allows him to delay his jump arc an unlimited number of times and then cancel it into any of his jump normals. This makes his jumping offense very ambiguous as he can bait out pre-emptive anti-airs for big damage or condition opponents to block and then land and apply deep jump pressure.
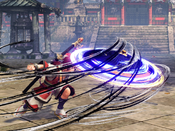
  • TAP: Shizu's Crazy Downpour (or "TAP" if you prefer to fight on the streets) is a fantastic and long-ranged invincible reversal that works as a threatening punish option against jumps, whiffed moves, backdashes and challenges against his recoil. At level 4 and 5 it does huge damage, cannot be bursted and can also be cancelled into from multiple normals. This forces costly early bursts out of fear of being killed outright by TAP and makes any defense against Shizu very risky.
  • Great recoil game: Shizu's TAP and 623S speak for themselves as strong recoil reversals but his 236D 236S are notable as far safer options. His fast and gigantic 5C is also great for leveraging his recoil game.
  • Huge damage in general.
  • Full-screen SSM is good for long-range punishment and shutting down fireballs.
  • Opportunity cost of TAP: TAP requires giving up at least one slash button in order to build charge. This means you lose out on utility from at least one of your normals as well as universal mechanics such as throw and deflect depending on what button you hold. TAP is also SSM punishable on block by most characters, meaning you can die without bursting if you make a mistake. It may be better in some situations to give up your TAP and fight without it.
  • Relies on jumping: Because Shizu's best neutral options are generally his jumping normals, he loses a lot of threat against characters with very strong extended air-to-airs like Warden and GSL as well as characters with invincible DP anti-airs.
  • DP is wonky: Shizu's 623S is unwieldy in that it has a slow startup period that moves him slightly forward. It must be used with careful spacing as an anti-air, lest you whiff under the opponent entirely and take a huge punish.

Data

  • Damage Taken: 105%
  • Rage Factor: 0.26
  • Rage Duration: 9 seconds
  • Jump: 50 frames (Very Slow)
  • Forward Walk Speed: 0.3 (Average)
  • Back Walk Speed: 0.23 (Average)
  • Dash Speed: Average
  • Back Dash: 27 frames (Cancelable from frame 11)
  • Weapon Pickup / Drop: 40 / 61 frames


Gameplan

Neutral

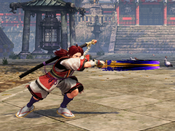
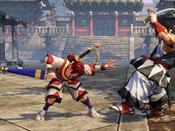
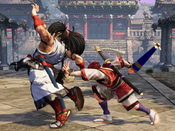
Shizumaru ground game is decent, with 5A as fast poke to stop opponent dashing, 66D as safe approaching tool, and far 5C as whiff punish tool. His anti-air options are not very strong, it's better to use jump C for air to air or 66D to dodge under jump attacks. He has more advantages in the air, jump C has a great hitbox, and jump B hits cross-up exceptionally well, combines with his floating ability to bait out anti-air, and floating BC for surprise attack. His projectile game is awesome too, 236S has great recovery time and 236D reflects most projectiles, and his SSM is deadly against anyone trying to play fireball game. He has wake up invincible move, but it's fairly slow so don't use it against meaty jump attacks.

Approaches

The below game styles of Shizumaru can be used in combination or independently depending on the match up for a fun and effective game experience. It's not all about TAP.

Aerial

The most basic game style of Shizu. Can be both offensive and defensive. His float gives him great control over the timing of his landing. A key movement is to forward or neutral jump and use a float to briefly stop above the opponent. The opponent might make attempts to catch Shizu's landing by using an anti-air option, going down in front to contest with j.C will beat out most attempts (even DPs with invul) or trade in Shizu's favor. His float can create a small delay and the invul of DP will run out allowing his jump normal to hit them. His j.B doesn't have a good downward hitbox to be a front offense, but the horizontal hitbox is just crazy. It hits as a cross up, when he lands behind an opponent from float, this will beat out any AA attempt that does not cover the back, denying most of the AA options. One good set up after j.B hits as a cross up (not deep) or blocked as a cross up, using float instant overhead diving attack, the range is close enough to catch a crouching opponent, it connects quite often as the opponent struggled to quickly correct the direction they block and often they block low. One other thing, because the game doesn't auto correct air attacks, this move makes a great air to air even when the opponent jumps to Shizu's back. It will also catch an back dash or back jump opponent due to it's amazing range.

A more defensive approach is forward jump from some distance float and use j.B, abusing its range can make many AA options can't even reach. Neutral and back jumping float then use j.B is the most defensive approach of Shizu. It will punish mistimed long pokes from afar, this happens quite often with float messing with his landing timing. The cross up hitbox of his j.B can catch opponents trying to run under to attack from behind. From some distance, the j.B will make a great poke to stop a dash. It is extremely difficult for the opponent trying to hit him out of the air from this distance.

This approach is effective against characters that need to get in for damage but not against zoning characters. If the opponent decides to use air normals to hit him out of float, it's time to change things up a little by starting to air to air them or change to a different game approach.

Ground

The ground approach can be more defensive. The basic idea is to use small but fast buttons to slowly bring down the opponent's health. His 5A is one of the fastest poke with a great range, the goal of the pokes are not for damage but to prompt opponents to jump or to throw big buttons.

Anti-Airs
Shizumaru's AA options might not be seemly as good compared to other characters, every option only works at a certain spacing.

  • 5D is the fastest option for standard jumps from the front with no knock down. It has a fast start up, long active frame, and decent range. It is good for short jumps, neutral jumps that require a fast response. It works as a keep-out tool like a poke, ruling out unexpected jumps on reaction.
  • 3D works similar to 5D with knock down, it allows Shizu to low profile the hitboxes of an attack and hit the hurtbox on the opponent.
  • 66C has good vertical range (a bit higher than 5D) to catch opponents earlier in air. Its start up is slow, hard to be done on reaction, can be beat out by air normals. It will hit the opponent in the back when started to dash earlier under the opponent.
  • 66D is a dashing version of 3D with no knock down, it will hit opponents in the back like 66C. It is good for catching opponents' jumps with momentum to continue pressure after neutral air reset. Like 5D, it almost will never lose as an anti air, hard to miss with autocorrect and the sliding animation.
  • DP has unique arcs making it a good AA for mid range neutral jumps and jump-ins. The medium version doesn't move forward that much on startup and its air invul makes it a decent AA for standard jump-ins. Good anticipations and reactions are needed for it to go without problem.
  • BD Float B+C is doing the float diving attack out of a backdash. Getting into a habit of instant float in neutral and react to jumps using the diving attack is a great AA for jump-ins from above or cross up attempts with optimum damage. It requires good read, usually going into backdash float on reaction to an opponent leaving the ground is too late for opponents with standard to shorter jumps.
  • WFT makes a good AA against any kind of jump (Neutral, back, forward, cross-up attempt). It can be done on reaction fairly easily with practice.
  • TAP is also a great AA on standard jump-ins. Level 1 to 4 is prone to trade, level 5 with full invul would not be beaten by any air attacks. When Shizu has it, theoretically it's death sentence to any jumps that can be reacted or predicted. When the opponent neutral jumps in corner, releasing level 3 or above TAP before they fall from their jump, from mid range or closer, the TAP dash animation would last long enough to catch the opponent's landing.

This approach requires good reads and reactions to be played well. When the opponent has more domination in the air, Shizu's floaty jump wouldn't be the best option in the match up. When all AA options are used to its fullest, Shizu can deny any jumps from mid range to behind him. It can also makes the opponent respect him and allows him to take things into the air again.

Guard Crush

This is the newest game approach full of fun. It's extremely offensive with big buttons. His 2C being a real low is great for dealing guard meter damage without worrying about deflect. The key is to decide what to recoil cancel. The most basic being a deflect if the opponent likes to hit normals on recoils. The most safe recoil option will be 236S. His 214A is also good with the faster start up. It will interrupt the start up of many moves in close range, even SSMs. If the opponent tries to punish afterwards it's hard as it recovers very fast (can set up for deflect). Use the B or C version 1 out of 5 times to mess up the punish timing of your opponents. Don't recoil anything is another option, or even go for a heavy DP but if blocked it would be bad. When the opponent wake-up, delay for a little and then hit them with 2C. Use some 5C's if you suspect them to jump or move on wake up.

2C, j.C, 66C, or 5C, use them interchangeably to bring down a guard meter in 4 hits, now either to make a GC attempt or use the reverse feeling of the opponent to deal more damage. If the opponent recklessly runs away when they are in GC state, use Shizu's air buttons to chase them down. Do not aim for GC until the opponent is losing more health trying to run from GC, if patient enough, the opponent might lose the round just by running from GC. There isn't a 100% safe GC setup, but he can use kicks (2D, 6D) and his projectile to mask his 5C. E.g. when the opponent wakes up, throw a meaty projectile to beat out potential deflect or to bait out a button, Shizu might block the opponent's normal unarmed or get hit by a light, these are opportunity for an unexpected 5C (since if hitting the button too fast, a u.5S will come out).

When you get a GC, time to land a TAP or SSM, see combo section. This approach is risky but can work on any opponents, and it's a lot of fun. It requires a lot of practice if attempt to keep TAP and good prediction to choose the right deflect options. It's more of an approach for fun than being practical, use it with the other approaches to enhance its efficiency.

Okizeme

Shizumaru has quite a few tools for wake up mix up, including 2C as a cancellable low / BC / 44 8S 2A combos / 44 8S BC, and tick throw with 2D, making him very strong against wake up, especially against forward roll.

Charging KRZ (Crazy Downpour)

General

When playing as Shizumaru, you need to get into the habit of holding down any Slash button (A, B or C) at all points during the match to charge KRZ. This move is your biggest joker and enables you to blow through anything the opponent does, doing a huge amount of unburstable damage. This gives you great comeback potential or a way to close out a round or match before the opponent can use their rage explosion. Because of the huge threat this move possesses, your opponent might hesitate to attack or even scare to jump, giving you more opportunities to win.

To charge KRZ, you don't have to stick to a single button - you can switch around buttons and still keep the charge, as long as at least one slash button is held down at all times. Because of the nature of holding down a button, you won't have access to certain moves in the neutral game. Apart from the obvious normals and specials, these are:

  • While holding A: No spot dodge and deflect.
  • While holding B: No spot dodge, deflect, universal overhead and WFT.
  • While holding C: No throw, universal overhead, WFT and SSM. Notable: No invincible 623C.

It helps to think of charging KRZ as a stance. Holding C is the defensive/neutral stance - you have access to quick normals to halt your opponent's approach, and you can deflect and spot dodge, but you lack the access to a quick whiff punish tool 5C and cannot use throw, as well as main combo part and reversal 623C, WFT and SSM. Holding A is the offensive stance - you can't do quick pokes or cannot deflect or spot dodge, but you can deal heavy damage with 5C and throw. Holding B has quite a few disadvantages, most notably you cannot use your main combo tool including near 5B / 66B / 2B and cross-up jump B.

Switching Charge

A good habit to get into is to never press and let go of a button but instead always holding it down. Even if you do not intend to keep holding it down, it gives you the option to choose. So if you're holding A, and then pressed C to poke/punish with Heavy Slash, keep holding down both buttons until you made up your mind which button you want to free up.

Other good ways and spots to switch the button you're currently holding is during the recovery of any move (mostly specials such as DP after a punish) or by masking it with a 2D (eg hold A, whiff 2D, switch to holding C).

It's important to always have a plan as to why you're holding which button. For example, holding A or B keeps you from using deflect, so in situations where you're soon likely to be able to land one, you want to plan ahead and free it up in time.

Concrete example: You're holding A and attempt to hit the opponent with a 5C, but it was blocked. If you kept holding A here, you're not able to recoil cancel into deflect and are defenseless against attempts by the opponent to punish with a Slash of their own. Instead, you want to hold A, press 5C and keep holding C, and if it was blocked, you can attempt to deflect. In case you're deciding to deflect, always switch back to holding A after deflecting (ie doing 236[A]+B and holding A), because if the deflect was successful you want your C button to be free up for SSM.

Think of different situations where you want to switch buttons around like this and incorporate these drills into your practice sessions!

Lv4 vs Lv5

Lv1, Lv2 and Lv3 KRZ are fairly useless, which is good because it lets us focus on the two important ones: Lv4 and Lv5. These are probably the only ones you want to use. Let's compare these two: Lv5 takes four times as long to charge compared to Lv4 (80s vs 20s, or 50 Samsho seconds vs ~13 Samsho seconds) while only adding a fraction of the damage, so Lv4 has a way better damage to charge time ratio. Lv5 however is of course completely invincible, whereas Lv4's invincibility runs out before the start up frames.

This means that if you can land Lv4 KRZ as soon as you get it, you will do a lot more damage over the course of a match than landing a single Lv5 KRZ. This makes his throw very potent, as KRZ can easily combo from it. However, reliably landing Lv4 every time after exactly 20s is unrealistic, and every second you "waste" after you get Lv4 makes you lose on DPS, which makes waiting for access to Lv5 KRZ more attractive. After all, which version you prefer to use is up to your playstyle. With that being said, closing out the first round (or second if you lost the first one and whiffed a KRZ already) by using a guaranteed Lv4 is probably always worth it, so don't hesitate to use it this way.

Managing levels

As said above, only Lv4 and Lv5 are worth using. There are two magic numbers that you need to memorize - 13 and 50. This is the amount of in-game time needed to charge to Lv4 and Lv5. ALWAYS keep track of the round timer to determine which level you are currently on. In the first round, assuming nothing stops the timer (like Rage Explosion), you have Lv4 as soon as the timer reaches 47 and Lv5 as soon as it reaches 10. If either of you dies when the timer shows 24, that means 36 Samsho seconds have passed, so you'll have Lv5 in the next round when the timer hits 46. Utilizing the timer to determine your current charge level is a very simple but powerful technique, and nothing feels more satisfying than to go through a fireball right as you hit that Lv5. Get into this habit as soon as possible.

Normal Moves

Far Slashes

5A
5A
SS Shizumaru 5A.png
Damage Guard Startup Active Recovery Total Hit Adv Block Adv Guard Dmg Cancel Recoil Deflectable Unarmed
40 Mid 9 - - 23 -2 -5 5 No Yes Yes No

Fast poke with great range and very safe on block.

5B
5B
SS Shizumaru 5B.png
Damage Guard Startup Active Recovery Total Hit Adv Block Adv Guard Dmg Cancel Recoil Deflectable Unarmed
100 Mid 11 - - 35 -4 -12 10 No Yes Yes No

Swats away at the opponent with his umbrella. Slightly slower but better reach and damage than far 5A, but more disadvantage on block.

5C
5C
SS Shizumaru 5C.png
Damage Guard Startup Active Recovery Total Hit Adv Block Adv Guard Dmg Cancel Recoil Deflectable Unarmed
270 Mid 19 - - 65 -7 -16 25 No Yes Disarm No

As one might expect from a student of Haohmaru, Shizu borrows heavily from Haohmaru's most iconic button. Covers decent range but much faster than Haoh's far 5C. Very good button for whiff punish.

2A
2A
SS Shizumaru 2A.png
Damage Guard Startup Active Recovery Total Hit Adv Block Adv Guard Dmg Cancel Recoil Deflectable Unarmed
30 Mid 5 4 8 16 +1~+5 -5~-1 5 Yes Yes Yes No

Fast hilt attack with long active frames.

2B
2B
SS Shizumaru 2B.png
Damage Guard Startup Active Recovery Total Hit Adv Block Adv Guard Dmg Cancel Recoil Deflectable Unarmed
20,60 Mid 9 - - 32 -2 -12 10 Yes,Yes Yes Yes No

A fast 2-hit umbrella attack which both hits are cancellable. The 1st hit has long hit-stun and almost no push back.

2C
2C
SS Shizumaru 2C.png
Damage Guard Startup Active Recovery Total Hit Adv Block Adv Guard Dmg Cancel Recoil Deflectable Unarmed
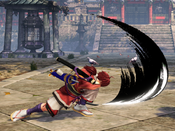
30,30,100 Low 18,19,20 - - 50 -3 -28 25 Yes,Yes,No Yes No No

This 3-hit heavy slash which hits low and the first two hits are cancellable. Depending on the range the first hit might whiff, so be aware of your spacing.

Near Slashes

n.5A
n.5A
SS Shizumaru n5A.png
Damage Guard Startup Active Recovery Total Hit Adv Block Adv Guard Dmg Cancel Recoil Deflectable Unarmed
30 Mid 4 - - 16 ±0 -5 5 No Yes Yes No

A hilt attack, which is the fastest normal in the game, but it's not cancellable.

n.5B
n.5B
SS Shizumaru n5B.png
Damage Guard Startup Active Recovery Total Hit Adv Block Adv Guard Dmg Cancel Recoil Deflectable Unarmed
80 Mid 9 - - 32 -3 -12 10 Yes Yes Yes No

His main combo tool with decent start up.

n.5C
n.5C
SS Shizumaru n5C.png
Damage Guard Startup Active Recovery Total Hit Adv Block Adv Guard Dmg Cancel Recoil Deflectable Unarmed
200 Mid 19 - - 49 -3 -28 25 No Yes Disarm No

Standard near 5C with slower startup.

Kicks

5D
5D
SS Shizumaru 5D.png
Damage Guard Startup Active Recovery Total Hit Adv Block Adv Guard Dmg Cancel Recoil Deflectable Unarmed
50 Mid 6 - - 22 -4 -7 5 Yes No No Yes

Very fast kick which is cancellable. It somehow makes a great anti-air, maybe the best one yet out of all his options. Small damage but annoying, safe on whiff or block, 95% of the time beat out an air normal before they can come out.

6D
6D
SS Shizumaru 6D.png
Damage Guard Startup Active Recovery Total Hit Adv Block Adv Guard Dmg Cancel Recoil Deflectable Unarmed
30 Low 9 8 9 25 -4~+3 -7~±0 5 Yes No No Yes

Fast low kick that which is cancellable.

2D
2D
SS Shizumaru 2D.png
Damage Guard Startup Active Recovery Total Hit Adv Block Adv Guard Dmg Cancel Recoil Deflectable Unarmed
20 Low 5 4 9 17 ±0~+3 -3~±0 5 No No No Yes

Standard fast low kick.

3D
3D
SS Shizumaru 3D.png
Damage Guard Startup Active Recovery Total Hit Adv Block Adv Guard Dmg Cancel Recoil Deflectable Unarmed
70 Low 8 4 19 30 KD(+102) -14~-11 5 Yes No No Yes

Fast low kick which knocks down the opponent and it's cancellable. His hurt-box becomes very small while he kicks (Low-profiling), and can dodge under lots of pokes like Jubei's far mid slash.

Dash Normals

66A
66A
SS Shizumaru 66A.png
Damage Guard Startup Active Recovery Total Hit Adv Block Adv Guard Dmg Cancel Recoil Deflectable Unarmed
60 Mid 7 - - 22 ±0 -19 5 No Yes Yes No

Running hilt attack which is deflectable and not cancellable, also very punishable, his 66D is way better option than this.

66B
66B
SS Shizumaru 66B.png
Damage Guard Startup Active Recovery Total Hit Adv Block Adv Guard Dmg Cancel Recoil Deflectable Unarmed
80 Mid 10 - - 33 -3 -35 10 Yes Yes Disarm No

Another main combo tool, similar motion like near 5B, also cancellable but very minus on block.

66C
66C
SS Shizumaru 66C.png
Damage Guard Startup Active Recovery Total Hit Adv Block Adv Guard Dmg Cancel Recoil Deflectable Unarmed
140 Mid 12 3 - 50 KD(+97) -16 20 No Yes Disarm No

Standard 66C which knocks down the opponent.

66D
66D
SS Shizumaru 66D.png
Damage Guard Startup Active Recovery Total Hit Adv Block Adv Guard Dmg Cancel Recoil Deflectable Unarmed
70 Low 7 9 - 29 -6~+2 -13~-5 5 No No No Yes

Low sliding kick with very long active frames and good upwards hit-box, it's very safe on block when space correctly.
It's also low-profiling like 3D, and sometimes hits airborne opponent in the back, making it useful anti-air.
No longer knocks down since version 2.10.

Air Normals

j.A
j.A
SS Shizumaru jA.png
Damage Guard Startup Active Recovery Total Hit Adv Block Adv Guard Dmg Cancel Recoil Deflectable Unarmed
30 High 5 - - - - - 5 No No No No

Fast air to air attack.

j.B
j.B
SS Shizumaru jB.png
Damage Guard Startup Active Recovery Total Hit Adv Block Adv Guard Dmg Cancel Recoil Deflectable Unarmed
100 High 13 - - - - - 10 No No No No

Amazing aerial, can be used both as an air-to-air and as a jump-in. Can also cross up, which is especially useful because float gives you a lot of control over your jump-in angle.

j.C
j.C
SS Shizumaru jC.png
Damage Guard Startup Active Recovery Total Hit Adv Block Adv Guard Dmg Cancel Recoil Deflectable Unarmed
160 High 11(12) - - - - - 20 No No No No

Jump heavy slash with very good downwards hit-box, startup is 11 frames for horizontal hit and 12 frames for downwards hit.

j.D
j.D
SS Shizumaru jD.png
Damage Guard Startup Active Recovery Total Hit Adv Block Adv Guard Dmg Cancel Recoil Deflectable Unarmed
30 High 8 - - - - - 5 No No No Yes

Jump kick with horizontal hit-box.

Unarmed Normals

u.5S
u.5S
SS Shizumaru u5S.png
Damage Guard Startup Active Recovery Total Hit Adv Block Adv Guard Dmg Cancel Recoil Deflectable Unarmed
50 Mid 7 - - 27 ±0 -5 5 No No No Only

Fast chop attack.

u.2S
u.2S
SS Shizumaru u2S.png
Damage Guard Startup Active Recovery Total Hit Adv Block Adv Guard Dmg Cancel Recoil Deflectable Unarmed
50 Mid 6 - - 24 +2 -3 5 No No No Only

Fast chop attack which is safe on block.

ju.S
ju.S
SS Shizumaru juS.png
Damage Guard Startup Active Recovery Total Hit Adv Block Adv Guard Dmg Cancel Recoil Deflectable Unarmed
50 High 5 - - - - - 5 - No No Only

Jump back fist with small hit-box.

u.66S
u.66S
SS Shizumaru u66S.png
Damage Guard Startup Active Recovery Total Hit Adv Block Adv Guard Dmg Cancel Recoil Deflectable Unarmed
50 Mid 10 - - 29 KD(+109) -4 5 No No No Only

Same motion like unarmed 2S but knocks down, startup is slow but safe on block.

Universal Mechanics

Guard Break
Guard Break (Throw)
SS Shizumaru 5CD.png
5C+D / 6C+D
5C+D / 6C+D
SS Shizumaru 4CD.png
4C+D
4C+D
Version Damage Guard Startup Active Recovery Total Hit Adv Block Adv Guard Dmg Cancel Recoil Deflectable Unarmed
Neutral / Forward 0 Throw 3 - 71 74 +20 - - - - - Yes
Back 0 Throw 5 - 69 74 +25 - - - - - Yes

Universal throw, can follow up with combos. Back throw has slower start up but better frame advantage. There is no throw tech, but throws are very punishable on whiff.

Surprise Attack
Surprise Attack (Overhead)
5B+C
SS Shizumaru 5BC.png
Armed
Armed
SS Shizumaru u5BC.png
Unarmed
Unarmed
Version Damage Guard Startup Active Recovery Total Hit Adv Block Adv Guard Dmg Cancel Recoil Deflectable Unarmed
Armed 60 High 20 - - 46 +2 -14 10 No No No No

Universal overhead. No longer knocks down the opponent since version 1.70.

Unarmed 60 High 20 - - 44 KD(+78) -12 10 No No No Only

Universal unarmed overhead. Knocks down the opponent.

Dodge
Dodge
5A+B
SS Shizumaru 5AB.png
Damage Guard Startup Active Recovery Total Hit Adv Block Adv Guard Dmg Cancel Recoil Deflectable Unarmed
N/A - 1 16 22 38 - - - - - - Yes

Universal dodge. Avoids all attacks for a brief moment, and is mainly used to avoid throws.

Complete invincibility from frames 1 to 10. Strike invincibility from frames 11 to 16.


Stance Break
Stance Break
A+B during Just Defense
SS Shizumaru gAB.png
Damage Guard Startup Active Recovery Total Hit Adv Block Adv Guard Dmg Cancel Recoil Deflectable Unarmed
0 Mid 5 - - 52 KD -24 - - - - Yes

Universal Stance Break.

Counter (Deflect) / Blade Catch
236A+B
SS Shizumaru 236AB.png
Weapon Deflect
Weapon Deflect
SS Shizumaru u236AB.png
Blade Catch
Blade Catch
Version Damage Guard Startup Active Recovery Total Hit Adv Block Adv Guard Dmg Cancel Recoil Deflectable Unarmed
Armed 0 N/A 2 11 34 46 +35~+59 - - - - - No

Universal counter that works against mid-guard normal slashes. Upon successful counter, you can follow up with any attack except throws.
The amount of time to follow up depends on timing and the strength of slash, and deflecting medium slashes staggering the opponent for longest amount of time.
Additionally, if you deflect a heavy slash or running medium slash, the opponent will be disarmed.

Unarmed 0 N/A 2 12 9 22 KD - - - - - Only

Universal unarmed counter, works against the same slashes as counter.
Upon successful blade catch, your will disarm your opponent and knock down the opponent to the corner, regardless of the strength of slash.

Rage Explosion
Rage Explosion
5A+B+C
SS Shizumaru 5ABC.png
Damage Guard Startup Active Recovery Total Hit Adv Block Adv Guard Dmg Cancel Recoil Deflectable Unarmed
0 Unblockable 21 1 - 58 0 - - - - - No

Activate the rage explosion gauge and push back the opponent, available once per match. In order to activate, the character must be on the ground with the weapon on hand.
It can be activated during hit stun / throw staggering / weapon deflected / recoil cancel / normal cancel / blocking, but not during action recovery.
It's nearly the same as max rage with extra damage buff (140% vs 120%), and it pauses the timer count down, also allows access to Lighting Blade.
The less amount of health remaining when activates, the more amount of rage explosion gauge it begins with.
Rage explosion ends if the gauge runs out, WFT connects, Lighting Blade used, or the round ended. Then the rage gauge disappears for the rest of match.
The activation push back is unblockable, and its hit-box extends all the way up to top of the screen.

Lightning Blade
Lightning Blade (Issen)
5A+B+C during Rage Explosion
SS Shizumaru Issen.png
Damage Guard Startup Active Recovery Total Hit Adv Block Adv Guard Dmg Cancel Recoil Deflectable Unarmed
300~709 Mid 9 - - - KD -44 - - - - No

Dashes full screen and slash across the opponent in classic style. It has full invincibility and can anti-air. Damage scales based on remaining rage explosion gauge.

Command Moves

Wall Jump
Wall Jump
(near wall)9
SS Shizumaru w9.png
Wall Jump
Wall Jump
SS Shizumaru w7.png
Reverse Attack
Reverse Attack
Damage Guard Startup Active Recovery Total Hit Adv Block Adv Guard Dmg Cancel Recoil Deflectable Unarmed
- - - - - - - - - - - - Yes

Shizumaru can jump off walls. When facing the wall, input 7A/B/C/D to perform a reverse falling attack, since his jump B hits cross up, he can do a hit / throw mix up.

Special Moves

Mist Blast
Mist Blast
236S
SS Shizumaru 236S.png
Version Damage Guard Startup Active Recovery Total Hit Adv Block Adv Guard Dmg Cancel Recoil Deflectable Unarmed
A 50 Mid 21 - - 54 KD -20 5 - - - No
B 50 Mid 26 - - 52 KD -13 5 - - - No
C 50 Mid 31 - - 50 KD -6 5 - - - No

Throws his umbrella as a projectile. Light version has the quickest startup but the shortest range. It's unsafe on block unless spaced perfectly. Very hard to utilize compared to the other two versions.
Medium version has better range and much safer on block, will be in the unarmed state until the umbrella returns.
Heavy version has the slowest startup with the longest range. Recovers very quickly, most of the time you can anti-air on reaction, but keep in mind that you are in the unarmed state, which means DP is not available, but can setup for a blade catch or an 66u.S for knock down.

Cross Current Slicer
623S
SS Shizumaru 623S.png
Version Damage Guard Startup Active Recovery Total Hit Adv Block Adv Guard Dmg Cancel Recoil Deflectable Unarmed
A 100 (10x4,60) Mid 8 - - 71 KD(+90) -35 22 - - - No
B 120 (10x5,70) Mid 12 - - 87 KD(+81) -47 22 - - - No
C 150 (10x6,90) Mid 16 - - 107 KD(+80) -61 22 - - - No
Rage 216 (12x10,96) Mid 16 - - 107 KD(+80) -61 27 - - - No

His DP type move and main combo tool. Light version is fast but has no invincibility.
Medium version has anti-air invincibility from frame 1~13, but it moves forward quite a bit, making it very situational anti-air.
Heavy / Rage version travels even further, and has full invincibility from frame 1~16, can be used as wake up reversal (although the start up is slow), recoil cancel tool or even goes through projectiles.
All versions are very unsafe on block and SSM punishable.

Freezing Rain Repeller
236D
SS Shizumaru 236D.png
Damage Guard Startup Active Recovery Total Hit Adv Block Adv Guard Dmg Cancel Recoil Deflectable Unarmed
40 Mid 6 - - 46 KD(+83) -28 10 - - - No

A projectile reflector which also deals a little damage at point blank range. Start up is very quick but recovery is slow and very punishable on block.
It reflects most projectiles except Rimururu's rolling ice ball (when it lands and starts rolling, it's reflectable before it touches the ground).
Because its poor range and damage, it's not good for combo or recoil cancel.

May Shower Slice
May Shower Slice
214S
SS Shizumaru 214S.png
Version Damage Guard Startup Active Recovery Total Hit Adv Block Adv Guard Dmg Cancel Recoil Deflectable Unarmed
A 90 (10,80) Mid 12 - - 59 KD(+65) -18 4 - - - No
B 130 (10,120) Mid 14 - - 91 KD(+61) -25 7 - - - No
C 160 (10,150) Mid 14 - - 135 KD(+68) -36 11 - - - No

Spins his umbrella to attack. If the opponent get caught before the last hit, he would still take full damage.
It deals a lot of chip damage, however it doesn't hit airborne opponent except the last hit.
Therefore the opponent can just jump on wake up to avoid cross up and chip damage, and use jump attack to punish it on whiff.

Rains of Time
Rains of Time
j.2D
SS Shizumaru j2D.png
Pogo Attack
Pogo Attack
Damage Guard Startup Active Recovery Total Hit Adv Block Adv Guard Dmg Cancel Recoil Deflectable Unarmed
30 (20) High 2 - 6 (Landing) - (Jumps again) ±0 (+4) 5 - - - No

Shizumaru lands on the umbrella tip, if it hits the opponent, he will bounce up again and fall with the same motion OR cancel into an air normal (ver 2.10), you can hold left or right to change direction.
The succeeding hits deals a less damage and it's more plus on blocked. It deals very little chip damage.
Additionally, if it hits meaty at the very last frame before landing, it won't bounce up and can combo with n5B / 2B, but it takes perfect frame kill timing.

Dreadful Drizzle
Dreadful Drizzle
8S during falling from jump / back dash
SS Shizumaru j8S.png
Damage Guard Startup Active Recovery Total Hit Adv Block Adv Guard Dmg Cancel Recoil Deflectable Unarmed
N/A - 4 - 3(Cancel) - - - - - - - No

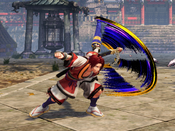
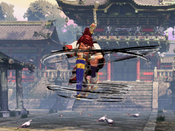
Shizumaru opens up his umbrella, halts the momentum and slowly floats down to the ground. You can steer left and right while floating, but it has a noticeable amount of delay.
It can be canceled and lands normally at any point by inputting down direction, along with his jump B to create deadly cross-up combos.
If you didn't attack, you can re-open the umbrella by inputting up and slash again, for example repeatedly input 28S while floating to deceive your opponent.
It can also be performed during back dash to create instant overhead combos. (back dash is cancellable starting from frame 12)
Since version 1.70 he cannot float right after wall jump, and his body hurt-box is bigger (e.g. no longer back dash float above Haohmaru's 236S).

Lightning Rain
Lightning Rain
B+C during Dreadful Drizzle
SS Shizumaru j8SBC.png
Damage Guard Startup Active Recovery Total Hit Adv Block Adv Guard Dmg Cancel Recoil Deflectable Unarmed
180~220 (10x4,180) High,Mid 4 - - - KD -24 5*n,6 - - - No

A fast attack out of the float, also a good way to chip out the opponent, but very punishable on block. (Could be -19 on block from far distance.)
Backdash cancel into float BC is an instant overhead, but it can be blocked low from distance outside of throw range, because the last hit is not an overhead.
It only deals a little damage to airborne opponents and cross up hit in most cases.

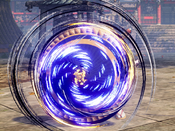
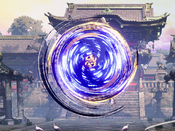
Crazy Downpour
Crazy Downpour
S (Hold and Release)
SS Shizumaru HS.png
SS Shizumaru HS2.png
"Ikuzo! Amanagare Kyourakuzan!"
Version Damage Guard Startup Active Recovery Total Hit Adv Block Adv Guard Dmg Cancel Recoil Deflectable Unarmed
LV1 (1.6 seconds) 100 Mid 20 - - - KD -38 0 - - - No
LV2  (3 seconds)  150 Mid 20 - - - KD -38 0 - - - No
LV3  (6 seconds)  230 Mid 20 - - - KD -38 0 - - - No
LV4 (20 seconds) 350 Mid 20 - - - KD -38 0 - - - No
LV5 (80 seconds) 500 (60, 110x4) Mid 20 - - - KD -38 0 - - - No

Shizumaru's turn around punch type move. Holding any slash button for a period of time and then release it, and he will toss his umbrella to the air and charge with this sword.
It's an important technique to switch between slash buttons while keeping the charge level, since version 1.30 it's impossible to rage explosion / issen and keep the charge level.
The level carries to the next round, and you can release the button before the next round starts.
Level 1 travels half of the screen, level 2 covers 80% of the screen, level 3 runs full screen, level 4 has startup invincibility from frame 1~16, and level 5 has full invincibility all the way, making it very scary for anti-air.
All versions are unsafe on blocked and punishable by some SSM, but sometimes the opponent is late for punish and you can perform blade catch, since Shizumaru is unarmed until the umbrella returns.
Since version 1.70, it's more punishable on block and on whiff. Now the opponent can rage explosion to burst out of Level 5 KRZ combos and punish it with Lighting Blade, WFT combos, or even SSM.
This surely made level 5 not a good option for combo, but it's still a super strong anti-ar, punish tool and gambling option.
Since version 2.10, getting disarmed by WFT or deflect will RESET his charge. Something interesting: getting a WFT at the end of a round and it killed, it WILL NOT reset the charge.
Exceptions:

  • Darli, only wouldn't reset if the first hit killed
  • Tam Tam, only wouldn't reset if the first hit killed (Basically would reset if you don't have like 1 hp)
  • Jubei, won't reset on chip out, but will be reset if the first hit didn't kill
  • Sogetsu, reset if the 7th hit didn't kill, 9 hits in total
  • Mina, will reset no matter
  • Hibiki, will reset no matter
  • Gongsun-Li, will reset no matter
  • Warden, will reset no matter

Supers

Weapon Flipping Technique

Hurricane Shredder Slash
236B+C
SS Shizumaru WFT.png
SS Shizumaru WFT2.png
Damage Guard Startup Active Recovery Total Hit Adv Block Adv Guard Dmg Cancel Recoil Deflectable Unarmed
420 (60,360) Mid 1+12~28 - - 78 KD -38 - - - - No

Available only during Max Rage or Rage Explosion. Disarms on hit. Shizumaru spins his umbrella and moves forward to slash.
It's very good at catching opponent back jump or jump behind Shizumaru. It has hit-box behind his back, able to hit cross up against wake up opponent. It also deals a lot of chip damage.

Super Special Move

Demon Memory: Heaven's Tears
641236C+D
SS Shizumaru SSM.png
SS Shizumaru SSM2.png
SS Shizumaru SSM3.png
Slayer - Raining Blood
Damage Guard Startup Active Recovery Total Hit Adv Block Adv Guard Dmg Cancel Recoil Deflectable Unarmed
680 (100,580) Mid 10+20~48 - - 115 KD -63~-44 - - - - No

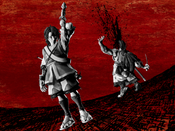
Available only once per match. Full invincibility from frame 1~10. Shizumaru throws his umbrella as projectile, and slash the opponent with true power. One of the best SSMs in the game, because it covers fullscreen quickly and blasts through any projectile, including moves like Yashamaru's and Jubei's WFT.

Combos

List combos, use numpad notation.

  • n.5B xx 623C / WFT
    Standard punish combo.
  • 66B xx 623C / WFT
    Far range punish combo, always connects after 66B hits.
  • 2B xx 623C / WFT
    Same as all his other mediums but short ranged.
  • 2B (1 hit) xx KRZ
    KRZ combo with 9 frame start up, only connects around throw range.
  • 2C xx KRZ
    KRZ combo, deals huge damage from low attack.
  • 2C xx 623C / WFT
    Standard combo from low attack.
  • 2C xx 214C
    A little bit more damage than 623C, it combos if the first hit of 2C hits.
  • 5CD / 4CD...
    • 66B xx WFT
      Standard WFT combo.
    • 66B xx 623C
      Standard forward throw combo.
    • 5C
      The optimal basic follow up, more consistent after back throw.
    • 2C xx KRZ
      KRZ combo, more consistent after back throw, only the 2nd hit of 2C connects.
    • 66B xx KRZ
      Tap combo only for lvl 4 and 5, medium needs to deep hit, works best in corner. WARNING: Hanzo and Galford can teleport out of it! This combo is prone to be punished by burst due to the invul it has!
  • jump B / C (Deep hit)...
    • n.5B xx 623C / WFT
      Standard combo.
    • 66B xx 623C / WFT
      Optimal combo.
    • 2C xx 623C / WFT / KRZ
      KRZ combo after jump in.
    • 2B xx 623C / WFT / KRZ
      KRZ is difficult to connect.
    • KRZ
      Only connects after jump C deep hit.
    • 5C / n.5C
      Universal combo after jump C deep hit.
    • Lighting Blade
      Issen combo.
  • 44 8S BC
    Instant overhead which deals heavy damage (190), only work at point-blank range and punishable on block, also works as cross-up against wake up.
  • 44 8S 2A...
    • 5A / 5B / 66D / 3D
      Instant overhead which is safe on block, 5B is extremely difficult to connect, 66D is very difficult to block. Since now 66D can't knock down, 3D works as an alternative but only on forward roll.
    • n.5B xx 623C / WFT
      Instant overhead with huge damage, but only works against forward roll.
    • 66B xx 623C / WFT
      Instant overhead with huge damage, but it's extremely difficult to connect (zero frame link), works within throw range. Worth a try because 66B is perfect for auto confirm.
    • Lightning Blade
      Instant overhead Issen, high risk and high reward.
  • (2A / 5D / 6D) xx 623B
    Combos from light attacks, 5D is fast with decent range, and 6D hits low.
  • Meaty jump 2D (n.5B / 2B) xx 623C / WFT
    Meaty combo with big damage, jump 2D is plus on block, but it's not safe jump, loses to fast anti-air attacks. Jump 2D combos if +48F while jumping.
    • 623C 2B
      Setup #1, works against forward roll or stationary wake up, it's the same for rage 623C.
    • 66C 2D 2B
      Setup #2, works against stationary wake up mid screen or corner.
    • 66D 236A
      Setup #3, works against stationary wake up in corner.

Guard Crush

  • n.5C...
    After recovery...
    • 66B xx 623C / WFT
      Standard follow up.
    • 66B xx KRZ
      Tap combo only for lvl 4 and 5, medium needs to deep hit. WARNING: Hanzo and Galford can teleport out of it! This combo is prone to be punished by burst due to the invul it has!
    • 2C(2) xx KRZ
      For the above reason use this one instead if that sounds too risky, only 20 less damage.
    • SSM
      SSM follow up. (Be careful with opponent bursting to avoid it)
  • 5C...
    After recovery...
    • 66B xx 623C / WFT
      Standard follow up.
    • 66B xx KRZ
      Tap combo only for lvl 4 and 5, medium needs to deep hit. WARNING: Hanzo and Galford can teleport out of it! This combo is prone to be punished by burst due to the invul it has!
    • 2C(2) xx KRZ
      For the above reason use this one instead if that sounds too risky, only 20 less damage.
  • n.5C / 5C...
    Cancel recovery...
    • Lightning Blade
      Universal Issen combo.

Videos

Colors

SS Shizumaru 1.png
SS Shizumaru 2.png
SS Shizumaru 3.png
SS Shizumaru 4.png


External Links


General
FAQ
Controls
Mechanics
Patch Notes
System Data
Characters
Amakusa
Baiken
Basara
Cham Cham
Charlotte
Darli
Earthquake
Galford
Genjuro
Gongsun Li
Hanzo
Haohmaru
Hibiki
Iroha
Jubei
Kazuki
Kyoshiro
Mina
Nakoruru
Rimururu
Shiki
Shizumaru
Sogetsu
Tam Tam
Ukyo
Wan-Fu
Warden
Wu
Yashamaru
Yoshitora