Introduction
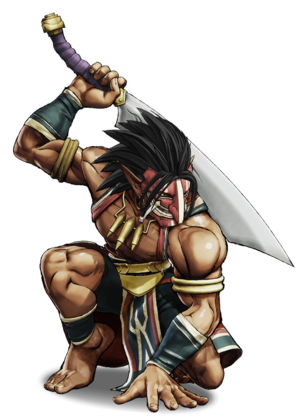
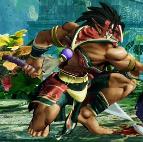
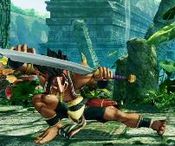
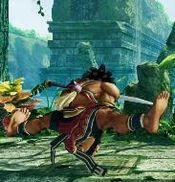
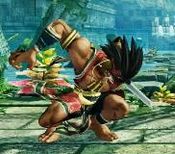
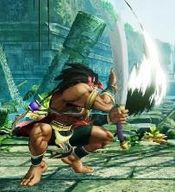
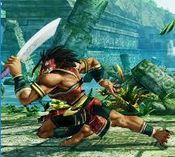
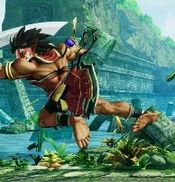
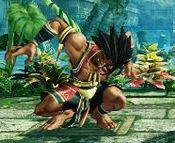
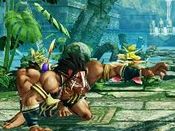
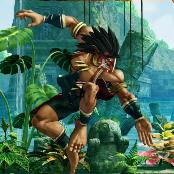
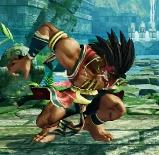
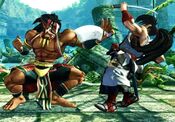
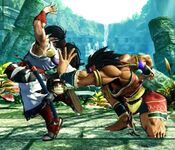
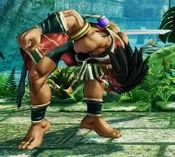
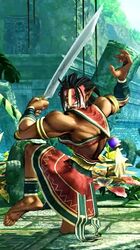
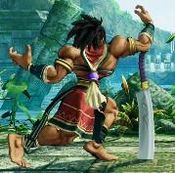
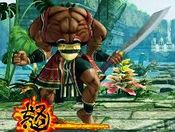
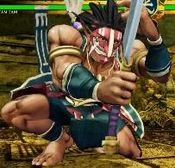
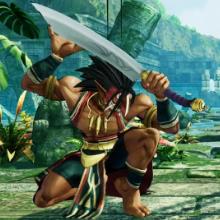
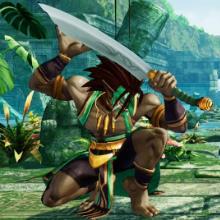
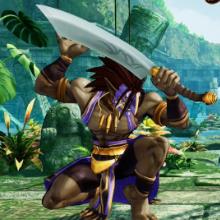
Green Hell's sacred warrior returns to Japan to retrieve his tribe's lost magic 8-ball. Without it, they may never know whether Cham Cham, too, will eventually be added to this game.
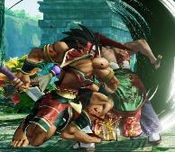
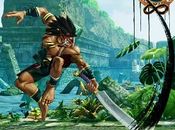
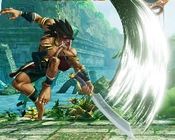
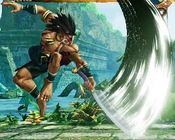
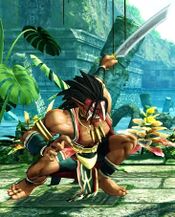
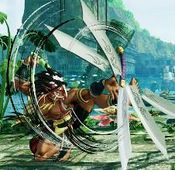
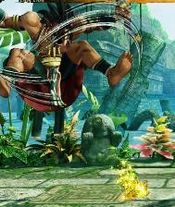
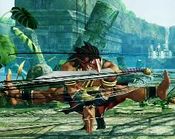
Tam Tam is best described as a “gambling” character of sorts in that much of his damage output comes from putting the opponent in extremely risky 50/50 situations where they have to guess between his low-hitting attacks and his powerful j.C instant overhead. He additionally sports a command grab in case the opponent is getting a bit too comfy down/backing in his face.
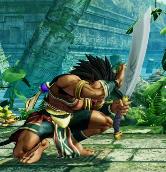
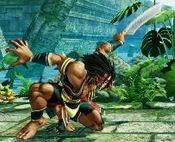
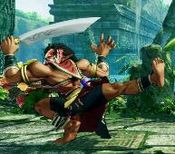
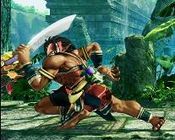
Tam Tam’s zoning toolset is very competent too: 5A is a great and annoying fast poke. His high and low “fireballs” can chain into each other up to three times and Tam Tams’ flame pillars and fast, far reaching air-to-air normals can keep the air space locked down without much effort. Tam Tam’s mobility has also been vastly improved since Vsp, with a fast run and a backdash that’s actually usable.
Going into Samsho 7, the biggest nerf that Tam Tam got was to his damage, as his mixup options and command throw generally don't hit as hard as they used to. Tam Tam is also very reliant on being in control of the match at all times, since he can’t handle being on the defensive at all.
Playstyle
 Tam Tam is an aggressive zoning character, who can easily force you into hard 50/50 mixups. Tam Tam is an aggressive zoning character, who can easily force you into hard 50/50 mixups.
|
| Strengths |
Weaknesses
|
- Some of the longest pokes and best A and D normals in the game
- Air normals have great hitboxes
- Can 50/50 via his IOH j.C and numerous lows
- Good grounded AAs via 2B, 66B and 66C
- Strong zoning via skulls
- Good punishment options
- Good at building guard crush
- SSM has long range and can hop over fireballs
- 421C is an invincible reversal that cannot be SSM punished on block
|
- Long recovery on his best normals as well as multiple blind spots
- Best normals are easy to deflect
- IOH 50/50 is low damage in this game and unsafe
- Bad run speed and running normals aren't suited for pressure
- Jump normals don't reach above his head
- Very floaty jump
- Low damage overall and really bad reward off a guard crush
- SSM is low damage and cannot counter-hit
- 421C has slow startup and can be safe meatied
- Multiple specials are gimmicky and have little purpose
|
Data
- Damage Taken: 105%
- Rage Factor: 0.28
- Rage Duration: 12 seconds
- Jump: 58 frames (Extremely Slow)
- Forward Walk Speed: 0.25 (Slow)
- Back Walk Speed: 0.2 (Slow)
- Dash Speed: 1.0 (Very Slow)
- Back Dash: 27 frames
- Weapon Pickup / Drop: 40 / 40 frames
Gameplan
Tam Tam makes one of the best zoning character, he's made to play a keep out game as long as possible. Most of his damaging normals are safer at mid and long range, if the opponent dash-in onto his face when he did a far button, it will whiff the opponent as they are too close. Some of his key buttons are: 5A, 5B, 2C, j.B, and j.C, plus his UOH, fireball and 421S, he can play a good and efficient game in neutral.
Neutral
Using 5A and 5B interchangeably as a poke to stop the opponent from getting into any range less than half screen. Adding some 2C to mess things up a little and beat out deflect attempts. When the opponent is about to jump, you may try using 236A to air reset the opponent, or jump back with j.C to anti-air (or use j.B which is faster), his jump is one of the highest in the game but it's very slow making it not the best for offense. Another AA option is his 623S, but it require good predication, if the opponent jumps at the distance of 623A and do an air normal, it often trades in the opponent's favor. So his 623S is mostly used to beat out attempts of zoning back on him using the C version.
When the range is less than half screen he has another approach which is mostly High / Low mix-ups game. If the opponent is not the best pressure keeping character (such as they have moderate to slow jumps), he can easily neutral j.C for an instant overhead, and use 2C to catch a standing opponent. This is a risky approach as he does better when he's at longer range. If the opponent does have a low jump or other pressure inducing skills, he shouldn't be staying in close combat, try using 421A or C to catch opponents off guard thus creating some space.
Okizeme
His Oki is mostly High-Low mix-ups. Neutral j.C is still good but there's a better approach. His UOH is plus on hit using it repeatedly to catch a crouching opponent on wake-up. When the opponent is conditioned to stand, use 3D or 421A and B for more damage. This is a good way to get some small damage stacked up.
Normal Moves
Far Slashes
5A
5A
|
| Damage
|
Guard
|
Startup
|
Active
|
Recovery
|
Total
|
Hit Adv
|
Block Adv
|
Guard Dmg
|
Cancel
|
Recoil
|
Deflectable
|
Unarmed
|
| 30
|
Mid
|
9
|
-
|
-
|
28
|
-7
|
-5
|
5
|
No
|
Yes
|
Yes
|
-
|
The scimitar swish from (green) hell is back and still as fast and non-cancellable as ever. However, due to the high rewards a deflect can lead to in this game, maybe you shouldn't spam it as much as you used to. Still, you'll use this a lot.
|
|
5B
5B
|
| Damage
|
Guard
|
Startup
|
Active
|
Recovery
|
Total
|
Hit Adv
|
Block Adv
|
Guard Dmg
|
Cancel
|
Recoil
|
Deflectable
|
Unarmed
|
| 90
|
Mid
|
13
|
-
|
-
|
38
|
-5
|
-12
|
10
|
Yes
|
Yes
|
Yes
|
-
|
Did you know Tam Tam had far slashes other than 5A? I know, it was news to me too. This medium slash has slightly more range than 5A but is obviously slower. Can be cancelled upon hit and whiff, and combos into WFT, which is all pretty neat. Another one you'll be using a lot.
|
|
5C
5C
|
| Damage
|
Guard
|
Startup
|
Active
|
Recovery
|
Total
|
Hit Adv
|
Block Adv
|
Guard Dmg
|
Cancel
|
Recoil
|
Deflectable
|
Unarmed
|
| 220[100,120]
|
Mid
|
22
|
-
|
-
|
67
|
-6
|
-28
|
25
|
No
|
Yes
|
Yes (disarm)
|
-
|
Range on this is pretty good, but second hit can whiff if you only graze them with the very tip of the first hit.
This one is now your preferred simple hard slash for punishes over 2C.
|
|
2A
2A
|
| Damage
|
Guard
|
Startup
|
Active
|
Recovery
|
Total
|
Hit Adv
|
Block Adv
|
Guard Dmg
|
Cancel
|
Recoil
|
Deflectable
|
Unarmed
|
| 30
|
Mid
|
6
|
-
|
-
|
17
|
+1
|
-5
|
5
|
Yes
|
Yes
|
Yes
|
-
|
Not a bad option if they're getting closer and you want to shut down some dash grab attempts.
|
|
2B
2B
|
| Damage
|
Guard
|
Startup
|
Active
|
Recovery
|
Total
|
Hit Adv
|
Block Adv
|
Guard Dmg
|
Cancel
|
Recoil
|
Deflectable
|
Unarmed
|
| 80
|
Mid
|
10
|
-
|
-
|
33
|
-3
|
-12
|
10
|
Yes
|
Yes
|
Yes
|
-
|
Combos into 421A and WFT.
|
|
2C
2C
|
| Damage
|
Guard
|
Startup
|
Active
|
Recovery
|
Total
|
Hit Adv
|
Block Adv
|
Guard Dmg
|
Cancel
|
Recoil
|
Deflectable
|
Unarmed
|
| 140
|
Low
|
18
|
-
|
-
|
64
|
KD
|
-23
|
25
|
No
|
No
|
No
|
-
|
Tam Tam's classic sword sweep took a small hit due to 5C now doing a lot more damage. It keeps its knockdown and non-deflectable properties, however. This one has no recoil animation on block, so definitely don't just throw this one out. If you's blocked, you's in trouble.
|
|
Near Slashes
n.5A
n.5A
|
| Damage
|
Guard
|
Startup
|
Active
|
Recovery
|
Total
|
Hit Adv
|
Block Adv
|
Guard Dmg
|
Cancel
|
Recoil
|
Deflectable
|
Unarmed
|
| 30
|
Mid
|
6
|
-
|
-
|
20
|
-2
|
-5
|
5
|
Yes
|
No
|
No
|
-
|
|
|
|
n.5B
n.5B
|
| Damage
|
Guard
|
Startup
|
Active
|
Recovery
|
Total
|
Hit Adv
|
Block Adv
|
Guard Dmg
|
Cancel
|
Recoil
|
Deflectable
|
Unarmed
|
| 80
|
Mid
|
9
|
-
|
-
|
29
|
0
|
-12
|
10
|
Yes
|
Yes
|
Yes
|
-
|
Can combo into WFT, 421A and the triple low skulls!
|
|
n.5C
n.5C
|
| Damage
|
Guard
|
Startup
|
Active
|
Recovery
|
Total
|
Hit Adv
|
Block Adv
|
Guard Dmg
|
Cancel
|
Recoil
|
Deflectable
|
Unarmed
|
| 200[100,100]
|
Mid
|
14
|
-
|
-
|
54
|
-1
|
-28
|
25
|
No
|
Yes
|
Yes (Disarm)
|
-
|
Another 2-Hit-Heavy, but no cancels this time around.
|
|
Kicks
5D
5D
|
| Damage
|
Guard
|
Startup
|
Active
|
Recovery
|
Total
|
Hit Adv
|
Block Adv
|
Guard Dmg
|
Cancel
|
Recoil
|
Deflectable
|
Unarmed
|
| 50
|
Mid
|
6
|
-
|
-
|
24
|
-6
|
-9
|
5
|
Yes
|
No
|
No
|
-
|
|
6D
6D
|
| Damage
|
Guard
|
Startup
|
Active
|
Recovery
|
Total
|
Hit Adv
|
Block Adv
|
Guard Dmg
|
Cancel
|
Recoil
|
Deflectable
|
Unarmed
|
| 30
|
Low
|
6~12
|
7
|
-
|
22
|
KD
|
-7~-1
|
5
|
Yes
|
No
|
No
|
-
|
|
2D
2D
|
| Damage
|
Guard
|
Startup
|
Active
|
Recovery
|
Total
|
Hit Adv
|
Block Adv
|
Guard Dmg
|
Cancel
|
Recoil
|
Deflectable
|
Unarmed
|
| 20
|
Low
|
6
|
-
|
-
|
17
|
+1
|
-2
|
5
|
Yes
|
No
|
No
|
-
|
|
3D
3D
|
| Damage
|
Guard
|
Startup
|
Active
|
Recovery
|
Total
|
Hit Adv
|
Block Adv
|
Guard Dmg
|
Cancel
|
Recoil
|
Deflectable
|
Unarmed
|
| 70
|
Low
|
19, 25
|
-
|
-
|
40
|
KD
|
-5, +1
|
5
|
No
|
No
|
No
|
-
|
|
Dash Normals
66A
66A
|
| Damage
|
Guard
|
Startup
|
Active
|
Recovery
|
Total
|
Hit Adv
|
Block Adv
|
Guard Dmg
|
Cancel
|
Recoil
|
Deflectable
|
Unarmed
|
| 30
|
Mid
|
8
|
-
|
-
|
24
|
-4
|
-7
|
5
|
Yes
|
No
|
No
|
-
|
|
66B
66B
|
| Damage
|
Guard
|
Startup
|
Active
|
Recovery
|
Total
|
Hit Adv
|
Block Adv
|
Guard Dmg
|
Cancel
|
Recoil
|
Deflectable
|
Unarmed
|
| 110
|
Mid
|
9
|
-
|
-
|
37
|
-8
|
-35
|
10
|
No
|
Yes
|
Yes (Disarm)
|
-
|
|
66C
66C
|
| Damage
|
Guard
|
Startup
|
Active
|
Recovery
|
Total
|
Hit Adv
|
Block Adv
|
Guard Dmg
|
Cancel
|
Recoil
|
Deflectable
|
Unarmed
|
| 150
|
Mid
|
13
|
-
|
-
|
53
|
KD
|
-18
|
20
|
No
|
No
|
Yes (Disarm)
|
-
|
|
66D
66D
|
| Damage
|
Guard
|
Startup
|
Active
|
Recovery
|
Total
|
Hit Adv
|
Block Adv
|
Guard Dmg
|
Cancel
|
Recoil
|
Deflectable
|
Unarmed
|
| 70
|
Low
|
6~14
|
9
|
-
|
35
|
KD
|
-13~-5
|
5
|
No
|
No
|
No
|
-
|
|
Air Normals
j.A
j.A
|
| Damage
|
Guard
|
Startup
|
Active
|
Recovery
|
Total
|
Hit Adv
|
Block Adv
|
Guard Dmg
|
Cancel
|
Recoil
|
Deflectable
|
Unarmed
|
| 50
|
High
|
5
|
-
|
-
|
-
|
-
|
-
|
5
|
No
|
No
|
-
|
-
|
|
j.B
j.B
|
| Damage
|
Guard
|
Startup
|
Active
|
Recovery
|
Total
|
Hit Adv
|
Block Adv
|
Guard Dmg
|
Cancel
|
Recoil
|
Deflectable
|
Unarmed
|
| 110
|
High
|
8
|
-
|
-
|
-
|
-
|
-
|
10
|
No
|
No
|
-
|
-
|
|
j.C
j.C
|
| Damage
|
Guard
|
Startup
|
Active
|
Recovery
|
Total
|
Hit Adv
|
Block Adv
|
Guard Dmg
|
Cancel
|
Recoil
|
Deflectable
|
Unarmed
|
| 150
|
High
|
9
|
-
|
-
|
-
|
-
|
-
|
20
|
No
|
No
|
-
|
-
|
The classic instant overhead, now new and improved without any blind spots, making it a great air-to-air as well, which is insane.
|
|
j.D
j.D
|
| Damage
|
Guard
|
Startup
|
Active
|
Recovery
|
Total
|
Hit Adv
|
Block Adv
|
Guard Dmg
|
Cancel
|
Recoil
|
Deflectable
|
Unarmed
|
| 30
|
High
|
9
|
-
|
-
|
-
|
-
|
-
|
5
|
No
|
No
|
-
|
-
|
This does less damage than any of Tam Tam's jumping slashes while also not being faster than any of them (same startup as j.C). Add to that the fact that the jumping slashes now have no blind spots anymore, and this move is pretty much pointless.
|
|
Unarmed Normals
u.5S
u.5S
|
| Damage
|
Guard
|
Startup
|
Active
|
Recovery
|
Total
|
Hit Adv
|
Block Adv
|
Guard Dmg
|
Cancel
|
Recoil
|
Deflectable
|
Unarmed
|
| 50
|
Mid
|
11
|
-
|
-
|
35
|
-4
|
-9
|
5
|
No
|
No
|
No
|
Yes
|
Standing headbutt, pretty much armed n.5A.
|
|
u.2S
u.2S
|
| Damage
|
Guard
|
Startup
|
Active
|
Recovery
|
Total
|
Hit Adv
|
Block Adv
|
Guard Dmg
|
Cancel
|
Recoil
|
Deflectable
|
Unarmed
|
| 50
|
Mid
|
5
|
-
|
-
|
28
|
-3
|
-8
|
5
|
No
|
No
|
No
|
Yes
|
Claw at their feet...or knees. Hits mid.
|
|
ju.S
ju.S
|
| Damage
|
Guard
|
Startup
|
Active
|
Recovery
|
Total
|
Hit Adv
|
Block Adv
|
Guard Dmg
|
Cancel
|
Recoil
|
Deflectable
|
Unarmed
|
| 50
|
High
|
7
|
-
|
-
|
-
|
-
|
-
|
5
|
-
|
No
|
-
|
Yes
|
|
|
|
u.66S
u.66S
|
| Damage
|
Guard
|
Startup
|
Active
|
Recovery
|
Total
|
Hit Adv
|
Block Adv
|
Guard Dmg
|
Cancel
|
Recoil
|
Deflectable
|
Unarmed
|
| 50
|
Mid
|
10
|
-
|
-
|
40
|
KD
|
-15
|
5
|
-
|
No
|
No
|
Yes
|
Knocks down, like all unarmed 66S.
|
|
Universal Mechanics
Guard Break
Guard Break (Throw)
5/6C+D / 4C+D Neutral / Forward Throw Neutral / Forward Throw Back Throw Back Throw
|
| Version
|
Damage
|
Guard
|
Startup
|
Active
|
Recovery
|
Total
|
Hit Adv
|
Block Adv
|
Guard Dmg
|
Cancel
|
Recoil
|
Deflectable
|
Unarmed
|
| Neutral / Forward
|
0
|
Throw
|
3
|
-
|
71
|
74
|
+20
|
N/A
|
-
|
No
|
No
|
No
|
Yes
|
Universal throw. Can be followed up with an attack.
|
| Back
|
0
|
Throw
|
5
|
-
|
69
|
74
|
+25
|
N/A
|
-
|
No
|
No
|
No
|
Yes
|
Universal throw. Can be followed up with an attack.
|
|
Surprise Attack
Surprise Attack (Overhead)
5B+C
|
| Damage
|
Guard
|
Startup
|
Active
|
Recovery
|
Total
|
Hit Adv
|
Block Adv
|
Guard Dmg
|
Cancel
|
Recoil
|
Deflectable
|
Unarmed
|
| 60
|
High
|
20~22
|
3
|
-
|
48
|
+2~+4
|
-10~-8
|
10
|
No
|
No
|
No
|
Yes
|
Universal overhead. The mightiest of headbutts. Strong sneeze gone wrong. A quick look for the lost contact lens. Tam Tam of course has much better ways to get overhead damage (instantly, even), but this can still catch some people off guard on wakeup sometimes.
|
|
Dodge
Dodge
5A+B
|
| Damage
|
Guard
|
Startup
|
Active
|
Recovery
|
Total
|
Hit Adv
|
Block Adv
|
Guard Dmg
|
Cancel
|
Recoil
|
Deflectable
|
Unarmed
|
| -
|
-
|
1
|
16
|
22
|
38
|
-
|
-
|
-
|
-
|
N/A
|
N/A
|
Yes
|
Universal dodge.
Complete invincibility from frames 1 to 10. Strike invincibility from frames 11 to 16.
|
|
Stance Break
Stance Break
A+B during Just Defense
|
| Damage
|
Guard
|
Startup
|
Active
|
Recovery
|
Total
|
Hit Adv
|
Block Adv
|
Guard Dmg
|
Cancel
|
Recoil
|
Deflectable
|
Unarmed
|
| 0
|
Mid
|
5
|
-
|
-
|
52
|
KD
|
-24
|
-
|
No
|
-
|
-
|
Yes
|
|
|
|
Counter / Blade Catch
Counter / Blade Catch
236A+B Counter Counter Blade Catch Blade Catch
|
| Version
|
Damage
|
Guard
|
Startup
|
Active
|
Recovery
|
Total
|
Hit Adv
|
Block Adv
|
Guard Dmg
|
Cancel
|
Recoil
|
Deflectable
|
Unarmed
|
| Armed
|
0
|
N/A
|
2
|
11
|
34
|
46
|
+35~+59
|
N/A
|
-
|
N/A
|
N/A
|
N/A
|
No
|
Universal counter. Allows you to follow up with a guaranteed attack of your own. The amount of time you have to followup depends on the strength of the attack you counter, with heavy attacks staggering the opponent for the longest amount of time. Additionally, if you counter a heavy slash or a running slash, your opponent will be disarmed.
|
| Disarmed
|
0
|
N/A
|
2
|
12
|
9
|
22
|
KD
|
N/A
|
-
|
N/A
|
N/A
|
N/A
|
Yes
|
Universal counter. While disarmed, your counter will disarm and knock away your opponent regardless of slash level countered.
|
|
Rage Explosion
Rage Explosion
5A+B+C
|
| Damage
|
Guard
|
Startup
|
Active
|
Recovery
|
Total
|
Hit Adv
|
Block Adv
|
Guard Dmg
|
Cancel
|
Recoil
|
Deflectable
|
Unarmed
|
| 0
|
Unblockable
|
21
|
1
|
N/A
|
58
|
0
|
N/A
|
-
|
N/A
|
N/A
|
N/A
|
No
|
Unblockable pushback attack.
|
|
Lightning Blade
Lightning Blade (Issen)
5A+B+C during Rage Explosion
|
| Damage
|
Guard
|
Startup
|
Active
|
Recovery
|
Total
|
Hit Adv
|
Block Adv
|
Guard Dmg
|
Cancel
|
Recoil
|
Deflectable
|
Unarmed
|
| 300~709
|
Mid
|
9
|
-
|
-
|
-
|
KD
|
-44
|
-
|
N/A
|
No
|
No
|
No
|
Has full invincibility and can anti-air. Damage scales up based on remaining health.
|
|
Special Moves
Paguna Paguna
Paguna Paguna
6S (repeatedly)
|
| Version
|
Damage
|
Guard
|
Startup
|
Active
|
Recovery
|
Total
|
Hit Adv
|
Block Adv
|
Guard Dmg
|
Cancel
|
Recoil
|
Deflectable
|
Unarmed
|
| A
|
20, 10x8
|
Mid
|
40
|
-
|
-
|
-
|
KD
|
-4
|
14
|
No
|
No
|
No
|
No
|
| B
|
20, 13x8
|
Mid
|
44
|
-
|
-
|
-
|
KD
|
-3
|
17
|
No
|
No
|
No
|
No
|
| C
|
20, 13x11
|
Mid
|
59
|
-
|
-
|
-
|
KD
|
-7
|
21
|
No
|
No
|
No
|
No
|
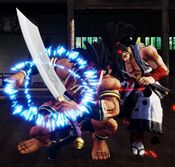
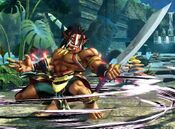
The ancient art of the propeller blade is back to expose you as a masher once again. While performing this move, you can slide towards your opponent, forcing them to block and doing a tiny amount of chip damage. No matter how late into the move's active phase you connect with this, you'll always get the same/max damage. That said, this move is not very good at all, mostly since it's telegraphed as hell. C version Can travel across the entire screen, if you want it to. Punishing it with a slash can be dangerous since this one's active phase is deceptively long.
Despite its appearance it can actually be jumped over by most characters (upper hitbox reduced after season 1)
Needs 4 slash inputs (A, B or C) to activate. Last button determines the version.
|
|
Ahaooh Gaboora
Ahaooh Gaboora
623S
|
| Version
|
Damage
|
Guard
|
Startup
|
Active
|
Recovery
|
Total
|
Hit Adv
|
Block Adv
|
Guard Dmg
|
Cancel
|
Recoil
|
Deflectable
|
Unarmed
|
| A
|
120
|
Mid
|
39
|
-
|
-
|
88
|
KD
|
-17
|
10
|
No
|
No
|
No
|
Yes
|
| B
|
120
|
Mid
|
61
|
-
|
-
|
100
|
KD
|
-9
|
6
|
No
|
No
|
No
|
Yes
|
| C
|
120
|
Mid
|
70
|
-
|
-
|
117
|
KD
|
-15
|
6
|
No
|
No
|
No
|
Yes
|
Tam Tam spits a fireball at the opponent's feet, launching them into the air. Distance traveled by the fireball depends on strength of slash button used. A goes right before Tam Tam, B goes to midscreen, and C can hit from full screen.
|
| Rage
|
144(A&B)
168(C)
|
Mid
|
70
|
-
|
-
|
114
|
KD
|
-3
|
14
|
No
|
No
|
No
|
Yes
|
When fully raged, this special powers up and does more damage.
|
|
Gaboora Gaboora
Gaboora Gaboora
236D
|
| Damage
|
Guard
|
Startup
|
Active
|
Recovery
|
Total
|
Hit Adv
|
Block Adv
|
Guard Dmg
|
Cancel
|
Recoil
|
Deflectable
|
Unarmed
|
| 180(146)
|
No
|
24
|
-
|
-
|
72
|
-
|
N/A
|
-
|
No
|
No
|
No
|
Yes
|
Tam Tam's command grab. Its range is not what it used to be and it no longer catches airborne opponents. At least you can still tick into it from 66A or n.2A, although you have to get right up in their grill for the grab to connect. Unarmed version does slight less damage. It now has increased range horizontally since version 2.10.
|
|
Pagoona Dios
Pagoona Dios
421S
|
| Version
|
Damage
|
Guard
|
Startup
|
Active
|
Recovery
|
Total
|
Hit Adv
|
Block Adv
|
Guard Dmg
|
Cancel
|
Recoil
|
Deflectable
|
Unarmed
|
| A
|
90
|
Low
|
8
|
-
|
-
|
59
|
KD
|
-23
|
9*2
|
No
|
No
|
No
|
Yes
|
A forward-moving spin attack with fast startup. Knocks down on hit, very unsafe on block.
|
| B
|
100
|
Low
|
24
|
-
|
-
|
-25
|
KD
|
-37,-25
|
9*3
|
No
|
No
|
No
|
Yes
|
A stationary spin with a pretty long windup phase. It's like a slower, slightly more damaging version of his 3D.
|
| C
|
120
|
Low
|
32
|
-
|
-
|
103
|
KD
|
-26
|
30
|
No
|
No
|
No
|
Yes
|
Tam Tam does a backdash, then launches into a very fast forward spin. The noise he makes during the backdash is different from his usual backdash noise, so it's not a perfect fake-out. If you do this close enough to the opponent and they block, you can get 6 hits of decent chip damage, about the same amount as a 2B.
|
|
Mula Mula
Mula Mula
236A or 236B (can use 3x consecutively)
|
| Damage
|
Guard
|
Startup
|
Active
|
Recovery
|
Total
|
Hit Adv
|
Block Adv
|
Guard Dmg
|
Cancel
|
Recoil
|
Deflectable
|
Unarmed
|
| 60
|
Mid (A)
Low (B)
|
18
|
-
|
-
|
48 / 54
|
-
|
-22
|
3*3
|
No
|
No
|
No
|
Yes
|
Mayan skull throw of doom. Tam Tam produces the skulls he brought from home and shows that he has enough for the whole class.
236A fires high flying skulls that sail right over most standing opponents heads, but will catch jumpers and backdashes, while 236B fires low flying skulls. You can fire up to three skulls by inputting the 236S motion one or two more times, and also mix up low and high skulls. The timing between consecutive skull throws can be slightly varied and delayed, and if you fire them fast enough, three low skulls in a row can combo.
|
|
Supers
Weapon Flipping Technique
Ahau Teotihuacan
236B+C
|
| Damage
|
Guard
|
Startup
|
Active
|
Recovery
|
Total
|
Hit Adv
|
Block Adv
|
Guard Dmg
|
Cancel
|
Recoil
|
Deflectable
|
Unarmed
|
| 360(420)
|
Mid
|
1+17
|
-
|
-
|
-
|
KD
|
-93
|
-
|
No
|
-
|
No
|
No
|
Available only during Max Rage or Rage Explosion. Disarms on hit. You can combo into this from 5B both forward and back throws. Be aware that they can use rage explosion to dodge the flame pillar and punish you with pretty much anything they want. The safest option is forward throw into WFT, as the opponent's rage explosion will knock you out of your animation every time. In corner converting it from 2B or n.5B shouldn't be burst avoidable.
|
|
Super Special Move
Magnus Dios Zahl
641236C+D
|
| Damage
|
Guard
|
Startup
|
Active
|
Recovery
|
Total
|
Hit Adv
|
Block Adv
|
Guard Dmg
|
Cancel
|
Recoil
|
Deflectable
|
Unarmed
|
| 660
|
Unblockable
|
31 [10+21]
|
-
|
-
|
-
|
KD
|
n/a
|
-
|
No
|
-
|
No
|
No
|
Available only once per match. Tam Tam leaps across the screen onto his opponent. Unblockable, so basically a leaping command grab that leads to a ton of damage. Best used on reaction VS an opponent's projectile, although it will get stuffed by some such as Wu's high 236C. Some others, like Charlotte's Tri Slash, will stuff it if your timing isn't perfect. As of 1.70, this can be steered by using 4 or 6 to change where Tam Tam will land, thus giving it more flexibility.
|
|
Combos
Midscreen
- (2A/n.5A) xx 421A
Combo from lights.
- 5D xx 421A
Combo from kick.
- (5B/2B/n.5B) xx 421A / WFT
Using 5B the follow up can whiff and the opponent can burst to punish WFT converted from 5B.
- (2B/n.5B) xx 236B (3x)
Close B into three skulls. The skull inputs have to be done pretty fast, but careful to not mash them out too recklessly or you might get 623B instead
- 5CD/4CD...
- 2C
Simple but reliable.
- '5B xx 421A
Standard throw combo.
- WFT
Go straight into WFT to avoid being bursted to punish.
- 5C
Only after back throw, timing is strict but possible.
Corner
- 5CD/4CD...
- (2B/n.5B) xx 421A / WFT
Same damage for both medium, WFT won't be burst avoidable at this close range.
- n.5C
Works in corner throw.
Guard Crush
- n.5C...
Combo from second hit...
- 421A
When there's no rage.
- 236B (3x)
More damage but no knock down.
- WFT
Combo into WFT.
- Lightning Blade
Universal Issen combo, combo from second hit.
- 5C...
Combo from second hit...
- Lightning Blade
Universal Issen combo, combo from second hit.
- The other combos from near 5C will work if at closer range.
- 5C...
Cancel second hit...
- 236A...
Whiff high skull...
- 2C
Probably the most reliable follow up from far 5C.
Videos
Colors
External Links
