Introduction
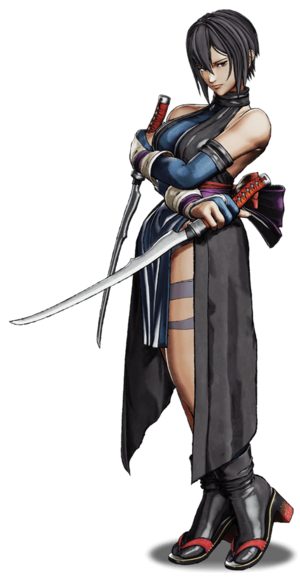
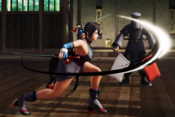
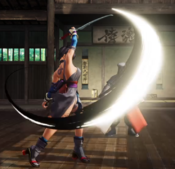
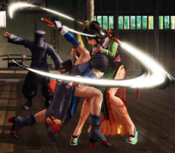
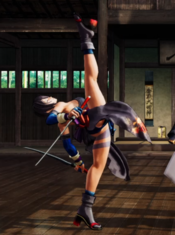
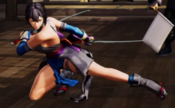
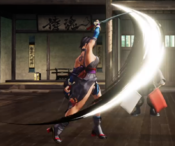
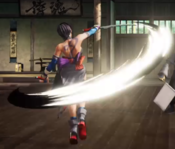
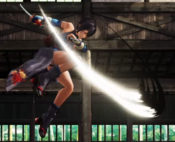
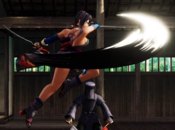
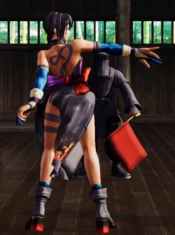
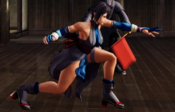
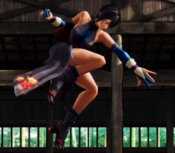
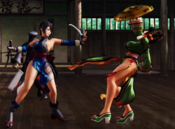
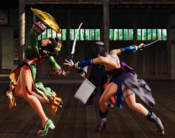
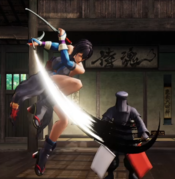
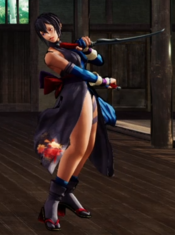
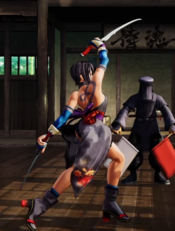
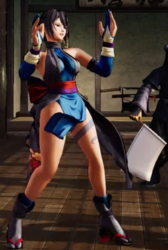
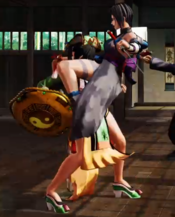
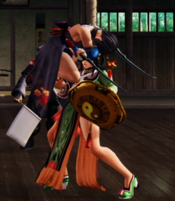
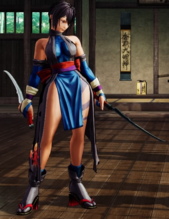
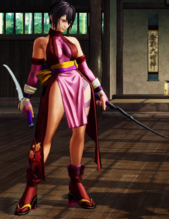
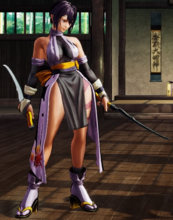
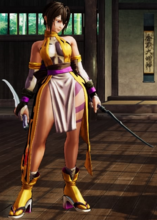
Shiki is a relentless rushdown specialist, who can keep her opponents on their toes constantly between her great mobility options and simple, yet effective mixups from close range. She’s the most extreme of the rushdown characters in that she has almost no options from farther ranges, which means she has to constantly force her way in to apply her mixup game.
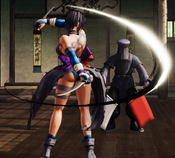
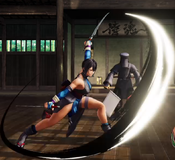
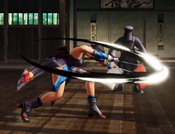
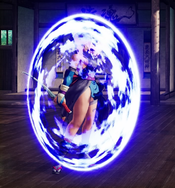
To achieve this, Shiki has access to some of the more unique tools among the cast. She is one of the few characters with a far special-cancelable button in 5B, which helps her neutral game immensely. Her teleports are fast and can be used as an alternate way of moving around the screen. Her SSM is also insane. It tracks anywhere on the screen, essentially giving her a free 65% punish on stuff most characters couldn’t even punish in the first place.
Playing the neutral with Shiki can be awkward, since she lacks range on her buttons and Shiki’s heavy slashes are very situational. While she is quite fast, she has no “get-in-free-card” she can abuse, so she is forced to bet the farm on a lucky jump-in or a reversal DP sometimes
| Strengths |
Weaknesses
|
- Strong mixup game
- Great mobility
- Arguably the best SSM in the game
|
- Has to get in to deal damage
- Awkward normals with short range
- Needs to take big risks constantly
|
Data
Damage taken: 110%
Rage duration: 8 seconds
Gameplan
Neutral
- n.5C, 5C, and a well-spaced 2C can all be recoil cancelled into 22A on block to remain relatively safe. This rarely allows you to punish your opponent's punish attempts due to the long recovery on the teleport, however.
Okizeme
Normal Moves
Far Slashes
5A
5A
|
| Damage
|
Guard
|
Startup
|
Active
|
Recovery
|
Total
|
Hit Adv
|
Block Adv
|
Guard Dmg
|
Cancel
|
Recoil
|
Deflectable
|
Unarmed
|
| 30
|
Mid
|
6
|
-
|
-
|
-
|
-2
|
-5
|
-
|
Yes
|
-
|
Yes
|
No
|
Short range cancelable light. Good for stuffing approaches or pressuring up close. Combos into 623A at point blank.
|
|
5B
5B
|
| Damage
|
Guard
|
Startup
|
Active
|
Recovery
|
Total
|
Hit Adv
|
Block Adv
|
Guard Dmg
|
Cancel
|
Recoil
|
Deflectable
|
Unarmed
|
| 89
|
Mid
|
9
|
-
|
-
|
-
|
0
|
-12(-6 vs unarmed)
|
-
|
Yes
|
-
|
Yes
|
No
|
Your main punish and neutral tool. Can be whiff cancelled into specials. Combos into 236A and 236B from basically any range and 236C while in rage. Also a very strong confirm tool for WFT. It's relatively safe on block when spaced and can be recoil cancelled into 22A for further safety.
|
|
5C
5C
|
| Damage
|
Guard
|
Startup
|
Active
|
Recovery
|
Total
|
Hit Adv
|
Block Adv
|
Guard Dmg
|
Cancel
|
Recoil
|
Deflectable
|
Unarmed
|
| 220
|
Mid
|
21
|
-
|
-
|
-
|
2
|
-16(-2 vs unarmed)
|
-
|
No
|
-
|
Yes
|
No
|
Shiki's longest ranged standing normal. Recoil canceling into 22A allows this normal to be kept relatively safe, so using it in footsies occasionally is not bad. Keep in mind many characters have normals with similar range that are faster, so you may trade with or lose to these normals often. This also combos from back throw midscreen.
|
|
2A
2A
|
| Damage
|
Guard
|
Startup
|
Active
|
Recovery
|
Total
|
Hit Adv
|
Block Adv
|
Guard Dmg
|
Cancel
|
Recoil
|
Deflectable
|
Unarmed
|
| 30
|
Mid
|
5
|
-
|
-
|
-
|
-5
|
-5(-8 vs unarmed)
|
-
|
Yes
|
-
|
Yes
|
No
|
Crouching, cancelable light. Combos into 623A at point blank.
|
|
2B
2B
|
| Damage
|
Guard
|
Startup
|
Active
|
Recovery
|
Total
|
Hit Adv
|
Block Adv
|
Guard Dmg
|
Cancel
|
Recoil
|
Deflectable
|
Unarmed
|
| 90
|
Mid
|
12
|
-
|
-
|
-
|
-4
|
-12(-8 vs unarmed)
|
-
|
Yes
|
-
|
Yes
|
No
|
Crouching alternative to 5B that does slightly more damage at the cost of some range and slower startup. Can be whiff cancelled into specials. This button also has some niche anti-air potential.
|
|
2C
2C
|
| Damage
|
Guard
|
Startup
|
Active
|
Recovery
|
Total
|
Hit Adv
|
Block Adv
|
Guard Dmg
|
Cancel
|
Recoil
|
Deflectable
|
Unarmed
|
| 150/150
|
Low
|
15
|
-
|
-
|
-
|
KD
|
-28(-16 vs unarmed)
|
-
|
No
|
-
|
No
|
No
|
A 2-hit sweep in which both hits knock down. Excellent for catching people walking back in neutral due to the great range, but very unsafe on block. If the second hit is blocked, it can be recoil cancelled into 22A for relative safety but this is easier to punish than recoil cancels from n.5C or 5C. Curiously, this normal isn't deflectable due to how low it hits, so it can be useful if your opponent likes to abuse recoil cancels into deflect.
|
|
Near Slashes
n.5C
n.5C
|
| Damage
|
Guard
|
Startup
|
Active
|
Recovery
|
Total
|
Hit Adv
|
Block Adv
|
Guard Dmg
|
Cancel
|
Recoil
|
Deflectable
|
Unarmed
|
| 200
|
Mid
|
15
|
-
|
-
|
-
|
-3
|
-16(-7 vs unarmed)
|
-
|
No
|
-
|
Yes
|
No
|
Good close range heavy punish tool if you don't want to commit to rekka. Can be recoil cancelled into 22A on block for safety, but some characters may be able to punish this.
|
|
* All of Shiki's other normals are identical regardless of proximity.
Kicks
5D
5D
|
| Damage
|
Guard
|
Startup
|
Active
|
Recovery
|
Total
|
Hit Adv
|
Block Adv
|
Guard Dmg
|
Cancel
|
Recoil
|
Deflectable
|
Unarmed
|
| 50
|
Mid
|
9
|
-
|
-
|
-
|
-8
|
-13
|
-
|
Yes
|
-
|
No
|
Yes
|
Low commit anti-air normal. Unsafe on hit, but cancelable, and can combo into 623S or 623K up close, so this is your best punish option if you find yourself disarmed. Otherwise, stick to 5B.
|
|
6D
6D
|
| Damage
|
Guard
|
Startup
|
Active
|
Recovery
|
Total
|
Hit Adv
|
Block Adv
|
Guard Dmg
|
Cancel
|
Recoil
|
Deflectable
|
Unarmed
|
| 40
|
Mid
|
9
|
-
|
-
|
-
|
KD
|
-15
|
-
|
No
|
-
|
No
|
Yes
|
Kick that knocks down on hit. Can be used mainly as an anti-air.
|
|
2D
2D
|
| Damage
|
Guard
|
Startup
|
Active
|
Recovery
|
Total
|
Hit Adv
|
Block Adv
|
Guard Dmg
|
Cancel
|
Recoil
|
Deflectable
|
Unarmed
|
| 20
|
Low
|
6
|
-
|
-
|
-
|
1
|
-2
|
-
|
No
|
-
|
No
|
Yes
|
Quick kick that is plus on hit. Can be used to check opponent movement and apply pressure up close.
|
|
3D
3D
|
| Damage
|
Guard
|
Startup
|
Active
|
Recovery
|
Total
|
Hit Adv
|
Block Adv
|
Guard Dmg
|
Cancel
|
Recoil
|
Deflectable
|
Unarmed
|
| 70
|
Low
|
13
|
-
|
-
|
-
|
KD
|
-28
|
-
|
No
|
-
|
No
|
Yes
|
Sweep that is slightly faster than 2C but still just as unsafe and not recoil cancelable. Use 2C unless you're disarmed.
|
|
Dash Normals
66A
66A
|
| Damage
|
Guard
|
Startup
|
Active
|
Recovery
|
Total
|
Hit Adv
|
Block Adv
|
Guard Dmg
|
Cancel
|
Recoil
|
Deflectable
|
Unarmed
|
| 30
|
Mid
|
5
|
-
|
-
|
-
|
-4
|
-42(-7 vs unarmed)
|
-
|
Yes
|
-
|
Yes
|
No
|
Animation is identical to 2A. Extremely unsafe on block. Combos into 623A up close.
|
|
66B
66B
|
| Damage
|
Guard
|
Startup
|
Active
|
Recovery
|
Total
|
Hit Adv
|
Block Adv
|
Guard Dmg
|
Cancel
|
Recoil
|
Deflectable
|
Unarmed
|
| 80
|
Mid
|
10
|
-
|
-
|
-
|
-6
|
-35(-10 vs unarmed)
|
-
|
Yes
|
-
|
Yes
|
No
|
Animation is similar (but not identical) to 2B. Also extremely unsafe on block, like 66A. Your best combo tool after throw if you don't want to risk comboing into rekka.
|
|
66C
66C
|
| Damage
|
Guard
|
Startup
|
Active
|
Recovery
|
Total
|
Hit Adv
|
Block Adv
|
Guard Dmg
|
Cancel
|
Recoil
|
Deflectable
|
Unarmed
|
| 140 (50, 50, 40)
|
Mid
|
8, 16, 26
|
-
|
-
|
-
|
KD
|
-11
|
-
|
No
|
-
|
Yes⁺
|
No
|
This is actually a very good normal in neutral. It's hard to punish on block (but not safe), and can catch far jumps and movement from quite far. It's also an excellent ranged punish due to the 3 hits.
⁺The last hit is not deflectable, due to it being a kick.
|
|
66D
66D
|
| Damage
|
Guard
|
Startup
|
Active
|
Recovery
|
Total
|
Hit Adv
|
Block Adv
|
Guard Dmg
|
Cancel
|
Recoil
|
Deflectable
|
Unarmed
|
| 60
|
Low
|
7
|
-
|
-
|
-
|
KD
|
-12
|
-
|
No
|
-
|
No
|
No
|
Sliding kick. Decent for catching people standing from a distance, but since Shiki has no dashing overhead the mixup potential with this normal is very low. Much safer on block than 2C or 3D, though.
|
|
Air Normals
j.A
j.A
|
| Damage
|
Guard
|
Startup
|
Active
|
Recovery
|
Total
|
Hit Adv
|
Block Adv
|
Guard Dmg
|
Cancel
|
Recoil
|
Deflectable
|
Unarmed
|
| 30
|
High
|
7
|
-
|
-
|
-
|
-
|
-
|
-
|
-
|
-
|
No
|
No
|
Quick jumping light. This normal has the distinction of being Shiki's most downward angled jump normal, but stick to j.B or j.C.
|
|
j.B
j.B
|
| Damage
|
Guard
|
Startup
|
Active
|
Recovery
|
Total
|
Hit Adv
|
Block Adv
|
Guard Dmg
|
Cancel
|
Recoil
|
Deflectable
|
Unarmed
|
| 100
|
High
|
10
|
-
|
-
|
-
|
-
|
-
|
-
|
-
|
-
|
No
|
No
|
Forward hitting jump normal. This is faster than j.C, so if you react late it's a slightly better air to air option. Very poor for jump-ins.
|
|
j.C
j.C
|
| Damage
|
Guard
|
Startup
|
Active
|
Recovery
|
Total
|
Hit Adv
|
Block Adv
|
Guard Dmg
|
Cancel
|
Recoil
|
Deflectable
|
Unarmed
|
| 140
|
High
|
14
|
-
|
-
|
-
|
-
|
-
|
-
|
-
|
-
|
No
|
No
|
Shiki's best jump normal, by far. Great for jump-ins and air-to-airing, given it's very large horizontal hitbox. This normal is also relatively easy (by SamSho standards) to combo from on a grounded connect, and leads to excellent damage when doing so. This normal is rather slow, however, so if you're losing air to air exchanges switch to j.B.
|
|
j.D
j.D
|
| Damage
|
Guard
|
Startup
|
Active
|
Recovery
|
Total
|
Hit Adv
|
Block Adv
|
Guard Dmg
|
Cancel
|
Recoil
|
Deflectable
|
Unarmed
|
| 30
|
High
|
11
|
-
|
-
|
-
|
-
|
-
|
-
|
-
|
-
|
No
|
Yes
|
Despite how this normal might look, it cannot cross-up at all. Relatively useless, unless disarmed.
|
|
Unarmed Normals
u.5S
u.5S
|
| Damage
|
Guard
|
Startup
|
Active
|
Recovery
|
Total
|
Hit Adv
|
Block Adv
|
Guard Dmg
|
Cancel
|
Recoil
|
Deflectable
|
Unarmed
|
| 50
|
Mid
|
5
|
-
|
-
|
-
|
+1
|
-4
|
-
|
No
|
-
|
No
|
Yes
|
Fast slap to the face. Not cancelable in any shape or form. Stick to 2D and 5D, or try to get your swords back.
|
|
u.2S
u.2S
|
| Damage
|
Guard
|
Startup
|
Active
|
Recovery
|
Total
|
Hit Adv
|
Block Adv
|
Guard Dmg
|
Cancel
|
Recoil
|
Deflectable
|
Unarmed
|
| 50
|
Mid
|
6
|
-
|
-
|
-
|
+2
|
-3
|
-
|
-
|
-
|
No
|
Yes
|
Fast slap to the groin. Like u.5S, also not cancelable in any shape or form. Stick to 2D or try to get your swords back.
|
|
ju.S
ju.S
|
| Damage
|
Guard
|
Startup
|
Active
|
Recovery
|
Total
|
Hit Adv
|
Block Adv
|
Guard Dmg
|
Cancel
|
Recoil
|
Deflectable
|
Unarmed
|
| 50
|
High
|
5
|
-
|
-
|
-
|
-
|
-
|
-
|
No
|
-
|
No
|
Yes
|
Really awful jump normal besides speed. Use j.D if disarmed instead.
|
|
u.66S
u.66S
|
| Damage
|
Guard
|
Startup
|
Active
|
Recovery
|
Total
|
Hit Adv
|
Block Adv
|
Guard Dmg
|
Cancel
|
Recoil
|
Deflectable
|
Unarmed
|
| 50
|
Mid
|
5
|
-
|
-
|
-
|
KD
|
-13
|
-
|
No
|
-
|
No
|
Yes
|
Identical animation to u.2S, but knocks down. This is not a low however, so 66D is still preferable if trying to get a knock down for safe weapon retrieval. (66D also does more damage, for some reason and safer)
|
|
Universal Mechanics
Guard Break
Guard Break (Throw)
4/5/6C+D Neutral/Forward Throw Neutral/Forward Throw Back Throw Back Throw
|
| Version
|
Damage
|
Guard
|
Startup
|
Active
|
Recovery
|
Total
|
Hit Adv
|
Block Adv
|
Guard Dmg
|
Cancel
|
Recoil
|
Deflectable
|
Unarmed
|
| Neutral/Forward
|
-
|
-
|
-
|
-
|
-
|
-
|
-
|
-
|
-
|
-
|
-
|
-
|
-
|
Universal throw. Best followed up with by 5B or 66B midscreen. (See below for combos.)
|
| Back
|
-
|
-
|
-
|
-
|
-
|
-
|
-
|
-
|
-
|
-
|
-
|
-
|
-
|
Universal throw. Best followed up with by 5C, 5B or 66B midscreen. (See below for combos.)
|
|
Surprise Attack
Surprise Attack (Overhead)
5B+C Armed Armed Unarmed Unarmed
|
| Version
|
Damage
|
Guard
|
Startup
|
Active
|
Recovery
|
Total
|
Hit Adv
|
Block Adv
|
Guard Dmg
|
Cancel
|
Recoil
|
Deflectable
|
Unarmed
|
| Armed
|
60
|
High
|
15
|
-
|
-
|
-
|
-3
|
-16
|
-
|
No
|
-
|
No
|
No
|
Universal overhead. Shiki's only true grounded overhead. This is minus on hit but is a necessary tool in order to condition people who are content to crouch block her offense, especially due to it being 15 frames, which is nigh-unreactable.
|
| Unarmed
|
60
|
High
|
18
|
-
|
-
|
-
|
-3
|
-16
|
-
|
No
|
-
|
No
|
Yes
|
Universal overhead. Unarmed version has far better range and can be spaced.
|
|
Dodge
Dodge
5A+B
|
| Damage
|
Guard
|
Startup
|
Active
|
Recovery
|
Total
|
Hit Adv
|
Block Adv
|
Guard Dmg
|
Cancel
|
Recoil
|
Deflectable
|
Unarmed
|
| -
|
-
|
-
|
-
|
-
|
-
|
-
|
-
|
-
|
-
|
-
|
-
|
-
|
|
|
|
Counter / Blade Catch
Counter / Blade Catch
236A+B Counter Counter Blade Catch Blade Catch
|
| Version
|
Damage
|
Guard
|
Startup
|
Active
|
Recovery
|
Total
|
Hit Adv
|
Block Adv
|
Guard Dmg
|
Cancel
|
Recoil
|
Deflectable
|
Unarmed
|
| Armed
|
-
|
-
|
-
|
-
|
-
|
-
|
-
|
-
|
-
|
-
|
-
|
-
|
-
|
Universal counter. Allows you to follow up with a guaranteed attack of your own. The follow up depends on the strength of the attack you counter. If you counter a heavy slash or a dashing slash, your opponent will be disarmed.
|
| Disarmed
|
-
|
-
|
-
|
-
|
-
|
-
|
-
|
-
|
-
|
-
|
-
|
-
|
-
|
Universal counter. While disarmed, your counter will disarm and knock away your opponent regardless of slash level used.
|
|
Rage Explosion
Rage Explosion
5A+B+C
|
| Damage
|
Guard
|
Startup
|
Active
|
Recovery
|
Total
|
Hit Adv
|
Block Adv
|
Guard Dmg
|
Cancel
|
Recoil
|
Deflectable
|
Unarmed
|
| 0
|
-
|
-
|
-
|
-
|
-
|
-
|
-
|
-
|
-
|
-
|
-
|
-
|
Unblockable pushback attack.
|
|
Lightning Blade
Lightning Blade (Issen)
5A+B+C during Rage Explosion
|
| Damage
|
Guard
|
Startup
|
Active
|
Recovery
|
Total
|
Hit Adv
|
Block Adv
|
Guard Dmg
|
Cancel
|
Recoil
|
Deflectable
|
Unarmed
|
| -
|
-
|
-
|
-
|
-
|
-
|
-
|
-
|
-
|
-
|
-
|
-
|
-
|
Has projectile invulnerability and anti-airs. Damage scales up beased on reamaining health.
|
|
Special Moves
Exodus Stream
Exodus Stream
236S Exodus Stream Exodus Stream
|
| Version
|
Damage
|
Guard
|
Startup
|
Active
|
Recovery
|
Total
|
Hit Adv
|
Block Adv
|
Guard Dmg
|
Cancel
|
Recoil
|
Deflectable
|
Unarmed
|
| A
|
40
|
Low
|
16
|
-
|
-
|
-
|
-20
|
-25
|
-
|
No
|
-
|
No
|
No
|
| B
|
50
|
Low
|
19
|
-
|
-
|
-
|
-20
|
-25
|
-
|
No
|
-
|
No
|
No
|
| C
|
60
|
Low
|
19
|
-
|
-
|
-
|
-20
|
-25
|
-
|
No
|
-
|
No
|
No
|
Shiki's rekka. This is her main distance confirm and combo tool, and can also be used as an (unsafe) low threat in neutral. This is unsafe on hit unless you perform the followup, but doing this also has its misgivings, as noted below.
|
| C (Rage)
|
108
|
Low
|
-
|
-
|
-
|
-
|
-20
|
-25
|
-
|
No
|
-
|
No
|
No
|
In rage, the C version of Shiki's rekka becomes multi-hit, fast enough to combo from 5B or 66B, and does significantly more damage. It remains unsafe on hit, however.
|
|
Cloudburst
Cloudburst
236S after Exodus Stream Cloudburst Cloudburst
|
| Version
|
Damage
|
Guard
|
Startup
|
Active
|
Recovery
|
Total
|
Hit Adv
|
Block Adv
|
Guard Dmg
|
Cancel
|
Recoil
|
Deflectable
|
Unarmed
|
| Normal
|
80
|
Mid
|
-
|
-
|
-
|
-
|
KD
|
-63~-65
|
-
|
No
|
-
|
No
|
No
|
The followup to Shiki's rekka. Performs the same move regardless of the button used. While it is necessary to perform this to keep yourself safe on hit, if your opponent rage explodes the first hit of your rekka and you commit to this, you can be punished immediately with Issen as Shiki's airborne state causes her to not get hit by the automatic knockback of the rage explosion. Be very wary about how you use rekka, especially in the final rounds of games. Galford and Hanzo can also escape your rekka for free without needing to use rage explosion. If your opponent is very happy about punishing this with rage explosion, you can try to use this to get them to waste their rage meter early (by dropping the combo early after the first hit on a read), allowing you to play the rest of the game without worrying about this threat.
|
| Rage (from 236C)
|
72
|
Mid
|
-
|
-
|
-
|
-
|
-
|
-63
|
-
|
No
|
-
|
No
|
No
|
When comboed into from 236C in rage, the rekka followup also becomes multihit, but it curiously does less damage than normal (the damage being frontloaded on the first hit of the rekka instead). The version from 236A and 236B remains the same, only gaining the universal damage boost from your rage state.
|
|
Elysium Halo
Elysium Halo
623S Elysium Halo Elysium Halo
|
| Version
|
Damage
|
Guard
|
Startup
|
Active
|
Recovery
|
Total
|
Hit Adv
|
Block Adv
|
Guard Dmg
|
Cancel
|
Recoil
|
Deflectable
|
Unarmed
|
| A
|
100
|
Mid
|
-
|
-
|
-
|
-
|
KD
|
-39
|
-
|
No
|
-
|
No
|
No
|
| B
|
120 (80, 40)
|
Mid
|
-
|
-
|
-
|
-
|
KD
|
-56
|
-
|
No
|
-
|
No
|
No
|
| C
|
140 (80, 30, 30)
|
Mid
|
-
|
-
|
-
|
-
|
KD
|
-62
|
-
|
No
|
-
|
No
|
No
|
Shiki's DP. This DP is actually quite useful as it has a decent amount of invulnerability and is a very consistent anti-air. It can also be used as an invincible reversal. Each version of her DP does an additional hit and travels higher based on strength. The C version is also her highest damage combo ender outside of rage, but you must be very close to combo into DP.
|
|
Tartarus Drop
Tartarus Drop
623K Tartarus Drop Tartarus Drop
|
| Damage
|
Guard
|
Startup
|
Active
|
Recovery
|
Total
|
Hit Adv
|
Block Adv
|
Guard Dmg
|
Cancel
|
Recoil
|
Deflectable
|
Unarmed
|
| 130 (20, 80, 30)
|
Low
|
-
|
-
|
-
|
-
|
KD
|
-37
|
-
|
No
|
-
|
No
|
Yes
|
This is a hitgrab that hits low, and not a command grab. Very unsafe on block. You must be extremely close to combo into this, but it can be useful in certain punish situations if you want to sideswitch your opponent towards the corner. You can also use this while unarmed as a punish in order to try and retrieve your weapon.
|
|
Setsuna
Setsuna
22S Setsuna Setsuna
|
| Damage
|
Guard
|
Startup
|
Active
|
Recovery
|
Total
|
Hit Adv
|
Block Adv
|
Guard Dmg
|
Cancel
|
Recoil
|
Deflectable
|
Unarmed
|
| -
|
-
|
-
|
-
|
-
|
-
|
-
|
-
|
-
|
-
|
-
|
-
|
Yes
|
Shiki's teleport. The A version teleports her backwards, the B version leaves her in-place, and the C version teleports her forward and can go behind the opponent. This teleport is only invincible while Shiki is invisible, leaving her very vunerable during the startup and recovery. Recoil cancel into 22A can be used to keep some normals safe, and doing teleport on your opponents wakeup can be used to bait out reversals or mixup what side you'll be on, as all 3 teleports look identical. Use sparingly, as it is very easy to punish if used improperly.
|
|
Lotus Dance of Sublimation
Lotus Dance of Sublimation
214S Lotus Dance of Sublimation Lotus Dance of Sublimation
|
| Damage
|
Guard
|
Startup
|
Active
|
Recovery
|
Total
|
Hit Adv
|
Block Adv
|
Guard Dmg
|
Cancel
|
Recoil
|
Deflectable
|
Unarmed
|
| 140
|
Throw
|
27
|
-
|
-
|
-
|
KD
|
-
|
-
|
No
|
-
|
No
|
No
|
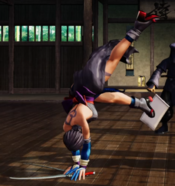
The grab version of Shiki's backflip. This grab is a bit finicky and has very niche uses, to say the least. The opponent can jump or crouch to avoid it, and it has no tracking ability and cannot be steered. When using it you want to aim for Shiki to hit the opponent a bit before she is fully inverted in the air, unlike how it might appear. Since the grab can be avoided simply by crouching, you'll have to do some serious conditioning if you want to land this as a mixup. This grab also side switches on hit (like most command grabs in the game), so it can be unfavorable to use if it will throw your opponent out of the corner. It is very unsafe on whiff and can be easily punished on reaction with heavy slashes, in the case that it does whiff. It does have some application for punishing distant jumps or going over specific normals or projectiles, but jumping or using 421S is more consistent for these tasks.
|
|
Lotus Dance of Oblivion
Lotus Dance of Oblivion
421S Lotus Dance of Oblivion Lotus Dance of Oblivion
|
| Version
|
Damage
|
Guard
|
Startup
|
Active
|
Recovery
|
Total
|
Hit Adv
|
Block Adv
|
Guard Dmg
|
Cancel
|
Recoil
|
Deflectable
|
Unarmed
|
| A
|
100
|
Mid
|
27
|
-
|
-
|
-
|
KD
|
-33
|
-
|
No
|
-
|
No
|
No
|
| B
|
140⁺
|
Mid
|
27
|
-
|
-
|
-
|
KD
|
-28
|
-
|
No
|
-
|
No
|
No
|
| C
|
140⁺
|
Mid
|
27
|
-
|
-
|
-
|
KD
|
-32
|
-
|
No
|
-
|
No
|
No
|
The hit version of Shiki's backflip. This move is more useful in general than the grab version, but remains very unsafe on whiff and on block. Despite this, you can use 421S to call out distant jumps, committal normals that do not anti-air, or projectiles, resulting in a knockdown. Up close, you can create a left/right mixup between 421A and 421B, as 421A will cross-up on (most) crouching opponents and hit in front on (most) standing opponents, and 421B will cross-up on (most) standing opponents (but whiff on crouchers). These mixups are dangerous as 421S is very unsafe on block, but can allow you to condition your opponent for other options on offense.
⁺421B and 421C will do less damage if the first 3 hits connect (about 120, instead of 140), since the third hit knocks down before the final hit can connect. This is mainly applicable against tall characters like Earthquake.
|
|
Supers
Weapon Flipping Technique
Tenma Wave Cyclone
236B+C
|
| Damage
|
Guard
|
Startup
|
Active
|
Recovery
|
Total
|
Hit Adv
|
Block Adv
|
Guard Dmg
|
Cancel
|
Recoil
|
Deflectable
|
Unarmed
|
| 348
|
Mid
|
14
|
-
|
-
|
-
|
KD
|
-40
|
-
|
No
|
-
|
No
|
No
|
Shiki's WFT. Can be confirmed into from 5B and 66B for an easy disarming of your opponent. Despite having the same animation as her rekka, this is a mid, and not a low. You can be thrown out of this on reaction if performed raw, so be careful about doing such.
|
|
Super Special Move
Skandha Avidya
641236C+D
|
| Damage
|
Guard
|
Startup
|
Active
|
Recovery
|
Total
|
Hit Adv
|
Block Adv
|
Guard Dmg
|
Cancel
|
Recoil
|
Deflectable
|
Unarmed
|
| 620
|
Mid
|
10+19
|
-
|
-
|
-
|
KD
|
-45
|
-
|
No
|
-
|
No
|
No
|
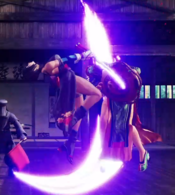
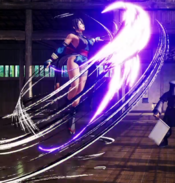
Shiki's SSM, which is available once per match. This super is incredible. Upon use Shiki summons 2 chains that will hit a grounded opponent from anywhere on the screen, starting an animation where she teleports to them and slices their chest open. The applications of this are endless. Anything that you can react to (or read) can be punished at any time for 70-80% damage. Careful use of this super will allow Shiki to always have a dangerous presence anywhere on screen, given that you haven't used the super already. It is also very safe on block if blocked from a distance. The one weakness of this super is its long startup; like other SSMs it is difficult to use as a punish on block to anything that is not absurdly unsafe. Additionally, you need to do this somewhat early if attempting to punish a projectile, as the projectile can hit you out of the super if it is too close when you perform it.
|
|
Combos
Midscreen
- (5A/2A/66A) xx 623A
Your fastest punish. Have to be very close for DP to combo.
- (6CD/j.C)...
- 2C
Low damage but reliable.
- 5B xx 236B xx 236S
Basic combo from 5B and forward throw. Keep in mind this can be Issen punished on hit.
- 5B xx 236C xx 236S
Rage only. Max damage from forward throw/5B when in rage (without using WFT). Note that you're a bit too far for this to combo after back throw midscreen.
- 5B xx 236BC
Easy combo or confirm into WFT.
- 66B xx 623C
Safer but slightly more difficult combo from forward throw that also does more damage than rekka outside of rage.
- 66B xx 623D
Sideswitch combo, if you want to switch sides and didn't just back throw to begin with.
Corner
- (6CD/j.C)...
- 5B xx 623C
- 5B xx 623D
After forward throw in the corner you're close enough for DP and your hit grab to combo without dashing.
Videos
Colors
External Links
