Eternal Fighter Zero/Sayuri Kurata
Introduction
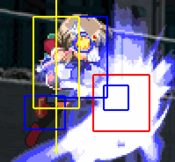
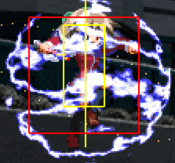
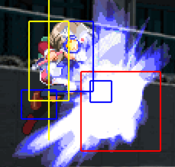
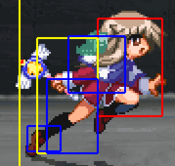
Despite having an unusual hover dash, Kurata Sayuri (倉田 佐祐理) is the closest thing EFZ has to a Street Fighter style footsies character. Her normals are some of the best in the game, while her mixups are fairly weak and straightforward, leading to a much slower paced fighting style based on poking and whiff punishing. Which is not to say that she completely lacks mixups, especially in the corner. Her hoverdash, although slow, can be used to crush lows and land an overhead, while with 2 super bars she gains a 1F super command throw. In terms of specials, she gets some slow moving projectiles to cover her approach, while her Magical☆Press gets her a corner knockdown from anywhere on screen. Defensively, she has a number of reversals, and one of her more unique specials, the counter move Ah, Got Your Skill. This move can counter any melee hit, regardless of whether it’s a high or low. Once a move has been caught, every time she blocks it she will flash white. Pressing a button during that flash will trigger a genocide cutter guard cancel/alpha counter.
Sayuri is a supporting character of Kanon, a visual novel produced by Key in 1999. She is a normal third-year student at the high school that Yuuichi goes to, and has been best friends with Mai since they first met during first-year. She is very polite and formal, but has a strange habit of addressing herself in the third person. During Kanon, Sayuri supports Yuuichi becoming Mai's friend and does what she can for them, and she stubbornly stays by Mai's side even as the strange incidents surrounding Mai continue to escalate...
Stage: Courtyard of the Lunch Break (昼休みの中庭)
BGM: The Girls' Opinions (彼女たちの見解)
Character-Specific Notes
- Sayuri is able to air jump once, and air dash/backstep once.
- Sayuri's ground dash is actually an air dash that moves forward-up at 45 degrees. Therefore, Sayuri does not have any dashing attacks. Any attacks she does during her "ground" dash will be considered jumping attacks.
- Sayuri's ground dashes do not actually count as air dashes/backsteps, so she is free to jump or dash/backstep at the end of her "ground" dash.
Normal Moves
The notation for the movelists can be found under Notation.
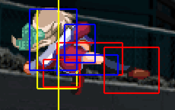
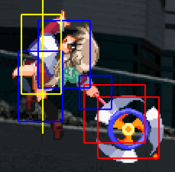
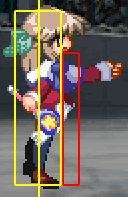
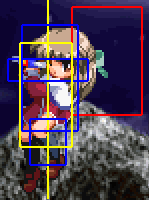
The normal move data table can be found under Sayuri Kurata/Move Data.
Standing
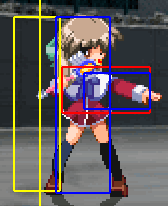
5A
5A
|
|---|
5B
5B
|
|---|
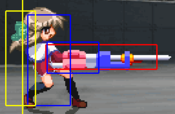
f5B
f5B
|
|---|
5C
5C
|
|---|
Crouching
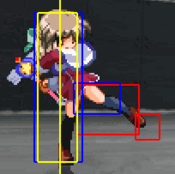
2A
2A
|
|---|
2B
2B
|
|---|
2C
2C
|
|---|
Jumping
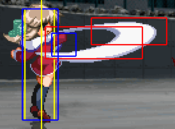
j5A
j5A
|
|---|
j5B
j5B
|
|---|
j5C
j5C
|
|---|
Grabs
Close 6C/4C
Ground Grab
Close 6C/4C |
|---|
Close j6C
Air Grab
Close j6C |
|---|
Special Moves
The notation for the movelists can be found under Notation.
The special move data table can be found under Sayuri Kurata/Move Data.
Specials
236*
Magical☆Shot
236* |
|---|
623*
Magical☆Sword 623* 623A 623A 623B 623B
|
|---|
214*
Ah, got your skill~
214* |
|---|
Magical☆Cutter
Magical☆Cutter
Any button |
|---|
j412*
Magical☆Smash j412* j412A/B j412A/B j412C j412C
|
Sayuri does some sort of magical energy dive. |
|---|
41236*
Magical☆Press
41236* |
|---|
Eternity Specials
236236*
Magical☆Agents
236236* |
|---|
2141236*
Magical☆Pressure
2141236* |
|---|
6321463214*
Magical☆Thunder
6321463214* |
|---|
Final Memory
22A2S
Magical☆On Stage
22A2S |
|---|
Strategy, Tactics, and Combos
Combos
You can watch all these combos (and a few more) here.
BnB combo: (close) 5BB 5C [cancel after first hit] 41236B. Does about 1800 damage, and doesn't require any RF or SP bar. If the opponent is against a corner, you can use the 41236B after the second hit of the 5C, which will add about 300 damage more to your combo.
Red IC Corner: 2A 5BB 623A IC 5AA 5BB 2C jAABC dj6C (whiff) Does roughly 3500 damage. Very stable combo with a stable tech punish.
Red IC Corner from 2B: 2B 623A IC 2B jC j66 jAC land 5AA 5BB 2C jAABC dj6C (whiff) Does roughly 3850 damage.
Magical☆Shot follow-up: 236A/B 2B jC j66 jAC land 5AA 5BB 2C jAABC dj6C (whiff) Does about 3540 damage. Useful if you hit an opponent with a standing 236A/B.
Blue IC Corner: 5AA 5BB 623A IC 2B jC j66 jC land c5B 2C jC j66 jAC land 5AA 5BB 2C jAABC dj6C (whiff) Does about 5900 damage.
Blue IC Midscreen: 5BB 623A IC 2B IAD jC land c5B 2C jC j66 jAC land 5AA 5BB 2C jAABC dj6C (whiff) Does about 5560 damage.
Into Magical☆Pressure: 5ABC(1 hit) 2141236A Does 2791 damage at level 1.
Into Magical☆Agents: 5ABC(2 hits) 236236A Does 2878 damage at level 1.
Red IC Into Magical☆Agents Level 2: 5ABB 623A IC 2B 236236B Does 3717 damage. Level 1 will not work for this combo, only level 2 and 3.
Advanced Combos - Launching with 236A/B
Sayuri is one of the few characters with the ability to launch into a juggle combo without having to use meter. If you have good reactions and timing, you'll be able to get 3k+ damage without having to spend any resources. The setups are character specific, and the most stable pickups are listed below. All combos are started from point blank, the 2A's are used for spacing and allowing you to hit confirm properly. Most combos leave out the enders, these are noted with [...]. For timing purposes and spacing purposes, microwalks are sometimes used - this is simply walking forward a very small amount. These are intended to be used as a starting point for learning star launches, as the situations where they can be used in matches are a lot more complicated - you are encouraged to experiment with their practical uses on your own.
Midscreen
Rumi, Akane, Misaki, Makoto, Shiori, Sayuri, Minagi, Ikumi, Doppel, Nayuki, Mishio, Kaori, Akiko - 2AA f5B 236B microwalk 5A jC j66 jAC[...]
Mizuka, Mio, Mai - 2AA f5B 236A microwalk 5A jC j66 jAC[...]
Misuzu - 2AA f5B slight delay 236B 5A jC j66 jAC[...]
Kano - 2AA f5B 236B jB j66 jAB[...]
Mayu, Ayu, Unknown, Nayuki (asleep) - Can't convert into juggles.
Corner
Rumi, Akane, Misaki, Nayuki (asleep), Makoto, Shiori, Kano, Minagi, Ikumi, Doppel, Mishio, Akiko - 2AA f5B 236B 5A jC j66 jAC[...]
Mizuka, Mio, Mai, - 2AA f5B 236A 5A jC j66 jAC[...]
Misuzu - 2AA f5B slight delay 236B 5A jC j66 jAC[...]
Unknown - 2AA f5B 236B 5A jA..B..C land 5AA 2C jBC dj6C(whiff)
Nayuki - 2AA f5B 236B 5A jA..B..C land 5A 5BB 2C jAABC dj6C(whiff)
Mayu, Ayu, Sayuri - Can't convert into juggles.
Strategy
Sayuri's main gameplan is to abuse her obnoxiously large and high priority normals to poke, whiff punish and generally Street Fighter her way to victory. Sayuri will get most of her damage out of capitalising off the opponent's mistakes and abusing command grabs when the opponent becomes too respectful of her normals and pressure.
Footsies
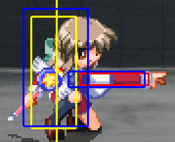
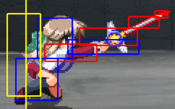
Sayuri's normals are some of the best in the game. On the ground she has f5B for an excellent eye height level poke that can sometimes be used to smack people out of the air. 2B is another excellent tool which covers the area below that of f5B. 2C is a decent anti air for when aerial opponents get too close for comfort and leads easily into juggle loops if it connects. In the air she has jB which has incredible horizontal priority. jC trumps this however, in being her best aerial normal. Sayuri's can neutral jump jC to stuff ground and aerial approaches alike.
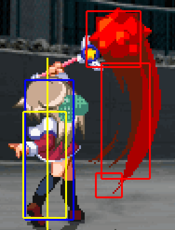
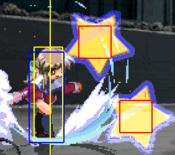
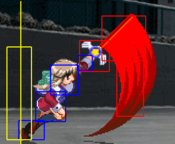
As for specials, her main tool is 623A. With 8F of startup and a huge hitbox that moves forward with Sayuri, this move has lots of uses. You can add it after f5B/2B pokes and be relatively safe on block/RG, or just use it as it's own neutral tool. Mixing it up with her other neutral tools can make for very surprising forward movements covered by a genuinely disgusting hitbox, leading into a knockdown. Speaking of knockdowns...
Okizeme
Compared to some characters in EFZ, Sayuri's okizeme is lackluster. Her main crossup oki tool is jB, which has a crossup hitbox to boot. Converting from hits using this is tough, however - and Sayuri definitely has better, albeit more expensive, setups to use.
j412C/jC Which Way
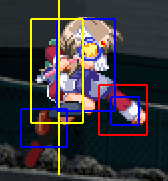
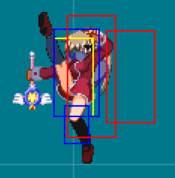
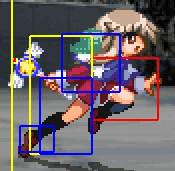
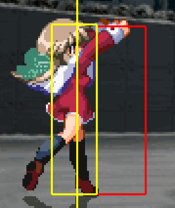
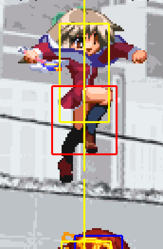
j412C is absolutely incredible. It has 38F of invul at the start, with the only downside being 5F of vulnerability with no hitbox cover before the second half the the move. The initial hitbox is huge. Please check the move list above to fully appreciate the hitbox. This makes it an especially scary okizeme tool - while it is possible to punish, it is difficult to properly time a 4F 5A before the second half of the move starts.
Off a lot of midscreen knockdowns (most commonly being 623A) you can go for a same side jC or a crossup j412C option select. To do this, IAD (instant air dash) after the knockdown and as you crossup the opponent input j412C in the opposite that you are air dashing. Essentially, this makes the input j632C. The game will auto correct the direction and go towards the opponent. If you end up doing an IAD that's too low to crossup, your j412C will just turn into a jC allowing you to land and confirm into a regular ground combo. To see followups for the crossup version, please use this reference.
66jC Overhead/c5B Low
With 22F of startup, 66jC is the fastest Sayuri has for an overhead. She can combo from this easily with j236B FIC, which you can see here. Has the ability to stuff lows and leads to some nice damage. Your alternative option, which you'll be using more often, is c5B. This is a Sayuri's longest reaching low and can be tough to use at first, as it requires some knowledge of the range at which close normals activate. Hitconfirming c5B is made easier by the fact it has an extra 6F of special hitstop.
236A IC IAD Which Way
Sayuri's star projectile can be used to create mixups on waking up opponents. Using 236A IC and instant air dashing over the opponent, with correct timing you can stay the same side of crossup. This setup is very easy to choose the side on, and if you choose crossup you can use j412A to convert from hits. You need to input this the same way you would the j412C crossup listed above, meaning you'll have to input is as j632A after you cross the opponent up.
Magical☆Thunder
When your opponent begins being overly respectful, not mashing and just blocking, you can bring out the tool that makes Sayuri genuinely scary. Magical☆Thunder (6321463214*) is a command grab super that deals a lot of damage, especially compared to Sayuri's usual combo damage output. The only useful versions are Level 2 and Level 3, as Level 1 is jumpable post super flash rendering it next to useless. Level 2 and 3 cannot be jumped post superflash so they must be predicted or the opponent must be mashing or holding jump in order to beat them. These command grabs have decent range, you don't have to be standing right next to the opponent for them to connect, but you can be no more than a few paces away. I'd recommend testing out the ranges of Level 2 and 3 respectively to get a feel for their uses.
Blockstrings
If done correctly, Sayuri can have some seemingly endless blockstrings if she manages her meter efficiently. Her main blockstring tools are: 41236A, 623A IC, 236A/B, 236A/B IC to catch mash/reversals, c5B f5B .. c5B f5B frame trap, and generally using her pokes at a safe distance (f5B and 2B, occasionally cancelling into star or 623A).
Her simplest and most predictable string is 2AA 2B 5C 41236A. If not for Recoil Guard, this string would be inescapable. You can repeat this over and over and the only way to beat it is to RG the 41236A. This will be the basis of our blockstrings. From this, you can adjust the string to add differently timed attacks into the mix. For instance, instead of 41236A which is fairly slow, you can instead use 623A to try and catch your opponent off guard. In the same sense, you can do 2AA 2B 236A/B and even IC into f5B to prevent the possibility of jumping out. Changing the timing for when you do each section of 2AA 2B 5C is also important, as it is important to mix this string's composition up. You can also do strings like 2AAA c5B f5B 5C or 2A c5B 5C (2 hits) - essentially anything to keep your strings from becoming predictable.
Every 8 seconds you will get access to Red IC, allowing you to go for riskier setups using IC. One example is 236A IC IAD jAAA - this forces a mixup situation of how many highs, when will they stop and go low, will they go for a command grab after the star is blocked, etc etc. Another option is from the mixups listed in Okizeme: using 66jC j236B FIC overhead or c5B, and as another option using the insane priority and invulnerability on j412C to predict reversals.
Stored Momentum from Rising Dash
Sayuri's rising ground dash has a unique property - if she jumps after dashing, she will keep some horizontal momentum.
This momentum is stored until:
- Sayuri uses the stored momentum (by jumping)
- Sayuri moves left or right on the ground
- She does a ground dash/backwards jump - the stored momentum has no effect on either of these but will still be used.
Doing a neutral jump after a dash will show you the amount of forward momentum that is stored. When doing a forward jump the stored momentum will be added onto the usual momentum of Sayuri's forward jump.
Doing a forward jump from the ground with the stored momentum is possible but requires forward and up to be pressed on the same frame. If 8 is pressed too early, you will get a momentum neutral jump. Pressing 6 too early will give you a regular forward jump. One trick to get a momentum forward jump from the ground is to make it impossible for air inputs to be executed, buffering a ground special during this time and buffering j9 during the ground special. The string will look something like 66 jB (whiff) j236B j9. During the jB (whiff) you buffer the 236B, and because you're already performing a normal j236B will not come out. Instead, you'll get 236B upon landing, allowing you to buffer the forward jump with ease. She can also do it after 66 j236A, buffering the j9 during the star. The jump wont come out until she hits the ground, even though Sayuri is capable of double jumping after 66 j236*.
Using the stored momentum on a double jump is much easier as there is no way of clearing the stored momentum in the air.
This has applications mainly in neutral, and especially after a ground star. The added momentum on Sayuri's forward jump allows her to keep just behind the star while it's travelling, and can be quite surprising if used sparingly.
Win Quotes
| Japanese | English |
|---|---|
|
佐祐理の射程と |
[TRANSLATION NEEDED] |
|
すみません |
[TRANSLATION NEEDED] |
|
あははー |
[TRANSLATION NEEDED] |
|
ふぇー |
[TRANSLATION NEEDED] |
|
テイルトウェイト |
Tiltowait [TRANSLATION NEEDED] ("Tiltowait" is a Level 7 Mage Spell from the game Wizardry. It is the strongest magic, causing a nuclear explosion and damages all monster groups.) |
|
(To Mai) |
(To Mai) |
|
(To UNKNOWN) |
(To UNKNOWN) |
|
(To Sayuri) |
(To Sayuri) |
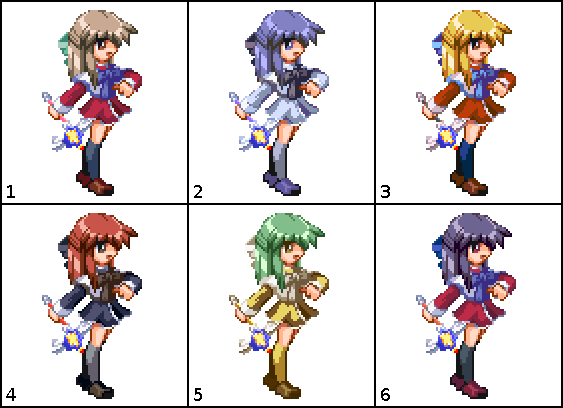
Colors
In-game References
External References
- Sayuri's "Magical☆Sword" move is based on Gambit's "Cajun Slash" move, from Marvel vs. Capcom 2.
- Sayuri's "Ah, got your skill~" move is based on Chaka's "Okuetazo" move, from Jojo's Bizarre Adventure.
- Sayuri's "Magical☆Cutter" move is based on Rugal's "Genocide Cutter" move, from The King of Fighters series.
- Sayuri's "Magical☆Smash" move is based on Omega Rugal's "Gravity Smash" move, from the The King of Fighters series.
- Sayuri's "Magical☆Press" move is based on Rugal's "God Press" move, from the The King of Fighters series.
- Sayuri's "Magical☆Pressure" move is based on Rugal's "Gigantic Pressure" move, from the The King of Fighters series.
- Sayuri's "Magical☆Agents" move is based on Bulleta's "Cool Hunting" move, from the Vampire Savior series.
- Sayuri's "Magical☆Thunder" move is based on Benimaru Nikaido's "Electrigger" move, from the The King of Fighters series.
- Sayuri's "Magical☆On Stage" move is based on Rugal's "Dead End Screamer" move, from the The King of Fighters series.

