Story
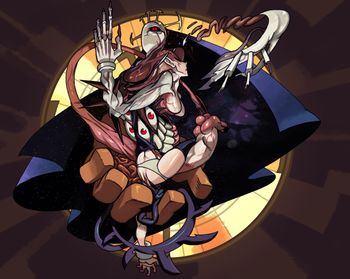
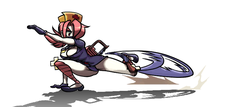
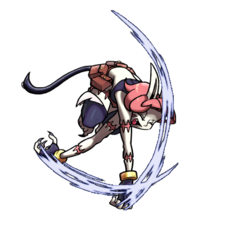
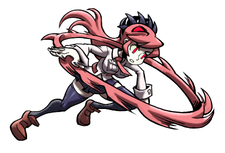
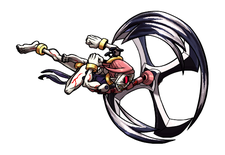
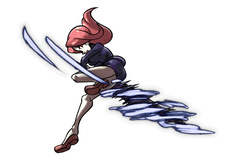
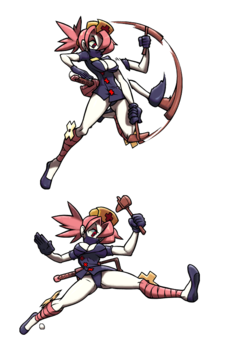
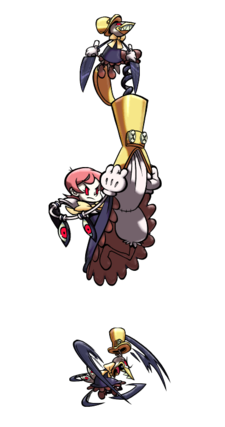
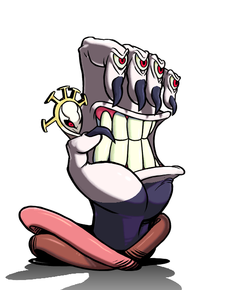
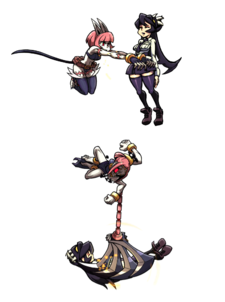
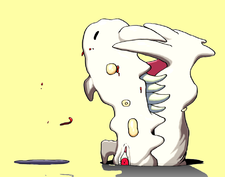
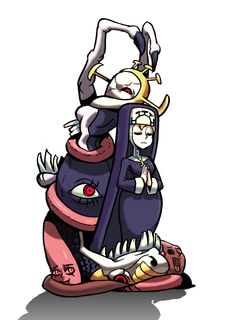
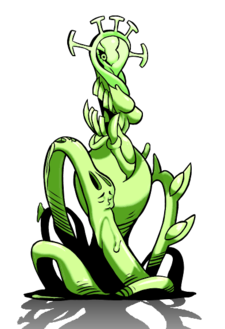
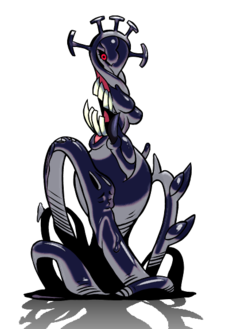
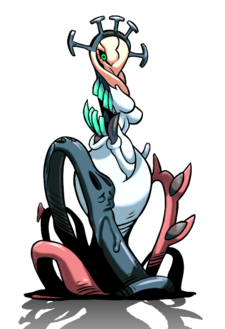
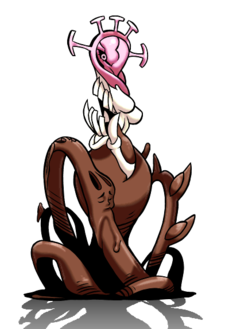
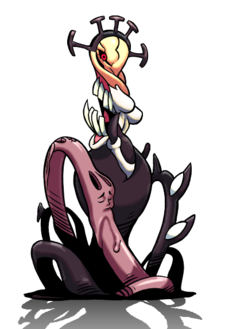
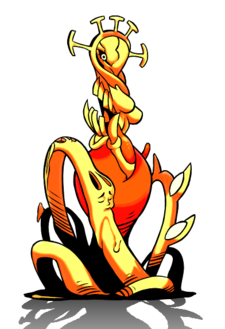
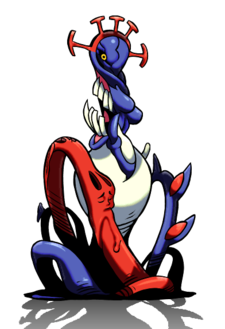
Double’s origins are a complete mystery. Seemingly without a will or motive of its own, this formless monster aids the Skullgirl.
Double is capable of transforming its nightmarish form into that of any person, but often appears as a smiling nun. It can frequently be found in the Grand Cathedral of the Divine Trinity, listening to confessions and attending to the catacombs beneath.
Basics
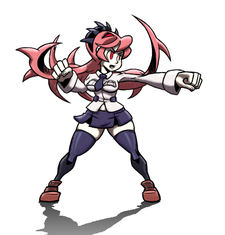
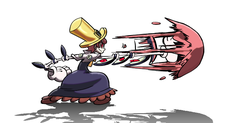
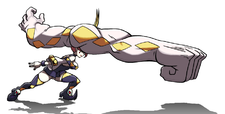
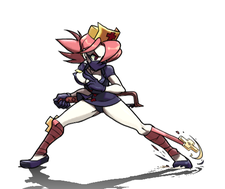
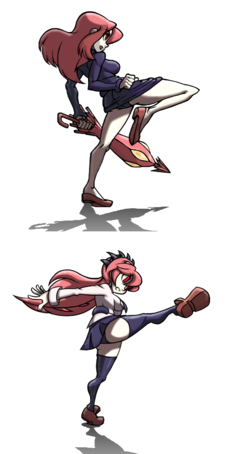
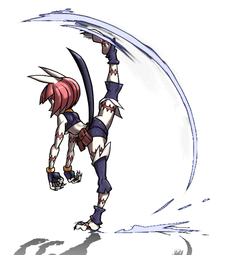
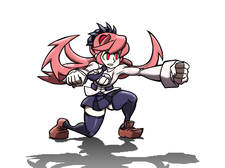
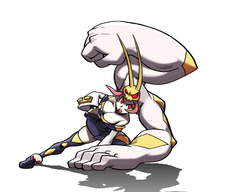
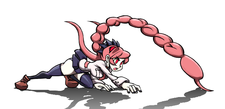
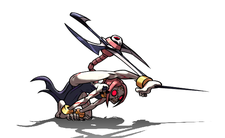
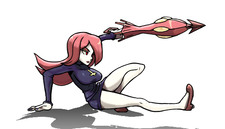
Double is a jack of all trades character whose moves borrow animations from other characters in the cast. Many of them have different properties than their original, and their uses are re-contextualized by belonging to a different character with a different kit. She also has some choice assists and a safe DHC that actually puts the momentum in her favor.
- Playstyle: Double's toolkit is very versatile and suited for either rushdown or turtling. Her double jump paired her varied air normals lets her play a slow paced game and out-maneuver opponents in the air. As long as she's above her opponent, jHP poses a threat. Her Lugers (236P) allow her to control a good amount of space from the ground, and is often able to convert into a combo. She has a great ground game as well. 2HP is a ground poke and frame trap tool, 5HP is a slower, long range poke that causes sliding knockdown, and her dash moves a large space forward quickly.
- Mixup: Double doesn't have a grounded overhead or IAD overhead option like much of the cast. Instead, she leverages her 2LK to keep opponents honest and create opportunities to open them up with her amazing throw range. Coupled with her dash, she has some of the best low / throw pressure in the game. After she lands a hit, she has an extremely simple and flexible left / right air vortex. Make them guess left / right, or mix it up even further with an air throw or burst bait. It's easy to loop as well as long as there's undizzy remaining.
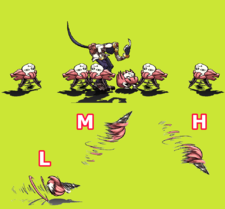
- DHC Synergy: Her level 2 catheads super (236KK) summons several Ms. Fortune heads that attack along with Double as she presses buttons. This can keep a blocking opponent blocking for even longer, but where this super really shines is as a DHC. Not only is it cheaper due to the universal rule that supers over one bar cost one less as a DHC, but it can totally reverse bad situations for the point character. The point character can use a reversal, DHC into catheads, and make the opponent block regardless if the reversal hit or was blocked.
- Her other supers offer flexible DHC synergy. Her her level 1 car super (236PP) can choose which side of the screen to come out of, allowing you to take back the corner if you didn't have it already before you DHC. DHCing into her level 1 puddle super (214KK) allows a full combo and decent damage. It can also be setup such that the puddle stays on the screen and traps the opponent in the corner. Her level 3 and level 5 supers are great for tacking on damage at the end of a combo.
- Reversals: Double's reversal is L Hornet Bomber (623LK). The hitbox will only hit in front of Double as it has no vertical reach. Aside from that, it has decent startup, full invulnerability, and leads into a full combo with meter. As a reversal, it does its job to get out of small windows of pressure and on wakeup. Her supers, while useful in other aspects, are rarely used as reversals. Car can only really be used if the opponent is in your face in the corner. Level 3 is extremely risky and the reward on hit isn't as good as going into a full combo with L Bomber. Level 5 is useful as a reversal since it's invulnerable, mostly safe, and can be done in the air. But, it will consume all of your meter, and can be used instead to ToD in 3v3 ratio.
- Flesh Step: One of her most unique tools is her command dash, Flesh Step (214K). It can pass through opponents, which allows for fast crossups when paired with an assist. It also has a period of projectile invulnerability, allowing her to bypass projectile zoning with good timing.
Important Moves
- 2LK - Fast, long range low poke that is plus on block.
- 2HP - Fast, long range heavy that also acts as an anti-air and can be hitconfirmed into Clide.
- jMK - Good for travelling from one side of the screen to the other and as an air-to-air.
- jHP - Versatile jump-in that confirms into full combos.
- jHK - Creates space between you and the opponent, and useful to use on the opponent's wakeup.
- Throw - Open people up expecting 2LK.
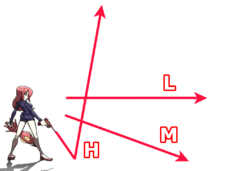
- L/H Luger (236P) - Great space control tools. L can be thought of as a fireball. H anti-airs and confirms into a full combo.
Stats
Chains
| Standing
|
3 Buttons:  or or  → →  or or  → →  or or 
|
| Crouching
|
3 Buttons:  or or  → →  or or  → →  or or 
|
| Air
|
5 Buttons:  → →  → →  → →  → →  or or 
|
Movement
| Weight
|
Dash
|
Double Jump
|
Airdash
|
IAD Lockout
|
| Heavy
|
Step
|
Yes
|
No
|
N/A
|
Wakeup Time
| Forward Tech
|
Backward Tech
|
Sliding KD
|
Hard KD
|
Crumple
|
| 39
|
41
|
7
|
36
|
33
|
Move List
Standing Normals
Standing Jab Toggle Hitboxes Toggle Hitboxes
|
| 5LP
|
s.
|
|
| x1, x2
|
Guard
|
Properties
|
Damage
|
Meter
|
On Hit
|
On Block
|
On Pushblock
|
| Mid
|
Chains Into Self
|
300
|
2.5%
|
-3
|
±0
|
|
| Startup
|
Active
|
Recovery
|
Hit Stun
|
Block Stun
|
Hit Stop
|
Super Hit Stop
|
| 6
|
3
|
19
|
18
|
21
|
7
|
{{{superhitstop}}}
|
|
|
|
|
- Her fastest normal, used in air crossup setups in order to make the gap as short as possible and prevent the opponent from escaping. Unfortunately, for that purpose, it is a bit small and can sometimes whiff if you're not completely on point.
- Used in the end of combos to start a chain with an LP button and tack on more hits since it chains into itself.
|
|
|
Strong Pie Toggle Hitboxes Toggle Hitboxes
|
| 5MP
|
s.
|
|
| Guard
|
Properties
|
Damage
|
Meter
|
On Hit
|
On Block
|
On Pushblock
|
| Mid
|
-
|
550
|
7.5%
|
±0
|
-4
|
|
| Startup
|
Active
|
Recovery
|
Hit Stun
|
Block Stun
|
Hit Stop
|
Super Hit Stop
|
| 12
|
3
|
26 (25 on miss)
|
28
|
24
|
9
|
{{{superhitstop}}}
|
|
|
|
|
- Although it's slower and has less horizontal reach than 2LK, it does have high crush potential, making it useful in specific situations.
- Used in combos to convert from H Luger.
|
|
|
Fugazi Knuckle Toggle Hitboxes Toggle Hitboxes
|
| 5HP
|
s.
|
|
| Guard
|
Properties
|
Damage
|
Meter
|
On Hit
|
On Block
|
On Pushblock
|
| Mid
|
-
|
1000
|
10%
|
Sliding KD
|
-5
|
|
| Startup
|
Active
|
Recovery
|
Hit Stun
|
Block Stun
|
Hit Stop
|
Super Hit Stop
|
| 21
|
3
|
22
|
26
|
19
|
14
|
{{{superhitstop}}}
|
|
|
|
|
- Slow, long range poke that causes sliding knockdown. The extended hurtbox lingers after the active frames so this button is suspect to whiff punishes. But, special canceling into Luger can make this move much safer as the hurtbox won't be out for as long.
- Less damage than Cerebella's 6HP (1000 instead of 1600), but is otherwise identical.
- Easy to combo into from her magic series chains, so you can choose to end your combos in a sliding knockdown for oki as long as OTG wasn't spent in the combo. Canceling 5HP into two subsequent Flesh Steps and throwing out a jHK is a safejump that will put Double point blank with a meaty projectile for oki.
|
|
|
Substitute Short Toggle Hitboxes Toggle Hitboxes
|
| 5LK
|
s.
|
|
| Guard
|
Properties
|
Damage
|
Meter
|
On Hit
|
On Block
|
On Pushblock
|
| Mid
|
-
|
400
|
2.5%
|
+5
|
+3
|
|
| Startup
|
Active
|
Recovery
|
Hit Stun
|
Block Stun
|
Hit Stop
|
Super Hit Stop
|
| 8
|
2
|
16
|
22
|
20
|
7
|
{{{superhitstop}}}
|
|
|
|
|
- Does more damage than 2LK, so use this when you need to start a chain with a LK button in the middle of your combo.
|
|
|
Too Forward Toggle Hitboxes Toggle Hitboxes
|
| 5MK
|
s.
|
|
| x1
|
Guard
|
Properties
|
Damage
|
Meter
|
On Hit
|
On Block
|
On Pushblock
|
| Mid
|
Chains Into Self
|
400
|
3.75%
|
-4
|
-5
|
|
| Startup
|
Active
|
Recovery
|
Hit Stun
|
Block Stun
|
Hit Stop
|
Super Hit Stop
|
| 11
|
4
|
21
|
20
|
19
|
10
|
{{{superhitstop}}}
|
|
|
|
| x2
|
Guard
|
Properties
|
Damage
|
Meter
|
On Hit
|
On Block
|
On Pushblock
|
| Mid
|
-
|
500
|
7.5%
|
-1
|
-6
|
|
| Startup
|
Active
|
Recovery
|
Hit Stun
|
Block Stun
|
Hit Stop
|
Super Hit Stop
|
| 11
|
3
|
23
|
24
|
19
|
9
|
{{{superhitstop}}}
|
|
|
|
|
- Two hit normal that is mostly a combo move. If you need to adjust the height of the character you're comboing, use this in your chain since it's two hits and can be delayed. It can be used in hit confirms but the frame data is abysmal, and is suspect to PBGC if you use all the hits in a blockstring.
|
|
|
Impawster Toggle Hitboxes Toggle Hitboxes
|
| 5HK
|
s.
|
|
| Guard
|
Properties
|
Damage
|
Meter
|
On Hit
|
On Block
|
On Pushblock
|
| Mid
|
Launcher
|
975
|
10%
|
-5
|
-13
|
|
| Startup
|
Active
|
Recovery
|
Hit Stun
|
Block Stun
|
Hit Stop
|
Super Hit Stop
|
| 16
|
2
|
33
|
29
|
21
|
12
|
{{{superhitstop}}}
|
|
|
|
|
- Double's launcher. If your hit confirm chain hits, use this move to continue the combo.
|
|
|
Crouching Normals
Crouching Jab Toggle Hitboxes Toggle Hitboxes
|
| 2LP
|
c.
|
|
| x1, x2
|
Guard
|
Properties
|
Damage
|
Meter
|
On Hit
|
On Block
|
On Pushblock
|
| Mid
|
Chains Into Self
|
200
|
2.5%
|
+4
|
+5
|
|
| Startup
|
Active
|
Recovery
|
Hit Stun
|
Block Stun
|
Hit Stop
|
Super Hit Stop
|
| 7
|
3
|
11
|
17
|
18
|
7
|
{{{superhitstop}}}
|
|
|
|
|
- Chains into itself. Compared to 2LK, it's one frame faster and has more advantage on hit, making it better for tick throw setups on hit.
|
|
|
Elbow Emulator Toggle Hitboxes Toggle Hitboxes
|
| 2MP
|
c.
|
|
| Guard
|
Properties
|
Damage
|
Meter
|
On Hit
|
On Block
|
On Pushblock
|
| Mid
|
-
|
575
|
7.5%
|
-1
|
-9
|
|
| Startup
|
Active
|
Recovery
|
Hit Stun
|
Block Stun
|
Hit Stop
|
Super Hit Stop
|
| 14
|
6
|
21
|
25
|
17
|
10
|
{{{superhitstop}}}
|
|
|
|
|
- Moves Double forward, making it the go-to move in Double's hit confirm chains. It's also a very consistent move to OTG with.
- Solid amount of active frames, so it can be used to convert from Beast of Gehenna.
- Unable to crossup opponents not already in hitstun.
|
|
|
Double Drawn Weave Toggle Hitboxes Toggle Hitboxes
|
| 2HP
|
c.
|
|
| Guard
|
Properties
|
Damage
|
Meter
|
On Hit
|
On Block
|
On Pushblock
|
| Mid
|
-
|
900
|
10%
|
-2,
Ground Bounce (vs air)
|
-9
|
|
| Startup
|
Active
|
Recovery
|
Hit Stun
|
Block Stun
|
Hit Stop
|
Super Hit Stop
|
| 12
|
3
|
28
|
28
|
21
|
9
|
{{{superhitstop}}}
|
|
|
|
|
- Excellent poke, frame trap, and can even anti-air. Fast startup for a heavy button. Difficult to punish from max range.
- Can confirm into Cilia Slide from maximum range on reaction, with some practice.
- Use 2HP xx H Bomber at the end of chains to end combos. Although 5HP does more damage, 2HP is far more consistent.
|
|
|
Stamp Toggle Hitboxes Toggle Hitboxes
|
| 2LK
|
c.
|
|
| Guard
|
Properties
|
Damage
|
Meter
|
On Hit
|
On Block
|
On Pushblock
|
| Low
|
-
|
200
|
2.5%
|
+2
|
+5
|
|
| Startup
|
Active
|
Recovery
|
Hit Stun
|
Block Stun
|
Hit Stop
|
Super Hit Stop
|
| 8
|
4
|
12
|
17
|
20
|
8
|
{{{superhitstop}}}
|
|
|
|
|
- Fast, slightly disjointed low poke with plenty of range and frame advantage. Use this to establish Double's low / throw mixup. Chain into 2MP or 2MK to hit confirm.
- Keeping in mind everything else Double has to enhance her low / throw game, such as her large confirmable throw range, and fast dash, this ends up being one of the scariest 2LK moves in the game.
|
|
|
Cliché Toggle Hitboxes Toggle Hitboxes
|
| 2MK
|
c.
|
|
| Guard
|
Properties
|
Damage
|
Meter
|
On Hit
|
On Block
|
On Pushblock
|
| Low
|
-
|
500
|
7.5%
|
±0
|
-4
|
|
| Startup
|
Active
|
Recovery
|
Hit Stun
|
Block Stun
|
Hit Stop
|
Super Hit Stop
|
| 15
|
4
|
19
|
22
|
18
|
9
|
{{{superhitstop}}}
|
|
|
|
|
- Alternative option for hitconfirming off 2LK. Has slightly lower damage and range than 2MP, but is much safer on block and acts as a second low in your chain.
|
|
|
Sweeping Generalization Toggle Hitboxes Toggle Hitboxes
|
| 2HK
|
c.
|
|
| Guard
|
Properties
|
Damage
|
Meter
|
On Hit
|
On Block
|
On Pushblock
|
| Low
|
Sweep
|
1000
|
10%
|
Soft KD (Invuln.)
|
-18
|
|
| Startup
|
Active
|
Recovery
|
Hit Stun
|
Block Stun
|
Hit Stop
|
Super Hit Stop
|
| 17
|
4
|
32
|
14
|
17
|
10
|
{{{superhitstop}}}
|
|
|
|
|
|
|
|
Jumping Normals
Clawpy Cat Toggle Hitboxes Toggle Hitboxes
|
| jLP
|
j.
|
|
| Guard
|
Properties
|
Damage
|
Meter
|
On Hit
|
On Block
|
On Pushblock
|
| High
|
-
|
250
|
2.5%
|
+1
|
±0
|
|
| Startup
|
Active
|
Recovery
|
Hit Stun
|
Block Stun
|
Hit Stop
|
Super Hit Stop
|
| 6
|
3
|
16
|
19
|
18
|
7
|
{{{superhitstop}}}
|
|
|
|
|
- Tied for fastest air normal in the game. Has a good crossup hitbox and shrinks Double's hurtbox, which can evade some attacks. Use this when you need your fastest air to air, or to disrespect air resets.
|
|
|
Cheap Haircut Toggle Hitboxes Toggle Hitboxes
|
| jMP
|
j.
|
|
| Guard
|
Properties
|
Damage
|
Meter
|
On Hit
|
On Block
|
On Pushblock
|
| High
|
-
|
150 x5, 250
|
1.0588% x6
|
+11
|
+8
|
|
| Startup
|
Active
|
Recovery
|
Hit Stun
|
Block Stun
|
Hit Stop
|
Super Hit Stop
|
| 11
|
2, 2, 2, 2, 2, 2
|
9
|
20 x5, 21
|
18 x6
|
4 x5, 9
|
{{{superhitstop}}}
|
|
|
|
|
- Multi-hitting move allowing it to be used to break armour.
- Easy to convert off of, but the multiple hits will scale the combo.
- Can be used for crossups.
|
|
|
Violet Tantrum Toggle Hitboxes Toggle Hitboxes
|
| jHP
|
j.
|
|
| Guard
|
Properties
|
Damage
|
Meter
|
On Hit
|
On Block
|
On Pushblock
|
| High
|
-
|
250, 225, 450
|
1.5% x3
|
+2
|
-6
|
|
| Startup
|
Active
|
Recovery
|
Hit Stun
|
Block Stun
|
Hit Stop
|
Super Hit Stop
|
| 17
|
11
|
14
|
22 x2, 24
|
17 x2, 15
|
7 x2, 12 (10 on block last hit)
|
{{{superhitstop}}}
|
|
|
|
|
- Versatile jump-in. Good hitbox, multi-hit, and can be converted from almost any range using dash 5LP.
- On block, if they don't pushblock, you can go for a low / throw mixup. To mix up the pushblock timing, you can fast fall with jHK, making this move scary even if it's blocked.
|
|
|
Spiral Fraud Toggle Hitboxes Toggle Hitboxes
|
| jLK
|
j.
|
|
| Guard
|
Properties
|
Damage
|
Meter
|
On Hit
|
On Block
|
On Pushblock
|
| High
|
-
|
100 x3
|
1.5% x3
|
-12
|
2
|
|
| Startup
|
Active
|
Recovery
|
Hit Stun
|
Block Stun
|
Hit Stop
|
Super Hit Stop
|
| 10
|
18
|
16
|
19 x3
|
22 x3
|
7 x3 (6 x3 on block)
|
{{{superhitstop}}}
|
|
|
|
|
- Disjointed air-to-air. Vacuums the opponent towards Double. Used in burst bait setups since you can do 5HK jump backwards jLK and the burst will be out of range.
|
|
|
Patellar Repeat Toggle Hitboxes Toggle Hitboxes
|
| jMK
|
j.
|
|
| Guard
|
Properties
|
Damage
|
Meter
|
On Hit
|
On Block
|
On Pushblock
|
| High
|
-
|
300, 600
|
2.5%, 6%
|
+10
|
+3
|
|
| Startup
|
Active
|
Recovery
|
Hit Stun
|
Block Stun
|
Hit Stop
|
Super Hit Stop
|
| 12
|
3, (3), 3
|
15
|
24, 27
|
17, 20
|
7, 10
|
{{{superhitstop}}}
|
|
|
|
|
- Useful not only in combos and conversions, but also as an additional movement option to complement her double jump. You can cover a lot of space very quickly with dashjump jMK.
- A very good air-to-air due to its momentum and the disjointed hitbox on the first hit.
- If you can get a grounded opponent to block this move it can be cancelled into jHP, providing multiple fastfall points that make it great for pressure.
- The second hit propels Double forward in the air.
- The second hit pops a grounded opponent into the air.
|
|
|
Bogus Buzzard Toggle Hitboxes Toggle Hitboxes
|
| jHK
|
j.
|
|
| 1st hit
|
Guard
|
Properties
|
Damage
|
Meter
|
On Hit
|
On Block
|
On Pushblock
|
| High
|
-
|
900
|
7.50%
|
-9
|
-8
|
|
| Startup
|
Active
|
Recovery
|
Hit Stun
|
Block Stun
|
Hit Stop
|
Super Hit Stop
|
| 13
|
2
|
30
|
22
|
21
|
11 (9 on block)
|
{{{superhitstop}}}
|
|
|
|
| Avery
|
Guard
|
Properties
|
Damage
|
Meter
|
On Hit
|
On Block
|
On Pushblock
|
| Mid
|
Projectile
|
450 x2
|
2.25% x2
|
N/A
|
N/A
|
|
| Startup
|
Active
|
Recovery
|
Hit Stun
|
Block Stun
|
Hit Stop
|
Super Hit Stop
|
| 7
|
(Until ground)
|
N/A
|
19 x2
|
17 x2
|
5 x2
|
{{{superhitstop}}}
|
|
|
|
|
- Hits once, then summons a bird projectile, Avery, which has two additional hits and travels straight downward.
- The first hit will pop a grounded opponent into the air.
- In neutral, the projectile can allow Double to safely back up and create space. With Avery, the opponent won't be able to chase too closely.
- In combos and resets, this move is essential. If the opponent is at the right height, it will leave the them suspended in the air for a crossup reset. Example: jLKx3 > jMP(1) > jHK. Then, dash under 5LP.
- A great way to pressure a cornered opponent, especially on incoming as they have to respect Avery.
|
|
|
Universal Mechanics
Godhand Toggle Hitboxes Toggle Hitboxes
|
| Throw
|
 + + 
|
|
| Guard
|
Properties
|
Damage
|
Meter
|
On Hit
|
On Block
|
On Pushblock
|
| Throw
|
50% Damage Scaling
|
0, 300, 900
|
4%, 0%, 7%
|
KD
|
N/A
|
|
| Startup
|
Active
|
Recovery
|
Hit Stun
|
Block Stun
|
Hit Stop
|
Super Hit Stop
|
| 7
|
1
|
28
|
N/A
|
N/A
|
N/A
|
{{{superhitstop}}}
|
|
|
|
|
- Double's throw is an essential part of her mixup game, and one of the bigger throws in the game. Fortunately, it can be converted from easily using Flesh Step 2MP. Saving OTG is possible on some characters by cancelling into H Luger.
|
|
|
Kitten Blender Toggle Hitboxes Toggle Hitboxes
|
| Air Throw
|
 + +  (in air) (in air)
|
|
| Guard
|
Properties
|
Damage
|
Meter
|
On Hit
|
On Block
|
On Pushblock
|
| Air Throw
|
50% Damage Scaling
|
0 x2, 800
|
0% x2, 9%
|
Ground Bounce
|
N/A
|
|
| Startup
|
Active
|
Recovery
|
Hit Stun
|
Block Stun
|
Hit Stop
|
Super Hit Stop
|
| 7
|
3
|
19
|
N/A
|
N/A
|
N/A
|
{{{superhitstop}}}
|
|
|
|
|
- Used frequently as a mixup in her air vortex. Convert using dash 2MP, or dash 2LK to save OTG.
- Unlike other air throws, doesn't deal all of its damage in red health.
- Under rare circumstances the opponent can get pushed out of the 2nd hit: (video)
|
|
|
Second Impact Toggle Hitboxes Toggle Hitboxes
|
|
| Guard
|
Properties
|
Damage
|
Meter
|
On Hit
|
On Block
|
On Pushblock
|
| Mid
|
Tag
|
200, 300
|
10% x2
|
Ground Bounce,
or KD
|
-51
|
|
| Startup
|
Active
|
Recovery
|
Hit Stun
|
Block Stun
|
Hit Stop
|
Super Hit Stop
|
| 31
|
40, (Until Ground)
|
65
|
10 x2
|
13 x2
|
9, 12
|
{{{superhitstop}}}
|
|
|
|
|
- Double enters from the side of the screen, then re-appears from the top of the screen.
- Allows a small window for a follow up combo.
- Avoid using this outside of a combo. The startup and amount of time it takes to travel across the screen gives the opponent plenty of time to react and makes it punishable even if done after killing a character since it finishes right in front of the opponent. The only time it's even possibly worth considering is vs Peacock or Robo-Fortune when you are sure the first part of the move will be interrupted by a projectile and that the opponent won't be able to convert.
- Double will not perform the second hit if she does not get off the screen after the first hit. Trading with the first hit causes a regular knockdown instead of the full ground bounce.
|
|
|
Chimeram Toggle Hitboxes Toggle Hitboxes
|
|
| Guard
|
Properties
|
Damage
|
Meter
|
On Hit
|
On Block
|
On Pushblock
|
| Mid
|
Snapback
|
0
|
-100%
|
N/A
|
-18
|
|
| Startup
|
Active
|
Recovery
|
Hit Stun
|
Block Stun
|
Hit Stop
|
Super Hit Stop
|
| 12 + 3
|
6
|
30
|
14
|
17
|
(9) 13
|
{{{superhitstop}}}
|
|
|
|
|
- Active for 6 frames instead of the normal 3 frames for snapbacks.
|
|
|
Specials
|
|
| Flesh Step
|
 + + 
|
|
| Guard
|
Properties
|
Damage
|
Meter
|
On Hit
|
On Block
|
On Pushblock
|
| N/A
|
Invuln. (Proj.) (Frame 12)
|
N/A
|
N/A
|
N/A
|
N/A
|
|
| Startup
|
Active
|
Recovery
|
Hit Stun
|
Block Stun
|
Hit Stop
|
Super Hit Stop
|
| 11
|
N/A
|
23
|
N/A
|
N/A
|
N/A
|
{{{superhitstop}}}
|
|
|
|
|
- A command dash that can pass through the opponent. Has projectile invulnerability starting on frame 12.
- Used in conjunction with an assist for crossup resets, and occasionally bypassing projectiles.
|
|
|
Toggle Hitboxes Toggle Hitboxes
|
| Luger Replica
|
 + + 
|
|

|
Guard
|
Properties
|
Damage
|
Meter
|
On Hit
|
On Block
|
On Pushblock
|
| Mid
|
Projectile,
75% Damage Scaling
|
650 (100)
|
(2.5%) 5.625%
|
±0,
KD (vs air)
|
-4
|
|
| Startup
|
Active
|
Recovery
|
Hit Stun
|
Block Stun
|
Hit Stop
|
Super Hit Stop
|
| 12
|
-
|
37
|
28
|
24
|
8
|
{{{superhitstop}}}
|
|
|
|

|
Guard
|
Properties
|
Damage
|
Meter
|
On Hit
|
On Block
|
On Pushblock
|
| Mid
|
Projectile,
75% Damage Scaling
|
650 (100)
|
(2.5%) 5.625%
|
±0,
KD (vs air)
|
-4
|
|
| Startup
|
Active
|
Recovery
|
Hit Stun
|
Block Stun
|
Hit Stop
|
Super Hit Stop
|
| 12
|
-
|
37
|
28
|
24
|
8
|
{{{superhitstop}}}
|
|
|
|

|
Guard
|
Properties
|
Damage
|
Meter
|
On Hit
|
On Block
|
On Pushblock
|
| Mid
|
Projectile,
75% Damage Scaling
|
650 (100)
|
(2.5%) 5.625%
|
Ground Bounce
|
±0
|
|
| Startup
|
Active
|
Recovery
|
Hit Stun
|
Block Stun
|
Hit Stop
|
Super Hit Stop
|
| 16
|
-
|
33
|
30
|
24
|
8
|
{{{superhitstop}}}
|
|
|
|
|
- Excellent tool for space control that causes a knockdown on air hit. The trajectory differs depending on the button pressed.

- Travels in a straight, horizontal line. It can be crouched under, but will catch moves that aren't low profile and air moves at IAD height. If it hits an air opponent, it knocks down and a conversion is usually possible by dashing and picking up OTG.
- Especially useful against characters with big hurtboxes, since it's harder for them to jump over.

- Travels diagonally towards the ground. Use to hit opponents trying to low profile the L version.

- Ricochets off the floor and covers the area right above Double. Great for anti-airing. Even if they block it in the air, Double is usually safe.
- Use this version if you're in point blank range and absolutely have to end your blockstring with something safe.
- The second Luger used in a combo will not knock the opponent nearly as high, limiting combo follow up options.
- Note about ending blockstrings with Luger: Each version is technically safe on block, but if the opponent pushblocked your string earlier, it can usually be punished with a PBGC.
- Each version of Luger reels Double's hurtbox backwards.
|
|
|
Toggle Hitboxes Toggle Hitboxes
|
| Hornet Bomber
|
 + + 
|
|

|
Guard
|
Properties
|
Damage
|
Meter
|
On Hit
|
On Block
|
On Pushblock
|
| Mid
|
Invuln. (Full)
|
600, 800 (100, 100)
|
(2.5%) 4.5%, 3.6%
|
KD
|
-34
|
|
| Startup
|
Active
|
Recovery
|
Hit Stun
|
Block Stun
|
Hit Stop
|
Super Hit Stop
|
| 12
|
16, 6
|
42
|
22, 14
|
25, 13
|
8, 8
|
{{{superhitstop}}}
|
|
|
|

|
Guard
|
Properties
|
Damage
|
Meter
|
On Hit
|
On Block
|
On Pushblock
|
| Mid
|
-
|
400, 500, 900 (100, 100, 100)
|
(2.5%) 4.5%, 4.6% x2
|
KD
|
-43
|
|
| Startup
|
Active
|
Recovery
|
Hit Stun
|
Block Stun
|
Hit Stop
|
Super Hit Stop
|
| 14
|
11, 4, (10), 9
|
49
|
20 x2, 17
|
23, 23, 14
|
10, 8, 9
|
{{{superhitstop}}}
|
|
|
|

|
Guard
|
Properties
|
Damage
|
Meter
|
On Hit
|
On Block
|
On Pushblock
|
| Mid
|
-
|
500, 600, 1000 (100, 100, 100)
|
(2.5%) 4.5%, 4.6% x2
|
KD
|
-47
|
|
| Startup
|
Active
|
Recovery
|
Hit Stun
|
Block Stun
|
Hit Stop
|
Super Hit Stop
|
| 17
|
12, 4, (11), 13
|
50
|
20 x3
|
23, 23, 15
|
11, 9, 10
|
{{{superhitstop}}}
|
|
|
|
|
- Double flies across the screen in an arc. The button used determines the size of the arc, and the L version has invulnerable startup.

- Double's primary reversal. Less than stellar hitbox that will only hit in front and not above. Extremely unsafe without a DHC.
- L Bomber into puddle is effectively -18 on block. The opponent can easily punish Double before she recovers or they are grabbed by the puddle.
- L Bomber into catheads is -26 on block but the Catheads will attack before Double recovers, making it effectively -12 on block against non-invincible moves.
- Super cancel into puddle for a combo on hit.
- The assist version has 2 more additional vulnerable frames, after the usual 3 vulnerable frames on every assist.

- Useful as a lockdown and space control assist, not much use on point.

- Combo ender for max damage. Useful as a zoning and lockdown assist.
|
|
|
Toggle Hitboxes Toggle Hitboxes
|
| Item Crash
|
(Air Only)  + + 
|
|

|
Guard
|
Properties
|
Damage
|
Meter
|
On Hit
|
On Block
|
On Pushblock
|
| High
|
-
|
500 (100)
|
(2.5%) 7.5%
|
Stagger
|
-23 (at best)
|
|
| Startup
|
Active
|
Recovery
|
Hit Stun
|
Block Stun
|
Hit Stop
|
Super Hit Stop
|
| 12
|
until landing
|
24 (40 on whiff)
|
24
|
17
|
8
|
{{{superhitstop}}}
|
|
|
|

|
Guard
|
Properties
|
Damage
|
Meter
|
On Hit
|
On Block
|
On Pushblock
|
| High
|
-
|
450, 475 (100, 100)
|
(2.5%) 4.5%, 7.5%
|
KD (2nd hit)
|
-14
|
|
| Startup
|
Active
|
Recovery
|
Hit Stun
|
Block Stun
|
Hit Stop
|
Super Hit Stop
|
| 12
|
until landing, 3
|
35
|
55, 34
|
23 x2
|
10 x2
|
{{{superhitstop}}}
|
|
|
|

|
Guard
|
Properties
|
Damage
|
Meter
|
On Hit
|
On Block
|
On Pushblock
|
| High
|
-
|
550, 650 (100, 200)
|
(2.5%) 6%, 7.5%
|
Ground Bounce (2nd hit)
|
-31
|
|
| Startup
|
Active
|
Recovery
|
Hit Stun
|
Block Stun
|
Hit Stop
|
Super Hit Stop
|
| 14
|
until landing, 3
|
55
|
55, 22
|
25, 26
|
10, 12
|
{{{superhitstop}}}
|
|
|
|
|
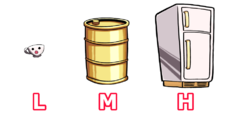
- Double transforms into one of three items depending on the button pressed and falls straight to the ground. Mainly a combo tool, used to bring the opponent back to the ground. Each version has some cross-up potential as well, but they're all minus on block, so only use it if you have an assist to cover you.

- Teacup. Staggers grounded opponents.
- Significantly shrinks Double's hurtbox, which can be used to avoid specific incoming setups and resets.
- Double's fastest meterless overhead

- Barrel. Causes a short ground bounce and can be picked up from using OTG
- Where the barrel loop combo gets its name from. Since the Avery from jHK will combo off the ground bounce before using OTG, this combo saves OTG. See the combo section for specifics.
- Can also be a slow overhead option from the ground, if done alongside an assist to combo off of. If you really want an overhead option as Double, unfortunately this is it.

- Fridge. Causes a higher ground bounce, does the most damage of all the versions.
- Super canceling into puddle is -5.
- This move is usually referred to by the corresponding item (teacup/barrel/fridge)
|
|
|
Toggle Hitboxes Toggle Hitboxes
|
|
| Guard
|
Properties
|
Damage
|
Meter
|
On Hit
|
On Block
|
On Pushblock
|
| Low
|
Sweep
|
1000 (100)
|
(2.5%) 7.5%
|
KD
|
-16
|
|
| Startup
|
Active
|
Recovery
|
Hit Stun
|
Block Stun
|
Hit Stop
|
Super Hit Stop
|
| 16
|
10
|
36
|
18
|
21
|
12
|
{{{superhitstop}}}
|
|
|
|
|
- Double quickly slides forward with a low hitting sweep. Extremely unsafe on block, so don't throw it out in neutral unless you are certain it will hit.
- Used to confirm off of 2HP, and in more damaging combo routes that side swap. (... 2HP Clide, dash 5LK ...)
- If used in conjunction with as assist, it can be used to force your way in, or to frame trap after a blocked 2HP.
- Super canceling into puddle is safer, but is effectively -10 and therefore light punishable. The puddle might scare them into not trying to punish, since you eat a full combo if you mess it up. If cancelled into Catheads (assuming the attacks are done as soon as possible) it will be a blockstring and is therefore completely safe on block.
|
|
|
Supers
"Be driven before us!" Toggle Hitboxes Toggle Hitboxes
|
Bandwagon Rushdown
Level 1
|
 + +  + + 
|
|
| Guard
|
Properties
|
Damage
|
Meter
|
On Hit
|
On Block
|
On Pushblock
|
| Mid
|
Invuln. (Full) ,
33% Minimum Scaling (except 1st hit)
|
500 x4, 1200 (100 x4. 200)
|
-100%
|
KD
|
-64 (at best)
|
|
| Startup
|
Active
|
Recovery
|
Hit Stun
|
Block Stun
|
Hit Stop
|
Super Hit Stop
|
| 6 + 2 or 6 + 11
|
--
|
32
|
26 x5
|
26 x5
|
(8) 5 x4, 24
|
{{{superhitstop}}}
|
|
|
|
|
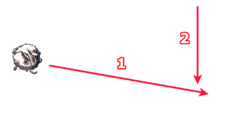
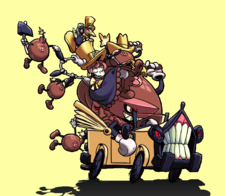
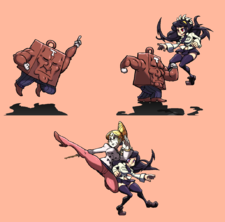
- Double disappears from the screen as Peacock, returning to run over the opponent as an invulnerable car.
- This full invulnerability makes this one of the best supers in the game for winning a DHC war (where both players DHC to try and beat the opponent's supers).
- The only way to beat this attack aside from punishing its recovery is with Valentine's counter super.
- Double becomes vulnerable again as she transforms during recovery, always appearing directly in front of the opponent.
- Holding back during start up will add 9f to the start up and drive across the screen from the other direction.
- This also reverses the direction in which you have to input your DHC.
- Since it can hit from either side of the screen, it can be used to punish from fullscreen away and then go into a DHC. For example, if Peacock is committing to two George bombs, this super can punish her.
- Used as a combo ender on point when it will kill, or to DHC into another character. Since you can choose the direction, you can get back the corner if you didn't have it already as long as you're close to either side of the screen.
- You can also DHC after the car passes through the opponent for a side switch.
- It will only work as a reversal if you are in the corner and the opponent is right in your face. Otherwise, there is travel time and the opponent can avoid it by cancelling into an ivincible attack.
- The recovery is long so it's not very advantageous even when it hits. If OTG has been used and the opponent is knocked back into the corner Car punishable on hit by a large proportion of the cast (see the Counterplay section). You basically want to DHC from this super unless it will kill.
- The dust that appears before the car appears on screen can be used to tell which side the car will come out of. The car will appear on the side of the screen the dust is on.
|
|
|
Toggle Hitboxes Toggle Hitboxes
|
Beast of Gehenna
Level 1
|
 + +  + + 
|
|
| Guard
|
Properties
|
Damage
|
Meter
|
On Hit
|
On Block
|
On Pushblock
|
| Mid
|
50% Damage Scaling,
Invuln. (Full) (1 frame before flash),
Hit Grab
|
0, 1500
|
-100%
|
KD
|
N/A
|
|
| Startup
|
Active
|
Recovery
|
Hit Stun
|
Block Stun
|
Hit Stop
|
Super Hit Stop
|
| 12 + 15 + 5
|
480, 2
|
20
|
N/A
|
19
|
(2) N/A (9 on block)
|
{{{superhitstop}}}
|
|
|
|
|
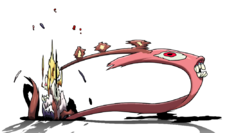
- Double descends into the floor to set a puddle in front of her which lingers for 8 seconds, then disappears. A monster will stick its head out and attempt to bite the opponent if they go over the puddle.
- The countdown timer will go 1.5x as fast when Double is not the point character.
- The puddle will disappear if Double is hit, even if it has already been activated.
- Used primarily to convert off of L Bomber, or as a DHC for conversions. Outside of combos, it's used to trap the opponent in the corner, or to set up tricky incoming mixups. Lastly, it can be used to make fridge safe on block.
- Convert easily using H Luger. A better conversion is 2MP, but it's more difficult to time.
- The puddle won't grab enemies being thrown.
- The puddle isn't triggered by projectiles.
- The opponent can whiff a move over the top of the puddle to trigger it without being grabbed, as long as the move retracts its hurtbox quickly enough.
- The puddle will not expire during the last part of Cerebella's Ultimate Showstopper, or the last part of Valentine's level 3.
- Commonly known as "monster", or "puddle".
|
|
|
"Dinner time!" Toggle Hitboxes Toggle Hitboxes
|
Catellite Lives
Level 2
|
 + +  + + 
|
|
| Guard
|
Properties
|
Damage
|
Meter
|
On Hit
|
On Block
|
On Pushblock
|
| Mid
|
Projectile, Invuln. (Full) (1 frame before flash)
|
200 xN (33 xN)
|
-200%
|
N/A
|
N/A
|
|
| Startup
|
Active
|
Recovery
|
Hit Stun
|
Block Stun
|
Hit Stop
|
Super Hit Stop
|
| 7 + 10
|
N/A
|
32
|
28
|
25
|
(2), 8
|
{{{superhitstop}}}
|
|
|
|
|
- Upon activation, 6 Ms. Fortune heads follow Double for 375f. The heads attack as Double presses attack buttons.
- L buttons make the heads attack forward along the ground.
- M buttons attack upwards at an angle.
- H buttons will attack downwards at an angle if they're in the air, or behave like the L buttons if they're on the ground.
- Used on point to extend pressure and keep your turn. As a DHC, it's amazing since it allows you to keep your turn as long as the super you're DHCing from is blocked.
- If the point's reversal whiffs, catheads can be punished since it has a lot of recovery.
- On block you still may be punished by PBGCs, invincible alpha counters, or alpha counter into super.
- Use throw inputs to have the heads attack without hitting the opponent as Double, which may add unwanted undizzy / IPS tracking.
- Although you get your turn, it can be hard to open up the opponent since Double has no quick overhead from the ground. However, jumping and mixing up between a low jLP and 2LK can be effective. Using Flesh Step will not work as a crossup if they're in continuous blockstun due to crossup protection from blockstun. However, if they pushblock, it's possible to crossup since they exit blockstun. In this case you can delay the cathead's attacks before attempting a Flesh Step crossup or low/throw mixup.
- Useful as a DHC in optimal combos. Can potentially do more damage than car for the same meter cost if you can get enough hits in and/or use any remaining undizzy effectively.
- The super ends early if Double leaves the screen.
- Double gains 16.6% of her usual meter gain as long as the super remains active.
- Commonly known as "catheads".
|
|
|
"Be praying..." Toggle Hitboxes Toggle Hitboxes
|
Nightmare Legion
Level 3
|
 + +  + + 
|
|
| Guard
|
Properties
|
Damage
|
Meter
|
On Hit
|
On Block
|
On Pushblock
|
| Mid
|
Invuln. (Full),
45% Minimum Scaling
|
0, 1500, 300x9, 0, 300x6, 2500 (200)
|
-300%
|
Sliding KD
|
-35
|
|
| Startup
|
Active
|
Recovery
|
Hit Stun
|
Block Stun
|
Hit Stop
|
Super Hit Stop
|
| 4 + 2
|
17
|
40
|
20
|
23
|
(6) 46 (10 on block)
|
{{{superhitstop}}}
|
|
|
|
|
- On hit, goes into a sequence of attacks as Double transforms into a variety of characters, ending in a sliding knockdown.
- A combo ender for lots of damage. Using this as a reversal works, but is extremely risky. It's very punishable, costs a lot of meter, and you can't convert into a full combo unless you spend even more meter to DHC.
- The full attack will only trigger after a successful first hit. If the point blocks but the move hits an assist, it will execute the attack but stop when the point blocks a hit. The follow up hits are all extremely advantageous on block, making this move safe if it hits an assist.
- If you haven't spent your OTG, you can follow up with a crossup car.
- Damage shows complete attack, frame data shows attack on whiff or block.
|
|
|
"Shoot the core!" Toggle Hitboxes Toggle Hitboxes
|
Megalith Array
Level 5
|
 , ,  + +  + + 
|
|
| Initial hit
|
Guard
|
Properties
|
Damage
|
Meter
|
On Hit
|
On Block
|
On Pushblock
|
| Mid
|
Invuln. (Full),
55% Minimum Scaling
|
2000 (200)
|
-500%
|
Ground Bounce
|
+25
|
|
| Startup
|
Active
|
Recovery
|
Hit Stun
|
Block Stun
|
Hit Stop
|
Super Hit Stop
|
| 4 + 1
|
3
|
0
|
22
|
25
|
(5), 12
|
{{{superhitstop}}}
|
|
|
|
| Initial hit (air)
|
Guard
|
Properties
|
Damage
|
Meter
|
On Hit
|
On Block
|
On Pushblock
|
| High
|
Invuln. (Full),
55% Minimum Scaling
|
100, 2000 (200, 200)
|
-500%
|
Ground Bounce
|
+23
|
|
| Startup
|
Active
|
Recovery
|
Hit Stun
|
Block Stun
|
Hit Stop
|
Super Hit Stop
|
| 4 + 1
|
(until ground), 3
|
0
|
55, 22
|
25 x2
|
(5), 10, 12
|
{{{superhitstop}}}
|
|
|
|

|
Guard
|
Properties
|
Damage
|
Meter
|
On Hit
|
On Block
|
On Pushblock
|
| Mid
|
45% Minimum Scaling,
Projectile
|
200 x3 (50 x3)
|
0%
|
N/A, KD (vs air)
|
N/A
|
|
| Startup
|
Active
|
Recovery
|
Hit Stun
|
Block Stun
|
Hit Stop
|
Super Hit Stop
|
| 8
|
--
|
35
|
30 x3
|
18 x3
|
8 x3
|
{{{superhitstop}}}
|
|
|
|

|
Guard
|
Properties
|
Damage
|
Meter
|
On Hit
|
On Block
|
On Pushblock
|
| Mid
|
45% Minimum Scaling,
Projectile
|
250 (100)
|
0%
|
KD
|
N/A
|
|
| Startup
|
Active
|
Recovery
|
Hit Stun
|
Block Stun
|
Hit Stop
|
Super Hit Stop
|
| 1
|
N/A
|
N/A
|
26
|
18
|
8
|
{{{superhitstop}}}
|
|
|
|

|
Guard
|
Properties
|
Damage
|
Meter
|
On Hit
|
On Block
|
On Pushblock
|
| Mid
|
45% Minimum Scaling,
Projectile
|
240 (100)
|
0%
|
N/A
|
N/A
|
|
| Startup
|
Active
|
Recovery
|
Hit Stun
|
Block Stun
|
Hit Stop
|
Super Hit Stop
|
| 1
|
N/A
|
N/A
|
26
|
18
|
8
|
{{{superhitstop}}}
|
|
|
|

|
Guard
|
Properties
|
Damage
|
Meter
|
On Hit
|
On Block
|
On Pushblock
|
| Mid
|
45% Minimum Scaling,
Projectile
|
265 x3 (100 x3)
|
0%
|
N/A, KD (vs air)
|
N/A
|
|
| Startup
|
Active
|
Recovery
|
Hit Stun
|
Block Stun
|
Hit Stop
|
Super Hit Stop
|
| 1
|
N/A
|
N/A
|
23 x3
|
18 x3
|
8 x3
|
{{{superhitstop}}}
|
|
|
|
 + +  / / 
|
Guard
|
Properties
|
Damage
|
Meter
|
On Hit
|
On Block
|
On Pushblock
|
| Mid
|
55% Minimum Scaling,
|
2250 (400)
|
0%
|
KD
|
-47
|
|
| Startup
|
Active
|
Recovery
|
Hit Stun
|
Block Stun
|
Hit Stop
|
Super Hit Stop
|
| 8
|
1
|
90
|
24
|
27
|
16
|
{{{superhitstop}}}
|
|
|
|
|
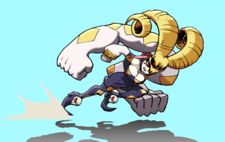
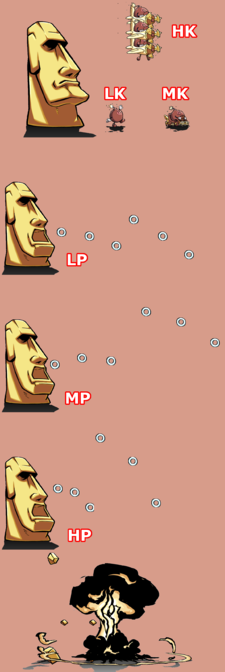
- Double transforms into a giant Easter Island statue which hits as an initial hit. For 600f, she can then shoot a variety of projectiles by pressing buttons. Punches put out three rings, and kicks put out bombs. The strength changes the formation of the rings and the type of the bombs. All projectiles will go away once the super ends.
- Can end the super early by exploding with 214P or 214K, which damages the opponent and inflicts 1500 recoverable damage to herself which cannot KO herself. If the timer runs out on its own, she will not explode. The explosion must be done in order to get the most damage out of this super.
- The most damaging super in the game if you can hit them with a lot of projectiles and the explosion. Can ToD in 3v3 with a 2LK starter.
- Methods for comboing the projectiles together:
- More details
- The meter gauge will drain during the super, so it can be used as a timer.
- Technically this is an air reversal option. Using this move in the air hits overhead and adds an initial hit and active frames as Double falls to the ground. This doesn't affect the number of invulnerable frames. It's easy to mash this super while being comboed, and your opponent can't mess up your input by crossing you up.
- After the initial invulnerability period, Double becomes vulnerable. She can begin attacking immediately after the active frames, but this will end her invulnerability.
- None of Double's attacks during this super can trigger IPS or build undizzy. Double will transform back to normal if she's hit.
- There is no recovery animation if she doesn't explode.
|
|
|
Taunt
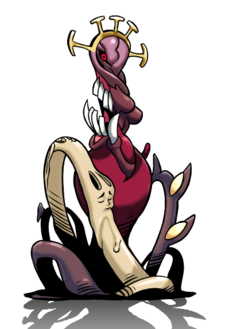
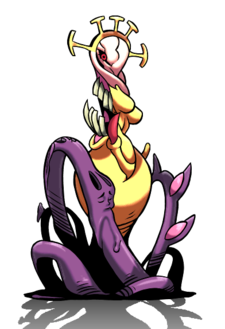
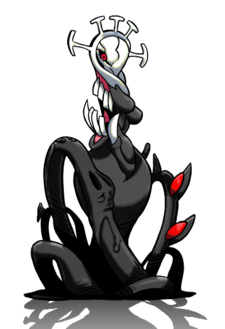
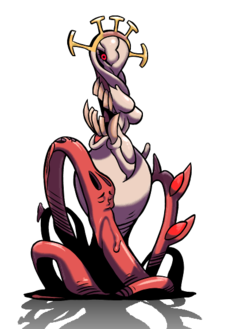
Colors
External Links
When browsing Skullheart, keep in mind it was most active when the game was on an older patch.
| General
|
|
| Characters
|
|
|
|
|
| Mechanics
|
|
| Other
|
|
 |140px]]
 |140px]]
 |140px]]
 |140px]]
 |140px]]


 |140px]]
 |140px]]
 |140px]]
 |140px]]
 |140px]]


 |140px]]
 |140px]]
 |140px]]
 |140px]]
 |140px]]


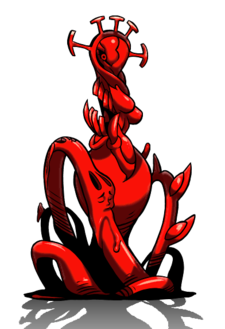 |140px]]
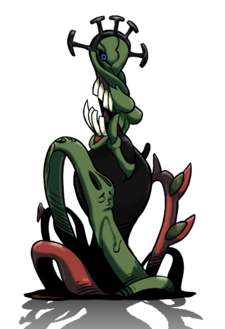 |140px]]
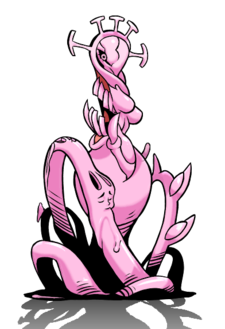 |140px]]
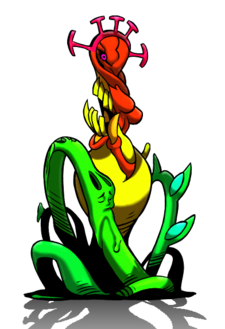 |140px]]
 |140px]]


 |140px]]
 |140px]]
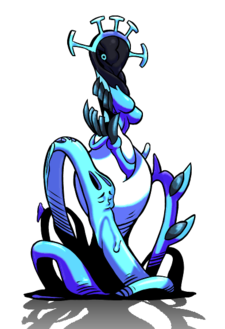
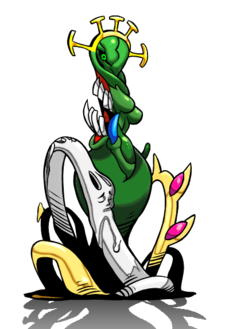
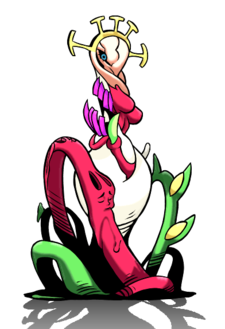
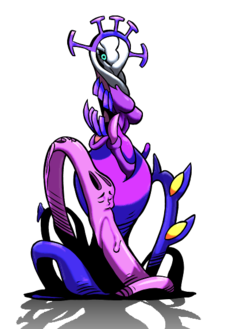 |140px]]
 |140px]]
 |140px]]


