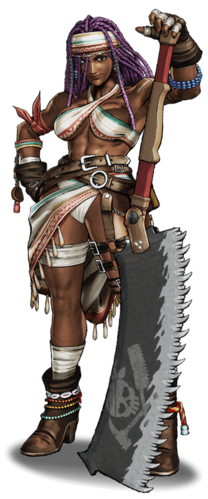
Darli Dagger
ダーリィ ダガ, Dāryi Dagā Introduction
Darli is a real powerhouse of a character. She feels most at home at the mid- to close-range, although she also has access to some light anti-zoning tools and a somewhat unconventional mobility option in her Blade Surf special move. Once Darli gets in, she can assert herself with her great normals and above-average grab game. She has access to an easy crossup in j.B which, when coupled with her fast jump, makes Darli’s close range game extra scary. She also has access to some truly monstrous Unblockables which, while slow and honestly kinda gimmicky can end the entire round right there, should they connect.
Darli’s main weakness would be her versatility. While she is very good at playing rushdown, she can’t adapt to most situations as well as other characters can. Her supers (Both WFT and SSM) also suffer from extremely short range which makes it hard for Darli to punish her enemies effectively.
| Strengths |
Weaknesses
|
- Scary up-close game
- High damage
- Unblockables
|
- Needs to stick to her gameplan at all times
- Very short range on both her WFT and her SSM
- Somewhat easy to keep out
|
Data
- Damage Taken: 100%
- Rage Factor: 0.32
- Rage Duration: 7 seconds
- Jump: 43 frames (Fast. Back jump is 40F)
- Forward Walk Speed: 0.3 (Average)
- Back Walk Speed: 0.25 (Above Average)
- Dash Speed: 1.1 (Slow)
- Back Dash: 27 frames
- Weapon Pickup / Drop: 40 / 64 frames
Gameplan
Darli prefers to play at close/mid range so that she can oppress the opponent with buttons and some mindgames. 236S is her primary tool for getting in from cancelable normals: it gives her both damage and positions her at her best spacing. Once she's in, she has n.5B and 2B as powerful setups for combos or recoils, and her jump-ins can act as savage cross-ups or help her defend her position in the air. At close range, both her normal throw and her 214K command throw lets her set up safejumps, and 214K can be used to challenge certain strings/moves or wakeup rolls and get corner carry as a reward.
Playing the close-mid game also gives Darli room to play with overheads, both the universal one and her 214S as a second option that can be feinted with a backdash to bait attacks and punish. She also has good options for damage, carry, or knockdown off of throw. Her 2D and 3D both happen to be relatively quick as far as kicks go, so they can help enforce a low game if used carefully despite not being cancelable.
However, once Darli is pushed out, she has a tough time working her way back in, and while she does have a fair share of punish options, she doesn't have a ton of flexibility with them if she's been put too far out of her comfort zone. Do your best to maintain at midrange.
Neutral
As far as pokes go, 5B is Darli's least committal button at midrange. With the 1.11 changes it is now cancelable on hit, and combined with the changes to 236S as well as 236K's incredible reach, she now has a way to convert the pokes from it into a strong positional shift.
2B is a bit slower and has slightly shorter reach, so it's better mostly as a punish--that said, it does have a little more reach than it seems, so when it's well-spaced and the opponent is a little intimidated, it can be put out as a deterrent. It also has some use as an anti-air, but n.5B is generally more reliable for that due to how the hitbox works.
Once she's in close, 5A, 2A, and n.5B (and occasionally 2B) are all good oppressive tools. Though 5A and 2A don't have much in the way of guaranteed combos outside of 236A, they're good for pressuring the opponent a little bit, potentially setting things up for tick throws. n.5B is much more flexible, especially now that 1.11 has reduced the pushback on it--236S is still an option, but you can also use 236K if you're looking for corner carry.
When it comes to punishes, 5C, 66B, 66C, and 66D all do the job in different ways. 5C dos a lot of damage and as of 1.11 is a bit faster than it used to be, but getting deflected and losing your weapon is a dangerous gamble. 66B is the fastest option of the four but has no follow ups. 66C and 66D are slower but knock down--with the changes to 66C in 1.11, choosing between it and 66D is mostly a matter of trying to either enforce a guessing game of high or low, or using 66D to go over incoming lows if you have good timing. 5C does the most damage, even if the spacing is a little off, but the whiff recovery is nasty. 5B's cancel property as of 1.11 also makes it a viable option if you're in a little closer.
For air-to-air, j.B and j.C both have amazing reach; j.B is slightly better to preempt your opponent in close air scrambles while j.C is better if you jump from farther out and have enough time to let it wind up. j.C also has slightly more utility as an air-to-ground button provided the spacing is correct, especially if you've set up a safejump. j.A is much shorter ranged but is especially fast if you think the timing is going to be too tight for a j.B or j.C, and j.D has so-so reach towards the ground.
Okizeme
Once the opponent is knocked down, Darli has a few oki options. The timing for safejumps are all relatively similar, though the button that you'll be using is different depending on the situation. If you're not directly at midscreen, getting a 214K or 236K that puts the opponent to the corner will usually give you enough time to jump in with a j.B to try and set up for crossup oki shenanigans, a j.C to stuff most attacks, or land safely and block whatever your opponent puts out next, provided that you time your jump correctly. If the opponent is going for rolls, particularly to side switch you, you have two options--charging 214S on initial knockdown and releasing it if they roll past you, or grabbing them with 214K to put them back in the blender. Between these two options, 214K is more reliable and generally less likely to backfire on you badly.
Aside from using 214S for sideswitch shenanigans, you can use it to bait wakeup attacks by backdash canceling it. Once the opponent is conditioned, this can be an essential part of mindgames, especially if using 214A and getting enough charge time for a full charge or close to.
Normal Moves
Far Slashes
5A
5A
|
| Damage
|
Guard
|
Startup
|
Active
|
Recovery
|
Total
|
Hit Adv
|
Block Adv
|
Guard Dmg
|
Cancel
|
Recoil
|
Deflectable
|
Unarmed
|
| 30
|
Mid
|
5
|
-
|
-
|
-
|
-2
|
-5
|
-
|
Yes
|
-
|
-
|
-
|
A smack with the bottom of the saw.
|
|
5B
5B
|
| Damage
|
Guard
|
Startup
|
Active
|
Recovery
|
Total
|
Hit Adv
|
Block Adv
|
Guard Dmg
|
Cancel
|
Recoil
|
Deflectable
|
Unarmed
|
| 110 (50, 10x6)
|
Mid
|
11
|
-
|
-
|
-
|
-9
|
-13
|
-
|
Yes (on first hit)
|
-
|
-
|
-
|
Darli swings the saw in, then pulls it back. If you're not close enough some hits will whiff. Now cancelable on the first hit, allowing you to easily get 236S or 236K at most ranges.
|
|
5C
5C
|
| Damage
|
Guard
|
Startup
|
Active
|
Recovery
|
Total
|
Hit Adv
|
Block Adv
|
Guard Dmg
|
Cancel
|
Recoil
|
Deflectable
|
Unarmed
|
200 (max range)
305 (closer, 50, 25x6, 80)
|
Mid
|
23
|
-
|
-
|
-
|
KD
|
-39
|
-
|
No
|
-
|
-
|
-
|
Darli swings her saw overhead. If at the tip of the range, you only get one hit; if you're closer (but not close enough for n5C), you'll get a saw effect where she pulls it out of the enemy. Has less startup as of 1.11.
|
|
2A
2A
|
| Damage
|
Guard
|
Startup
|
Active
|
Recovery
|
Total
|
Hit Adv
|
Block Adv
|
Guard Dmg
|
Cancel
|
Recoil
|
Deflectable
|
Unarmed
|
| 30
|
Mid
|
6
|
-
|
-
|
-
|
0
|
-5
|
-
|
Yes
|
-
|
-
|
-
|
A crouching version of 5A.
|
|
2B
2B
|
| Damage
|
Guard
|
Startup
|
Active
|
Recovery
|
Total
|
Hit Adv
|
Block Adv
|
Guard Dmg
|
Cancel
|
Recoil
|
Deflectable
|
Unarmed
|
| 90
|
Mid
|
11
|
-
|
-
|
-
|
-9
|
-12
|
-
|
Yes
|
-
|
-
|
-
|
Darli chops her saw downward.
|
|
2C
2C
|
| Damage
|
Guard
|
Startup
|
Active
|
Recovery
|
Total
|
Hit Adv
|
Block Adv
|
Guard Dmg
|
Cancel
|
Recoil
|
Deflectable
|
Unarmed
|
| 250 (50, 100x2)
|
Mid
|
24
|
-
|
-
|
-
|
KD
|
-42
|
-
|
No
|
-
|
-
|
-
|
Darli swings her saw upward.
|
|
Near Slashes
n.5B
n.5B
|
| Damage
|
Guard
|
Startup
|
Active
|
Recovery
|
Total
|
Hit Adv
|
Block Adv
|
Guard Dmg
|
Cancel
|
Recoil
|
Deflectable
|
Unarmed
|
| 80
|
Mid
|
7
|
-
|
-
|
-
|
-2
|
-12
|
-
|
Yes
|
-
|
-
|
-
|
Darli quickly swings her saw upward. Pushes the opponent back less on hit in 1.11, giving it more reliability in jump-in combos as well as landing 236S or WFT.
|
|
n.5C
n.5C
|
| Damage
|
Guard
|
Startup
|
Active
|
Recovery
|
Total
|
Hit Adv
|
Block Adv
|
Guard Dmg
|
Cancel
|
Recoil
|
Deflectable
|
Unarmed
|
| 225 (150, 50, 25)
|
Mid
|
25
|
-
|
-
|
-
|
KD
|
-29
|
-
|
No
|
-
|
-
|
-
|
|
|
|
n.2C
n.2C
|
| Damage
|
Guard
|
Startup
|
Active
|
Recovery
|
Total
|
Hit Adv
|
Block Adv
|
Guard Dmg
|
Cancel
|
Recoil
|
Deflectable
|
Unarmed
|
| 200
|
Low
|
20
|
-
|
-
|
-
|
KD
|
-28
|
-
|
No
|
-
|
-
|
-
|
Darli swings her saw up and back a bit.
|
|
Kicks
5D
5D
|
| Damage
|
Guard
|
Startup
|
Active
|
Recovery
|
Total
|
Hit Adv
|
Block Adv
|
Guard Dmg
|
Cancel
|
Recoil
|
Deflectable
|
Unarmed
|
| 50
|
Mid
|
13
|
-
|
-
|
-
|
-6
|
-13
|
-
|
No
|
-
|
-
|
-
|
A swinging kick with the rear leg.
|
|
6D
6D
|
| Damage
|
Guard
|
Startup
|
Active
|
Recovery
|
Total
|
Hit Adv
|
Block Adv
|
Guard Dmg
|
Cancel
|
Recoil
|
Deflectable
|
Unarmed
|
| 60
|
Low
|
17
|
-
|
-
|
-
|
KD
|
-17
|
-
|
No
|
-
|
-
|
-
|
Darli swings her foot up for a stomp. Despite the animation, this is a low.
|
|
2D
2D
|
| Damage
|
Guard
|
Startup
|
Active
|
Recovery
|
Total
|
Hit Adv
|
Block Adv
|
Guard Dmg
|
Cancel
|
Recoil
|
Deflectable
|
Unarmed
|
| 20
|
Low
|
6
|
-
|
-
|
-
|
-4
|
-7
|
-
|
Yes(Whiff Only)
|
-
|
-
|
Yes
|
A straight leg kick. Fast but weak.
|
|
3D
3D
|
| Damage
|
Guard
|
Startup
|
Active
|
Recovery
|
Total
|
Hit Adv
|
Block Adv
|
Guard Dmg
|
Cancel
|
Recoil
|
Deflectable
|
Unarmed
|
| 70
|
Low
|
6
|
-
|
-
|
-
|
KD
|
-14
|
-
|
No
|
-
|
-
|
Yes
|
A sweeping kick. Knocks down.
|
|
Dash Normals
66A
66A
|
| Damage
|
Guard
|
Startup
|
Active
|
Recovery
|
Total
|
Hit Adv
|
Block Adv
|
Guard Dmg
|
Cancel
|
Recoil
|
Deflectable
|
Unarmed
|
| 30
|
Mid
|
5
|
-
|
-
|
-
|
-3
|
-42
|
-
|
-
|
-
|
-
|
-
|
A dashing version of 5A. Not cancelable on hit but appears to retain a whiff cancel window. Is a bit safer to use in 1.11 thanks to decreased recovery on block and no disarmament if it's deflected.
|
|
66B
66B
|
| Damage
|
Guard
|
Startup
|
Active
|
Recovery
|
Total
|
Hit Adv
|
Block Adv
|
Guard Dmg
|
Cancel
|
Recoil
|
Deflectable
|
Unarmed
|
| 110 (30, 20x2, 10x2, 30)
|
Mid
|
8
|
-
|
-
|
-
|
-2
|
-36
|
-
|
No
|
-
|
-
|
No
|
A dashing version of 5B. The damage is distributed a little differently, with most of the power coming from the first and last hits with one less actual hit. Has a wider hitbox as of 1.11 so it's more likely to hit.
|
|
66C
66C
|
| Damage
|
Guard
|
Startup
|
Active
|
Recovery
|
Total
|
Hit Adv
|
Block Adv
|
Guard Dmg
|
Cancel
|
Recoil
|
Deflectable
|
Unarmed
|
| 150
|
Low
|
14
|
-
|
-
|
-
|
KD
|
-24
|
-
|
No
|
-
|
-
|
No
|
A dashing version of her n.2C that does less damage. Got a range buff in 1.11, putting it a bit closer to 66D's reach.
|
|
66D
66D
|
| Version
|
Damage
|
Guard
|
Startup
|
Active
|
Recovery
|
Total
|
Hit Adv
|
Block Adv
|
Guard Dmg
|
Cancel
|
Recoil
|
Deflectable
|
Unarmed
|
| Armed
|
70
|
High
|
20
|
-
|
-
|
-
|
KD
|
-46
|
-
|
No
|
-
|
No
|
No
|
| Unarmed
|
-
|
High
|
17
|
-
|
-
|
-
|
KD
|
-49
|
-
|
-
|
-
|
No
|
Yes
|
Darli does a dropkick using her saw as a vault. Can go over lows. Unarmed version is 3 frames faster, but has 3 less frames of blockstun. Has reduced recovery in 1.11 and is counted as aerial the moment Darli's feet leave the gound.
|
|
Air Normals
j.A
j.A
|
| Damage
|
Guard
|
Startup
|
Active
|
Recovery
|
Total
|
Hit Adv
|
Block Adv
|
Guard Dmg
|
Cancel
|
Recoil
|
Deflectable
|
Unarmed
|
| 30
|
High
|
10
|
-
|
-
|
-
|
-
|
-
|
-
|
No
|
-
|
-
|
No
|
|
|
|
j.B
j.B
|
| Damage
|
Guard
|
Startup
|
Active
|
Recovery
|
Total
|
Hit Adv
|
Block Adv
|
Guard Dmg
|
Cancel
|
Recoil
|
Deflectable
|
Unarmed
|
| 100
|
High
|
11
|
-
|
-
|
-
|
-
|
-
|
-
|
No
|
-
|
-
|
No
|
An upward swing with the saw. Can cross-up!
|
|
j.C
j.C
|
| Damage
|
Guard
|
Startup
|
Active
|
Recovery
|
Total
|
Hit Adv
|
Block Adv
|
Guard Dmg
|
Cancel
|
Recoil
|
Deflectable
|
Unarmed
|
| 150
|
High
|
14
|
-
|
-
|
-
|
-
|
-
|
-
|
No
|
-
|
-
|
No
|
A big downward saw swing.
|
|
j.D
j.D
|
| Damage
|
Guard
|
Startup
|
Active
|
Recovery
|
Total
|
Hit Adv
|
Block Adv
|
Guard Dmg
|
Cancel
|
Recoil
|
Deflectable
|
Unarmed
|
| 30
|
High
|
8
|
-
|
-
|
-
|
-
|
-
|
-
|
No
|
-
|
-
|
No
|
|
|
|
Unarmed Normals
u.5S
u.5S
|
| Damage
|
Guard
|
Startup
|
Active
|
Recovery
|
Total
|
Hit Adv
|
Block Adv
|
Guard Dmg
|
Cancel
|
Recoil
|
Deflectable
|
Unarmed
|
| 50
|
Mid
|
12
|
-
|
-
|
-
|
-9
|
-14
|
-
|
No
|
-
|
-
|
Yes
|
|
|
|
u.2S
u.2S
|
| Damage
|
Guard
|
Startup
|
Active
|
Recovery
|
Total
|
Hit Adv
|
Block Adv
|
Guard Dmg
|
Cancel
|
Recoil
|
Deflectable
|
Unarmed
|
| 50
|
Low
|
12
|
-
|
-
|
-
|
-4
|
-9
|
-
|
No
|
-
|
-
|
Yes
|
A hook punch to the ankles.
|
|
ju.S
ju.S
|
| Damage
|
Guard
|
Startup
|
Active
|
Recovery
|
Total
|
Hit Adv
|
Block Adv
|
Guard Dmg
|
Cancel
|
Recoil
|
Deflectable
|
Unarmed
|
| 50
|
High
|
7
|
-
|
-
|
-
|
-
|
-
|
-
|
-
|
-
|
-
|
Yes
|
|
|
|
u.66S
u.66S
|
| Damage
|
Guard
|
Startup
|
Active
|
Recovery
|
Total
|
Hit Adv
|
Block Adv
|
Guard Dmg
|
Cancel
|
Recoil
|
Deflectable
|
Unarmed
|
| 50
|
Mid
|
8
|
-
|
-
|
-
|
-
|
-7
|
-
|
No
|
-
|
-
|
Yes
|
A dashing uppercut. Knocks down.
|
|
Universal Mechanics
Guard Break
Guard Break (Throw)
4/6C+D Forward Throw Forward Throw Back Throw Back Throw
|
| Version
|
Damage
|
Guard
|
Startup
|
Active
|
Recovery
|
Total
|
Hit Adv
|
Block Adv
|
Guard Dmg
|
Cancel
|
Recoil
|
Deflectable
|
Unarmed
|
| Forward
|
-
|
-
|
4
|
-
|
-
|
-
|
20
|
-
|
-
|
-
|
-
|
-
|
-
|
Universal throw. Can be followed up with an attack.
|
| Back
|
-
|
-
|
6
|
-
|
-
|
-
|
25
|
-
|
-
|
-
|
-
|
-
|
-
|
Universal throw. Can be followed up with an attack.
|
|
Surprise Attack
Surprise Attack (Overhead)
5B+C
|
| Version
|
Damage
|
Guard
|
Startup
|
Active
|
Recovery
|
Total
|
Hit Adv
|
Block Adv
|
Guard Dmg
|
Cancel
|
Recoil
|
Deflectable
|
Unarmed
|
| Armed
|
80
|
High
|
23
|
-
|
-
|
-
|
4
|
-14
|
-
|
-
|
-
|
-
|
No
|
|
|
| Unarmed
|
70
|
High
|
16
|
-
|
-
|
-
|
4
|
-9
|
-
|
-
|
-
|
-
|
Yes
|
|
|
|
Dodge
Dodge
5A+B
|
| Damage
|
Guard
|
Startup
|
Active
|
Recovery
|
Total
|
Hit Adv
|
Block Adv
|
Guard Dmg
|
Cancel
|
Recoil
|
Deflectable
|
Unarmed
|
| 0
|
N/A
|
1
|
16
|
22
|
-
|
N/A
|
N/A
|
-
|
N/A
|
-
|
N/A
|
Yes
|
Universal dodge. Avoids all attacks for a brief moment, and is mainly used to avoid throws.
Complete invincibility from frames 1 to 10. Strike invincibility from frames 11 to 16.
|
|
Counter / Blade Catch
Counter / Blade Catch
236A+B Counter Counter Blade Catch Blade Catch
|
| Version
|
Damage
|
Guard
|
Startup
|
Active
|
Recovery
|
Total
|
Hit Adv
|
Block Adv
|
Guard Dmg
|
Cancel
|
Recoil
|
Deflectable
|
Unarmed
|
| Armed
|
0
|
N/A
|
2
|
11
|
34
|
-
|
+35~+59
|
N/A
|
-
|
N/A
|
-
|
N/A
|
No
|
Universal counter. Allows you to follow up with a guaranteed attack of your own. The amount of time you have to followup depends on the strength of the attack you counter, with heavy attacks staggering the opponent for the longest amount of time. Additionally you counter a heavy slash or a running slash, your opponent will be disarmed.
|
| Disarmed
|
0
|
N/A
|
2
|
12
|
22
|
-
|
KD
|
N/A
|
-
|
N/A
|
-
|
N/A
|
Yes
|
Universal counter. While disarmed, your counter will disarm and knock away your opponent regardless of slash level countered.
|
|
Rage Explosion
Rage Explosion
5A+B+C
|
| Damage
|
Guard
|
Startup
|
Active
|
Recovery
|
Total
|
Hit Adv
|
Block Adv
|
Guard Dmg
|
Cancel
|
Recoil
|
Deflectable
|
Unarmed
|
| 0
|
-
|
-
|
-
|
-
|
-
|
-
|
-
|
-
|
-
|
-
|
-
|
-
|
Unblockable pushback attack.
|
|
Lightning Blade
Lightning Blade (Issen)
5A+B+C during Rage Explosion
|
| Damage
|
Guard
|
Startup
|
Active
|
Recovery
|
Total
|
Hit Adv
|
Block Adv
|
Guard Dmg
|
Cancel
|
Recoil
|
Deflectable
|
Unarmed
|
| -
|
-
|
-
|
-
|
-
|
-
|
-
|
-
|
-
|
-
|
-
|
-
|
-
|
Has projectile invulnerability and anti-airs. Damage scales up based on remaining health.
|
|
Special Moves
Blade Surf
Blade Surf
236S COWABUNGA IT IS COWABUNGA IT IS
|
| Version
|
Damage
|
Guard
|
Startup
|
Active
|
Recovery
|
Total
|
Hit Adv
|
Block Adv
|
Guard Dmg
|
Cancel
|
Recoil
|
Deflectable
|
Unarmed
|
| A
|
90 (30x3)
|
Mid
|
12
|
-
|
-
|
-
|
KD
|
-
|
-
|
No
|
-
|
-
|
No
|
Darli jumps forward with a blue wave effect on her saw. 3 hits. All versions have a ton of recovery, so don't throw them out carelessly. Their trajectories make them odd, and somewhat workable, anti-airs or jump deterrents when used correctly. Light version will land Darli right in front of the opponent's face. The bigger hitbox and increased damage for this version of the move in 1.11 makes it a more reliable conversion from both 5B and 2B.
|
| B
|
100 (10, 20x2, 50)
|
Mid
|
15
|
-
|
-
|
-
|
KD
|
-
|
-
|
No
|
-
|
-
|
No
|
4 hits. Goes a bit higher and farther than light version, and Darli lands on the other side of the opponent. Got the same changes as the A version, making it a fantastic conversion tool on hit.
|
| C
|
130 (10x2, 30x2, 50)
|
Mid
|
20
|
-
|
-
|
-
|
KD
|
-
|
-
|
No
|
-
|
-
|
No
|
5 hits. Travels the highest and farthest of all three versions, and is the most punishable. Darli lands at about the same position as the medium version. Got faster in 1.11, making it more reliable.
|
| Rage
|
252 (12x6, 60, 120)
|
Mid
|
-
|
-
|
-
|
-
|
-
|
-
|
-
|
No
|
-
|
-
|
No
|
Same trajectory as the Heavy version, but has 7 hits, with an extra attack on landing that knocks the opponent to the other side of the screen if it hits. 1.11 gave it a bigger hitbox and more forward motion on startup.
|
|
Serpentine Breaker
Serpentine Breaker
214S (hold S to charge) Stop! Stop! Hammer time. Hammer time.
|
| Version
|
Damage
|
Guard
|
Startup
|
Active
|
Recovery
|
Total
|
Hit Adv
|
Block Adv
|
Guard Dmg
|
Cancel
|
Recoil
|
Deflectable
|
Unarmed
|
| A (Uncharged)
|
80
|
Mid
|
41
|
-
|
-
|
-
|
-8
|
-20
|
-
|
No
|
-
|
-
|
No
|
Darli pulls out a hammer and holds it while the button is held down. She swings it when the button is released, creating a spark when she swings. This move will autocorrect to hit an opponent behind Darli if the button is released once the opponent has crossed behind her, and can be backdash canceled while holding it. If she hits a projectile with the hammer, it's reflected; if the projectile is hit by the spark, it's negated. Half charged at about 1.5 seconds, fully charged at about 2 seconds. All fully charged versions have a point of armor.
|
| A (Half-charged)
|
160 (80x2)
|
Mid
|
-
|
-
|
-
|
-
|
-
|
-
|
-
|
No
|
-
|
-
|
No
|
Darli swings the hammer around, then overhead, creating two sparks.
|
| A (Charged)
|
200
|
Unblockable
|
-
|
-
|
-
|
-
|
-
|
-
|
-
|
No
|
-
|
-
|
No
|
Darli jumps up and swings the hammer down.
|
| B (Uncharged)
|
90
|
Mid
|
45
|
-
|
-
|
-
|
-8
|
-20
|
-
|
No
|
-
|
-
|
No
|
Half charged at about 2 seconds, fully charged at about 3 seconds.
|
| B (Half-charged)
|
220 (100, 120)
|
Mid
|
-
|
-
|
-
|
-
|
-
|
-
|
-
|
No
|
-
|
-
|
No
|
Similar to the Light version.
|
| B (Charged)
|
250
|
Unblockable
|
-
|
-
|
-
|
-
|
-
|
-
|
-
|
No
|
-
|
-
|
No
|
Similar to the Light version, but hits full-screen.
|
| C (Uncharged)
|
100
|
Mid
|
49
|
-
|
-
|
-
|
-8
|
-20
|
-
|
No
|
-
|
-
|
No
|
Half charged at about 2 seconds, fully charged at about 4 seconds.
|
| C (Half-charged)
|
180 (80, 100)
|
Mid
|
-
|
-
|
-
|
-
|
-
|
-
|
-
|
No
|
-
|
-
|
No
|
Similar to the Medium version, but forces a stun state onto the opponent when it hits and they've recovered from the hit, allowing for free combos.
|
| C (Charged)
|
500
|
Unblockable
|
-
|
-
|
-
|
-
|
-
|
-
|
-
|
No
|
-
|
-
|
No
|
Similar to the Medium version, but does much more damage and forces stun state like the half-charged version does.
|
|
High Tide
High Tide
236K Catch... Catch... ...and release! ...and release!
|
| Damage
|
Guard
|
Startup
|
Active
|
Recovery
|
Total
|
Hit Adv
|
Block Adv
|
Guard Dmg
|
Cancel
|
Recoil
|
Deflectable
|
Unarmed
|
| 110 (10, 100)
|
Mid
|
18
|
-
|
-
|
-
|
KD
|
-22
|
-
|
No
|
-
|
-
|
No
|
Darli swings her saw forward. If it hits, she pulls the opponent in, then knees them away from her. Has incredible reach--if she's standing on the edge of the screen it will reach the middle.
|
|
Riptide Pierce
Riptide Pierce
214K Drill, baby, drill Drill, baby, drill
|
| Damage
|
Guard
|
Startup
|
Active
|
Recovery
|
Total
|
Hit Adv
|
Block Adv
|
Guard Dmg
|
Cancel
|
Recoil
|
Deflectable
|
Unarmed
|
| 140 (20x7)
|
Throw
|
6
|
-
|
-
|
-
|
KD
|
-
|
-
|
No
|
-
|
-
|
No
|
Command throw. Darli uses a drill and grinds the opponent's guts with it before it breaks and blasts them away from her.
|
|
Point Break
Point Break
236S "Why I oughta.." "Why I oughta.." The spirit of Galactica Phantom comes to Samurai Shodown 2019 The spirit of Galactica Phantom comes to Samurai Shodown 2019
|
| Version
|
Damage
|
Guard
|
Startup
|
Active
|
Recovery
|
Total
|
Hit Adv
|
Block Adv
|
Guard Dmg
|
Cancel
|
Recoil
|
Deflectable
|
Unarmed
|
| A
|
300
|
Mid
|
85
|
-
|
-
|
-
|
KD
|
-
|
-
|
No
|
-
|
No
|
Only
|
Darli rolls her shoulder a bit as she walks forward, then punches. Blockable, but it can be canceled with either a forward dash or a backdash, and it does a lot of damage.
|
| B
|
300
|
Mid
|
85
|
-
|
-
|
-
|
KD
|
-
|
-
|
No
|
-
|
No
|
Only
|
No known differences from the light version.
|
| C
|
600
|
Unblockable
|
85
|
-
|
-
|
-
|
KD
|
-
|
-
|
No
|
-
|
No
|
Only
|
Does the most damage of all three versions, but cannot be backdash canceled. Instead, it gets one guard point during startup and is completely unblockable. It is visibly similar to the other versions so it can be used as a very, very limited mixup tool. Use only if you know you can land it.
|
|
Supers
Weapon Flipping Technique
Lagoon Onslaught
236B+C
|
| Damage
|
Guard
|
Startup
|
Active
|
Recovery
|
Total
|
Hit Adv
|
Block Adv
|
Guard Dmg
|
Cancel
|
Recoil
|
Deflectable
|
Unarmed
|
| 408
|
Mid
|
-
|
-
|
-
|
-
|
KD
|
-
|
-
|
-
|
-
|
-
|
No
|
Darli hits the opponent with an uppercut, then two more blows from her saw. Has a guard point during the startup so she can block incoming attacks. The rest of the move will come out on block, but not on whiff. Available only during Max Rage or Rage Explosion. Disarms opponent on hit.
|
|
Super Special Move
Perfect Storm
641236C+D HISSATSU! HISSATSU! A shipwright's drill is her soul. A shipwright's drill is her soul.
|
| Damage
|
Guard
|
Startup
|
Active
|
Recovery
|
Total
|
Hit Adv
|
Block Adv
|
Guard Dmg
|
Cancel
|
Recoil
|
Deflectable
|
Unarmed
|
| 680
|
Mid
|
-
|
-
|
-
|
-
|
KD
|
-
|
-
|
No
|
-
|
-
|
No
|
Available only once per match.
|
|
Combos
Midscreen
- 5A/2A xx...
- 236A
A short and quick combo into 236A for knockdown at midscreen.
- 236BC
Combo straight into WFT. You need to be in close for this to work or it'll whiff hard.
- 2B/n.5B xx...
- 236S
Good close range conversion into 236S. This doesn't work very well at 2B's max range, though. Use n.5B when at all possible.
- 236K
At ranges where you know you're not getting n.5B, or if you hit with the tip of 2B, this combo is what you want. For some characters with smaller hitboxes, sometimes 236K will whiff.
- 236BC
Combo into WFT. Much like comboing off of 5A/2A, you need to be in close or you'll get a whiff.
- CD/4CD...
- 5B 236S/236K
1.11 conversion thanks to the changes to 5B. Easy conversion option.
- 5C
1.11 conversion thanks to 5C's decreased startup.
- 66C
Max damage option from a forward throw. Gives a knockdown.
- 236A/236B
Similar to 5A/2A 236A, gives you good positioning.
- Max damage option from a back throw. If you're having trouble getting 5C, try double or triple tapping C as the backthrow ends, though it should be easier in 1.11.
- j.B/j.C...
- n.5B xx 236A/236B/236BC
If you hit with a deep jump-in for j.B or j.C, this is basically your max damage combo. The timing can be a little strange when going from j.B/j.C to n.5B; if you're having trouble try to make sure you're not hitting the opponent too high in your jump arc, and that you're not pressing 5B too early. Thanks to reduced pushback on n.5B in 1.11 it should be possible to get WFT if the n.5B lands.
- 2B xx 236K
If you're worried that you're out of range for n.5B, you can go into this instead.
- j.C...
- 5C
Requires a deep hit but it will work.
- 214C (half/max charge)... (Note: these combos are real, but will require your opponent to be very scared of your charges and not try to knock you out of them. Don't focus on setting these up unless you've conditioned them to get hit.)
- 641236CD
Max damage followup after a half/max charged 214C. The stun will give you more than enough time to run up if you're at more than half-screen.
- j.B/j.C n.5B/2B...:
Jump-in combo. You'll have to time it carefully to make sure you don't whiff the jump-in while the opponent is stunned. Refer to the j.B/j.C starters above for combo options.
- 2BCD 236C
Self-disarm for a guaranteed 236C. Much like going into SSM, this will basically do enough damage to end a round flat.
Corner
Pretty much all of Darli's midscreen combos work in the corner, too.
- n.5B/2B xx 236S/236K
- Guaranteed in the corner.
- CD...
- n.5B xx 236A/236B/236K
Similar to the throw combo above, but with n.5B added for more damage.
- microwalk n.5B xx 236BC
Throw combo into WFT. Microwalk is required to keep n.5B from whiffing.
Videos
Colors
External Links


