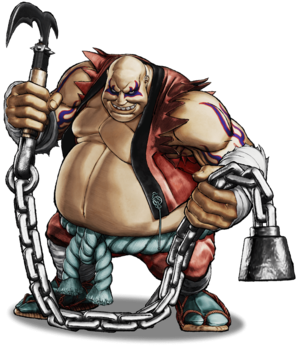
Earthquake
アースクェイク, Āsukweiku Introduction
Earthquake has strong control over the mid-range, with many of his key pokes knocking down on hit. His dangerous ranged lows force the opponent to crouch-block often, restricting their movement. On top of that, he has reliable and strong punishment tools from any range, and a great WFT to boot.
Somewhat surprisingly for a character of his statue, Earthquake is also remarkably difficult to pin down, as he has access to a walljump, a teleport and even a weird pseudo-divekick that can alter his jump trajectory. His jumping normals are excellent, with j.C in particular being one of the most oppressive air-to-ground normals in the entire game. On the flipside, Earthquake has some of the worst ground movement among the cast, forcing him to play a much slower paced game than other characters. His normals are also slow to recover and easy to jump over, making mistakes very costly for him.
| Strengths |
Weaknesses
|
- Long reach
- Surprisingly okay mobility
- Reliable Punishment
|
- Sluggish normals
- Slow walk speed, slowest run speed in the game
- Big hurtbox
|
Data
- Damage Taken: 95%
- Rage Factor: 0.28
- Rage Duration: 10 seconds
- Jump: 48 frames (Slow)
- Forward Walk Speed: 0.15 (Extremely Slow)
- Back Walk Speed: 0.12 (Extremely Slow)
- Dash Speed: 0.55 (Extremely Slow)
- Back Dash: 27 frames
- Weapon Pickup / Drop: 40 / 70 frames
Gameplan
Similar to the Strategy section of the 5sp wiki pages. List Earthquake archetype, strengths, weaknesses, etc. Sample subsections could include Neutral, Okizeme, etc.
Neutral
Okizeme
Setting up Command Grabs
Fat Bomber is a neat little addition to Earthquake's moveset that has a surprising number of useful setups. It only deals around 140 damage, but it has good range, recovers quickly and gives you a knockdown, which EQ can build momentum off of.
From A/B Chainsaw
Cancelling 5A into A Fat Chainsaw from tip range won't actually hit the opponent but it will move you into point blank range. Since Chainsaw recovers so quickly and because your opponent is probably looking for a block punish, you can sneak in a grab here. If your opponent knows about the setup, mix it up with B chainsaw.
From full screen, quickly whiff cancel 5A into B Chainsaw as a sort of pseudo-command dash. This will place you directly in front of the opponent - again, without actually hitting them. You can go into A chainsaw instead as a fake-out or into C chainsaw if you really wanna party (C Chainsaw is heavily punishable though - beware).
From 66C
66C works a bit like Zangief's f.MK in Street Fighter V - It's a very active forward moving attack that's unsafe on block but quick to recover. Because its hitbox is so tall, it also catches people trying to jump over you quite reliably. Once they respect 66C, go for the command grab.
From Fat Bomber
If you read the opponent's forward roll after a successfull Fat Bomber, do nothing and wait for your opponent to roll towards you. Rolls lose throw invulnerability on wakeup so you can do a meaty command throw and make them hate life.
From j.A/j.D
Not recommended. A deep j.A or j.D leaves you at a very small amount of frame advantage on block. This is usually enough to beat jabs with your own n.5A or 5D but not enough to get a true command grab mixup. Simply jumping will beat both options.
Normal Moves
Far Slashes
5A
5A
|
| Damage
|
Guard
|
Startup
|
Active
|
Recovery
|
Total
|
Hit Adv
|
Block Adv
|
Guard Dmg
|
Cancel
|
Recoil
|
Deflectable
|
Unarmed
|
| 40
|
Mid
|
8
|
-
|
-
|
-
|
-6
|
-5
|
-
|
Yes
|
-
|
Yes
|
No
|
Premium jab with big range that's also special cancellable. Combos into A Chainsaw at close ranges. Hilliariously more unsafe on hit than on block. Nevertheless, this is a great button with a multitude of applications. Learn to piano 5A into each strength of Fat Chainsaw for easy access in the neutral.
|
|
5B
5B
|
| Damage
|
Guard
|
Startup
|
Active
|
Recovery
|
Total
|
Hit Adv
|
Block Adv
|
Guard Dmg
|
Cancel
|
Recoil
|
Deflectable
|
Unarmed
|
| 100
|
Mid
|
14
|
-
|
-
|
-
|
-9
|
-14
|
-
|
No
|
-
|
Yes
|
No
|
Pretty reliable mid-range poke with a nice balance of speed and range. Sadly -14, sou you'll usually eat a f.5B in retalliation if this is blocked. Causes a backflip against jumping oponents.
|
|
5C
5C footsies, lol footsies, lol
|
| Damage
|
Guard
|
Startup
|
Active
|
Recovery
|
Total
|
Hit Adv
|
Block Adv
|
Guard Dmg
|
Cancel
|
Recoil
|
Deflectable
|
Unarmed
|
| 70*70*100
|
Mid
|
13
|
-
|
-
|
-
|
-10~-8
|
-36
|
-
|
No
|
-
|
Disarm
|
No
|
Your go-to punisher if the opponent does something stupid. Guaranteed followup after backthrow from midscreen. Be careful, since the 3rd hit can whiff on very close opponents making this button punishable ON HIT!
|
|
2A
2A
|
| Damage
|
Guard
|
Startup
|
Active
|
Recovery
|
Total
|
Hit Adv
|
Block Adv
|
Guard Dmg
|
Cancel
|
Recoil
|
Deflectable
|
Unarmed
|
| 40
|
Mid
|
8
|
-
|
-
|
-
|
-5
|
-5
|
-
|
Yes
|
-
|
Yes
|
No
|
Functionally identical to 5A. Also combos into A Chainsaw
|
|
2B
2B
|
| Damage
|
Guard
|
Startup
|
Active
|
Recovery
|
Total
|
Hit Adv
|
Block Adv
|
Guard Dmg
|
Cancel
|
Recoil
|
Deflectable
|
Unarmed
|
| 90
|
Low
|
13
|
-
|
-
|
-
|
KD
|
-17
|
-
|
No
|
-
|
No
|
No
|
Decently fast knockdown low with great range, therefore extremely useful.
|
|
2C
2C Three hits Three hits
|
| Damage
|
Guard
|
Startup
|
Active
|
Recovery
|
Total
|
Hit Adv
|
Block Adv
|
Guard Dmg
|
Cancel
|
Recoil
|
Deflectable
|
Unarmed
|
| 60*60*80
|
Low
|
15
|
-
|
54
|
-
|
-21~-10
|
-36
|
-
|
No
|
-
|
No
|
No
|
Like 5C, but a low. Slightly shorter and less damaging.
|
|
Near Slashes
n.5A
n.5A
|
| Damage
|
Guard
|
Startup
|
Active
|
Recovery
|
Total
|
Hit Adv
|
Block Adv
|
Guard Dmg
|
Cancel
|
Recoil
|
Deflectable
|
Unarmed
|
| 40
|
Mid
|
8
|
-
|
-
|
-
|
-6
|
-5
|
-
|
Yes
|
-
|
Yes
|
No
|
|
|
|
n.5B
n.5B
|
| Damage
|
Guard
|
Startup
|
Active
|
Recovery
|
Total
|
Hit Adv
|
Block Adv
|
Guard Dmg
|
Cancel
|
Recoil
|
Deflectable
|
Unarmed
|
| 100
|
Mid
|
10
|
-
|
-
|
-
|
-2
|
-12
|
-
|
No
|
-
|
Yes
|
No
|
Similar animation to n.5A but does more damage. Although it can't be canceled, it can offer more upfront damage, in the case where the opponent is highly likely to burst, than n.5A cancel combo. Otherwise n.5A xx A Fat Chainsaw will do more damage.
|
|
n.5C
n.5C
|
| Damage
|
Guard
|
Startup
|
Active
|
Recovery
|
Total
|
Hit Adv
|
Block Adv
|
Guard Dmg
|
Cancel
|
Recoil
|
Deflectable
|
Unarmed
|
| 200
|
Mid
|
12
|
-
|
-
|
-
|
-4
|
-28
|
-
|
No
|
-
|
Yes
|
No
|
Very fast for a heavy, at only 12f. Really nice punisher.
|
|
n.2A
n.2A
|
| Damage
|
Guard
|
Startup
|
Active
|
Recovery
|
Total
|
Hit Adv
|
Block Adv
|
Guard Dmg
|
Cancel
|
Recoil
|
Deflectable
|
Unarmed
|
| 40
|
-
|
8
|
-
|
-
|
-
|
-6
|
-5
|
-
|
Yes
|
-
|
Yes
|
No
|
|
|
|
n.2B
n.2B
|
| Damage
|
Guard
|
Startup
|
Active
|
Recovery
|
Total
|
Hit Adv
|
Block Adv
|
Guard Dmg
|
Cancel
|
Recoil
|
Deflectable
|
Unarmed
|
| 100
|
-
|
8
|
-
|
-
|
-
|
-5
|
-12
|
-
|
No
|
-
|
Yes
|
No
|
Similar animation to n.5B. Has faster startup but does less damage.
|
|
Kicks
5D
5D Hits two times Hits two times
|
| Damage
|
Guard
|
Startup
|
Active
|
Recovery
|
Total
|
Hit Adv
|
Block Adv
|
Guard Dmg
|
Cancel
|
Recoil
|
Deflectable
|
Unarmed
|
| (20)(20)
|
Mid, Mid
|
7
|
-
|
-
|
-
|
-6
|
-9
|
-
|
Yes
|
-
|
No
|
Yes
|
Earthquakes fastest normal, although not his safest as it can be punished on hit by some characters. Has decent range and hits twice. Very useful for hit-confirming into WFT.
|
|
6D
6D
|
| Damage
|
Guard
|
Startup
|
Active
|
Recovery
|
Total
|
Hit Adv
|
Block Adv
|
Guard Dmg
|
Cancel
|
Recoil
|
Deflectable
|
Unarmed
|
| 50
|
Mid
|
10
|
-
|
-
|
-
|
KD
|
-21
|
-
|
No
|
-
|
No
|
Yes
|
Knocks opponent to the other side of the screen. Apparently a decent anti-air against characters with low jump-arcs. Very unsafe on block.
|
|
2D
2D
|
| Damage
|
Guard
|
Startup
|
Active
|
Recovery
|
Total
|
Hit Adv
|
Block Adv
|
Guard Dmg
|
Cancel
|
Recoil
|
Deflectable
|
Unarmed
|
| 30
|
Low
|
10
|
-
|
-
|
-
|
-5
|
-8
|
-
|
No
|
-
|
No
|
Yes
|
An OK get-off-me button. Notable for having longer reach than most other 2Ds but it's mostly outclassed by 66D in almost every way.
|
|
3D
3D
|
| Damage
|
Guard
|
Startup
|
Active
|
Recovery
|
Total
|
Hit Adv
|
Block Adv
|
Guard Dmg
|
Cancel
|
Recoil
|
Deflectable
|
Unarmed
|
| 70
|
Low
|
10
|
-
|
-
|
-
|
KD
|
-17
|
-
|
No
|
-
|
No
|
Yes
|
Earthquake's pathetic attempt at a knockdown sweep. Your hurtbox actually moves quite far down during the animation.
|
|
Dash Normals
66A
66A Earthquakes worst normal. Earthquakes worst normal.
|
| Damage
|
Guard
|
Startup
|
Active
|
Recovery
|
Total
|
Hit Adv
|
Block Adv
|
Guard Dmg
|
Cancel
|
Recoil
|
Deflectable
|
Unarmed
|
| 40
|
Mid
|
9
|
-
|
-
|
-
|
-9
|
-42
|
-
|
No
|
-
|
Yes
|
No
|
His worst normal. Slower than your regular 5A. -9 even on hit. Do not use 66A.
|
|
66B
66B [insert dummy thicc joke here] [insert dummy thicc joke here]
|
| Damage
|
Guard
|
Startup
|
Active
|
Recovery
|
Total
|
Hit Adv
|
Block Adv
|
Guard Dmg
|
Cancel
|
Recoil
|
Deflectable
|
Unarmed
|
| 80
|
High
|
23
|
-
|
-
|
-
|
KD
|
-18
|
-
|
No
|
-
|
No
|
No
|
Slow, long range overhead with hella active frames that knocks down on hit. Quite punishable, even at tip range so think twice before throwing this out.
|
|
66C
66C
|
| Damage
|
Guard
|
Startup
|
Active
|
Recovery
|
Total
|
Hit Adv
|
Block Adv
|
Guard Dmg
|
Cancel
|
Recoil
|
Deflectable
|
Unarmed
|
| 130
|
Mid
|
11
|
-
|
-
|
-
|
KD
|
-15
|
-
|
No
|
-
|
No
|
No
|
Medium-risk medium-reward button with deceptively short range. Works surprisingly well as a predictive anti-air. Since you recover relatively fast from this attack, you can try and whiff this on purpose to set up a command grab.
|
|
66D
66D Sliding into your DMs like Sliding into your DMs like
|
| Damage
|
Guard
|
Startup
|
Active
|
Recovery
|
Total
|
Hit Adv
|
Block Adv
|
Guard Dmg
|
Cancel
|
Recoil
|
Deflectable
|
Unarmed
|
| 60
|
Low
|
6
|
-
|
-
|
-
|
KD
|
-9
|
-
|
No
|
-
|
No
|
Yes
|
Long range, undeflectable, very fast knockdown low that is -9 at worst. Incredible normal.
|
|
Air Normals
j.A
j.A
|
| Damage
|
Guard
|
Startup
|
Active
|
Recovery
|
Total
|
Hit Adv
|
Block Adv
|
Guard Dmg
|
Cancel
|
Recoil
|
Deflectable
|
Unarmed
|
| 30
|
High
|
8
|
-
|
-
|
-
|
-
|
-
|
-
|
-
|
-
|
-
|
-
|
Earthquake inherited all of his air normals from Samurai Shodown 6. If you've never played Earthquake in SS6, that's probably for the better.
j.A is just your standard air-to-air jab. Decently large hitbox and quick to come out.
|
|
j.B
j.B
|
| Damage
|
Guard
|
Startup
|
Active
|
Recovery
|
Total
|
Hit Adv
|
Block Adv
|
Guard Dmg
|
Cancel
|
Recoil
|
Deflectable
|
Unarmed
|
| 100
|
-
|
9
|
-
|
-
|
-
|
-
|
-
|
-
|
-
|
-
|
-
|
-
|
Long range air-to-air with great horizontal range. Useful in certain matchups. Doesn't hit grounded opponents at all anymore.
|
|
j.C
j.C Three hits Three hits
|
| Damage
|
Guard
|
Startup
|
Active
|
Recovery
|
Total
|
Hit Adv
|
Block Adv
|
Guard Dmg
|
Cancel
|
Recoil
|
Deflectable
|
Unarmed
|
| 50*50*60
|
High
|
12
|
-
|
-
|
-
|
-
|
-
|
-
|
-
|
-
|
-
|
-
|
Extremely annoying button. Huge range, safe (or sometimes even +) on block, highly damaging. Unfortunalely too slow to be used as an instant overhead. Abuse liberally.
|
|
j.D
j.D
|
| Damage
|
Guard
|
Startup
|
Active
|
Recovery
|
Total
|
Hit Adv
|
Block Adv
|
Guard Dmg
|
Cancel
|
Recoil
|
Deflectable
|
Unarmed
|
| 30
|
High
|
7
|
-
|
-
|
-
|
-
|
-
|
-
|
-
|
-
|
-
|
-
|
j.D is probably your most reliable anti-air due to its speed and generous hitbox, especially against characters with fast jumps such as Darli and Charlotte. It can cross up and it neatly sets up command grabs for you. Great multi-purpose button.
|
|
Unarmed Normals
u.5S
u.5S
|
| Damage
|
Guard
|
Startup
|
Active
|
Recovery
|
Total
|
Hit Adv
|
Block Adv
|
Guard Dmg
|
Cancel
|
Recoil
|
Deflectable
|
Unarmed
|
| 50
|
Mid
|
7
|
-
|
-
|
-
|
-5
|
-10
|
-
|
-
|
-
|
-
|
Yes
|
|
u.2S
u.2S
|
| Damage
|
Guard
|
Startup
|
Active
|
Recovery
|
Total
|
Hit Adv
|
Block Adv
|
Guard Dmg
|
Cancel
|
Recoil
|
Deflectable
|
Unarmed
|
| 50
|
Mid
|
7
|
-
|
-
|
-
|
-3
|
-8
|
-
|
-
|
-
|
-
|
Yes
|
|
ju.S
ju.S
|
| Damage
|
Guard
|
Startup
|
Active
|
Recovery
|
Total
|
Hit Adv
|
Block Adv
|
Guard Dmg
|
Cancel
|
Recoil
|
Deflectable
|
Unarmed
|
| 50
|
High
|
6
|
-
|
-
|
-
|
-
|
-
|
-
|
-
|
-
|
-
|
Yes
|
Very similar to j.A, but even faster, and slightly more damaging. This is actually an incredible anti-air, so don't let people jump at you for free when you get disarmed!
|
|
u.66S
u.66S
|
| Damage
|
Guard
|
Startup
|
Active
|
Recovery
|
Total
|
Hit Adv
|
Block Adv
|
Guard Dmg
|
Cancel
|
Recoil
|
Deflectable
|
Unarmed
|
| -
|
-
|
-
|
-
|
-
|
-
|
-
|
-
|
-
|
-
|
-
|
-
|
Yes
|
|
Universal Mechanics
Guard Break
Guard Break (Throw)
4/5/6C+D Neutral Throw Neutral Throw Forward Throw Forward Throw Back Throw Back Throw
|
| Version
|
Damage
|
Guard
|
Startup
|
Active
|
Recovery
|
Total
|
Hit Adv
|
Block Adv
|
Guard Dmg
|
Cancel
|
Recoil
|
Deflectable
|
Unarmed
|
| Neutral
|
-
|
-
|
-
|
-
|
-
|
-
|
-
|
-
|
-
|
-
|
-
|
-
|
-
|
Universal throw. Can be followed up with an attack.
|
| Back
|
-
|
-
|
-
|
-
|
-
|
-
|
-
|
-
|
-
|
-
|
-
|
-
|
-
|
Universal throw. Can be followed up with an attack.
|
| Forward
|
-
|
-
|
-
|
-
|
-
|
-
|
-
|
-
|
-
|
-
|
-
|
-
|
-
|
Universal throw. Can be followed up with an attack.
|
|
Surprise Attack
Surprise Attack (Overhead)
5B+C
|
| Damage
|
Guard
|
Startup
|
Active
|
Recovery
|
Total
|
Hit Adv
|
Block Adv
|
Guard Dmg
|
Cancel
|
Recoil
|
Deflectable
|
Unarmed
|
| 60
|
-
|
20~21
|
-
|
61
|
-
|
1~2
|
-12~-11
|
-
|
No
|
-
|
-
|
-
|
|
|
|
Dodge
Dodge
5A+B
|
| Damage
|
Guard
|
Startup
|
Active
|
Recovery
|
Total
|
Hit Adv
|
Block Adv
|
Guard Dmg
|
Cancel
|
Recoil
|
Deflectable
|
Unarmed
|
| 0
|
N/A
|
1
|
16
|
22
|
-
|
N/A
|
N/A
|
-
|
N/A
|
-
|
N/A
|
Yes
|
Universal dodge. Avoids all attacks for a brief moment, and is mainly used to avoid throws.
Complete invincibility from frames 1 to 10. Strike invincibility from frames 11 to 16.
|
|
Counter / Blade Catch
Counter / Blade Catch
236A+B Counter Counter Blade Catch Blade Catch
|
| Version
|
Damage
|
Guard
|
Startup
|
Active
|
Recovery
|
Total
|
Hit Adv
|
Block Adv
|
Guard Dmg
|
Cancel
|
Recoil
|
Deflectable
|
Unarmed
|
| Armed
|
0
|
N/A
|
2
|
11
|
34
|
-
|
+35~+59
|
N/A
|
-
|
N/A
|
-
|
N/A
|
No
|
Universal counter. Allows you to follow up with a guaranteed attack of your own. The amount of time you have to followup depends on the strength of the attack you counter, with heavy attacks staggering the opponent for the longest amount of time. Additionally you counter a heavy slash or a running slash, your opponent will be disarmed.
|
| Disarmed
|
0
|
N/A
|
2
|
12
|
22
|
-
|
KD
|
N/A
|
-
|
N/A
|
-
|
N/A
|
Yes
|
Universal counter. While disarmed, your counter will disarm and knock away your opponent regardless of slash level countered.
|
|
Rage Explosion
Rage Explosion
5A+B+C
|
| Damage
|
Guard
|
Startup
|
Active
|
Recovery
|
Total
|
Hit Adv
|
Block Adv
|
Guard Dmg
|
Cancel
|
Recoil
|
Deflectable
|
Unarmed
|
| 0
|
-
|
-
|
-
|
-
|
-
|
-
|
-
|
-
|
-
|
-
|
-
|
-
|
Unblockable pushback attack.
|
|
Lightning Blade
Lightning Blade (Issen)
5A+B+C during Rage Explosion
|
| Damage
|
Guard
|
Startup
|
Active
|
Recovery
|
Total
|
Hit Adv
|
Block Adv
|
Guard Dmg
|
Cancel
|
Recoil
|
Deflectable
|
Unarmed
|
| -
|
-
|
-
|
-
|
-
|
-
|
-
|
-
|
-
|
-
|
-
|
-
|
-
|
Has projectile invulnerability and anti-airs. Damage scales up beased on reamaining health. Unfortunately earthquake has the shortest issen distance in the game, making it much more difficult to catch jumps at a distance. Get used to the range of his issen so you don't accidentally issen, only to whiff right in front of their face.
|
|
Special Moves
Fat Breath
Fat Breath
214S Totally not Yoga Flame Totally not Yoga Flame
|
| Version
|
Damage
|
Guard
|
Startup
|
Active
|
Recovery
|
Total
|
Hit Adv
|
Block Adv
|
Guard Dmg
|
Cancel
|
Recoil
|
Deflectable
|
Unarmed
|
| A
|
100
|
-
|
18
|
-
|
-
|
-
|
KD
|
-11
|
-
|
-
|
-
|
-
|
Yes
|
| B
|
110
|
-
|
21
|
-
|
-
|
-
|
KD
|
-12
|
-
|
-
|
-
|
-
|
Yes
|
| C
|
120
|
-
|
24
|
-
|
-
|
-
|
KD
|
-15
|
-
|
-
|
-
|
-
|
Yes
|
Fat Breath acts like a stationary multi-hit projectile on block, making it a very useful meaty in situations where your opponent can't roll out of its hitbox (i.e. they're in the corner). Each individual hit deals around 12~14 chip damage. Use A or C Fat Breath as an optimal followup after unarmed forward or backthrow respectively. A Fat Breath can also be used to be used to cancel out enemy projectiles, even multi-hitting ones.
|
|
Fat Bound
Fat Bound
j.2S Token Caption (Optional) Token Caption (Optional)
|
| Version
|
Damage
|
Guard
|
Startup
|
Active
|
Recovery
|
Total
|
Hit Adv
|
Block Adv
|
Guard Dmg
|
Cancel
|
Recoil
|
Deflectable
|
Unarmed
|
| A
|
30x3
|
-
|
7
|
-
|
-
|
-
|
KD
|
-22
|
-
|
-
|
-
|
-
|
Yes
|
This is the most useful version. Can be done very early as a fast instant-overhead that knocks down on hit.
|
| B
|
30x3,30,30,40
|
-
|
7
|
-
|
-
|
-
|
KD
|
-23
|
-
|
-
|
-
|
-
|
Yes
|
If your opponent keeps blocking and punishing A Fat Bound, use this version instead to catch their retaliation attempts. Last hit of the second bounce knocks down on hit. Characters with fast invincible moves can punish the A version and interrupt the B version.
|
| C
|
30x3,30x3,30x2,50
|
-
|
7
|
-
|
-
|
-
|
KD
|
-20
|
-
|
-
|
-
|
-
|
Yes
|
Meme version of Fat Bound. Since the opponent can block in between the 3rd and the 4th bounce, this is completely free to punish unless the 3rd bounce actually kills.
|
|
Fat Chainsaw
Fat Chainsaw
6SS Sanicquake Sanicquake
|
| Version
|
Damage
|
Guard
|
Startup
|
Active
|
Recovery
|
Total
|
Hit Adv
|
Block Adv
|
Guard Dmg
|
Cancel
|
Recoil
|
Deflectable
|
Unarmed
|
| A
|
20x3,30
|
-
|
10
|
-
|
-
|
-
|
KD
|
-13
|
-
|
-
|
-
|
-
|
No
|
| B
|
20x4,40
|
-
|
14
|
-
|
-
|
-
|
KD
|
-14
|
-
|
-
|
-
|
-
|
No
|
| C
|
20x6,40
|
-
|
19
|
-
|
-
|
-
|
KD
|
-29
|
-
|
-
|
-
|
-
|
No
|
| EX
|
15x9,50
|
-
|
10
|
-
|
-
|
-
|
KD
|
-35
|
-
|
-
|
-
|
-
|
No
|
Chainsaw is a versatile, albeit somewhat wonky, special with a lot of interesting properties. All versions have brief invulnerability on startup (not frame 1!) before moving forward with the A version travelling the least distance and the C/EX versions travelling the farthest. A and B Chainsaw also recover surprisingly quickly, usually only allowing for a B punish afterwards. All versions knock down on hit.
|
|
Fat Replica Attack
Fat Replica Attack
63214D Bonk. Bonk.
|
| Damage
|
Guard
|
Startup
|
Active
|
Recovery
|
Total
|
Hit Adv
|
Block Adv
|
Guard Dmg
|
Cancel
|
Recoil
|
Deflectable
|
Unarmed
|
| 100
|
-
|
41
|
-
|
-
|
-
|
KD
|
-59
|
-
|
-
|
-
|
-
|
Yes
|
The flying body splash, which all big bodies are required by law to have. This one's actually a teleport. Earthquake disappears briefly before dropping onto his opponents from directly above them. While this might seem like an amazing recoil cancel at first glance, it is very slow, and takes ages to recover - enough for most characters to punish with SSM if they're ready for it. Use it as a hard callout, or against extremely laggy moves you wouldn't be able to punish otherwise.
|
|
Fat Bomber
Fat Bomber
236D Token Caption (Optional) Token Caption (Optional)
|
| Damage
|
Guard
|
Startup
|
Active
|
Recovery
|
Total
|
Hit Adv
|
Block Adv
|
Guard Dmg
|
Cancel
|
Recoil
|
Deflectable
|
Unarmed
|
| 40,120
|
-
|
8
|
-
|
61
|
-
|
KD
|
-
|
-
|
-
|
-
|
-
|
Yes
|
Quick command grab with decent range. Allows for some pretty nasty oki, should the opponent decide to roll forward on wakeup.
|
|
Supers
Weapon Flipping Technique
Damned Earth
236B+C
|
| Damage
|
Guard
|
Startup
|
Active
|
Recovery
|
Total
|
Hit Adv
|
Block Adv
|
Guard Dmg
|
Cancel
|
Recoil
|
Deflectable
|
Unarmed
|
| 408
|
-
|
8
|
-
|
-
|
-
|
-
|
-
|
-
|
-
|
-
|
-
|
-
|
8f startup makes this tied for fastest WFT in the game. Has very good range and combos from A normals or 5D. On block, Earthquake will try to catch the opponent 3 more times, during which you can slightly reposition yourself and maybe mess up the opponent's punish. The gaps between hits allow the opponents an wide range of punishes going up to SSM.
|
|
Super Special Move
Earth Crisis
641236C+D
|
| Damage
|
Guard
|
Startup
|
Active
|
Recovery
|
Total
|
Hit Adv
|
Block Adv
|
Guard Dmg
|
Cancel
|
Recoil
|
Deflectable
|
Unarmed
|
| 100*600
|
-
|
27
|
-
|
-
|
-
|
-
|
-
|
-
|
-
|
-
|
-
|
-
|
Stationary SSM with a decent amount of horizontal range. Tied with Kyoshiro for fastest startup SSM in the game which allows him a few more punish opportunities with SSM than the rest of the cast.
|
|
Combos
List combos, use numpad notation.
Midscreen
Corner
Videos
Link to Earthquake videos and specify year it was produced or patch version in brackets.
Example: Earthquake combo video by "name of content creator" (2019).
Colors
External Links


