 Kirishima Kano
Introduction
Kirishima Kano (霧島 佳乃) is a character focused on space control, she has access to the best projectiles in the game and incredible range on her normals. To balance that however, she is extremely slow and has a lot of trouble opening people up. Her defining mechanic is her magic: any spell she uses requires a fully charged magic meter. She can charge by pressing S, and cancel it by pressing S again, which, in combination with the range on her normals, allows her to do safe Order Sol style charge cancel pressure, varying the timing on her strings and giving her massive frame advantage. This however only works while her magic gauge is not full, so she continually needs to consider the trade off between access to spells and access to charge cancels.
Kano is one of the heroines of AIR, a visual novel produced by Key in 2000. Kano is a school girl in the town where the story takes place. Both of her parents passed away long ago, and she now lives with her older sister who runs the town's clinic. Kano loves animals, and takes care of the animals at school. She is always with her pet dog, Potato, also known as the "alien fur ball" to Yukito. Kano believes that the ribbon tied to her right wrist will enable her to use magic if she keeps it on until adulthood. During AIR, Yukito learns the reason Kano wants magic, and the purpose of the ribbon...
Stage: Shinto Shrine near the Sky (Day) (空に近い神社(昼))
BGM: Puddle (水たまり)
Character-Specific Notes
- Kano is able to air jump once, and air dash/backstep once.
- Kano has one of the most floaty jumps in the game.
- Kano usually has a "Magic" gauge underneath her life gauge. Kano will not be able to cast any magic until her magic gauge is full. If she does not have a full magic gauge and she tries to cast magic, she will charge uninterrupted until her magic gauge is full, and then cast her magic. In the case that there is no magic gauge, it simply means that the gauge is empty.
- Kano is able to automatically generate SP on her own. Her recovery rate is fastest when she has less than SP level 1, and becomes slower with each level she reaches. However, if Kano stays in the same horizontal position (jumping straight up or attacking is okay) and is not attacked by the opponent for 4 seconds, a blue "30" will appear over her, and she will gain 1/3 of a level of SP.
Normal Moves
The notation for the movelists can be found under Controls.
The normal move table can be found under Kano Kirishima/Move Data.
Standing
5A
5A
|
| Damage
|
Proration
|
Juggle
|
Guard
|
Startup ¹ ²
|
Active
|
Recovery
|
Adv Hit
|
Adv Block
|
Cancel
|
| 190
|
-
|
-
|
Ground
|
|
|
9
|
0
|
-1
|
-
|
A bit on the slow side for a 5A, and minus on block. Despite that, it's a pretty strong move, as it has a great hitbox, especially vertically. This allows it to beat standard high/low invul meterless reversals while still keeping the initiative on RG. Most other characters are forced to use their close B for that, which forces them on the defensive if the opponent RGs.
|
|
5B
5B
|
| Damage
|
Proration
|
Juggle
|
Guard
|
Startup ¹ ²
|
Active
|
Recovery
|
Adv Hit
|
Adv Block
|
Cancel
|
| 410
|
-
|
-
|
Ground
|
7
|
2
|
10
|
+5
|
+3
|
-
|
The only plus on block normal she can chain into, has an extremely disappointing hitbox, especially noticeable in corner combos, where it will completely whiff for no reason. At 7F startup, it's not a great move to cancel into if the opponent RGs, only do it if you've conditioned them with 2As/5As and you know they're not going to mash. It does give you frame advantage, but at that range there's not a whole lot Kano can do mixup wise, so it ends up being mostly filler in combos and pressure strings.
|
|
f5B
f5B
|
| Damage
|
Proration
|
Juggle
|
Guard
|
Startup ¹ ²
|
Active
|
Recovery
|
Adv Hit
|
Adv Block
|
Cancel
|
| 450
|
-
|
-
|
Ground
|
9
|
1
|
15
|
-1
|
-3
|
-
|
One of Kano's main pokes, fast, great range, fantastic at annoying and interrupting the opponent. It's a very versatile move when spaced right, as it can be safely cancelled into 5C, 3C, 6C, spells or charge.
|
|
6B
Full Swing Rod
(フルスイングロッド)
6B
|
| Damage
|
Proration
|
Juggle
|
Guard
|
Startup ¹ ²
|
Active
|
Recovery
|
Adv Hit
|
Adv Block
|
Cancel
|
| 520
|
-
|
-
|
Ground
|
12
|
1
|
17
|
-1
|
-3
|
-
|
Kano's other main poke, very similar looking to fB, and her strongest mid range normal. It is fast for its range, and has a bit more horizontal and vertical range than fB, allowing you to hit instant air dash attempts. Unlike fB though, you cannot chain out of it (only cancel into specials or charge), making it weaker in pressure. Since fB and 6B look so similar, it can be hard for the opponent to figure out which one was used immediately, allowing you to stagger your timings at mid range, and to hit opponents who think they can safely do a move when outside of her fB range (whiff fB into immediate 6B for example).
|
|
5C
5C
|
| Damage
|
Proration
|
Juggle
|
Guard
|
Startup ¹ ²
|
Active
|
Recovery
|
Adv Hit
|
Adv Block
|
Cancel
|
| 610
|
-
|
-
|
Ground
|
13
|
2
|
27
|
-5
|
-7
|
-
|
Looks a lot stronger than it is, hitbox is smaller than it visually should be, Kano extends her hurtbox long before the hitbox appears, and it only has 2 active frames. Bad on block, worse on RG, and suicide on whiff, this move absolutely needs to be cancelled into 6C, charge or spell. Despite its look, makes for an absolutely terrible anti air. Only used in combos and pressure strings. It does have a decent range, so depending on the matchup an RG'd fB can be safely cancelled into it.
|
|
6C
Napalm Beat
(ネイパムビート)
6C
|
| Damage
|
Proration
|
Juggle
|
Guard
|
Startup ¹ ²
|
Active
|
Recovery
|
Adv Hit
|
Adv Block
|
Cancel
|
| 650
|
-
|
-
|
Any
|
21
|
1
|
24
|
/
|
-3
|
-
|
A fantastic move with a huge hitbox, good speed for its range, and the key to her high damage Napalm Loop bnbs. Costs a tiny bit of SP meter. Learning to charge cancel this move is vital to playing Kano, as it drastically strengthens her combos and pressure game (makes the move +6 on block). It is also fantastic for hitting players when they try to move after blocking a spell, or when they try to set up their game outside of Kano's fB/6B range. Napalm Beat's main weakness is that it ends your turn on RG, and is horrible on whiff. No matter how good a hitbox it has, a well timed jump will get you punished. Also has the bad habit of coming out and whiffing point blank when you're going for a throw.
|
|
Crouching
2A
2A
|
| Damage
|
Proration
|
Juggle
|
Guard
|
Startup ¹ ²
|
Active
|
Recovery
|
Adv Hit
|
Adv Block
|
Cancel
|
| 220
|
-
|
-
|
Ground
|
5
|
2
|
9
|
0
|
-1
|
-
|
Once again, a fairly slow, negative on block 2A, which doesn't even have the decency to hit low. On the plus side, it has an amazing horizontal range, rivaling some 2Bs, which makes it fantastic to mash or use in RG battles beyond point blank range. Its hitbox is angled upwards, which makes it surprisingly decent as an anti air, or to catch people jumping out. This property also allows it to beat some moves with lower body invul. Conversely, that also means that some low profile moves will beat it in nonsensical situations.
|
|
2B
2B
|
| Damage
|
Proration
|
Juggle
|
Guard
|
Startup ¹ ²
|
Active
|
Recovery
|
Adv Hit
|
Adv Block
|
Cancel
|
| 480
|
-
|
-
|
Low
|
8
|
1
|
14
|
/
|
0
|
-
|
Kano's fastest and most useful low. Can be considered a sweep that has fast startup, decent range, is neutral on block and has fairly low recovery on whiff. Can also cancel into the same moves as her f5B, allowing for multiple followups. Despite being even on block, it can also be used for pseudo frame traps depending on spacing, as few chars have the normals to challenge Kano at that range.
|
|
2C
2C
|
| Damage
|
Proration
|
Juggle
|
Guard
|
Startup ¹ ²
|
Active
|
Recovery
|
Adv Hit
|
Adv Block
|
Cancel
|
| 650
|
-
|
-
|
Any
|
5
|
8
|
45
|
/
|
-31
|
-
|
An incredible move that's suicide when the opponent calls it out, or when you accidentally do it instead of 3C. This move has a massive hitbox, barely any hurtbox, hits on both sides, and only comes out in 5F, rivaling the speed of many As/2As. As an anti air, it is only air unblockable from active frame 2 (!?), but will beat out any jump normal in the game. Combined with its speed, it allows Kano to anti air any jump attack in neutral. Its weakness is its massive recovery, and its complete inability to be cancelled into other moves. If the opponent calls it out, and makes it whiff or jump RGs, then the only way to save yourself is to use the very short IC window to IC it. Beyond using it as a straight anti air, its speed can be abused to kill non meaty crossup setups and to get hoverdash characters off you when they try to get back in during blockstrings.
|
|
3C
Sliding
(スライディング)
3C
|
| Damage
|
Proration
|
Juggle
|
Guard
|
Startup ¹ ²
|
Active
|
Recovery
|
Adv Hit
|
Adv Block
|
Cancel
|
| 610
|
-
|
-
|
Low
|
8
|
24
|
14
|
/
|
-17
|
-
|
A slide with an average hitbox and no low profile. Its biggest strength lies in its startup speed, making it extremely strong in RG battles at mid range. If they RG one of your normals beyond their 2A/5A range, then Kano's slide will win against almost any normal they counter with, netting you a knockdown. It is her farthest reaching low, and can be used in pressure strings against opponents who stand up when beyond Kano's 2B range (do not use this against characters with high walk speed as the slide will whiff). It can be cancelled into spells or charge cancelled (+8 on block), making it safe for a slide, as long as the opponent does not RG it. If they do RG it, cancel it into Fast Aria, Lighting Bolt or Fire Wall.
|
|
Jumping
j5A
j5A
|
| Damage
|
Proration
|
Juggle
|
Guard
|
Startup ¹ ²
|
Active
|
Recovery
|
Adv Hit
|
Adv Block
|
Cancel
|
| 210
|
-
|
-
|
High
|
6
|
2
|
11
|
/
|
/
|
-
|
A typical jA, fast, pretty decent hitbox, used in many of her bnbs as filler.
|
|
j5B
j5B
|
| Damage
|
Proration
|
Juggle
|
Guard
|
Startup ¹ ²
|
Active
|
Recovery
|
Adv Hit
|
Adv Block
|
Cancel
|
| 450
|
-
|
-
|
Any
|
8
|
2
|
44
|
/
|
/
|
-
|
| 450
|
-
|
-
|
High
|
22
|
2
|
30
|
/
|
/
|
-
|
A 2 hit move, and one of the strongest jBs in the game. Has a very fast startup given its range. Both hits have ridiculous hitboxes, with the first hit knocking down, and the second sending them flying away. Unfortunately the first hit is not an overhead. Used mostly in neutral to swat them away when they're in the air, and as a combo ender to knock them down. Both hits can be air dash cancelled or jump cancelled, leaving her plenty of options if it is blocked.
|
|
j5C
j5C
|
| Damage
|
Proration
|
Juggle
|
Guard
|
Startup ¹ ²
|
Active
|
Recovery
|
Adv Hit
|
Adv Block
|
Cancel
|
| 130 x 5
|
-
|
-
|
High
|
19
|
14
|
23
|
/
|
/
|
-
|
Another great Kano aerial normal, used as her standard jump in and in some advanced combos. It's fast, multiple hits make it really hard to RG, and she can use it to improvise ambiguous crossups. If they do manage to RG it, you can still double jump or air dash cancel any of the hits.
|
|
j2*
Rod Surfing
(ロッドサーフィン)
j2*
|
| Version
|
Damage
|
Proration
|
Juggle
|
Guard
|
Startup ¹ ²
|
Active
|
Recovery
|
Adv Hit
|
Adv Block
|
Cancel
|
| j2A
|
500
|
-
|
-
|
Any
|
13
|
/
|
/
|
/
|
/
|
-
|
| j2B
|
500
|
-
|
-
|
High
|
15
|
/
|
/
|
/
|
/
|
-
|
| j2C
|
500
|
-
|
-
|
Any
|
13
|
/
|
/
|
/
|
/
|
-
|
Kano's dive kick/yoga spiral. Has frame advantage if you hit their feet, can be cancelled into from jA and jB. Can be used to bait out anti airs and mashing if you have IC available to make it safe/combo off a hit. The A version is a decent movement option, TKing it in her pressure allows her to beat slides and low mashes. The only overhead version is the B one, it can be TK'd for an "instant" overhead in pressure strings. Unfortunately it is very slow and obvious, and probably won't hit unless they're mashing. Never use the B version without an IC as it can be punished on hit or block.
|
|
Dashing
66A
66A
|
| Damage
|
Proration
|
Juggle
|
Guard
|
Startup ¹ ²
|
Active
|
Recovery
|
Adv Hit
|
Adv Block
|
Cancel
|
| 220
|
-
|
-
|
Ground
|
8
|
2
|
6
|
+3
|
+2
|
-
|
A rare plus on block normal, does not link into anything on hit. Its hitbox is similar to her 5A, you lose the initiative if it is RG'd. Used to get in on the opponent.
|
|
66B
66B
|
| Damage
|
Proration
|
Juggle
|
Guard
|
Startup ¹ ²
|
Active
|
Recovery
|
Adv Hit
|
Adv Block
|
Cancel
|
| 520
|
-
|
-
|
Ground
|
11
|
1
|
17
|
-1
|
-3
|
-
|
Dashing version of her 6B, used for very much the same purpose, if you want to sacrifice some speed to gain some range.
|
|
66C
66C
|
| Damage
|
Proration
|
Juggle
|
Guard
|
Startup ¹ ²
|
Active
|
Recovery
|
Adv Hit
|
Adv Block
|
Cancel
|
| 690
|
-
|
-
|
Ground
|
10
|
2
|
38
|
/
|
-7
|
-
|
5C's hotter, smarter, more successful brother. Its faster startup and forward momentum make all the difference in the world. Incredibly useful in pressure strings, especially in the corner. Will easily catch opponents jumping out, leading to napalm loops (see combos) if their guard gauge has been cranked up. While it is still horrible on RG, the forward momentum means that you're using it at a range where Kano has the most options available to her, making it hard for the opponent to get the read needed for RG. Should always be cancelled into either charge or a spell. Gives massive frame advantage (up to +8) using the charge cancel technique.
|
|
662A
662A
|
| Damage
|
Proration
|
Juggle
|
Guard
|
Startup ¹ ²
|
Active
|
Recovery
|
Adv Hit
|
Adv Block
|
Cancel
|
| 220
|
-
|
-
|
Ground
|
6
|
2
|
8
|
+1
|
0
|
-
|
Almost the same hitbox as her 2A, neutral on block and does not link into anything on hit. It has a similar use to 66A, use 66A when you end up close to them after the dash, 662A when you're further away (hit them with the tip of the staff). Can also be used to slip under some attacks in specific situations, as she slides forward while shrinking her hurt/collision boxes.
|
|
662B
662B
|
| Damage
|
Proration
|
Juggle
|
Guard
|
Startup ¹ ²
|
Active
|
Recovery
|
Adv Hit
|
Adv Block
|
Cancel
|
| 400
|
-
|
-
|
Low
|
7
|
1
|
15
|
+1
|
0
|
-
|
Dashing version of her 2B, still hits low but no longer knocks down. Does not link into anything on hit. A lot of players stop blocking low when out of Kano's 2B range. 662B is there to safely snipe those players, and can actually lead to a full combo with the proper setup.
|
|
662C
662C
|
| Damage
|
Proration
|
Juggle
|
Guard
|
Startup ¹ ²
|
Active
|
Recovery
|
Adv Hit
|
Adv Block
|
Cancel
|
| 140 x 6
|
-
|
-
|
Ground
|
8
|
2 x 6
|
30
|
/
|
-15 ~ -5
|
-
|
A fancy, hard to use move that whiffs on crouching characters. Used as an anti air in neutral, and as a super execution heavy combo filler with charge cancel. Has a fast startup, a good hitbox, and causes multiple hits similarly to her jC. Very useful as an anti air once the opponents start countering Kano by jump RGing her spells, as RGing the spell and the 662C is nigh impossible.
|
|
Grabs
Close 6C/4C
Ground Grab
Close 6C/4C
|
| Damage
|
Proration
|
Juggle
|
Guard
|
Startup ¹ ²
|
Active
|
Recovery
|
Adv Hit
|
Adv Block
|
Cancel
|
| 1000
|
-
|
-
|
Grab
|
5
|
1
|
19
|
/
|
/
|
-
|
Dosukoi. A standard throw that knocks them half a screen away. Can be IC'd for some combos, including some very damaging ones with BIC and level 3 spells.
|
|
Close j6C
Air Grab
Close j6C
|
| Damage
|
Proration
|
Juggle
|
Guard
|
Startup ¹ ²
|
Active
|
Recovery
|
Adv Hit
|
Adv Block
|
Cancel
|
| 1200
|
-
|
-
|
Grab
|
2
|
1
|
/
|
/
|
/
|
-
|
The other anti air used to counter jump RG strats. Kano tosses the opponent behind her in an arc. Can lead to a combo if you throw them into the corner.
|
|
Special Moves
The notation for the movelists can be found under Controls.
The special move table can be found under Kano Kirishima/Move Data.
Specials
236*
Lightning Bolt
(ライトニングボルト)
236*
|
| Version
|
Damage
|
Proration
|
Juggle
|
Guard
|
Startup ¹ ²
|
Active
|
Recovery
|
Adv Hit
|
Adv Block
|
Cancel
|
| A
|
450
|
-
|
-
|
Any
|
22
|
2
|
30
|
/
|
-10
|
-
|
| B
|
450 x 3
|
-
|
-
|
Any
|
21
|
2 x 3
|
30
|
/
|
-10 ~ 4
|
-
|
| C
|
450 x 5
|
-
|
-
|
Any
|
21
|
2 x 5
|
30
|
/
|
-10 ~ 18
|
-
|
The initial lightning strike can land with 3 different spacings, close, mid, and long range. This can be controlled by holding back, neutral or forward after inputting the move.
While lightning bolts have 20F+ startup time, they come out even if Kano gets interrupted after 14F, which is usually to her advantage. This often makes lightning bolt her best special to cancel into if the opponent RGs her C moves.
Lightning bolt can be used to snipe the opponent from anywhere. Also very useful as a tech trap after a 66C.
Covers both ground and air approaches, great to throw out if you can read their dash/air dash timings.
- A version: rarely used outside of the opponent RGing her slide. Even then another version/spell might be better. Lowest damage, requires good spacing and does not give frame advantage.
- B version: the most useful version, easiest to combo into and to use as a tech trap.
- C version: harder to snipe and combo with than the B version, but does more damage/pushes them further away on block.
|
|
214*
Fire Bolt
(ファイアボルト)
214*
|
| Version
|
Damage
|
Proration
|
Juggle
|
Guard
|
Startup ¹ ²
|
Active
|
Recovery
|
Adv Hit
|
Adv Block
|
Cancel
|
| A
|
680
|
-
|
-
|
Any
|
18
|
/
|
21
|
/
|
9 ~ 47
|
-
|
| B
|
680 x 3
|
-
|
-
|
Any
|
18
|
/
|
27
|
/
|
9 ~ 49
|
-
|
| C
|
680 x 5
|
-
|
-
|
Any
|
18
|
/
|
33
|
/
|
9 ~ 51
|
-
|
Controls ground and low air approaches.
Each fire bolt is 2 hits, the initial one and an explosion on contact. It's this explosion that causes the burn status and does most of the damage. The explosion also triggers on hitting another projectile.
In some rare cases (odd hitbox interactions) the explosion does not trigger, in that case the opponent is in short hitstun from the initial hit without catching fire.
- A version: used to gain frame advantage from an opponent trying to RG. As the fire bolts are effectively 2 hits, they will RG the first hit and be forced to block the second, leaving Kano at frame advantage. Using A firebolt to cover ground approaches is slightly dangerous, as it is vulnerable to low profile moves and instant air dashes. You might also trigger the above bug where the explosion does not happen.
- B version: used to cover ground approaches, and in the same way as A fire bolt in pressure. This version covers more vertical space, and is able to beat most low profile moves and instant air dashes. It can also be used in pressure to gain a bit more chip damage at the expense of costing more magic.
- C version: used to cover ground approaches and low air approaches, in pressure for maximum chip and frame advantage and to beat many RF reversals. This version covers the most horizontal and vertical space, to the point where it can even be used against some jumping opponents. It will also blow up opponents trying to bully their way in with RF moves.
|
|
421*
Cold Bolt
(コルドボルト)
421*
|
| Version
|
Damage
|
Proration
|
Juggle
|
Guard
|
Startup ¹ ²
|
Active
|
Recovery
|
Adv Hit
|
Adv Block
|
Cancel
|
| A
|
450
|
-
|
-
|
Any
|
41
|
/
|
-
|
/
|
23
|
-
|
| B
|
450 x 3
|
-
|
-
|
Any
|
41
|
/
|
-
|
/
|
35
|
-
|
| C
|
450 x 5
|
-
|
-
|
Any
|
41
|
/
|
-
|
/
|
45
|
-
|
The spell does not hit on the way up, each spike aims for the opponent as they become active.
While this is her slowest spell to become active, it is also the one with the fastest recovery, making it fairly safe to throw out.
- A version: used in neutral to harass, and is involved in corner oki and pressure string setups, leading to Kano's strongest meterless combos in the corner. Has the lowest recovery out of all her spells.
- B version: probably the least used out of the cold bolts, can play the same roles as the C version, but not as effectively. Not bad at all, but used more for variation than because of any specific strength.
- C version: used as meaty corner oki, providing massive frame advantage while allowing Kano to recover before any reversal. It is also great at sniping opponents who try to approach from high up in the air, as Kano is able to cross under the opponent off screen while the ice bolts track them.
|
|
5S*
Aria
(詠唱)
5S
|
| Damage
|
Proration
|
Juggle
|
Guard
|
Startup ¹ ²
|
Active
|
Recovery
|
Adv Hit
|
Adv Block
|
Cancel
|
| -
|
-
|
-
|
-
|
8
|
-
|
8 + Charge + 5
|
-
|
-
|
-
|
- Aria can only be done when Kano's magic gauge is not full.
- Pressing S once will start a charge, pressing it again will stop it.
- This move is crucial to Kano's gameplay, as her pressure and advanced combos revolve around the correct use of Aria to cancel moves and gain frame advantage (aka Charge Cancelling).
- Most useful moves to charge cancel: 5C, 66C, 6C, 3C.
- A quick charge cancel in neutral can also bait frustrated opponents to charge right in.
|
|
236S*
Fast Aria
(高速詠唱)
236S
|
| Damage
|
Proration
|
Juggle
|
Guard
|
Property
|
Startup ¹ ²
|
Active
|
Recovery
|
Adv Hit
|
Adv Block
|
Cancel
|
| 500
|
-
|
-
|
Any
|
I=1-10
|
10
|
7
|
22
|
/
|
-7
|
-
|
- Kano makes a charging pose as a sphere of light briefly surrounds her entire body.
- This is her only RF move, and can be used as a reversal. Fully invulnerable until active.
- After this move is performed, Kano will have a full magic gauge. However, she cannot use this move if her magic gauge is already full.
- Fast Aria can be used to cancel Lightning Bolt, Fire Bolt, and Cold Bolt, making it an excellent escape option if the opponent gets too close while you are still casting a spell.
- Since Kano can cancel her spells into this move, and charges her magic gauge while doing so, she can use her RF meter to "machine gun" C spells, hitting opponents who try to take advantage of her charge time to get in.
- It is also useful when the opponent RGs a move they think they can punish, most notably her slide.
|
|
Eternity Specials
236236A
Fire Ball
(ファイアーボール)
236236 A
|
| Damage
|
Proration
|
Juggle
|
Guard
|
Startup ¹ ²
|
Active
|
Recovery
|
Adv Hit
|
Adv Block
|
Cancel
|
| 1800
|
-
|
-
|
Any
|
11
|
/
|
55
|
/
|
-12
|
-
|
- A fairly strong, fast moving projectile aimed at the opponent. Causes multiple explosions similarly to Fire Bolt.
- Used in some side switch corner combos with BIC.
|
|
236236B
Fire Wall
(ファイアワール)
236236 B
|
| Damage
|
Proration
|
Juggle
|
Guard
|
Startup ¹ ²
|
Active
|
Recovery
|
Adv Hit
|
Adv Block
|
Cancel
|
| 900
|
-
|
-
|
Any
|
5 + 5
|
-
|
51
|
/
|
-
|
-
|
| 200 x N
|
-
|
-
|
Any
|
-
|
-
|
-
|
-
|
-
|
-
|
- Kano throws up a fire wall with 3 flames that burn until either they exhaust their hits, or a certain amount of time passes. Each flame has its own number of hits.
- Burns the opponent on hit, launching them in the air, they can be repeatedly bounced on the firewall with jB in the corner.
- Very fast startup, making it usable in corner pressure strings even on RG.
- The ideal spacing is to activate it so that only one flame hits the opponent while they're blocking in the corner. While they're in blockstun just approach them. One flame disappears from the blocked hits, the other two will still be there, preventing the opponent from mashing, or extending their hurtbox in any way. At that point they are free to throws or 5As should they try to jump. Any hit will extend their hurtbox into the flames and launch them for a juggle.
|
|
236236c
Meteor Storm
(メテオストーム)
236236C
|
| Damage
|
Proration
|
Juggle
|
Guard
|
Startup ¹ ²
|
Active
|
Recovery
|
Adv Hit
|
Adv Block
|
Cancel
|
| 4000
|
-
|
-
|
Any
|
7 + 3
|
-
|
93
|
/
|
-
|
-
|
| 1600 x N
|
-
|
-
|
Any
|
-
|
-
|
-
|
/
|
-
|
-
|
Kano launches 6 projectiles in the air, which later come down as meteors.
- The number of meteors is the same as the number of shots in the air, so 6 by default, less should Kano be interrupted.
- The meteors come down over time and deal the burning status.
- They can be dodged easily if the opponent switches sides.
- The shots hit on the way up and can be used as an anti air as they are pretty fast. Sadly they are not air unblockable and the move lacks invulnerability.
- Can be combo'd off a throw with IC/BIC for decent damage and followup meteors.
|
|
214214A
Frost Diver
(フロストダイバー)
214214A
|
| Damage
|
Proration
|
Juggle
|
Guard
|
Startup ¹ ²
|
Active
|
Recovery
|
Adv Hit
|
Adv Block
|
Cancel
|
| 800
|
-
|
-
|
Low
|
11 + 4
|
/
|
93
|
/
|
-10
|
-
|
- A poor man's Frost Nova, used in similar situations but inferior in every way. Causes the freeze status, only use if you don't have the meter for Frost Nova.
- Hits low for some reason so you might be able to gimmick your opponent once.
|
|
214214B
Frost Nova
(フロストノヴァ)
214214B
|
| Damage
|
Proration
|
Juggle
|
Guard
|
Startup ¹ ²
|
Active
|
Recovery
|
Adv Hit
|
Adv Block
|
Cancel
|
| 2500
|
-
|
-
|
Any
|
5 + 3
|
/
|
24
|
/
|
10
|
-
|
- Kano's most useful spell, the core of her high damage combos.
- Also her only armor breaking move, although it will rarely be used for that.
- Fast enough that it can be used to snipe opponents, can be combo'd into from many situations.
- Look to land this when you have BIC on deck.
|
|
214214C
Storm Gust
(ストームガスト)
214214C
|
| Damage
|
Proration
|
Juggle
|
Guard
|
Startup ¹ ²
|
Active
|
Recovery
|
Adv Hit
|
Adv Block
|
Cancel
|
| 500
|
-
|
-
|
Ground
|
5
|
/
|
74
|
/
|
-26 ~ 2
|
-
|
| 5200
|
-
|
-
|
Any
|
-
|
/
|
-
|
/
|
10
|
-
|
- If you have 3 meters, IC or BIC and a full magic gauge then this move comes into play.
- Combos off a throw midscreen for massive damage, 4000+ with IC and 6000+ with BIC.
- Does a lot less damage in the corner, consider using Meteor Storm for control or Lord Of Vermilion for damage instead.
|
|
641236A
Thunderstorm
(サンダーストーム)
641236A
|
| Damage
|
Proration
|
Juggle
|
Guard
|
Startup ¹ ²
|
Active
|
Recovery
|
Adv Hit
|
Adv Block
|
Cancel
|
| 1400
|
-
|
-
|
Any
|
14 + 6
|
/
|
55
|
/
|
-10 ~ 37
|
-
|
- Kano makes a magic seal appear on the ground, which moves forward for as long as you hold A. As soon as you let go a massive diagonal thunder strike hits the seal. Kano recovers and can act while the seal is advancing on screen.
- Useful to force the opponent to either move or allow you in. Either way they will have to deal with your strong normals and the threat of the thunder release. Should they try to avoid it by jumping, you can dash under them for a mixup, as you get to chose when to release the thunder. Or just get in their face, block and release the thunder at the same time.
|
|
641236B
Jupiter Thunder
(ユピテルサンダー)
641236B
|
| Damage
|
Proration
|
Juggle
|
Guard
|
Startup ¹ ²
|
Active
|
Recovery
|
Adv Hit
|
Adv Block
|
Cancel
|
| 3600
|
-
|
-
|
Any
|
11 + 5
|
/
|
84
|
/
|
-17 ~ 190
|
-
|
- This spell is a mystery. It looks and sounds cool.
- Does massive chip damage and gives absolutely ridiculous frame advantage when done facing out of the corner, it's basically an airtight corner to corner blockstring.
- Very hard to combo out of and definitely not worth it when Frost Nova is there for the same cost.
|
|
641236C
Lord of Vermilion
(ロードオブヴァーミリオン)
64123C
|
| Damage
|
Proration
|
Juggle
|
Guard
|
Startup ¹ ²
|
Active
|
Recovery
|
Adv Hit
|
Adv Block
|
Cancel
|
| 4800
|
-
|
-
|
Any
|
12 + 10
|
/
|
165
|
/
|
-40
|
-
|
- Looks extremely cool, and has a lot of invincibility. Damage is good but inconsistent, as it depends on the random locations of the explosions.
- Unfortunately it has such a slow startup that your opponent will recover from pretty much any normal attack before it becomes active. Despite its looks it is also air blockable, making it doubly useless as an anti air.
- Can be combo'd off a corner throw with IC/BIC for damage. Otherwise reserved for swag combos and very hard reads in neutral.
|
|
22B
Safety Wall
(セイフティワール)
22B
|
| Damage
|
Proration
|
Juggle
|
Guard
|
Startup ¹ ²
|
Active
|
Recovery
|
Adv Hit
|
Adv Block
|
Cancel
|
| /
|
-
|
-
|
Any
|
5 + 40
|
/
|
33
|
/
|
/
|
-
|
- Kano sets a Safety Wall right under her. It grows larger when she stands in it, and absorbs hits in that state.
- On absorbing a hit, the Safety Wall deactivates for 8F. This makes it weak to fast multi hit moves, as they can easily hit Kano while it is down. The wall still regenerates if Kano is in hitstun, as long as she's standing inside it.
- Safety Wall does not absorb throws, however if the throw animation contains followup hits then it will absorb them, as long as it regenerates fast enough.
- As a spell it is fairly useless for 2 meters, it can be used as a lesser Firewall in the corner, and maybe to stall for time to get BIC midscreen. Firewall does seem to be the better spell for the same cost and similar uses, the one advantage Safety Wall has over it is its longer duration.
|
|
214236*
Soul Strike
(ソウルストライク)
214236*
|
| Version
|
Damage
|
Proration
|
Juggle
|
Guard
|
Property
|
Startup ¹ ²
|
Active
|
Recovery
|
Adv Hit
|
Adv Block
|
Cancel
|
| A
|
1900
|
-
|
-
|
Any
|
I: 1-58
|
17
|
/
|
106
|
/
|
-12
|
-
|
| B
|
2900
|
-
|
-
|
Any
|
I: 1-58
|
17
|
/
|
106
|
/
|
-3
|
-
|
| C
|
3800
|
-
|
-
|
Any
|
I: 1-69
|
17
|
/
|
106
|
/
|
+9
|
-
|
- Kano's best reversal, and her only spell that does not need a full magic meter to use. She shoots a number of souls behind her that then track the opponent. The higher the level used, the more projectiles come out and the harder it is to punish; all versions can be IC'd. The projectiles do not disappear if Kano gets hit, although they can be nullified by other projectiles.
- Can be used regardless of the magic meter state, if it is not full then she will instantly charge it for the spell.
- An IC'd level 3 Soul Strike is completely safe, as she is invulnerable until the IC point.
- Can additionally be used in corner combos off her slide (character specific) as it does good damage, is untechable, and does not depend on the state of the magic meter.
|
|
Final Memory
214236S
Memory of Shiraho
白帆の記憶)
214236S During Recoil Guard During Recoil Guard
|
| Damage
|
Proration
|
Juggle
|
Guard
|
Startup ¹ ²
|
Active
|
Recovery
|
Adv Hit
|
Adv Block
|
Cancel
|
| 5000
|
-
|
-
|
Grab
|
5 + 40
|
/
|
33
|
/
|
/
|
-
|
- Kano reaches out with her hands. If it hits, she grabs the opponent by the neck and lifts them completely off the ground. After saying the lines "If it must be done, I would rather kill you with my own hands...", she crushes their neck and drops them.
- Counts as a throw.
- Can only be inputted when RGing an opponent's move, making it very hard to use outside of a read.
- The only way the opponent can escape it when done correctly is if he correctly reads it, and cancels the RG freeze in a throw invulnerable move.
|
|
Strategy
Tactics
- 5S Cancelling
- Normals can be cancelled into 5S magic charge, allowing her to cut the recovery on her higher recovery normals by starting charging and immediately stopping with 5SS. This technique is crucial to Kano's pressure and combos.
- 236S Cancelling
- It's possible to cancel special attacks into 236S to instantly recover a full magic bar.
- Wand/staff
- you can survive with kano in one place simply never using forward or back. simply using the wand's range and the way the attacks flow into each other, and using only up to jump cancel, gaining super is very easy.
- using a spell first and then using the wand without moving around will usually be enough for the meter boost.
- a string of ice bolts in the corner on knockdown, is deadly effective, working both to stuff out jump atempts and keep them in the corner at maximum wand range where you can use your best poke/punish game.
- magic managing
- plan your asssaults. concentrate on what your magic allows.
- after a large spell or at the start of the match you have no magic, keep your attacks short and go for quick knockdowns. short charges, cancels, backdashes and the reach of your wand are your main assets. use your wand for quick knockdowns and not damage.
- with a full magic bar, concentrate on landing spells. hitting with a weak lightning bolt usually sets up for a combo, hitting with an ice spell (ice diver or other) will usually leave the opponent vulnerable enough for a free combo, and fire spells hurt alot. hitting with any spell and immediately charging magic or following with a combo/knockdown will lead to more time and control the flow of battle from afar. staying behind your magic generates magic, and if you play well enough and not jump the gun with counters (lightning vs air, ice vs far, fire vs mid, wand vs near) your super will charge and the damage will come naturally. full magic is your damaging phase.
- learn to cycle the 2 phases, if you have almost full magic, act the same as if you have no magic. if you have magic, go for the damage.
- Do NOT use RF solely for the purpose of instant-magic charging and "bombing" out of attacks.
- Multi hit moves
- kano has plenty of multi-hit moves, like her dash-wand spin, and her aerial wand spin, not to mention her spells. if you use these together with spells, the opponent won't be able to RG through spells (specifically lightning in the air, a situation that leaves you very vulnerable if they get through it).
- spells usually hit more than once, and can overwhelm the opponent. blockstun is usually very high and you can get very precious seconds in one place off a single spell and generate super. something like a soulstrike can refund it's own super cost even if it's blocked if you don't follow up with melee and rather use spells.
- this is just a thought dump, but if you find something useful in these "tactics" posts, more power to you.
- looking for the old kano combo video, ice spells galore.
Combos
| Notation Help
|
Disclaimer: Combos are written by various contributors, some combo notations may deviate slightly from the notation listed below.
For more information, see Controls
|
| IC
|
Input Instant Charge (22C) when you have the right amount of RF Meter.
|
| FIC
|
Input Flicker Instant Charge (22C) when you have the right amount of RF Meter.
|
| {X/Y/Z}
|
Move X or Y or Z can be used.
|
| #*
|
Indicates that any of A, B and C may be used with #. Example: 214*.
|
| [<- X] [-> X]
|
Side switch notation. All inputs grouped by the square brackets are performed facing the arrow's direction. They are still written as if they were done facing right, however.
|
| [X]xN
|
Loop the inputs in the square brackets as many times as N.
|
| c5B
|
Proximity normal only usable while close.
|
| f5B
|
Proximity normal only usable outside of c5B range or when cancelled from another normal. Known as far 5B.
|
| jX
|
Button X is input during your first jump.
|
| djX
|
Button X is input during your double jump.
|
| X(whiff)
|
Indicates that X is intended to whiff.
|
| X(tech trap)
|
Indicates a combo ender intended to catch the opponent's air tech. The most common kind of tech trap is j6C, which will air throw early techs and jC later techs. Executionally identical to X(whiff) but different in purpose.
|
| ~
|
Indicates a followup for moves which have them. Example: 236A~236A.
|
| ..
|
Indicates a short delay.
|
| IAD
|
Indicates an Instant Air Dash.
|
| IABD
|
Indicates an Instant Air Back Dash.
|
| (X)
|
X move is omittable from the combo.
|
| tk.X
|
Indicates the motion "X" is input immediately after leaving the ground. Stands for tiger knee.
|
Charge Cancelling
Charge Cancelling is key to playing Kano, both her pressure and her Napalm Loop require it.
- It cannot be done when Kano has a full magic meter.
- It is done by pressing S to start charging, and then pressing S again to stop her magic charge.
- If S is pressed too early the second time it will not register and you end up with Kano in her vulnerable charging animation. It is better to do the second S too late than too early.
- Key moves to learn how to Charge Cancel are 6B, 5C, 6C, 3C, and 66C.
- 6C Charge Cancel is especially important as it is the key to her Napalm Loop.
The Napalm Loop
This is Kano's main high damage combo, while it's most commonly used off a BIC, it can also start off certain spell or normal hits.
- Basic version to get the idea
- Needs full magic, 2+ super meter, full BIC meter.
- Opponent in the corner, Kano at a comfortable fB range.
214214B, wait (opponent gets frozen, lands), 6C, BIC, f5B, 5C, 6C, Charge Cancel, f5B, 5C, 6C, Charge Cancel, f5B, 5C, 6C, Charge Cancel, f5B, 5C, jump cancel, jB, j2A/j2C.
- Taking it apart:
- 214214B, wait (opponent gets frozen, lands): A combo into 214214B is very common, and what Kano should be looking for when she has BIC and 2 super meters. Use the time where the opponent is frozen to space Kano correctly for the loop.
- 6C, BIC: The launcher that allows for the Napalm Loop.
- f5B, 5C, 6C, Charge Cancel: The actual Napalm Loop, repeated 3 times in this instance
- f5B, 5C, jump cancel, jB, j2A/j2C: ender into knockdown.
- Important Notes
- You should go for a Napalm Loop rep only if the scaling (Power under the combo counter) is above 63.5, below that go for the ender.
- An alternative, higher execution ender is 66C, jA x 2, jump cancel, jA x 6, jB, land. This does more damage and builds more RF and SP meter.
- All Napalm Loops take place in the corner, here are some alternative starters:
- Similarly to the example above, any combo into 214214B in the corner with BIC.
- At f5B spacing: 214A, wait for apex of launch, 6C, charge cancel, Napalm Loop (1 iteration), Ender.
- At f5B spacing: 421A, 662B, Charge Cancel, (ice hits), Napalm Loop (2 iterations), Ender.
- At f5B spacing and opponent has guard gauge cranked up: 66C, Charge cancel, (position yourself), Napalm Loop, Ender.
Combo Routes
Damage listed is the approximate maximum one (Full RF or maximum Red RF gauge, minimum guts).
Optional moves and explanations are listed in parenthesis.
- Poverty, No Magic, No IC, No Super:
- Midscreen:
- 5A/2A (x n), c5B, f5B, 5C, 6C, (charge/charge cancel): ~2100 damage
- 5A/2A (x n), c5B, f5B, 3C (charge/charge cancel): ~1600 damage
- 5A/2A (x n), 2B, f5B, 5C, 6C, (charge/charge cancel): ~1700 damage
- Corner:
- All midscreen ones with the right spacing.
- 5A/2A, 2B, f5B, 2A (link), c5B, f5B, 5C, jump cancel, jA x 2, jump cancel, jA x 6, jB (2 hits), land, (5A, c5B, f5B): ~3500 damage, ~3800 with the optional extension after landing.
- Allows her to build 30% super meter if you neutral jump in the combo.
- The extension does more damage, but forces a hard read on their tech, giving up oki on being wrong. The lower damage version guarantees a knockown/tech trap.
- The aerial part of the combo (all the jAs ending with jB) is one of her fundamental combo parts, and her most common corner combo ender.
- Magic, No IC, No Super:
- Midscreen:
- 5A/2A (x n), c5B, f5B, 5C, 236C, 66C, (charge/charge cancel): ~3200 damage
- 5A/2A (x n), 2B, f5B, 236C, 66C, (charge/charge cancel): ~2900 damage
- Both of these combos are spacing dependent, you might need to adjust the lightning spacing and/or use B lightning, which will also affect damage for the worse.
- generally the 2B version is easier to hit with C lightning, while the 5C version is easier to hit with B lightning.
- Corner:
- 5A/2A (x n), c5B, f5B, 5C, 236B, 66C, jump cancel, jB, j2A: ~3460 damage
- The ender after the jump cancel is her other important one in the corner, used when the opponent is too high up for the previously mentioned jA one to hit.
- Example for her combo enders in increasing order of difficulty and damage:
- Mid range 214A, 66C, jump cancel, jB, j2A: ~2000 damage
- Mid range 214A, walk forward, fB, 5C, jump cancel, jA x 2, jump cancel, jA x 6, jB, land: ~3000 damage
- Mid range 214A, 6C, charge cancel, Napalm Loop: ~3700 with damage ender.
- Mid range 421A, 6B/6C/66B/662B/66C, charge cancel, (ice hits), Napalm Loop: ~4400 damage with high damage ender
- Napalm Loop is the most reliable followup once you have it down, other 2 enders need improv on timings and spacings.
- Red IC:
- Midscreen:
- Throw, IC, 214214C: ~4700 damage, needs full super and full magic.
- Corner:
- Throw, IC, wait, c5B, 5C, jump cancel, jA x 2, neutral jump cancel, jA x 6, jB, land: ~2800 damage, if you don't want to use super, or want to build 30% meter.
- Throw, IC, wait, c5B, (omit to make it easier) f5B, 3C, (late cancel) 214214A, wait, 2B, f5B, 5C, jump cancel, jA x 2, neutral jump cancel, jA x 6, jB, land: ~3700 damage, full magic and 1 super, regain ~65% super and IC for oki.
- Throw, IC, wait, c5B, 3C, 2141236A/B/C: ~2900 damage for level 1, 3500 for level 2, 4100 for level 3. If you have super but the magic gauge isn't full.
- Throw, IC, wait, c5B, f5B, 5C, 236236C: ~4300 damage, to get meteors.
- Throw, IC, 641236C: ~4600 damage, for max damage
- Blue IC:
- All Red IC combos are valid, do more damage.
- Corner:
- Any combo into 214214B, 6C, BIC, Napalm loop: ~up to 7500+ damage.
Win Quotes
| Japanese
|
English
|
|
ちゃちゃっと
朝飯前なんだよぉ!
|
I eat people like you for breakfast!
|
|
どすこーい!
どすこーい!
どす…
…アレ?
|
Dosukooi!
Dosukooi!
Dosu...
...huh?
|
|
うわー…
ゴメン
ちょっと加減
間違えたかも…
|
Uwa~...
Sorry!
I might have
overdone it a bit...
|
|
テン ニ
トド ケ ヨ
アマタ ノ
ネガ イ
ツバサ モツ モノ
トワ ノ
ソラ ヘ ト
|
DELIVER TO HEAVEN
EVERYONE'S WISHES
THOSE WITH WINGS
TO THE ENDLESS SKY
|
|
かのりん
大勝利だぁ!
|
Kano-rin's
great victory!
|
|
(To Sayuri)
魔法が使えたら…
うん
悪くないと思うよ
思っていたのと
ちょっと違うけどね
|
(To Sayuri)
If you can use magic...
Yeah,
that's not bad at all.
A little different that what
I had imagined, though.
|
|
(To UNKNOWN)
何も変わらない
ってのも
良いんだと思うよ
でも
何も変われない
ってのは
良くないと思う
|
(To UNKNOWN)
I think it's fine
if nothing changes.
But.
I don't think it's good
if nothing can change.
|
|
(To Kano)
よーし
君をかのりん影武者隊
一号に任命する!
折角だからもっと
たくさん欲しいねぇ
|
(To Kano)
All right!
I hereby appoint you
"Kanorin Body Double No. 1"!
While we're at it,
I kind want a whole army...
|
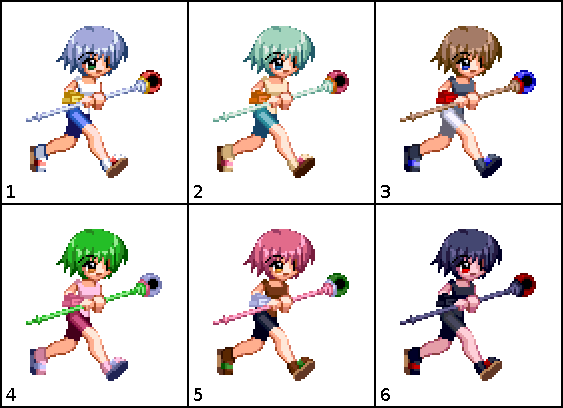
Colors
In-game References
External References
- The name and look of every single one of Kano's magic spells is taken from the Mage/Wizard class spells, from Ragnarok Online.
- The way that Kano gradually recovers SP, and the fact that she recovers it faster by staying still, is based on the basic gameplay of Ragnarok Online. Even the blue numbers that show up and fade away is exactly like Ragnarok Online.
AIR References
- The shinto shrine in the background is a common recurring location in Kano's scenario.
- The magic that Kano uses is a reference to her dream of becoming a magician in AIR.
- The entire scenario in Kano's "Memory of Shiraho" move is based on an actual event that takes place in the game.
| General
|
|
| Characters
|
|
| Mechanics
|
|
| Guides
|
|
| Wiki
|
|


