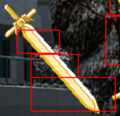
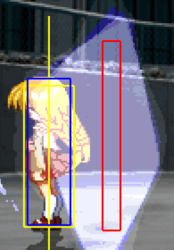
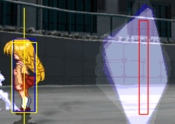
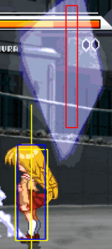
Eternal Fighter Zero/Akane Satomura: Difference between revisions
m (→Combos) |
(→Okizeme: Moved Akane Okizeme section over from my user page) |
||
| (16 intermediate revisions by 3 users not shown) | |||
| Line 44: | Line 44: | ||
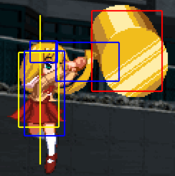
====== <font style="display:none" size="0">c5B</font> ====== | ====== <font style="display:none" size="0">c5B</font> ====== | ||
{{MoveData | {{MoveData | ||
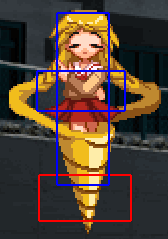
|image= | |image=EFZ_Akane_c5B.png | ||
|caption= | |caption= | ||
|name=c5B | |name=c5B | ||
|data= | |data= | ||
{{AttackData-EFZ | {{AttackData-EFZ | ||
|version=Active Frames 1 - 2 | |version=Active Frames 1-2 | ||
|damage=360 | |damage=360 | ||
|guard=Ground | |guard=Ground | ||
| Line 65: | Line 63: | ||
{{AttackData-EFZ | {{AttackData-EFZ | ||
|header=no | |header=no | ||
|version=Active Frames 3 - 4 | |version=Active Frames 3-4 | ||
|damage=350 | |damage=350 | ||
|guard=Ground | |guard=Ground | ||
| Line 79: | Line 77: | ||
{{AttackData-EFZ | {{AttackData-EFZ | ||
|header=no | |header=no | ||
|version=Active Frames 5 - 7 | |version=Active Frames 5-7 | ||
|damage=300 | |damage=300 | ||
|guard=Ground | |guard=Ground | ||
| Line 90: | Line 88: | ||
|cancel=N SP J IC f5B 2B | |cancel=N SP J IC f5B 2B | ||
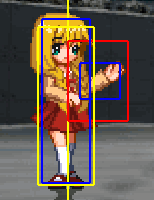
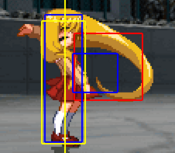
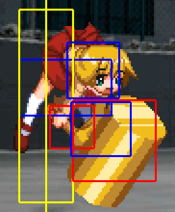
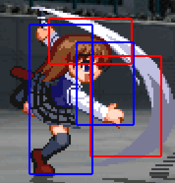
|description=Akane tosses her hair forward into the opponent. | |description=Akane tosses her hair forward into the opponent. | ||
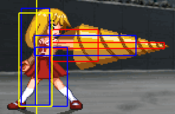
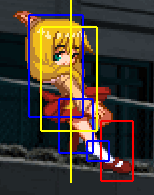
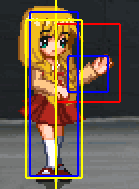
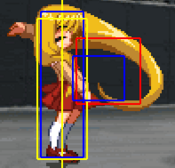
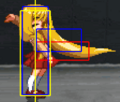
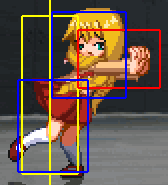
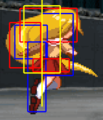
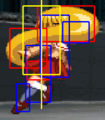
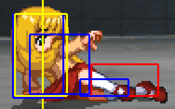
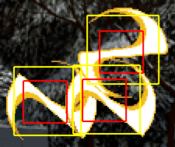
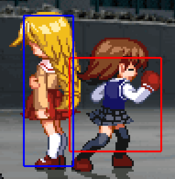
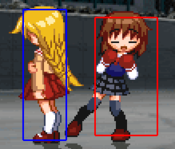
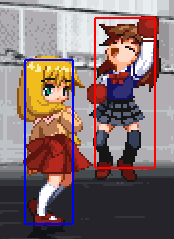
<gallery class="mw-collapsible mw-collapsed" data-expandtext="show hitboxes" data-collapsetext="hide hitboxes"> | |||
EFZ_Akane_c5B_1.png|Active frames 3-4 | |||
EFZ_Akane_c5B_2.png|Active frames 5-7 | |||
</gallery> | |||
}} | }} | ||
}} | }} | ||
| Line 300: | Line 302: | ||
====== <font style="display:none" size="0">66B</font> ====== | ====== <font style="display:none" size="0">66B</font> ====== | ||
{{MoveData | {{MoveData | ||
|image= | |image=EFZ_Akane_66B.png | ||
|caption= | |caption= | ||
|name=66B | |name=66B | ||
|data= | |data= | ||
| Line 316: | Line 316: | ||
|advBlock=-7~-1 | |advBlock=-7~-1 | ||
|cancel=SP J IC | |cancel=SP J IC | ||
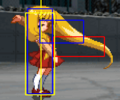
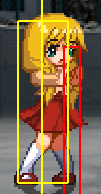
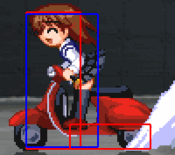
|description=Akane tosses her hair forward into the opponent. | |description=Akane tosses her hair forward into the opponent with afterimages following her. Hits multiple times. | ||
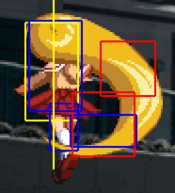
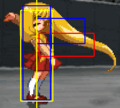
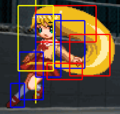
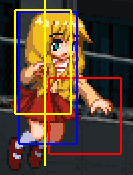
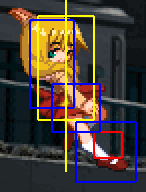
<gallery class="mw-collapsible mw-collapsed" data-expandtext="show hitboxes" data-collapsetext="hide hitboxes"> | |||
EFZ_Akane_66B_1.png|2nd hit | |||
EFZ_Akane_66B_2.png|3rd hit | |||
</gallery> | |||
}} | }} | ||
}} | }} | ||
| Line 557: | Line 561: | ||
|image2=Akane623bc.png | |image2=Akane623bc.png | ||
|caption2=623B/C | |caption2=623B/C | ||
|name=Rainy Spin <br> レイニースピン | |name=Rainy Spin <br> レイニースピン | ||
|input=623* | |input=623* | ||
| Line 615: | Line 614: | ||
* Requires 50% RF to use. | * Requires 50% RF to use. | ||
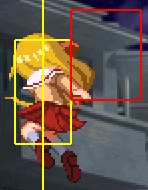
* IC'ing the 7th hit will launch the opponent while keeping Akane grounded. | * IC'ing the 7th hit will launch the opponent while keeping Akane grounded. | ||
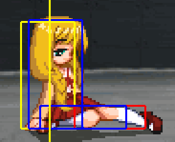
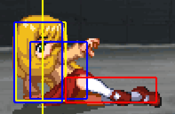
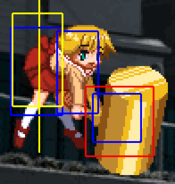
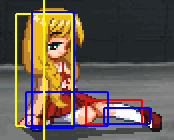
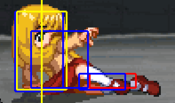
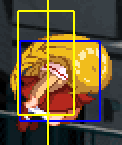
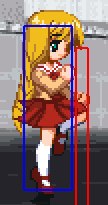
<gallery class="mw-collapsible mw-collapsed" data-expandtext="show rising hitboxes" data-collapsetext="hide rising hitboxes"> | |||
EFZ_Akane_623A_2.png | |||
EFZ_Akane_623A_3.png | |||
EFZ_Akane_623A_4.png | |||
EFZ_Akane_623A_5.png | |||
</gallery> | |||
}} | }} | ||
}} | }} | ||
| Line 879: | Line 885: | ||
{{MoveData | {{MoveData | ||
|image=EFZ_Akane_236236X_1.png | |image=EFZ_Akane_236236X_1.png | ||
|caption= | |caption= | ||
|name=Rain of Tears <br> レインオブティア | |name=Rain of Tears <br> レインオブティア | ||
| Line 925: | Line 928: | ||
|cancel=None | |cancel=None | ||
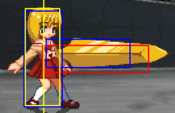
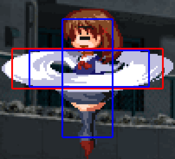
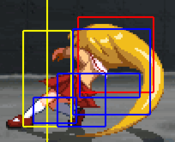
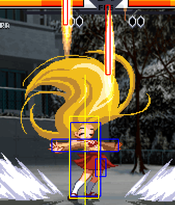
|description=Akane launches several hair swords straight up off screen. A moment later, the swords fall aimed at the opponent. There are three different random angles of falling sword which have increasing damage and chip correlating to how steep the sword falls. The opponent can be hit by both the launched swords going up and the falling swords coming down. The number of swords that fall is directly related to the number of swords Akane launches. If Akane is interrupted by an opponent during the move and only launches 5 swords, only 5 swords will fall. In the corner, this attack can easily be comboed after a 214 4C or a 66C wallbounce. It is usually used for tech trap okizeme setups or just for damage. Don't use this randomly because it is easily punished by throws, the throw invincibility keeps the opponent safe from falling swords. | |description=Akane launches several hair swords straight up off screen. A moment later, the swords fall aimed at the opponent. There are three different random angles of falling sword which have increasing damage and chip correlating to how steep the sword falls. The opponent can be hit by both the launched swords going up and the falling swords coming down. The number of swords that fall is directly related to the number of swords Akane launches. If Akane is interrupted by an opponent during the move and only launches 5 swords, only 5 swords will fall. In the corner, this attack can easily be comboed after a 214 4C or a 66C wallbounce. It is usually used for tech trap okizeme setups or just for damage. Don't use this randomly because it is easily punished by throws, the throw invincibility keeps the opponent safe from falling swords. | ||
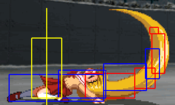
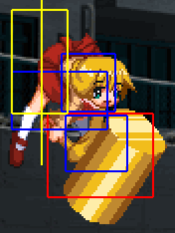
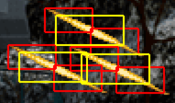
<gallery class="mw-collapsible mw-collapsed" data-expandtext="show sword hitboxes" data-collapsetext="hide sword hitboxes"> | |||
EFZ_Akane_236236X_2.png | |||
EFZ_Akane_236236X_3.png | |||
Akane236236p2.png | |||
</gallery> | |||
}} | }} | ||
}} | }} | ||
| Line 1,153: | Line 1,162: | ||
== Combos == | == Combos == | ||
:Replay pack: [https://mega.nz/file/lo0G3Z7D#GArkBXK39OY0TMRJ848V3meVpTttN1X7SWXwJMlojRo Mizuumi Akane Combos] | |||
{{ComboLegend-EFZ}} | {{ComboLegend-EFZ}} | ||
When performing Akane's combos it is especially important to consider which character your opponent is playing because her combo routes and timings can deviate dramatically between characters. In order to practice efficiently check the [[Eternal_Fighter_Zero/Players|Player List]], spectate matches, watch replays and interact with the community to discover which characters your opponents are likely to pick. In casual matches, if you have been training to fight a particular player's character don't be afraid to ask your opponent to switch or stick to that character. | |||
Combos can also change if you are Player 1 or 2 and/or in the left or right corner. Keep track of these variables when playing and practice each of these scenarios, particularly for any corner combos that utilise 214*~4C. | |||
Be prepared to adapt your combo routes on the fly: spacing, timing, positioning and unusual juggle hurtboxes will often influence your combo options. | |||
=== No IC === | === No IC === | ||
''Anywhere'' | |||
:'''2AA c5B {f5B/2B} 2C''' | |||
:*Basic knockdown which leads to midscreen okizeme setups. | |||
''Corner'' | |||
:'''Throw FM''' | |||
''Corner Facing Out'' | |||
:'''2AA c5B {f5B/2B} 5C 236B 662B ({2ABC/623B})''' | |||
:*662B 2A is very tight character specific link that only works with a perfectly spaced 662B. | |||
:*623B can be used to eke out extra damage but the opponent can air recover after this. | |||
==== | ==== 2C Jump Cancel Pickups ==== | ||
:From deep jump-ins or starters very close to the opponent, it can be possible to perform extended combos without using IC by jump cancelling 2C. These combos are situational but can be practical in the corner. | |||
:''Corner'' | |||
::'''{jC/5A(A)/2A(A)} 2B .. 2C jAAB6C djBC [j236A IC](tech trap)''' | |||
::*Works on everyone except Akane, Mayu and Unknown. | |||
::*Hard on Mio (the second jA sometimes drops with very close 2Cs) and Mishio. | |||
* | : | ||
::'''{5A/2A} 5B 2B .. 2C jAAB6C djBC [j236A IC](tech trap)''' | |||
::*Works on everyone except Akane, Mayu, Sayuri, Unknown and Mishio. | |||
::'''{jC/5A/2A} 2B .. 2C jB 66 jB j214C~4C...''' | |||
::*Works on everyone except Makoto. | |||
::*Hard on Mizuka, Rumi, Ayu, Shiori, Misuzu, Doppel, Unknown and Nayuki (Awake). | |||
* | |||
::'''{jC/5A/2A} 2B .. 2C jB 66 jA6C land j6C djC [j236A IC](tech trap)''' | |||
::*Works on everyone except Makoto. | |||
::*Hard on Mizuka, Rumi, Ayu, Shiori, Misuzu, Doppel, Unknown and Nayuki (Awake). | |||
* | |||
* | |||
::'''{jC/5A(A)/2A(A)} 2B .. 2C jAAB6C 236236C j6C djC [j236A IC](tech trap)''' | |||
::*Works on everyone except Akane, Mayu and Unknown. | |||
::*Hard on Mio (the second jA sometimes drops with very close 2Cs) and Mishio. | |||
::'''{jC/5A/2A} 2B .. 2C jB 66 jA6C 236236C j6C djC [j236A IC](tech trap)''' | |||
::*Works on everyone except Makoto. | |||
*Works on everyone except | ::*Hard on Mizuka, Rumi, Ayu, Shiori, Misuzu, Doppel, Unknown and Nayuki (Awake). | ||
:''Midscreen'' | |||
::'''{5A/2A} 2B .. 2C jB 66 jB j214C~4C''' | |||
::*Works on Mio, Shiori, Mai, Kaori, Akiko and Kanna. | |||
::*Hard but possible on Kano, Ikumi and Unknown. | |||
* | |||
::'''{5A/2A} c5B 2B .. 2C jC''' | |||
::*Works on Rumi, Mio, Doppel and Nayuki (Awake). | |||
* | |||
::'''{5A/2A} 2B .. 2C jC''' | |||
::*Works on Mizuka, Rumi, Mio, Doppel, Nayuki (Awake), Mishio and Akiko. | |||
* | |||
=== Red IC === | === Red IC === | ||
''Anywhere'' | |||
:'''{j236A/j236B} IC 66B(1) jB djB j66 jB j214C~4C...''' | |||
:*Basic juggle that works on all characters. | |||
:'''{j236A/j236B} IC 5C(3-4) {412B/412C/214C}~5C c5B 214C~5C c5B 214C~4C...''' | |||
:*Air Sting loop that works on most characters. | |||
:'''{j236A/j236B} IC 5C(3-4) {412B/412C/214C}~5C c5B 214C~5C 5A 66C 236A 9 j214C~4C...''' | |||
:*Closer to the corner you may need to jump 7 rather than 9. | |||
:'''{j236A/j236B} IC 5C(3-4) {412B/412C/214C}~5C c5B 214C~5C 5A 66C 236A 662B(whiff) 236236A''' | |||
:*Variation of the above combo with swords okizeme when closer to the corner you may need to 44 rather than 662B. | |||
:'''623A(1-2) IC 662B(cross under) 5C 214C~5C...''' | |||
:*Situational sideswap, can be used after a close 662B or crossup Air Sting to corner the opponent. | |||
:'''Throw IC FM''' | |||
''Midscreen'' | |||
:'''2ABC 236C .. 5A .. c5B 2C IAD jB...''' | |||
:*Timing is character specific. | |||
:'''2AABC IC 662B 5A 2C IAD jB...''' | |||
:*Only works on a few characters. | |||
:'''{j236A/j236B} IC 5C(3-4) {412B/412C/214C}~5C c5BB 2C IAD jB {5A/66A} 66C...''' | |||
:*Air Sting and c5B need to hit at the exact height demonstrated, if you can tell that the height is not correct then you should fall back to an Air Sting loop. | |||
:'''{j236A/j236B} IC 5C(3-4) {412B/412C/214C}~5C c5BB 2C IAD jB (c5B) jBC j66 j6C(tech trap)''' | |||
:*Use this when further out from the corner where 66C wouldn't wallbounce. | |||
:'''{j236A/j236B} IC 5C(3-4) {412B/412C/214C}~5C c5BB 2C IAD jB 5A 2C IAD jB...''' | |||
:*Character specific double 2C IAD extension. | |||
:*Very difficult to get a 66C ender after this due to limited juggle time. | |||
:'''{j236A/j236B} IC 5C(3-4) {412B/412C/214C}~5C c5B 214C~5C c5BB 2C IAD jB...''' | |||
:*Variation with Air Sting to adjust height. | |||
:'''{j236A/j236B} IC {5A/c5B} 2C IAD jB {5A/c5B} 2C IAD jB {5A/c5B} 2C IAD jB 66C...''' | |||
:*More damaging than Air Sting combos but can be extremely difficult on some characters. | |||
:*Highly recommended to use on Ayu and Mai because it is much easier than usual and the other routes often drop. | |||
:'''{j236A/j236B}(1) IC 236B 2C IAD jB {5A/c5B} 2C IAD jB 66C...''' | |||
:*Experimental Shiiko route, needs more testing. | |||
:*Only works midscreen due to 236B travel time. | |||
''Corner'' | |||
:'''2AA c5B {f5B/2B} 2C IC 66C {766/7966} jB 66C...''' | |||
:'''2AA c5B {f5B/2B} 2C IC .. 66C .. 214B~5C {5A/66A} 66C...''' | |||
:*Delay 66C to wallbounce as low as possible. | |||
* | |||
:'''{j236A/j236B}(1) IC 66C [{766/7966} jB 66C]x2...''' | |||
:'''{j236A/j236B}(1) IC [.. 66C .. 214B~5C]x2 {5A/66A} 66C...''' | |||
:*Delay 66C to wallbounce as low as possible. | |||
* | |||
:'''{j236A/j236B}(1) IC 66C IABD 236B .. 2C IAD jB 66C...''' | |||
:*Experimental Shiiko route, needs more testing. | |||
* | |||
:'''Throw IC 66C 214B~C c5B 2C 412C~2C (2A) 2C jAAB (djB j6C tech trap)''' | |||
''Corner Facing Out'' | |||
:'''2AA c5B {f5B/2B} 5C 236B 662B 623B(5) IC 2C''' | |||
:*Knockdown which leads to midscreen okizeme setups. | |||
:*At some spacings you may need to walk backwards before doing 2C, input this as 1C to avoid misinputting 412C. | |||
* | |||
:'''2AA c5B {f5B/2B} 5C 236B 662B 623B(5) IC 2C IAD jB land c5B jBC j66 j6C(tech trap)''' | |||
:*Full corner to corner carry. | |||
* | |||
=== Blue IC === | === Blue IC === | ||
:Akane's Blue IC combos are generally quite similar to her Red IC combos often just adding in an extra wallbounce loop and/or a fancy starter. Her Red IC combos will also work fine with Blue IC doing slightly more damage and being more more lenient with juggle times. | |||
The combos | |||
''Anywhere'' | |||
:'''{j236A/j236B} BIC 5C(3-4) 412B~5C 5C(3-4) 412B~5C c5B 214C~5C c5B 214C~5C ({5A/66A}) 66C...''' | |||
:'''{j236A/j236B}(1) BIC {c5B/5C(7-9)} 214C~4C 66 66C...''' | |||
:* BIC double proration optimisation, requires full BIC bar. | |||
:* 7 hits of 5C is optimal. | |||
:* 5B is more stable midscreen. | |||
''Corner'' | |||
:'''2AA c5B {f5B/2B} 2C BIC 66C [{766/7966} jB 66C]x3...''' | |||
:'''2AA c5B {f5B/2B} 2C BIC 66C [214B~5C 66C]x3 IABD j214B~5C c5B 2C IAD jB 66C...''' | |||
:'''214A~4C jB BIC 214C~4C 236A 214C~C 5B 66C...''' | |||
:'''214A~4C jB BIC 214C~4C 66C...''' | |||
=== Combo Enders === | |||
:Routes on this page ending with "..." have various combo enders shown below based on positioning, available meter and desired okizeme options. | |||
''Anywhere'' | |||
:'''...(c5B) jBC j66 j6C(tech trap)''' | |||
''Near Corner'' | |||
:'''...66C 236A 9 j214C~4C...''' | |||
:*High damage near corner ender. | |||
:*Closer to the corner you may need to jump 7 rather than 9. | |||
:'''...66C 7 jC(whiff) land jBC''' | |||
:*jBC must be done low to prevent air recovery. | |||
:*Leaves a small gap in the corner for left/right okizeme. | |||
:'''...66C 236A 662B(whiff) [buffer facing -> 236236A(tech trap)]''' | |||
:*Sword setup for near corner. | |||
:*662B can steal the corner to set up left/right swords okizeme. | |||
''Corner'' | |||
:'''...(c5B) jB j6C djBC [j236A IC](tech trap)''' | |||
:*Should only be used with IC available because the opponent can air recover after getting hit by j236A without a combo. | |||
:'''...66C 236A [-> 44] 236236A(tech trap)''' | |||
:*Standard corner setup for left/right swords okizeme. | |||
:*Does not steal the corner from Mai due to her wide collision box. | |||
:*Kano and Mio wake up too slowly for the falling swords to hit, 236236B can be used instead. | |||
:'''...66C 236A 236236B [<- 6] 7 dj214C~4C''' | |||
:*The opponent can air recover after this. | |||
:'''...66C 236A 236236C [<- 6] j6C djC [j236A IC](tech trap)''' | |||
:'''...66C 236A 236236C j6C djC j236C''' | |||
:*The opponent can air recover after this. | |||
==== 214*~4C Followups ==== | |||
:Combos ending in 214*~4C often deal high damage but leave the opponent high in the air. Tech traps and okizeme may only be available with meter, this often means the opponent will be able to safely air recover. | |||
:'''...78 [djB j6C](tech trap)''' | |||
:*Corner tech trap. | |||
:*Only works from low 214C~4Cs above ~60 power. | |||
:*On hit combos into 214~4C. | |||
:'''...(jB) j6C (jB) dj6C''' | |||
:*The opponent can air recover after this. | |||
:*Mainly for eking out extra damage to kill or when no meter is available. | |||
:*One or two jBs can be added in the corner if the height and power allows. | |||
:*Player 2 Akane in the right-hand corner will steal the corner so must walk out of the corner before jumping. This extra walking time means that player 2 Akane will often be unable to do these followups. | |||
:'''...236236A(tech trap)''' | |||
:*Player 2 Akane in the right-hand corner steals the corner after the 4C followup, in this case 236236A must be input in the opposite direction. This allows player 2 Akane to do left/right swords okizeme. | |||
:'''...236236B/C 7 dj8 j214C~4C''' | |||
:*High damage meter dump. | |||
:*The opponent can air recover after this. | |||
:*Player 2 Akane in the right-hand corner steals the corner after the 4C followup, in this case 236236B/C must be input in the opposite direction. | |||
==== | ==== From 214214B Okizeme ==== | ||
:'''412*~2C (66)2A(OTG) c5B 2C IAD jB...''' | |||
* | :'''412*~2C [buffer facing -> 236B(OTG)] 2C IAD jB {5A/c5B} 2C IAD jB...''' | ||
:'''412*~5C(whiff) 5C(3-4) {412B/412C/214C}~5C''' | |||
:*Safer route against characters with large vertical reversals. | |||
:*You may need to microwalk before 5C to adjust your spacing. | |||
==== From 236236* Okizeme ==== | |||
:'''412A~2C (66)2A(OTG) 66C ({766/7966} jB 66C)...''' | |||
:'''412A~2C (66)2A(OTG) 66C .. 214B~5C {5A/66A} 66C...''' | |||
:'''412A~2C (66)2A(OTG) 66C IABD j214B~5C c5B 2C IAD jB 66C...''' | |||
:'''{IAD/j9/214A~6C(whiff)} 66C 7966 jB 66C...''' | |||
:*Wait until the swords stop hitting or 66C won't wallbounce. | |||
== Okizeme == | |||
=== From 2C === | |||
''Meterless'' | |||
:'''IAD jC land 2A''' | |||
:*Can land on either side for a left/right mixup with 2A depending on spacing and how long you hold the airdash. Delaying slightly can mixup high/low with jC and 2A but make sure you are spaced sufficiently to hit jC in front. | |||
:*If spaced correctly (quite close so that the airdash is cancelled for turn around buttons) or just outside the corner you can attempt to cross up with IAD jAB {2B/662B} or IAD jC {2B/662B}. | |||
}} | |||
:'''7 j66 jC''' | |||
:*Safejump setup which can land on either side. jC can crossup here but it is quite difficult. | |||
{{EFZComboVideo | {{EFZComboVideo | ||
|text=''' | |text=:'''669 jC''' | ||
|video={{#ev:youtube|xX7PG3B-sJg|||||start=263&end=276}} | |||
|video={{#ev:youtube| | |||
}} | }} | ||
:*Safejump setup which can land on either side. jC can crossup here but it is quite difficult. The advantage of this setup is that you still have a double jump and airdash available on block for further mixups or to escape RG. | |||
:'''9 jA djAC''' | |||
:*Safejump setup which can land on either side. This one is quite hard for the opponent to see because the double jump scrolls them off screen. The speed of falling from a greater height also makes this an easier safejump. | |||
''With IC'' | |||
:If you end a corner combo with 236C and then push the opponent just outside the corner with 662B, the exhaust fumes of the scooter can be used to hide your left/right/high/low mixup. | |||
{{EFZComboVideo | {{EFZComboVideo | ||
|text= | |text=:'''IAD j236A or IAD j236B''' | ||
|video={{#ev:youtube|xX7PG3B-sJg|||||start=278&end=296}} | |||
|video={{#ev:youtube| | |||
}} | }} | ||
:*By airdashing just behind the opponent and using bad waffle you can do a crossup high and combo or start pressure on block. The B version will be an uncrossup high since it moves backwards during the startup which can be very hard to block correctly. The startup of jC looks somewhat like bad waffle so you can use jC land 2A as a mixup, this makes bad waffle even harder to react to. | |||
:'''669 jA(whiff) j236*''' | |||
:*Similar to above but you can choose to do the bad waffle from higher up which forfeits the low mixup potential for another left/right mixup depending on whether bad waffle has passed through them by the time they wakeup. | |||
: | :'''.. 669 jC(high up) j236A IC''' | ||
:*This can be used to bait some reversals because they will whiff under the jC and on RG it is hard to counterpoke against bad waffle at that height. | |||
''With Super Meter'' | |||
: | :It is important to know the spacing of the 214214B barrier to ensure it will meaty their wakeup. If you cancel 2C instantly into 214214B it will combo so delay it slightly. | ||
: | :'''214214B 66412B''' | ||
:: | :'''214214B 66 (do nothing)''' | ||
:*If the barrier hits you can pickup with 2C IAD. | |||
:: | {{EFZComboVideo | ||
|text=:'''214214B ({66A/662A}(whiff)) 412C''' | |||
|video={{#ev:youtube|xX7PG3B-sJg|||||start=297&end=316}} | |||
}} | |||
:*66A or 662A can be used to reposition and/or assist with timing. | |||
: | :'''214214B 214C~5C''' | ||
: | :'''214214B IAD(hold)''' | ||
: | :'''214214B 662B(whiff) 412A''' | ||
:*Use this to corpse push if they would otherwise wakeup in front of the mirror. | |||
=== Left/Right Swords === | |||
: | {{EFZComboVideo | ||
|text=:'''236236A(left/right setup) 412A~2C''' | |||
|video={{#ev:youtube|xX7PG3B-sJg|||||start=316&end=337}} | |||
}} | |||
:*Vary the timing of 412A to get left or right. | |||
:*If blocked the 2C pile masher followup will act as a second mixup because of the pushback from the swords. | |||
: | :'''236236A(left/right setup) {IAD/j9/214A~6C(whiff)}''' | ||
:*Vary the timing to get left or right. | |||
:*On characters with a tall wakeup like Nayuki you will need to airdash slightly higher up to cross over them. | |||
=== Other === | |||
: | :'''412C~236A FIC 412C~2C 2A...''' | ||
:*Left/right stun needles setup, use from point blank. | |||
:*You must FIC and trick leap as fast as possible to get the crossup. | |||
:*On hit the 2C pile masher followup will allow you to pickup an OTG combo afterwards. | |||
:*Can also work in blockstrings. | |||
:: | {{EFZComboVideo | ||
|text=:'''641236C''' | |||
: | |video={{#ev:youtube|xX7PG3B-sJg|||||start=338&end=353}} | ||
}} | |||
:*Level 3 Shiiko is unblockable and you can punish any reversals depending on the setup. The typical setup from a corner combo is: 66C 641236C backwards hit 66A which puts them into the corner to be meatied by the unblockable. Just setting up 641236C from any close up knockdown (like a dropped combo) and then meatying with 1A c5B 5C 623B is also an option to keep the opponent stuck in the unblockable. This is not unescapable or safe from all reversals though so be sure to check your opponents meter and be ready to bait. | |||
== Win Quotes == | == Win Quotes == | ||
Revision as of 15:28, 15 June 2024
Introduction
Satomura Akane (里村 茜) is the Millia of EFZ, both in how she plays and how she looks. While she has low damage, her mixup game is extremely strong as in addition to Millia’s tools, she received Urien’s Aegis Reflector and Akuma’s Demon Flip. She is also a threat in the neutral game, being able to use Captain Commando style assists to control space. Her limits are mostly linked to the player’s execution, as the timings of her various setups and combos are extremely tight and character specific.
Akane is one of the heroines of ONE, a visual novel produced by Tactics in 1998. She is a classmate of Kouhei. When it rains, one will always find Akane at the grassy field, looking as if she was waiting for someone. She is very quiet to the point where you could say she isolates herself from others. During ONE, Kouhei learns the reason for Akane's melancholy, which is connected to his own fate...
Akane was part of EFZ's original cast.
Stage: Rainy Field (雨の空き地)
BGM: A Tair
Character-Specific Notes
- Akane is assisted by her friend Shiiko in some of her attacks. Any move involving Shiiko cannot be used while she is already on-screen.
Normal Moves
| Frame Data Help | |
|---|---|
| The notation for the move lists can be found under Controls. | |
| Cells filled with a "-" indicate a placeholder. Cells filled by a "/" indicate a non-applicable field. | |
| Values separated by a "~" (X~Y) indicate a range or variance. A "~" preceding a single value (~X) may indicate approximation. A "-" separating frame values of a property (X-Y) indicate the duration of the property. | |
| Cell data accompanied by a ※ indicate properties unusual to the template. Explanations for such properties can be found at another ※ in the description. If a move requires multiple ※'s, subscripts will be attached to indicate relation (※1, ※2, ※3...). | |
| Frame data with decimal values .33 or .66 relate to subframes. | |
| Version | Used for moves with multiple special attacks on one motion. |
| Damage | The base damage value that the specific hit will do. See damage scaling for more information. |
| Proration | Base value Power% reduces by per hit. |
| Juggle | Juggle value used to determine juggle time after a move hits an aerial or juggle state opponent. |
| Guard | Indicates how the move must be blocked, if it can be blocked at all.
Low: Crouch Block |
| Property | Shows what properties the move has and the time (in frames) that these properties are active. Example: "I: 0.33-9", which means the move is invulnerable on the first subframe of the move until the 9th full frame (or 27th subframe).
I: Full Invincibility |
| Startup | Indicates where the move's first active hitbox is. |
| Active | Total frames the hitbox is active for. |
| Recovery | Total frames until the character can block. Note: After the recovery of any action, before any other action may occur, there exists 1 frame in which the only action you may take is to block. |
| Adv Hit | Frame advantage on hit. |
| Adv Block | Frame advantage on block. |
| Cancel | Possible cancel options.
N: Normals |
Standing
5A
5A
|
|---|
c5B
c5B
|
|---|
f5B
f5B
|
|---|
5C
5C
|
|---|
Crouching
2A
2A
|
|---|
2B
2B
|
|---|
2C
2C
|
|---|
Jumping
j5A
j5A
|
|---|
j5B
j5B
|
|---|
j5C
j5C
|
|---|
j6C
Side Hammer
サイドハンマー j6C |
|---|
Dashing
66A
66A
|
|---|
66B
66B
|
|---|
66C
66C
|
|---|
662A
662A
|
|---|
662B
662B
|
|---|
662C
662C
|
|---|
Grabs
Ground Grab
Ground Grab
Close 6C/4C |
|---|
Air Grab
Air Grab
Close j6C |
|---|
Special Moves
Specials
236*
Enter Shiiko-san 詩子さん登場です 236* 236A (Shiikocopter) 236A (Shiikocopter) 236B 236B 236C (Bike) 236C
(Bike) |
Akane calls her friend Shiiko to attack for her, similar to Captain Commando's assists in MVC2. Akane is unactionable until she removes her hand from her shoulder, which can leave her vulnerable. Shiiko cannot be called if she is already out and if hit will lie on the ground for a while before getting up and retreating. |
|---|
623*
Rainy Spin レイニースピン 623* 623A/Launching hit 623A/Launching hit 623B/C 623B/C
|
Akane spins into the air. Extremely punishable on whiff or block without IC, and has the special property of not allowing Akane to Recoil Counter during the landing recovery, giving the opponent guaranteed punishes after an RG. All versions allow the opponent to air recover with little risk, so the reward on hit is middling. |
|---|
214*/412*
Assault Leap アサルトリープ (j)214* Trick Leap
トリックリープ (j)412* |
Demon Flip. Both Assault Leap and Trick Leap can cancel into a variety of follow-ups, listed below. |
|---|
214*/412*_FOLLOWUP
Assault/Trick Leap Follow-ups 214A/C~Empty follow-up 214A/C~Empty follow-up 214*~4C 214*~4C 214*/412*~5C 214*/412*~5C 214*/412*~236A/C 214*/412*~236A/C 214*/412*~236B 214*/412*~236B Bouncing RF Needles Bouncing RF Needles 412*~2C 412*~2C
|
|---|
j236*
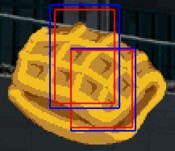
Bad Waffle
バッドワッフル j236* |
|---|
Eternity Specials
236236*
Rain of Tears
レインオブティア 236236* |
|---|
214214*
Absolute Rejection Barrier 絶対拒否障壁 214214* A A B B C C
|
Akane turns her back toward the opponent and summons a barrier that slowly moves forward. All versions cost 1 SP meter. Barriers do little damage but stun the opponent for a long time on hit. Barrier collision overlaps with barrier hitboxes. |
|---|
641236*
Dempshiiko Roll デンプ詩子ロール 641236* 641236A 641236A 641236B 641236B 641236C 641236C
|
|---|
Final Memory
FM
Unpleasant Hell Murder
嫌獄殺 AA6BC |
|---|
Strategy
- Akane is an executionally demanding setplay oriented character with strong mixup options, especially with meter.
- Akane's combo damage is often quite low without utilising her advanced combos which are difficult and vary a lot depending on the opponent's character and screen position.
- Akane's longer range attacks have extended hurtboxes which are often beaten by more footsie based characters. This leads to Akane often playing a patient neutral utilising her assist, Shiiko, to control space.
Neutral
- Notable moves
- f5B - A decently ranged poke with low commitment.
- 2B - A fast low slide, it doesn't go as far as its dashing counterpart but is safer and good in RG battles. There is also a momentum glitch which gives this move a substantial speed and distance boost. This can be performed by pressing 3B in a single frame window (you can start from 6).
- 5C - Giant multi-hitting air unblockable drill. This move usefulness is very matchup dependant, some characters with small crouching hurtboxes like Ikumi, Mayu, Mio and Nayuki (Asleep) can crouch and even poke underneath this attack.
- 662B - Very fast long distance sliding low, great for punishing and making your opponent watch their toes.
- j6C - Amazing horizontal and upwards vertical reach, use this to defend your airspace. Unfortunately difficult to convert from unless near the corner.
- j5B - Akane's go to air to air move, it has the same startup as her j5A with less active frames but much better horizontal reach. Easy to convert from.
- Anti-airs
- 236A - It is important to consider screen position when using this move, when Akane is cornered the move hits much faster, when the opponent is cornered it will reach them extremely slowly. There are several ways this move can play out against a jump in. The most simple is opponent is hit by Shiiko, depending on their height and distance from Akane it may be possible to combo afterwards. The opponent can hit Akane and then gets hit by Shiiko, this is often the ideal scenario and gives the most opportunity to combo at the expense of some HP. The opponent can hit Shiiko knocking her out for a short time, depending on the attack this can give Akane time to jump up and punish (provided the attack didn't also hit Akane).
- 236B - The same rules and scenarios as 236A apply. This is slightly slower but does hit lower down where 236A would whiff, this is most useful against hoverdashes and instant airdashes.
- Airthrow - A solid anti-air option in EFZ, 2f startup after jumping and beats opponents trying to air RG your anti airs. Gives decent corner carry and time for non-super meter mixups.
- RG 5A/5B - This is a strong option select against mid sized air normals and empty mixups. 5A is small horizontally but very fast and has good vertical reach, 5B is almost as fast and trades some vertical reach for horizontal. By buffering the RG and pressing attack can you OS against empty mixups. This OS is defeated by multi-hitting or rapid cancelling attacks which will hit you out of your attack after RG (these kinds of attacks are usually quite small or high committal so are vulnerable to other anti-airs). The opponent is also able to counter RG your attack.
- RG 236A/236B - Similar to above but 236A hits higher to retaliate against larger attacks or double jump cancels. This can also beat out some multi-hitting attacks by allowing Akane to tank the hit for Shiiko to hit them.
- RG FM - If the opponent is close and low enough there is nothing they can do to stop this hitting unless they have an invincible air move.
- Reversals
- 623C - Invincible startup with low hitboxes but fast forward movement. With BIC this can be cancelled into pressure on block or into high damage on hit. Without BIC, on hit it does not lead to a knockdown or a guaranteed airtech trap and essentially resets to neutral. This needless to say, this move is extremely unsafe on whiff or block without BIC.
- 641236B (Level 2 Shiiko Super) - Invincible startup, reasonable damage on hit and can be FIC'd to make it safe even if the opponent doesn't block it. Unfortunately, this move does not possess good vertical reach and the opponent will often fall out of the super if they are hit by it in the air.
- FM - While this possesses no invincible frames, it does have a 1 frame startup so can challenge close up opponents moves that are not already active.
- Akane has some unique options in RG battles by using her assault leap or trick leap specials to bypass the movement restrictions that are usually imposed by RG.
Pressure
- Mixup options
- TK bad waffle (2369A) is a fast scary overhead that can beat low mash and converts into good damage with IC. 5A, 2A, c5B and 2B are all jump cancellable on block allowing for a fast TK waffle but be sure to watch for RGs. It is also possible to buffer a dashing TK bad waffle using 62369A to threaten overhead from a longer range.
- 662C is also another overhead that can beat some lows, it is slower and has a more obvious startup but can still catch people off guard. Notably 662C can be linked into 5A and converted from without IC or super meter.
- Akane's ground throw can be IC'd, with BIC in the corner this can lead to very good damage.
- 2A is Akane's fastest low, you may want to delay it sometimes to catch opponents trying to fuzzy your overhead. It has good range, frame advantage and active frames for a 2A.
- 2B is a slightly longer range low that is further down the cancel chain, make sure to use this to ensure your opponent keeps blocking low.
- If the opponent is blocking low midscreen and spaced correctly or just outside the corner you can attempt to cross up with IAD jAB 2B/662B or IAD jC 2B/662B.
- 5C is a good mixup tool if the opponent likes to RG a lot due to the lack of absolute guard in EFZ. The very fast multi-hit properties makes it is extremely difficult to RG and in the case that it is RG'd it is very difficult to challenge the followup hits. On hit, you can combo into 623B/C (IC) on reaction.
- Pressure resets
- 66A and 662A have a fast startup, forward movement, low recovery are plus on block so use them to stay close to your opponent and keep the threat of TK bad waffle. 66C is also plus on block but may not put you at as good spacing and has worse startup and recovery.
- 236B is an interesting reset option but as with anything Shiiko related it's effectiveness depends on your screen position. Providing the opponent is close enough to your corner this can be tight from 5C, 2C and 66C. On block this will give you frame advantage reset and often puts you at a spacing where 662B is plus on block. You can also dash, airdash or trick leap back in for more pressure or a mixup. On RG the opponent is locked in place but free to attack so be cautious when trying to reset and think about the best way to avoid or punish the button they may press.
- 236C can be used as a frametrap and pressure reset from longer ranges where your opponent may feel safer trying to jump out.
- 214 assault leap and 412 trick leap can be used to reset pressure. The 5C air sting divekick followup can be plus on block depending on spacing and timing but you need to be ready to IC or counter RG if they RG. On IC you can double jump, airdash, bad waffle or land 2A as a mixup. From assault leap you also can try to throw the opponent with 4C air carrier (which also grabs airborne opponents!) if they commit to trying to RG (or air RG) your 5C air sting divekick. You can use the 236 stun needle followup to bait and punish anti-airs, you can also FIC these needles to airdash in for a pressure reset or combo.
- 412* trick leap into the 2C pile masher followup can be used to crossup the opponent, is hard to anti-air and will often punish jumps. 2C pile masher can sometimes be plus on block depending on the height it is blocked from.
- 623B IC can also be used to reset pressure, especially after using a 662B that may be punishable or not spaced to be plus. It is multi-hit and moves forward so can provide some corner carry. You can IC any blocked hit and even IC it to end up in the air for an interesting mixup situation. Be careful of RGs because this move has a 10 frame startup and will often lose in an RG battle despite its special trade prevention invincibility frames. You may want to IC the move you are cancelling from or use 623A IC instead in these scenarios. 623C is the frame 1 invincible EX variant, but you will need BIC to IC this (or an almost fully red RF gauge so you generate enough RF meter to IC back while they block it).
Combos
- Replay pack: Mizuumi Akane Combos
| Notation Help | |
|---|---|
| Disclaimer: Combos are written by various contributors, some combo notations may deviate slightly from the notation listed below. For more information, see Controls | |
| IC | Input Instant Charge (22C) when you have the right amount of RF Meter. |
| FIC | Input Flicker Instant Charge (22C) when you have the right amount of RF Meter. |
| {X/Y/Z} | Move X or Y or Z can be used. |
| #* | Indicates that any of A, B and C may be used with #. Example: 214*. |
| [<- X] [-> X] | Side switch notation. All inputs grouped by the square brackets are performed facing the arrow's direction. They are still written as if they were done facing right, however. |
| [X]xN | Loop the inputs in the square brackets as many times as N. |
| c5B | Proximity normal only usable while close. |
| f5B | Proximity normal only usable outside of c5B range or when cancelled from another normal. Known as far 5B. |
| jX | Button X is input during your first jump. |
| djX | Button X is input during your double jump. |
| X(whiff) | Indicates that X is intended to whiff. |
| X(tech trap) | Indicates a combo ender intended to catch the opponent's air tech. The most common kind of tech trap is j6C, which will air throw early techs and jC later techs. Executionally identical to X(whiff) but different in purpose. |
| ~ | Indicates a followup for moves which have them. Example: 236A~236A. |
| .. | Indicates a short delay. |
| IAD | Indicates an Instant Air Dash. |
| IABD | Indicates an Instant Air Back Dash. |
| (X) | X move is omittable from the combo. |
| tk.X | Indicates the motion "X" is input immediately after leaving the ground. Stands for tiger knee. |
When performing Akane's combos it is especially important to consider which character your opponent is playing because her combo routes and timings can deviate dramatically between characters. In order to practice efficiently check the Player List, spectate matches, watch replays and interact with the community to discover which characters your opponents are likely to pick. In casual matches, if you have been training to fight a particular player's character don't be afraid to ask your opponent to switch or stick to that character.
Combos can also change if you are Player 1 or 2 and/or in the left or right corner. Keep track of these variables when playing and practice each of these scenarios, particularly for any corner combos that utilise 214*~4C.
Be prepared to adapt your combo routes on the fly: spacing, timing, positioning and unusual juggle hurtboxes will often influence your combo options.
No IC
Anywhere
- 2AA c5B {f5B/2B} 2C
- Basic knockdown which leads to midscreen okizeme setups.
Corner
- Throw FM
Corner Facing Out
- 2AA c5B {f5B/2B} 5C 236B 662B ({2ABC/623B})
- 662B 2A is very tight character specific link that only works with a perfectly spaced 662B.
- 623B can be used to eke out extra damage but the opponent can air recover after this.
2C Jump Cancel Pickups
- From deep jump-ins or starters very close to the opponent, it can be possible to perform extended combos without using IC by jump cancelling 2C. These combos are situational but can be practical in the corner.
- Corner
- {jC/5A(A)/2A(A)} 2B .. 2C jAAB6C djBC [j236A IC](tech trap)
- Works on everyone except Akane, Mayu and Unknown.
- Hard on Mio (the second jA sometimes drops with very close 2Cs) and Mishio.
- {jC/5A(A)/2A(A)} 2B .. 2C jAAB6C djBC [j236A IC](tech trap)
-
- {5A/2A} 5B 2B .. 2C jAAB6C djBC [j236A IC](tech trap)
- Works on everyone except Akane, Mayu, Sayuri, Unknown and Mishio.
- {5A/2A} 5B 2B .. 2C jAAB6C djBC [j236A IC](tech trap)
- {jC/5A/2A} 2B .. 2C jB 66 jB j214C~4C...
- Works on everyone except Makoto.
- Hard on Mizuka, Rumi, Ayu, Shiori, Misuzu, Doppel, Unknown and Nayuki (Awake).
- {jC/5A/2A} 2B .. 2C jB 66 jB j214C~4C...
- {jC/5A/2A} 2B .. 2C jB 66 jA6C land j6C djC [j236A IC](tech trap)
- Works on everyone except Makoto.
- Hard on Mizuka, Rumi, Ayu, Shiori, Misuzu, Doppel, Unknown and Nayuki (Awake).
- {jC/5A/2A} 2B .. 2C jB 66 jA6C land j6C djC [j236A IC](tech trap)
- {jC/5A(A)/2A(A)} 2B .. 2C jAAB6C 236236C j6C djC [j236A IC](tech trap)
- Works on everyone except Akane, Mayu and Unknown.
- Hard on Mio (the second jA sometimes drops with very close 2Cs) and Mishio.
- {jC/5A(A)/2A(A)} 2B .. 2C jAAB6C 236236C j6C djC [j236A IC](tech trap)
- {jC/5A/2A} 2B .. 2C jB 66 jA6C 236236C j6C djC [j236A IC](tech trap)
- Works on everyone except Makoto.
- Hard on Mizuka, Rumi, Ayu, Shiori, Misuzu, Doppel, Unknown and Nayuki (Awake).
- {jC/5A/2A} 2B .. 2C jB 66 jA6C 236236C j6C djC [j236A IC](tech trap)
- Midscreen
- {5A/2A} 2B .. 2C jB 66 jB j214C~4C
- Works on Mio, Shiori, Mai, Kaori, Akiko and Kanna.
- Hard but possible on Kano, Ikumi and Unknown.
- {5A/2A} 2B .. 2C jB 66 jB j214C~4C
- {5A/2A} c5B 2B .. 2C jC
- Works on Rumi, Mio, Doppel and Nayuki (Awake).
- {5A/2A} c5B 2B .. 2C jC
- {5A/2A} 2B .. 2C jC
- Works on Mizuka, Rumi, Mio, Doppel, Nayuki (Awake), Mishio and Akiko.
- {5A/2A} 2B .. 2C jC
Red IC
Anywhere
- {j236A/j236B} IC 66B(1) jB djB j66 jB j214C~4C...
- Basic juggle that works on all characters.
- {j236A/j236B} IC 5C(3-4) {412B/412C/214C}~5C c5B 214C~5C c5B 214C~4C...
- Air Sting loop that works on most characters.
- {j236A/j236B} IC 5C(3-4) {412B/412C/214C}~5C c5B 214C~5C 5A 66C 236A 9 j214C~4C...
- Closer to the corner you may need to jump 7 rather than 9.
- {j236A/j236B} IC 5C(3-4) {412B/412C/214C}~5C c5B 214C~5C 5A 66C 236A 662B(whiff) 236236A
- Variation of the above combo with swords okizeme when closer to the corner you may need to 44 rather than 662B.
- 623A(1-2) IC 662B(cross under) 5C 214C~5C...
- Situational sideswap, can be used after a close 662B or crossup Air Sting to corner the opponent.
- Throw IC FM
Midscreen
- 2ABC 236C .. 5A .. c5B 2C IAD jB...
- Timing is character specific.
- 2AABC IC 662B 5A 2C IAD jB...
- Only works on a few characters.
- {j236A/j236B} IC 5C(3-4) {412B/412C/214C}~5C c5BB 2C IAD jB {5A/66A} 66C...
- Air Sting and c5B need to hit at the exact height demonstrated, if you can tell that the height is not correct then you should fall back to an Air Sting loop.
- {j236A/j236B} IC 5C(3-4) {412B/412C/214C}~5C c5BB 2C IAD jB (c5B) jBC j66 j6C(tech trap)
- Use this when further out from the corner where 66C wouldn't wallbounce.
- {j236A/j236B} IC 5C(3-4) {412B/412C/214C}~5C c5BB 2C IAD jB 5A 2C IAD jB...
- Character specific double 2C IAD extension.
- Very difficult to get a 66C ender after this due to limited juggle time.
- {j236A/j236B} IC 5C(3-4) {412B/412C/214C}~5C c5B 214C~5C c5BB 2C IAD jB...
- Variation with Air Sting to adjust height.
- {j236A/j236B} IC {5A/c5B} 2C IAD jB {5A/c5B} 2C IAD jB {5A/c5B} 2C IAD jB 66C...
- More damaging than Air Sting combos but can be extremely difficult on some characters.
- Highly recommended to use on Ayu and Mai because it is much easier than usual and the other routes often drop.
- {j236A/j236B}(1) IC 236B 2C IAD jB {5A/c5B} 2C IAD jB 66C...
- Experimental Shiiko route, needs more testing.
- Only works midscreen due to 236B travel time.
Corner
- 2AA c5B {f5B/2B} 2C IC 66C {766/7966} jB 66C...
- 2AA c5B {f5B/2B} 2C IC .. 66C .. 214B~5C {5A/66A} 66C...
- Delay 66C to wallbounce as low as possible.
- {j236A/j236B}(1) IC 66C [{766/7966} jB 66C]x2...
- {j236A/j236B}(1) IC [.. 66C .. 214B~5C]x2 {5A/66A} 66C...
- Delay 66C to wallbounce as low as possible.
- {j236A/j236B}(1) IC 66C IABD 236B .. 2C IAD jB 66C...
- Experimental Shiiko route, needs more testing.
- Throw IC 66C 214B~C c5B 2C 412C~2C (2A) 2C jAAB (djB j6C tech trap)
Corner Facing Out
- 2AA c5B {f5B/2B} 5C 236B 662B 623B(5) IC 2C
- Knockdown which leads to midscreen okizeme setups.
- At some spacings you may need to walk backwards before doing 2C, input this as 1C to avoid misinputting 412C.
- 2AA c5B {f5B/2B} 5C 236B 662B 623B(5) IC 2C IAD jB land c5B jBC j66 j6C(tech trap)
- Full corner to corner carry.
Blue IC
- Akane's Blue IC combos are generally quite similar to her Red IC combos often just adding in an extra wallbounce loop and/or a fancy starter. Her Red IC combos will also work fine with Blue IC doing slightly more damage and being more more lenient with juggle times.
Anywhere
- {j236A/j236B} BIC 5C(3-4) 412B~5C 5C(3-4) 412B~5C c5B 214C~5C c5B 214C~5C ({5A/66A}) 66C...
- {j236A/j236B}(1) BIC {c5B/5C(7-9)} 214C~4C 66 66C...
- BIC double proration optimisation, requires full BIC bar.
- 7 hits of 5C is optimal.
- 5B is more stable midscreen.
Corner
- 2AA c5B {f5B/2B} 2C BIC 66C [{766/7966} jB 66C]x3...
- 2AA c5B {f5B/2B} 2C BIC 66C [214B~5C 66C]x3 IABD j214B~5C c5B 2C IAD jB 66C...
- 214A~4C jB BIC 214C~4C 236A 214C~C 5B 66C...
- 214A~4C jB BIC 214C~4C 66C...
Combo Enders
- Routes on this page ending with "..." have various combo enders shown below based on positioning, available meter and desired okizeme options.
Anywhere
- ...(c5B) jBC j66 j6C(tech trap)
Near Corner
- ...66C 236A 9 j214C~4C...
- High damage near corner ender.
- Closer to the corner you may need to jump 7 rather than 9.
- ...66C 7 jC(whiff) land jBC
- jBC must be done low to prevent air recovery.
- Leaves a small gap in the corner for left/right okizeme.
- ...66C 236A 662B(whiff) [buffer facing -> 236236A(tech trap)]
- Sword setup for near corner.
- 662B can steal the corner to set up left/right swords okizeme.
Corner
- ...(c5B) jB j6C djBC [j236A IC](tech trap)
- Should only be used with IC available because the opponent can air recover after getting hit by j236A without a combo.
- ...66C 236A [-> 44] 236236A(tech trap)
- Standard corner setup for left/right swords okizeme.
- Does not steal the corner from Mai due to her wide collision box.
- Kano and Mio wake up too slowly for the falling swords to hit, 236236B can be used instead.
- ...66C 236A 236236B [<- 6] 7 dj214C~4C
- The opponent can air recover after this.
- ...66C 236A 236236C [<- 6] j6C djC [j236A IC](tech trap)
- ...66C 236A 236236C j6C djC j236C
- The opponent can air recover after this.
214*~4C Followups
- Combos ending in 214*~4C often deal high damage but leave the opponent high in the air. Tech traps and okizeme may only be available with meter, this often means the opponent will be able to safely air recover.
- ...78 [djB j6C](tech trap)
- Corner tech trap.
- Only works from low 214C~4Cs above ~60 power.
- On hit combos into 214~4C.
- ...(jB) j6C (jB) dj6C
- The opponent can air recover after this.
- Mainly for eking out extra damage to kill or when no meter is available.
- One or two jBs can be added in the corner if the height and power allows.
- Player 2 Akane in the right-hand corner will steal the corner so must walk out of the corner before jumping. This extra walking time means that player 2 Akane will often be unable to do these followups.
- ...236236A(tech trap)
- Player 2 Akane in the right-hand corner steals the corner after the 4C followup, in this case 236236A must be input in the opposite direction. This allows player 2 Akane to do left/right swords okizeme.
- ...236236B/C 7 dj8 j214C~4C
- High damage meter dump.
- The opponent can air recover after this.
- Player 2 Akane in the right-hand corner steals the corner after the 4C followup, in this case 236236B/C must be input in the opposite direction.
From 214214B Okizeme
- 412*~2C (66)2A(OTG) c5B 2C IAD jB...
- 412*~2C [buffer facing -> 236B(OTG)] 2C IAD jB {5A/c5B} 2C IAD jB...
- 412*~5C(whiff) 5C(3-4) {412B/412C/214C}~5C
- Safer route against characters with large vertical reversals.
- You may need to microwalk before 5C to adjust your spacing.
From 236236* Okizeme
- 412A~2C (66)2A(OTG) 66C ({766/7966} jB 66C)...
- 412A~2C (66)2A(OTG) 66C .. 214B~5C {5A/66A} 66C...
- 412A~2C (66)2A(OTG) 66C IABD j214B~5C c5B 2C IAD jB 66C...
- {IAD/j9/214A~6C(whiff)} 66C 7966 jB 66C...
- Wait until the swords stop hitting or 66C won't wallbounce.
Okizeme
From 2C
Meterless
- IAD jC land 2A
- Can land on either side for a left/right mixup with 2A depending on spacing and how long you hold the airdash. Delaying slightly can mixup high/low with jC and 2A but make sure you are spaced sufficiently to hit jC in front.
- If spaced correctly (quite close so that the airdash is cancelled for turn around buttons) or just outside the corner you can attempt to cross up with IAD jAB {2B/662B} or IAD jC {2B/662B}.
- 7 j66 jC
- Safejump setup which can land on either side. jC can crossup here but it is quite difficult.
- 669 jC
- Safejump setup which can land on either side. jC can crossup here but it is quite difficult. The advantage of this setup is that you still have a double jump and airdash available on block for further mixups or to escape RG.
- 9 jA djAC
- Safejump setup which can land on either side. This one is quite hard for the opponent to see because the double jump scrolls them off screen. The speed of falling from a greater height also makes this an easier safejump.
With IC
- If you end a corner combo with 236C and then push the opponent just outside the corner with 662B, the exhaust fumes of the scooter can be used to hide your left/right/high/low mixup.
- IAD j236A or IAD j236B
- By airdashing just behind the opponent and using bad waffle you can do a crossup high and combo or start pressure on block. The B version will be an uncrossup high since it moves backwards during the startup which can be very hard to block correctly. The startup of jC looks somewhat like bad waffle so you can use jC land 2A as a mixup, this makes bad waffle even harder to react to.
- 669 jA(whiff) j236*
- Similar to above but you can choose to do the bad waffle from higher up which forfeits the low mixup potential for another left/right mixup depending on whether bad waffle has passed through them by the time they wakeup.
- .. 669 jC(high up) j236A IC
- This can be used to bait some reversals because they will whiff under the jC and on RG it is hard to counterpoke against bad waffle at that height.
With Super Meter
- It is important to know the spacing of the 214214B barrier to ensure it will meaty their wakeup. If you cancel 2C instantly into 214214B it will combo so delay it slightly.
- 214214B 66412B
- 214214B 66 (do nothing)
- If the barrier hits you can pickup with 2C IAD.
- 214214B ({66A/662A}(whiff)) 412C
- 66A or 662A can be used to reposition and/or assist with timing.
- 214214B 214C~5C
- 214214B IAD(hold)
- 214214B 662B(whiff) 412A
- Use this to corpse push if they would otherwise wakeup in front of the mirror.
Left/Right Swords
- 236236A(left/right setup) 412A~2C
- Vary the timing of 412A to get left or right.
- If blocked the 2C pile masher followup will act as a second mixup because of the pushback from the swords.
- 236236A(left/right setup) {IAD/j9/214A~6C(whiff)}
- Vary the timing to get left or right.
- On characters with a tall wakeup like Nayuki you will need to airdash slightly higher up to cross over them.
Other
- 412C~236A FIC 412C~2C 2A...
- Left/right stun needles setup, use from point blank.
- You must FIC and trick leap as fast as possible to get the crossup.
- On hit the 2C pile masher followup will allow you to pickup an OTG combo afterwards.
- Can also work in blockstrings.
- 641236C
- Level 3 Shiiko is unblockable and you can punish any reversals depending on the setup. The typical setup from a corner combo is: 66C 641236C backwards hit 66A which puts them into the corner to be meatied by the unblockable. Just setting up 641236C from any close up knockdown (like a dropped combo) and then meatying with 1A c5B 5C 623B is also an option to keep the opponent stuck in the unblockable. This is not unescapable or safe from all reversals though so be sure to check your opponents meter and be ready to bait.
Win Quotes
| Japanese | English |
|---|---|
|
私に… |
Please... |
|
髪の毛… |
My hair... |
|
詩子… |
Shiiko... |
|
お終いです |
It's over. |
|
(To Ayu) |
(To Ayu) |
|
(To Mai) |
(To Mai) |
|
(To Mio) |
(To Mio) |
|
(To UNKNOWN) |
(To UNKNOWN) |
|
(To Akane) |
(To Akane) |
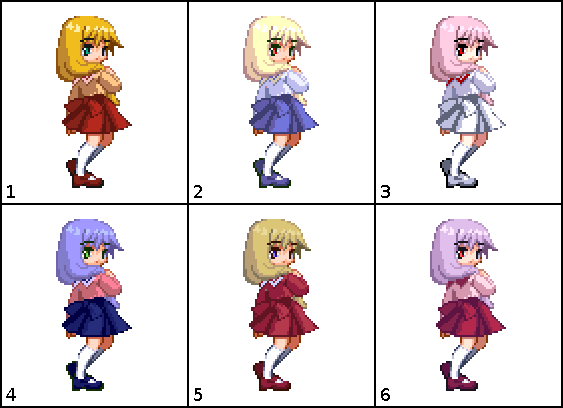
Colors
In-game References
External References
- Akane's ability to shapeshift her hair for fighting is a reference to Millia Rage from the Guilty Gear series.
- The A version of Akane's "Shiiko-san Appears" move is based on the light version of Captain Commando's "Captain Strike" in the Marvel vs Capcom series.
- Akane's j236* and its name "Bad Waffle" are based on Millia Rage's "Bad Moon" special, from the Guilty Gear series.
- Akane's 623* is based on Sol Badguy's "Grand Viper", from the Guilty Gear series.
- Akane's 214* is based on Akuma's "Hyakki Shuu" in the Street Fighter III series.
- Akane's 214*~5C is based on Akuma's "Hyakki Goujin" in the Street Fighter III series.
- Akane's 214*~236* is based on Anji Mito's "Shin: Ichisiki" attack in the Guilty Gear XX series.
- Akane's 412*~2C is based on Anakaris' "Seinaru Bohi" command normal in the Darkstalkers series.
- Akane's 236236* is based on War Machine's "War Destroyer" in the Marvel vs Capcom series.
- Akane's 214214* is based on Urien's "Aegis Reflector" in the Street Fighter III series.
- Akane's Final Memory is based on Akuma's "Shun Goku Satsu" from the Street Fighter series.
ONE References
- Akane's stage is the raining field she frequently visits in ONE.

