Background
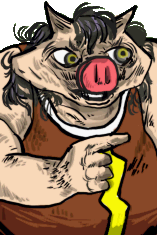
An aspiring musician, Spike has tried to make a living as the sole member of his punk rock music act, “Spike★Headz”.
Down on his luck, he fell into a downward spiral, drowning his sorrows in alcohol.
Eventually, the only place that came to welcome his music was his favorite pub, Hammer Spot, owned by the Tsuchinoko family.
Ruri, Anna's sister and the main proprietor of Hammer Spot, really wants Spike to succeed, even managing to reduce his drinking habits.
After some encouragement, Spike decided to get a job at a construction company, but he hasn’t completely given up on his music dreams.
Because he performed drunk for so long, he now pretends to be drunk on stage as part of the act.
Overview
Playstyle
 Spike is a Hybrid Rushdown/Keepaway Spike is a Hybrid Rushdown/Keepaway
|
| Pros |
Cons |
- Great Rushdown: Great angle variability on jump attacks keeps you from becoming predictable and getting parried on incoming.
- Great Zoning: 5X combined with 2X provides a decent wall to keep people out.
- Jack of All Trades: Got a decent version of everything: 5A confirms, 50/50s, projectiles, Meter taunt. Can be put in most places.
|
- Get Swept Idiot : Really weak to slides. All moves outside of U1 on wakeup lose to a well placed slide.
- Expensive Reversal and Knockdowns: Most reliable reversals and Knockdowns are in Ultras.
- Moment 34: Gets invalidated by parries as the only low is 2A.
|
Movelist
5A
|
| Damage
|
Guard
|
Startup
|
Active
|
Recovery
|
Invuln
|
Adv. Hit
|
Adv. Block
|
Adv. Parry
|
Effect
|
| N/A
|
Mid
|
N/A
|
N/A
|
N/A
|
N/A
|
N/A
|
N/A
|
N/A
|
N/A
|
|
|
|
2A
|
| Damage
|
Guard
|
Startup
|
Active
|
Recovery
|
Invuln
|
Adv. Hit
|
Adv. Block
|
Adv. Parry
|
Effect
|
| N/A
|
Low
|
N/A
|
N/A
|
N/A
|
N/A
|
N/A
|
N/A
|
N/A
|
N/A
|
Only active for 1 frame unlike most jabs.
|
|
J.A
|
| Damage
|
Guard
|
Startup
|
Active
|
Recovery
|
Invuln
|
Effect
|
| N/A
|
High
|
N/A
|
Until Ground
|
Until Ground
|
0
|
N/A
|
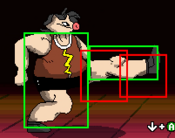
Pops Spike back into the air similar to Blues' j.B, good active until landing hitbox.
|
|
5B
|
| Damage
|
Guard
|
Startup
|
Active
|
Recovery
|
Invuln
|
Adv. Hit
|
Adv. Block
|
Adv. Parry
|
Effect
|
| N/A
|
Mid
|
N/A
|
N/A
|
N/A
|
N/A
|
N/A
|
N/A
|
N/A
|
N/A
|
Moves Spike forward a considerable amount. Safe on block.
|
|
2B
|
| Damage
|
Guard
|
Startup
|
Active
|
Recovery
|
Invuln
|
Adv. Hit
|
Adv. Block
|
Adv. Parry
|
Effect
|
| N/A
|
Low
|
N/A
|
N/A
|
N/A
|
N/A
|
N/A
|
N/A
|
N/A
|
N/A
|
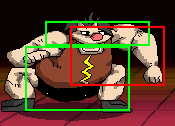
A very Kyanta-like crouching overhead, has a janky hitbox so it's hard to properly space the move and get both hits.
|
|
J.B
|
| Damage
|
Guard
|
Startup
|
Active
|
Recovery
|
Invuln
|
Effect
|
| N/A
|
High
|
N/A
|
Until Ground
|
Until Ground
|
0
|
N/A
|
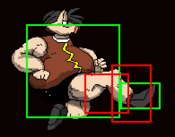
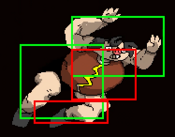
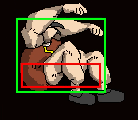
Body press. Moves Spike forward a bit. Amazing jump-in.
|
|
5X
|
| Damage
|
Guard
|
Startup
|
Active
|
Recovery
|
Invuln
|
Adv. Hit
|
Adv. Block
|
Adv. Parry
|
Effect
|
| N/A
|
Mid
|
N/A
|
N/A
|
N/A
|
N/A
|
N/A
|
N/A
|
N/A
|
N/A
|
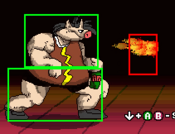
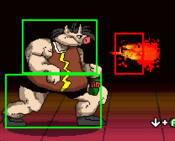
Spike can move back or forward as he throws this two-hit fireball.
|
|
2X
|
| Damage
|
Guard
|
Startup
|
Active
|
Recovery
|
Invuln
|
Adv. Hit
|
Adv. Block
|
Adv. Parry
|
Effect
|
| N/A
|
Mid
|
N/A
|
N/A
|
N/A
|
N/A
|
Knockdown
|
N/A
|
N/A
|
-
|
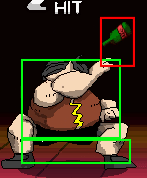
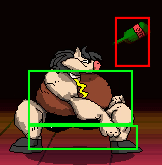
Spike can move back or forward as he throws this arcing bottle.
|
|
J.X
|
| Damage
|
Guard
|
Startup
|
Active
|
Recovery
|
Invuln
|
Effect
|
| N/A
|
High
|
N/A
|
N/A
|
N/A
|
N/A
|
N/A
|
Good instant overhead. Combos into 2A. Causes chunky amount of damage decay though.
|
|
5EX Main Reversal Main Reversal
|
| Damage
|
Guard
|
Startup
|
Active
|
Recovery
|
Invuln
|
Adv. Hit
|
Adv. Block
|
Adv. Parry
|
Effect
|
| N/A
|
Mid
|
N/A
|
N/A
|
N/A
|
N/A
|
Knockdown
|
N/A
|
N/A
|
KD, KB, C
|
Like 5X. Invulnerable through startup.
|
|
2EX
|
| Damage
|
Guard
|
Startup
|
Active
|
Recovery
|
Invuln
|
Adv. Hit
|
Adv. Block
|
Adv. Parry
|
Effect
|
| N/A
|
High
|
N/A
|
N/A
|
N/A
|
N/A
|
Knockdown
|
N/A
|
N/A
|
KD
|
Like 2X. Invulnerable through startup.
|
|
J.EX
|
| Damage
|
Guard
|
Startup
|
Active
|
Recovery
|
Invuln
|
Effect
|
| N/A
|
High
|
N/A
|
N/A
|
Until Ground
|
N/A
|
KD
|
Like j.X. Instantly active. Spike's actual instant overhead option. can be looped with 5As in between.
|
|
Ultra 1 (2Y) Rollout Rollout
|
| N/A
|
120
|
Mid
|
N/A
|
N/A
|
N/A
|
N/A
|
N/A
|
N/A
|
?
|
KD, KB, BD, F, NC
|
Rollout super. Seems to have 9 hits, but does not seem possible to get more than 4 to connect.
|
|
Ultra 2 (Y) YOGA YOGA
|
| Damage
|
Guard
|
Startup
|
Active
|
Recovery
|
Invuln
|
Adv. Hit
|
Adv. Block
|
Adv. Parry
|
Effect
|
| N/A
|
Mid
|
N/A
|
N/A
|
N/A
|
N/A
|
Knockdown
|
N/A
|
-N/A
|
-
|
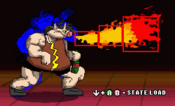
Flame breath. Spike can move during this super and he's invulnerable until recovery.
|
|
Grab (AB)
|
| Damage
|
Guard
|
Startup
|
Active
|
Recovery
|
Invuln
|
Adv. Hit
|
Adv. Block
|
Adv. Parry
|
Effect
|
| N/A
|
Grab
|
N/A
|
N/A
|
N/A
|
N/A
|
Knockdown
|
Knockdown
|
N/A
|
KD, KB
|
Decent Multihit grab. Can be combo'd after.
|
|
Taunt (Select)
|
| Damage
|
Guard
|
Startup
|
Active
|
Recovery
|
Invuln
|
Adv. Hit
|
Adv. Block
|
Adv. Parry
|
Effect
|
| +20 to next attack
|
N/A
|
N/A
|
N/A
|
N/A
|
N/A
|
N/A
|
N/A
|
N/A
|
N/A
|
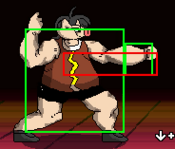
Gives Spike 1 meter. Tip of his finger has a hitbox.
|
|
Combos
| Notation Help
|
Disclaimer:
Combos are written by various writers, so notation may differ slightly from this notation.
For more information, see Controls.
Character-specific notation, will be on the character's page.
|
| FB
|
Refers to the act of gaining a "Flash Bonus", which grants you extra meter, on the hit of a move.
|
| KC
|
Refers to pressing B+Y on the same frame, or the macro-button for B+Y. This is known as a Kyanta-Cancel, this game's Roman-Cancel.
|
| DC
|
Refers to cancelling a move by activating Demon type's buff, similar to KC.
|
| XEX
|
Refers to pressing X+Y on the same frame, or the macro-button for X+Y.
This is known as an EX move, for example: j.EX>5EX>2EX.
|
| {X/Y/Z}
|
Move X or Y or Z can be used.
|
| #X
|
Indicates that any of A, B and C may be used with #. Example: 3A (Down-right, Light.)
If you have trouble with this notation, you may want to google for "Numpad Notation" elsewhere.
|
| (X)xN or (X)xN-N
|
Loop the inputs in the square brackets or parenthesis as many times as N, sometimes doesn't include brackets or parenthesis but still means the same thing.
Also occasionally includes a dash to indicate that a varying amount of hits can be performed.
|
| j.X
|
Button X is input while you are in the air jump.
|
| X(whiff)
|
Indicates that X is intended to whiff.
|
| (Delay) or (Wait)
|
Indicates a short delay on the hit.
|
| (X)
|
X move is omittable from the combo, this will be mentioned in the hover text.
|
| tk.X
|
Indicates the motion "X" is input immediately after leaving the ground. Stands for tiger knee.
|
| AA
|
Indicates the move hits an opponent in the air, referred to as an Anti-air. Hence AA.
|
| [X]
|
Indicates if a move should be held down.
|
| ]X[
|
Indicates if a held move should be released, for example: 5[B] > 5]B[.
|
MID
j.B > (2A)x4 > 5B (52)
5X > [AB] 6 > 5X Hit > Grab (63)
2X > [AB] 6 > 2X Hit > Grab (55)
- Very strong OS projectile grab combos, alternatively you can press 5B only when you're overlapping the opponent to retain the ability to block.
5A,5B,U1/U2
Corner
AA j.B/5B > (5B)x2 > U1 (153)
- Does the same damage no matter what starter you use.
Demon Loop (j.EX,5A)
Other Resources
Guides/Showcases
Notable Players
YFDHIPPO
| General
|
|
| Advanced
|
|
| Characters
|
|
