Ultra Fight Da! Kyanta 2/Blues

From Mizuumi Wiki
Jump to navigation Jump to search
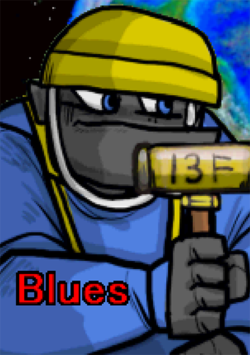
Blues
Blood type: Type A
Pronoun: He/Him
Race: Rhino(?)
Birthday: October 22 (Libra)

Background

Blues is the owner of Blue Mortar Construction Company which specializes in remodeling and repairing dilapidated buildings.
Ever since his son died in an abandoned building accident, it has been his mission in life to repair old abandoned buildings.
He always takes contracts at cost often earning almost no income. This was too much for his wife. Now divorced and alone, all he has left, is the company.

"I don't care if I cut 12 million to 10 million, it's still too expensive for my customers!"
Some would call him a saint. His workers, after a light payday, call him other things...
He tries to make it up to them when he can and ultimately his good character and the size of generosity inspires and motivates his workers to continue working for him.
"Chief Blues? Well.. He's just trying his best and we are regarded as a excellent construction company. He often gives us free food as well!"

Likes:

  • Ham cutlet sandwiches
  • Enjoying a meal with co-workers
  • Safety
  • Watching Hollywood Blockbusters


Dislikes:

  • Accidents
  • Aging buildings that haven't been properly maintained


Win Quotes:

  • "SAFETY FIRST"
  • "Insurance won't cover everything. Be careful!"
  • "You've got to raise your voice! No, louder. Your voice!"


Overview

Playstyle

Recommended Types: Stamina

UFDK2 Blues Icon.png Blues is a straight-foward fundamentals character, he doesn't have any tricks, but if he hits, he kills.
Pros Cons
  • Best-in-Class Buttons: Blues has the best versions of the safe 5B, 2B, jump-in j.A, and fullscreen j.B. Other characters like Sendou or Robo-Azuma may have similar tools, but they spec into different niches. Blues is exactly what you want, no nonsense, plus frames and all.
  • Great Approaches: Blues has several angles to approach from, both on the ground and in the air, along with several advancing buttons that are plus.
  • Great EXs: Blues doesn't have a bad EX, they're all more than worth the meter spent for their specific uses. 5EX has exceptional invuln, 2EX is a great EX projectile, and j.EX is a great damage button that doesn't need to be tk'd to shine.
  • Absurd Damage: U1, j.EX, 5EX, 2B, j.B, 5X, and most combos deal too much damage for the meter spent. Blues is the only character with a .75 bar TOD.
  • The Best Grab: Blues has the best grab in the game, it sets up for easy TODs, gives him free corner carry, and lets him do very flashy combos. Even Chihiro has a worse grab.
  • No Gimmicks: Blues can't gimmick you out to get his grab or to force his win condition like other characters, he has to work for his openings at times.
  • Combo Monster: Blues, while having great damage, means it's squarely on you to land your confirms and combos when presented the opportunity. It's hard to be aware of the opening and be ready to do your highest damaging combo.
  • No Meter Taunt: Meter taunts are free economy and help immensely, just having a damage taunt isn't very useful when you're Blues.

Movelist

Tech

Option Selects / Neutral

  • 5B/2B Spam

If you trap someone in the corner, just press 5B.
Mix in some 2B's every once in a while.
Nearly inescapable without meter.

  • 2B > 2X or 2X > 2B

Can be set up from about 2/3rds screen as a layer of protection on incoming opponents.
Either trading a low fireball or acting as parry bait to force a reaction out of your opponent.
Speed/Super can do it from half screen. Susceptible to being parried.

  • 5EX(1-Hit) > KC
  • 2EX > KC

Invincible forward attack canceled by KC, you can react if you got the hit or not and react accordingly.
If you got the hit, you get a full combo, potentially building your meter back or killing.
If you got blocked/parried, or whiff, the KC keeps you safe and lets you quickly go for an option like 5B or 2B to pester the opponent.

Low-profile Whiffs

5B, 5X, and 5A are prone to whiffing on some of the cast.
Here's the list of the characters who it whiffs on crouching:

  • Kyanta (5A)
  • Rogue (5A)
  • Garasha(5A)
  • K. Kyanta (5A)
  • Kinoko (5A)
  • Taro (5A/B)


(Those listed as "HS" get hit anyways if they're already in hitstun.)

Moves

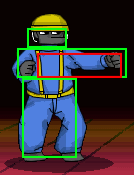
5A
UFDK2 Blues 5A.png
Damage Guard Startup Active Recovery Invuln Adv. Hit Adv. Block Adv. Parry Effect
5 Mid 1 1 2 0 9 9 -2 N/A

Staple 1-frame jab with good range. One of the better 5As.
Can whiff pretty often against some of the cast, so opt for 2A in that scenario.
Full whiff list is in the Tech section.

2A
UFDK2 Blues 2A.png
Damage Guard Startup Active Recovery Invuln Adv. Hit Adv. Block Adv. Parry Effect
5 Low 1 2 2 0 8 8 -2 N/A

Standard commanding low jab.
Is also used against short characters when 5A whiffs.

J.A
UFDK2 Blues JA.png
Damage Guard Startup Active Recovery Invuln Effect
15 High 10 Until Ground Until Ground 0 N/A

Adequate until-ground j.A.
Use it for a no nonsense jump in, when you don't need j.B's hop.

5B
UFDK2 Blues 5B.png
ZOOOM PUNCH
ZOOOM PUNCH
Damage Guard Startup Active Recovery Invuln Adv. Hit Adv. Block Adv. Parry Effect
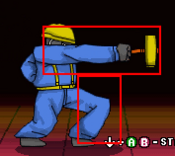
25 Mid 3 2 9 0 0 1 -9 N/A

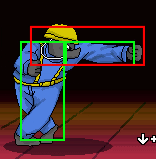
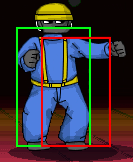
A very quick 1-hit forward moving heavy attack.
A great tool in neutral, blockstrings, combos, pressure. Great ender or confirm into bigger damage.
The best 5B of it's class in the game, it does everything.

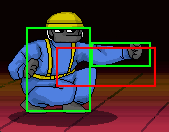
2B
UFDK2 Blues 2B.png
Damage Guard Startup Active Recovery Invuln Adv. Hit Adv. Block Adv. Parry Effect
20 Low 5 3 7 0 0 1 -7 N/A

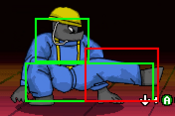
Not as busted as 5B, but it's still a very very fast and hard to contest low.
Combined with 5B it mixes up your pressure, making it harder for your opponent to parry you.

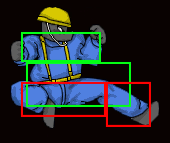
J.B
UFDK2 Blues JB.png
Damage Guard Startup Active Recovery Invuln Effect
15 High 9 Until Ground Until Ground 0 N/A

Fullscreen jump-in, great air-to-air and approach option.
Blues performs an air hop that's surprisingly evasive, allowing him to completely jump over neutral with a huge hitbox.

5X
UFDK2 Blues 5X.png
13 FRAMES
13 FRAMES
Damage Guard Startup Active Recovery Invuln Adv. Hit Adv. Block Adv. Parry Effect
25 High 12 8 5 0 Knockdown -1 -5 KD, KB

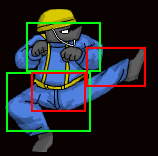
13 frame overhead. Able to move backwards and forwards during the the start-up.
A meaty 5X can be followed up. Used in combos or as a starter, the "everything" button.

2X
UFDK2 Blues 2X.png
Bomba
Bomba
Damage Guard Startup Active Recovery Invuln Adv. Hit Adv. Block Adv. Parry Effect
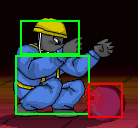
25 Mid 5 Until Off-screen 13 0 -1 -1 -10 F

Projectile that rolls on the ground. Keeps opponents at arms length.
Very hard to punish and can often be auto-piloted when you're not approaching.

J.X
UFDK2 Blues JX.png
Damage Guard Startup Active Recovery Invuln Effect
14,15(27) Mid 11 Until Ground Until Ground 0 N/A

Not a great move, but provides an angle of entry not available with other moves.
Using an instant j.X can be faster than walking and is used in some confirms.

5EX
UFDK2 Blues 5EX.png
Damage Guard Startup Active Recovery Invuln Adv. Hit Adv. Block Adv. Parry Effect
20*2(38) High 12 8 9 1-25 Knockdown -1 -9 KD, KB

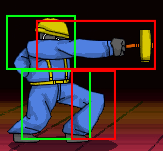
2-hit EX hammer that moves you forward with great invincibility.
Good combo starter that's exceptionally hard to punish, on block or hit Blues gets his win condition.

2EX
UFDK2 Blues 2EX.png
LA BOMBA
LA BOMBA
Damage Guard Startup Active Recovery Invuln Adv. Hit Adv. Block Adv. Parry Effect
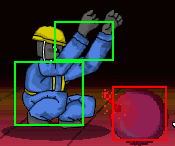
30 Mid 3 Until Off-screen 11 1-5 Knockdown 3 -8 KD, F

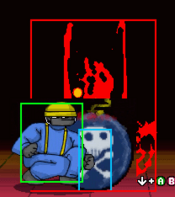
Blues crouches and becomes invincible as he sends a large version of 2X forward.
Bomb knocks down on hit. Comes out quick which can catch the opponent off guard.
In the corner can followed up into a combo, or alternatively into a Demon loop.

J.EX
UFDK2 Blues JEX.png
Damage Guard Startup Active Recovery Invuln Effect
15*7(63) Mid 3 Until Ground Until Ground 1-9 KD

Souped up j.X, can be looped for huge damage in Demon-type or as a big crouching punish.

Ultra 1 (Y)
UFDK2 Blues U1.png
Damage Guard Startup Active Recovery Invuln Adv. Hit Adv. Block Adv. Parry Effect
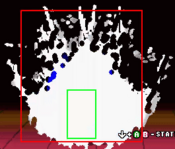
100 Mid 4 1 30 ? Knockdown -15 -30 KD, KB

Blues explodes creating a large explosion around him.
A great super that retains a lot of damage even after heavy scaling.
Great as an ender or reversal, similar to Robo-Azuma's U1.

Ultra 2 (2Y)
UFDK2 Blues U2.png
Damage Guard Startup Active Recovery Invuln Adv. Hit Adv. Block Adv. Parry Effect
100 Mid 1 1 15 ? Knockdown ? ? KD

Blues sets a big bomb down, which can be punched around by both players.
Can be activated by pressing 2Y again after a short recovery, or goes off after a certain amount of time.
It has its uses but really outclassed by the damage of U1.
Strangely, has the same super launch as Kinoko.

Grab (AB)
UFDK2 Blues GRAB.png
The End
The End
Damage Guard Startup Active Recovery Invuln Adv. Hit Adv. Block Adv. Parry Effect
40 Grab 3 4 5 0 Knockdown Knockdown N/A KD

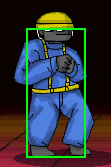
Blues grabs the opponent and hurls them into the air. Best throw in the game.
The throw is a 1-hit knockdown, that Blues can follow up in a number of ways, usually leading to a TOD.
This makes Blues' pressure exceptionally scary, any one mistake could mean certain death.

Taunt (Select)
UFDK2 Blues TAUNT.png
Damage Guard Startup Active Recovery Invuln Adv. Hit Adv. Block Adv. Parry Effect
+20 to next attack N/A N/A N/A ? N/A N/A N/A N/A N/A

A damage taunt, not bad, not good either. Similar to Azuma-Deka's taunt, it' easy to get off and pretty reliable, just not meter sadly.

Combos

Notation Help
Disclaimer:

Combos are written by various writers, so notation may differ slightly from this notation.
For more information, see Controls.
Character-specific notation, will be on the character's page.

FB Refers to the act of gaining a "Flash Bonus", which grants you extra meter, on the hit of a move.
KC Refers to pressing B+Y on the same frame, or the macro-button for B+Y. This is known as a Kyanta-Cancel, this game's Roman-Cancel.
DC Refers to cancelling a move by activating Demon type's buff, similar to KC.
XEX Refers to pressing X+Y on the same frame, or the macro-button for X+Y.

This is known as an EX move, for example: j.EX>5EX>2EX.

{X/Y/Z} Move X or Y or Z can be used.
#X Indicates that any of A, B and C may be used with #. Example: 3A (Down-right, Light.)

If you have trouble with this notation, you may want to google for "Numpad Notation" elsewhere.

(X)xN or (X)xN-N Loop the inputs in the square brackets or parenthesis as many times as N, sometimes doesn't include brackets or parenthesis but still means the same thing.

Also occasionally includes a dash to indicate that a varying amount of hits can be performed.

j.X Button X is input while you are in the air jump.
X(whiff) Indicates that X is intended to whiff.
(Delay) or (Wait) Indicates a short delay on the hit.
(X) X move is omittable from the combo, this will be mentioned in the hover text.
tk.X Indicates the motion "X" is input immediately after leaving the ground. Stands for tiger knee.
AA Indicates the move hits an opponent in the air, referred to as an Anti-air. Hence AA.
[X] Indicates if a move should be held down.
]X[ Indicates if a held move should be released, for example: 5[B] > 5]B[.

Universal

Midscreen

0 BAR
(5A)x3 > 5B (30)

Corner

0 BAR
Grab > 5B > 5X > 5B >(5A)x3 >5B (123)
Grab > 5X > 5B > (5A)x2 >2EX >5A > 5B (139)

1 BAR

5X > 5B > KC > 9X(FB) > (5A)x3 > 5B > KC > 5A > 5B (159)
Grab > 5B >KC > 6B(FB) > (5A)x2 > 5B > KC > 5A > 5B (159)

Ultra 1

Midscreen

1.5 Bar
Grab 5AB > 5B > KC > 6 > 6X(FB) > KC > 4 > 6X > 5A > 2EX > 5A > 5B (180)
AA 5B > KC > 7X(1-HIT)(FB) > (5B)x2 > 5A > U1 (195)

3 BAR
5EX > KC > 5B > (KC>6X)x2 > 5A > 2EX > 5A > 5B (180)

Corner

.25 Bar
Grab > 5B > 5X > (5A)x3 >U1 (182)

Demon

Midscreen

1 BAR
j.X > DC > j.EX > (2EX)x6 (137)
AA j.B > DC > j.EX > 6X > (2EX)x6 (168)
5X > DC > 5B > 6 > 6B > 5A > (2EX)x6 (180)
AA j.A > 5B > 5X > 5B > DC > (2EX)x6 (180)
AA j.X > 5B > 5X > 5B > DC > (2EX)x6 (180)
Grab > DC > 5X > (2EX)x6 (190)

1.5 BAR
5EX(1-HIT) > DC > 5B > 6X > (2EX)x7 (190)

2.5 BAR
(In Demon) 5EX > (2EX)xUntil Out Of Install > DC > (2EX)x7 > 5B (229)

Corner

.25 BAR
(5B)x3 > (5A)x3 > DC > (2EX)x7 (162)
Grab > 5B > 5X > (5A)x3 > 5B > DC > (2EX)x6 > 5A > 5B (182)

.5 BAR
Grab > 5B > 5X > DC > 5X > (2EX)x6 (180)

1 BAR
j.8X > (2A)x3 > 5B > DC > (2EX)x6 (131)
j.9X > 2X > (2A)x2 > 5B > DC > (2EX)x6 (134)
2X > DC > (2EX)x6 (143)
2X > 6X >DC >(2EX)x6 (153)
2X > 5B > DC > (2EX)x6 (159)
5X > (2EX)x6 (163)
Grab > 5B > 5X > 5B > DC > (2EX)x6 (200)

1.5 BAR
2EX > DC > (5B)x2 > (2EX)x7 (200)

EX

Midscreen

1 BAR
AA U1 > 5B > KC > 5B(FB) > 5X > (5A)x2 > U1 (180)

Corner

0 Bar
Grab > 5B > 5X > (5A)x3 > U1 (182)

Other Resources/Notable Players

Other Guides/Showcases


2nd Impact
THE DEMON BLUES by YFDHippo
Intro into Bomb Loops: 1 Bar by YFDHippo

POST IBBE
Blues 2: Electric Spinaroo

Notable Players

Disclaimer: This list is derived from community input and is in no way comprehensive or a form of ranking of any kind. Our community criteria can be found here.

Usual Color Handles/Links Region Status Notes
YFDHippo United States
United States
West Coast


General
FAQ
Advanced
Characters
Kyanta
Buttobi
Spike
Anna
Tsukinami
Blues
Jakor
Sendou
Michelle
Chihiro
Investigator Azuma
Rogue
Rare
Garasha
Hisomi
Well Done
Cocorn
Nanatsu
Robo-Azuma
Gyanta
Mask Michelle
Katana Kyanta
Masao
Taro
Hatoyan
Masako
kinoko
ZackyWild
Natanee
Dr. K