Background
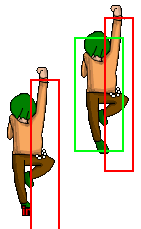
Masao is a student at Inuneko Junior High School that’s always been a bit of a wimp.
He is insecure, nervous, and lacks initiative. He shares a close relationship with Kyanta, and looks up to him as a role model.
He’s been training under Kyanta to learn how to shoot a Kyantaro-ho for himself, but has a long way to go before he can master the Kyanta Force.
Overview
Playstyle
 Masao, the pre-gender change beam version of Masako. He plays like Dan. Masao, the pre-gender change beam version of Masako. He plays like Dan.
|
| Pros |
Cons |
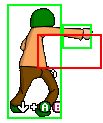
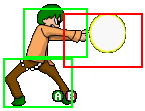
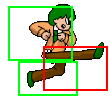
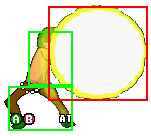
- Tiny Hurtbox: His hurtbox is tiny, both grounded and aerial, this makes him insanely hard to hit, especially while he's doing 2B. Some characters can't even combo him because of this.
- j.B-OTG: One of two characters who can OTG hit, gives him unscaled damage at the end of every combo and lets him capitalize more off of the same openings that other characters get.
- "What are you gonna do? Kill me?": While Masao is very meter hungry, he can still meter taunt and die to battery for the other characters on his team. No game is a losing game when you have two extra bars at your disposal.
|
- Meter Hungry: Masao needs meter for his basic confirms (tk.j.EX) and to run neutral (5EX). He can't exhert ANY pressure besides jabs and 2B without meter, leaving him more defensless than other characters when out of meter.
- Character-specific Combos: Masao's best routes can often be character specific or drop on some characters entirely, it's hard to get a foot-hold when your combos don't work.
- Bad Buttons: j.X is practically unusable, 5[B] is insanely hard to get off despite the great reward and has a glitch that can guarantee a punish for the opponent, and 5X/2X are ridiculously minus.
- Nearly Useless Ultras: U1 is almost as bad as K.Kyanta's U2, it's unreliable and you can't use it in juggles. U2 is better and actually works but deals pitiful damage, he has to rely on it though for combos.
- Execution: Unlike most characters, Masao relies on parries and tight execution to get around their weaknesses, or even just to perform when he DOES have the advantage. The character can be volatile on netplay and some match-ups can be reduced to a coin-toss if Masao can't hit his parries.
|
Movelist
Moves
5A
|
| Damage
|
Guard
|
Startup
|
Active
|
Recovery
|
Invuln
|
Adv. Hit
|
Adv. Block
|
Adv. Parry
|
Effect
|
| 5
|
Mid
|
1
|
1
|
2
|
0
|
?
|
?
|
?
|
N/A
|
Extremely stubby jab with bad range, ya gotta use it though!
|
|
2A
|
| Damage
|
Guard
|
Startup
|
Active
|
Recovery
|
Invuln
|
Adv. Hit
|
Adv. Block
|
Adv. Parry
|
Effect
|
| 5
|
Low
|
1
|
1
|
2
|
0
|
?
|
?
|
?
|
N/A
|
Slightly better range than 5A and it's a low, still not a reliable jab.
|
|
J.A
|
| Damage
|
Guard
|
Startup
|
Active
|
Recovery
|
Invuln
|
Effect
|
| 15
|
High
|
5
|
Until Ground
|
Until Ground
|
0
|
N/A
|
Instant overhead.
Does a lil' hop after you do it, so you can't get combos/blockstrings off of it.
The hitbox is also very very tiny, it's mainly used for jumping over projectiles due to this.
|
|
5[B] Mappa Hunch? Massy Hunch. Mappa Hunch? Massy Hunch.
|
| Version
|
Damage
|
Guard
|
Startup
|
Active
|
Recovery
|
Invuln
|
Adv. Hit
|
Adv. Block
|
Adv. Parry
|
Effect
|
| Level 1
|
20
|
Mid
|
9
|
6
|
6
|
0
|
?
|
?
|
?
|
KB
|
Minus on hit mid that you can pretty easily mis-input going for a grab.
Can be piloted during the wind-up using 4/6 to shimmy back and forth, varying attack range.
Least range.
During the wind-up animation, the opponent can initiate a super flash and force Masao to 5[B], giving you a punish.
Essentially, if the opponent has a bar, DO NOT HOLD 5[B].
Whoops.
|
| Level 2
|
30
|
Mid
|
?
|
6
|
6
|
0
|
Knockdown
|
?
|
?
|
KB, KD
|
Has the same launcher as Level 3, just less damage.
Only really gets seen as a panic release when the opponent walks at you, either that or a dropped combo.
Medium range.
|
| Level 3
|
40
|
Mid
|
21
|
6
|
6
|
0
|
Knockdown
|
?
|
?
|
KB, KD
|
The haymaker! Good luck hitting it, good move regardless.
Gives you a pretty workable launcher with 5A, the preferred starter for TODs and the like.
Most range.
|
|
2B
|
| Damage
|
Guard
|
Startup
|
Active
|
Recovery
|
Invuln
|
Adv. Hit
|
Adv. Block
|
Adv. Parry
|
Effect
|
| 20
|
Low
|
7
|
4
|
6
|
0
|
?
|
?
|
?
|
N/A
|
Insanely low slide, starts combos and insanely hard to punish due to the small hurtbox and low-profile.
This might as well be Masao's entire kit.
|
|
J.B
|
| Damage
|
Guard
|
Startup
|
Active
|
Recovery
|
Invuln
|
Effect
|
| 20 (Normal)/10 (OTG)
|
High
|
7
|
Until Ground
|
13
|
0
|
N/A
|
Unsafe on hit, but it doesn't matter since this is the combo-ender/OTG hit.
Once you've got a knockdown, throw this out for a free 10 dmg, it adds up quickly and helps Masao a lot.
This is what keeps Masao from totally being useless without meter, damage-wise at least.
|
|
5X Can't-arohou Can't-arohou
|
| Damage
|
Guard
|
Startup
|
Active
|
Recovery
|
Invuln
|
Adv. Hit
|
Adv. Block
|
Adv. Parry
|
Effect
|
| 15*3 (39)
|
Mid
|
9
|
4(2)4(2)4(2)4(2)4
|
8
|
0
|
?
|
?
|
?
|
N/A
|
Despite seeming like a poke, this is actually a stationary projectile.
A completely indestructible projectile at that, which means it can delete other projectiles!
Weird, but this is actually a very good anti-fireball/anti-air tool.
Just, don't expect to be able to use this in combos.
|
|
2X
|
| Damage
|
Guard
|
Startup
|
Active
|
Recovery
|
Invuln
|
Adv. Hit
|
Adv. Block
|
Adv. Parry
|
Effect
|
| 25
|
Mid
|
6
|
6
|
18
|
0
|
Knockdown
|
?
|
?
|
KD
|
It's a DP, a bad vulnerable one, but a DP nonetheless.
Situational and generally poor anti-air, better used as a lazy and meterless combo-ender with a j.B-OTG after.
|
|
J.X Dankukyaku! Dankukyaku!
|
| Damage
|
Guard
|
Startup
|
Active
|
Recovery
|
Invuln
|
Effect
|
| 13*4 (40)
|
High
|
1
|
4(6)4(4)4(6)2
|
Until Ground
|
0
|
N/A
|
Despite having ridiculous start-up, there's a very distinct hop that Masao does after the Tatsu.
This alone, makes you ridiculously punishable and unsafe, while Gyanta's j.B at least has reward, this doesn't.
Do not use.
|
|
5EX His True Power His True Power
|
| Damage
|
Guard
|
Startup
|
Active
|
Recovery
|
Invuln
|
Adv. Hit
|
Adv. Block
|
Adv. Parry
|
Effect
|
| 20*3 (54)
|
Mid
|
9
|
4(2)4(2)4(2)4(2)4
|
8
|
1-21
|
Knockdown
|
?
|
?
|
KD
|
The everything button.
The main feature is the move's insane invuln, taking up half of the move's duration, with an INSANE disjoint.
Now somewhat more useful in combos with j.EX>5EX loops but overall not a great combo tool, still does everything you'd want in the neutral.
Also Masao's only consistent reversal option at the cost of half a bar.
|
|
2EX
|
| Damage
|
Guard
|
Startup
|
Active
|
Recovery
|
Invuln
|
Adv. Hit
|
Adv. Block
|
Adv. Parry
|
Effect
|
| 20*3 (54)
|
Mid
|
9
|
9
|
14
|
1-18
|
Knockdown
|
?
|
?
|
KD
|
5EX is strictly better for the same purpose.
Has its niche uses but generally not too useful.
|
|
J.EX
|
| Damage
|
Guard
|
Startup
|
Active
|
Recovery
|
Invuln
|
Effect
|
| 15*5 (55)
|
High
|
1
|
(2(6)2(4))xN
|
Until Ground
|
1-25
|
KD
|
Your combo button, has to be tk'd to connect properly for most situations.
Goes fullscreen and will repeat the same kick loop until it reaches the other end of the screen, dropping after set number of frames.
Despite what the activity and move behavior may suggest, you'll always do the same damage no matter where you are on the screen.
|
|
Ultra 1 (Y) Wimpy Kyantarohou Wimpy Kyantarohou
|
| Damage
|
Guard
|
Startup
|
Active
|
Recovery
|
Invuln
|
Adv. Hit
|
Adv. Block
|
Adv. Parry
|
Effect
|
| 10*9 (120)
|
Mid
|
?
|
?
|
?
|
?
|
Knockdown
|
?
|
?
|
KD, NKB
|
Buffed 5X, not a buffed 5EX though, suffers from all the same problems as 5X, but worse.
Despite the alarming amount of hits, it has horrible scaling and doesn't do much more damage even on crouching opponents.
One of the few moves to be cursed with no knockback as well, do not use this Ultra.
|
|
Ultra 2 (Y) Wimpy Kyanta Upper Wimpy Kyanta Upper
|
| Damage
|
Guard
|
Startup
|
Active
|
Recovery
|
Invuln
|
Adv. Hit
|
Adv. Block
|
Adv. Parry
|
Effect
|
| 25*5 (113)
|
Mid
|
?
|
?
|
?
|
?
|
Knockdown
|
?
|
?
|
KD
|
Easily confirmable multi-hit Shoryureppa.
Actually deals slightly better damage than Kyanta's U2, but as a trade-off has worse scaling.
Tends to drop heavily at midscreen, just like Kyanta's U2.
|
|
Grab (AB)
|
| Damage
|
Guard
|
Startup
|
Active
|
Recovery
|
Invuln
|
Adv. Hit
|
Adv. Block
|
Adv. Parry
|
Effect
|
| 15*3(45)
|
Grab
|
3
|
5
|
7
|
0
|
Knockdown
|
Knockdown
|
N/A
|
KD, FC
|
Strangely has a fixed cancel built-in to the recovery frames, allowing Masao to cancel it into his Ultras, this really just means Masao gets a nice U2 confirm.
One of the few grabs to be combo-able, so Masao gets a ton of options off of it, including allowing you to taunt after the grab KOs the opponent for a free bar, a quality not found in any other move.
|
|
Taunt (Select)
|
| Damage
|
Guard
|
Startup
|
Active
|
Recovery
|
Invuln
|
Adv. Hit
|
Adv. Block
|
Adv. Parry
|
Effect
|
| +1 bar to EX gauge
|
N/A
|
?
|
N/A
|
?
|
N/A
|
N/A
|
N/A
|
N/A
|
N/A
|
A meter taunt, just like Kyanta's!
Actually pretty good for what it's worth, helps since Masao has almost zero meter build.
|
|
Combos
| Notation Help
|
Disclaimer:
Combos are written by various writers, so notation may differ slightly from this notation.
For more information, see Controls.
Character-specific notation, will be on the character's page.
|
| FB
|
Refers to the act of gaining a "Flash Bonus", which grants you extra meter, on the hit of a move.
|
| KC
|
Refers to pressing B+Y on the same frame, or the macro-button for B+Y. This is known as a Kyanta-Cancel, this game's Roman-Cancel.
|
| DC
|
Refers to cancelling a move by activating Demon type's buff, similar to KC.
|
| XEX
|
Refers to pressing X+Y on the same frame, or the macro-button for X+Y.
This is known as an EX move, for example: j.EX>5EX>2EX.
|
| {X/Y/Z}
|
Move X or Y or Z can be used.
|
| #X
|
Indicates that any of A, B and C may be used with #. Example: 3A (Down-right, Light.)
If you have trouble with this notation, you may want to google for "Numpad Notation" elsewhere.
|
| (X)xN or (X)xN-N
|
Loop the inputs in the square brackets or parenthesis as many times as N, sometimes doesn't include brackets or parenthesis but still means the same thing.
Also occasionally includes a dash to indicate that a varying amount of hits can be performed.
|
| j.X
|
Button X is input while you are in the air jump.
|
| X(whiff)
|
Indicates that X is intended to whiff.
|
| (Delay) or (Wait)
|
Indicates a short delay on the hit.
|
| (X)
|
X move is omittable from the combo, this will be mentioned in the hover text.
|
| tk.X
|
Indicates the motion "X" is input immediately after leaving the ground. Stands for tiger knee.
|
| AA
|
Indicates the move hits an opponent in the air, referred to as an Anti-air. Hence AA.
|
| [X]
|
Indicates if a move should be held down.
|
| ]X[
|
Indicates if a held move should be released, for example: 5[B] > 5]B[.
|
For the sake of not transcribing a bunch of combos that may be out of date, please refer to Melody's Masao Combo Doc
Other Resources/Notable Players
Other Guides/Showcases
Masao Combo Guide by Melody? (Outdated, made for version 0021)
Masao Combo Doc by Melody?
Notable Players
Disclaimer: This list is derived from community input and is in no way comprehensive or a form of ranking of any kind. Our community criteria can be found here.
| General
|
|
| Advanced
|
|
| Characters
|
|


