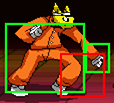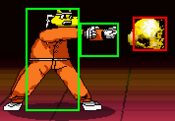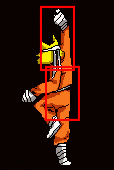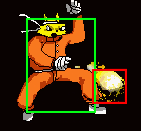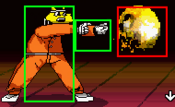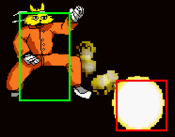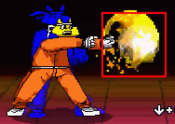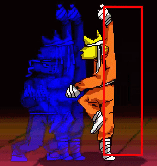
Kyanta Blood type: Blood Type A
Pronoun: They/Them
Race: Dog
Birthday: April 23 (Taurus)
Background
As the lone practitioner of the Kyanta fighting style, Kyanta is a Pomeranian that can take on any challengers.
Although they are very powerful, they only use their strength for defense. Always having lived as a bit of a loner, Kyanta tends to avoid attracting too much attention.
They've been training Masao, a Jr High School student, to master the Kyanta Force.
Overview
Playstyle
|
Recommended Types: Stamina/Super
 Kyanta is THE Shoto of the game, that's it. Kyanta is THE Shoto of the game, that's it.
|
| Pros |
Cons |
- Amazing Mobility: Has j.B which jumps over the entire screen, j.X which does the same and shoots a fireball, and 2B which low-profiles.
- Great reversals: 2X is a meterless DP reversal that forces the opponent to react, not to mention 2EX and 5EX which are safer and cannot be frame-trapped, but cost meter.
- Excellent Neutral: Mixing up 5EX and 5X gives Kyanta an oppressive fireball game that can mix-up those who parry too well and let you get a safe taunt, even without hitting them. j.X and j.EX are also good at this, letting you disengage while forcing your options.
- Oppressive Corner: Thanks to 5A/2A/2B/6B and 5B, Kyanta can poke you to death safely, then go for a standing hi/lo, which most characters don't have, and then safely use that mental stack to 2X call-out or Grab call-out. Or... if Kyanta hits 2B they get a full combo.
- 2nd Best Taunt: One of the fastest taunts in the game, gives Kyanta one bar of meter, basically forces the opponent to call-out the fireball game or be down in the meter economy. Can be done safely after most air knockdowns too.
- "What are you gonna do? Kill me?": Kyanta has such absurd neutral and ease to taunting that by picking Kyanta and just getting off a taunt, even on death you're up two bars for your next character. Potentially MORE thanks to fireball game, the opponent also can lose their resources as well. Making fighting Kyanta a losing scenario no matter what.
|
- Expensive Damage: Despite not having anything wrong with Kyanta at all, they can't explicitly deal big damage without spending a lot of meter, some characters can end a game with one good read. Kyanta has to read you far more to end the game, giving them more chances to slip-up.
|
Movelist
Tech
J.B "Edge"

j.B is a very weird move, giving extra momentum to Kyanta on the way up and on the way down when done, allowing for Kyanta to land faster or jump higher.
It's a very simple Kyanta-style Tatsu, comes out in a single frame. Due to this, it can be used to link combos that wouldn't normally link.
Through the use of a KC, buttons can be done in the air after other moves, so j.B can be used as a pseudo-edge that makes you land faster and cancel landing recovery.
This is used in Kyanta's very strong FB-bonus 2X combo, learning it is essential to hitting the execution skill-ceiling and performing some of their harder combos.
Moves
5A it exists it exists
|
| Damage
|
Guard
|
Startup
|
Active
|
Recovery
|
Invuln
|
Adv. Hit
|
Adv. Block
|
Adv. Parry
|
Effect
|
| 5
|
Mid
|
2
|
1
|
2
|
0
|
8
|
8
|
-2
|
N/A
|
Simple 2f start-up jab with an ok hitbox.
2A is usually preferred for faster start-up and low guard.
|
|
2A
|
| Damage
|
Guard
|
Startup
|
Active
|
Recovery
|
Invuln
|
Adv. Hit
|
Adv. Block
|
Adv. Parry
|
Effect
|
| 5
|
Low
|
1
|
2
|
2
|
0
|
7
|
7
|
-2
|
N/A
|
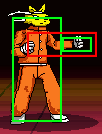
Kyanta's fastest normal and amazing jab with a pretty good hitbox and some small disjoint.
Good button for pressure after a jump-in, sets up well for high/low mix-ups.
|
|
J.A
|
| Damage
|
Guard
|
Startup
|
Active
|
Recovery
|
Invuln
|
Effect
|
| 15
|
High
|
13
|
Until Ground
|
Until Ground
|
0
|
N/A
|
Solid jump in normal that does a small short hop upwards in the air, disrupting vertical momentum, while maintaining horizontal movement.
Good combo starter and can cross-up the opponent in rare situations, very safe on block at any height but varies depending on how soon you land after it hits the opponent.
Really good after a j.X, can also be tk'd near an opponent to acts as a pseudo-instant overhead for Kyanta.
|
|
5B stanky leg stanky leg
|
| Damage
|
Guard
|
Startup
|
Active
|
Recovery
|
Invuln
|
Adv. Hit
|
Adv. Block
|
Adv. Parry
|
Effect
|
| 15*2(28)
|
Mid
|
3
|
7
|
4
|
0
|
3
|
3
|
-5
|
N/A
|
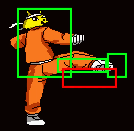
Multi-hit forward moving kick.
Can be used after 5A for a combo or to end a juggle off of corner any range or midscreen close range 2B. Can cancel into U1
A rather solid move, use it as a footsie tool to counter poke.
|
|
6B
|
| Damage
|
Guard
|
Startup
|
Active
|
Recovery
|
Invuln
|
Adv. Hit
|
Adv. Block
|
Adv. Parry
|
Effect
|
| 15*2(28)
|
High
|
17
|
6
|
1
|
0
|
?
|
?
|
-1
|
N/A
|
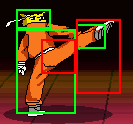
This move is pretty slow but still catches people off-guard sometimes.
You can get a combo off it even at mid-screen, but usually you're going to want to avoid mis-inputting this move while doing 5B.
Has a similar problem to Azuma-Deka's 2B. But isn't nearly as slow and unsafe. Decent if when you can trap your opponent in the corner with jab pressure.
|
|
2B they needed a low profile they needed a low profile
|
| Damage
|
Guard
|
Startup
|
Active
|
Recovery
|
Invuln
|
Adv. Hit
|
Adv. Block
|
Adv. Parry
|
Effect
|
| 15
|
Low
|
8
|
3
|
7
|
0
|
Knockdown
|
2
|
-7
|
KD
|
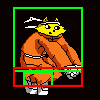
Shrinks Kyanta's hitbox significantly making it good for low profiling projectiles and standing jabs.
Knockdown on hit which can lead to combos in corners or in any point on screen really if you get a deep hit on the opponent. Common follow-ups are: 5A, 2X, Ultra 2, or 5B.
Be careful using this too often in match-ups where the opponent has good disjointed lows or very good air moves, otherwise you'll be easily read and dealt with.
|
|
J.B
|
| Damage
|
Guard
|
Startup
|
Active
|
Recovery
|
Invuln
|
Effect
|
| 15*4(48)
|
High
|
1
|
2(4)xUntil Ground
|
Until Ground
|
0
|
N/A
|
Janky tatsu, escapes corner and can kindaaa air-to-air.
Keyword being "kinda" because it the hitbox alternates between hitting back and forth.
Pretty good on start, as it will corner carry on most characters if your opponent jumps and gets hit.
In general, this is the move you'll be using to combo people into the corner. Or used to add extra hits before starting 2X loops.
More importantly though, doing j.B gives you extra momentum.
If done on the way up you jump higher, clearing almost the whole screen.
If done on the way down, you fall faster, allowing you to link combos that wouldn't normally be possible.
|
|
5X
|
| Damage
|
Guard
|
Startup
|
Active
|
Recovery
|
Invuln
|
Adv. Hit
|
Adv. Block
|
Adv. Parry
|
Effect
|
| 10
|
Mid
|
8
|
Until Off-screen
|
13
|
0
|
?
|
?
|
-7
|
N/A
|
Standard Fireball with Standard damage.
Also remember people can parry so mix-up the timing a bit or throw out a 5EX.
Using it close or about 1/4 screen away from your opponent makes it hard to parry, giving you the hesitation needed to jump in or go low.
Keep in mind, you can't throw out another fireball while this is currently active.
|
|
2X cavemen discovered this before fire cavemen discovered this before fire
|
| Damage
|
Guard
|
Startup
|
Active
|
Recovery
|
Invuln
|
Adv. Hit
|
Adv. Block
|
Adv. Parry
|
Effect
|
| 15*3(39)
|
Mid
|
5
|
18
|
16
|
1-23
|
Knockdown
|
?
|
?
|
KD, KB
|
The standard fully invincible DP.
In all seriousness this the best DP in the game.
Deceptively unsafe on whiff and block despite what the numbers suggest.
Keep in mind, a smart opponent will be looking to punish a whiffed/blocked DP into an easy TOD.
|
|
J.X Kyantarohou on the go-go! Kyantarohou on the go-go!
|
| Damage
|
Guard
|
Startup
|
Active
|
Recovery
|
Invuln
|
Effect
|
| 10
|
Mid
|
11
|
Until Off-screen
|
6
|
0
|
N/A
|
A very good air fireball with the coveted property of ending in the air.
You can make a lot of approaches safe with this by linking into j.A or j.B (especially against moves like Spikes 2X or Rouge's 2Y) and even zone pretty well too with j.9X.
At the corner you can get some real wonky 5-6 fireball combos with this on an airborne opponent.
Keep in mind, you can't throw out another fireball while this is currently active.
|
|
5EX meatball surprise meatball surprise
|
| Damage
|
Guard
|
Startup
|
Active
|
Recovery
|
Invuln
|
Adv. Hit
|
Adv. Block
|
Adv. Parry
|
Effect
|
| 20*2(38)
|
Mid
|
5
|
Until Off-screen
|
12
|
1-7
|
Knockdown
|
?
|
?
|
KD
|
This is the main EX. It goes through pretty much everything and you can taunt after it for free meter, or just opt for okizeme.
This can combo into itself, so it's a good meter-dump if you want to guarantee a kill, but spamming EXs isn't really too great when you have other options.
Although, at point blank range it's somewhat safe on block and with K-Cancel is insanely advantageous on block, allowing for 6B overhead with no gaps or a swift 2X.
Goes into 2X for free extra damage, all follow-ups get meter if below 10-hits too, making it potentially meter positive or neutral on hit in the corner if you don't convert.
Keep in mind, you can't throw out another fireball while this is currently active.
|
|
2EX WHY are the EX VERSIONS wORSE WHY are the EX VERSIONS wORSE
|
| Damage
|
Guard
|
Startup
|
Active
|
Recovery
|
Invuln
|
Adv. Hit
|
Adv. Block
|
Adv. Parry
|
Effect
|
| 15*3,5*2(45)
|
Mid
|
1
|
14
|
30
|
1-15
|
Knockdown
|
?
|
?
|
KD, KB
|
Not very good since Kyanta's regular DP(2X) does the same thing for free, with longer invulnerability baked in.
But it's still a slightly higher damage DP that's slightly faster, so if you're using it to combo it's not too bad.
Primarily used to escape 1-frame frame-traps that 2X would be caught trying to get out of.
|
|
J.EX
|
| Damage
|
Guard
|
Startup
|
Active
|
Recovery
|
Invuln
|
Effect
|
| 20*2(38)
|
Mid
|
8
|
Until Off-screen
|
Until Ground
|
1-5
|
KD
|
It's just 5EX but with j.X angle.
Sadly doesn't end in the air like regular j.X, at least it can combo into 5EX if tiger knee'd in the corner.
You can use this move to lock down your opponent with an invulnerable approach if tiger knee'd, just make sure not to accidentally do it on the way down or no fireball will come out.
More likely you can use this move as a reactive air defense or use it while jumping back to stop an approach on players who are particularly good at parrying j.X.
Keep in mind, you can't throw out another fireball while this is currently active.
|
|
Ultra 1 (Y) spicy meatball spicy meatball
|
| Damage
|
Guard
|
Startup
|
Active
|
Recovery
|
Invuln
|
Adv. Hit
|
Adv. Block
|
Adv. Parry
|
Effect
|
| 30*4 (108)
|
Mid
|
3
|
Until Off-screen
|
26
|
1-48
|
Knockdown
|
?
|
?
|
KD
|
It's like 5EX but 2 more hits, just a huge Kyantaro-ho that hits 4 times more or less.
Serves the same purpose as 5EX, has some combos and is a good neutral tool but it's just a free way to get 100 dmg or end the projectile-war.
Often trades if done reactively against midscreen buttons or other Ultras.
BS-long inuvln frames.
Also, keep in mind, you can't throw out another fireball while this is currently active.
|
|
Ultra 2 (2Y)
|
| Damage
|
Guard
|
Startup
|
Active
|
Recovery
|
Invuln
|
Adv. Hit
|
Adv. Block
|
Adv. Parry
|
Effect
|
| 20*5 (104)
|
Mid
|
3
|
3(4)3(4)13
|
Until Ground
|
1-31
|
Knockdown
|
?
|
?
|
KD, KB
|
Super Pom Upper does 3 DPs with the first two being very ending low to the ground like a Shoryureppa from Street Fighter.
Very fast start up as like 2EX so you can swap them out for simple reliable combos, making it better for combos than Ultra 1.
Make sure you confirm it however, since it scales very well there's no reason not too, as there's a very large chance you will whiff a hit midscreen resulting in less damage or a huge punish.
For this reason, you generally see more "unga"-players go with Ultra 1.
|
|
Grab (AB) cup of ice, no water cup of ice, no water
|
| Damage
|
Guard
|
Startup
|
Active
|
Recovery
|
Invuln
|
Adv. Hit
|
Adv. Block
|
Adv. Parry
|
Effect
|
| 40
|
Grab
|
3
|
3
|
5
|
0
|
Knockdown
|
Knockdown
|
N/A
|
KD
|
Just a regular throw for a regular Kyanta.
Decent 1 hit throw, but can be tricky to combo out of KC, very underwhelming follow-ups.
|
|
Taunt (Select) what if I did this in neutral :flushed: what if I did this in neutral :flushed:
|
| Damage
|
Guard
|
Startup
|
Active
|
Recovery
|
Invuln
|
Adv. Hit
|
Adv. Block
|
Adv. Parry
|
Effect
|
| +1 bar to EX gauge
|
N/A
|
47
|
N/A
|
57
|
N/A
|
N/A
|
N/A
|
N/A
|
N/A
|
Standard meter gain taunt, the best in the game.
Kyanta is granted meter the second they start talking, which is extremely quick for a full bar of meter.
Can usually be done safely behind a AA 5X, although any knockdown will completely confirm it.
You can also punish people trying to punish you for taunting by buffering 2X sometimes.
It's cheesy and not guaranteed but it works more often than you'd think.
|
|
Combos
| Notation Help
|
Disclaimer:
Combos are written by various writers, so notation may differ slightly from this notation.
For more information, see Controls.
Character-specific notation, will be on the character's page.
|
| FB
|
Refers to the act of gaining a "Flash Bonus", which grants you extra meter, on the hit of a move.
|
| KC
|
Refers to pressing B+Y on the same frame, or the macro-button for B+Y. This is known as a Kyanta-Cancel, this game's Roman-Cancel.
|
| DC
|
Refers to cancelling a move by activating Demon type's buff, similar to KC.
|
| XEX
|
Refers to pressing X+Y on the same frame, or the macro-button for X+Y.
This is known as an EX move, for example: j.EX>5EX>2EX.
|
| {X/Y/Z}
|
Move X or Y or Z can be used.
|
| #X
|
Indicates that any of A, B and C may be used with #. Example: 3A (Down-right, Light.)
If you have trouble with this notation, you may want to google for "Numpad Notation" elsewhere.
|
| (X)xN or (X)xN-N
|
Loop the inputs in the square brackets or parenthesis as many times as N, sometimes doesn't include brackets or parenthesis but still means the same thing.
Also occasionally includes a dash to indicate that a varying amount of hits can be performed.
|
| j.X
|
Button X is input while you are in the air jump.
|
| X(whiff)
|
Indicates that X is intended to whiff.
|
| (Delay) or (Wait)
|
Indicates a short delay on the hit.
|
| (X)
|
X move is omittable from the combo, this will be mentioned in the hover text.
|
| tk.X
|
Indicates the motion "X" is input immediately after leaving the ground. Stands for tiger knee.
|
| AA
|
Indicates the move hits an opponent in the air, referred to as an Anti-air. Hence AA.
|
| [X]
|
Indicates if a move should be held down.
|
| ]X[
|
Indicates if a held move should be released, for example: 5[B] > 5]B[.
|
Midscreen
| Condition
|
Notation
|
Damage
|
Notes
|
|
Midscreen
0 Bar
Works On: All
|
|
32
|
|
| Meter Gained: 4 Hits |
Meter Spent: 0 Bar |
(Video) |
| Builds meter off a midscreen jab. |
|
|
Midscreen
0 Bar
Works On: All
|
|
51
|
|
| Meter Gained: 5 Hits |
Meter Spent: 0 Bar |
(Video) |
| Builds meter off a midscreen 6B, not that good of a move but still an okay mix-up option with some meter/damage to gain from it. |
|
|
Midscreen
0 Bar
Works On: All
|
|
51
|
|
| Meter Gained: 8 Hits |
Meter Spent: 0 Bar |
(Video) |
Knockdown that carries into the corner.
Leads into the 2X loops, check the second Corner combo for more information. |
|
|
Midscreen
0 Bar
Works On: Specific
|
|
59
|
|
| Meter Gained: 9 Hits |
Meter Spent: 0 Bar |
(Video) |
Knockdown that carries into the corner.
Leads into the 2X loops, check the second Corner combo for more information.
Does not work on these characters from midscreen, instead only working from the corner:
- Anna
- kinoko
- Azuma-Deka
- Rogue
- Hisomi
- K. Kyanta
|
|
|
Corner
| Condition
|
Notation
|
Damage
|
Notes
|
|
Corner
0 Bar
Works On: All
|
|
54
|
|
| Meter Gained: 6 Hits |
Meter Spent: 0 Bar |
(Video) |
| Builds meter off a jump-in, simple corner combo, no knockdown sadly. |
|
|
Corner
1.75 Bar
Works On: All
|
- 2B > 5B(1-hit)> KC> (2X(FB)> KC> (delay)j.2B)xMeterBars
|
75 + (31)xLoop
|
|
| Meter Gained: 10 Hits + FBxLoop |
Meter Spent: 1 Bar (Per loop) |
(Video) |
More often that not, your optimal combo ender will be: 2X(3-hit)> KC> 2X(FB), starting the KC loop.
You can always loop the sequence off of any cornered 2X as long as you have meter to KC the last hit of 2X.
You whiff j.2B, on the way down from a 2X(3-hit)>KC, to land faster than the opponent.
Make sure not to hit the opponent on the way down with j.B, or you lose your FB for 2X.
If you're out of meter you can press j.B early to get the damage,Otherwise you can do 2X(3-hit)>KC>2X.
Here's the various midscreen 2X carries:
- 2B> 5A> j.B> 2X
- Grab> KC> J.B> 2X
- 2X> KC> 5A> J.B> 2X
- j.A> U2> Last Hit KC> j.B> 2X
- AA j.B> 2X
Here's the various 2X corner confirms:
- j.A/B> 5A> 2X
- 2B> 5B> 2X
- 2B> 5A> 2X
- 5EX> 2X
- 6B(1-hit)> KC> 2B> 5A> 2X
- Grab> KC> 5A> j.B> 2X
- Grab> KC> (5B)x2> 2X
|
|
|
Corner, Anti-air
0 Bar
Works On: All
|
- AA j.X> (j.X)x3> 5B(1-hit) > 2X
|
46
|
|
| Meter Gained: 8 Hits |
Meter Spent: 0 Bar |
(Video) |
Really cheesy j.X jump-in combo you get if you catch opponents trying to jump out of corner.
Not good but not bad either, leads into 2X loops, read Corner combo #2 for more info. |
|
|
Other Resources/Notable Players
Other Guides/Showcases
PRE IBBE
Starter Combos
KYANTAROHO a Kyanta combo video
Kyantaween 2, punishing Kyanta 2X midscreen with every character
Kyantaween 4, punishing Kyanta 2X midscreen with every character on jump parry FB
POST IBBE
Kyantaween 4, punishing Kyanta 2X midscreen with every character on jump parry FB IBBE
Notable Players
Disclaimer: This list is derived from community input and is in no way comprehensive or a form of ranking of any kind. Our community criteria can be found here.
| Usual Color |
Handles/Links |
Region |
Status |
Notes
|
| Color 06
|
cowthecat310
|

United States
Mid
|
Active
|
|
| Color 03
|
YellowSwerve
|

United States
West Coast
|
Active
|
 Kyanta / Kyanta /  Tsukinami / Tsukinami /  Anna Anna
|
| General
|
|
| Advanced
|
|
| Characters
|
|
