|
|
| Line 203: |
Line 203: |
| |input =5X | | |input =5X |
| |image =UFDK2_Razuma_5X.png | | |image =UFDK2_Razuma_5X.png |
| |caption =home depot power drill | | |caption =WRRRRRRRNNYYAUUUUUU |
| |data = | | |data = |
| {{AttackData-KYANTA2 | | {{AttackData-KYANTA2 |
Revision as of 05:15, 17 April 2022
General
Background
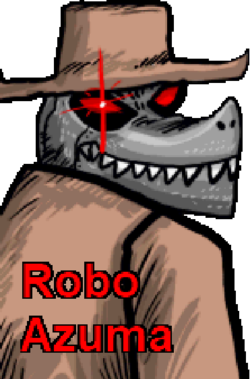
Robo-Azuma? Azuma-Robo? is a robot created by Michelle, designed to mimic Azuma’s appearance. It will carry out its orders at any cost.
It can be found late at night in dark alleys, capturing those who cross its path to take back to Michelle’s lair for experiments.
It will fight back when in danger, using its drill with deadly force. In an emergency, it can self-destruct to keep its internal data confidential.
When its synthetic skin is off, it is in combat mode, ready to use its full strength and weaponry.
"GOSH. DAMN."
The community refers to him under a few different nicknames, they are: "Razuma" and "Robo".
This resource refers to him as Razuma, although others may vary.
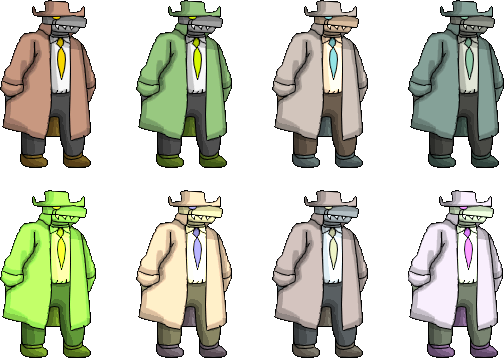
Colors

Gameplay
General
Recommended Types: Stamina/Super/Speed
Razuma plays as a sort of "reversal-powerhouse", having little-to-no-range due to his incredibly slow speed, forcing him to rely on parries or EX moves to cover distance.
But what he lacks in speed, he makes up for in moves, he has some of the safest and strongest moves in the game, his full kit is full of ridiculous buttons and he relies on leveraging these huge pokes to get things done.
Not only that, but thanks to his odd U1 and his ability to crouch-slide, he gains extreme TOD potential and has complete control over opponent's boko-bars. You never want to be caught blocking against Razuma.
Just in general, you're playing an uphill battle with extreme reward, one slip-up on the side of the opponent can be certain death.
Often times, Razuma just can't get in due to his speed, forcing him to drop meter or make trades to get things done, some MUs are just complete hell for the poor gator.
Keep in mind, one of the hardest characters, Razuma has to work twice as hard for these things.
Tech
Crouch-Slide Tech

Jab Loops
Using crouch slide you can infinitely loop jabs by timing a drop after every 5th one and gaplessly pressing 2A again.
It's corner-stone of the character's pressure, every jab can extend for multiple hits and a potential mix-up.
It builds tons of meter, does lots of damage, it's one of his safest pokes, and is also the general combo ender.
3A Blockstring
It's +10 on block and completely gapless if timed right, forcing the opponent to red parry low to escape the true infinite blockstring.
This guarantees some easy Boko-breaks, with U1 already primed you can pop U1 after 10 jabs against trios. Forcing the opponent to try a risky option or risk a full boko-break combo.
On Boko-break Razuma has a number of options, depending on where he is on the screen you can get a number of combos.
Crouch-Slide Parry OS
As the name implies, using 3 you can OS parries, since using 3 will not consume your parry.
This means Razuma is the only character who can approach and parry on the ground, this is essential for dealing with Razuma's horrible approach.
Especially since, most of the time, air parrying won't cut it.
The OS is performed as: [3] > (6)4, in which you hold 3 and then quickly flick to 6 when you need to parry.
After you hit 6, you can opt for 4 to OS block, either getting the parry or immediately blocking and being completely safe.
If you hit the parry, then continue parrying the attack.
Movelist
5A
|
| Damage
|
Guard
|
Startup
|
Active
|
Recovery
|
Invuln
|
Adv. Hit
|
Adv. Block
|
Adv. Parry
|
Effect
|
| 5
|
Mid
|
1
|
2
|
2
|
0
|
10
|
10
|
-2
|
N/A
|
While this isn't bad, 2A is far far better.
It's better to just get into the groove of crouch-sliding with 2A, unless you're hitting the U1 Flash Bonus.
|
|
2A
|
| Damage
|
Guard
|
Startup
|
Active
|
Recovery
|
Invuln
|
Adv. Hit
|
Adv. Block
|
Adv. Parry
|
Effect
|
| 5
|
Low
|
1
|
2
|
2
|
0
|
10
|
10
|
-2
|
N/A
|
This move seems simple on the surface, but its pairing with crouch-sliding makes it an active powerhouse, it handles all of your troubles.
Meter? Damage? Juggles? Carries? You name it, it can do it. It hits fairly low and with proper spacing you can safely poke without putting your hurtbox into the fray.
Bread n' butter basically, just don't spam it, ok?
|
|
J.A Link N-Air, the sequel. Link N-Air, the sequel.
|
| Damage
|
Guard
|
Startup
|
Active
|
Recovery
|
Invuln
|
Adv. Hit
|
Adv. Block
|
Adv. Parry
|
Effect
|
| 15
|
High
|
5
|
Until Ground
|
Until Ground
|
0
|
?
|
?
|
?
|
N/A
|
The biggest j.A hitbox in the game, extremely safe and fast to use.
Pokes for free, but trades on air-to-airs.
j.B is better when you're in, j.A is how you get in.
|
|
5B Awful arm-swing. Awful arm-swing.
|
| Damage
|
Guard
|
Startup
|
Active
|
Recovery
|
Invuln
|
Adv. Hit
|
Adv. Block
|
Adv. Parry
|
Effect
|
| 10,10,20(28)
|
Mid
|
9
|
10
|
4
|
0
|
9
|
9
|
-4
|
N/A
|
The start-up is deceptive, it's more-so 12f start-up as oppose to the 9f due to the first state.
The swing works in three states, which are:
High Hand
- 3f duration
- cannot hit opponents on the ground at all
- great for anti-airs but due to 5B having collision this physically cannot hit on the ground
- drops on certain characters when hitting 5B after 2X, makes 5B have to be routed out of combos
Mid Hand
- 4f duration
- safest hitbox, leaves you +9
- extremely slight disjoint but has the most forward momentum
- leads into a double-hit
Low Hand
- 3f duration
- disjoint
- reset to neutral on hit or block
Since the move is very problematic to hit and is far too slow for most combos, it's used for the first hitbox's anti-air pick-ups.
If you can help it, don't use this button in neutral, ever.
|
|
2B Stanky Leg Stanky Leg
|
| Damage
|
Guard
|
Startup
|
Active
|
Recovery
|
Invuln
|
Adv. Hit
|
Adv. Block
|
Adv. Parry
|
Effect
|
| 20
|
Low
|
8
|
3
|
5
|
0
|
9
|
9
|
-5
|
N/A
|
The longest 2B hitbox in the game, fast and safe to use.
Pokes for free, with an insane disjoint for a low... in a game with really bad lows.
Doubles up as a great combo tool and completely overshadows 5B in neutral, you can even anti-fireball with it!
Breaks all the rules, great.
|
|
J.B METALLIC FIST OF POWER METALLIC FIST OF POWER
|
| Damage
|
Guard
|
Startup
|
Active
|
Recovery
|
Invuln
|
Adv. Hit
|
Adv. Block
|
Adv. Parry
|
Effect
|
| 20
|
High
|
11
|
Until Ground
|
Until Ground
|
0
|
?
|
?
|
?
|
N/A
|
You use j.A to get in, you use j.B when you're in.
It's got a very safe and disjointed hitbox, incredibly fast due to the momentum change.
If you hit it you can snap right into slide-jabs, making for a nasty hi/lo pressure which leads into your infinite blockstring.
|
|
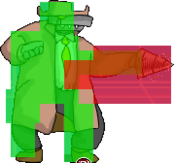
5X WRRRRRRRNNYYAUUUUUU WRRRRRRRNNYYAUUUUUU
|
| Damage
|
Guard
|
Startup
|
Active
|
Recovery
|
Invuln
|
Adv. Hit
|
Adv. Block
|
Adv. Parry
|
Effect
|
| 7*8(30)
|
Mid
|
14
|
24
|
7
|
0
|
Knockdown
|
9
|
-7
|
KD, KB
|
Serves as a combo-tool, due to the 8 hits, extremely good for meter-gain.
Doesn't apply that well outside of combos, don't use it in neutral unless you're calling someone out.
|
|
2X Alex stomp will never die Alex stomp will never die
|
| Damage
|
Guard
|
Startup
|
Active
|
Recovery
|
Invuln
|
Adv. Hit
|
Adv. Block
|
Adv. Parry
|
Effect
|
| 25
|
High
|
18
|
4
|
1
|
0
|
Knockdown
|
9
|
-3
|
KD
|
Deceptive start-up combo starter that's surprisingly evasive and can hop over most slides and projectiles.
This is your main combo-starter, you'll be relying on this to start any combo.
As such, everyone knows this is your starter and will throw all caution to the wind to DP you or do any sort of anti-air to stop your damage.
Can be difficult to hit in some match-ups, but once you're in, you're in.
|
|
J.X
|
| Damage
|
Guard
|
Startup
|
Active
|
Recovery
|
Invuln
|
Adv. Hit
|
Adv. Block
|
Adv. Parry
|
Effect
|
| 10
|
Mid
|
13
|
Until Off-screen
|
Until Ground
|
0
|
?
|
?
|
?
|
N/A
|
Amazing air-fireball.
Seems bad, but it's great for controlling space considering how slow Razuma is, goes at an amazing angle that invalidates other slow characters.
This move is why Razuma vs. Razuma MU is horrible.
|
|
5EX Main Reversal Main Reversal
|
| Damage
|
Guard
|
Startup
|
Active
|
Recovery
|
Invuln
|
Adv. Hit
|
Adv. Block
|
Adv. Parry
|
Effect
|
| 10,20,20(44)
|
Mid
|
7
|
10
|
1
|
1-15
|
Knockdown
|
10
|
-1
|
KD, KB
|
Your main reversal, covers every single angle around Razuma.
It's essentially a good version of 5B, but hitting all of the hits is just as finnicky.
But due to its speed, odd hitboxes, and invuln, this is your go-to reversal.
|
|
2EX Y'know how I said it was like Alex stomp? Yeah... Y'know how I said it was like Alex stomp? Yeah...
|
| Damage
|
Guard
|
Startup
|
Active
|
Recovery
|
Invuln
|
Adv. Hit
|
Adv. Block
|
Adv. Parry
|
Effect
|
| 35
|
High
|
11
|
14
|
1
|
1-11
|
Knockdown
|
10
|
-3
|
KD
|
Just as gimmicky as Alex's EX Stomp.
Works as a pseudo anti-air reversal, the hitbox comes out at around the hp-display and you lose your invuln from there.
Mainly used to punish characters like Kinoko or ZackyWild that sit above you on wake-up, great for anti-air situations.
Although, it's still not good at all and you'd be better off trying to 5B for anti-air pick-ups.
|
|
J.EX
|
| Damage
|
Guard
|
Startup
|
Active
|
Recovery
|
Invuln
|
Adv. Hit
|
Adv. Block
|
Adv. Parry
|
Effect
|
| 40
|
Mid
|
4
|
Until Off-screen
|
Until Ground
|
1-10
|
Knockdown
|
?
|
?
|
KD
|
Broken move, for realsies.
Requires you to hit tiger-knee combos to make it shine, but once you do it rips through characters like a hot knife through butter.
It blocks all projectiles in its path too, so you should throw this move out in neutral and approach with it.
|
|
Ultra 1 (Y) BWAAAAAAAAAAAAAAA BWAAAAAAAAAAAAAAA
|
| Version
|
Damage
|
Guard
|
Startup
|
Active
|
Recovery
|
Invuln
|
Adv. Hit
|
Adv. Block
|
Adv. Parry
|
Effect
|
| Prime
|
N/A
|
N/A
|
N/A
|
N/A
|
7
|
0-7
|
N/A
|
N/A
|
N/A
|
N/A
|
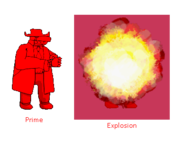
An unavoidable 7 frames of Priming the move that keeps U1 from being absolutely busted and lets us have install-state.
...still very very scary.
|
| Explosion
|
120
|
Mid
|
7
|
10
|
66
|
0-34
|
Knockdown
|
?
|
?
|
KD, KB, BD, F, NC
|
Deals huge damage and is super useful in any combo as it can be cancelled into once primed after ANY move (except Grab).
It's very useful to great effect on the defensive or the offensive, perfectly playing into any type or playstyle you'd like.
Can be applied as a pseudo-guard cancel, works as anti-air, reversal, and combo-ender.
Also, U1 can be used in the air, letting you pop U1 after an air-to-air to kill your momentum.
After you're out of explosion animation, you're neutral, letting you input buttons like j.A or j.X.
Very useful for escaping projectiles or punishing DPs.
|
|
Ultra 2 (j.Y) Hyper-charging Star! Hyper-charging Star!
|
| Damage
|
Guard
|
Startup
|
Active
|
Recovery
|
Invuln
|
Adv. Hit
|
Adv. Block
|
Adv. Parry
|
Effect
|
| 15*10(113)
|
Mid
|
2
|
1(11)1(11)1(11)1(11)1(11)1(11)1(11)1(11)1(11)1
|
23
|
0-57
|
Knockdown
|
-5
|
-11
|
-
|
One of the few distinctly worse Ultra choices.
Despite the ridiculous I-frames and start-up, it's still stupidly punishable and reactable at the same time.
You can use it to avoid projectiles and force an approach, but overall it's far out-shadowed by Ultra 1 in terms of overall use and safety.
Corner carries are as follows:
- Air Hit > U2
- 2X > Anything > U2
- Any EX > U2
(Also, there's actually no recovery if it whiffs entirely too, the active frames also never "flicker" if it whiffs, so it's better to punish it via blocking.)
|
|
Grab (AB)
|
| Damage
|
Guard
|
Startup
|
Active
|
Recovery
|
Invuln
|
Adv. Hit
|
Adv. Block
|
Adv. Parry
|
Effect
|
| 15*3(45)
|
Grab
|
3
|
6
|
5
|
0
|
Knockdown
|
Knockdown
|
N/A
|
KD, KB
|
Can't be cancelled by U1 and the KC follow-ups are very underwhelming.
Naturally combos in the corner however, but the best you can get off of it is a U1 (extremely minus) or a bunch of slide jabs.
|
|
Taunt (Select) Every robot has gotta have spinny-limb taunt! Every robot has gotta have spinny-limb taunt!
|
| Damage
|
Guard
|
Startup
|
Active
|
Recovery
|
Invuln
|
Adv. Hit
|
Adv. Block
|
Adv. Parry
|
Effect
|
| +20 to next attack
|
N/A
|
N/A
|
N/A
|
72
|
N/A
|
N/A
|
N/A
|
N/A
|
N/A
|
Practically the same as InAzuma's taunt, just slower, so don't use it.
|
|
Crouch Slide (3) Makes this character playable. Makes this character playable.
|
| Damage
|
Guard
|
Startup
|
Active
|
Recovery
|
Invuln
|
Adv. Hit
|
Adv. Block
|
Adv. Parry
|
Effect
|
| N/A
|
N/A
|
N/A
|
N/A
|
N/A
|
N/A
|
N/A
|
N/A
|
N/A
|
N/A
|
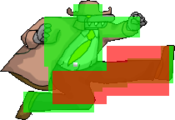
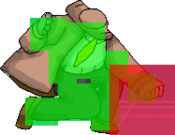
As the name implies, you crouch and slide across the ground. You cannot block or parry during this.
It's performed by holding 3 or down-right, once the combo-counter hits 6-hits, you're unable to crouch slide.
It's a pretty unique movement option, allowing Razuma to approach despite his huge hurtbox at times, but mainly to extend his 3A-jab combos.
|
|
Combos
| Notation Help
|
Disclaimer:
Combos are written by various writers, so notation may differ slightly from this notation.
For more information, see Controls.
Character-specific notation, will be on the character's page.
|
| FB
|
Refers to the act of gaining a "Flash Bonus", which grants you extra meter, on the hit of a move.
|
| KC
|
Refers to pressing B+Y on the same frame, or the macro-button for B+Y. This is known as a Kyanta-Cancel, this game's Roman-Cancel.
|
| DC
|
Refers to cancelling a move by activating Demon type's buff, similar to KC.
|
| XEX
|
Refers to pressing X+Y on the same frame, or the macro-button for X+Y.
This is known as an EX move, for example: j.EX>5EX>2EX.
|
| {X/Y/Z}
|
Move X or Y or Z can be used.
|
| #X
|
Indicates that any of A, B and C may be used with #. Example: 3A (Down-right, Light.)
If you have trouble with this notation, you may want to google for "Numpad Notation" elsewhere.
|
| (X)xN or (X)xN-N
|
Loop the inputs in the square brackets or parenthesis as many times as N, sometimes doesn't include brackets or parenthesis but still means the same thing.
Also occasionally includes a dash to indicate that a varying amount of hits can be performed.
|
| j.X
|
Button X is input while you are in the air jump.
|
| X(whiff)
|
Indicates that X is intended to whiff.
|
| (Delay) or (Wait)
|
Indicates a short delay on the hit.
|
| (X)
|
X move is omittable from the combo, this will be mentioned in the hover text.
|
| tk.X
|
Indicates the motion "X" is input immediately after leaving the ground. Stands for tiger knee.
|
| AA
|
Indicates the move hits an opponent in the air, referred to as an Anti-air. Hence AA.
|
| [X]
|
Indicates if a move should be held down.
|
| ]X[
|
Indicates if a held move should be released, for example: 5[B] > 5]B[.
|
Razuma's Ultra-1 has special notation, starting it is referred to as "U1 Prime", while using it after it's activated is referred to as "U1 Activate".
Simply putting "U1", by itself means to activate and prime it as one full use.
Midscreen
| Condition
|
Notation
|
Damage
|
Notes
|
|
Midscreen
0 Bar
Works On: All
|
*j.B > (3A)x2
|
26/29 (Speed)
|
|
| Meter Gained: .25 Bar/.3 Bar (Speed) |
Meter Spent: 0 Bar |
(Video) |
Generic jump-in combo with an active-until-landing jump-in.
If you're using Speed/Super-type you can get an extra jab, thanks to Razuma's crouch-slide movement. |
|
|
Midscreen
0 Bar
Works On: All
|
*(3A)x4
|
14/20 (Speed)
|
|
| Meter Gained: .3 Bar/.5 Bar (Speed) |
Meter Spent: 0 Bar |
(Video) |
Standard cross-up jab combo.
If you're using Speed/Super-type you get two extra jabs, thanks to Rauzma's crouch-slide movement.
Notably could get more but thanks to crouch-slide capping off at 6-hits you can't move enough to link any more jabs. |
|
|
Midscreen, Anti-air
.75 Bar
Works On: All
|
|
180
|
|
| Meter Gained: .30 Bar |
Meter Spent: 1 Bar |
(Video) |
Finneky anti-air combo since you have to have pretty good timing for a niche pick-up.
Works but it's not nearly as easy as WD's j.B pick-up, Gyanta's 5B pick-up, or Rogue's 5B pick-up. |
|
|
Midscreen
0 Bar
Works On: Taro-only
|
*(J.B)x3 > 2B > (3A)x2
|
71/83 (Speed)
|
|
| Meter Gained: .5 Bar/.75 Bar (Speed) |
Meter Spent: 0 Bar |
(Video) |
Taro has extra hitstun so (tk.j.B)x3 connects, you get extra 3As with faster movement speed too!
If this hits in the corner, you can swap out the 2B for U1 and TOD Taro. |
|
|
Close-To-Corner
| Condition
|
Notation
|
Damage
|
Notes
|
|
Close-To-Corner
0 Bar
Works On: All
|
|
74
|
|
| Meter Gained: .7 Bar |
Meter Spent: 0 Bar |
(Video) |
Depending on the character, you can get extra jabs, with the most notable being Rogue/Hisomi.
On Rogue/Hisomi you can get: 2X > 2B > j.B > 3Ax7(80)(.90 bar built)
This is due to their hurttboxes extending the furthest out horizontally, basically wider hurtbox means more jabs. |
|
|
Close-To-Corner
.5 Bar
Works On: All
|
- 2X > 2B > j.B > (3A)x4 > U1
|
177
|
|
| Meter Gained: .6 Bar |
Meter Spent: 1 Bar |
(Video) |
U1 version of the usual midscreen BNB.
Does a ton of damage but you're minus after the U1, usually doesn't matter though thanks to the Boko-build scaring people. |
|
|
Close-To-Corner, Anti-air
1 Bar
Works On: All
|
- AA 5B (1-hit)> KC> 5B(1-hit)> 5X> U1 Prime> 5A(FB) > U1 Activate
|
182
|
|
| Meter Gained: 1.5 Bar |
Meter Spent: 2 Bar |
Anti-air version of the corner FB combo.
Not sure why this wasn't on here already? Guess I forgot.
Leaves you plus on meter afterwards too. |
|
|
Close-To-Corner, Demon
1 Bar
Works On: All
|
- 2X > 2B > DC >(delay) j.B(FB) > (tk.j.EX)x4 > 2B
|
189
|
|
| Meter Gained: .75 Bar |
Meter Spent: 1 Bar |
(Video) |
| j.EX kill combo, every j.EX must be within a 1f gap of each other. |
|
|
Close-To-Corner, Demon
1.5 Bar
Works On: All
|
- 5EX(3-hit) > DC > 5EX(1-hit) > (tk.j.EX)x5
|
188
|
|
| Meter Gained: 0 Bar |
Meter Spent: 1.5 Bar |
(Video) |
Used for when you're further out than the above combo.
You can get a 6th tk.j.EX, but it's pretty hard.
More power to you if you get it though. |
|
|
Corner
| Condition
|
Notation
|
Damage
|
Notes
|
|
Corner
.8 Bar
Works On: All
|
- 2X > 2B > KC >(delay) 5X(FB)> U1 Prime > 5A(FB) > U1 Activate
|
188
|
|
| Meter Gained: 1.5 Bar |
Meter Spent: 2 Bar |
(Video) |
Extra meter build and damage if you hit every hit of 5X, this combo assumes you hit the bare minimum.
Leaves you positive .5 bar when performed successfully, wackity combo. |
|
|
Corner
2.5 Bar
Works On: All
|
- 2X > 2B > KC >(delay) 5X(FB)> U1 Prime > 5A(FB) > U1 Activate > KC > U1 Prime > U1 Activate > Grab > 3A(FB)> (3A)x2
|
408
|
|
| Meter Gained: 2 Bar |
Meter Spent: 4 Bar |
(Video) |
Solos Kill Combo, you need to come into this combo with a bit of Boko cranked. Not even impractical.
Leaves you positive .75 bar when performed successfully, just like the normal version of this combo. |
|
|
Corner
0 Bar
Works On: All
|
|
63
|
|
| Meter Gained: .75 Bar |
Meter Spent: 0 Bar |
(Video) |
If you land a grab smack in the corner you get this, regardless of movement speed.
Has a tendency to naturally FB-Bonus on the first 3A after, which is really nice. |
|
|
Corner
.75 Bar/.5 Bar (Speed)
Works On: All
|
*j.B > (3A)x4 > U1
|
142/144 (Speed)
|
|
| Meter Gained: .45 Bar/.60 Bar (Speed) |
Meter Spent: 1 Bar |
| Corner jump-in combo, for whatever reason only multiples of 2 allow you to link into U1. |
|
|
Other Resources/Notable Players
Other Guides
Robo-Azuma Cool Kid Guide by Durdge-o
Showcases
Razuma Combos by Durdge-o
Notable Players
(Names to look out for when searching for VODs of this character.)
| General
|
|
| Advanced
|
|
| Characters
|
|

