General
Background
Mysterious adversary.
An extremely powerful entitiy with a striking resemblance to Kyanta.
No one has ever fought them and survived.
They only care about strength and nothing else.
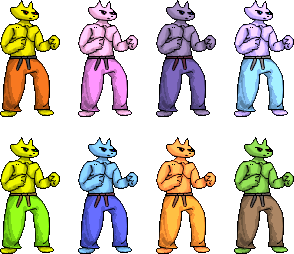
Colors
Gameplay
General
Recommended Types: Stamina
If Akuma and Elena had a baby more or less. (Don't think about it too hard.)
In fact, taking that a step further, Gyanta is just more meter-hungry Kyanta.
Almost exclusively picked by people who are too good for Kyanta but apparently not good enough to pick another character.
Relies on his Ultras to carry himself through neutral, shares a lot of issues that Elena buttons have.
Gyanta trades:
- Sweep
- Full Invuln Meterless DP
- Air Buttons that END in the Air
- Meterless Combo-able Knockdown
- Reliable Buttons
For:
- Really Good Anti-air Combo
- Secret Ultra
- Raging Demon
- Better 5X (Worse j.X)
- Really Good j.EX
- Relatively Safe Pokes
- Best Taunt In The Game (Damage, Knockdown, Meter, can be done mid-combo as an extender...)
This character can't do much of anything without meter, play Kyanta instead if you're looking for a more stable shoto.
More or less, Kyanta has versatile buttons, health, but lacks killing power.
Gyanta has extremely situational buttons, less health, but deals far more damage for the openings he does get.
Tech
Gyanta doesn't have any tech, he's an extremely straight-forward character.
He has a special cancel in 2EX > j.Y which is situational at best.
He can also force an unblockable by jumping in with j.X and then doing U1, forcing the opponent to parry then jump to escape.
Movelist
Notation notes:
If you see something like, 5(5)5(5) for Active, that means that all #s outside of parenthesis are active frames and anything in parenthesis are inactive frames in-between each hitbox.
Also taunt recovery refers to the length of the taunt, if you see a # for startup frames, that will be how long until the taunt's effect activates.
However, if the taunt has a hitbox (i.e. Spike), it will be formatted in the same way that a normal move would be.
(Damage buff taunts will not do this, since there is no way to accurately measure when the buff kicks in.)
5A
|
| Damage
|
Guard
|
Startup
|
Active
|
Recovery
|
Invuln
|
Adv. Hit
|
Adv. Block
|
Adv. Parry
|
Effect
|
| 5
|
Mid
|
1
|
1
|
2
|
0
|
?
|
?
|
?
|
N/A
|
Fast safe mid jab. Less active than 2A.
Links into 2A at any range, close-up you link into 2X, 2EX, U2, and Taunt.
If blocked or on grounded hit you can use U1 to guarantee the Raging Demon.
5A is preferred in general, since less activity means it will actually link into moves like 2B.
|
|
2A
|
| Damage
|
Guard
|
Startup
|
Active
|
Recovery
|
Invuln
|
Adv. Hit
|
Adv. Block
|
Adv. Parry
|
Effect
|
| 5
|
Low
|
1
|
2
|
2
|
0
|
?
|
?
|
?
|
N/A
|
Low with slightly better range then 5A. Links into the same combos as 5A.
Is less advantageous than 5A so you cannot get a guaranteed U1 off of this without linking it into 5A first.
Another thing of note: 2A does NOT link into 2B, instead use 5A.
|
|
J.A
|
| Damage
|
Guard
|
Startup
|
Active
|
Recovery
|
Invuln
|
Adv. Hit
|
Adv. Block
|
Adv. Parry
|
Effect
|
| 20
|
High
|
6
|
Until Ground
|
Until Ground
|
0
|
?
|
?
|
?
|
N/A
|
Solid jump-in active until ground normal.
Combos into 5A, 2A, or 2B. 5A/2A routes lead to higher damage conversions with meter while 2B does more meterless.
|
|
5B Overhead that whiffs on crouch Overhead that whiffs on crouch
|
| Damage
|
Guard
|
Startup
|
Active
|
Recovery
|
Invuln
|
Adv. Hit
|
Adv. Block
|
Adv. Parry
|
Effect
|
| 30
|
High
|
11
|
4
|
8
|
0
|
?
|
?
|
?
|
N/A
|
Gyanta does a shorthop forward that hits overhead.
Seems okay at first, until you realize it whiffs on small crouchers like Gyanta himself.
If you do manage to hit your opponent with this you can only get a follow-up combo if they were crouching, if not then you end up almost neutral.
However, the real application is anti-air combos.
If this hits a airborne opponent, it juggles into itself 2 more times, then j.EX, then j.B.
That's a full-blown TOD! ...Now only if it didn't lose to every other air-to-air option.
|
|
2B Scoot Scoot Scoot Scoot
|
| Damage
|
Guard
|
Startup
|
Active
|
Recovery
|
Invuln
|
Adv. Hit
|
Adv. Block
|
Adv. Parry
|
Effect
|
| 15
|
Low
|
7
|
6
|
8
|
0
|
?
|
?
|
?
|
N/A
|
Weird shifty scoot scoot that you can pilot during the whole duration.
Shrinks Gyanta's hitbox slightly making it possible to low profile some projectiles and standing jabs.
Doesn't knockdown or have any real follow-ups so it's best to just hold 1 to back off every time you use it.
Tragically, since this move doesn't knockdown there's almost no ways to get knockdown for free with Gyanta, one of Kyanta to Gyanta's worst trade-offs.
|
|
J.B Helicopter go brr- until you get punished on hit Helicopter go brr- until you get punished on hit
|
| Damage
|
Guard
|
Startup
|
Active
|
Recovery
|
Invuln
|
Adv. Hit
|
Adv. Block
|
Adv. Parry
|
Effect
|
| 13*12 (66)
|
High
|
2
|
6(2)6(2)6xUntil Ground
|
Until Ground
|
0
|
?
|
?
|
?
|
N/A
|
A janky move with some strange properties on it's damage and hitboxes.
Works okay as an air-to-air but can go horribly wrong on grounded opponents, as you're completely minus even on hit.
Travels in a straight line with an alternating hitbox on the sides and partially below, which for whatever reason is prone to throwing characters out of the juggle.
If you do hit a cornered opponent with this, you get a good chunk of damage and hits, so it's a good meterless juggle ender.
Or it can be applied as a meter dump by doing j.B>KC>j.B over and over.
|
|
5X
|
| Damage
|
Guard
|
Startup
|
Active
|
Recovery
|
Invuln
|
Adv. Hit
|
Adv. Block
|
Adv. Parry
|
Effect
|
| 10
|
Mid
|
5
|
Until Off-screen
|
11
|
0
|
?
|
?
|
?
|
N/A
|
Gyanta's fireball which comes out extremely quickly.
Basically just built to win fireball war against 1-hit fireballs or slow fireballs, unless they're EX in which case you're not destroying anything.
Good for harassing opponents to force dumb decisions, very easy to parry if used predictably so mix it up.
Keep in mind, you can't throw out another fireball while this is currently active.
|
|
2X
|
| Damage
|
Guard
|
Startup
|
Active
|
Recovery
|
Invuln
|
Adv. Hit
|
Adv. Block
|
Adv. Parry
|
Effect
|
| 15*3 (39)
|
Mid
|
7
|
9
|
23
|
1-16
|
Knockdown
|
?
|
?
|
KD
|
The standard fully invincible DP, meterless DP, yadda yadda.
Not nearly as busted as Kyanta's 2X, has worse invulnerability and is much easier to punish due to that.
In general, due to this you shouldn't be spamming it as much as you would want to spam Kyanta's.
Treat this like a reversal DP, not an everything DP.
|
|
J.X
|
| Damage
|
Guard
|
Startup
|
Active
|
Recovery
|
Invuln
|
Adv. Hit
|
Adv. Block
|
Adv. Parry
|
Effect
|
| 10
|
Mid
|
11
|
Until Off-screen
|
6
|
0
|
?
|
?
|
?
|
N/A
|
Downward angled projectile. Unlike Kyanta it doesn't end in the air and you don't get a small hop.
Makes it worse than it has to be, it's extremely easy to use it and fall right into a projectile.
Forces the player to play more cautiously unlike other air fireballs.
Wherever this combos you'd be better doing jump-in j.A and landing into some jabs or something.
Its main use is for setting up the U1 unblockable, by doing j.X>U1 they're forced to parry jump to escape.
If they block they'll eat a Raging Demon.
|
|
5EX
|
| Damage
|
Guard
|
Startup
|
Active
|
Recovery
|
Invuln
|
Adv. Hit
|
Adv. Block
|
Adv. Parry
|
Effect
|
| 20*3 (54)
|
Mid
|
14
|
Until Off-screen
|
8
|
1-15
|
Knockdown
|
?
|
?
|
KD
|
It goes through pretty much everything and you can taunt after it for free meter, or just opt for okizeme.
Gyanta is a lot more meter hungry than Kyanta, so throwing this out half-hazardly isn't really a good option.
You're much better off saving for j.EX trying to get that extremely huge damage or just saving it to do U1 and completely ignore neutral entirely.
The frame-data is much worse than Kyanta too, so just stick with normal fireballs, only use this to mix-up opponents who parry.
|
|
2EX
|
| Damage
|
Guard
|
Startup
|
Active
|
Recovery
|
Invuln
|
Adv. Hit
|
Adv. Block
|
Adv. Parry
|
Effect
|
| 15*6 (60)
|
Mid
|
1
|
18
|
29
|
1-26
|
Knockdown
|
?
|
?
|
KD
|
Reverse of Kyanta's 2X/2EX scenario.
Instead of 2EX having worse frame-data and 2X being better, 2EX is better, this move also cancels into j.Y as one of the few cancels in the game.
Still, don't opt for this as an ender, use j.B instead as it's multi-hit holds characters in place much better than 2EX can.
|
|
J.EX
|
| Damage
|
Guard
|
Startup
|
Active
|
Recovery
|
Invuln
|
Adv. Hit
|
Adv. Block
|
Adv. Parry
|
Effect
|
| 25*7 (133)
|
High
|
2
|
6(2)8(2)4xUntil Ground
|
Until Ground
|
1-14
|
Knockdown
|
?
|
?
|
KD
|
Similar to J.B but travels in an arc when holding 7/9 and just goes straight up when holding 8, it has absolutely busted damage.
However, this move tends to drops on practically every opening, it's insanely hard to pick-up in an actual game.
Still, if you manage to land it using one of the few setups you're dealing Ultra damage for .5 bar.
|
|
Ultra 1 (Y) Raging Pomeranian, no Demons included. Raging Pomeranian, no Demons included.
|
| Damage
|
Guard
|
Startup
|
Active
|
Recovery
|
Invuln
|
Adv. Hit
|
Adv. Block
|
Adv. Parry
|
Effect
|
| 105
|
Grab
|
?
|
?
|
?
|
?
|
Knockdown
|
Knockdown
|
N/A
|
KD
|
Genuine bullshit command grab that travels across the stage while fully invulnerable, if you touch him at all (it's deceptively hard not to) you eat 105 damage.
Absurd as a Raging Demon should be, this move completely ignores neutral, extreme unga-bunga tactic as it's insanely hard to properly punish without getting grabbed.
If you catch an opponent in blockstun ever (or just a dumb-luck grab), especially with a point-blank fireball, this move will take 105 and put both players into complete neutral.
The reason why people play this character.
|
|
Ultra 2 (2Y) Kyanta's U1 but slightly better Kyanta's U1 but slightly better
|
| Damage
|
Guard
|
Startup
|
Active
|
Recovery
|
Invuln
|
Adv. Hit
|
Adv. Block
|
Adv. Parry
|
Effect
|
| 30*5 (130)
|
Mid
|
?
|
?
|
?
|
?
|
Knockdown
|
?
|
?
|
KD
|
Fullscreen ultra fireball.
Serves the same purpose as 5EX, has some combos and is a good neutral tool but it's just a free way to get 130 dmg or end the projectile-war.
Has an extra hit just so it slightly edges out Kyanta's U1, is also faster and safer so you won't be trading with it as often as Kyanta's U1 but it's still prone to it.
Largely outclassed by U1.
|
|
Hidden Ultra (J.Y) Legit jsut Akuma's SSA2 lmao Legit jsut Akuma's SSA2 lmao
|
| Damage
|
Guard
|
Startup
|
Active
|
Recovery
|
Invuln
|
Adv. Hit
|
Adv. Block
|
Adv. Parry
|
Effect
|
| 30*5 (130)
|
Mid
|
?
|
?
|
?
|
?
|
Knockdown
|
?
|
?
|
KD
|
A "secret" downward angled aerial U2, you have this available as long as you have the ability to Ultra. (So you can't do j.Y in Super-type.)
This move has some uses in neutral but cannot be easily combo'd into and is largely unsafe without a KC.
However, it supports a unique cancel from 2EX into it. Which is most likely only in the game as a reference to 3S Akuma.
Not bad? Not good either, has it's uses when using U1 but when using U2 it might as well not be there at all.
|
|
Grab (AB)
|
| Damage
|
Guard
|
Startup
|
Active
|
Recovery
|
Invuln
|
Adv. Hit
|
Adv. Block
|
Adv. Parry
|
Effect
|
| 40
|
Grab
|
3
|
6
|
5
|
0
|
Knockdown
|
Knockdown
|
N/A
|
KD
|
Probably one of the worst grabs.
Gyanta slams the opponent into the floor dealing damage and the same time forcing knockdown.
Can be KC'd for an okay albeit expensive launcher, not incredibly practical.
|
|
Taunt (Select) TAUNT REVERSALS ARE REAL TAUNT REVERSALS ARE REAL
|
| Damage
|
Guard
|
Startup
|
Active
|
Recovery
|
Invuln
|
Adv. Hit
|
Adv. Block
|
Adv. Parry
|
Effect
|
| 20, +1 bar to EX gauge
|
Mid
|
?
|
?
|
?
|
0
|
?
|
?
|
?
|
KD
|
An aura surrounds Gyanta which has a very huge disjointed hitbox on it.
Gives 1 bar of meter if completed, but more importantly it can act as a pseudo-reversal and even combo-starter.
It's essentially just a normal move, it knocks down, it deals damage, it's fast and not very laggy, and it leads into combos.
Since it can only be done once per round, it's best to save Taunt for the j.EX corner combo.
If you're playing an anchor-focused team, then opt for Taunt on knockdown.
|
|
Combos
| Notation Help
|
Disclaimer:
Combos are written by various writers, so notation may differ slightly from this notation.
For more information, see Controls.
Character-specific notation, will be on the character's page.
|
| FB
|
Refers to the act of gaining a "Flash Bonus", which grants you extra meter, on the hit of a move.
|
| KC
|
Refers to pressing B+Y on the same frame, or the macro-button for B+Y. This is known as a Kyanta-Cancel, this game's Roman-Cancel.
|
| DC
|
Refers to cancelling a move by activating Demon type's buff, similar to KC.
|
| XEX
|
Refers to pressing X+Y on the same frame, or the macro-button for X+Y.
This is known as an EX move, for example: j.EX>5EX>2EX.
|
| {X/Y/Z}
|
Move X or Y or Z can be used.
|
| #X
|
Indicates that any of A, B and C may be used with #. Example: 3A (Down-right, Light.)
If you have trouble with this notation, you may want to google for "Numpad Notation" elsewhere.
|
| (X)xN or (X)xN-N
|
Loop the inputs in the square brackets or parenthesis as many times as N, sometimes doesn't include brackets or parenthesis but still means the same thing.
Also occasionally includes a dash to indicate that a varying amount of hits can be performed.
|
| j.X
|
Button X is input while you are in the air jump.
|
| X(whiff)
|
Indicates that X is intended to whiff.
|
| (Delay) or (Wait)
|
Indicates a short delay on the hit.
|
| (X)
|
X move is omittable from the combo, this will be mentioned in the hover text.
|
| tk.X
|
Indicates the motion "X" is input immediately after leaving the ground. Stands for tiger knee.
|
| AA
|
Indicates the move hits an opponent in the air, referred to as an Anti-air. Hence AA.
|
| [X]
|
Indicates if a move should be held down.
|
| ]X[
|
Indicates if a held move should be released, for example: 5[B] > 5]B[.
|
Optimal Combos
Air
(5B)x3 > j.EX > j.B (216)
Midscreen
j.A > 5A > 3B (49)
- Probably the only meterless midscreen combo.
Cross-up 5A > tk.j.EX (85)
- 5A has to be done right as you cross through the opponent, different characters have different timing and may give less or more hits.
Corner
Cross-up 5A > tk.j.EX > 4 > j.B (140+, does more for some characters)
- 5A must cross-up, same combo as the midscreen one though. Have to press 4 to walk back after j.EX or you'll j.B out of the corner.
Grab (4) > (5A)x2 > (j.EX)x2 > j.B (190)
- Need to reverse the grab so the opponent faces towards the corner, very janky confirm with 5A followed by two tk.j.EXs and a well-timed j.B.
j.A > 2A > Taunt > KC > j.EX > j.B (186)
- Taunt combo which seems like a meme but it's actually one of the only j.EX pick-ups that Gyanta has, since he has no meterless KD.
j.Y > KC > j.B (180)
- An improvement on the ol' j.B>KC>j.B loop that wastes a lot of meter, not better by much but it'll do.
Flash Bonus
N/A
Other Resources/Notable Players
Other Guides
Showcases
Notable Players
(Names to look out for when searching for VODs of this character.)
| General
|
|
| Advanced
|
|
| Characters
|
|


