 |
Outdated Version
- This page is for an outdated version of the game (AH3LMSS). To see Yoriko Yasuzumi's character page for the latest version (AH3X), click here.
|
Profile
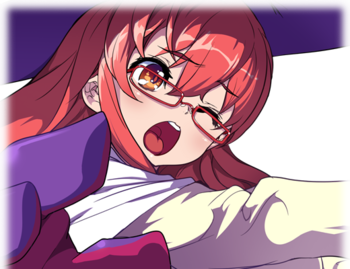
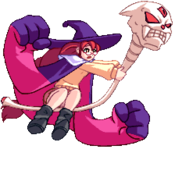
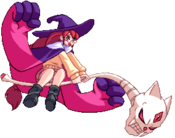
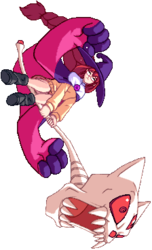
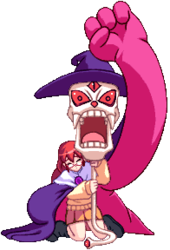
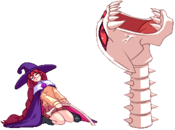
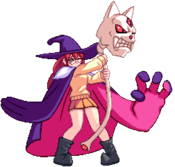
A dedicated bookworm and cat lover, Yoriko is incredibly timid and shy. She is also obsessed with the occult, and has taken over the school's former library room for her occult research club (which has no members other than herself…). Pressured by Lilica into summoning a demon, Yoriko only partly succeeded, conjuring up the self-proclaimed demon lord Michelangelo, although she stripped him of his more significant powers in the process. And thanks to Yoriko's failure, they were bound by a contract that forbids them to ever be apart from one another.
Since then, Yoriko has tried to return to a semblance of a normal life, although Mikey's selfish desire to explore the human world frequently throws a monkey wrench into her plans. For example, she always blows through her allowance money buying French crullers for her unwanted demon familiar.
They hear rumors that with the planar rifts opening in the world, celestial stones are appearing that can grant their finders a wish. But ignoring the rumor about the wishes, Yoriko sets off to find them for their value as strange magical items, with Mikey willfully helping her fight.
Overview
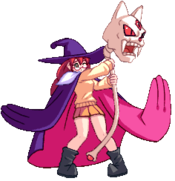
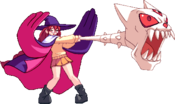
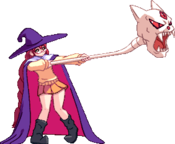
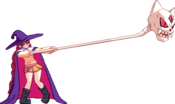
Starts as a mid-range zoner with stretchy, Dhalsim-style attacks. Wants to input a triangle or pentagram (after 632146A/A+B) to power-up her specials and then rush the opponent down, e.g. all 236x specials become invul and multi-hit.
Recommended Arcana
Normal Moves
5A
5A
|
| Damage
|
Guard
|
Cancel
|
Startup
|
Active
|
Recovery
|
Frame Adv
|
Level
|
| 500
|
All
|
-
|
5
|
1
|
10
|
+1
|
A
|
Chainable 5F normal. Hits mid. Good horizontal and vertical range.
|
|
5B
5B
|
| Damage
|
Guard
|
Cancel
|
Startup
|
Active
|
Recovery
|
Frame Adv
|
Level
|
| 1100
|
All
|
-
|
10
|
4
|
10
|
+1
|
B
|
Good mid-range move. Has start-up clash frames and is a good combo starter. Not used as often as 2B. Can chain into 3B.
|
|
5C
5C
|
| Damage
|
Guard
|
Cancel
|
Startup
|
Active
|
Recovery
|
Frame Adv
|
Level
|
| 2200
|
All
|
-
|
15
|
3
|
20
|
0
|
C
|
Has start-up clash and a good hitbox. Not a very good combo move, but can be useful for trying to cause a clash to get out of certain situations.
|
|
5E
5E
|
| Version
|
Damage
|
Guard
|
Cancel
|
Startup
|
Active
|
Recovery
|
Frame Adv
|
Level
|
| Normal
|
2200
|
Mid
|
-
|
16
|
9
|
24
|
-10
|
D
|
| Charged
|
2200*2
|
Unb
|
-
|
33
|
2(16)7
|
25
|
-
|
E
|
Pretty decent E move. Hits a large area in front of Yoriko and slightly above her, and once it starts, it's treated as airborne. Will some people off guard but it is unreliable in that regard. It is also hard to combo off.
|
|
2A
2A
|
| Damage
|
Guard
|
Cancel
|
Startup
|
Active
|
Recovery
|
Frame Adv
|
Level
|
| 500
|
All
|
-
|
5
|
3
|
8
|
+1
|
A
|
Chainable 5F normal. Hits low. Great range. Most common hit confirm normal for Yoriko.
|
|
2B
2B
|
| Damage
|
Guard
|
Cancel
|
Startup
|
Active
|
Recovery
|
Frame Adv
|
Level
|
| 1000
|
All
|
-
|
10
|
2
|
15
|
-1
|
B
|
Good range, start-up clash frames and projectile reflect on the hitbox. Chains into 3B.
|
|
2C
2C
|
| Damage
|
Guard
|
Cancel
|
Startup
|
Active
|
Recovery
|
Frame Adv
|
Level
|
| 2200
|
Low/Air
|
-
|
16
|
4
|
19
|
±0
|
C
|
Very strong grounded poke and a combo move. Has a huge hit range and is air-unblockable. This move can be used during strings to keep people from jumping out. It can be chained into 6C on hit or block, and if it hits, Yoriko can convert it into huge damage and a Pent setup.
|
|
2E
2E
|
| Version
|
Damage
|
Guard
|
Cancel
|
Startup
|
Active
|
Recovery
|
Frame Adv
|
Level
|
| Normal
|
2400
|
Mid
|
-
|
12
|
6
|
16
|
+1
|
D
|
| Charged
|
2800
|
Unb
|
-
|
27
|
4
|
30
|
-
|
E
|
Good E move. Primary usage is as an anti-air or a guard break move. 2E covers a different distance than 3A, so you can use it on some opponents who attack you more directly, but be caution of it's start up (12F for uncharged).
|
|
C.6A
c.6A
|
| Damage
|
Guard
|
Cancel
|
Startup
|
Active
|
Recovery
|
Frame Adv
|
Level
|
| 700
|
All
|
-
|
7
|
5(?)
|
9(?)
|
+5
|
B
|
This normal was added in AH3LM. This will come out when you use 6A and your opponent is close enough to be hit by it. Comes out slightly faster than the far version, making it good to use from a 4D or a 4GC. Also has a better starting prorate than the far version (.93 compared to .70).
|
|
6A
6A
|
| Damage
|
Guard
|
Cancel
|
Startup
|
Active
|
Recovery
|
Frame Adv
|
Level
|
| 1000
|
Mid
|
-
|
9
|
3
|
15
|
-2
|
B
|
A standing low that floats the opponent on hit, cannot tech until they hit the ground, lower invincibility and grab-proof from frames 1-5. Use in pressure to bait and punish throws or attempted 2A poke outs, can be confirmed into safe equip EFC combos.
|
|
C.6B
c.6B
|
| Damage
|
Guard
|
Cancel
|
Startup
|
Active
|
Recovery
|
Frame Adv
|
Level
|
| 1100
|
Mid
|
-
|
8
|
5(?)
|
15(?)
|
-1
|
B
|
This normal was added in AH3LM as well. Hits low. This will come out when you use 6B and your opponent is close enough to be hit by it. The close version of 6B is air-unblockable, unlike the far version. Because of it's small hit area, it's somewhat difficult to setup air guard break scenarios with it, but it can be used to punish poor air techs. Is jump cancelable.
|
|
6B
6B
|
| Damage
|
Guard
|
Cancel
|
Startup
|
Active
|
Recovery
|
Frame Adv
|
Level
|
| 1500
|
All
|
-
|
11
|
3
|
17
|
-4
|
B
|
Long range low air poke. The far version is air-blockable. Is also jump cancelable.
|
|
C.6C
c.6C
|
| Damage
|
Guard
|
Cancel
|
Startup
|
Active
|
Recovery
|
Frame Adv
|
Level
|
| 2200
|
All
|
-
|
17
|
10(?)
|
28(?)
|
-6
|
C
|
This normal was also added in AH3LM with the same conditions as her other close/far moves. Unlike the far version of 6C, it doesn't have the same amount of hit stun on it. This move is also a little harder to convert from because of the lessened hit stun, but it's still possible.
|
|
6C
6C
|
| Damage
|
Guard
|
Cancel
|
Startup
|
Active
|
Recovery
|
Frame Adv
|
Level
|
| 3200
|
All
|
-
|
20
|
3
|
28
|
-6
|
C
|
Yoriko's longest range poke and a good combo tool. This can be used as a spacing tool if you notice the opponent likes to stay closer to the ground. It can also catch people either in homing or jump start up.
|
|
3A
3A
|
| Damage
|
Guard
|
Cancel
|
Startup
|
Active
|
Recovery
|
Frame Adv
|
Level
|
| 900
|
Mid
|
-
|
5
|
6
|
11
|
-1
|
B
|
Fast and reliable anti-air move. Comes out very fast, is air-unblockable, and has a great start-up clash frame on it. This move is also jump/high jump cancelable, making it very easy to convert from.
|
|
c.3B
c.3B
|
| Damage
|
Guard
|
Cancel
|
Startup
|
Active
|
Recovery
|
Frame Adv
|
Level
|
| 1200
|
Low/Air
|
-
|
9
|
6
|
17
|
-3
|
B
|
This move is similar to 6A but it causes a techable knockdown instead of a standing hit. Not very useful on it's own since it's hard to confirm with. Generally used as a combo or pressure move. Chains into 2C.
|
|
3B
3B
|
| Damage
|
Guard
|
Cancel
|
Startup
|
Active
|
Recovery
|
Frame Adv
|
Level
|
| 1200
|
Low/Air
|
-
|
13
|
2
|
22
|
-8
|
B
|
Same usage as the close version of 3B. Mostly relegated to combos because of difficulty confirming and converting with it. Chains into 2C.
|
|
3C
3C
|
| Damage
|
Guard
|
Cancel
|
Startup
|
Active
|
Recovery
|
Frame Adv
|
Level
|
| 2200
|
Low
|
-
|
24
|
4
|
29
|
-10
|
C
|
Longer range 2C. Air-unblockable. Great range but comes out very slow and has a lot of recovery. Very risky to poke with. Commonly used in combos or long pressure strings.
|
|
j.A
j.A
|
| Damage
|
Guard
|
Cancel
|
Startup
|
Active
|
Recovery
|
Frame Adv
|
Level
|
| 900
|
High/Air
|
-
|
8
|
6
|
12
|
-
|
A
|
Great hitbox (has a hitbox on Mike's head and his extended fist) but a bit slow compared to other character's jump normals, so not that useful in a clash situation. Great for raw air-to-air, however.
|
|
j.B
j.B
|
| Damage
|
Guard
|
Cancel
|
Startup
|
Active
|
Recovery
|
Frame Adv
|
Level
|
| 1400
|
High/Air
|
-
|
9
|
2
|
22
|
-
|
B
|
Good horizontal spacing jump move and Yoriko's most comment air-to-ground move. Her hurtbox is extended with this move, so take care in using it for approaches as she tends to get hit out of this move a lot.
|
|
j.C
j.C
|
| Damage
|
Guard
|
Cancel
|
Startup
|
Active
|
Recovery
|
Frame Adv
|
Level
|
| 2200
|
High/Air
|
-
|
14
|
4
|
19
|
-
|
D
|
Decent hit box. Ground slams on hit. Not used that often in combos but is used frequently in whiff air normal mix-ups.
|
|
j.[C]
j.[C]
|
| Damage
|
Guard
|
Cancel
|
Startup
|
Active
|
Recovery
|
Frame Adv
|
Level
|
| 2600
|
High/Air
|
-
|
16
|
2
|
31
|
-
|
D
|
Has a great vertical hitbox and it often used to hit people as an instant overhead. Not very useful as an approach move because of the start up and the reach. Can be chained into any of Yoriko's spit normals.
|
|
j.E
j.E
|
| Damage
|
Guard
|
Cancel
|
Startup
|
Active
|
Recovery
|
Frame Adv
|
Level
|
| 1800*2
|
High/Air
|
-
|
17
|
2*2
|
33
|
-
|
D
|
Mostly a combo move but can be used as a mid-screen mix-up tool close to the ground (IAD > j.2E > j.E is a hard to react to double overhead). Not very good in neutral because of it's heavy recovery.
|
|
j.2E
j.2E
|
| Damage
|
Guard
|
Cancel
|
Startup
|
Active
|
Recovery
|
Frame Adv
|
Level
|
| 2500
|
High/Air
|
-
|
9
|
2
|
16
|
-
|
D
|
Great air combo ender and also a good defensive move. This move has start up clash frames, so in the air, you can use this move either in a clash or to force a clash with the opponent. This move's hitbox will persist past a clash, making it a pretty reliable clash move.
|
|
j.634BC
j.3/4/6BC j.6BC j.6BC j.3BC j.3BC j.4BC j.4BC
|
| Damage
|
Guard
|
Cancel
|
Startup
|
Active
|
Recovery
|
Frame Adv
|
Level
|
| 1500
|
All
|
-
|
12
|
13
|
31F Total
|
-
|
B
|
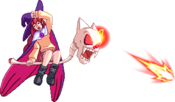
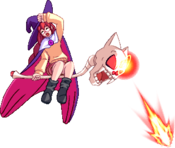
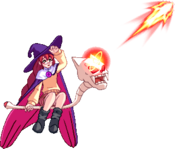
Fireballs that cover various angles. #BC is the one most often used,, and is one of the strongest zoning moves in the game.
|
|
Throws
Neutral Throw
Throw
|
| Damage
|
Guard
|
Cancel
|
Startup
|
Active
|
Recovery
|
Frame Adv
|
Level
|
| 2500
|
Throw
|
-
|
5
|
1
|
23
|
-
|
-
|
Leaves opponent airborne.
|
|
Lever Throw
Lever Throw
|
| Damage
|
Guard
|
Cancel
|
Startup
|
Active
|
Recovery
|
Frame Adv
|
Level
|
| 2500
|
Throw
|
-
|
3
|
1
|
23
|
-
|
-
|
Sideswaps and knocks down the opponent
|
|
Air Throw
Air Throw
|
| Damage
|
Guard
|
Cancel
|
Startup
|
Active
|
Recovery
|
Frame Adv
|
Level
|
| 2000
|
Throw
|
-
|
3
|
1
|
23
|
-
|
-
|
|
|
|
Special Moves
Punishing Assault From Hell
Punishing Assault From Hell
236X (air OK) A A B B C C
|
| Version
|
Damage
|
Guard
|
Cancel
|
Startup
|
Active
|
Recovery
|
Frame Adv
|
Level
|
| A
|
Normal: 2800
Powered: 300*4, 2800
|
All
|
-
|
22
|
Normal: 22
Powered: 3*4, 10
|
18
|
Normal: +4
Powered: -5
|
D
|
| j.A
|
Normal: 2800
Powered: 300*4, 2800
|
All
|
-
|
15
|
Normal: 22
Powered: 3*4, 7
|
15
|
±4
|
D
|
Yoriko's horizontal rush special. Was formerly a low, now hits mid in AH3LM. A good combo move (combos directly into 236AB on the ground for a free triangle Pent setup) and a somewhat usable neutral move. It can be used from a 4GC in pressure, but beware of advancing opponents and using this in the corner since it has very long start up (start up is 22F). The air version of this comes out slightly faster and you have free air movement after using the air version.
|
| Version
|
Damage
|
Guard
|
Cancel
|
Startup
|
Active
|
Recovery
|
Frame Adv
|
Level
|
| B
|
Normal: 2400
Powered: 300*4, 2400
|
High/Air
|
-
|
27
|
Normal: 11
Powered: 3*4, 2
|
Normal: 14
Powered: 26
|
Normal: +4
Powered: -4
|
D
|
| j.B
|
Normal: 2400
Powered: 300*4, 2400
|
High/Air
|
-
|
18
|
Normal: Till L
Powered: Till L, 3*n
|
Normal: 12
Powered: 0
|
Normal: +4
Powered: +22
|
D
|
Yoriko's arcing rush special. Hits overhead. Not much utility for this as a combo move or in neutral since you can't convert any damage from it, but it can be used for a quick in a string on an unsuspecting opponent.
|
| Version
|
Damage
|
Guard
|
Cancel
|
Startup
|
Active
|
Recovery
|
Frame Adv
|
Level
|
| C
|
Normal: 2500
Powered: 300*4, 2500
|
All
|
-
|
7
|
Normal: 21
Powered: 3*4, 9
|
32+7 L
|
Normal: -2
Powered: -48
|
D
|
| j.C
|
Normal: 2500
Powered: 300*4, 2500
|
All
|
-
|
5
|
Normal: 21
Powered: 3*4, 6
|
23
|
-2
|
D
|
Yoriko's vertical rush special (her DP). Comes out in 7F on the ground (5F in the air) and has low invincibility on start up. Not a true reversal since it doesn't have full invincibility, but it's fast enough that you can disrespect on anything shy of a meaty. The ground version of 236C travels much higher vertically than the air version, so you can potentially hit opponents high up in the air with it when they thought they were safe. The downside to the ground version is that if it whiffs, you don't have any control of Yoriko until she lands and recovers. The air version, however, doesn't travel nearly as high as the ground version, but you do have air movement after using it if it whiffs. Use with caution.
|
|
Rising Anguish of the Underworld
Rising Anguish of the Underworld
421X
|
| Version
|
Damage
|
Guard
|
Cancel
|
Startup
|
Active
|
Recovery
|
Frame Adv
|
Level
|
| Uncharged
|
300, 1800
|
Mid
|
-
|
Normal: 15
Powered: 13
|
Normal: 10, 8
Powered: 3, 1
|
Normal: 17
Powered: 20
|
Normal: -4
Powered: ±0
|
A, C
|
| Partial charge
|
300*n, 1800
|
Mid
|
-
|
Normal: 15
Powered: 13
|
Normal: 3, 10, 8
Powered: 2, 2, 4, 1
|
Normal: 23
Powered: 22
|
Normal: -10
Powered: -2
|
A*n, C
|
| Partial charge
|
300*n, 1800
|
Mid
|
-
|
Normal: 15
Powered: 13
|
Normal: 3, 4, 8, 8
Powered: 2, 2, 4, 1, 3, 1
|
Normal: 29
Powered: 24
|
Normal: -16
Powered: -4
|
A*n, C
|
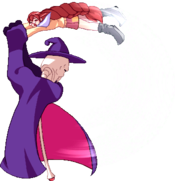
Mike's head goes underground and attacks the opponent from the button up, think of it as a special version of 2C or 3C. The different versions of this move change how far from you Mike's head pops out from with A being the closest to you, and C as the farthest. You can also change how high he goes up by holding the button. You can use this move to limit your opponents air movement since this move is air unblockable. But be careful not to whiff this move, the recovery is extremely long. When powered, the your start up and recovery are much better and can be used in combos. For example, 421A will combo into 236C. The number of hits also increases.
|
|
Raining Vengeance of Hades
Raining Vengeance of Hades
j.214X Normal version. Standard dive Normal version. Standard dive Powered version gets a fire effect. Powered version gets a fire effect.
|
| Damage
|
Guard
|
Cancel
|
Startup
|
Active
|
Recovery
|
Frame Adv
|
Level
|
Normal: 1600
Powered: 800*n
|
All
|
-
|
16
|
Normal: 16
Powered: 2*n
|
Normal: 14
Powered: 5
|
Normal: 14
Powered: 5
|
Normal: C
Powered: B*n
|
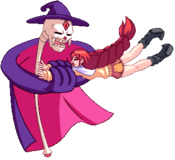
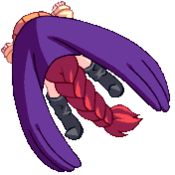
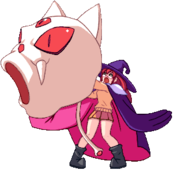
Mike turns Yoriko into a human drill with his cape and they both descend downwards. on hit Yoriko bounces up afterward, making it almost impossible to combo with. As an anti-ground move, you'll need specific set ups to make it connect to anything. This is mostly a air combo stopgap move. However, when powered by the Ancient Talisman, this becomes a multi hit move, preventing you from bouncing back up on hit or on block. On hit with a grounded opponent, you can connect a powered Raining Makai into a 2A for combos.
|
|
Ancient Talisman
Ancient Talisman
632146X (air OK)
|
| Version
|
Damage
|
Guard
|
Cancel
|
Startup
|
Active
|
Recovery
|
Frame Adv
|
Level
|
| Stance
|
-
|
-
|
-
|
-
|
-
|
86 Total
|
-
|
-
|
| Bullet
|
100
|
All
|
-
|
15
|
5
|
47 Total
|
-17
|
A
|
| Complete
|
0
|
All
|
-
|
9
|
10
|
12
|
+3
|
E
|
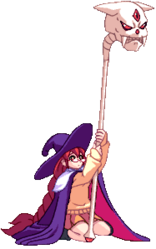
Yoriko takes a stance with Mike in the middle. From there, A small mean shoots out from Mike's forehead. This attack itself is weak but the main purpose of the move, and a a large bulk of Yoriko's style is to use the follow up in puts to draw a magic symbol in the shape of a pentagram or a triangle with the beam. Upon successfully creating a magical formation with Ancient Talisman, all of Yoriko's special moves and specific command normals will power up for a limiter period of time. The triangle is easier to do, but your power up only lasts about half as long (600F -vs- 300F).
|
|
Super Moves
The Power of the World Conquering Demon King
The Power of the World Conquering Demon King
236A+B
|
| Damage
|
Guard
|
Cancel
|
Startup
|
Active
|
Recovery
|
Frame Adv
|
Level
|
Normal: 1600, 1000, 400x11, 1000
Powered: 1600, 1000, 300x21, 1500
|
Normal: All
Powered: Mid
|
-
|
5
|
4
|
Normal: 35
Powered: 31
|
Normal: -14
Powered: -10
|
-
|
The "Mike Punch," no not Tyson. Mike does an uppercut with the mantle like with 2E, then transforms and fires a laser at thee opponent. The first hit, the uppercut, ignores clash and locks the opponent up for the rest of this super. While powered, the first hit also becomes air unblockable, the the following hits get a damage boost.
|
|
The Forbidden Sorcery that Controls Life and Death
The Forbidden Sorcery that Controls Life and Death
63214A+B
|
| Damage
|
Guard
|
Cancel
|
Startup
|
Active
|
Recovery
|
Frame Adv
|
Level
|
Normal: 400*n, 400
Powered: 500*n, 500
|
Unb
|
-
|
Normal: 0+3
Powered: 5+0
|
Normal: 2
Powered: 1
|
Normal: 21
Powered: 22
|
-
|
-
|
This is a command grab that steals health from the opponent. After it hits, you can increase the health absorption by pressing buttons and shaking the control stick. However, your opponent can also decrease the health absorption by doing the same. The normal version can be escaped after the superflash as long as your opponent is paying attention. However the powered version gains 720 status and cannot be escaped after the superflash.
|
|
Impervious Shelter for Summoning an Ancient Talisman
Impervious Shelter for Summoning an Ancient Talisman
632146A+B
|
| Damage
|
Guard
|
Cancel
|
Startup
|
Active
|
Recovery
|
Frame Adv
|
Level
|
| -
|
-
|
-
|
5
|
1
|
70 F Total
|
-
|
-
|
Freezes time for a VERY brief moment to allow you to set up a magic formation safely. If you still have not finished in this time, this move provide a barrier to help you. The barrier will resist one attack and protect you from throws.
|
|
Critical Heart
The Inferno from the Demon World that Scorches Both Heaven and Earth
641236A+B while powered up from a Talisman
|
| Version
|
Damage
|
Guard
|
Cancel
|
Startup
|
Active
|
Recovery
|
Frame Adv
|
Level
|
| Normal
|
2000*n, 1600
|
All
|
-
|
3
|
Till edge of screen
|
After hitting edge of screen
|
-
|
-
|
| Extend Force
|
4000*2, 600*17, 5000, 1600
|
All
|
-
|
3
|
Till edge of screen
|
After hitting edge of screen
|
-
|
-
|
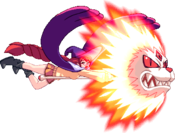
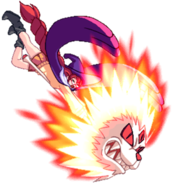
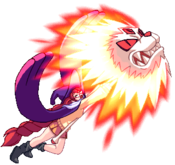
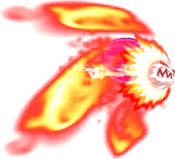
This critical heart requires you to be powered up first. When used, Yoriko leaves the screen for a moment, then flies through the screen once while completely engulfed in flames. Can connect off of a power 236A and can stack a good bit of damage on to the opponent. The EF version of this move makes The two fly around a couple of times before driving straight into the opponent. By the way, The bound up, bouncing around Yoriko can also hit the opponent after the XH... for some reason this is unblockable.
|
|
Combos
Solo Combos
- 5B>2B>3B>421A>5B>2C>3C>6C
- 5B>2B>3B>1C>3C>6C
Arcana Combos
---Rock---
- 5B>2B>421A>5B>2C>236E>5D>delay jB>3A>2E
- 5B>2B>421A>5B>2C>236E>3C>421C
---Plant---
5B>2B>3B>3C>6C>236E>3A>jB>djc>jB>jE
Videos
