
Mizuumi Wiki:Sandbox: Difference between revisions
Jump to navigation
Jump to search
 Fire
Fire
 Ice
Ice
 Axe
Axe

(Created page with "550px|thumb|right|<center><font size="3">'''Hyde'''</font></center> image:movelist-hyde.jpg|450px|thumb|right|<center><font size="3">'''Hyde's Mov...") |
|||
| (122 intermediate revisions by 31 users not shown) | |||
| Line 1: | Line 1: | ||
<b>This is a sandbox page for general testing, everyone is able to edit here. Feel free to practice wiki editing or play around with existing templates to familiarize yourself with them.</b><hr/> | |||
= | <!--- Table as a template parameter by escapaing the separators --> | ||
{{2 Column Flex|flex1=9|flex2=1|reverse=yes|content1=test content 1|content2={{{!}} class="wikitable" style="float:right; margin-left: 10px;" | |||
{{!}}- | |||
! align="center" colspan="2" {{!}} Impostor | |||
{{!}}- | |||
{{!}} align="center" colspan="2" {{!}} [[File:Among-Us-Red-Crewmate.png|center|frameless|350px]] | |||
{{!}}- | |||
{{!}} '''Health''' {{!}}{{!}} 3000 | |||
{{!}}} | |||
}} | |||
<tabber> | |||
BBoySonicX= | |||
[[File:Tier bboysonicx.jpg]] | |||
|-| | |||
Scrub Saibot= | |||
[[File:Tier scrubsaibot.jpg]] | |||
|-| | |||
tab3={{Template:SomeTemplate}} | |||
</tabber> | |||
<br> | |||
==select screen== | |||
{| class="wikitable" style="align:left" | |||
|- | |||
| [[File:SS_Amakusa_Icon.png|40px]] [[Samurai Shodown/Shiro_Tokisada_Amakusa|Amakusa]] || [[File:SS_Baiken_Icon.png|40px]] [[Samurai_Shodown/Baiken|Baiken]] || [[File:SS_Basara_Icon.png|40px]] [[Samurai Shodown/Basara|Basara]] || [[File:SS_ChamCham_Icon.png|40px]] [[Samurai Shodown/Cham_Cham|Cham Cham]] || [[File:SS_Charlotte_Icon.png|40px]] [[Samurai Shodown/Charlotte|Charlotte]] || [[File:SS_Darli_Icon.png|40px]] [[Samurai Shodown/Darli_Dagger|Darli Dagger]] | |||
|- | |||
| [[File:SS_Earthquake_Icon.png|40px]] [[Samurai Shodown/Earthquake|Earthquake]] || [[File:SS_Galford_Icon.png|40px]] [[Samurai Shodown/Galford|Galford]] || [[File:SS_Genjuro_Icon.png|40px]] [[Samurai Shodown/Genjuro_Kibagami|Genjuro]] || [[File:SS_Gongsun_Icon.png|40px]] [[Samurai Shodown/Gongsun_Li|Gongsun Li]] || [[File:SS_Hanzo_Icon.png|40px]] [[Samurai Shodown/Hanzo_Hattori|Hanzo]] || [[File:SS_Haohmaru_Icon.png|40px]] [[Samurai Shodown/Haohmaru|Haohmaru]] | |||
|- | |||
| [[File:SS_Hibiki_Icon.png|40px]] [[Samurai Shodown/Hibiki_Takane|Hibiki]] || [[File:SS_Iroha_Icon.png|40px]] [[Samurai Shodown/Iroha|Iroha]] || [[File:SS_Jubei_Icon.png|40px]] [[Samurai Shodown/Jubei_Yagyu|Jubei]] || [[File:SS_Kazuki_Icon.png|40px]] [[Samurai Shodown/Kazuki_Kazama|Kazuki]] || [[File:SS_Kyoshiro_Icon.png|40px]] [[Samurai Shodown/Kyoshiro_Senryo|Kyoshiro]] || [[File:SS_Mina_Icon.png|40px]] [[Samurai Shodown/Mina_Majikina|Mina]] | |||
|- | |||
| [[File:SS_Nakoruru_Icon.png|40px]] [[Samurai Shodown/Nakoruru|Nakoruru]] || [[File:SS_Rimururu_Icon.png|40px]] [[Samurai Shodown/Rimururu|Rimururu]] || [[File:SS_Shiki_Icon.png|40px]] [[Samurai Shodown/Shiki|Shiki]] || [[File:SS_Shizumaru_Icon.png|40px]] [[Samurai Shodown/Shizumaru_Hisame|Shizumaru]] || [[File:SS_Sogetsu_Icon.png|40px]] [[Samurai Shodown/Sogetsu_Kazama|Sogetsu]] || [[File:SS_TamTam_Icon.png|40px]] [[Samurai Shodown/Tam_Tam|Tam Tam]] | |||
|- | |||
| [[File:SS_Ukyo_Icon.png|40px]] [[Samurai Shodown/Ukyo_Tachibana|Ukyo]] || [[File:SS_WanFu_Icon.png|40px]] [[Samurai Shodown/Wan-Fu|Wan-Fu]] || [[File:SS_Warden_Icon.png|40px]] [[Samurai Shodown/Warden|Warden]] || [[File:SS_Wu_Icon.png|40px]] [[Samurai Shodown/Wu-Ruixiang|Wu-Ruixiang]] || [[File:SS_Yashamaru_Icon.png|40px]] [[Samurai Shodown/Yashamaru_Kurama|Yashamaru]] || [[File:SS_Yoshitora_Icon.png|40px]] [[Samurai Shodown/Yoshitora_Tokugawa|Yoshitora]] | |||
|} | |||
==we out here glove on fightin== | |||
{|width="60%" | |||
| width="50%"| | |||
{| class="wikitable" | |||
!colspan="6" style="padding: 10px; width: 10%;"|A Normals | |||
|- | |||
|width="30%"| '''7A''' | |||
|width="30%"| '''8A''' | |||
|width="30%"| '''9A''' | |||
|- | |||
| '''4A''' | |||
|| '''5A''' | |||
|| '''6A''' | |||
Sidestep Move | |||
Hits High | |||
|- | |||
| '''1A''' | |||
|| '''2A''' | |||
|| '''3A''' | |||
|} | |||
| width="50%" | | |||
{| class="wikitable" | |||
!colspan="6" style="padding: 10px; width: 10%;"|B Normals | |||
|- | |||
|width="30%"| '''7B''' | |||
|width="30%"| '''8B''' | |||
|width="30%"| '''9B''' | |||
|- | |||
| '''4B''' | |||
|| '''5B''' | |||
|| '''6B''' | |||
Sidestep Move | |||
Hits High | |||
|- | |||
| '''1B''' | |||
|| '''2B''' | |||
|| '''3B''' | |||
|} | |||
|} | |||
{|width="60%" class="wikitable" | |||
!colspan="2" style="padding: 10px; width: 10%;"|Special Moves | |||
|- | |||
! j.2B | |||
| How do you use air moves in a jumpless game??? | |||
|- | |||
! 236X | |||
| This move goes places... | |||
|- | |||
! 22X | |||
| DP? Sure | |||
|} | |||
{|width="60%" class="wikitable" | |||
!colspan="2" style="padding: 10px; width: 10%;"|Supers | |||
|- | |||
! 4AB | |||
| DP? Sure | |||
|- | |||
! 6AB | |||
| Desperation Super. | |||
|- | |||
! 2AB | |||
| Futaba Date slows down the state of time. This is the ultimate move, and makes her top 1 in every game, even if she isn't playable or does not appear in a game. | |||
|} | |||
==beware, noob testing== | |||
{{Navbox| title=Dual Souls: The Last Bearer | link=Dual Souls: The Last Bearer | |||
| rows= | |||
{{Navbox/Row| text=General | textwidth=70 | |||
| data= | |||
{{Navbox/Icon| image=icon controls.png | text=Controls }} | |||
{{Navbox/Icon| image=icon faq.png | text=FAQ }} | |||
{{Navbox/Icon| image=icon glossary.png | text=Glossary }} | |||
{{Navbox/Icon| image=icon hud.png | text=HUD }} | |||
{{Navbox/Icon| image=icon links.png | text=Links }} | |||
{{Navbox/Icon| image=icon system.png | text=Mechanics }} | |||
}} | |||
{{Navbox/Row| text=Characters | textwidth=70 | |||
| data= | |||
{{Navbox/Icon| image=DSTLB_Random.png | text=Alperen }} | |||
{{Navbox/Icon| image=DSTLB_Random.png | text=Efe }} | |||
{{Navbox/Icon| image=DSTLB_Random.png | text=Kanae }} | |||
{{Navbox/Icon| image=DSTLB_Random.png | text=Brandon }} | |||
{{Navbox/Icon| image=DSTLB_Random.png | text=Andre }} | |||
{{Navbox/Icon| image=DSTLB_Random.png | text=Shin }} | |||
{{Navbox/Icon| image=DSTLB_Random.png | text=Nagashapa }} | |||
{{Navbox/Icon| image=DSTLB_Random.png | text=Rungard }} | |||
{{Navbox/Icon| image=DSTLB_Random.png | text=Mirei (Warrior) }} | |||
{{Navbox/Icon| image=DSTLB_Random.png | text=Mirei (Assassin) }} | |||
{{Navbox/Icon| image=DSTLB_Random.png | text=Jaman }} | |||
}} | |||
}} | |||
==testing stuff again== | |||
|- | {{MoveData | ||
| | |name= Wild Throw | ||
|input= 5S | |||
|data= | |||
{{AttackData-ANS | |||
| damage = 15 | |||
| guard = Unblockable | |||
| startup = - | |||
| active = - | |||
| recovery = - | |||
| hitstun = - | |||
| hitAdv = - | |||
| blockAdv = - | |||
| description = doddooddododo it's the description | |||
}} | |||
}} | |||
{{MoveData | |||
|name= Wild Throw (Air) | |||
|input= j.S | |||
|data= | |||
{{AttackData-ANS | |||
| damage = 18 | |||
| guard = Unblockable | |||
| startup = - | |||
| active = - | |||
| recovery = - | |||
| hitstun = - | |||
| hitAdv = - | |||
| blockAdv = - | |||
| description = also a description | |||
}} | |||
}} | |||
==Something Else== | |||
| | ===== <span class="invisible-header">3C</span> ===== | ||
| | {{MoveDataCargo | ||
|} | | title = Jab | ||
| subtitle = | |||
| input = AAA | |||
| images = | |||
{{MoveDataCargoImage|roa_wra_a1.png|caption= }} | |||
| hitboxes = | |||
{{MoveDataCargoImage|roa_wra_a1_hit.png|caption= |hitbox=yes}} | |||
| info = <br> | |||
===Jab 1=== | |||
{{AttackDataCargo-ROA/Query|roa_wra_a1}} | |||
== | ===Jab 2=== | ||
{{AttackDataCargo-ROA/Query|roa_wra_a2}} | |||
===Jab 3=== | |||
{{AttackDataCargo-ROA/Query|roa_wra_a3}} | |||
</br> | |||
}} | |||
{{{!}} class="mw-collapsible mw-collapsed wikitable" | |||
{{!}}- | |||
{{!}}+'''Reflectable Projectiles Table''' | |||
{{!}}- | |||
!Character | |||
!Move | |||
{{!}}- | |||
{{!}}A.B.A | |||
{{!}}Kihi (Purple Fireball; Normal Mode) | |||
{{!}}- | |||
{{!}}Anji | |||
{{!}}(FB) Shitsu (Butterfly projectile) | |||
Shin: Ichishiki (Aerial fan projectiles) | |||
{{!}}- | |||
{{!}}Axl | |||
{{!}}None | |||
{{!}}- | |||
{{!}}Baiken | |||
{{!}}None | |||
{{!}}- | |||
{{!}}Bridget | |||
{{!}}None | |||
{{!}}- | |||
{{!}}Chipp | |||
{{!}}None | |||
{{!}}- | |||
{{!}}Dizzy | |||
{{!}}None | |||
{{!}}- | |||
{{!}}Eddie | |||
{{!}}Normal Shadow's ]D[ (Ball) | |||
{{!}}- | |||
{{!}}Faust | |||
{{!}}None | |||
{{!}}- | |||
{{!}}I-no | |||
{{!}}(Air/FB) Antidepressant Scale (Flat Note) | |||
{ | (Horizontal/Vertical) Chemical Love (Big Laser) | ||
{{!}}- | |||
{{!}}Jam | |||
{{!}}None | |||
{{!}}- | |||
{{!}}Johnny | |||
{{!}}None | |||
{{!}}- | |||
{{!}}Justice | |||
{{!}}None | |||
{{!}}- | |||
{{!}}Kliff | |||
{{!}}None | |||
{{!}}- | |||
{{!}}Ky | |||
{{!}}Stun Edge / Air Stun Edge (Lighting Shot) | |||
(Air/FB)Charged Stun Edge (Big Lightning Shot, 1st part only) | |||
Sacred Edge (Glowing Blue Blade)<SUPER> | |||
{{!}}- | |||
{{!}}May | |||
{{!}}None | |||
{{!}}- | |||
{{!}}Millia | |||
{{!}}(FB) Tandem Top (Discs) | |||
{{!}}- | |||
{{!}}Order-Sol | |||
{{!}}None | |||
{{!}}- | |||
{{!}}Potemkin | |||
{{!}}None | |||
{{!}}- | |||
{{!}}Robo-Ky | |||
{{!}}{{clr|4|2H}} (Knee Missile) | |||
Want some Ky? (Bazooka) | |||
Aerial Want some Ky? (Aerial Missiles) | |||
{{!}}- | |||
{{!}}Slayer | |||
{{!}}None (lol) | |||
{{!}}- | |||
{{!}}Sol | |||
{{!}}(DI) Gunflame (Ground Hugging Flames) | |||
{{!}}- | |||
{{!}}Testament | |||
{{!}}None | |||
{{!}}- | |||
{{!}}Venom | |||
{{!}}(FB) (Charged) Stinger Aim (Horizontal Ball Shot) | |||
(FB) (Charged) Carcass Raid (Vertical Ball Shot) | |||
Ball Seisei / Ball Set (Cue Ball, Only when the ball is in motion) | |||
Dubious Curve (Ball Skull Bash, Only when the ball is in motion) | |||
Red Hail (Multi Shot Raid) <SUPER> | |||
Tactic Arch (Cue Ball Setup, Only when balls are in motion) <SUPER> | |||
{{!}}- | |||
{{!}}Zappa | |||
{{!}}None | |||
{{!}}} | |||
</div> | |||
</div> | |||
}} | |||
}} | |||
{{Navbox| title=Street Fighter: The Movie | link=Street Fighter: The Movie | |||
| rows= | |||
{{Navbox/Row| text=General | |||
| data= | |||
{{Navbox/Text| text=FAQ}} | |||
{{Navbox/Text| text=Controls}} | |||
{{Navbox/Text| text=HUD}} | |||
{{Navbox/Text| text=Mechanics | last=yes }} | |||
}} | |||
{{Navbox/Row| text=Characters | iconwidth=56 | iconheight=53 | |||
| data= | |||
{{Navbox/Icon| image=SFTM-Akuma-Icon.png | text=Akuma}} | |||
{{Navbox/Icon| image=SFTM-Arkane-Icon.png | text=Arkane}} | |||
{{Navbox/Icon| image=SFTM-Balrog-Icon.png | text=Balrog}} | |||
{{Navbox/Icon| image=SFTM-Bison-Icon.png | text=Bison}} | |||
{{Navbox/Icon| image=SFTM-Blade-Icon.png | text=Blade}} | |||
{{Navbox/Icon| image=SFTM-Cammy-Icon.png | text=Cammy}} | |||
{{Navbox/Icon| image=SFTM-ChunLi-Icon.png | text=Chun Li}} | |||
{{Navbox/Icon| image=SFTM-F7-Icon.png | text=F7}} | |||
{{Navbox/Icon| image=SFTM-Guile-Icon.png | text=Guile}} | |||
{{Navbox/Icon| image=SFTM-Honda-Icon.png | text=Honda}} | |||
{{Navbox/Icon| image=SFTM-Ken-Icon.png | text=Ken}} | |||
{{Navbox/Icon| image=SFTM-Khyber-Icon.png | text=Khyber}} | |||
{{Navbox/Icon| image=SFTM-Ryu-Icon.png | text=Ryu}} | |||
{{Navbox/Icon| image=SFTM-Sagat-Icon.png | text=Sagat}} | |||
{{Navbox/Icon| image=SFTM-Sawada-Icon.png | text=Sawada}} | |||
{{Navbox/Icon| image=SFTM-Vega-Icon.png | text=Vega}} | |||
{{Navbox/Icon| image=SFTM-Zangief-Icon.png | text=Zangief}} | |||
}} | |||
{{Infobox Game | |||
| gamename = Inuyasha: A Feudal Fairy Tale | |||
| abbreviation = InuFFT | |||
| image = InuYasha_FFT_PSX_Cover.png | |||
| developer = Bandai, Dimps | |||
| system = PlayStation | |||
| netcode = [https://yuribacon.com/netplaypacks/Inuyasha%20A%20Feudal%20Fairy%20Tale%20Netplay%20Pack.zip Delay-based (Netplay Pack)] | |||
| community = [https://discord.gg/bcjQKdunsx The Community Discord] | |||
}} | |||
}} | |||
<!-----------------------------------------------------------------------------Section Divider-----------------------------------------------------------------------------> | |||
== '''''SOMEONE GIVE ME SOME FUCKING BAKED BEANS''''' == | |||
'''InuYasha: A Feudal Fairy Tale''' (犬夜叉 戦国お伽合戦, ''Inuyasha: Sengoku Otogi Kassen'') is a 2D fighting game based on the manga and anime series Inuyasha. It consists of battles and minigames in an effort to retrieve shards of the sacred Jewel of Four Souls, essentially following the overall plot of the series. | |||
=== Throw Img test === | |||
===== <span class="invisible-header"></span> ===== | |||
{{MoveData | |||
|name =Kaeru Spring | |||
|subtitle=カエルスプリング | |||
|input =Behind 4P+K | |||
|image = | |||
|caption = | |||
|data = | |||
{{User:SageVarq/sandbox5 | |||
|condition =Opponent backturned, standing | |||
|damage =Throw Down|startup =x | |||
|active =x | |||
|recovery =x | |||
|escapeOff =-x | |||
|escapeDef =+x | |||
|throwInfoImage = [[File:SG fil slp1 fd.png|left]] | |||
|description=blah blah blah something like this but an image should be above between the data above and this | |||
}} | |||
}} | |||
[[User:SageVarq/sandbox5]] | |||
===== <span class="invisible-header"></span> ===== | |||
{{MoveData | |||
|name =Kaeru Package Hold | |||
|subtitle=カエルパッケージホールド | |||
|input =2P+K | |||
|image = | |||
|caption = | |||
|data = | |||
{{ToyThrowData | |||
|condition =Crouching | |||
|startup =x | |||
|active =x | |||
|recovery =x | |||
|escapeOff =-x | |||
|escapeDef =+x | |||
|throwInfoImage=[[File:SG fil slp1 fd.png|left]] | |||
}} | |||
}} | |||
{{MoveData | |||
|name =Reverse Power Bomb | |||
|subtitle=リバースパワーボム | |||
|input =P+K (Reversal 1) | |||
|image = | |||
|caption = | |||
|data = | |||
{{ToyThrowData | |||
|condition =Reversal | |||
|escapeOff =-x | |||
|escapeDef =+x | |||
|throwInfoImage=[[File:SG fil slp1 fd.png|left]] | |||
|description=description | |||
}} | |||
}} | |||
Red Earth | |||
== | == Normal Moves == | ||
<div style="position: sticky; top: 0; display: flex; justify-content: center; background-color: #cacace;" class="movelist-toggles sticky"> | |||
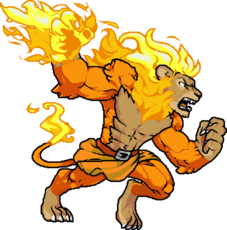
<div id="movelist-toggle-1" class="movelist-toggle-button">[[File:RE_Leo_DP_123_First_Fire.png|120px|link=]] Fire</div> | |||
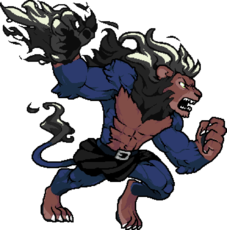
<div id="movelist-toggle-2" class="movelist-toggle-button">[[File:RE_Leo_DP_123_First_Ice.png|120px|link=]] Ice</div> | |||
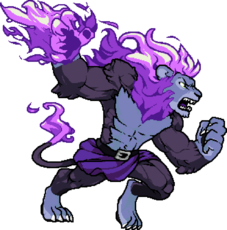
<div id="movelist-toggle-3" class="movelist-toggle-button">[[File:RE_Leo_DP_123_First_Axe.png|120px|link=]] Axe</div> | |||
</div> | |||
<div id="movelist-1" class="movelist"> | |||
{{MoveData | |||
| name = 1 | |||
| image = RE_Leo_1.png | |||
| data = | |||
{{AttackData-RE | |||
| damage = 12-15 | |||
| guard = Mid | |||
| duration = 26 (9-2-15) | |||
| startup = 10 | |||
| active = 2 | |||
| recovery = 15 | |||
| hit adv = -6 | |||
| block adv = -7 | |||
| ug adv = -7 (+8) | |||
| special cancel = Yes | |||
| description = Leo steps forward, striking with a vertical slash. It not only possesses a tall hitbox, but is super and special cancellable. Useful for not only anti-airs, but for blockstrings on an airborne opponent, leading to an extension dependent on orb count and distance. | |||
}} | |||
}} | |||
{{MoveData | |||
| name = 2 | |||
| image = RE_Leo_2.png | |||
| caption = Can be ducked. | |||
| data = | |||
{{AttackData-RE | |||
| damage = 13-16 | |||
| guard = Mid | |||
| duration = 36 (12-4-20) | |||
| startup = 13 | |||
| active = 4 | |||
| recovery = 20 | |||
| hit adv = -7 | |||
| block adv = -8 | |||
| ug adv = -8 (+7) | |||
| special cancel = Super only | |||
| description = Honestly one of his weaker normals. The range is nice, and super cancelling is too, but most of the time 1 or cr.1 is the safer and better option. Use in fringe cases. | |||
}} | |||
}} | |||
{{MoveData | |||
| name = 3 | |||
| image = RE_Leo_3.png | |||
| image2 = RE_Leo_3_3.png | |||
| caption = Staggers Kenji. | |||
| caption2 = 3 followup. | |||
| data = | |||
{{AttackData-RE | |||
| version = 3 | |||
| damage = 14-17 | |||
| guard = Mid | |||
| duration = 34 (13-3-18) | |||
| startup = 14 | |||
| active = 3 | |||
| recovery = 18 | |||
| hit adv = -1 (+4) | |||
| block adv = -6 | |||
| ug adv = -6 (+9) | |||
| special cancel = No | |||
| description = Leo swings horizontally once again, but with a twist. In exchange for cancel ability and some range, Leo can chain into a second slash. The meat to it is that this followup is optional, as well as highly delayable. A good check option, especially if the opponent likes to jump or Ultimate Guard. Great conditioning tool, just mind the range is a bit short. | |||
}} | |||
{{AttackData-RE | |||
| header = no | |||
| version = 3 > 3 | |||
| damage = 14-17 | |||
| guard = Mid | |||
| duration = 62 (41-2-19) | |||
| startup = 42 [minimum] | |||
| active = 2 | |||
| recovery = 19 | |||
| hit adv = HKD | |||
| block adv = -2 | |||
| ug adv = -2 (+13) | |||
| special cancel = No | |||
| description = Will guard crush if the first 3 was blocked, allowing you to confirm into Hercules Rush at certain ranges. | |||
}} | |||
}} | |||
{{MoveData | |||
| name = 4 | |||
| image = RE_Leo_4.png | |||
| data = | |||
{{AttackData-RE | |||
| damage = 7-9 | |||
| guard = Mid | |||
| duration = 16 (2-6-8) | |||
| startup = 3 | |||
| active = 6 | |||
| recovery = 8 | |||
| hit adv = +3 | |||
| block adv = +2 | |||
| ug adv = +2 (+17) | |||
| special cancel = Yes | |||
| description = Leo's fastest grounded normal. Simple and to the point, Leo knees the opponent in the gut. Can be super and special cancelled, and is plus on contact. Great for staggering and tick throws into his command grabs. | |||
}} | |||
}} | |||
{{MoveData | |||
| name = 5 | |||
| image = RE_Leo_5.png | |||
| caption = "The Father" | |||
| data = | |||
{{AttackData-RE | |||
| damage = 9-11 | |||
| guard = Mid | |||
| duration = 21 (4-6-11) | |||
| startup = 5 | |||
| active = 6 | |||
| recovery = 11 | |||
| hit adv = +8 | |||
| block adv = +7 | |||
| ug adv = +7 (+22) | |||
| special cancel = Yes | |||
| description = Similar story to 4, but at the cost of being slightly slower to start and recover, has a great vertical hitbox, and has the luxury of being his strongest special cancellable normal. Exceptional anti-air button, and great combo fuel, leaving you a whopping +8 on hit, +7 on block. One of his best normals, use often. | |||
}} | |||
}} | |||
{{MoveData | |||
| name = 6 | |||
| image = RE_Leo_6.png | |||
| caption = Can be ducked. Staggers Kenji. | |||
| data = | |||
{{AttackData-RE | |||
| damage = 10-13 | |||
| guard = High | |||
| duration = 34 (16-5-13) | |||
| startup = 17 | |||
| active = 5 | |||
| recovery = 13 | |||
| hit adv = +7 (+14) | |||
| block adv = +6 | |||
| ug adv = +6 (+21) | |||
| special cancel = No | |||
| description = Only for the brave or foolish, Leo steps forward, booting the opponent in the face. Leo is left +7 on hit, and left close, making links both tantalizing AND rewarding. The catch is while it is an overhead, it whiffs on the cast crouching, bar a guarding Tessa, or himself. As such, it's recommended to only save this for optimal Ultimate Guard punishes, or brutal mirror match shenanigans. | |||
}} | |||
}} | |||
{{MoveData | |||
| name = cr.1 | |||
| image = RE_Leo_Crouch_1.png | |||
| data = | |||
{{AttackData-RE | |||
| damage = 12-15 | |||
| guard = Low | |||
| duration = 27 (8-4-15) | |||
| startup = 9 | |||
| active = 4 | |||
| recovery = 15 | |||
| hit adv = -8 | |||
| block adv = -9 | |||
| ug adv = -9 (+6) | |||
| special cancel = Yes | |||
| description = Off the bat, the range of this thing is huge. Pokes as far if not slightly less than cr.5, which is nothing to scoff at. On top of this, it's super and special cancellable, leading to some dangerous footsies if he has orbs. Be wary of a lightning orb Leo. Only drawback is that it's minus on hit or block, and as such is best cancelled into something, namely his dp.1. Even so, one can use it to bait an Ultimate Guard, and cancel into 360. Also owns the high praise of being Leo's only cancellable low. Definitely one to experiment with. | |||
}} | |||
}} | |||
{{MoveData | |||
| name = cr.2 | |||
| image = RE_Leo_Crouch_2_First.png | |||
| image2 = RE_Leo_Crouch_2_Second.png | |||
| caption2 = Two hits. First hit can be ducked. | |||
| data = | |||
{{AttackData-RE | |||
| damage = 17-22 | |||
| guard = Mid | |||
| duration = 44 (13-6-25) | |||
| startup = 14 | |||
| active = 3/3 | |||
| recovery = 25 | |||
| hit adv = -12 | |||
| block adv = -13 | |||
| ug adv = -13 (+2) | |||
| special cancel = No | |||
| description = Leo swings low to the ground. While weak as a poke, it's surprisingly decent as an anti-air, hits twice, and is fairly good at keeping a cornered opponent locked down. Wouldn't advise using too often, but certainly a tool to remember. | |||
}} | |||
}} | |||
{{MoveData | |||
| name = cr.3 | |||
| image = RE_Leo_Crouch_3_First.png | |||
| image2 = RE_Leo_Crouch_3_Second.png | |||
| image3 = RE_Leo_Crouch_3_Third.png | |||
| data = | |||
{{AttackData-RE | |||
| damage = 14-17 | |||
| guard = Mid | |||
| duration = 41 (8-6-27) | |||
| startup = 9 | |||
| active = 2/2/2 | |||
| recovery = 27 | |||
| hit adv = Launch | |||
| block adv = -22 | |||
| ug adv = -22 (-7) | |||
| special cancel = No | |||
| description = Slashing upwards in a pose not unbefitting of a Master of the Universe, cr.3 is a decent anti-air option due to it's wide hitbox when Leo's arm is fully extended, also causing a juggle state on hit that can be extended on a ground connect, but be warned: This move has absolutely ABYSMAL frame data if whiffed/blocked. Very committal, swing with this move and you better mean it. | |||
}} | |||
}} | |||
{{MoveData | |||
| name = cr.4 | |||
| image = RE_Leo_Crouch_4.png | |||
| data = | |||
{{AttackData-RE | |||
| damage = 11-14 | |||
| guard = Mid | |||
| duration = 34 (8-6-20) | |||
| startup = 9 | |||
| active = 6 | |||
| recovery = 20 | |||
| hit adv = -15 | |||
| block adv = -16 | |||
| ug adv = -16 (-1) | |||
| special cancel = No | |||
| description = Most attacks in Red Earth are well designed, and have distinctive uses that make them at least somewhat viable in some situations. This however, is the exception that proves the rule. There is no reason to press this button. Ever. Its angle is pitiful, its damage is mediocre, you can't cancel from it and to top it off its not even a low, AND is mega minus even on hit. Assuming you LIKE having a health bar, DO, NOT, PRESS, THIS, BUTTON! | |||
}} | |||
}} | |||
{{MoveData | |||
| name = cr.5 | |||
| image = RE_Leo_Crouch_5.png | |||
| caption = "The Son" | |||
| data = | |||
{{AttackData-RE | |||
| damage = 12-15 | |||
| guard = Low | |||
| duration = 32 (7-4-21) | |||
| startup = 8 | |||
| active = 4 | |||
| recovery = 21 | |||
| hit adv = -9 | |||
| block adv = -10 | |||
| ug adv = -10 (+5) | |||
| special cancel = No | |||
| description = A classic normal among Leo mains, Leo stabs outward, plain and simple. The most obvious benefit of this move is that it's GIGANTIC, seriously covers a good 2/3 of horizontal screen give or take, while also being a low, COMMANDING the opponent be ready for it. Pushes the opponent a decent bit back, meaning at max range it can be difficult, if not almost impossible to be punished meterless. Be wary however, this godlike range comes at a cost. A good chunk of Leos sword is also classified as a hurtbox, and the move is also pretty minus on contact, -9 on hit and -10 if blocked, meaning an ill spaced poke can be punished by everyone to some extent. A good button, make no mistake. But one that's weaknesses must be properly respected. | |||
}} | |||
}} | |||
{{MoveData | |||
| name = cr.6 | |||
| image = RE_Leo_Crouch_6.png | |||
| image2 = RE_Leo_Crouch_6_6.png | |||
| caption2 = 6 followup. | |||
| data = | |||
{{AttackData-RE | |||
| version = cr.6 | |||
| damage = 12-15 | |||
| guard = Low | |||
| duration = 30 (11-3-16) | |||
| startup = 12 | |||
| active = 3 | |||
| recovery = 16 | |||
| hit adv = HKD | |||
| block adv = 0 | |||
| ug adv = 0 (+15) | |||
| special cancel = No | |||
}} | |||
{{AttackData-RE | |||
| header = no | |||
| version = cr.6 > 6 | |||
| damage = 13-16 | |||
| guard = Low | |||
| duration = 66 (33-3-30) | |||
| startup = 34 [minimum] | |||
| active = 3 | |||
| recovery = 30 | |||
| hit adv = HKD | |||
| block adv = -14 | |||
| ug adv = -14 (+1) | |||
| special cancel = No | |||
| description = Similar to cr.1 and cr.5 in that it reaches pretty far, the main distinction of this button is twofold. For one, it's Leo's designated sweep, meaning it can be pretty good for closing the distance when connected. Second, completely safe, making it an actually decent button to throw out against a grounded opponent. It also helps that it can actually be cancelled into a followup with the same input, making it an ambiguous button the opponent will think twice about disrespecting. However, due to this a savvy opponent can Ultimate Guard the second swing, and punish accordingly if you're too predictable. | |||
}} | |||
}} | |||
{{MoveData | |||
| name = j.1 | |||
| image = RE_Leo_Jump_1.png | |||
| data = | |||
{{AttackData-RE | |||
| version = j.1 | |||
| damage = 12-15 | |||
| guard = High | |||
| duration = Varies | |||
| startup = 6 | |||
| active = 2 | |||
| recovery = Until landing | |||
| hit adv = +15 [maximum] | |||
| block adv = +15 [maximum] | |||
| ug adv = +15 (+30) [maximum] | |||
| special cancel = No | |||
}} | |||
{{AttackData-RE | |||
| header = no | |||
| version = sj.1 | |||
| damage = 12-15 | |||
| guard = High | |||
| duration = 27 (5-2-20) | |||
| startup = 6 | |||
| active = 2 | |||
| recovery = 20 | |||
| hit adv = +15 [maximum] | |||
| block adv = +15 [maximum] | |||
| ug adv = +15 (+30) [maximum] | |||
| special cancel = No | |||
| description = Comes out fairly quickly. However, its only real weakness is that it doesn't really have much of a use outside of poking an opponent at weird angles. As an air to air tool, it's mostly outclassed by j.3 in basically every metric that matters | |||
}} | |||
}} | |||
{{MoveData | |||
| name = j.2 | |||
| image = RE_Leo_Jump_2.png | |||
| data = | |||
{{AttackData-RE | |||
| version = j.2 | |||
| damage = 12-15 | |||
| guard = High | |||
| duration = Varies | |||
| startup = 9 | |||
| active = 3 | |||
| recovery = Until landing | |||
| hit adv = +16 [maximum] | |||
| block adv = +15 [maximum] | |||
| ug adv = +15 (+30) [maximum] | |||
| special cancel = No | |||
}} | |||
{{AttackData-RE | |||
| header = no | |||
| version = sj.2 | |||
| damage = 12-15 | |||
| guard = High | |||
| duration = 33 (8-3-22) | |||
| startup = 9 | |||
| active = 3 | |||
| recovery = 22 | |||
| hit adv = +16 [maximum] | |||
| block adv = +15 [maximum] | |||
| ug adv = +15 (+30) [maximum] | |||
| special cancel = No | |||
| description = Reaches slightly further than j.1, but is also 3 frames slower. In regards to an air to air situation, j.3 is generally a safer, and thus more appealing button to press in that scenario. | |||
}} | |||
}} | |||
{{MoveData | |||
| name = j.3 | |||
| image = RE_Leo_Jump_3.png | |||
| caption = Staggers Kenji. | |||
| data = | |||
{{AttackData-RE | |||
| version = j.3 | |||
| damage = 13-16 | |||
| guard = High | |||
| duration = Varies | |||
| startup = 6 | |||
| active = 2 | |||
| recovery = Until landing | |||
| hit adv = +20 (+27) [maximum] | |||
| block adv = +15 [maximum] | |||
| ug adv = +15 (+30) [maximum] | |||
| special cancel = No | |||
}} | |||
{{AttackData-RE | |||
| header = no | |||
| version = sj.3 | |||
| damage = 13-16 | |||
| guard = High | |||
| duration = 28 (5-2-21) | |||
| startup = 6 | |||
| active = 2 | |||
| recovery = 21 | |||
| hit adv = +20 (+27) [maximum] | |||
| block adv = +15 [maximum] | |||
| ug adv = +15 (+30) [maximum] | |||
| special cancel = No | |||
| description = Definitely Leos best air to air button, as well as an acceptable jump in option. Comes out just as fast as j.1, but has the benefit of his hurtbox being substantially more squashed, and thus more difficult to trade with for the opponent, alongside the actual hitbox being fairly disjointed from it. | |||
}} | |||
}} | |||
{{MoveData | |||
| name = j.4 | |||
| image = RE_Leo_Jump_4_First.png | |||
| image2 = RE_Leo_Jump_4_Second.png | |||
| data = | |||
{{AttackData-RE | |||
| version = j.4 | |||
| damage = 12-15 | |||
| guard = High | |||
| duration = Varies | |||
| startup = 9 | |||
| active = 2/3 | |||
| recovery = Until landing | |||
| hit adv = +15 [maximum] | |||
| block adv = +15 [maximum] | |||
| ug adv = +15 (+30) [maximum] | |||
| special cancel = No | |||
}} | |||
{{AttackData-RE | |||
| header = no | |||
| version = sj.4 | |||
| damage = 12-15 | |||
| guard = High | |||
| duration = 29 (8-5-16) | |||
| startup = 9 | |||
| active = 2/3 | |||
| recovery = 16 | |||
| hit adv = +15 [maximum] | |||
| block adv = +15 [maximum] | |||
| ug adv = +15 (+30) [maximum] | |||
| special cancel = No | |||
| description = To be blunt, one of Leo's best normals, and one you should press often. Its hitbox is excellent, in that it is really wide underneath him, serving not only as his most reliable cross up button, but making it just a solid button to press while the opponent is beneath you to keep them pinned. Does enough hitstun to comfortably link into his cancellable normals, making it his most consistent jump in tool as well. | |||
}} | |||
}} | |||
{{MoveData | |||
| name = j.5 | |||
| image = RE_Leo_Jump_5.png | |||
| caption = "The Holy Spirit" | |||
| data = | |||
{{AttackData-RE | |||
| version = j.5 | |||
| damage = 12-15 | |||
| guard = High | |||
| duration = Varies | |||
| startup = 10 | |||
| active = 14 | |||
| recovery = Until landing | |||
| hit adv = +16 [maximum] | |||
| block adv = +15 [maximum] | |||
| ug adv = +15 (+30) [maximum] | |||
| special cancel = No | |||
}} | |||
{{AttackData-RE | |||
| header = no | |||
| version = sj.5 | |||
| damage = 12-15 | |||
| guard = High | |||
| duration = 32 (9-14-9) | |||
| startup = 10 | |||
| active = 14 | |||
| recovery = 9 | |||
| hit adv = +16 [maximum] | |||
| block adv = +15 [maximum] | |||
| ug adv = +15 (+30) [maximum] | |||
| special cancel = No | |||
| description = A great neutral tool as it's active for 14 frames, and covers a good distance in front and below Leo. Incredibly useful for controlling space and challenging your opponents escape options. Be warned however, as Ice Super and characters with a DP can hit you out of it if you perform it too close, so don't lean on it. Excellent normal, hard to go wrong. | |||
}} | |||
}} | |||
{{MoveData | |||
| name = j.6 | |||
| image = RE_Leo_Jump_6_First.png | |||
| image2 = RE_Leo_Jump_6_Second.png | |||
| caption2 = Staggers Kenji (+27). | |||
| data = | |||
{{AttackData-RE | |||
| version = j.6 | |||
| damage = 12-15 | |||
| guard = high | |||
| duration = Varies | |||
| startup = 9 | |||
| active = 2/2 | |||
| recovery = Until landing | |||
| hit adv = +20 (+27) [maximum] | |||
| block adv = +15 [maximum] | |||
| ug adv = +15 (+30) [maximum] | |||
| special cancel = No | |||
}} | |||
{{AttackData-RE | |||
| header = no | |||
| version = sj.6 | |||
| damage = 12-15 | |||
| guard = high | |||
| duration = 34 (8-4-22) | |||
| startup = 9 | |||
| active = 2/2 | |||
| recovery = 22 | |||
| hit adv = +20 (+27) [maximum] | |||
| block adv = +15 [maximum] | |||
| ug adv = +15 (+30) [maximum] | |||
| special cancel = No | |||
| description = High utility normal right here. Comes out fairly quick, and has 2 hitboxes (only hits once however), one that hits fairly low, and one that reaches higher in front of him. Definitely Leo's strongest jump-in, and pretty decent for guard break strings in the corner. | |||
}} | |||
}} | |||
</div> | |||
{| | ==gaming in progress== | ||
| | ===Default Colors=== | ||
{{ColorGallery | filePrefix=zet_col_ | colors= | |||
{{ColorGallery/Color|default| text = Default}} | |||
{{ColorGallery/Color|blue| text = Alt Blue}} | |||
{{ColorGallery/Color|red| text = Alt Red}} | |||
{{ColorGallery/Color|green| text = Alt Green}} | |||
{{ColorGallery/Color|gray| text = Alt Gray}} | |||
{{ColorGallery/Color|purple| text = Alt Purple}} | |||
{{ColorGallery/Color|cc1| text = Custom Color 1}} | |||
{{ColorGallery/Color|cc2| text = Custom color 2}} | |||
{{ColorGallery/Color|abyss| text = Abyss}} | |||
{{ColorGallery/Color|rank| text = Ranked}} | |||
}} | |||
===Seasonal Colors=== | |||
{{ColorGallery | filePrefix=zet_col_ | colors= | |||
{{ColorGallery/Color|ceo| text = CEO Dreamland 2017}} | |||
{{ColorGallery/Color|frostbite| text = Frostbite 2017}} | |||
{{ColorGallery/Color|valentines| text = Valentines}} | |||
{{ColorGallery/Color|summer| text = Summer}} | |||
{{ColorGallery/Color|halloween| text = Halloween}} | |||
{{ColorGallery/Color|christmas| text = Christmas}} | |||
}} | |||
| | ===Premium Skins=== | ||
| | {{ColorGallery | filePrefix=zet_col_ | colors= | ||
|} | {{ColorGallery/Color|rcs| text = Champion}} | ||
{{ColorGallery/Color|ex| text = Excaliburn}} | |||
{{ColorGallery/Color|ea| text = Early Access Promo}} | |||
{{ColorGallery/Color|shine| text = Shine 2017}} | |||
{{ColorGallery/Color|promo| text = Golden Zetterburn Promo}} | |||
{{ColorGallery/Color|loa| text = Lovers of Aether}} | |||
{{ColorGallery/Color|rank| text = Ranked}} | |||
{{ColorGallery/Color|rcs6| text = Steampunk}} | |||
}} | |||
== | ===Testing image size=== | ||
<tabber> | |||
|-|Jab 1= | |||
{{MoveData | |||
|image=Koihime_Kanu_214.png | |||
|caption=Jab1 | |||
|name=Jab | |||
|input=5A | |||
|data= {{AttackData-RushRev | |||
|Version=0.1.1.x | |||
|Type=Jab | |||
|Hits=1 | |||
|StartUp= 4 | |||
|Active= 3 | |||
|Lag= 16 | |||
|Total=23 | |||
|Landlag= 0 | |||
|Whifflag= 0 | |||
|FrameAdv= -4/ -10 | |||
|GrantsSpark= Yes | |||
|Iframes=- | |||
|Armor=- | |||
|Damage= 2 | |||
|Angle= 75 | |||
|Knockback= 30 | |||
|ShieldStun= 6 | |||
|Hitlag= 4 | |||
|KnockbackGrowth= 0 | |||
|Paralyzer=- | |||
|Chargeable= No | |||
|description= Jab 1 | |||
}} | |||
}} | |||
|-|Jab 2= | |||
{{MoveData | |||
|image=Koihime_Kanu_214.png | |||
|caption=Jab2 | |||
|name=Jab2 | |||
|input=5AA | |||
|data= {{AttackData-RushRev | |||
|Version=0.1.1.x | |||
|Type=Jab 2 | |||
|Hits=1 | |||
|StartUp= 5 | |||
|Active= 3 | |||
|Lag= 16 | |||
|Total=24 | |||
|Landlag= 0 | |||
|Whifflag= 0 | |||
|FrameAdv= -3/ -9 | |||
|GrantsSpark= Yes | |||
|Iframes=- | |||
|Armor=- | |||
|Damage= 2 | |||
|Angle= 45 | |||
|Knockback= 40 | |||
|ShieldStun= 7 | |||
|Hitlag= 5 | |||
|KnockbackGrowth= 0 | |||
|Paralyzer=- | |||
|Chargeable= No | |||
|description= Jab 2 | |||
}} | |||
}} | |||
|-|Jab 3= | |||
{{MoveData | |||
|image=RushRev_Ashani_Jab3.webm | |||
|imageSize=300x300px | |||
|name=Jab3 | |||
|input=5AAA | |||
|data= {{AttackData-RushRev | |||
|Version=0.1.1.x | |||
|Type=Jab 3 | |||
|Hits=1 | |||
|StartUp= 8 | |||
|Active= 4 | |||
|Lag= 21 | |||
|Total=33 | |||
|Landlag= 0 | |||
|Whifflag= 0 | |||
|FrameAdv= -8/ -19 | |||
|GrantsSpark= Yes | |||
|Iframes=- | |||
|Armor=- | |||
|Damage= 3 | |||
|Angle= 45 | |||
|Knockback= 40 | |||
|ShieldStun= 2 | |||
|Hitlag= 4 | |||
|KnockbackGrowth= 1 | |||
|Paralyzer=- | |||
|Chargeable= No | |||
|description= Launching Jab 3 | |||
}} | |||
}} | |||
</tabber> | |||
{| | {{Navbox| title=Cobra Kai 2: Dojos Rising | link=Cobra Kai 2: Dojos Rising | ||
| | | rows= | ||
{{Navbox/Row| text=General | textwidth=56 | maxlines=1 | |||
| data= | |||
{{Navbox/Icon| image=icon controls.png | text=Controls}} | |||
{{Navbox/Icon| image=icon hud.png | text=HUD}} | |||
}} | |||
{{Navbox/Separator}} | |||
{{Navbox/Row| text=Characters | iconwidth=68 | maxlines=1 | |||
| data= | |||
{{Navbox/Icon| image=CK2 Johnny.png | text=Johnny}} | |||
{{Navbox/Icon| image=CK2 Miguel.png | text=Miguel}} | |||
{{Navbox/Icon| image=CK2 Kreese.png | text=Kreese}} | |||
{{Navbox/Icon| image=CK2 Tory.png | text=Tory}} | |||
{{Navbox/Icon| image=CK2 Daniel.png | text=Daniel}} | |||
{{Navbox/Icon| image=CK2 Sam.png | text=Sam}} | |||
{{Navbox/Icon| image=CK2 Robby.png | text=Robby}} | |||
{{Navbox/Icon| image=CK2 Doug.png | text=Doug}} | |||
{{Navbox/Icon| image=CK2 Derek.png | text=Derek}} | |||
{{Navbox/Icon| image=CK2 StingRay.png | text=Stingray}} | |||
{{Navbox/Icon| image=CK2 Edwin.png | text=Edwin}} | |||
{{Navbox/Icon| image=CK2 Kyler.png | text=Kyler}} | |||
{{Navbox/Icon| image=CK2 Hawk.png | text=Hawk}} | |||
{{Navbox/Icon| image=CK2 Demetri.png | text=Demetri}} | |||
{{Navbox/Icon| image=CK2 Aisha.png | text=Aisha}} | |||
{{Navbox/Icon| image=CK2 Kenny.png | text=Kenny}} | |||
{{Navbox/Icon| image=CK2 Brucks.png | text=Brucks}} | |||
{{Navbox/Icon| image=CK2 Trey.png | text=Trey}} | |||
{{Navbox/Icon| image=CK2 Cruz.png | text=Cruz}} | |||
{{Navbox/Icon| image=CK2 Shawn.png | text=Shawn}} | |||
{{Navbox/Icon| image=CK2 Chris.png | text=Chris}} | |||
{{Navbox/Icon| image=CK2 Mitch.png | text=Mitch}} | |||
{{Navbox/Icon| image=CK2 Nate.png | text=Nate}} | |||
{{Navbox/Icon| image=CK2 Bert.png | text=Bert}} | |||
{{Navbox/Icon| image=CK2 DevonLee.png | text=Devon Lee}} | |||
{{Navbox/Icon| image=CK2 Piper.png | text=Piper}} | |||
{{Navbox/Icon| image=CK2 Xander.png | text=Xamder}} | |||
{{Navbox/Icon| image=CK2 Yasmine.png | text=Yasmine}} | |||
{{Navbox/Icon| image=CK2 Bo.png | text=Bo}} | |||
{{Navbox/Icon| image=CK2 Gabriel.png | text=Gabriel}} | |||
{{Navbox/Icon| image=CK2 Hammer.png | text=Hammer}} | |||
{{Navbox/Icon| image=CK2 SkeletonLord.png | text=Skeleton Lord}} | |||
{{Navbox/Icon| image=CK2 TerrySilver.png | text=Terry Silver}} | |||
}} | |||
}} | |||
<div class="toccolours mw-collapsible mw-collapsed" style="width:700px"> | |||
<div style="font-weight:bold;line-height:1.6;">Source</div> | |||
<pre class="mw-collapsible-content"> | |||
{{Navbox| title=Nitroplus Blasterz: Heroines Infinite Duel | link=Nitroplus Blasterz: Heroines Infinite Duel | |||
| rows= | |||
{{Navbox/Row| text=General | textwidth=56 | maxlines=1 | |||
| data= | |||
{{Navbox/Icon| image=icon controls.png | text=Controls}} | |||
{{Navbox/Icon| image=icon glossary.png | text=Notation}} | |||
{{Navbox/Icon| image=icon hud.png | text=HUD}} | |||
{{Navbox/Icon| image=icon system.png | text=System}} | |||
{{Navbox/Icon| image=icon faq.png | text=FAQ}} | |||
}} | |||
{{Navbox/Separator}} | |||
{{Navbox/Row| text=Characters | iconwidth=68 | maxlines=1 | |||
| data= | |||
{{Navbox/Icon| image=NPB Ein Icon.png | text=Ein}} | |||
{{Navbox/Icon| image=NPB Al Icon.png | text=Al Azif}} | |||
{{Navbox/Icon| image=NPB Mora Icon.png | text=Mora}} | |||
{{Navbox/Icon| image=NPB Ruili Icon.png | text=Ruili}} | |||
{{Navbox/Icon| image=NPB Anna Icon.png | text=Anna}} | |||
{{Navbox/Icon| image=NPB Saya Icon.png | text=Saya}} | |||
{{Navbox/Icon| image=NPB Ignis Icon.png | text=Ignis}} | |||
{{Navbox/Icon| image=NPB Muramasa Icon.png | text=Muramasa}} | |||
{{Navbox/Icon| image=NPB Ethica Icon.png | text=Ethica}} | |||
{{Navbox/Icon| image=NPB Saber Icon.png | text=Saber}} | |||
{{Navbox/Icon| image=NPB Ouka Icon.png | text=Ouka}} | |||
{{Navbox/Icon| image=NPB Sonico Icon.png | text=Sonico}} | |||
{{Navbox/Icon| image=NPB Heart Icon.png | text=Heart}} | |||
{{Navbox/Icon| image=NPB Homura Icon.png | text=Homura}} | |||
}} | |||
</pre> | |||
</div> | |||
==Health Values== | |||
<center> | |||
{| class="wikitable" style="display:inline-table" | |||
|+ Health Values | |||
|- | |||
!Health | |||
!Character(s) | |||
!Notes | |||
|- | |||
|align="center"|'''1050''' | |||
|'''Part 6:''' {{NotationIcon-ASBR|ErmesMini}} | |||
| | |||
<div style="text-align: left;"> | |||
*Ermes triggers Resolve Mode at low health. | |||
</div> | |||
|- | |||
|align="center"|'''1000''' | |||
|'''Part 1:''' {{NotationIcon-ASBR|JonathanMini}}<br>'''Part 2:''' {{NotationIcon-ASBR|JosephMini}}, {{NotationIcon-ASBR|StroheimMini}}<br>'''Part 3:''' {{NotationIcon-ASBR|Jotaro3Mini}}, {{NotationIcon-ASBR|AvdolMini}}<br>'''Part 4:''' {{NotationIcon-ASBR|Josuke4Mini}}, {{NotationIcon-ASBR|Jotaro4Mini}}, {{NotationIcon-ASBR|OkuyasuMini}}, {{NotationIcon-ASBR|RohanMini}}<br>'''Part 5:''' {{NotationIcon-ASBR|RisottoMini}}<br>'''Part 8:''' {{NotationIcon-ASBR|Josuke8Mini}} | |||
| | |||
<div style="text-align: left;"> | |||
*Through a certain ability, Jonathan can revive after a KO with 100 health. | |||
*Through a certain ability, Risotto can recover 100 health as White Damage. | |||
</div> | |||
|- | |||
|align="center"|'''950''' | |||
|'''Part 1:''' {{NotationIcon-ASBR|ZeppeliMini}}, {{NotationIcon-ASBR|SpeedwagonMini}}<br>'''Part 2:''' {{NotationIcon-ASBR|CaesarMini}}, {{NotationIcon-ASBR|Wamuu}}<br>'''Part 3:''' {{NotationIcon-ASBR|OldJosephMini}}, {{NotationIcon-ASBR|HolHorse}}, {{NotationIcon-ASBR|VanillaIce}}<br>'''Part 4:''' {{NotationIcon-ASBR|AkiraMini}}, {{NotationIcon-ASBR|KiraMini}}<br>'''Part 5:''' {{NotationIcon-ASBR|GiornoMini}}, {{NotationIcon-ASBR|BucciaratiMini}}, {{NotationIcon-ASBR|MistaMini}}, {{NotationIcon-ASBR|TrishMini}}, {{NotationIcon-ASBR|AbbacchioMini}}, {{NotationIcon-ASBR|ProsciuttoMini}}, {{NotationIcon-ASBR|Ghiaccio}}<br>'''Part 6:''' {{NotationIcon-ASBR|JolyneMini}}<br>'''Part 7:''' {{NotationIcon-ASBR|JohnnyMini}} | |||
| | |||
<div style="text-align: left;"> | |||
*Wamuu and Vanilla Ice are considered Stone Mask characters, incurring White Damage upon being hit. | |||
*Through a certain ability, Vanilla Ice can recover health. | |||
*Giorno, Bucciarati, Mista, Abbacchio, Prosciutto and Ghiaccio trigger Resolve Mode at low health. | |||
*For the cost of 1 HH Gauge, Bucciarati can revive after a KO with 95 health. | |||
*Through a certain ability, Giorno can recover 100 health as White Damage. | |||
</div> | |||
|- | |||
|align="center"|'''930''' | |||
|'''Part 3:''' {{NotationIcon-ASBR|PolnareffMini}} | |||
| | |||
|- | |||
|align="center"|'''920''' | |||
|'''Part 7:''' {{NotationIcon-ASBR|DiegoMini}}, {{NotationIcon-ASBR|AWDiegoMini}} | |||
| | |||
|- | |||
|align="center"|'''900''' | |||
|'''Part 2:''' {{NotationIcon-ASBR|LisaLisa}}<br>'''Part 3:''' {{NotationIcon-ASBR|KakyoinMini}}, {{NotationIcon-ASBR|Mariah}}<br>'''Part 4:''' {{NotationIcon-ASBR|KoichiMini}}, {{NotationIcon-ASBR|YukakoMini}}, {{NotationIcon-ASBR|ShigechiMini}}, {{NotationIcon-ASBR|KeichoMini}}, {{NotationIcon-ASBR|KosakuMini}}<br>'''Part 5:''' {{NotationIcon-ASBR|FugoMini}}, {{NotationIcon-ASBR|Diavolo}}<br>'''Part 6:''' {{NotationIcon-ASBR|FooFighters}}, {{NotationIcon-ASBR|AnasuiMini}}, {{NotationIcon-ASBR|WeatherMini}}, {{NotationIcon-ASBR|WSPucciMini}}, {{NotationIcon-ASBR|FinalPucciMini}}<br>'''Part 7:''' {{NotationIcon-ASBR|GyroMini}}, {{NotationIcon-ASBR|ValentineMini}} | |||
| | |||
<div style="text-align: left;"> | |||
*Prior to version 2.00, Kakyoin possessed 1000 health. | |||
*For the cost of 1 HH Gauge, Yukako can revive after a match-losing KO with 175 health. | |||
*Prior to version 2.00, Keicho possessed 840 health. | |||
*Prior to version 1.30, Kosaku possessed 1000 health. | |||
*Through his GHA, Kosaku can recover 200 health. | |||
*Fugo triggers Resolve Mode at low health. | |||
*Prior to version 2.30, Foo Fighters possessed 950 health. | |||
*Through her HHA, Foo Fighters can recover 100 health. | |||
*Obtaining 2 Holy Corpse parts reduces the amount of damage Valentine takes by 10%. | |||
*With D4C -Love Train- active, the amount of damage taken by Valentine is reduced by 25%. | |||
*Once per match, Valentine can fully recover his health through a certain ability. | |||
</div> | |||
|- | |||
|align="center"|'''850''' | |||
|'''Part 2:''' {{NotationIcon-ASBR|Kars}}<br>'''Part 4:''' {{NotationIcon-ASBR|YuyaMini}}<br>'''Part 5:''' {{NotationIcon-ASBR|NaranciaMini}}<br>'''Part 8:''' {{NotationIcon-ASBR|WonderofU}}<br>'''Other:''' {{NotationIcon-ASBR|BaohMini}} | |||
| | |||
<div style="text-align: left;"> | |||
*Kars is considered a Stone Mask character, incurring White Damage upon being hit. | |||
*Through certain abilities, Yuya can recover health as White Damage. | |||
*Prior to version 1.30, Narancia possessed 950 health. | |||
*Wonder of U's Calamity Level increases as it loses health. | |||
*Baoh triggers Baoh Armed Phenomenon at low health. | |||
</div> | |||
|- | |- | ||
|align="center"|'''840''' | |||
|'''Part 3:''' {{NotationIcon-ASBR|DIO}} | |||
| | | | ||
<div style="text-align: left;"> | |||
*DIO is considered a Stone Mask character, incurring White Damage upon being hit. | |||
*Through a certain ability, DIO can recover health. | |||
</div> | |||
|- | |||
|align="center"|'''800''' | |||
|'''Part 1:''' {{NotationIcon-ASBR|Brando}}<br>'''Part 2:''' {{NotationIcon-ASBR|Esidisi}}<br>'''Part 3:''' {{NotationIcon-ASBR|Iggy}}, {{NotationIcon-ASBR|PetShop}} | |||
| | |||
<div style="text-align: left;"> | |||
*Dio Brando and Esidisi are considered Stone Mask characters, incurring White Damage upon being hit. | |||
*Through certain abilities, Dio Brando can recover health. | |||
*Through his HHA, Esidisi can recover 120 health. | |||
</div> | |||
|- | |||
|} | |} | ||
</center> | |||
= | {| class="wikitable" style="float:right; margin-left: 10px;" | ||
|- | |||
! align="center" colspan="2"|Load Ran/Dark Ran | |||
|- | |||
|align="center" colspan="2"| | |||
<tabber> | |||
|-|Load Ran= | |||
[[File:TSS_LoadRan.png|center|frameless|350px]] | |||
|-|Dark Ran= | |||
[[File:TSS DarkRan Render.png|center|frameless|350px]] | |||
</tabber> | |||
|- | |||
| '''Speed''' | |||
|☆☆ | |||
|- | |||
| '''Shot''' | |||
|☆☆ | |||
|} | |||
{{-}} | |||
<tabber> | |||
|-|Load Ran= | |||
{| class="wikitable" style="float:right; margin-left: 10px;" | |||
|- | |||
! align="center" colspan="2"|Load Ran | |||
|- | |||
|align="center" colspan="2"| | |||
[[File:TSS_LoadRan.png|center|frameless|350px]] | |||
|- | |||
| '''Attack Rating''' | |||
|★★★☆☆ | |||
|- | |||
| '''Defense Rating''' | |||
|★★☆☆☆ | |||
|} | |||
|-|Dark Ran= | |||
{| class="wikitable" style="float:right; margin-left: 10px;" | |||
|- | |||
! align="center" colspan="2"|Dark Ran | |||
|- | |||
|align="center" colspan="2"| | |||
[[File:TSS DarkRan Render.png|center|frameless|350px]] | |||
|- | |||
| '''Attack Rating''' | |||
|★★★☆☆ | |||
|- | |||
| '''Defense Rating''' | |||
|★★☆☆☆ | |||
|} | |||
</tabber> | |||
{{ | ==Sky Cross Duel== | ||
<pre> | |||
{{MoveData | |||
|image=The file you want use as an image. Use the abbrevation for your game as a prefix for the filename. Example: SXD_Ronin_5L.png | |||
|caption=If you want to add a note below the image | |||
|image2=For when you need a second image. image3 for when three are needed, and so on. | |||
|caption2=Per above. | |||
|name=Your move's name (or input, if it's a normal) | |||
|input=The input of your special move, assuming a name was put above | |||
|data= | |||
{{AttackData-SXD | |||
|version=For when you need to talk about versions of a given move. Leave empty if not needed | |||
|subtitle=For a name below the version. Useful for when they have different ones | |||
|damage= | |||
|launchheight= | |||
|startup= | |||
|active= | |||
|recovery= | |||
|blockadv= | |||
|blockdmg= | |||
|chipdmg= | |||
|description= | |||
What you want to say about this move. | |||
*A note you may want to add. | |||
*Another one. Use as many as needed. | |||
}} | |||
{{AttackData-SXD | |||
|version=If you needed to use this, you will need to copy this box for every version you need. | |||
|header=if you want the header at the top of the template (Damage, Launch Height, etc.) to show up for this version. If you don't want this, put "no" | |||
|subtitle= | |||
|damage= | |||
|guard= | |||
|startup= | |||
|active= | |||
|recovery= | |||
|blockadv= | |||
|hitadv= | |||
|description= | |||
Second verse | |||
*Same as the first | |||
*And the third | |||
}} | |||
}} | |||
</pre> | |||
{{MoveData | |||
|image=SXD_Ronin_5L.png | |||
|caption=That's an attack, alright | |||
|name=5L | |||
|input= | |||
|data= | |||
{{AttackData-SXD | |||
|damage=5 | |||
|launchheight=16 | |||
|startup=7 | |||
|active=3 | |||
|recovery=15 | |||
|blockadv=+2 | |||
|blockdmg=30 | |||
|chipdmg=10 | |||
|description= | |||
Ronin does something here | |||
*This is something I want to add about this move. | |||
*I guess I needed to say more. | |||
}} | |||
}} | |||
``` | |||
{{MoveData | |||
|image=SXD_Ronin_5L.png | |||
|caption=That's an attack, alright | |||
|image2=SXD_Ronin_5L_(2).png | |||
|caption2=And this is another one | |||
|name=Special Move Name | |||
|input=Special Move Input | |||
|data= | |||
{{AttackData-SXD | |||
|version=Ground | |||
|subtitle=Special Move Version Name | |||
|damage=5 | |||
|launchheight=16 | |||
|startup=7 | |||
|active=3 | |||
|recovery=15 | |||
|blockadv=+2 | |||
|blockdmg=30 | |||
|chipdmg=10 | |||
|description= | |||
Ronin does something here | |||
*This is something I want to add about this move. | |||
*I guess I needed to say more. | |||
}} | |||
{{AttackData-SXD | |||
|version=Air | |||
|header= | |||
|subtitle=Special Move Version Name | |||
|damage=9 | |||
|launchheight=16 | |||
|startup=7 | |||
|active=3 | |||
|recovery=15 | |||
|blockadv=+2 | |||
|blockdmg=30 | |||
|chipdmg=10 | |||
|description= | |||
Ronin does something else here | |||
*This is something I want to add about this other move. | |||
*I guess I needed to say more about this other move. | |||
}} | |||
}} | |||
Latest revision as of 17:38, 8 June 2024
This is a sandbox page for general testing, everyone is able to edit here. Feel free to practice wiki editing or play around with existing templates to familiarize yourself with them.
test content 1
| Impostor | |
|---|---|
 | |
| Health | 3000 |

select screen
we out here glove on fightin
|
| ||||||||||||||||||||||||||||||
| Special Moves | |
|---|---|
| j.2B | How do you use air moves in a jumpless game??? |
| 236X | This move goes places... |
| 22X | DP? Sure |
| Supers | |
|---|---|
| 4AB | DP? Sure |
| 6AB | Desperation Super. |
| 2AB | Futaba Date slows down the state of time. This is the ultimate move, and makes her top 1 in every game, even if she isn't playable or does not appear in a game. |
beware, noob testing

testing stuff again
Wild Throw
5S |
|---|
Wild Throw (Air)
j.S |
|---|
Something Else
3C
Jab
AAA
Lua error: Wikimedia\Rdbms\Platform\SQLPlatform::makeList: empty input for field main_table.
Lua error: Wikimedia\Rdbms\Platform\SQLPlatform::makeList: empty input for field main_table.
Hitboxes Off
Hitboxes On
Jab 1
No results
Jab 2
No results
Jab 3
No results
| Character | Move |
|---|---|
| A.B.A | Kihi (Purple Fireball; Normal Mode) |
| Anji | (FB) Shitsu (Butterfly projectile)
Shin: Ichishiki (Aerial fan projectiles) |
| Axl | None |
| Baiken | None |
| Bridget | None |
| Chipp | None |
| Dizzy | None |
| Eddie | Normal Shadow's ]D[ (Ball) |
| Faust | None |
| I-no | (Air/FB) Antidepressant Scale (Flat Note)
(Horizontal/Vertical) Chemical Love (Big Laser) |
| Jam | None |
| Johnny | None |
| Justice | None |
| Kliff | None |
| Ky | Stun Edge / Air Stun Edge (Lighting Shot)
(Air/FB)Charged Stun Edge (Big Lightning Shot, 1st part only) Sacred Edge (Glowing Blue Blade)<SUPER> |
| May | None |
| Millia | (FB) Tandem Top (Discs) |
| Order-Sol | None |
| Potemkin | None |
| Robo-Ky | 2H (Knee Missile)
Want some Ky? (Bazooka) Aerial Want some Ky? (Aerial Missiles) |
| Slayer | None (lol) |
| Sol | (DI) Gunflame (Ground Hugging Flames) |
| Testament | None |
| Venom | (FB) (Charged) Stinger Aim (Horizontal Ball Shot)
(FB) (Charged) Carcass Raid (Vertical Ball Shot) Ball Seisei / Ball Set (Cue Ball, Only when the ball is in motion) Dubious Curve (Ball Skull Bash, Only when the ball is in motion) Red Hail (Multi Shot Raid) <SUPER> Tactic Arch (Cue Ball Setup, Only when balls are in motion) <SUPER> |
| Zappa | None |
}} }}

SOMEONE GIVE ME SOME FUCKING BAKED BEANS
InuYasha: A Feudal Fairy Tale (犬夜叉 戦国お伽合戦, Inuyasha: Sengoku Otogi Kassen) is a 2D fighting game based on the manga and anime series Inuyasha. It consists of battles and minigames in an effort to retrieve shards of the sacred Jewel of Four Souls, essentially following the overall plot of the series.
Throw Img test
Kaeru Spring
カエルスプリング Behind 4P+K |
|---|
Kaeru Package Hold
カエルパッケージホールド 2P+K |
|---|
Reverse Power Bomb
リバースパワーボム P+K (Reversal 1) |
|---|
Red Earth
Normal Moves
Fire Ice Axe1  |
|---|
2  Can be ducked. Can be ducked.
|
|---|
3  Staggers Kenji. Staggers Kenji.  3 followup. 3 followup.
|
|---|
4  |
|---|
5  "The Father" "The Father"
|
|---|
6  Can be ducked. Staggers Kenji. Can be ducked. Staggers Kenji.
|
|---|
cr.1  |
|---|
cr.2   Two hits. First hit can be ducked. Two hits. First hit can be ducked.
|
|---|
cr.3    |
|---|
cr.4  |
|---|
cr.5  "The Son" "The Son"
|
|---|
cr.6   6 followup. 6 followup.
|
|---|
j.1  |
|---|
j.2  |
|---|
j.3  Staggers Kenji. Staggers Kenji.
|
|---|
j.4   |
|---|
j.5  "The Holy Spirit" "The Holy Spirit"
|
|---|
j.6   Staggers Kenji (+27). Staggers Kenji (+27).
|
|---|
gaming in progress
Default Colors
Default

Alt Blue

Alt Red

Alt Green

Alt Gray

Alt Purple

Custom Color 1

Custom color 2

Abyss

Ranked
Seasonal Colors
CEO Dreamland 2017

Frostbite 2017

Valentines

Summer

Halloween

Christmas

Premium Skins
Champion

Excaliburn

Early Access Promo

Shine 2017

Golden Zetterburn Promo

Lovers of Aether

Ranked
Steampunk

Testing image size
Jab 5A  Jab1 Jab1
|
|---|
Jab2 5AA Jab2 Jab2
|
|---|
Jab3 5AAA |
|---|


Source
{{Navbox| title=Nitroplus Blasterz: Heroines Infinite Duel | link=Nitroplus Blasterz: Heroines Infinite Duel
| rows=
 {{Navbox/Row| text=General | textwidth=56 | maxlines=1
 | data=
  {{Navbox/Icon| image=icon controls.png | text=Controls}}
  {{Navbox/Icon| image=icon glossary.png | text=Notation}}
  {{Navbox/Icon| image=icon hud.png      | text=HUD}}
  {{Navbox/Icon| image=icon system.png   | text=System}}
  {{Navbox/Icon| image=icon faq.png      | text=FAQ}}
 }}
 {{Navbox/Separator}}
 {{Navbox/Row| text=Characters | iconwidth=68 | maxlines=1
 | data=
  {{Navbox/Icon| image=NPB Ein Icon.png      | text=Ein}}
  {{Navbox/Icon| image=NPB Al Icon.png       | text=Al Azif}}
  {{Navbox/Icon| image=NPB Mora Icon.png     | text=Mora}}
  {{Navbox/Icon| image=NPB Ruili Icon.png    | text=Ruili}}
  {{Navbox/Icon| image=NPB Anna Icon.png     | text=Anna}}
  {{Navbox/Icon| image=NPB Saya Icon.png     | text=Saya}}
  {{Navbox/Icon| image=NPB Ignis Icon.png    | text=Ignis}}
  {{Navbox/Icon| image=NPB Muramasa Icon.png | text=Muramasa}}
  {{Navbox/Icon| image=NPB Ethica Icon.png   | text=Ethica}}
  {{Navbox/Icon| image=NPB Saber Icon.png    | text=Saber}}
  {{Navbox/Icon| image=NPB Ouka Icon.png     | text=Ouka}}
  {{Navbox/Icon| image=NPB Sonico Icon.png   | text=Sonico}}
  {{Navbox/Icon| image=NPB Heart Icon.png    | text=Heart}}
  {{Navbox/Icon| image=NPB Homura Icon.png   | text=Homura}}
}}
Health Values
| Health | Character(s) | Notes |
|---|---|---|
| 1050 | Part 6: |
|
| 1000 | Part 1: Part 2: Part 3: Part 4: Part 5: Part 8: |
|
| 950 | Part 1: Part 2: Part 3: Part 4: Part 5: Part 6: Part 7: |
|
| 930 | Part 3: |
|
| 920 | Part 7: |
|
| 900 | Part 2: Part 3: Part 4: Part 5: Part 6: Part 7: |
|
| 850 | Part 2: Part 4: Part 5: Part 8: Other: |
|
| 840 | Part 3: |
|
| 800 | Part 1: Part 2: Part 3: |
|
| Load Ran/Dark Ran | |
|---|---|
  | |
| Speed | ☆☆ |
| Shot | ☆☆ |
| Load Ran | |
|---|---|
|
| |
| Attack Rating | ★★★☆☆ |
| Defense Rating | ★★☆☆☆ |
| Dark Ran | |
|---|---|
|
| |
| Attack Rating | ★★★☆☆ |
| Defense Rating | ★★☆☆☆ |
Sky Cross Duel
{{MoveData
|image=The file you want use as an image. Use the abbrevation for your game as a prefix for the filename. Example: SXD_Ronin_5L.png
|caption=If you want to add a note below the image
|image2=For when you need a second image. image3 for when three are needed, and so on.
|caption2=Per above.
|name=Your move's name (or input, if it's a normal)
|input=The input of your special move, assuming a name was put above
|data=
 {{AttackData-SXD
 |version=For when you need to talk about versions of a given move. Leave empty if not needed
 |subtitle=For a name below the version. Useful for when they have different ones
 |damage=
 |launchheight=
 |startup=
 |active=
 |recovery=
 |blockadv=
 |blockdmg=
 |chipdmg=
 |description=
What you want to say about this move.
*A note you may want to add.
*Another one. Use as many as needed.
 }}
 {{AttackData-SXD
 |version=If you needed to use this, you will need to copy this box for every version you need.
 |header=if you want the header at the top of the template (Damage, Launch Height, etc.) to show up for this version. If you don't want this, put "no"
 |subtitle=
 |damage=
 |guard=
 |startup=
 |active=
 |recovery=
 |blockadv=
 |hitadv=
 |description=
Second verse
*Same as the first
*And the third
 }}
}}
5L That's an attack, alright That's an attack, alright
|
|---|
```
Special Move Name Special Move Input That's an attack, alright That's an attack, alright And this is another one And this is another one
|
|---|
.png)