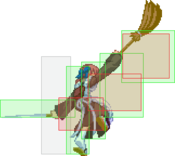
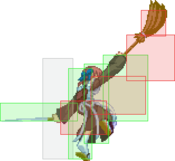
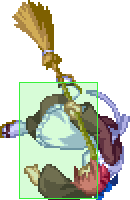
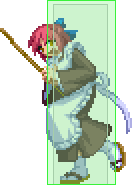
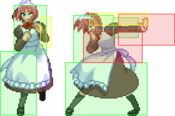
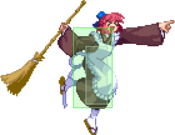
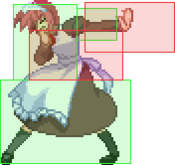
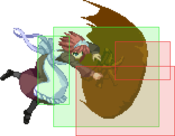
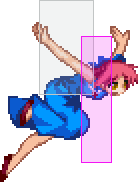
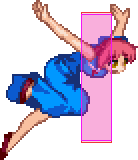
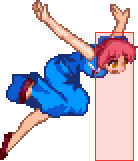
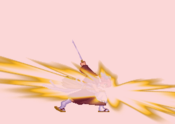
Character Page Progress
This page is still a work in progress, consider joining as an editor to help expand it. Please update this character's roadmap page when one of the editing goals have been reached.
| In Progress |
To-do
|
- Move Descriptions:
- Expand upon the move descriptions, cite their uses, add captions where helpful, etc.
|
- Additional Ressources/Players to watch/ask
- Add any external links to ressources such as video guides or articles.
- If you know any players in particular that can be helpful for learning this character, please add them with, if possible a way to contact them (such as a Discord handle) and a name that can be searched in the match video database.
- Overview/General Gameplan:
- Add a short summary of this character with a list of strengths and weaknesses
- Do your best to describe how to play this character, change or add subsections based on what you would write as a guide.
- Combos:
- Add tech in the starters, enders, OTG pickup and normal/corner combo sections.
- Add damage, meter gain/given numbers and video links to combos as you add them.
|
Additional Resources
C-Maids Match Video Database
Cmaids Hisui oki
Players to watch/ask
its important to note that each player had a particular preferred lead, for this purpose it is notated with either (H) or (K) that stands for Kohaku or Hisui respectively.
JP:
NA:
Overview
Strengths Weaknesses
| Strengths
|
- Lots of setplay options with coverage on either maid lead
- Can play BOTH maids
- Can do safe heat set ups and continue pressure
- Flexible mus due to being able to switch to the other maid
- Hisui lead has more rewards from either throws or strikes.
- Some mix ups unique to them due to 22D(tag)
|
| Weaknesses
|
- Both maids loses out on a few options. Hisui loses j.6B, pot toss in exchange for Kohaku's plants, Kohaku loses 6C, molotovs and command grab for Hisui's assists
- Lower health than their respective solo counterparts
- Hisui has slightly poorer neutral due to no pot toss.
- Kohaku losing command grab, 6C and molotov slightly hinders her Oki and pressure ability.
|
Cmaids is essentially either Hisui leading for Kohaku leading backed up by their sister. It's safe to say that if you have the foundation from playing their solo characters then you should have be all set with cmaids and you can choose which one. if you know both, even better!
Both are extremely setplay heavy thanks to hisui getting back up from Kohaku. While some tools are lost such as Kohaku's 6C, Command grab and molotovs she is still dangerous and Hisui gains all the more from having Kohaku's 22B(214A) as an oki tool and having molotovs(214B) along with Kohaku's j.C(214C). you play this character to get the best out of both worlds or......to go whichever's grass is greener on the other side via tag. Up to you.
General Gameplan
From this point on for consistency sake the notations for hisui lead vs Kohaku lead will be notated as Hisui lead and Kohaku lead
Hisui lead
For the most part you are playing Hisui except without the pot toss. You still have very fast movement both in the air and on the ground. This time though instead of using pot toss to control the pacing of the match. you have to be a bit more involved with moving around with dash 2B, 5A 6C, 5A 5C. Iad j.C etc.
In some cases you can use 214C to make Kohaku go to the opponent to try to hit them and force a reaction. This all changes in the corner where her gameplan revolves heavily around a basic strike/throw game, which is made safer by her extremely strong okizeme. Her 22x series (or bento) are specials which place down explosive bento boxes which explode after a certain amount of time, forcing the opponent to block after they tech her throws. This is now further layered with the additional help of 214A(Kohaku's plant), 214B(Kohaku's molotov) and 214C(Kohaku's j.C) making it very hard to figure out when to predict the strike/throw coming as well as adding insurance while doing them.
This version of Hisui is very setplay oriented and really brings out the most of it when you utilize bento and Kohaku's assist.
Neutral
Hisui lead
Most of what C-Hisui can do, this team can do as well.
Without pot toss, you can't just sit somewhere and toss projectiles to control the pacing of the match. You also do not have j.6B at your disposal to help you in neutral but you still have most of the tools necessary. you do have to be more involved with using your airdash j.C, j.B. Typically the rule of thumb is to use j.C at lower heights so that they cannot get underneath it while using j.B for people well above you. j.A is also a really good option up close in the air as many j.A's are.
Hisui can also control the air in front of her using 623[B] if you think they'll airdash towards you predictably. If they're giving Hisui enough space, she can do 22A and 22B, and are allowed to set down up to two bentos which will create even more clutter on the screen for the opponent to keep mind of. Against zoners or people that try to play too passive you can use 214C and advance as Kohaku runs up to them giving you at least some coverage since 214C has two clash points.
Be sure to use j2C, j.2[C], and j236A/B to throw off people's anti air timing since most people will look for when Hisui will attack, and those three moves alter her air momentum and throw the opponent off guard. She can also air dodge to further alter her air movement and reposition herself accordingly. Also, don't be afraid to sometimes throw out j.BB, the 2nd j.B is a book slam that has a good hitbox on it. Note that if j.BB is blocked, Hisui is now put in a vulnerable state and can be punished, for this reason be ready to cancel j.BB on block into j.236B just in case.
On the ground, dash 2B/5[C] is going to be your best button for stuffing ground approaches, while buttons like 5A 6C are better for catching people in the air. You may sometimes use 5A 5C to hit someone out of the air. You can also use 5A 5[C] to catch people backdashing. In some matchups also don't be afraid to use dash 2C, while it does have a good bit of recovery, it's got a deceptively long range than one would expect making it useful in matchups like caoko, nero,etc. There are many more things you'll see in match footage - things like dash 623C allow safe heat set ups in neutral and place a persistent hitbox on the screen that doesn't go away even if Hisui gets hit, making it a very versatile EX move for both neutral, pressure, and okizeme, which will all be covered later.
Pressure
Hisui lead
Like C-Hisui's pressure has a lot of freedom of where to end and where to pick it back up. She is a strike/throw character with several normals that move her forward, as well as good specials and EX moves that allow her to expand her toolkit in pressure. While you do have Kohaku assist, they are mainly used for oki purposes and not to extend pressure those options will be covered later in this page.
Below is a set of normals Hisui commonly uses in her pressure, followed by specials to use. For reference head to #Normal Moves and #Special Moves
Normals
- 2A
- 2B
- 5A
- 2C
- 5C/5[C]
- 6C
- j2C
- j.C
- 4B (Will be explained later)
Specials
An important thing to note is that staggering your pressure to frame trap the opponent is key - luckily she has quite a bit in her arsenal to do so. 2A 5C is a natural frame trap, as is 2B 5[C]. 5C and 5[C] both move Hisui forward, and it's very important to learn where to use them. At low level play it's a very strange move to use, but better players may shield, dodge, or backdash it if they have a good option to counter 5C. It's very important to keep both 5C and 5[C] in your back pocket as an extra tool you can use in her pressure. 2B is another common button since it's one of her main lows. 2A is a mid, but is very fast and is generally very good for setting up tick throws. 2C is her 2nd low that's good to use in stagger pressure to open up the opponent.
j.2C is a way to throw off people looking to throw tech vs Hisui, although she has tools like dash 5B to crush OS as well. 6C is an interesting normal, in that you can input 6[C] afterwards and the move will become an overhead, which you can followup by hitting 236C (you can also just rekka 6CC 236C for the non-overhead version). 4B drains meter and trips standing, and works well with 6C[C] since one option is a high and the other option trips on standing making for a niche yet somewhat useful mixup option if the opponent isn't aware. 5A is very good to cancel into at a lot of parts in your offense, making her pressure very fluid and hard to deal with at times, even with EX guard in mind. Here are some strings you may see in her typical pressure with normals only:
- 2A 2A 2A 2B delay 5[C]
- 2A 5[C]/5C
- 2A (w5A), Grab or 2A 2B
- 2A 2A 2B 5[C] (w5A), 5[C]
- 2A 2A 2A 2B delay 5[C] delay 2C (w5A)
- 2A (2A), j2C
- 2A 2A 2B w5A, 2B
- 2B 5[C] 2A dash 2A.
- 2A 2A 2B 6C (w5A)
- 2A 2A 2B 6C[C] or 2C (w5A)
- 2A 2A 2B 5[C] 6C, delay 4B
With these strings, Hisui can incorporate IAD j.C to further her pressure. The following are a few options to reset her pressure with specials.
- Stagger 2A 2A 2B delay 5[C] 236B
- 2A 2A TK236A or jump, j.236B
You can also use EX dust anytime you need to extend your pressure when you're too far out.
Okizeme
Refer to this for this part, particularly the j.BB ender section that will be covered
#Aircombo Enders
Like C-Hisui(solo) Hisui gets her oki from 623A or 236B~B, and each has their unique uses and placements. 623A has a lot of KD timing, so you can cancel into 22A/B/C really late. This greatly helps your oki since the later you set down Bento, the more you play with the timing of your main strike/throw mixup. Additionally you now get the ability to use kohaku's assist to strengthen your oki
22A oki
the oki is somewhat similar except now you have koha's assist to help layer your oki game
This is done off either 2C into 22A or 623A into 22A. It's important that you learn to delay the 22A a bit so that you get more options such as early throw, where if they tech, the bento explodes and it's still your turn. Here are some common options you will see for her corner oki:
- dash w5A, 6E/6A+D
- dash 5A delay 5B/6C(this beats throw tech oses)
- dash 2A dash grab
- dash 2B dash grab
- dash 2B delay 5B/5C(to compliment the option above to beat throw tech OS, jumps and mash)
- dash 6C delay 2C or 6C6[C]
- dash, iad j.C
22C is faster and, unlike 22A, is full untech if they get hit. It also poisons over time and deals more damage, and is a very versatile option that Hisui has. Here are some ways to get 22C out other than 623A or 236A~A (in some routes that use 236A~236A Hisui can only EX cancel in which case you should use 22C) All of these situations listed are specifically corner only unless stated otherwise.
- throw, 623C, 22C (requires to be in max for this to be meter efficient)
- 623A, 22A, dash 5B/2B, 22C
- throw 22A 5B/2B, 22C
The oki with 22C is pretty much the same as the ones for 22A listed above, although with an added set up which is this sequence:
- 623A, 22C/ 236A~236A, 22C, jump j.A airdash j.C vs j.A, 2B
- 623A 22C/ 236A~236A, 22C, 5C/2C 214C or 214B into either dash grab or super jump delay airdash j.C or empty jump 2B
Hisui lead specific oki
The part above just goes over the basic bento oki now with Hisui lead what you want to do is either do the tech trap combo and do the following:
- W5A 2C 214A
- W5A 2C 623A 22A or 214C/214B
If you can do yayaya routes into 623A you can choose the following:
- 623A, 214A
- 623A, 214C
- 623A, 214B
With 214A it's important that you meaty with 2B 5C/2C, dash 2AA 2B since plant does not meaty by itself. the typical sequence you will see is this:
- 623A 214A, 2B 5C 214B, 22A
This set up is good since it presents a lot of ambiguous throw points and also allows you to high/low during 214A, 214B and even the 22A portions.
Another set up are these:
1. 623A, 214C
2. 623A, 214A 2B 5C 22A
Option 1 is good because you can actually heat and still continue pressure after 214C hits. option 2 is good because this covers metered bunker since bento is persistent.
If in the event that in pressure you use 623C to gain frame advantage you can also do 214C or 214B and set up another strike throw situation as well even a high/low mix up with respect gained.
For more set up ideas please watch This video as it explains a good portion of the set ups in detail.
Defense
Defense wise, they have lower health and no dp but both of them do have heat and Hisui lead in particular does have Ex dust to use whenever there is a significant gap or she has the space to pull it out.
That being said it's much better to use the system mechanics such as ex guard, ex shield when appropriate and jump out otherwise. You also have fast buttons on either lead so you can take advantage of a gap if you feel as though abare 2A will work. Other than that Hisui lead still has her versatile AD to crank out on defense while Kohaku lead is just still Kohaku so not much to mash out that's invuln.
Luckily They are Crescent Moon and aren't meter intensive, which means you'll rarely have a moment without at least 100 meter. You need to make use of all universal defensive options in order to protect yourself as Hisui or Kohaku, for example blocking, jumping, fuzzy jumping, shielding, bunkering, EX guarding, dodging, backdashing.
Combos
| Combo Notation Help
|
Disclaimer: Combos are written by various writers, so the actual notation used in pages can differ from the standard one.
For more information, see Glossary and Controls.
|
| X > Y
|
X input is cancelled into Y.
|
| X > delay Y
|
Must wait for a short period before cancelling X input into Y.
|
| X, Y
|
X input is linked into Y, meaning Y is done after X's recovery period.
|
| X+Y
|
Buttons X and Y must be input simultaneously.
|
| X/Y
|
Either the X or Y input can be used.
|
| X~Y
|
This notation has two meanings.
- Use attack X with Y follow-up input.
- Input X then within a few frames, input Y. Usually used for option selects.
|
| X(w)
|
X input must not hit the opponent (Whiff).
|
| j.X
|
X input is done in the air, implies a jump/jump cancel if the previous move was done from the ground.
Applies to all air chain sections:
- Assume a forward jump cancel if no direction is given.
- Air chains such as j.A > j.B > j.C can be shortened to j.ABC.
|
| sj.X
|
X input is done after a super jump. Notated as sj8.X and sj9.X for neutral and forward super jumps respectively.
|
| dj.X
|
X input is done after a double jump.
|
| sdj.X
|
X input is done after a double super jump.
|
| tk.X
|
Stands for Tiger Knee. X motion must be buffered before jumping, inputting the move as close to the ground as possible. (ex. tk.236A)
|
| (X)
|
X is optional. Typically the combo will be easier if omitted.
|
| [X]
|
Input X is held down. Also referred to as Blowback Edge (BE). Depending on the character, this can indicate that this button is held down and not released until indicated by the release notation.
|
| ]X[
|
Input X is released. Will only appear if a button is previously held down. This type of input is referred to as Negative Edge.
|
| {X}
|
Button X should only be held down briefly to get a partially charged version instead of the fully charged one.
|
| X(N)
|
Attack "X" should only hit N times.
|
| (XYZ)xN
|
XYZ string must be performed N times. Combos using this notation are usually referred to as loops.
|
| (XYZ^)
|
A pre-existing combo labelled XYZ is inserted here for shortening purposes.
|
| CH
|
The first attack must be a Counter Hit.
|
| Air CH
|
The first attack must be a Counter Hit on an airborne opponent.
|
| 66
|
Performs a ground forward dash.
|
| j.66
|
Performs an aerial forward dash, used as a cancel for certain characters' air strings.
|
| IAD/IABD
|
Performs an Instant AirDash.
|
| AT
|
Performs an Air Throw. (j.6/4A+D)
|
| IH
|
Performs an Initiative Heat.
|
| AD
|
Performs an Arc Drive.
|
| AAD
|
Performs an Another Arc Drive.
|
Hisui Lead
Aircombo Enders
| Condition
|
Notation
|
Damage
vs V.Sion
|
Notes
|
|
| Aircombo
|
|
???
|
| |
| Meter Gained: ??? |
Meter Given (vs C-Moon): ??? |
| 2B will punish a neutral or forwards ground tech. Dash 2B will punish neutral or backwards ground tech. Versus no tech, you recover in time to meaty 2A. |
|
|
| corner to corner and midscreen corner
|
|
???
|
| |
| Meter Gained: ??? |
Meter Given (vs C-Moon): ??? |
| In some combos you see on melty.games it full corner carries and sets up a tech trap situation, If they don't tech then you still get a knockdown. It's very important to learn her tech trap options to make the most out of this ender. |
|
|
Aircombo
Opponent in / near corner preferred
|
|
???
|
| |
| Meter Gained: ??? |
Meter Given (vs C-Moon): ??? |
| The situation after j.BB in the corner is a true 50-50. 5A allows you to punish neutral tech or no tech, while 2B punishes forwards and back tech. Depending on spacing you may want to dj8 rather than dj9. |
|
|
Anywhere
| Condition
|
Notation
|
Damage
vs V.Sion
|
Notes
|
|
| Normal starter, grounded opponent
|
- 2A > 2B > 5C(1) > 2C > 623A
|
2399
|
| |
| Meter Gained: 40.0% |
Meter Given (vs C-Moon): 12.0% |
| Simple ground combo to her 623A dust. 623A ender allows Hisui to safely lay out a 22A/b bento or do any oki of her choice. |
|
|
| Normal starter, grounded opponent
|
- 2AA > 2B > 2C > 5C > 6C > j.BC > Ender
|
???
|
| |
| Meter Gained: ??? |
Meter Given (vs C-Moon): ??? |
| Simple BnB. Reasonable for starting out. |
|
|
| Normal starter, grounded opponent
|
- 2A > 2B > 5C > 2C > 6B > j.[C]AB > land > j.(A)BC > Ender
|
???
|
| |
| Meter Gained: ??? |
Meter Given (vs C-Moon): ??? |
| Basic BnB utilizing 2C 6B. Decent corner carry. Learn this. |
|
|
| Normal starter, grounded opponent
|
- 2AA > 2B > 2C > 236B~236B > j.[C]AB > land > j.BC > Ender
|
???
|
| |
| Meter Gained: ??? |
Meter Given (vs C-Moon): ??? |
| Variation BnB using 236B236B instead of 6B. |
|
|
| Normal starter, grounded opponent
|
- 2A > 2B > 5C > 2C > 6C > j.C > j.66 > j.B > Ender
|
???
|
| |
| Meter Gained: ??? |
Meter Given (vs C-Moon): ??? |
| BnB utilizing her Airdash into her combo. Use this if you use 5C in a ground combo and you only have 6C to follow up after 2C. |
|
|
| Normal starter, grounded opponent
|
- 2B > 5C > 2C > 6B > j.[C]B > j.66 > j.BB > j.236A > land > j.AAC > j.66 > j.BB > j.236B > 623A / 236A~236A
|
???
|
| |
| Meter Gained: ??? |
Meter Given (vs C-Moon): ??? |
| Advanced midscreen route. Excellent meter build, solid damage and full corner carry into oki from anywhere. j.[C]B must be delayed slightly to obtain the correct height. Significantly more difficult than other options. |
|
|
| Raw Airthrow
|
- Raw AT > j.BB > j.236A > land > j.ABC > Ender
|
???
|
| |
| Meter Gained: ??? |
Meter Given (vs C-Moon): ??? |
| Basic airthrow combo. |
|
|
| Raw Airthrow
|
- Raw AT > 5A > 6C > j.B > j.C > sdj j.C > airdash j.B~B
|
???
|
| |
| Meter Gained: ??? |
Meter Given (vs C-Moon): ??? |
| a an easier combo with more corner carry |
|
|
Midscreen to Corner
| Condition
|
Notation
|
Damage
vs V.Sion
|
Notes
|
|
| Normal starter, grounded opponent
|
- 2A > 2B > 5C > 2C > 6B > j.[C]AB > dj.ABB > j.236B > 623A / 236A~236A
|
4524
(2B starter)
|
|
| Meter Gained: +101.5 |
Meter Given (vs C-Moon): +33.4 |
(Video) |
| Single yaya combo. Corner carries from midscreen; if you're not in the corner by the time you get to j.236B do a standard aircombo ender instead. 623A ender has stricter height requirements than 236A~A. |
|
|
| Normal starter, grounded opponent
|
- 2A > 2B > 5C > 2C > 6B > j.[C]AB > dj.ABB > j.236B > land > j.AAC > j.66 > j.ABB > j.236B > 623A / 236A~236A
|
???
|
| |
| Meter Gained: ??? |
Meter Given (vs C-Moon): ??? |
| Yaya loop. Corner carries from midscreen. 623A ender has stricter height requirements. |
|
|
| Raw AT
|
- Raw AT > 5A > 6C > j.B > j.C > sdj j.C airdash j.B~B
|
???
|
| |
| Meter Gained: ??? |
Meter Given (vs C-Moon): ??? |
| one of the basics air throw combos |
|
|
Corner
| Condition
|
Notation
|
Damage
vs V.Sion
|
Notes
|
|
| Normal starter, grounded opponent
|
- 2A > 2B > 5C > 6CC > 236C > delay 5A > 6C > j.BC > Ender
|
???
|
| |
| Meter Gained: ??? |
Meter Given (vs C-Moon): ??? |
| Corner BnB using her 6CC236C frying pan series. |
|
|
| Normal starter, grounded opponent
|
- 2A > 2B > 2C > 5C/6C > j.C > j.66 > j.BB > j.236B > land > j.AC > j.66 > j.BB > j.236B > land > 623A / 236A~236A
|
???
|
| |
| Meter Gained: ??? |
Meter Given (vs C-Moon): ??? |
| Basic double yaya combo. Great for meter gain, decent damage, and assuring a bento setup in the corner. For best results, delay the 2nd B of the j.BB. |
|
|
| Normal starter, grounded opponent
|
- 6[C]C~236C > 5A > j.AC > j.66 > j.BB > j.236B > land > j.AC > j.66 > j.BB > j.236B > land > 623A / 236A~236A
|
???
|
| |
| Meter Gained: ??? |
Meter Given (vs C-Moon): ??? |
| Variant of the above from ground overhead. |
|
|
Metered Combos
| Condition
|
Notation
|
Damage
vs V.Sion
|
Notes
|
|
| Normal starter, grounded opponent, Midscreen only
|
- 2A > 2B > 5C(1) > 623C > 2B > 5C > delay 2B > 5C > delay 2B > 5C > 2C > 623A
|
???
|
| |
| Meter Gained: ??? |
Meter Given (vs C-Moon): ??? |
| EX Dust combo, back from AC. |
|
|
| Normal starter, grounded opponent, Midscreen only
|
- 5[C] > 623C > 5B > 5C > 5B > 5C > 5B > 2C > 5C > 6B > j.[C]B > 236A~236A
|
5263
|
| |
| Meter Gained: ??? |
Meter Given (vs C-Moon): ??? |
| Another EX Dust combo. j.[C]B must be delayed. |
|
|
| 200% or max required
|
- 2A > 2A > 2B > 2C > 6B > j.[C] > delay j.A > 236C > 2C > 22C > OTG 2AAA2B2C > 22A
|
5856
(Airthrow ender)
|
| |
| Meter Gained: ??? |
Meter Given (vs C-Moon): ??? |
| Poison bento set up that also allows you to set up one or two 22A as well. |
|
|
Kohaku Lead
Move Descriptions
| Frame Data Help
|
| Header
|
Tooltip
|
| Move Box Colors
|
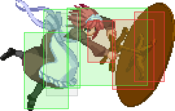
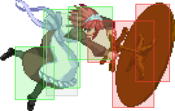
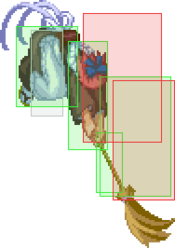
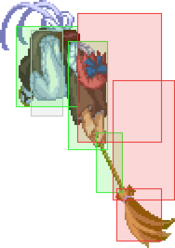
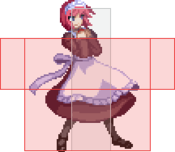
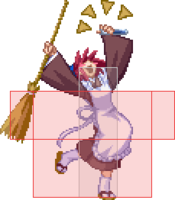
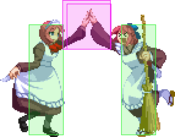
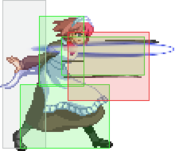
Light gray = Collision Box (A move lacking one means it can go through the opponent's own collision box).
Green: Hurt Boxes.
Red: Hit(/Grab) Boxes.
Yellow: Clash Boxes (When an active hitbox strikes a clash box, the active hitbox stops being active. Multi-hit attacks can beat clash since they will still progress to the next hitbox.)
Magenta: Projectile-reflecting boxes OR Non-hit attack trigger boxes (usually).
Blue: Reflectable Projectile Boxes.
|
| Damage
|
Base damage done by this attack.
(X) denotes combined and scaled damage tested against standing V. Sion.
|
| Red Damage
|
Damage done to the recoverable red health bar by this attack. The values are inherently scaled and tested against standing V. Sion.
(X) denotes combined damage.
|
| Proration
|
The correction value set by this attack and the way it modifies the scaling during a string. See this page for more details.
X% (O) means X% Overrides the previous correction value in a combo if X is of a lower percentage.
X% (M) means the current correction value in a combo will be Multiplied by X%. This can also be referred to as relative proration.
|
| Circuit
|
Meter gained by this attack on hit.
(X%) denotes combined meter gain.
-X% denotes a meter cost.
|
| Cancel
|
Actions this move can be cancelled into.
SE = Self cancelable.
N = Normal cancelable.
SP = Special cancelable.
CH = Cancelable into the next part of the same attack (Chain in case of specials).
EX = EX cancelable.
J = Jump cancelable.
(X) = Cancelable only on hit.
-X- = Cancelable on whiff.
|
| Guard
|
The way this move must be blocked.
L = Can block crouching
H = Can block standing.
A = Can block in the air.
U = Unblockable.
|
| Startup
|
Amount of frames that must pass prior to reaching the active frames. Also referred to as "True Startup".
|
| Active
|
The amount of frames that this move will have a hitbox.
(x) denotes frame gaps where there are no hitboxes is present. Due to varied blockstuns, (x) frames are difficult to use to determine punish windows. Generally the larger the numbers, the more time you have to punish.
X denotes active frames with a duration separate from its origin move's frame data, such as projectile attacks. In this case, the total length of the move is startup+recovery only.
|
| Recovery
|
Frames that this move has after the active frames if not canceled. The character goes into one frame where they can block but not act afterwards, which is not counted here.
|
| Advantage
|
The difference in frames where you can act before your opponent when this move is blocked (assuming the move isn't canceled and the first active frame is blocked).
If the opponent uses a move with startup that is at least 2 frames less than this move's negative advantage, it will result in the opponent hitting that move.
±x~±y denotes a range of possible advantages.
|
| Invul
|
Lists any defensive properties this move has.
X y~z denotes X property happening between the y to z frames of the animations. If no frames are noted, it means the invincibility lasts through the entire move.
Invicibility:
- Strike = Strike invincible.
- Throw = Throw invincible.
Hurtbox-Based Properties:
- Full = No hurtboxes are present.
- High = Upper body lacks a hurtbox.
- Low = Lower body lacks a hurtbox.
Miscellaneous Properties
- Clash = Frames in which clash boxes are active.
- Reflect = Frames in which projectile-reflecting boxes are active.
- Super Armor = Frames in which the character can take hits without going into hit stun.
|
Note: Move inputs in this section will be preceded by H/K for Hisui lead/Kohaku lead respectively.
Normal Moves
Standing Normals
|
|
| Damage
|
Red Damage
|
Proration
|
Cancel
|
Guard
|
| 300
|
156
|
78% (O)
|
-SE-, -N-, -SP-, -EX-, (J)
|
LH
|
| First Active
|
Active
|
Recovery
|
Frame Adv
|
Circuit
|
Invuln
|
| 4
|
4
|
8
|
0
|
3.0%
|
-
|
|
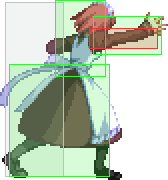
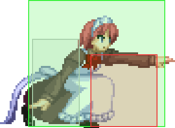
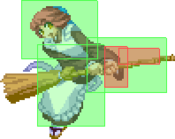
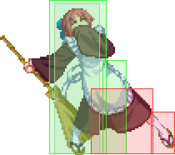
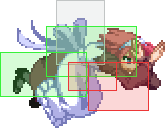
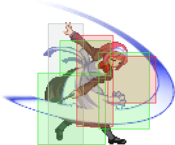
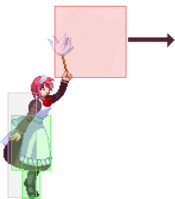
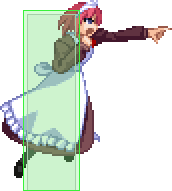
Hisui slap. Whiffs on crouching characters except for Warachia, Hime and Nero.
|
|
|
|
| Damage
|
Red Damage
|
Proration
|
Cancel
|
Guard
|
| 350
|
166
|
78% (O)
|
-SE-, -N-, -SP-, -EX-, (J)
|
LH
|
| First Active
|
Active
|
Recovery
|
Frame Adv
|
Circuit
|
Invuln
|
| 4
|
4
|
8
|
0
|
3.5%
|
-
|
|
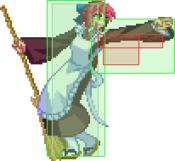
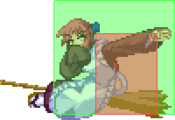
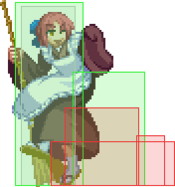
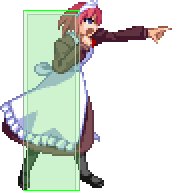
Kohaku jab.
|
|
|
|
| Damage
|
Red Damage
|
Proration
|
Cancel
|
Guard
|
| 600
|
539
|
80% (O)
|
N, SP, EX, (J)
|
LH
|
| First Active
|
Active
|
Recovery
|
Frame Adv
|
Circuit
|
Invuln
|
| 8
|
6
|
13
|
-4
|
7.0%
|
-
|
|
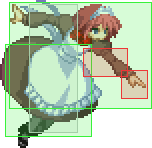
Hisui pushes the opponent back with her palm.
|
|
|
|
| K5B
|
Damage
|
Red Damage
|
Proration
|
Cancel
|
Guard
|
| 600
|
392
|
70% (O)
|
N, SP, EX, (J)
|
H (Whiffs vs Crouch.),
LH
|
| First Active
|
Active
|
Recovery
|
Frame Adv
|
Circuit
|
Invuln
|
| 9
|
5
|
14
|
-4 (vs Stand.)
-2 (vs Crouch.)
|
6.0%
|
-
|
|
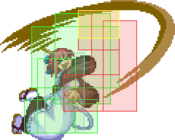
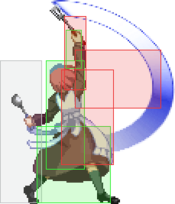
Kohaku swipes with the broom over her head.
|
| K5[B]
|
Damage
|
Red Damage
|
Proration
|
Cancel
|
Guard
|
| 1000
|
686
|
70% (O)
|
N, SP, EX, (J)
|
LH
|
| First Active
|
Active
|
Recovery
|
Frame Adv
|
Circuit
|
Invuln
|
| 18
|
8
|
12
|
-5
|
10.0%
|
-
|
|
Charged version inflicts a ground techable knockdown on air hit.
|
|
|
|
| H5C
|
Damage
|
Red Damage
|
Proration
|
Cancel
|
Guard
|
| 400, 700 (1078)
|
(866)
|
100%
|
N, SP, EX, (J)
|
LH
|
| First Active
|
Active
|
Recovery
|
Frame Adv
|
Circuit
|
Invuln
|
| 13
|
6
|
14
|
0
|
7.0%, 8.0% (15.0%)
|
-
|
|
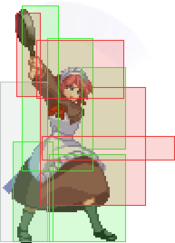
Hisui pulls a chair out of nowhere and hits the opponent over the head with it. Neutral on block.
|
| H5{C}
|
Damage
|
Red Damage
|
Proration
|
Cancel
|
Guard
|
| 400*2, 700 (1443)
|
(1132)
|
100%
|
N, SP, EX, (J)
|
LH
|
| First Active
|
Active
|
Recovery
|
Frame Adv
|
Circuit
|
Invuln
|
| 15
|
7~18
|
14
|
0
|
4.0%, 7.0%, 8.0% (19.0%)
|
-
|
|
Partial charging this will make Hisui rush forward a bit before hitting with the chair.
|
| H5[C]
|
Damage
|
Red Damage
|
Proration
|
Cancel
|
Guard
|
| 400, 600, 800 (1731)
|
(945)
|
100%
|
N, SP, EX, (J)
|
LH
|
| First Active
|
Active
|
Recovery
|
Frame Adv
|
Circuit
|
Invuln
|
| 15
|
18
|
21
|
-7
|
4.0%, 7.0%, 8.0% (19.0%)
|
-
|
|
Fully charged version goes the furthest and is more damaging.
|
|
|
|
| K5C
|
Damage
|
Red Damage
|
Proration
|
Cancel
|
Guard
|
| 900
|
686
|
90% (O)
|
N, SP, -CH-, EX, (J)
|
LH
|
| First Active
|
Active
|
Recovery
|
Frame Adv
|
Circuit
|
Invuln
|
| 8
|
6
|
18
|
-9
|
6.0%
|
-
|
|
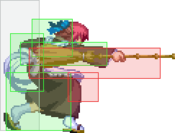
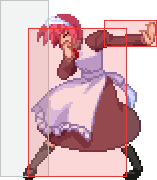
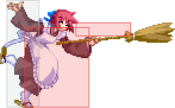
Kohaku stabs with the broom handle.
|
| K5C~C
|
Damage
|
Red Damage
|
Proration
|
Cancel
|
Guard
|
| 150*3, 800 (1160)
|
(451)
|
100%*3, 60% (M)
|
N, SP, EX, (J)
|
LHA
|
| First Active
|
Active
|
Recovery
|
Frame Adv
|
Circuit
|
Invuln
|
| 3
|
10
|
29
|
-15
|
1.0%*4 (4.0%)
|
-
|
|
After 5C, Kohaku does a twirl with her broom handle for 4 hits, with the last hit launching them.
|
|
Crouching Normals
|
|
| Damage
|
Red Damage
|
Proration
|
Cancel
|
Guard
|
| 300
|
137
|
75% (O)
|
-SE-, -N-, -SP-, -EX-, (J)
|
LH
|
| First Active
|
Active
|
Recovery
|
Frame Adv
|
Circuit
|
Invuln
|
| 5
|
4
|
8
|
0
|
3.0%
|
-
|
|
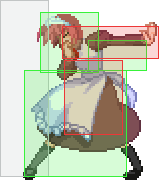
Hisui quickly chops at the opponent's knees from a crouching position. Hits mid.
|
|
|
|
| Damage
|
Red Damage
|
Proration
|
Cancel
|
Guard
|
| 300
|
98
|
75% (O)
|
-SE-, -N-, -SP-, -EX-, (J)
|
L
|
| First Active
|
Active
|
Recovery
|
Frame Adv
|
Circuit
|
Invuln
|
| 4
|
4
|
8
|
0
|
3.0%
|
-
|
|
Kohaku performs a crouching jab that hits low.
|
|
|
|
| Damage
|
Red Damage
|
Proration
|
Cancel
|
Guard
|
| 550
|
294
|
80% (O)
|
N, SP, EX, (J)
|
L
|
| First Active
|
Active
|
Recovery
|
Frame Adv
|
Circuit
|
Invuln
|
| 7
|
6
|
12
|
-3
|
6.0%
|
-
|
|
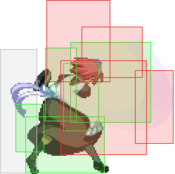
Hisui leans her body forward from a crouching position and palm strikes the opponent's legs.
|
|
|
|
| K2B
|
Damage
|
Red Damage
|
Proration
|
Cancel
|
Guard
|
| 500
|
294
|
85% (O)
|
N, SP, -CH-, EX, (J)
|
LH
|
| First Active
|
Active
|
Recovery
|
Frame Adv
|
Circuit
|
Invuln
|
| 8
|
4
|
22
|
-11
|
5.0%
|
Clash 8-11
|
|
Crouching upward broom swipe with a clash box on top.
|
| K2B~2B
|
Damage
|
Red Damage
|
Proration
|
Cancel
|
Guard
|
| 500
|
313
|
85% (O)
|
N, SP, EX, (J)
|
L
|
| First Active
|
Active
|
Recovery
|
Frame Adv
|
Circuit
|
Invuln
|
| 7
|
4
|
17
|
-6
|
5.0%
|
-
|
|
Low hit command followup to 2B.
|
|
|
|
| Damage
|
Red Damage
|
Proration
|
Cancel
|
Guard
|
| 1000
|
637
|
60% (O)
|
N, SP, EX, (J)
|
L
|
| First Active
|
Active
|
Recovery
|
Frame Adv
|
Circuit
|
Invuln
|
| 9
|
3
|
23
|
-8
|
11.0%
|
-
|
|
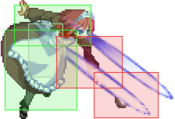
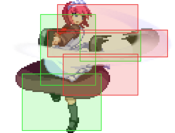
Hisui reaches behind her and drop step swishes at the opponent's feet with a water bucket and a rag, which moves her forward slightly
|
|
|
|
| K2C
|
Damage
|
Red Damage
|
Proration
|
Cancel
|
Guard
|
| 1100
|
686
|
60% (O)
|
N, SP, EX, (J)
|
L
|
| First Active
|
Active
|
Recovery
|
Frame Adv
|
Circuit
|
Invuln
|
| 10
|
4
|
24
|
-10
|
7.0%
|
-
|
|
Kohaku literally sweeps the opponent. Hits low.
|
| K2[C]
|
Damage
|
Red Damage
|
Proration
|
Cancel
|
Guard
|
| 1400
|
980
|
90% (M)
|
N, SP, EX, (J)
|
L
|
| First Active
|
Active
|
Recovery
|
Frame Adv
|
Circuit
|
Invuln
|
| 22
|
5
|
24
|
-11
|
12.0%
|
-
|
|
Charged version has a smaller hurtbox.
|
|
Aerial Normals
|
|
| Damage
|
Red Damage
|
Proration
|
Cancel
|
Guard
|
| 300
|
147
|
75% (O)
|
SE, N, SP, EX, J
|
LHA
|
| First Active
|
Active
|
Recovery
|
Frame Adv
|
Circuit
|
Invuln
|
| 5
|
4
|
10
|
-
|
4.0%
|
-
|
|
Small air jab, angled downwards.
|
|
|
|
| Damage
|
Red Damage
|
Proration
|
Cancel
|
Guard
|
| 300
|
98
|
73% (O)
|
SE, N, SP, J
|
LHA
|
| First Active
|
Active
|
Recovery
|
Frame Adv
|
Circuit
|
Invuln
|
| 5
|
4
|
10
|
-
|
3.0%
|
-
|
|
A broom handle poke in the air.
|
|
|
|
| Hj.B
|
Damage
|
Red Damage
|
Proration
|
Cancel
|
Guard
|
| 600
|
294
|
90% (O)
|
N, SP, -CH-, EX, J
|
HA
|
| First Active
|
Active
|
Recovery
|
Frame Adv
|
Circuit
|
Invuln
|
| 6
|
5
|
-
|
-
|
5.0%
|
-
|
|
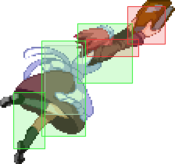
A fast book slash aimed upwards.
|
| Hj.B~B
|
Damage
|
Red Damage
|
Proration
|
Cancel
|
Guard
|
| 700
|
392
|
100%
|
SP, EX
|
LHA
|
| First Active
|
Active
|
Recovery
|
Frame Adv
|
Circuit
|
Invuln
|
| 6
|
3
|
-
|
-
|
6.5%
|
-
|
|
Followup to j.B. Stalls your vertical air momentum
|
|
|
|
| Damage
|
Red Damage
|
Proration
|
Cancel
|
Guard
|
| 680
|
392
|
90% (O)
|
N, SP, J
|
HA
|
| First Active
|
Active
|
Recovery
|
Frame Adv
|
Circuit
|
Invuln
|
| 8
|
4
|
-
|
-
|
5.0%
|
-
|
|
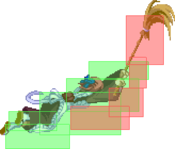
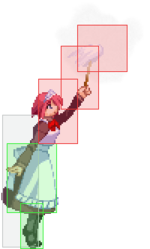
A blazingly fast upward broom swipe that has a truly staggering range.
|
|
|
|
| Hj.C
|
Damage
|
Red Damage
|
Proration
|
Cancel
|
Guard
|
| 1000
|
441
|
90% (M)
|
N, SP, EX, J
|
HA
|
| First Active
|
Active
|
Recovery
|
Frame Adv
|
Circuit
|
Invuln
|
| 10
|
4
|
-
|
-
|
11.0%
|
-
|
|
A downward slam with a table pulled out of nowhere.
|
| Hj.[C]
|
Damage
|
Red Damage
|
Proration
|
Cancel
|
Guard
|
| 1200
|
588
|
95% (O)
|
N, SP, EX, J
|
HA
|
| First Active
|
Active
|
Recovery
|
Frame Adv
|
Circuit
|
Invuln
|
| 21
|
4
|
-
|
-
|
15.0%
|
-
|
|
Charged version of j.C. Hard knockdown.
|
|
|
|
| Kj.C
|
Damage
|
Red Damage
|
Proration
|
Cancel
|
Guard
|
| 1000
|
637
|
70% (O)
|
N, SP, J
|
HA
|
| First Active
|
Active
|
Recovery
|
Frame Adv
|
Circuit
|
Invuln
|
| 10
|
3
|
-
|
-
|
10.0%
|
-
|
|
A downward broom swipe. Techable knockdown on air hit.
|
| Kj.[C]
|
Damage
|
Red Damage
|
Proration
|
Cancel
|
Guard
|
| 1050
|
686
|
80% (M)
|
N, SP, J
|
HA
|
| First Active
|
Active
|
Recovery
|
Frame Adv
|
Circuit
|
Invuln
|
| 28
|
3
|
-
|
-
|
5.0%
|
-
|
|
Charged version ground bounces on air hit.
|
|
Command Normals
|
|
| H4B
|
Damage
|
Red Damage
|
Proration
|
Cancel
|
Guard
|
| 100
|
98
|
100%
|
-
|
U
(Whiffs vs Crouch.)
|
| First Active
|
Active
|
Recovery
|
Frame Adv
|
Circuit
|
Invuln
|
| 16
|
4
|
17
|
-
|
6.0%, 5.0% (11.0%)
|
-
|
| H4[B] (Max)
|
Damage
|
Red Damage
|
Proration
|
Cancel
|
Guard
|
| 100
|
98
|
100%
|
-
|
U
(Whiffs vs Crouch.)
|
| First Active
|
Active
|
Recovery
|
Frame Adv
|
Circuit
|
Invuln
|
| 16
|
4 (13) 3 (13) 3 (13) 3 (13) 3
|
17
|
-
|
6.0%, 5.0%*5 (31.0%)
|
-
|
|
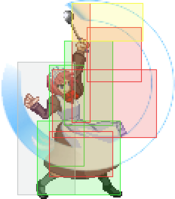
The watering can. Has a massive deadzone in front of Hisui. It only hits where the water hits the ground. On contact, the opponent will lose around 12% meter. Holding this attack will make the meter drain effect happen up to 5 times. Inflicts untechable knockdown unless the opponent is crouching.
|
|
|
|
| K4B
|
Damage
|
Red Damage
|
Proration
|
Cancel
|
Guard
|
| 800
|
490
|
80% (O)
|
N, SP, EX, (J)
|
L
|
| First Active
|
Active
|
Recovery
|
Frame Adv
|
Circuit
|
Invuln
|
| 7
|
5
|
10
|
0
|
8.0%
|
-
|
|
A small low kick.
|
| K4[B]
|
Damage
|
Red Damage
|
Proration
|
Cancel
|
Guard
|
| 1000
|
784
|
55% (O)
|
N, SP, EX, (J)
|
LH
|
| First Active
|
Active
|
Recovery
|
Frame Adv
|
Circuit
|
Invuln
|
| 27
|
5
|
10
|
1
|
10.0%
|
-
|
|
A charged kick that hits mid and vacuums the opponent in on block or trips on hit.
|
|
|
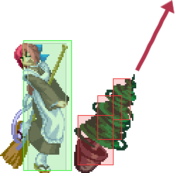
|
| Damage
|
Red Damage
|
Proration
|
Cancel
|
Guard
|
| 800
|
441
|
65% (O)
|
N, SP, EX, (J)
|
LH
|
| First Active
|
Active
|
Recovery
|
Frame Adv
|
Circuit
|
Invuln
|
| 15
|
5
|
16
|
-6
|
6.0%
|
Clash 15-19
|
|
Ladle launcher.
|
|
|
|
| Hj.2C
|
Damage
|
Red Damage
|
Proration
|
Cancel
|
Guard
|
| 600
|
294
|
100%
|
-
|
LHA
|
| First Active
|
Active
|
Recovery
|
Frame Adv
|
Circuit
|
Invuln
|
| 15
|
X
|
4
|
8 (TK)
|
5.0%
|
-
|
|
Hisui launches a Thunder Cross Split Attack without fooling the opponent first. This attack can be blocked while crouching.
|
| Hj.2[C]
|
Damage
|
Red Damage
|
Proration
|
Cancel
|
Guard
|
| 1000
|
686
|
70% (O)
|
-
|
LHA
|
| First Active
|
Active
|
Recovery
|
Frame Adv
|
Circuit
|
Invuln
|
| 24
|
X
|
4
|
12 (TK)
|
7.0%
|
-
|
|
Charged version. Can still be blocked crouching.
|
|
Universal Mechanics
|
|
| Hisui/Kohaku
|
Damage
|
Red Damage
|
Proration
|
Cancel
|
Guard
|
| 1000
|
490
|
100%
|
-
|
U
|
| First Active
|
Active
|
Recovery
|
Frame Adv
|
Circuit
|
Invuln
|
| 3
|
1
|
20
|
-
|
0.0%
|
-
|
|
Both maids' ground throws function the same. Untechable knockdown.
|
|
|
|
| Hisui
|
Damage
|
Red Damage
|
Proration
|
Cancel
|
Guard
|
| 1600 (Raw)/1200
|
474
|
30%
|
-
|
U
|
| First Active
|
Active
|
Recovery
|
Frame Adv
|
Circuit
|
Invuln
|
| 2
|
1
|
12
|
-
|
0.0%
|
-
|
|
Hisui takes the opponent to the ground with her. Results in a sideswitch. Ground techable if done as a combo ender.
|
| Kohaku
|
Damage
|
Red Damage
|
Proration
|
Cancel
|
Guard
|
| 1600 (Raw)/1300
|
588
|
30%
|
-
|
U
|
| First Active
|
Active
|
Recovery
|
Frame Adv
|
Circuit
|
Invuln
|
| 2
|
1
|
12
|
-
|
0.0%
|
-
|
|
Ground bounces the opponnent using a 16-ton weight.
|
|
|
|
| Hisui/Kohaku
|
Damage
|
Red Damage
|
Proration
|
Cancel
|
Guard
|
| 500
|
196
|
50%
|
-
|
LHA
|
| First Active
|
Active
|
Recovery
|
Frame Adv
|
Circuit
|
Invuln
|
| 26
|
4
|
19
|
-5
|
0.0%
(-50.0% in blockstun)
|
Clash 1-10
|
| (Clash)
|
Damage
|
Red Damage
|
Proration
|
Cancel
|
Guard
|
| 500
|
196
|
50%
|
-
|
LHA
|
| First Active
|
Active
|
Recovery
|
Frame Adv
|
Circuit
|
Invuln
|
| 8
|
4
|
19
|
-5
|
0.0%/-50.0%
|
Strike 1-7
|
|
Hisui performs her 5B as a shield bunker.
Kohaku performs a flaming Battou swipe.
|
|
|
|
| Hisui/Kohaku
|
Damage
|
Red Damage
|
Proration
|
Cancel
|
Guard
|
| 100
|
0
|
100%
|
-
|
U
|
| First Active
|
Active
|
Recovery
|
Frame Adv
|
Circuit
|
Invuln
|
| 16
|
7
|
25
|
-
|
-100.0% (min)
|
Full 1-22
|
|
Both maids have the same Heat frame data.
|
|
|
|
| Ground
|
Damage
|
Red Damage
|
Proration
|
Cancel
|
Guard
|
| 100
|
0
|
100%
|
-
|
U
|
| First Active
|
Active
|
Recovery
|
Frame Adv
|
Circuit
|
Invuln
|
| 11
|
10
|
20
|
-
|
removes all
|
Full 1-39
|
| Air
|
Damage
|
Red Damage
|
Proration
|
Cancel
|
Guard
|
| 100
|
0
|
100%
|
-
|
U
|
| First Active
|
Active
|
Recovery
|
Frame Adv
|
Circuit
|
Invuln
|
| 12
|
10
|
15
|
-
|
removes all
|
Strike 1-30
|
|
Universal burst mechanic. Unlike Crescent/Full Heat activation, the hitbox and frame data doesn't vary between characters. However, you can be thrown out of this move if you input it in the air.
|
|
Special Moves
|
|
| Damage
|
Red Damage
|
Proration
|
Cancel
|
Guard
|
| -
|
-
|
-
|
-
|
-
|
| First Active
|
Active
|
Recovery
|
Frame Adv
|
Circuit
|
Invuln
|
| -
|
-
|
~20 (min)
|
-
|
-
|
-
|
|
Tags in the other sister.
|
|
Hisui Specials
A/B A/B ~236A ~236A ~236B/C ~236B/C EX EX
|
| A
|
Damage
|
Red Damage
|
Proration
|
Cancel
|
Guard
|
| 320*6 (1770)
|
(538)
|
100%
|
-CH-
|
LHA
|
| First Active
|
Active
|
Recovery
|
Frame Adv
|
Circuit
|
Invuln
|
| 9
|
22
|
10
|
-2
|
2.0%*6 (12.0%)
|
-
|
| B
|
Damage
|
Red Damage
|
Proration
|
Cancel
|
Guard
|
| 250*9 (1965)
|
(766)
|
100%
|
-CH-
|
LHA
|
| First Active
|
Active
|
Recovery
|
Frame Adv
|
Circuit
|
Invuln
|
| 13
|
33
|
4
|
4
|
1.2%*9 (10.8%)
|
-
|
|
Yayaya ladle jab series.
A: Hits 6 times.
B: Hits 9 times.
|
| ~236A
|
Damage
|
Red Damage
|
Proration
|
Cancel
|
Guard
|
| 600
|
392
|
100%
|
-EX-
|
LH
|
| First Active
|
Active
|
Recovery
|
Frame Adv
|
Circuit
|
Invuln
|
| 9
|
3
|
19
|
-4
|
4.0%
|
-
|
| ~236B/C
|
Damage
|
Red Damage
|
Proration
|
Cancel
|
Guard
|
| 600
|
392
|
50% (O)
|
-EX-, (J)
|
LH
|
| First Active
|
Active
|
Recovery
|
Frame Adv
|
Circuit
|
Invuln
|
| 7
|
4
|
19
|
-8
|
4.0%
|
-
|
|
Follow-ups to her 236X series. Only works from the grounded version.
A: Knocks down.
B/C: Launches with a spatula. Jump cancelable. If input with C, this is what you get.
|
| EX
|
Damage
|
Red Damage
|
Proration
|
Cancel
|
Guard
|
| 200*12, 600 (2358)
|
(1701)
|
100%, 75% (O)
|
-
|
LHA
|
| First Active
|
Active
|
Recovery
|
Frame Adv
|
Circuit
|
Invuln
|
| 2+6
|
44 (7) 4
|
24
|
-16
|
-100.0%
|
Full 1-5
|
|
Hits 12 times, and then ends with an uppercut that is fully untechable.
|
|
A/B A/B EX EX
|
| A
|
Damage
|
Red Damage
|
Proration
|
Cancel
|
Guard
|
| 250*8 (1778)
|
(831)
|
100%
|
EX
|
LHA
|
| First Active
|
Active
|
Recovery
|
Frame Adv
|
Circuit
|
Invuln
|
| 9
|
16
|
0
|
10 (TK)
|
1.5%*8 (12.0%)
|
-
|
|
Air yayaya series.
Hits 8 times.
|
| B
|
Damage
|
Red Damage
|
Proration
|
Cancel
|
Guard
|
| 250*12 (2479)
|
(1158)
|
100%
|
EX
|
LHA
|
| First Active
|
Active
|
Recovery
|
Frame Adv
|
Circuit
|
Invuln
|
| 13
|
24
|
0
|
10 (TK)
|
1.5%*12 (18.0%)
|
-
|
|
Hits 12 times. An integral part of her Ayayaya loops due to it's high untech.
|
| EX
|
Damage
|
Red Damage
|
Proration
|
Cancel
|
Guard
|
| 250*N
|
176*N
|
100%
|
-
|
LHA
|
| First Active
|
Active
|
Recovery
|
Frame Adv
|
Circuit
|
Invuln
|
| 3+4
|
X
|
0
|
10 (TK)
|
-100.0%
|
Full 1-6
|
|
Keeps hitting until it reaches the ground.
|
|
|
|
| A
|
Damage
|
Red Damage
|
Proration
|
Cancel
|
Guard
|
| 650*2 (1279)
|
(578)
|
100%
|
EX
|
LH
|
| First Active
|
Active
|
Recovery
|
Frame Adv
|
Circuit
|
Invuln
|
| 12
|
2 (9) 4
|
10
|
-4
|
5.0%*2 (10.0%)
|
-
|
|
Hisui waves her duster directly in front of her. Untechable knockdown.
|
| B
|
Damage
|
Red Damage
|
Proration
|
Cancel
|
Guard
|
| 800
|
392
|
70% (O)
|
EX
|
LH
|
| First Active
|
Active
|
Recovery
|
Frame Adv
|
Circuit
|
Invuln
|
| 11
|
2 (8) 4
|
17
|
-19, -9
|
8.0%
|
High 1-32
|
|
Dusts above her head. Launches instead of knocking down. Has upper body invincibility.
|
[B]
(Projectile)
|
Damage
|
Red Damage
|
Proration
|
Cancel
|
Guard
|
800
500*3 (1662)
|
392
(1068)
|
70% (O)
|
EX
|
LH
LHA
|
| First Active
|
Active
|
Recovery
|
Frame Adv
|
Circuit
|
Invuln
|
22
23
|
2 (8) 4
45
|
11
|
-13, -3
-
|
8.0%
5.0%*3 (23.0%)
|
High 1-44
|
|
Charged version spawns a dust cloud projectile in the air.
|
| EX
|
Damage
|
Red Damage
|
Proration
|
Cancel
|
Guard
|
| 500*N
|
490*N
|
80% (M)
|
-
|
LHA
|
| First Active
|
Active
|
Recovery
|
Frame Adv
|
Circuit
|
Invuln
|
| 1+2
|
152
|
1+31
|
-2 (min)
|
-100.0%
|
Full 1
|
|
Spawns an extremely quick, multihit forward-going dust cloud.
|
|
A A B B C C
|
| A
|
Damage
|
Red Damage
|
Proration
|
Cancel
|
Guard
|
| 280*8 (1724)
|
(782)
|
-4%*8
|
-
|
LHA
|
| First Active
|
Active
|
Recovery
|
Frame Adv
|
Circuit
|
Invuln
|
| 112
|
32
|
59
|
-
|
3.0%*8 (24.0%)
|
-
|
|
Hisui commands Kohaku to perform one of her moves.
B Plant assist.
|
| B
|
Damage
|
Red Damage
|
Proration
|
Cancel
|
Guard
|
| 600*3 (1743)
|
(853)
|
100%*2, 80% (O)
|
-
|
LHA
|
| First Active
|
Active
|
Recovery
|
Frame Adv
|
Circuit
|
Invuln
|
| 73 ~ 74
|
2 (2) 2 (2) 8
|
47
|
-
|
6.0%*3 (18.0%)
|
-
|
|
214 assist.
|
| C
|
Damage
|
Red Damage
|
Proration
|
Cancel
|
Guard
|
| 800*2 (1265)
|
(619)
|
60% (O)
|
-
|
LHA
|
| First Active
|
Active
|
Recovery
|
Frame Adv
|
Circuit
|
Invuln
|
66
(min)
|
6
|
47
|
-
|
8.0%*2 (16.0%)
|
Clash 60-64, 67-72*
|
|
Kohaku dashes toward the opponent and performs a multi-hit j.C assist.
|
|
Same assist hitboxes as grounded version. Same assist hitboxes as grounded version.
|
| A
|
Damage
|
Red Damage
|
Proration
|
Cancel
|
Guard
|
| 280*8 (1724)
|
(782)
|
-4%*8
|
-
|
LHA
|
| First Active
|
Active
|
Recovery
|
Frame Adv
|
Circuit
|
Invuln
|
| 112
|
32
|
14
|
-
|
3.0%*8 (24.0%)
|
-
|
| B
|
Damage
|
Red Damage
|
Proration
|
Cancel
|
Guard
|
| 600*3 (1743)
|
(853)
|
100%*2, 80% (O)
|
-
|
LHA
|
| First Active
|
Active
|
Recovery
|
Frame Adv
|
Circuit
|
Invuln
|
| 73 ~ 74
|
2 (2) 2 (2) 8
|
14
|
-
|
6.0%*3 (18.0%)
|
-
|
| C
|
Damage
|
Red Damage
|
Proration
|
Cancel
|
Guard
|
| 800*2 (1265)
|
(619)
|
60% (O)
|
-
|
LHA
|
| First Active
|
Active
|
Recovery
|
Frame Adv
|
Circuit
|
Invuln
|
66
(min)
|
6
|
14
|
-
|
8.0%*2 (16.0%)
|
Clash 60-64, 67-72*
|
|
Aerial Kohaku assist series. Identical to the grounded version.
|
|
|
|
A/B
(Explosion)
|
Damage
|
Red Damage
|
Proration
|
Cancel
|
Guard
|
| 600
|
392
|
50% (O)
|
-
|
LH
|
| First Active
|
Active
|
Recovery
|
Frame Adv
|
Circuit
|
Invuln
|
92
9/93
|
180
2
|
50
|
-
|
8.0%
|
-
|
|
Hisui puts down a mat with a Bento box on it. The mat explodes if the opponent comes in contact with it.
A: Plunks a mat down right in front of her.
B: Plunks a mat down right where the A version ends.
|
EX
(Explosion)
|
Damage
|
Red Damage
|
Proration
|
Cancel
|
Guard
|
| 1800
|
1176
|
50% (O)
|
-
|
LH
|
| First Active
|
Active
|
Recovery
|
Frame Adv
|
Circuit
|
Invuln
|
6+79
80
|
180
2
|
6+29
|
-
|
-100.0%
|
-
|
|
Hisui puts down a BIG mat. The explosion is completely untechable and it poisons on hit.
|
|
|
|
| H6C
|
Damage
|
Red Damage
|
Proration
|
Cancel
|
Guard
|
| 750
|
490
|
75% (O)
|
N, SP, -CH-, EX, (J)
|
LH
|
| First Active
|
Active
|
Recovery
|
Frame Adv
|
Circuit
|
Invuln
|
| 15
|
3
|
21
|
-6
|
7.0%
|
-
|
|
Pan uppercut. Can Reverse Beat from it.
|
| H6C~6C
|
Damage
|
Red Damage
|
Proration
|
Cancel
|
Guard
|
| 600
|
392
|
100%
|
-CH-
|
LH
|
| First Active
|
Active
|
Recovery
|
Frame Adv
|
Circuit
|
Invuln
|
| 13
|
4
|
20
|
-6
|
6.0%
|
-
|
|
Second hit of the pan rekka.
|
| H6C~6[C]
|
Damage
|
Red Damage
|
Proration
|
Cancel
|
Guard
|
| 1200
|
784
|
100%
|
-CH-
|
H
|
| First Active
|
Active
|
Recovery
|
Frame Adv
|
Circuit
|
Invuln
|
| 24
|
4
|
20
|
-6
|
10.0%
|
-
|
|
Charged followup becomes an overhead.
|
| H6C~6C/6[C]~236C
|
Damage
|
Red Damage
|
Proration
|
Cancel
|
Guard
|
| 800
|
686
|
50% (O)
|
-
|
LH
|
| First Active
|
Active
|
Recovery
|
Frame Adv
|
Circuit
|
Invuln
|
| 14
|
6
|
21
|
-9
|
6.0%
|
-
|
|
Rekka ender. Wallslams on hit.
|
|
Kohaku Specials
A A [A] [A] B B [B] [B] A/[A]~A A/[A]~A B/[B]~A B/[B]~A ~B ~B ~C ~C EX EX
|
| A
|
Damage
|
Red Damage
|
Proration
|
Cancel
|
Guard
|
| 1000
|
656
|
96% (M)
|
(SP)*, -CH-, -EX-
|
LHA
|
| First Active
|
Active
|
Recovery
|
Frame Adv
|
Circuit
|
Invuln
|
| 8
|
2
|
29
|
-13
|
10.0%
|
Clash 4-5
|
| [A]
|
Damage
|
Red Damage
|
Proration
|
Cancel
|
Guard
|
| 1500
|
950
|
60% (O)
|
-CH-, -EX-
|
HA
|
| First Active
|
Active
|
Recovery
|
Frame Adv
|
Circuit
|
Invuln
|
| 29
|
2
|
44
|
-28
|
10.0%
|
-
|
|
Low slash. Charged version knocks down and is an overhead. Uncharged version can cancel into 236B on hit.
|
| B
|
Damage
|
Red Damage
|
Proration
|
Cancel
|
Guard
|
| 1000
|
656
|
70% (O)
|
-CH-, -EX-, (J)
|
LHA*
|
| First Active
|
Active
|
Recovery
|
Frame Adv
|
Circuit
|
Invuln
|
| 9
|
4
|
44
|
-24
|
3.0%
|
Clash 4-5
|
| [B]
|
Damage
|
Red Damage
|
Proration
|
Cancel
|
Guard
|
| 1200
|
980
|
70% (O)
|
-CH-, -EX-
|
LH
|
| First Active
|
Active
|
Recovery
|
Frame Adv
|
Circuit
|
Invuln
|
| 26
|
4
|
44
|
-24
|
10.0%
|
-
|
|
High slash. Charged version wallslams and is air-unblockable.
|
| A/[A]~A
|
Damage
|
Red Damage
|
Proration
|
Cancel
|
Guard
|
| 800
|
294
|
70% (O)
|
-
|
LH*
|
| First Active
|
Active
|
Recovery
|
Frame Adv
|
Circuit
|
Invuln
|
| 13
|
4
|
28
|
-18 ~ -17
|
8.0%
|
-
|
| B/[B]~A
|
Damage
|
Red Damage
|
Proration
|
Cancel
|
Guard
|
| 800
|
294
|
85% (M)
|
-
|
LH
|
| First Active
|
Active
|
Recovery
|
Frame Adv
|
Circuit
|
Invuln
|
| 13
|
10
|
40
|
-38
|
3.0%
|
-
|
| ~B
|
Damage
|
Red Damage
|
Proration
|
Cancel
|
Guard
|
| -
|
-
|
-
|
-
|
-
|
| First Active
|
Active
|
Recovery
|
Frame Adv
|
Circuit
|
Invuln
|
| -
|
-
|
35
|
-
|
-
|
-
|
| ~C
|
Damage
|
Red Damage
|
Proration
|
Cancel
|
Guard
|
| -
|
-
|
-
|
-
|
-
|
| First Active
|
Active
|
Recovery
|
Frame Adv
|
Circuit
|
Invuln
|
| -
|
-
|
18
|
-
|
-
|
-
|
|
For non-EX versions, any of these can be used on hit, whiff, or block:
- Pressing A will do a follow-up attack, launching the opponent. Will launch behind Kohaku if done from A slash, and upwards if done from B slash.
- Pressing B will do a follow-up roll.
- Pressing C during startup will cancel the attack.
|
| EX
|
Damage
|
Red Damage
|
Proration
|
Cancel
|
Guard
|
| 2000
|
1568
|
100%
|
-
|
LH
|
| First Active
|
Active
|
Recovery
|
Frame Adv
|
Circuit
|
Invuln
|
| 4+6
|
1
|
55
|
-38
|
-100.0%
|
Full 1-7
|
|
Low slash. Untechable launch.
|
|
A A B B C C
|
| A
|
Damage
|
Red Damage
|
Proration
|
Cancel
|
Guard
|
| 600
|
392
|
70% (O)
|
-
|
LH
|
| First Active
|
Active
|
Recovery
|
Frame Adv
|
Circuit
|
Invuln
|
14
(min)
|
4
|
54
|
-14
|
5.0%
|
Clash 11-12, 15-18*
|
|
Kohaku commands Hisui to perform one of her moves. All versions make Hisui dash toward the opponent before attacking.
5B assist. Air unblockable and wallslams on hit.
|
| B
|
Damage
|
Red Damage
|
Proration
|
Cancel
|
Guard
|
| 800*2 (1342)
|
(821)
|
70% (O)
|
-
|
LHA
|
| First Active
|
Active
|
Recovery
|
Frame Adv
|
Circuit
|
Invuln
|
13
(min)
|
8
|
55
|
-2
|
8.0%*2 (16.0%)
|
-
|
|
5C assist.
|
| C
|
Damage
|
Red Damage
|
Proration
|
Cancel
|
Guard
|
| 700
|
196
|
70% (M)
|
-
|
HA
|
| First Active
|
Active
|
Recovery
|
Frame Adv
|
Circuit
|
Invuln
|
25
(min)
|
4
|
56
|
-3
|
7.0%
|
Clash 12-23, 26-29*
|
|
j.C assist. An overhead unlike H214C.
|
|
A A B B C C
|
| A
|
Damage
|
Red Damage
|
Proration
|
Cancel
|
Guard
|
| 600
|
392
|
70% (O)
|
-
|
LH
|
| First Active
|
Active
|
Recovery
|
Frame Adv
|
Circuit
|
Invuln
|
22
(min)
|
4
|
14
|
-
|
5.0%
|
-
|
| B
|
Damage
|
Red Damage
|
Proration
|
Cancel
|
Guard
|
| 800*2 (1342)
|
(821)
|
70% (O)
|
-
|
LHA
|
| First Active
|
Active
|
Recovery
|
Frame Adv
|
Circuit
|
Invuln
|
25
(min)
|
8
|
14
|
-
|
8.0%*2 (16.0%)
|
-
|
| C
|
Damage
|
Red Damage
|
Proration
|
Cancel
|
Guard
|
| 1000
|
294
|
75% (M)
|
-
|
LHA
|
| First Active
|
Active
|
Recovery
|
Frame Adv
|
Circuit
|
Invuln
|
33
(min)
|
4
|
14
|
-
|
8.0%
|
-
|
|
Aerial Hisui assist series. Does not have the grounded version's clash frames, and air C assist is not an overhead.
|
|
|
|
A
(~[X])
|
Damage
|
Red Damage
|
Proration
|
Cancel
|
Guard
|
| 333*N
|
98*N
|
100%
|
-
|
LHA
|
| First Active
|
Active
|
Recovery
|
Frame Adv
|
Circuit
|
Invuln
|
57
(~58)
|
X
|
49
|
-
|
3.0%*N
|
-
|
|
Kohaku puts out a spinning pine tree that goes diagonally upwards. The take-off can be delayed by holding any button beforehand, giving you a negative-edge type attack.
|
| B
|
Damage
|
Red Damage
|
Proration
|
Cancel
|
Guard
|
| 280*8 (1724)
|
(782)
|
-4%*8
|
-
|
LHA
|
| First Active
|
Active
|
Recovery
|
Frame Adv
|
Circuit
|
Invuln
|
| 81
|
32
|
53
|
-
|
3.0%*8 (21.0%)
|
-
|
|
This version puts out a grounded multihit spinning tree.
|
| EX
|
Damage
|
Red Damage
|
Proration
|
Cancel
|
Guard
|
| 500, 250*12 (1986)
|
(1521)
|
-4%*8
|
-
|
LH (1), LHA
|
| First Active
|
Active
|
Recovery
|
Frame Adv
|
Circuit
|
Invuln
|
| 4+24
|
15 (12), 1 (7) 1 (9) x5,
1 (5) 2
|
4+34
|
-
|
-100.0%
|
Full 1-5
|
|
Pulls out a cactus that performs a series of punches. On hit, this will finish with a superflash into a wallslam hit.
|
|
|
|
| Damage
|
Red Damage
|
Proration
|
Cancel
|
Guard
|
| 800*4
|
588*4
|
80% (O)
|
-
|
LHA
|
| First Active
|
Active
|
Recovery
|
Frame Adv
|
Circuit
|
Invuln
|
| 3+114
|
X
|
3+46
|
-
|
-150.0%
|
-
|
|
Special plant that spits 4 fireballs. Will correct which way it faces if it appears behind the opponent. Costs 150% meter.
|
|
|
|
| Damage
|
Red Damage
|
Proration
|
Cancel
|
Guard
|
| 100
|
49
|
50%
|
-
|
LH
|
| First Active
|
Active
|
Recovery
|
Frame Adv
|
Circuit
|
Invuln
|
| 3+109
|
72
|
3+36
|
-
|
-150.0%
|
-
|
|
Special plant that spits a slow poison projectile. On hit, it will inflict a damage over time effect on the opponent for approx. 15 seconds, though that effect only deals recoverable damage. The DoT effect automatically ends if Kohaku is hit. Will correct which way it faces if it appears behind the opponent. Costs 150% meter.
|
|
Don't do drugs, kids, as they are a waste of meter. Don't do drugs, kids, as they are a waste of meter.
|
| Damage
|
Red Damage
|
Proration
|
Cancel
|
Guard
|
| -
|
-
|
-
|
-
|
-
|
| First Active
|
Active
|
Recovery
|
Frame Adv
|
Circuit
|
Invuln
|
| -
|
-
|
24+100
|
-
|
-100.0%
|
-
|
|
Kohaku injects herself with drugs, granting her Blood Heat and super armor during its duration. After the long super flash, there is a long startup (100f), and it can only be safely used if the opponent is under cactus lockdown. The Blood Heat lasts 300f (5 seconds), shorter than Full Moon's maximum Blood Heat duration (750f, or 12.5 seconds). The super armor completely ignores normal throws, even if you tech throw it she's still invulnerable to that, however command throws can beat it. The only way to cancel it with a throw is by attacking Kohaku during the animation before the super armor comes, with that it becomes a total waste of meter.
24f of startup, then long super flash, then 100f before it becomes active.
While cool-looking, this move has no real practical uses, unless you want to use it for memes.
|
|
Arc Drives
|
|
| Hisui
|
Damage
|
Red Damage
|
Proration
|
Cancel
|
Guard
|
| 8080 (4837)
|
(3031)
|
100%
|
-
|
LHA
|
| First Active
|
Active
|
Recovery
|
Frame Adv
|
Circuit
|
Invuln
|
| 2+4
|
4
|
29
|
-15
|
removes all
|
Full 1-9
|
| Kohaku
|
Damage
|
Red Damage
|
Proration
|
Cancel
|
Guard
|
| 7680 (4589)
|
(3140)
|
100%
|
-
|
LHA
|
| First Active
|
Active
|
Recovery
|
Frame Adv
|
Circuit
|
Invuln
|
| 2+5
|
4
|
22
|
-8
|
removes all
|
Full 1-10
|
|
Hitgrab-type Arc Drive, follows up into fast series of attacks from both maids, finishing in the assisting maid's air throw. Ends in a knockdown that's untechable if done as Hisui lead, and ground techable as Kohaku Lead.
|
|
Uncharged Uncharged Fully Charged Fully Charged
|
| (Min. Charge)
|
Damage
|
Red Damage
|
Proration
|
Cancel
|
Guard
|
| 1000*3 (2629)
|
(2577)
|
90% (M)*3
|
-
|
LH
|
| First Active
|
Active
|
Recovery
|
Frame Adv
|
Circuit
|
Invuln
|
| 3+1+2
|
X
|
25
|
27
|
removes all
|
Full 1-24
|
| (Max. Charge)
|
Damage
|
Red Damage
|
Proration
|
Cancel
|
Guard
|
| 800*8 (4668)
|
(3392)
|
95% (M)*8
|
-
|
LH
|
| First Active
|
Active
|
Recovery
|
Frame Adv
|
Circuit
|
Invuln
|
| 3+378+379
|
X
|
25
|
92
|
removes all
|
Full 1-3, 375-398
|
|
Hisui charges up and delivers a dashing blow through the opponent. If the C button is held, Hisui delays her invulnerable blast of energy, which grants the projectile more hits once it is released.
|
|
|
|
Ground
Air
|
Damage
|
Red Damage
|
Proration
|
Cancel
|
Guard
|
| 1200*2, 1600 (3682)
|
(2626)
|
100%
|
-
|
LH
|
| First Active
|
Active
|
Recovery
|
Frame Adv
|
Circuit
|
Invuln
|
36+48 (min)
30+48 (min)
|
6 (11) 3 (35) 4
|
36+38
3
|
-
|
removes all
|
-
|
|
Hisui commands Kohaku to perform her Arc Drive. Unlike the solo version, this one doesn't function like a dashing command grab and instead Kohaku automatically performs a blockable 3-hit sequence when coming in contact with the opponent. Wallslam into ground-techable knockdown on hit.
|
|
|
|
| Damage
|
Red Damage
|
Proration
|
Cancel
|
Guard
|
| 4700 (2176)
|
(859)
|
50% (O)
|
-
|
U
(Whiffs vs Air.)
|
| First Active
|
Active
|
Recovery
|
Frame Adv
|
Circuit
|
Invuln
|
| 2+15
|
X
|
Knockdown*
|
-
|
removes all
|
Full
|
|
Kohaku dashes forward at high speed and goes into a 3-hit sequence that circuit breaks and knocks the opponent down. This is an unblockable that can only be evaded jumping. If this misses, Kohaku will hit the wall and be in an untechable knockdown state that allows for the opponent to OTG you.
|
|
|
|
Ground
Air
|
Damage
|
Red Damage
|
Proration
|
Cancel
|
Guard
|
| 1000*3 (2629)
|
(2577)
|
90% (M)*3
|
-
|
LH
|
| First Active
|
Active
|
Recovery
|
Frame Adv
|
Circuit
|
Invuln
|
6+7
15+8
|
X
|
6+40
2
|
-
|
removes all
|
-
|
|
Kohaku commands Hisui to perform her Arc Drive. About the same as the solo version, but cannot be charged.
|
|
Another Arc Drives
|
|
| Damage
|
Red Damage
|
Proration
|
Cancel
|
Guard
|
| 800*8 (4668)
|
(3392)
|
95% (M)*8
|
-
|
LH
|
| First Active
|
Active
|
Recovery
|
Frame Adv
|
Circuit
|
Invuln
|
| 2+1+2
|
X
|
22
|
95
|
removes all
|
Full 1-25
|
|
Same as Arc Drive version, but it is automatically fully charged, which means it cannot be delayed.
|
|
|
|
| Damage
|
Red Damage
|
Proration
|
Cancel
|
Guard
|
| 13800 (5238)
|
(3826)
|
50%
|
-
|
U
(Whiffs vs Air.)
|
| First Active
|
Active
|
Recovery
|
Frame Adv
|
Circuit
|
Invuln
|
| 2+18
|
X
|
Knockdown*
|
-
|
removes all
|
Full
|
|
Essentially the same as Arc Drive version in the beginning, but it has much more hits and wallslams the opponent into a ground tech situation. More damage, but does not circuit break.
|
|
Last Arcs
|
|
| Damage
|
Red Damage
|
Proration
|
Cancel
|
Guard
|
| 3000 (1500 ~ 3000)
|
(1225 ~ 2254)
|
50% + 50% * remaining BH time
|
-
|
U
|
| First Active
|
Active
|
Recovery
|
Frame Adv
|
Circuit
|
Invuln
|
| 4+2
|
2
|
54
|
-
|
removes all
|
Full 1-52
|
|
Brainwasher Detective Hisui. It does somewhat low damage, but reverses the controls of the opponent for ten seconds and causes break for a staggering twenty seconds.
|
|
|
|
| Damage
|
Red Damage
|
Proration
|
Cancel
|
Guard
|
| 7000 (3500 ~ 7000)
|
2930 ~ 5374
|
50% + 50% * remaining BH time
|
-
|
U
|
| First Active
|
Active
|
Recovery
|
Frame Adv
|
Circuit
|
Invuln
|
| 4+0
|
1+1
|
16+56
|
-
|
removes all
|
Full
|
|
The final battou. Goes into a cutscene on hit. Untechable knockdown.
|
|
MBAACC Navigation
