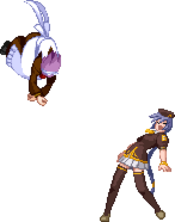
Character Page Progress
This page is still a work in progress, consider joining as an editor to help expand it. Please update this character's roadmap page when one of the editing goals have been reached.
| In Progress |
To-do
|
- Combos:
- Add damage/meter numbers or videos to combos that are missing them.
|
- Additional Ressources/Players to watch/ask
- Add any external links to ressources such as video guides or articles.
- If you know any players in particular that can be helpful for learning this character, please add them with, if possible a way to contact them (such as a Discord handle) and a name that can be searched in the match video database.
- Overview:
- Add a list of strengths and weaknesses.
|
Overview
Playstyle
 C-NecoMech is a setplay oriented character with strong oki and pressure tools. C-NecoMech is a setplay oriented character with strong oki and pressure tools. |
| Pros |
Cons |
- Strong pressure text
- Strong okizeme text
- Good meter options text
|
- Low damage text
- Reliance on Neco text
|
C-NecoMech is a setplay oriented character with strong oki and pressure tools, although she has a fairly low damage ceiling without a counter hit starter. 214X resets is what her pressure is all about, ambiguously using it in blockstrings to keep your opponent guessing if they should jump out or not during the resets, many of which are not easy to pin point the exact points where they can jump out, along side a number of frametraps and throw/low mixups. If you can force respect you can guard break your opponent very fast with her pressure, however her pressure can be accidentally ended if you're not careful and hit neco during it, as you can not use any Neco summons when Neco is knocked down.
She also has one of the best forward air dashes in the game and is a considerably fast character. She has the fastest walk speed in the game, but her back walk speed, back dash, and air back dash are considerably slower than average. She does not have the best neutral with her normals, but you will mostly be controlling space with the threat of the air unblockable Neco, which can be activated with either 623X, 6C, 6[C], or j.[C], however you can be counterhit during it if you are not careful. The best way to use the AUB Neco is from a safe position (when the opponent is knocked down or a distance away) or to punish something the opponent does from across the screen if they are not ready for it. You can hit Neco during scrambles to force favorable trades if you're feeling brave, but it's high risk medium reward at best. She also has some of the better anti air options in the game with her 5A, 22A(has clash frames and is top body invul on startup), 5C/[C], and 6C/[C](usually hitting Neco at the same time for the AUB since 6C is not AUB).
Move Descriptions
| Frame Data Help
|
| Header
|
Tooltip
|
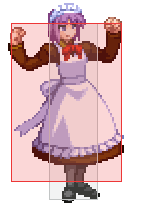
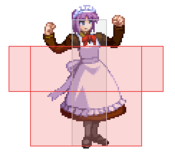
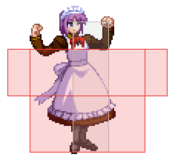
| Move Box Colors
|
Light gray = Collision Box (A move lacking one means it can go through the opponent's own collision box).
Green: Hurt Boxes.
Red: Hit(/Grab) Boxes.
Yellow: Clash Boxes (When an active hitbox strikes a clash box, the active hitbox stops being active. Multi-hit attacks can beat clash since they will still progress to the next hitbox.)
Magenta: Projectile-reflecting boxes OR Non-hit attack trigger boxes (usually).
Blue: Reflectable Projectile Boxes.
|
| Damage
|
Base damage done by this attack.
(X) denotes combined and scaled damage tested against standing V. Sion.
|
| Red Damage
|
Damage done to the recoverable red health bar by this attack. The values are inherently scaled and tested against standing V. Sion.
(X) denotes combined damage.
|
| Proration
|
The correction value set by this attack and the way it modifies the scaling during a string. See this page for more details.
X% (O) means X% Overrides the previous correction value in a combo if X is of a lower percentage.
X% (M) means the current correction value in a combo will be Multiplied by X%. This can also be referred to as relative proration.
|
| Circuit
|
Meter gained by this attack on hit.
(X%) denotes combined meter gain.
-X% denotes a meter cost.
|
| Cancel
|
Actions this move can be cancelled into.
SE = Self cancelable.
N = Normal cancelable.
SP = Special cancelable.
CH = Cancelable into the next part of the same attack (Chain in case of specials).
EX = EX cancelable.
J = Jump cancelable.
(X) = Cancelable only on hit.
-X- = Cancelable on whiff.
|
| Guard
|
The way this move must be blocked.
L = Can block crouching
H = Can block standing.
A = Can block in the air.
U = Unblockable.
|
| Startup
|
Amount of frames that must pass prior to reaching the active frames. Also referred to as "True Startup".
|
| Active
|
The amount of frames that this move will have a hitbox.
(x) denotes frame gaps where there are no hitboxes is present. Due to varied blockstuns, (x) frames are difficult to use to determine punish windows. Generally the larger the numbers, the more time you have to punish.
X denotes active frames with a duration separate from its origin move's frame data, such as projectile attacks. In this case, the total length of the move is startup+recovery only.
|
| Recovery
|
Frames that this move has after the active frames if not canceled. The character goes into one frame where they can block but not act afterwards, which is not counted here.
|
| Advantage
|
The difference in frames where you can act before your opponent when this move is blocked (assuming the move isn't canceled and the first active frame is blocked).
If the opponent uses a move with startup that is at least 2 frames less than this move's negative advantage, it will result in the opponent hitting that move.
±x~±y denotes a range of possible advantages.
|
| Invul
|
Lists any defensive properties this move has.
X y~z denotes X property happening between the y to z frames of the animations. If no frames are noted, it means the invincibility lasts through the entire move.
Invicibility:
- Strike = Strike invincible.
- Throw = Throw invincible.
Hurtbox-Based Properties:
- Full = No hurtboxes are present.
- High = Upper body lacks a hurtbox.
- Low = Lower body lacks a hurtbox.
Miscellaneous Properties
- Clash = Frames in which clash boxes are active.
- Reflect = Frames in which projectile-reflecting boxes are active.
- Super Armor = Frames in which the character can take hits without going into hit stun.
|
Normal Moves
Standing Normals
|
|
| Damage
|
Red Damage
|
Proration
|
Cancel
|
Guard
|
| 300
|
176
|
78% (O)
|
-SE-, -N-, -SP-, -EX-, (J)
|
LH
|
| First Active
|
Active
|
Recovery
|
Frame Adv
|
Circuit
|
Invuln
|
| 5
|
4
|
9
|
-1
|
3.0%
|
-
|
|
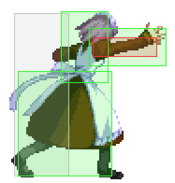
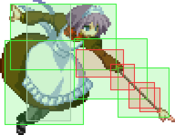
A decent ranged 5A slap that whiffs most crouchers. Will mostly be used as an anti air against IAD's or during 5[C] charges in blockstrings to purposefully whiff and then tick throw.
|
|
|
|
| Damage
|
Red Damage
|
Proration
|
Cancel
|
Guard
|
| 700
|
490
|
100%
|
N, SP, EX, (J)
|
LH
|
| First Active
|
Active
|
Recovery
|
Frame Adv
|
Circuit
|
Invuln
|
| 6
|
3
|
18
|
-3
|
7.0%
|
-
|
|
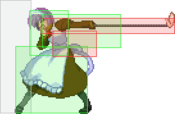
A good ranged 5B that hits crouchers when up close. Good for catching jumpouts on wakeup. Does not hit Neco.
|
|
|
|
| 5C
|
Damage
|
Red Damage
|
Proration
|
Cancel
|
Guard
|
| 300*2, 600 (981)
|
(716)
|
80% (O)
|
N, SP, EX, (J)
|
LH
|
| First Active
|
Active
|
Recovery
|
Frame Adv
|
Circuit
|
Invuln
|
| 12
|
8
|
21
|
-5
|
4.0%*2, 3.0% (11.0%)
|
-
|
|
Multi-hit chainsaw swing that can function as an anti air, but won't be used in neutral very often otherwise.
|
| 5[C]
|
Damage
|
Red Damage
|
Proration
|
Cancel
|
Guard
|
| 400, 500, 600 (1236)
|
(814)
|
80%*2 (O), 70% (O)
|
N, SP, EX, (J)
|
LH
|
| First Active
|
Active
|
Recovery
|
Frame Adv
|
Circuit
|
Invuln
|
| 15
|
18
|
21
|
-5
|
4.0%*2, 6.0% (14.0%)
|
-
|
|
Mech-Hisui charges forward with her chainsaw. The first hit has 10 extra active frames and propels her really far forward, and the later hits have a great hitbox for contesting both air and ground approaches (the speed from the charge can catch people off-guard). Should be used minimally however, since it is very easy to punish on whiff.
|
|
Crouching Normals
|
|
| Damage
|
Red Damage
|
Proration
|
Cancel
|
Guard
|
| 320
|
156
|
78% (O)
|
-SE-, -N-, -SP-, -EX-, (J)
|
LH
|
| First Active
|
Active
|
Recovery
|
Frame Adv
|
Circuit
|
Invuln
|
| 5
|
4
|
9
|
-1
|
2.8%
|
-
|
|
A crouching jab that hits mid. Range is average. For combo starters or tick throws.
|
|
|
|
| Damage
|
Red Damage
|
Proration
|
Cancel
|
Guard
|
| 500*2 (887)
|
(521)
|
80% (O)
|
N, SP, EX, (J)
|
L
|
| First Active
|
Active
|
Recovery
|
Frame Adv
|
Circuit
|
Invuln
|
| 8
|
6
|
19
|
-6
|
5.0%*2 (10.0%)
|
-
|
|
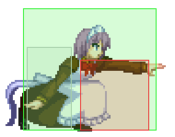
A crouching extended push with good range.
|
|
|
|
| Damage
|
Red Damage
|
Proration
|
Cancel
|
Guard
|
| 1000
|
686
|
60% (O)
|
N, SP, EX, (J)
|
L
|
| First Active
|
Active
|
Recovery
|
Frame Adv
|
Circuit
|
Invuln
|
| 13
|
3
|
28
|
-13
|
10.0%
|
-
|
|
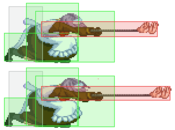
A laser sword sweep. Has deceptively good range and can catch people off guard with it, especially if you use it as a meaty from a distance away.
|
|
Jumping Normals
|
|
| Damage
|
Red Damage
|
Proration
|
Cancel
|
Guard
|
| 300
|
196
|
80% (O)
|
SE, N, J
|
LHA
|
| First Active
|
Active
|
Recovery
|
Frame Adv
|
Circuit
|
Invuln
|
| 7
|
4
|
7
|
-
|
2.0%
|
-
|
|
A diagonal downward pointing air jab that hits mid. This move is not that great for most neutral situations and you're really better off using j.B or j.C.
|
|
|
|
| Damage
|
Red Damage
|
Proration
|
Cancel
|
Guard
|
| 500
|
196
|
80% (O)
|
N, J
|
HA
|
| First Active
|
Active
|
Recovery
|
Frame Adv
|
Circuit
|
Invuln
|
| 6
|
4
|
-
|
-
|
2.0%
|
-
|
|
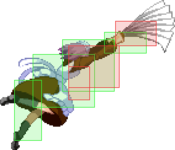
A diagonal upward pointing fan swing with good range. You'll be fishing for tons of counter hits with this move. j.C > j.B also serves as a double overhead against opponents on the ground.
|
|
j.Cj.[C]
([C] Launches Neco)
|
| j.C
|
Damage
|
Red Damage
|
Proration
|
Cancel
|
Guard
|
| 900
|
637
|
90% (M)
|
N, J
|
HA
|
| First Active
|
Active
|
Recovery
|
Frame Adv
|
Circuit
|
Invuln
|
| 11
|
7
|
-
|
-
|
6.0%
|
-
|
|
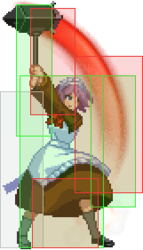
A hammer swing covering horizontal and a bit of diagonal downward space. Your main air to ground move, as well as covering spots where j.B can not.
|
| j.[C]
|
Damage
|
Red Damage
|
Proration
|
Cancel
|
Guard
|
| 1600
|
1078
|
100%
|
N, J
|
HA
|
| First Active
|
Active
|
Recovery
|
Frame Adv
|
Circuit
|
Invuln
|
| 27
|
8
|
-
|
-
|
14.0%
|
-
|
|
Charged hammer swing with less green that is hard bounce on aerial hit, and sends Neco flying up into the air on hit. You'll be using this move a lot to hit Neco in order to control air space, so be wary of being counter hit out of it as it does have considerable start up. However, you can also play around this by using j.C instead to hit your opponent earlier if they expect j.[C]. Because of its long start up, you can also whiff this move on landing for tick throws.
|
|
Command Normals
|
|
| 6C
|
Damage
|
Red Damage
|
Proration
|
Cancel
|
Guard
|
| 800
|
490
|
70% (O)
|
SP, EX, (J)
|
LHA
|
| First Active
|
Active
|
Recovery
|
Frame Adv
|
Circuit
|
Invuln
|
| 10
|
4
|
22
|
-8
|
6.0%
|
-
|
|
Neco Mech swings her hammer in a half circle, covering all of her front and above. Turns Neco into a hitbox on hit, which can function as a delayed anti air. Can also serve as a means of protecting you from enemies crossing you up, as the 6C can anti air behind from both the top of the swing and the neco being flung backwards, as neco being hit autocorrects towards the opponent's location.
|
| 6[C]
|
Damage
|
Red Damage
|
Proration
|
Cancel
|
Guard
|
| 1000
|
490
|
70% (O)
|
SP, EX, (J)
|
LH
|
| First Active
|
Active
|
Recovery
|
Frame Adv
|
Circuit
|
Invuln
|
| 21
|
4
|
22
|
-8
|
6.0%
|
-
|
|
Same deal with 6C, except the launch on hit from it launches in an arc, is AUB, and hitting neco makes her fly with greater speed and distance, wallslamming the opponent.
|
|
Universal Mechanics
|
|
| Damage
|
Red Damage
|
Proration
|
Cancel
|
Guard
|
| 500*6, 300 (1680)
|
(783)
|
50%
|
-
|
U
|
| First Active
|
Active
|
Recovery
|
Frame Adv
|
Circuit
|
Invuln
|
| 3
|
1
|
20
|
-
|
0.0%
|
-
|
|
Mech-Hisui electrocutes the opponent. Untechable knockdown.
|
|
|
|
| Damage
|
Red Damage
|
Proration
|
Cancel
|
Guard
|
| 1600 (Raw)/1200
|
490
|
30%
|
(Any if Raw)
|
U
|
| First Active
|
Active
|
Recovery
|
Frame Adv
|
Circuit
|
Invuln
|
| 2
|
1
|
12
|
-
|
0.0%
|
-
|
|
Standard air throw. Ground bounces if done raw, causes an untechable knockdown otherwise.
|
|
|
|
| Bunker
|
Damage
|
Red Damage
|
Proration
|
Cancel
|
Guard
|
| 500
|
196
|
50%
|
-
|
LHA
|
| First Active
|
Active
|
Recovery
|
Frame Adv
|
Circuit
|
Invuln
|
| 26
|
4
|
19
|
-5
|
0.0%
(-50.0% in blockstun)
|
Clash 1-10
|
| (Clash)
|
Damage
|
Red Damage
|
Proration
|
Cancel
|
Guard
|
| 500
|
196
|
50%
|
-
|
LHA
|
| First Active
|
Active
|
Recovery
|
Frame Adv
|
Circuit
|
Invuln
|
| 8
|
4
|
19
|
-5
|
0.0%/-50.0%
|
Strike 1-7
|
|
Performs an attack similar to H Moon's 623A/B. Moves Mech-Hisui forward.
|
|
|
|
| Damage
|
Red Damage
|
Proration
|
Cancel
|
Guard
|
| 100
|
0
|
100%
|
-
|
U
|
| First Active
|
Active
|
Recovery
|
Frame Adv
|
Circuit
|
Invuln
|
| 18
|
4
|
24
|
-
|
-100.0% (min)
|
Full 1-21
|
|
Same as solo Mech Heat.
|
|
|
|
| Ground
|
Damage
|
Red Damage
|
Proration
|
Cancel
|
Guard
|
| 100
|
0
|
100%
|
-
|
U
|
| First Active
|
Active
|
Recovery
|
Frame Adv
|
Circuit
|
Invuln
|
| 11
|
10
|
20
|
-
|
removes all
|
Full 1-39
|
| Air
|
Damage
|
Red Damage
|
Proration
|
Cancel
|
Guard
|
| 100
|
0
|
100%
|
-
|
U
|
| First Active
|
Active
|
Recovery
|
Frame Adv
|
Circuit
|
Invuln
|
| 12
|
10
|
15
|
-
|
removes all
|
Strike 1-30
|
|
Universal burst mechanic. Unlike Crescent/Full Heat activation, the hitbox and frame data doesn't vary between characters. However, you can be thrown out of this move if you input it in the air.
|
|
Special Moves
No laser sprites, framedisplay is bugged. No laser sprites, framedisplay is bugged. EX EX
|
| A
|
Damage
|
Red Damage
|
Proration
|
Cancel
|
Guard
|
| 250*8 (1589)
|
(742)
|
100%
|
-
|
LHA
|
| First Active
|
Active
|
Recovery
|
Frame Adv
|
Circuit
|
Invuln
|
| 51
|
16
|
48
|
33
|
0.0%
|
-
|
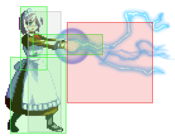
- Neco shoots beams from her eyes. Also used for air tech traps after purposefully dropped combos, i.e. xx dj.ACB land 236A/B
Neco shoots beams across the screen. Mostly used as oki or after wallslam from 22B/C.
|
| B
|
Damage
|
Red Damage
|
Proration
|
Cancel
|
Guard
|
| 300*7 (1705)
|
(662)
|
100%
|
-
|
LHA
|
| First Active
|
Active
|
Recovery
|
Frame Adv
|
Circuit
|
Invuln
|
| 43
|
14
|
38
|
31
|
0.0%
|
-
|
|
Neco shoots beams at a 45 degree angle. Can be used against someone trying to jump over necobeams thinking it's the A version, or as fake oki for a dash up throw.
|
| EX
|
Damage
|
Red Damage
|
Proration
|
Cancel
|
Guard
|
| 300*8
|
245*8
|
90% (O)
|
-
|
HA
(Whiffs vs. Crouch)
|
| First Active
|
Active
|
Recovery
|
Frame Adv
|
Circuit
|
Invuln
|
| 1+25
|
16
|
29
|
-17
|
-100.0%
|
Full 1-19
|
| (Neco-Arc)
|
Damage
|
Red Damage
|
Proration
|
Cancel
|
Guard
|
| 250*10 (1705)
|
147*10
|
100%
|
-
|
LHA
|
| First Active
|
Active
|
Recovery
|
Frame Adv
|
Circuit
|
Invuln
|
| 1+24
|
20
|
29
|
-13
|
0.0%
|
-
|
|
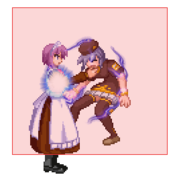
Neco and Mech both shoot beams from their eyes. Invulnerable on startup and can be used a reversal in a way, but not totally reliable. Don't use this version.
|
|
|
|
| A
|
Damage
|
Red Damage
|
Proration
|
Cancel
|
Guard
|
| 400*5 (1696)
|
(828)
|
100%
|
-EX-
|
LHA
|
| First Active
|
Active
|
Recovery
|
Frame Adv
|
Circuit
|
Invuln
|
| 7
|
13
|
17
|
0
|
5.0%*5 (25.0%)
|
-
|
- Mech shoots electricity from her fingertips.
Mech quickly shoots out electricity, giving hard knockdown if all hits connect. Can be used to hit neco as an anti air or just to control space. +0 on block.
|
| B
|
Damage
|
Red Damage
|
Proration
|
Cancel
|
Guard
|
| 150*15 (1751)
|
(1141)
|
100%
|
-EX-
|
LHA
|
| First Active
|
Active
|
Recovery
|
Frame Adv
|
Circuit
|
Invuln
|
| 25
|
27
|
12
|
-6
|
1.0%*15 (15.0%)
|
Clash 1-13
|
|
Mech shoots out electricity after a delay, with more range and damage. Does not give any knockdown. If blocked in the air in the corner, Neco can be hit during it for an unblockable setup.
|
| EX
|
Damage
|
Red Damage
|
Proration
|
Cancel
|
Guard
|
| 250*19 (3351)
|
(2614)
|
100%
|
-
|
LHA
|
| First Active
|
Active
|
Recovery
|
Frame Adv
|
Circuit
|
Invuln
|
| 1+7
|
28
|
14
|
-12
|
-100.0%
|
Full 1-2
|
|
Mech shoots out electricity in a big area dealing a ton of damage and giving knockdown
|
|
|
|
| A
|
Damage
|
Red Damage
|
Proration
|
Cancel
|
Guard
|
| 250*8
|
196*8
|
100%
|
-
|
LHA
|
| First Active
|
Active
|
Recovery
|
Frame Adv
|
Circuit
|
Invuln
|
| 26
|
X
|
9
|
9 ~ 44
|
2.5%*8 (20.0%)
|
-
|
- Mech places a Neco rocket in front of her with varying amounts of speed and plus frames.
Neco rocket that comes out slowly, but with a lot of plus frames. If used a certain distance on someone in midscreen you can push them back with your dash to make them get hit by the neco rocket a few more times.
|
| B
|
Damage
|
Red Damage
|
Proration
|
Cancel
|
Guard
|
| 400*10
|
294*10
|
100%
|
-
|
LHA
|
| First Active
|
Active
|
Recovery
|
Frame Adv
|
Circuit
|
Invuln
|
| 15
|
X
|
24
|
-6 ~ 39
|
2.0%*10 (20.0%)
|
-
|
|
Faster Neco Rocket, but not as many plus frames. Negative on block when used point blank, but is progressively more plus the further away it is used.
|
| EX
|
Damage
|
Red Damage
|
Proration
|
Cancel
|
Guard
|
| 120, 300*16
|
117, 255*17
|
100%
|
-
|
LHA
|
| First Active
|
Active
|
Recovery
|
Frame Adv
|
Circuit
|
Invuln
|
| 13+3
|
X
|
23
|
-5 ~ 76
|
-100.0%
|
-
|
|
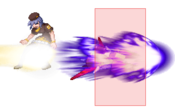
Neco transforms all parts of her body into a rocket and flies a large distance across the screen. A fantastic pressure reset that can be used at 214B distance to immediately get back in. Used in some combos and can be thrown out in neutral as a neutral skip if the opponent is on the ground or landing.
|
|
|
|
| A
|
Damage
|
Red Damage
|
Proration
|
Cancel
|
Guard
|
| 1000
|
784
|
50% (O)
|
-
|
LHA
|
| First Active
|
Active
|
Recovery
|
Frame Adv
|
Circuit
|
Invuln
|
| 9
|
9
|
27
|
-8
|
10.0%
|
High 1-8, Clash 5-8
|
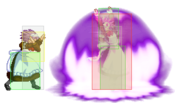
- Barrier shield, has some upper body invincibility and clash frames. This move can be used as an anti air by itself or after a normal shield. Fairly unsafe on ground block or whiff, but fairly safe on air block. Launches vertically on hit. This move's input cannot be crossed up adding to its usefulness as a special cancel out of normal shield against left/rights.
|
| B
|
Damage
|
Red Damage
|
Proration
|
Cancel
|
Guard
|
| 320*7 (1822)
|
(884)
|
50% (O)
|
-
|
LHA
|
| First Active
|
Active
|
Recovery
|
Frame Adv
|
Circuit
|
Invuln
|
| 19
|
20
|
28
|
-17
|
2.6%*7 (18.2%)
|
Full 9-19, Clash 3-16
|
|
Mech surrounds herself with a bigger barrier with no invul on startup, but is invul shortly after with clashframes. Hits multiple times and the last hit wallslams the opponent. Best used when the opponent has to dash in to apply pressure or can't get a proper meaty. Using on wakeup is considerably risky and should only be used if you're willing to bet your opponent won't hit the startup.
|
| EX
|
Damage
|
Red Damage
|
Proration
|
Cancel
|
Guard
|
| 360*11 (2292)
|
(1301)
|
-5%*11
|
-
|
LHA
|
| First Active
|
Active
|
Recovery
|
Frame Adv
|
Circuit
|
Invuln
|
| 5+10
|
20
|
27
|
-18
|
-100.0%
|
Full 1-15
|
|
Mech surrounds herself with a big barrier, fully invul on startup with no clashframes. Wallslams opponent on last hit.
|
|
Arc Drive
|
|
| Damage
|
Red Damage
|
Proration
|
Cancel
|
Guard
|
| 500*13 (4143)
|
(2416)
|
90% (O)
|
-
|
LHA
|
| First Active
|
Active
|
Recovery
|
Frame Adv
|
Circuit
|
Invuln
|
| 17+8
|
X
|
21
|
45 ~ 72
|
removes all
|
Full 1-29
|
|
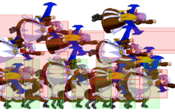
Mech summons a Mech rush from behind her, covering the entire ground. Invul on startup, although there is a small window where Mech can be hit out of it and the mech rush is cancelled. One of the best Arc Drives in the game. Tons of plus and can be combo'd off of for huge damage. Can also be aggressively used in neutral for air unblockable setups if the opponent is caught air blocking it.
|
|
Another Arc Drive
|
|
| Damage
|
Red Damage
|
Proration
|
Cancel
|
Guard
|
| 500*29 (5969)
|
(3470)
|
90% (O)
|
-
|
LHA
|
| First Active
|
Active
|
Recovery
|
Frame Adv
|
Circuit
|
Invuln
|
| 1+23
|
X
|
22
|
42 ~ 68
|
removes all
|
Full 1
|
|
Similar to her Arc Drive, but now covering a significant portion of the air and dealing more damage. Doesn't have Arc Drive's startup invuln.
|
|
Last Arc
|
|
| Damage
|
Red Damage
|
Proration
|
Cancel
|
Guard
|
| 2100*4 (3250~6500)
|
(2500~5000)
|
50% + 50% * remaining BH time
|
-
|
U
|
| First Active
|
Active
|
Recovery
|
Frame Adv
|
Circuit
|
Invuln
|
| 1+3
|
13 (23) 13 (21) 13 (23) 13
|
111
|
-
|
removes all
|
Full
|
|
Activated in the air, Mech transforms herself into a rocket and flies back and forth across the screen dealing a good amount of damage. May whiff after a few hits if activated on an opponent who was in the air during the activation.
|
|
General Gameplan
Neutral
- Spacing the Neco
Many players trying to play C-NecoMech often are unsure of how to keep Neco positioned properly in neutral to fully take advantage of her. Realistically, the easiest way for one to understand how to position Neco is through experience alone. However, there are a number of things to keep in mind to expedite the process of learning how to manage her positioning. Firstly, you must recognize Neco as an extension of your normals/specials and not just a disjointed hitbox. Neco can be activated with 623x, 6C, 6[C], or j.[C], and each of these have a unique use for various scenarios (detailed further in Defense and anti air options). Secondly, you are to let the opponent come to the Neco's current position in an opportunistic way. Think of Neco as an occasional anchor to base your movements and neutral decisions around.
- Setting up expectations
With that being said, if you base all your neutral decisions around Neco, you will start to become predictable. It is very easy to get counter hit in trying to hit Neco with a j.[C] for example, as it has a very long start and your path towards the Neco can be very predictable. However that doesn't mean you shouldn't ever try to hit Neco, you just have to condition your opponent into expecting Neco. For example, moving in a way that makes the opponent think you are going to hit Neco with a j.[C] so they preemptively move to counter hit your start up. But instead of you doing j.[C], you do a normal j.C(or j.A/B) and you counter hit their attempt to hit you. Another example is doing an empty neutral jump above the Neco, and then suddenly airdashing forward or landing to hit Neco with 6C, or double jumping to then hit the Neco, etc. The key thing to note is to make your opponent expect certain things regarding Neco and then mix up your options around it. With the implicit threat of Neco being established it allows you to control a portion of the screen without needing to do anything (Of course, be sure to actually hit Neco from time to time to remind them it exists).
- Learning to not depend on Neco
It is also important to know how to play neutral with her normals alone, as Neco will not always be in the right position. As a general rule (this also applies to any character you play) you shouldn't use up all your movement options right away. Don't double jump in the air and then airdash to meet your opponent who's a full screen away. It is very tempting to just air dash at your opponent all the time, as her airdash carries you very far. Focus on approaching with dashing(her dash allows her to hold [1] during, which is useful against certain zoners), walking, neutral jumping and drifting forward to see what your opponent will do, basically not doing anything committal unless you have a clear line to approach.
Pressure
Refer to the following video: (Youtube)
- Note: Every time you hit neco with j.[C] and it flies directly above the opponent, you can do either do 2B(beats fuzzy jumping/attempting to jump, since 2B hits two times), walk/dash up throw either early or late(beats throw OS), Dash up IAD(beats opponent using 4E to throw), dashing up then neutral super jump j.[C] as the neco hits(beats heat and throw OS), and simply crouching and waiting from where you landed(beats heat and DP)
Catching jump outs on wake up: (Streamable)
- Mixups, setplay, and gimmicks
Refer to the following video: (Youtube)
j.C fuzzy on tall characters: (Streamable)
- Note: You can also do 2C 5A(whiff) for the j.[C] set ups after 623C knockdown.
Defense/Anti-Air options
- Defense
In addition to heat, ex shield, and bunker, Neco Mech also has access to 22x. 22A is top body invul on start up with clash frames and is best used in conjunction with shield, very powerful against moves like h len j.2C or nero j.B. 22B is not invul on start up, but is fully invul shortly after with a clash frame. Whatever you do, do NOT use 22B to contest jump ins. 22B does not have as fast of a start up as 22A, so what often happens with 22B is that you clash their jump in, and they are able to block once they land. 22B is unsafe on block, and should be used as a reversal to beat resets in pressure(dash ins). While 22B may appear like it can be used as a reversal vs non-meaties on wakeup, clash is jump cancellable, and a knowledgeable opponent will j7 chicken block it and punish you. Its worth checking to see if your opponent knows the knowledge check occasionally though. 22C is fully invul on start up, but has no clash frame. It doesn't have a very fast start up(comes out frame 13), but it is a reversal nonetheless.
- Anti air
Neco Mech has access to some fairly decent anti air options with her 5A, 5C/[C], 6C/[C], 623A and j.[C]. 5A is a self explanatory anti air, best used in conjunction with ex shield. 5C/[C] is bit more of a niche anti air option as it does have a good hitbox disjoint above Neco Mech, but its slow start up, long recovery, and momentum from being charged makes it awkward to use solely as an anti air. The most realistic application of 5[C] as an anti air is dashing under someone in the air, and using it to charge towards their position. 6C/[C] is your best anti air option overall, as the ability to trade with this move is phenomenal. It covers a large area in front and above Neco Mech, and as long as you aren't late to use it, it trades very often or even outright beats many air normals. When used in conjuction with hitting neco, it allows you to anti air various kinds of approaches. Note that 6C is not AUB, but 6[C] is AUB. 6[C] is useful for catching predictable landing trajectories, such as a neutral air tech near the corner. 6C/[C] also allows you to target enemies who cross over you in the air, as hitting neco when the enemy is behind you enables neco's trajectory to auto correct and fly towards their current position. 623A has many of the same applications as 6C when it comes to hitting neco, but the main feature of 623A over 6C is that it has less recovery, and is +0 on block. 623A by itself is not a great anti air however. j.[C] being used to hit neco is a very strong as a preemptive anti air zoning tool, but converting into a combo isn't possible more often than not since the opponent can often air tech out before you get close enough for a confirm. It is very easy to confirm on counter hit however.
Combos
| Combo Notation Help
|
Disclaimer: Combos are written by various writers, so the actual notation used in pages can differ from the standard one.
For more information, see Glossary and Controls.
|
| X > Y
|
X input is cancelled into Y.
|
| X > delay Y
|
Must wait for a short period before cancelling X input into Y.
|
| X, Y
|
X input is linked into Y, meaning Y is done after X's recovery period.
|
| X+Y
|
Buttons X and Y must be input simultaneously.
|
| X/Y
|
Either the X or Y input can be used.
|
| X~Y
|
This notation has two meanings.
- Use attack X with Y follow-up input.
- Input X then within a few frames, input Y. Usually used for option selects.
|
| X(w)
|
X input must not hit the opponent (Whiff).
|
| j.X
|
X input is done in the air, implies a jump/jump cancel if the previous move was done from the ground.
Applies to all air chain sections:
- Assume a forward jump cancel if no direction is given.
- Air chains such as j.A > j.B > j.C can be shortened to j.ABC.
|
| sj.X
|
X input is done after a super jump. Notated as sj8.X and sj9.X for neutral and forward super jumps respectively.
|
| dj.X
|
X input is done after a double jump.
|
| sdj.X
|
X input is done after a double super jump.
|
| tk.X
|
Stands for Tiger Knee. X motion must be buffered before jumping, inputting the move as close to the ground as possible. (ex. tk.236A)
|
| (X)
|
X is optional. Typically the combo will be easier if omitted.
|
| [X]
|
Input X is held down. Also referred to as Blowback Edge (BE). Depending on the character, this can indicate that this button is held down and not released until indicated by the release notation.
|
| ]X[
|
Input X is released. Will only appear if a button is previously held down. This type of input is referred to as Negative Edge.
|
| {X}
|
Button X should only be held down briefly to get a partially charged version instead of the fully charged one.
|
| X(N)
|
Attack "X" should only hit N times.
|
| (XYZ)xN
|
XYZ string must be performed N times. Combos using this notation are usually referred to as loops.
|
| (XYZ^)
|
A pre-existing combo labelled XYZ is inserted here for shortening purposes.
|
| CH
|
The first attack must be a Counter Hit.
|
| Air CH
|
The first attack must be a Counter Hit on an airborne opponent.
|
| 66
|
Performs a ground forward dash.
|
| j.66
|
Performs an aerial forward dash, used as a cancel for certain characters' air strings.
|
| IAD/IABD
|
Performs an Instant AirDash.
|
| AT
|
Performs an Air Throw. (j.6/4A+D)
|
| IH
|
Performs an Initiative Heat.
|
| AD
|
Performs an Arc Drive.
|
| AAD
|
Performs an Another Arc Drive.
|
Alternatively, here's a video javashige has on C-NecoMech (with arguably more optimized versions of combos): (NicoVideo)
Note: Optional parts of a combo will be surrounded by parentheses, for example: (5C(3)). Numbers with parentheses around them simply indicate the number of times that move hits.
Normal Combos
| Condition
|
Notation
|
Damage
vs V.Sion
|
Notes
|
|
| Normal starter, grounded opponent
|
- 2A > 2B(2) > (5C(3) >) 2C > 6C > j.BC > dj.BC > AT
|
3970
|
|
| Meter Gained: 57.8 |
Meter Given (vs C-Moon): 17.3 |
(Video) |
| Standard BnB, using 5C may cause 6C to whiff if they are not close enough. |
|
|
| Normal starter, grounded opponent
|
- 2A > 2B(2) > 2C > 6C > j8.CB > j.66 > j.B > dj.AC > AT
|
3646
|
|
| Meter Gained: 52.8 |
Meter Given (vs C-Moon): 15.8 |
(Video) |
| Universal BnB that works on all characters (except Necos), and is not height specific. Be sure to forward jump after the airdash to not whiff. |
|
|
| Normal starter, grounded opponent
|
- 2A > 2B(2) > 2C > 5C(2) > 6C > j8.CB > j.66 > j.B > dj.BC > AT
|
3923
|
|
| Meter Gained: 62.8 |
Meter Given (vs C-Moon): 18.8 |
(Video) |
| Height specific combo that needs to be adjusted to work on ryougi and nero by doing 5C(1) 6C instead. Can also use dj.AC if you don't want to deal with it being height specific. Be sure to forward jump after the airdash to not whiff. |
|
|
Note: Any of the previous three air BnB portions of the combos can be used instead of the standard j.BC > dj.BC > AT for some other combos, although they may not always work. You are free to use the air BnB of your choice on combos with > (Air BnB) at the end.
| Condition
|
Notation
|
Damage
vs V.Sion
|
Notes
|
|
| Normal starter, grounded opponent
|
- 2A > 2B(2) > (5C(3) >) 2C > 214A, j.[C] > dj.[C](A/B), land 623A
|
3652
|
|
| Meter Gained: 62.3 |
Meter Given (vs C-Moon): 30.6 |
(Video) |
| Corner carry combo from midscreen into hard knockdown. Careful not to hit Neco before 214A. |
|
|
| Normal starter, grounded opponent
|
- 2A > 2B(2) > (5C(3) >) 2C > 214A, j.[C], land 66 > 2B(2) > 623A
|
3494
|
| |
| Meter Gained: 59.6 |
Meter Given (vs C-Moon): 28.8 |
| More consistent version of previous combo for midscreen oki. |
|
|
| Normal starter, grounded opponent
|
- 2A > 2B(2) > (5C(3) >) 2C > 214A, j.[C] > dj.[C](A/B), land 5B > 6C > (Air BnB)
|
4047
|
|
| Meter Gained: 68.2 |
Meter Given (vs C-Moon): 34.5 |
(Video) |
| Same as previous combo, but for damage instead of hard knockdown. |
|
|
| Raw Airthrow starter
|
- Raw AT, land (2B(2) >) 5B > 6C > (Air BnB)
|
2840
|
|
| Meter Gained: 35.0 |
Meter Given (vs C-Moon): 10.5 |
(Video) |
| Standard Raw AT combo. |
|
|
| Raw Airthrow starter
|
- Raw AT, land 2C > 214A, j.[C](A/B) > land 5B > 6C > j8.CB > dj.BC > AT
|
2878
|
|
| Meter Gained: 39.9 |
Meter Given (vs C-Moon): 22.9 |
(Video) |
| Does similar damage as the previous combo. Not much of a reason to be using this, unless you want to do 623A ender after j.[C]A/B for hard knockdown. |
|
|
| 236A starter
|
- 236A, j.[C] > dj.[C], land (2B(2) >) 5B > 6C > (Air BnB)
|
5757
|
|
| Meter Gained: 73.0 |
Meter Given (vs C-Moon): 29.6 |
(Video) |
| You probably won't ever pull this off in a match unless your opponent doesn't block 236A on wakeup. |
|
|
| Normal starter, grounded opponent, 100% meter
|
|
3552
|
| |
| Meter Gained: 29.8-100.0 |
Meter Given (vs C-Moon): 30.0 |
| Meter dump combo for when you're in MAX or if you want hard knockdown. |
|
|
| Arc Drive starter
|
- 41236C, j.[C] > dj.[C], land 2B(2) > 5B > 6C > (Air BnB)
|
6729
|
|
| Meter Gained: -all |
Meter Given (vs C-Moon): 36.3 |
(Video) |
| Arc Drive combo for big damage. |
|
|
Counter Hit & j.[C] Combos
| Condition
|
Notation
|
Damage
vs V.Sion
|
Notes
|
|
| 6C Counterhit starter
|
- CH 6C, (2B(2) >) 5B > 6C > (Air BnB)
|
???
|
| |
| Meter Gained: ??? |
Meter Given (vs C-Moon): ??? |
| 6C counter hit combo if you forget you can jump for double j.[C] combos. |
|
|
| 6C Counterhit starter
|
- CH 6C > j.[C] > dj.[C]B, land j.ACB > dj.BC > AT
|
4558
|
|
| Meter Gained: 63.0 |
Meter Given (vs C-Moon): 18.9 |
(Video) |
| Standard 6C counter hit combo. |
|
|
| 6C Counterhit starter
|
- CH 6C > j.[C] > dj.[C], land j.ACB > dj.BC > AT
|
4557
|
| |
| Meter Gained: 58.0 |
Meter Given (vs C-Moon): 17.4 |
| Same as previous combo, but easier. |
|
|
| 6C Counterhit starter
|
- CH 6C > j.[C] > dj.[C] > j.66 > j.CB, land j.BC > dj.BC > AT
|
4848
|
|
| Meter Gained: 67.0 |
Meter Given (vs C-Moon): 20.1 |
(Video) |
| 6C counter hit combo with a bit more damage, although j.CB may whiff if you airdash too far. |
|
|
| 6C Counterhit starter, airborne opponent
|
- CH 6C, j.[C] > dj.[C], land (2B(2) >) 5B > 6C > (Air BnB)
|
5287
|
|
| Meter Gained: 79.0 |
Meter Given (vs C-Moon): 23.7 |
(Video) |
| Only works when counter hitting a jumping opponent in order to let 6C fully recover. Her most damaging meterless 6C counter hit combo. |
|
|
| Aerial normal counterhit starter, airborne opponent
|
- CH j.B, land 5B > 6C > (Air BnB)
|
3573
|
|
| Meter Gained: 40.0 |
Meter Given (vs C-Moon): 12.0 |
(Video) |
| Standard aerial counter hit combo. |
|
|
| 6C Counterhit starter, (100% meter)
|
- CH 6C > j.[C] > dj.[C], land (2B(2) > 623C >) 2B(2) > 623A
|
4920
|
|
Meter Gained: -41.1
(58.9-100.0) |
Meter Given (vs C-Moon): 41.4 |
(Video) |
(Numbers measured by including 2B(2) > 623C)
For hard knockdown. |
|
|
| 6C Counterhit starter, 100% meter
|
- CH 6C > j.[C], land 214C, sj9.[C] > dj.[C]B, land j.ABC > dj.BC > AT
|
5442
|
|
Meter Gained: -55.6
(44.4-100.0) |
Meter Given (vs C-Moon): 31.9 |
(Video) |
Her most damaging 6C counter hit combo, although getting the exact height for 214C can be tricky.
Note: you don't have to superjump for this combo, but it can make it a little bit easier if you're not close enough. |
|
|
| 6C Counterhit starter, airborne opponent, 100% meter
|
- CH 6C, j.[C], land 214C, j.[C] > dj.[C]B, land 5B > 6C > (Air BnB)
|
???
|
| |
Meter Gained: ???
(???-100.0) |
Meter Given (vs C-Moon): ??? |
| Metered version of an aerial 6C counter hit. |
|
|
| Aerial normal counterhit starter, airborne opponent, 100% meter
|
- CH j.B, land 214C, j.[C] > dj.[C], land (2B(2) >) 5B > 6C > (Air BnB)
|
6052
|
|
Meter Gained: -63.8
(36.2-100.0) |
Meter Given (vs C-Moon): 31.1 |
(Video) |
| This is realistically going to be your most damaging combo off of an aerial counter hit. |
|
|
| Aerial normal counterhit starter, airborne opponent, 100% meter
|
- CH j.B > dj.[C], land 214C j.[C] > dj.[C](A/B), land 5B > 6C > (Air BnB)
|
6052
|
|
Meter Gained: -51.9
(48.1-100.0) |
Meter Given (vs C-Moon): 33.8 |
(Video) |
| This combo requires a hard commitment after pressing j.B if you know you're going to get a counter hit off of it and you're at the right height. C-NecoMech's most damaging combo. |
|
|
Corner Combos
| Condition
|
Notation
|
Damage
vs V.Sion
|
Notes
|
|
| Normal starter, grounded opponent
|
- 2A > 2B(2) > 2C > 5C(2) > 5B > 6C > (Air BnB)
|
4143
|
|
| Meter Gained: 69.8 |
Meter Given (vs C-Moon): 20.9 |
(Video) |
| Corner-specific version of the third normal combo. This is only really used to add a little extra damage. |
|
|
| 6C Counterhit starter
|
- CH 6C > j.[C], land 214A, j.[C] > dj.[C]B, land j.ACB > dj.BC > AT
|
5253
|
|
| Meter Gained: 89.5 |
Meter Given (vs C-Moon): 28.8 |
(Video) |
| Corner specific 6C counter hit combo that doesn't have to use meter. |
|
|
| 6[C] (Neco Launch) Counterhit starter
|
- CH 6[C] (Neco Hit), j.[C] > dj.[C](A/B), land 5B > 6C > (Air BnB)
|
5708
|
|
| Meter Gained: 71.0 |
Meter Given (vs C-Moon): 21.8 |
(Video) |
| Corner specific wall slam combo, can be tricky to pull off if you're not ready for the counter hit. Does not work unless it is a counter hit or your opponent doesn't air tech. |
|
|
| 6[C] (Neco Launch) Counterhit starter
|
- CH 6[C] (Neco Hit), j.[C] > dj.[C](A/B), land 623A
|
4359
|
|
| Meter Gained: 61.0 |
Meter Given (vs C-Moon): 18.3 |
(Video) |
| Previous combo but with hard knockdown. |
|
|
Additional Resources
C-NecoMech Match Video Database
Javashige's combo guide
Notable Players
| Name |
Color
|
Region |
Common Venues |
Status |
Details
|
javashige
(Java磁) |

|
Japan |
Big One 2nd |
Active |
The best C-NecoMech player
|
MBAACC Navigation
