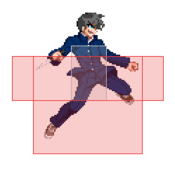
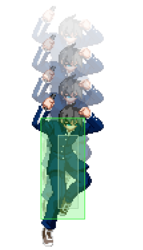
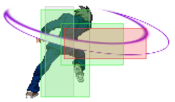
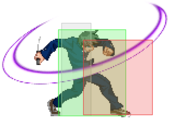
Additional Resources
F-Nanaya Match Video Database
Video of combos listed on this page
Notable Players
| Name |
Color
|
Region |
Common Venues |
Status |
Details
|
Alps
|

|
North America |
Lunar Phase, Netplay |
Active |
|
Butterfree
|

|
North America |
CEOtaku, KoreWaMelty |
Inactive |
|
emu
(えむ) |

|
Japan |
A-cho, Play Spot BIG ONE 2nd |
Active |
|
ShadowCarnage
|

|
South America |
Netplay |
Inactive |
|
Sydoh
|

|
North America |
Netplay |
Inactive |
|
Overview
Strengths / Weaknesses
| Strengths
|
- Crazy ambiguous okizeme and excellent mixups.
- Top-tier DP allows him to threaten huge damage reversals and challenge options many other characters would struggle to interact with.
- High damage ceiling for combos.
- Strong, fast air and ground buttons make Nanaya a footsies beast when in his effective range.
- Divekick beats out a ton of moves and is a great pressure/mixup tool.
- Lightning-fast airdash and ground dash combined with divekick, fastfall, and teleports give F-Nanaya a truly unique and powerful set of movement options.
- Top tier throw game.
- Strong initiative heat cancel options between rekka, divekick, and DP.
- Rewards fundamentals while also allowing for wild knowledge checks and shenanigans.
|
| Weaknesses
|
- Effective range for most tools and movement is relatively short. Nanaya will have to close in on the opponent slowly or make big reads to be able to use his tools effectively.
- Low effective HP means that mistakes hurt.
- Combos that do high damage provide poor oki, and combos that give oki do poor damage, with no easy way to mitigate this or combine oki and damage outside of IH combos.
- Pressure can be vulnerable to jump outs and oki can be vulnerable to shields, and these options sometimes require hard callouts to be beaten.
- Can have a hard time maintaining pressure if he goes deep into his normal chains, as his pressure is built around moves like 2A and divekick.
|
General Gameplan
Neutral
F-Nanaya loses out on very versatile ranged tools in exchange for normals with excellent frame advantage, a quick and lengthy air dash, and crazy ambiguous pressure. You'll essentially struggle against most of the cast to get in - be patient and use your air dash combined with moves like 2B and 2C to slowly close in space. If the opponent has no reliable anti-air moves though - choose your dive kick wisely to thwart Shield attempts and get to work. Your dive kicks yield great frame advantage, cross-up, and beat-out a good number of moves. However, with Current Code's Counter system, if your opponent trades with a dive kick, you're gonna eat a fat combo.
Meter management is pretty simple. In neutral, use your Full Moon meter charge if it's safe to do so while you figure out how to approach. Double 623BB combos net you around 70 meter per go, so keep hitting people and you'll get into MAX eventually. You'll mostly be Initiative Heat cancelling whiffed dive kicks to heal your red health and keep your flimsy self alive, or just holding it to Circuit Spark if things turn sour. If you have good health but extraneous meter, you can go for the EX Rekka (236C) which does hard knockdown on standing foes and an impressive amount of damage too. If you're feeling confident, you can activate Blood HEAT in max, and your Rekka series is actually a frame trap for your Another Arc Drive (which will ALWAYS guarantee you 5k+ damage). Due to Full's insanely momentum-dependent gameplan, saving meter so you can Circuit Spark once you reach 300 or Max to save your behind and your positional advantage is probably best, though.
Pressure
Once in, your 2A alone can be used as your blockstring due to its insane frame advantage. Stagger it into dash 2A, tick throw, 5A fake-outs into more 2As or a tick throw, or try to meaty frametrap by going into a jump -> dive kick, 2B or 2C. Partially charged 5Cs work fine too in tandem with fully charged ones to beat out mash attempts. Your two teleport series also keep your opponent guessing. While his pressure is very strong, it can get very predictable, so keep your opponent guessing or else they'll disrespect and send you back into neutral or into the next round.
Learn the double 623BB combos as the damage output on it combined with your meter gain makes F-Nanaya a pain to deal with if left to his own devices. It also makes every successful reversal of yours very aggravating - it'll likely win a few rounds for you due to it usually breaking 3k damage raw. Outside of 623BB combos, your 236 Rekka series will give you tons of time to set-up creative and sadistic okizeme. Unfortunately, F-Nanaya's okizeme set-up combos net him poor damage, but your options off of it are too good to pass up unless you understand neutral well enough to just disrespect with 623BB the whole game and abuse your huge 1-frame air throw into some more double 623BB's.
Okizeme
Note: Many of these same tactics can be shared by C-Nanaya off the same knockdowns
F-Nanaya has about as large a quantity of okizeme options as his Crescent counterpart. Many of which are shared, some of which are scarier than anything C has. Unfortunately, his rigid combo-ability makes it difficult for him to balance both damage and knockdowns; especially since he's designed to be geared more towards the former. It's also an issue when considering that flexible combo-ability is what gives C-Nanaya great okizeme options in the corner, something F-Nanaya can't truly afford as well.
All things considered, this doesn't mean he isn't capable of it. Far from it in reality. Setplay is still very much an option for F-Nanaya whenever he does score one, so learn to abuse this to its fullest to complement the gains on your damage even further.
- Midscreen
-OFF 214A- (NOTE THAT MOST OF THESE WILL NOT WORK ON HIME DUE TO HER UNUSUALLY LARGE COLLISION BOX)
214A is Nanaya's greatest knockdown in that it gives him the most space and time in order to start his grimy mixups.
Here are his most basic mixups on knockdown off midscreen 214A:
- This causes you to land on the other side of the opponent as they're knocked down. The 5A is there to help your superjump input so you don't mess up.
- A variant of the above in that it's a fake crossup. It looks like you're going to, since you move in that direction, but you actually don't.
- 66 > (5A >) sj9 > j.44 > j.C
- Makes you return to the same side and attack from above. Frame advantage to continue pressure if blocked, combo conversion if not.
- 66 > (5A >) sj9 > j.44 > j.22
- Recommended you do a grab after the fastfall. Do this if your enemy respects you but also predicts the above option.
- Always makes you land on the other side of the opponent. Gimmick.
- A variant of the above that actually makes it difficult to see where you'll land. Difficult to make truly ambiguous however.
- Wait where you are after 214A > sj9 > j.22
- You land with the fastfall right as the enemy's getting up. This makes it difficult to predict whether Nanaya will be landing left or right.
- You can make the enemy react pre-emptively on wakeup and force them to make a bad decision. The teleport crouch can be 214A, 214C (albeit delayed a little), or 22C. Use these in accordance with what your enemy's habits are.
And as a bonus, here are some F-Nanaya specific setups that C can't do off the same knockdown:
- Leads into an ambiguous left/right whichway
- Depending on your position, this may end up a true 50/50. Though actually getting the position for it is rather hard
Now here's where Nanaya's okizeme gets absurd. You can layer many of these options on top of one another. And with how many options exist, respecting, disrespecting, reacting, and predicting all become that much more difficult. But in order to use these options correctly you must be willing to predict your opponent and what they'll do on wakeup, rather than just throw these out and assume they will work just because so many options exist. The reward off of many of these alone, depending on what you follow up with, is typically not amazing. Plus, against experienced opponents, they'll have seen all this, will be able to react to many of these, and will know how to counter them. You must outmaneuver your foe in that regard, and know how to get them to crack. With how many options exist at your disposal, it's easy to get carried away. But in the right hands, it's possible to crack your enemy apart.
Note that many of these are unsafe if disrespected properly, and can be disrespected rather easily if predicted, so don't get greedy. These become incredibly dangerous if not though
Some examples of layered mixups:
- 66 > (5A >) sj9 > j.22 > sj9 > j.22
- Double sideswitch. Can be made safe if you omit 5A and do the fastfalls quickly enough.
- 66 > (5A >) j9 > j.22 > j9 > j.22
- Double fakeout. Can also be made safe the same way as the above.
- 66 > (5A >) s9 > j.22 > j9 > j.22
- Sideswitch into fakeout. Safe if etc.
- 66 > (5A >) j9 > j.22 > sj9 > j.22
- Fakeout into sideswitch. Safe if etc.
- 66 > (5A >) sj9 > j.22 > sj9 > j.44 > j.C
- Sideswitch into Aerial Same-side high
- 66 > (5A >) sj9 > j.22 > sj9 > j.44 > j.22 > 4/6A+D
- Self explanatory
- Self explanatory
- 66 > j8(~[4]/[6] >) Land > j/sj9
"Telegraphed landing into unexpected, difficult-to-react-to followup
The ways you can mix and match these various options go on for miles. See if you can come up with anything new or interesting with this too!
-OFF 214C-
214C is arguably F-Nanaya's most absurd okizeme tool. You can cancel with dj.8 post-knockdown, then follow up with j.2B. Depending on the many, tiny nuances of your cancel timing and height, this effectively makes it a true 50/50 mixup in nature. The large quantity of tells put collectively together are improbable, if not outright impossible to react to in your left/right landings. This is a strength for 214C that F-Nanaya has in which C-Nanaya does not.
As a bonus, F-Nanaya also gets all the other mixups that C does from this particular move.
- Corner
- Filler > 2C > c.214B, 2C > 214A
Though it isn't visible, this sets up space ever so slightly so that this actually allows for 50/50 scenarios. For example, you can follow up with Dash 22A after landing from 214A, and you'll end up on the other side. You can also apply all the fastfall mixups from the midscreen okizeme section, and the layered mixups as well, making this a very tricky setup that's difficult to react to.
This frankly not so preferred for F-Nanaya compared to C. C-Nanaya has routes which can lead into the part after "Filler", since he can jump cancel his 214B. As F-Nanaya cannot, this is an extremely situational, though possible setup.
Defense
F-Nanaya has strong defensive options but must balance them with his low health limiting his ability to survive risky decisions. 623B can go through oki and pressure tools that other characters might have to respect. It’s also a great cancel option from shield. Skilled opponents will try to play around it with DP-safe setups, but it’s impossible to mitigate entirely. If you study matchups, find gaps, and learn your opponent’s patterns, you can tear their offense apart and frustrate them. It can be tempting to RPS on wakeup all the time, but be careful to not get too impatient; your strongest tools can be used against you if they become bad habits. However, if you have MAX, 623B IH is an amazing tool that is effectively impossible to punish on whiff, leaves you plus on block, yields a combo on hit, and because you’re F moon, gives you all your red health back. Waiting to use this on wakeup is often a better idea than bursting a combo, unless it’ll kill you or you’ll run out of MAX before then.
Nanaya’s A buttons are extremely fast but relatively small. You can mash out of throw setups, but trying to tech (especially with an OS) is sometimes a better option. If you tech a throw, 2B and 2C are strong abare options that will hit at the range throw tech leaves you at. 5A anti-airing air pressure can work, but consider shield 623B as well. In some matchups, 214B can be a useful abare option, often against characters who seek to do pressure by outranging your tools such as Hime and Wara, though it is easily baited and not to be relied upon. Keep an eye out for setups that teleports can escape and air tech traps that fastfall can mess with; these options can catch an opponent off guard, but are also not something to base your defense around.
Overall, F-Nanaya’s defense revolves around wise placement of DPs and occasionally mixing in something wild to throw your opponent off. His tools reward matchup knowledge, and his DP means that you’re never out of a round until your HP hits 0.
Misc.
- Blood Heat Setups
You can set up Blood Heat safely with:
- f.214B confirms, provided the 214B knocks the opponent back far enough for them to not reach you and punish you
- 214A knockdowns. If you find yourself stuck in the corner at some point because of 214A putting you on the other side, you can safely superjump or 22A out before the opponent can try to punish you.
- j.BC > dj.BC > j.22. Also provided the opponent will tech at a point not specific nor close enough to punish you. This is best done midscreen as the lack of space in the corner will make it feasible to punish you for attempting this
- Using Initiative Heat
Initiative Heat is easily used when F-Nanaya is in MAX. He has many ways in which to make it impossible to punish for incredibly easy execution. The three moves in which he can whiff cancel into IH are:
- Of course you can also do 236A, but since B lasts longer, your window for IH cancelling is wider. The angle at which 236B hits is impractical to challenge. There's just about no bad situation in which to do 236B > IH in order to recover red health. This is your best move for such an occasion
- Divekick is also whiff cancellable with IH. It takes longer than the rekkas, and it might leave an extremely small enough gap for retaliation with its startup. But it's still extremely difficult to challenge in all practical terms. Another excellent option for going into IH
- Now this one seems wild, and it is. You seriously have to rely on this when the above two options are less prone to execution error, and by extension, punishment. But if you can do it correctly, you not only get the fastest startup of the three, but the most i-frames. You have to IH about 5f or so after the move has been input. So you have to press it ASAP, basically. But if you do this right, there's absolutely zero way whatsoever to interfere or punish you, unless a projectile is involved at nigh-impossible specifics and circumstances.
And just like any other F-Moon character, IH is possible when any of your attacks are blocked. In being a rushdown character, this is also advantageous for F-Nanaya.
There's also some neat tactics where you can use Initiative Heat in the middle of pressure/blockstrings
- Listed in "Initiative Heat Combos" above, but also doubles as a totally legitimate blockstring, and pressure extension
- If this is blocked, you can cancel into IH immediately after 236C is finished, and you'll be plus. This is an extremely obscure tactic.
- Once you know that you can do this, the trickery is pretty much gone. And the recovery is too much for you to sensibly use this as delay pressure. Still not bad though
- Safejump Setups
- (Hits >) 2C ~ 22C ~ 22B > j.C > land > 2B
- If timed correctly, this is a reliable safejump setup. The 22C and 22B must be delayed in a way which will match with the wakeup of your opponent after being knocked down by 2C. This is somewhat tricky to do as the timing can vary among characters, but better to have a safejump than none at all.
An elaborate series of universal safejump setups across all three Nanaya moons.
- Extra
F-Nanaya's 5C is actually is very useful pressure tool against Hime. Because of her slower 2A (7f across all Moons) you can counterpoke her if she tries to mash with your own 2A. Also has limited use against Nero, but his 2B will beat you if you're close.
Combos
| Combo Notation Help
|
Disclaimer: Combos are written by various writers, so the actual notation used in pages can differ from the standard one.
For more information, see Glossary and Controls.
|
| X > Y
|
X input is cancelled into Y.
|
| X > delay Y
|
Must wait for a short period before cancelling X input into Y.
|
| X, Y
|
X input is linked into Y, meaning Y is done after X's recovery period.
|
| X+Y
|
Buttons X and Y must be input simultaneously.
|
| X/Y
|
Either the X or Y input can be used.
|
| X~Y
|
This notation has two meanings.
- Use attack X with Y follow-up input.
- Input X then within a few frames, input Y. Usually used for option selects.
|
| X(w)
|
X input must not hit the opponent (Whiff).
|
| j.X
|
X input is done in the air, implies a jump/jump cancel if the previous move was done from the ground.
Applies to all air chain sections:
- Assume a forward jump cancel if no direction is given.
- Air chains such as j.A > j.B > j.C can be shortened to j.ABC.
|
| sj.X
|
X input is done after a super jump. Notated as sj8.X and sj9.X for neutral and forward super jumps respectively.
|
| dj.X
|
X input is done after a double jump.
|
| sdj.X
|
X input is done after a double super jump.
|
| tk.X
|
Stands for Tiger Knee. X motion must be buffered before jumping, inputting the move as close to the ground as possible. (ex. tk.236A)
|
| (X)
|
X is optional. Typically the combo will be easier if omitted.
|
| [X]
|
Input X is held down. Also referred to as Blowback Edge (BE). Depending on the character, this can indicate that this button is held down and not released until indicated by the release notation.
|
| ]X[
|
Input X is released. Will only appear if a button is previously held down. This type of input is referred to as Negative Edge.
|
| {X}
|
Button X should only be held down briefly to get a partially charged version instead of the fully charged one.
|
| X(N)
|
Attack "X" should only hit N times.
|
| (XYZ)xN
|
XYZ string must be performed N times. Combos using this notation are usually referred to as loops.
|
| (XYZ^)
|
A pre-existing combo labelled XYZ is inserted here for shortening purposes.
|
| CH
|
The first attack must be a Counter Hit.
|
| Air CH
|
The first attack must be a Counter Hit on an airborne opponent.
|
| 66
|
Performs a ground forward dash.
|
| j.66
|
Performs an aerial forward dash, used as a cancel for certain characters' air strings.
|
| IAD/IABD
|
Performs an Instant AirDash.
|
| AT
|
Performs an Air Throw. (j.6/4A+D)
|
| IH
|
Performs an Initiative Heat.
|
| AD
|
Performs an Arc Drive.
|
| AAD
|
Performs an Another Arc Drive.
|
All combos were tested on Sion Tatari (standing). All damage and meter gain calculations are thus based on such, unless otherwise specifically stated. If there are any calculations in parentheses, that means they're calculations showing how much more you gain for tighter confirms (optional normals in the combo that do more damage.) If they're not listed, despite such parenthesized normals being in the transcript, it was omitted because it follows the basic pattern of either:
- A starters resulting in less damage but more meter if you stack them on before B/C starters due to scaling
- j.A always adding more damage and meter in air combo finishers
- j.B/C always adding more damage if used as starters, on top of more meter
- Adding a proper string of normals fully before DDP also always nets more
Combo Logic/Theory
F-Nanaya is a very straightforward character, so understanding how his combos should be utilized isn't difficult at all. All you need to know is that:
- Your go-to option is converting into Double DP combo, typically off of 2C
- If you want a hard knockdown and good okizeme, end your combo/confirm with 2C > 214A
- Rekka ender is a gimmick, but depends more on what the players will do after. In certain cases however, such as post max-range 2B, rekka's the only choice you have
The rest is situational awareness, and knowing what each individual combo listed below is good for. Thanks to the streamlined nature of F-Moon, and especially F-Nanaya, knowing what to convert into, or what you want to convert into, is incredibly easy, and will often times just fall into either Double DP, 214A, or Rekka. Mostly the first. There isn't much to discuss beyond this.
- Extra Part 1: 2C
Generally, the most optimal chain before DDP is 5B > 2B > 2C, so you'll be using 2C before the first DP a lot as F-Nanaya. It's important to understand the effect of 2C on this combo due to its constant use, and effect on height.
Delaying 623B a little after 2C is recommended, as it will net you some lowered height on the opponent. This gives you a bit more time to input, will guarantee three hits instead of sometimes-two (optimizing damage), and will ultimately make execution easier due to the distance between the ground and the launched opponent.
- Extra Part 2: Burst Bait
As mentioned in the previous part, filler into 2C typically precedes the DDP combo. In situations where the enemy has MAX, this makes Circuit Spark after 2C a common, but effective way to punish you post-landing.
If you think they'll do this, you could bait with jump/22B after 2C, then punish (22B recommended as safer since your hurtbox disappears). This is a strong option. If they burst AFTER getting hit by 2C, they'll be left in an aerial state, which makes the hitbox on their Circuit Spark worse, and forces extra lag due to landing frames. If they don't burst here, then you still get a hard knockdown, and thus okizeme; powerful for F-Nanaya's extreme rushdown style.
- Extra Part 3: Covering Misc. Scenarios
Sometimes you might just use 623BB and accidentally catch an enemy in the air thanks to its air unblockable property. It's highly unlikely, if not impossible in such cases, for you to follow up with the combo as normally intended. In times such as those it's best to improvise by eyeballing through experience and settling for some iteration of 623BB > sdj.(B)C > AT, cutting out the fastfall and second DP entirely.
Final piece of advice is to practice this BnB after multiple random chains at various paces and distances.
- E.g.: 2AA > 5C > Combo, 2A > 5B > 2C > Combo, etc.
You won't actually be using such freeform chains in real matches like this as they aren't desirable in any way. But it does help solidify your execution by ironing out any loose ends.
- Extra Part 4: The 214B Extension
You might've read that a midscreen c.214B extension is possible. However, the dash into 2C is tricky and you can't seem to do it. Admittedly it is a very tough combo to execute, albeit netting much nicer damage and meter gain. Mainly because of the strict timing on the dash > 2C. The best advice one can offer for this scenario is that you can buffer the dash after 214B, making it so that Nanaya does it on the first frame it's possible to move. After inputting the dash, it becomes a matter of timing your 2C so that it cancels at just the right moment. Keep practicing this and you'll be able to execute it consistently without dropping.
If your issue with this extension was something else, refer to this video/its description.
The launching version for 214B adjusts its gravity and height based on two things:
- The preceding number of hits
- The position of the enemy
In order for the dash into 2C to work, you need to make sure that before 214B, the enemy is in knockdown state before touching the ground (so 2C is mandatory) and that the preceding number of hits (including 2C) does not go above 3. Any less than 3 is fine however, so long as 2C is somewhere before 214B.
So instead of 5B 2B 2C, you could instead opt for 2AA 2C, 2A 2B 2C, j.C 2A 2C, etc., and 214B into dash 2C will still work.
The above rules apply to everyone except the following five characters:
- Hime, Nanaya, Ryougi, and Warachia. These four are an exception in that instead of three hits, this combo will only work if there's only two hits before 214B.
- Arcueid. This combo just does not work on her period.
- Closing Notes:
- You might not always be able to get the sdj.ABC ender (depending on your position and how early/late you cancel out of 623BB), but sdj.BC ender is always possible.
- There cannot be too much delay between 2C and 214B. You need to do 214B as soon as enemy height during knockdown becomes low enough to launch instead of knock back. Any millisecond later and they'll be too low for dash 2C to work.
- Somewhat obvious but you can omit the dash and just do 2C into 623B if you're close enough to the corner. That version applies to everyone without exception.
Performing the Double DP Combo
For people starting F-Nanaya, learning the nuances to his iconic double DP combo (623BB > tk.j.22 > land > 623BB > sdj.BC > AT) is tricky, granted there are many ways that it can become invalid. However, this section is dedicated to helping you master the nuances so that you can pull it off consistently every time.
Note: Doing 2C before the 623B will make timing easier, and having the dummy crouch will allow more time before airtech. If you want to practically optimize your execution, set your dummy to stand and start the combo (with 623B) point-blank. There will be such scenarios where you'll need this, after all.
Video reference for how the combo is supposed to look. Feel free to look to this while practicing the combo yourself and reading the rest of this section: https://www.youtube.com/watch?v=6Y7pjfnTQ74
- Part 1: The First 623BB
The first DP is nothing tricky. Just do the second B of this special as fast as you can.
Tip for keyboard/hitbox: You can input 6[2]6, holding 2 as you input the second 6 and the shoryuken will come out clean.
This applies to every other DP input in the game too, of course.
- Part 1.5: Transitioning to the Fastfall
While this is not utterly necessary to know like other parts, it absolutely does help smoothen things out.
You can only input the flipkick of 623BB after the final hit of the DP strikes. While this is not a buffer, the time in between the DP's last hit and kickflip can feel deceptively ample. This might however, subtly trick you into doing the wrong timing for fastfall. The fastfall relies on a jump cancel, and jump cancels in this game must be done upon strike-contact, meaning no buffer or early inputting.
In short, you want to input the flipkick ASAP after the final hit of the first DP. But you want to rely on the visual cue of the flipkick hitting before doing the fastfall. Keep this in mind and your fastfall inputs, as well as your ASAP 623BB inputs, should become those few levels smoother.
- Part 2: The Fastfall
Inputting the fastfall can be done several ways:
What matters more than the method here is that you do the fastfall as quickly as possible. You can buffer your motion 1 frame (a.k.a. immediately) after the flipkick of 623BB hits.
Note 2: It doesn't matter which one you pick. HOWEVER, if you're performing 282 on keyboard, make sure there's a little delay after the 8 before the second 2, otherwise the jump won't register.
- Part 3: The Second 623B
This is where timing and position get tricky. At this point, your aim is to net two hits on the initial part of this attack (the ascension), not one.
The key here is to NOT do your attacks as fast as possible. You need to leave a small gap in between the time when you land to when you do the DP. This timing may be natural to beginners at first with enough practice, but there is such a thing as executing this part too quickly. Doing so will have you hit the opponent too high. This results in either unoptimal damage or dropping the combo entirely.
Video showcase of this error: https://www.youtube.com/watch?v=er0D6qkx3xo
Compare the small timing gap of 623B to the example video linked above, and you may eventually notice the difference. Try to avoid this mistake in any case, or at least be prepared to cut off j.B from the rest of the sequence on reaction.
- Part 4: 623B~B, The Second Flipkick
Unlike the first DP, you actually want to delay the second B for this part of the special, to let the enemy's height drop a little so the next part becomes easier.
A good point to know when to do the second B is to input it a split second after the visual effect from the kick on the first B fades out. But of course, don't wait out too long on this, otherwise you'll pass the input window.
It's best to practice and learn the timing by attrition. You can practice the delay for this attack with just a regular DP too, if it helps.
- Part 5: The Air Combo Finisher
The final part of the combo: sdj.BC > AT
In this game, super double jump input can be done as 2369, or a quick 9 tap during the most immediate window an aerial attack is jump cancelable. HOWEVER, the second method is incompatible with what's to be explained next, so learn the former method if you haven't already, no matter what controller you're using.
Superjump cancel towards the enemy as late as possible from the flipkick in order to lower the opponent lower even more, putting you at optimal height for the finisher. Super jump cancelling towards the enemy may result in you only being able to net j.C, or worse, drop the combo. Learn the delay and super jump cancel with 2369, since doing it with 9 if delayed too much isn't possible.
In most cases, you can still land dj.BC if you jump out of the flipkick ASAP. However, this method is to guarantee the last few hits and weed out all scenarios where it'd be impossible otherwise.
- Closing
In review, the simple input of:
- 623BB > j.22 > 623BB > sdj.BC > AT
With detail becomes more like:
- 623BB > j.22 (slight delay >) 623B~B ~ sdj.BC > AT
Practice having all this in mind and you shouldn't run into any more surprise mistakes when doing the combo. And once you can do this consistently, then converting into it during real matches should, with a bit of experience and practice, quickly become second-nature.
Normal Combos
A video demonstration of the combos listed below can he found here.
| Condition
|
Notation
|
Damage
vs V.Sion
|
Notes
|
|
Double DP Combo
Normal starter, grounded opponent
|
- ((2A > 5B > 2B > OR 236A/B Ground to Air CH) > 2C > slight delay 623BB > j.22, land > 623B~B > sj9.BC > AT
|
3622
|
|
| Meter Gained: 65.7 |
Meter Given (vs C-Moon): 23.0 |
[Link (Video)] |
| The very combo which defines F-Nanaya, one all players for this character HAVE to know. If you are going to learn any F-Nanaya combo, want to start playing him immediately with just one combo, or possibly ever only stick to one that covers everything, it's this.
Great damage and meter gain. Due to F-Nanaya's overall rather streamlined but effective design, you aren't going to need much more than this. In fact this will be the one combo you use almost every time you convert from something. Learning this is about the same as learning 70% of the basic essentials.
If this is proving to be too difficult, or more information, refer to the above section: Performing the Double DP Combo |
|
|
Normal starter, grounded opponent, midscreen-only
Works On: All but Arcueid
|
- (5B > 2B >/j.C > 5B >) 2C > c.214B, 66 2C > 623BB > tk.dj.22 > 623B~B > sdj.ABC > AT
|
4706
|
|
| Meter Gained: 97.2 |
Meter Given (vs C-Moon): 33.5 |
[Link (Video)] |
| Optimal version of the above combo, with far more meter to boot.
ONLY POSSIBLE MIDSCREEN, or if there's enough space to sideswitch with 214B in the corner.
This notation is under the assumption you have to dash 2C for this to work. If you're close enough to the corner so that you can just omit the dash and go straight to 2C, this becomes universally applicable.
This combo route is not possible on Arcueid. There also exist exceptions to how this combo may become possible or not based on the number of hits preceding 2C.
For more information, refer to the Extra Part 4: The 214B Extension subsection of Combo Logic/Theory. |
|
|
| Normal starter, grounded opponent,
|
- (3 or more preceding hits >) 2C > c.214B, 66 2A > 623BB > tk.dj.22 (fastfall) > 623B~B > sdj.ABC > AT
|
4457
|
|
| Meter Gained: 91.3 |
Meter Given (vs C-Moon): 31.5 |
[Link (Video)] |
| A variant for the above combo. Universally applicable on the whole cast, BUT ONLY IF you are close enough to the corner.
To be used when there are more than 2 hits preceding 2C into 214B.
Note that you must delay 2C more than usual before 214B on some characters, such as Warachia or Arcueid, or it will turn into f.214B instead. It's suggested for this variant you delay regardless, since that'll help universal timing for this particular route.
Despite doing less damage than the more optimal variant above, it still does more damage than the respective routes of the normal version of this combo (which would be just 5B > 2B > 2C > 623BB > etc.) no matter which way you choose your hits. More meter too.
E.g.: 2AAA 5B 2B 2C 214B etc. gives significantly more damage and meter than 2AAA 5B 2B 2C 623BB etc. Another example would be j.C 5B 2B 2C before either 214B or 623BB, and the route following the former still gets more damage and meter. And so on.
As a bonus, unlike the above combo, it has the benefit more meter and can be done on anyone. |
|
|
Normal starter, grounded opponent,
Works On: All (See Notes)
|
|
2568
|
|
| Meter Gained: 29.7 |
Meter Given (vs C-Moon): 9.9 |
[Link (Video)] |
| Basic full Rekka confirm. On certain characters, you need to slightly delay the last Rekka so that the whole combo connects, or else the final hit will pass through them and you'll get punished. Try to make all three hits land not too fast, but also not too slow of course. That's the kind of pace you should be keeping for everyone. Not just to hitconfirm, but also to guarantee the hits. There's absolutely no reason to rush them if you understand this
List of characters you must delay the last rekka for: Akiha, Seifuku, V.Akiha, Aoko, Ciel, Hisui, Len, Mech Hisui, Nanaya, Red Arcueid, Roa, Ryougi, Satsuki, Tohno, White Len
It will be easier to tell some characters are affected by this weird property than others (e.g. V.Akiha more susceptible to making your last rekka miss if you do it too fast compared to Ciel), so if you don't understand immediately why some characters are listed, it may be because they're harder to miss on than others if you rekka too fast. That doesn't mean it isn't possible with them, however. |
|
|
Beginner's DP Conversion
Works On: Untested
|
- (2A > 2B > 2C >) 623BB > sdj.BC > AT
|
3001
|
| |
| Meter Gained: 45.9% |
Meter Given (vs C-Moon): 16.4% |
| Not optimal, but significantly easier to execute for beginners. Learning the double DP combo is quite important to Nanaya's meter build, and you should start working it into your combos, even if you drop it now and then, to build the muscle memory. This being said, this is a useful crutch to use when you are first starting out. |
|
|
| 214C starter
|
- 214C > dj.8 > j.2A/B, land 5A(A) > 623BB > sdj.BC > AT
|
3399
(3424)
|
|
Meter Gained: 22.2
(23.8) |
Meter Given (vs C-Moon): 18.7
(19.9) |
[Link (Video)] |
| Tight timing on the divekick. But don't be alarmed, it is possible on the whole cast.
May have to omit the second 5A on some characters (e.g. Ryougi) to make this combo possible
Everything in this notation starting from j.2A/B is your staple divekick-OTG conversion if you happen to run into such a scenario.
Max damage combo confirm off of 214C, without involving ridiculous timings that give only about 200 more damage
A gimmick at first sight in that you could be opting for something better. But upon closer inspection, this transforms what should just be a command grab, into a command grab, that leads into an average of 3.4K damage. Even better since this command grab is part of a mixup series to begin with, making it all the more frightening. Especially since F-Nanaya's rewards off of other options, especially in tandem, are just as intimidating. |
|
|
| Counterhit aerial normal/623A starter
|
- CH j.A/B/C/2X or CH 623A > 5B > 5C > j.BC > dj.BC > AT
|
5027
|
|
| Meter Gained: 58.5 |
Meter Given (vs C-Moon): 20.6 |
[Link (Video)] |
| Tested with CH j.C starter.
Overall a rather simple but well optimized combo to perform. An easy conversion for aerial counter hits. However, if you mistime the 5B > 5C, the enemy might be too high for a j.BC. In which case, on reaction, omit the j.C part of j.BC, and go right to dj.BC.
If this ends up being too hard, or if you want more meter, replace everything after the initial Counter Hit with 2C into Double DP combo. |
|
|
| Counterhit aerial normal starter
|
- CH j.A/B/C/2C, land 5[C], 66 2C > (Double DP combo^)
|
5294
|
|
| Meter Gained: 98.1 |
Meter Given (vs C-Moon): 33.8 |
[Link (Video)] |
| Has to be started while on the apex or descent of Nanaya's initial jump, and the enemy's vertical positioning has to be similar. If done otherwise, this combo won't work.
Even higher damaging and more meter-gaining version of the above.
Cannot be done with 623A, or even with 623AA, due to the time it takes up |
|
|
| Shield counter starter
|
- (Air) Shield counter > 2C > (Double DP Combo^)
|
3558
|
|
| Meter Gained: 87.6 |
Meter Given (vs C-Moon): ~27.5 |
[Link (Video)] |
| Double DP from a shield counter. Again, your only real options, for all intents and purposes. Unless you wanna opt for the even more damaging or meter gaining variants listed above if you're midscreen (c.214B sideswitch combo after 2C), which is the only other thing you'll ever want to do off this starter. you have plenty of time to adjust your spacing on the 2C after the counter in any case, so just take it easy.
Note that Counter Hits off of Shield Counter do not actually mean anything. Damage does not change, and neither does meter gain. The Shield Counter itself is basically a flat-value starter, should the enemy get hit by it |
|
|
| Grounded Shield into 236A Anti-Air Counter-Hit
|
- 5D > 236A(ch), 5[C], (dash >) 2C > Double DP Combo
|
4368
|
| |
| Meter Gained: 92.3 |
Meter Given (vs C-Moon): 31.7 |
| Best possible BnB damage off of Shield. If you feel this is too hard, you can opt instead to just do 2C into DP combo, or even 5B > 5C Aircombo |
|
|
| Raw Airthrow starter
|
- Raw AT > 5[C], Dash > 2C > (Double DP Combo^)
|
3621
|
|
| Meter Gained: 88.2 |
Meter Given (vs C-Moon): 31.6 |
[Link (Video)] |
| Only real combo you want to use off of a Raw AT, for all intents and purposes. |
|
|
| Normal starter, grounded opponent, 100% meter
|
|
4144
|
|
| Meter Gained: -85.6 |
Meter Given (vs C-Moon): 12.5 |
[Link (Video)] |
| Basic ground combo into EX Rekka. Sets up a knockdown with not much time for okizeme, but that in its own right can be made scary with F-Nanaya's speed. Overall not a great option, but not one to totally discard. |
|
|
| Normal starter, grounded opponent, MAX mode
|
- (2A >) 5B > 2B > (5/2C >) 236B~236B~236B > IH
|
3218
|
|
| Meter Gained: ??? |
Meter Given (vs C-Moon): 9.9 |
[Link (Video)] |
| Combo into rekka. Doubles as an airtight blockstring.
You can OTG with Dash > 2A after this combo, which also doubles as a pressure-extender if everything is blocked. |
|
|
| Normal starter, grounded opponent, MAX mode
|
- (2A >) 5B > 2B > (5C >) 236B~236B >IH, 66 5B > 2B > 2C > (Double DP Combo^)
|
5948
|
|
| Meter Gained: ??? |
Meter Given (vs C-Moon): 37.7 |
[Link (Video)] |
| Does 6k damage and up on average (and even moreif you get a j.C starter). Essentially a full-screen corner carry.
If the Dash > 5B part is too tight, try Dash > 2A. Slightly less damage but slightly easier confirm.
Kind of gimmicky, and extremely situational. You'll rarely see use for this.
If you can afford it, do the c.214B extension for even more reward. |
|
|
| Normal starter, grounded opponent, MAX mode
|
- (2A >) 5B > 2B > (5C >) 236B~236B > IH, 66 (2A >) 5B > 2B > 2C > 623B > 41236C > walk out of corner 214A
|
4878
|
|
| Meter Gained: ??? |
Meter Given (vs C-Moon): 26.0 |
[Link (Video)] |
| Initiative Heat combo that gives you respectable damage while leading to 214A oki. |
|
|
Corner Combos
| Condition
|
Notation
|
Damage
vs V.Sion
|
Notes
|
|
| Normal starter, grounded opponent,
|
- (2A) > 5B > 2B > 2C > delay 623B~B > j.22, land j.BC > AT
|
4106
|
|
| Meter Gained: 68.4 |
Meter Given (vs C-Moon): 23.9 |
[Link (Video)] |
| A corner variant of the original double DP combo where you fastfall into aerials instead. Does less damage, but since it keeps Nanaya closer to the ground, you get a bit more frame advantage after the air throw for okizeme. |
|
|
| Counterhit 214B starter, grounded opponent,
|
- CH 214B, 2C > (Double DP Combo^)
|
4252
|
|
| Meter Gained: 82.8 |
Meter Given (vs C-Moon): 28.7 |
[Link (Video)] |
| For when you're near the corner and you got a counter hit on your opponent with 214B, for some reason. |
|
|
| 2C/Rekka starter, grounded opponent,
|
- (2C/Rekka >) 2AAA > 5B > 2B > 2C (> 623C)
|
1705
|
|
| Meter Gained: 31.9 |
Meter Given (vs C-Moon): 10.6 |
[Link (Video)] |
| Staple (and only) corner OTG combo (aside from the Kouma specific one listed in the below section).
Use the 623C for when you have meter to spare for that tint of extra damage.
Note that in the corner, 2C OTG sets up for a tech punish if you time correctly. |
|
|
| Sweep starter, grounded opponent, 100% meter
|
- Sweep > (66 >) 623C, land 2AB > (Double DP Combo^)
|
3643
|
|
| Meter Gained: -77.6 |
Meter Given (vs C-Moon): ~33.7 |
[Link (Video)] |
| Tested on Miyako, same defense modifiers as Sion Tatari except this combo works on her
Corner specific combo for when you sweep certain characters and OTG them.
Note that if you have any more hits than 2 before the OTG, this combo will not work due to hitcount affecting gravity off of OTG state far too much. You must do this specifically after 2C/final rekka hitting and hitting alone. If you do 2A 2C, 2B 2C, or if you try this combo off of a full rekka confirm, it's not going to work. This specific property however, is if you're too close to the opponent. Because of the stubby hitbox on F-Nanaya's 2A, it's difficult to do this if you are going to EX DP OTG point-blank. However, if you space yourself just far out enough, increasing hitcount shouldn't matter. But in the case of rekka, a full rekka will either make you sideswitch, not giving you enough time to OTG, or push you all the way in, making it so that your 2A won't connect.
Note that if the EX DP hits all 6 times, instead of just 5 when doing OTG, it means this combo is possible, but also character specific. Here are the following list of characters in which this combo is possible on:
Arcueid, Kouma, Miyako, Nanaya, Red Arcueid, Satsuki
This combo is possible on Nero, but instead of 2AB, do 2AA. 2B won't hit him here
Despite the 2A after landing seeming too difficult, it is possible to do. |
|
|
| Throw starter, Kouma-specific, 100% meter
|
- Sweep > (66 >) 623C, land 2AB > (Double DP Combo^)
|
4839
|
|
| Meter Gained: -86.6 |
Meter Given (vs C-Moon): ~30.7 |
[Link (Video)] |
| Kouma-specific metered corner combo. Highest possible damage and meter gaining confirm possible. Same as above, but nets more damage due to the throw starter not prorating as much
:ll three hits of the first DP should be landing. Otherwise you're doing it too slow and Kouma will go too high.
Despite the 2A after landing seeming too difficult, it is possible to do. |
|
|
Move Descriptions
| Frame Data Help
|
| Header
|
Tooltip
|
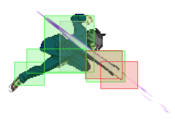
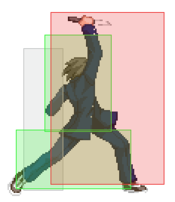
| Move Box Colors
|
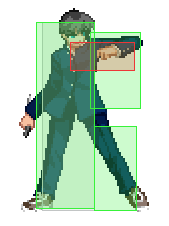
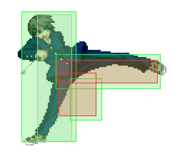
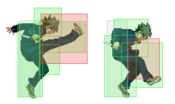
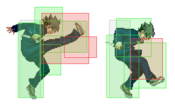
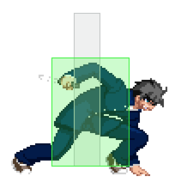
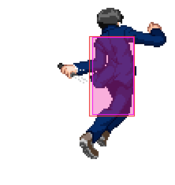
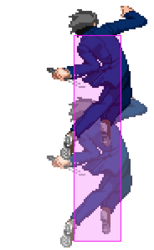
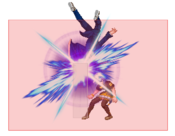
Light gray = Collision Box (A move lacking one means it can go through the opponent's own collision box).
Green: Hurt Boxes.
Red: Hit(/Grab) Boxes.
Yellow: Clash Boxes (When an active hitbox strikes a clash box, the active hitbox stops being active. Multi-hit attacks can beat clash since they will still progress to the next hitbox.)
Magenta: Projectile-reflecting boxes OR Non-hit attack trigger boxes (usually).
Blue: Reflectable Projectile Boxes.
|
| Damage
|
Base damage done by this attack.
(X) denotes combined and scaled damage tested against standing V. Sion.
|
| Red Damage
|
Damage done to the recoverable red health bar by this attack. The values are inherently scaled and tested against standing V. Sion.
(X) denotes combined damage.
|
| Proration
|
The correction value set by this attack and the way it modifies the scaling during a string. See this page for more details.
X% (O) means X% Overrides the previous correction value in a combo if X is of a lower percentage.
X% (M) means the current correction value in a combo will be Multiplied by X%. This can also be referred to as relative proration.
|
| Circuit
|
Meter gained by this attack on hit.
(X%) denotes combined meter gain.
-X% denotes a meter cost.
|
| Cancel
|
Actions this move can be cancelled into.
SE = Self cancelable.
N = Normal cancelable.
SP = Special cancelable.
CH = Cancelable into the next part of the same attack (Chain in case of specials).
EX = EX cancelable.
J = Jump cancelable.
(X) = Cancelable only on hit.
-X- = Cancelable on whiff.
|
| Guard
|
The way this move must be blocked.
L = Can block crouching
H = Can block standing.
A = Can block in the air.
U = Unblockable.
|
| Startup
|
Amount of frames that must pass prior to reaching the active frames. Also referred to as "True Startup".
|
| Active
|
The amount of frames that this move will have a hitbox.
(x) denotes frame gaps where there are no hitboxes is present. Due to varied blockstuns, (x) frames are difficult to use to determine punish windows. Generally the larger the numbers, the more time you have to punish.
X denotes active frames with a duration separate from its origin move's frame data, such as projectile attacks. In this case, the total length of the move is startup+recovery only.
|
| Recovery
|
Frames that this move has after the active frames if not canceled. The character goes into one frame where they can block but not act afterwards, which is not counted here.
|
| Advantage
|
The difference in frames where you can act before your opponent when this move is blocked (assuming the move isn't canceled and the first active frame is blocked).
If the opponent uses a move with startup that is at least 2 frames less than this move's negative advantage, it will result in the opponent hitting that move.
±x~±y denotes a range of possible advantages.
|
| Invul
|
Lists any defensive properties this move has.
X y~z denotes X property happening between the y to z frames of the animations. If no frames are noted, it means the invincibility lasts through the entire move.
Invicibility:
- Strike = Strike invincible.
- Throw = Throw invincible.
Hurtbox-Based Properties:
- Full = No hurtboxes are present.
- High = Upper body lacks a hurtbox.
- Low = Lower body lacks a hurtbox.
Miscellaneous Properties
- Clash = Frames in which clash boxes are active.
- Reflect = Frames in which projectile-reflecting boxes are active.
- Super Armor = Frames in which the character can take hits without going into hit stun.
|
Normal Moves
Standing Normals
Can catch jump-outs. Can catch jump-outs.
|
| Damage
|
Red Damage
|
Proration
|
Cancel
|
Guard
|
| 340
|
202
|
70% (O)
|
-SE-, -N-, -SP-, -EX-, (J)
|
LH
|
| First Active
|
Active
|
Recovery
|
Frame Adv
|
Circuit
|
Invuln
|
| 5
|
4
|
5
|
3
|
3.6%
|
-
|
|
Horrid range - not really much use for it besides breaks in 2A staggers into tick throws (it whiffs on crouchers) or catching air counter-hits. It is advantageous on block and could be used as an anti-jump move against cornered opponents once in a full moon.
|
|
Too much pushback for use in blockstrings. Too much pushback for use in blockstrings.
|
| Damage
|
Red Damage
|
Proration
|
Cancel
|
Guard
|
| 650
|
606
|
90% (O)
|
N, SP, EX, (J)
|
LH
|
| First Active
|
Active
|
Recovery
|
Frame Adv
|
Circuit
|
Invuln
|
| 8
|
2
|
15
|
1
|
7.2%
|
-
|
|
Has good horizontal range but isn't too fast. Moves forward a bit and is +1 on block. Aside from poking for a Rekka set-up at max range, you'll be using this to catch air counter-hits into the standard air combo (j.BC > j.BC > AT). Only use this sparingly in blockstrings since you can't stagger this and it usually pushes F-Nanaya too far away to do anything threatening.
|
|
Your other mixup options are better. Your other mixup options are better.
|
| 5C
|
Damage
|
Red Damage
|
Proration
|
Cancel
|
Guard
|
| 900
|
505
|
90% (O)
|
SP, EX, (J)
|
LH
|
| First Active
|
Active
|
Recovery
|
Frame Adv
|
Circuit
|
Invuln
|
| 11
|
4
|
16
|
-2
|
7.2%
|
-
|
|
A forward-moving axe kick. Has decent horizontal range and surprisingly good vertical range. You can use this to maximize damage off of air counter-hit hit confirms, and under some situations, can be used as an anti-air. Due to its arc, it's not really effective in catching jump-outs. Counter hits from this usually garner good damage combos, so mix this in with 5[C] sometimes. Safe on block on its own and you can special cancel it as well.
|
| 5[C]
|
Damage
|
Red Damage
|
Proration
|
Cancel
|
Guard
|
| 1500
|
1010
|
65%
|
SP, EX, (J)
|
H
|
| First Active
|
Active
|
Recovery
|
Frame Adv
|
Circuit
|
Invuln
|
| 28
|
4
|
17
|
-3
|
13.5%
|
-
|
|
Chargeable overhead variant of the kick. The cancel window is right as it hits, so be prepared to hit confirm - it combos into any non-teleport special including 623BB into aircombo. On airborne opponents (usually in a combo), it ground bounces, so you can instant air dash an air normal or buffer a 2C to extend combos. Best used when you mix it up with partially charged 5Cs. Safe on block.
|
|
Crouching Normals
The pressure GOD The pressure GOD
|
| Damage
|
Red Damage
|
Proration
|
Cancel
|
Guard
|
| 300
|
101
|
68% (O)
|
-SE-, -N-, -SP-, -EX-, (J)
|
L
|
| First Active
|
Active
|
Recovery
|
Frame Adv
|
Circuit
|
Invuln
|
| 4
|
4
|
5
|
3
|
3.15%
|
-
|
|
Terrible horizontal range so don't think about using this to try to mash out of decent pressure. However, it's insanely fast and advantageous on block, making it the cornerstone of your blockstrings and frametrap pressure. Use this to mix-up into tick throws, dive kick, more 2As, and a lot of other stuff. The key to F-Nanaya is making sure you stagger 2A effectively and strike fear into your opponent's heart with it. Can also be used to confirm air counters since it stabilizes quite nicely, but it will take away a good bit of damage if used this way.
|
|
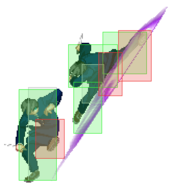
For stabbing the feet of anyone who dares enter footsies range. For stabbing the feet of anyone who dares enter footsies range.
|
| Damage
|
Red Damage
|
Proration
|
Cancel
|
Guard
|
| 700
|
454
|
75% (O)
|
N, SP, EX, (J)
|
L
|
| First Active
|
Active
|
Recovery
|
Frame Adv
|
Circuit
|
Invuln
|
| 8
|
4
|
15
|
-4
|
6.3%
|
-
|
|
Slightly different from Crescent's and Half's as it has less active frames and therefore slightly less horizontal range. Furthermore, it has less raw recovery and is still easily staggered into your C normals, making it useful for blockstrings. This has the furthest horizontal reach in F-Nanaya's moveset and is fundamental for poking and keeping pressure. If you're fishing for a hit, remember you need to account for the distance from you and your opponent. To play it safe when attacking from afar, you can hit confirm with the first hit of 236B then fall back or finish the Rekka.
|
|
Great for catching ground techs. Great for catching ground techs.
|
| Damage
|
Red Damage
|
Proration
|
Cancel
|
Guard
|
| 1000
|
707
|
60% (O)
|
SP, EX, (J)
|
L
|
| First Active
|
Active
|
Recovery
|
Frame Adv
|
Circuit
|
Invuln
|
| 8
|
8
|
12
|
-2
|
9.0%
|
-
|
|
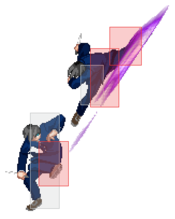
The movement is negligible compared to Crescent's and Half's 2C slides but this makes his hurtbox smaller, allowing you to duck under some projectiles and moves. The start-up is on par with your B normals, has very nice active meaty active frames, and good frame advantage - using it to poke is acceptable.
|
|
Aerial Normals
Note: All aerial normals are cancellable into Fastfall on block/hit.
For air CH fishing. For air CH fishing.
|
| Damage
|
Red Damage
|
Proration
|
Cancel
|
Guard
|
| 300
|
151
|
75% (O)
|
SE, N, J
|
HA
|
| First Active
|
Active
|
Recovery
|
Frame Adv
|
Circuit
|
Invuln
|
| 5
|
4
|
10
|
-
|
2.7%
|
-
|
|
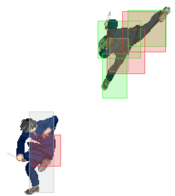
Tiger Knee kick in the air. Very fast and chains into itself but has poor range. Full Moon characters can cancel j.As into an airdash, and so this is good for the occasional air poke. Use it sparingly for pressure while in the air to mix it up with other aerials otherwise it's rather easy to mash out of. Since you can chain it close to the ground from an instant air dash, you can actually use this to imitate a fuzzy guard string in tandem with your divekicks and fastfall.
|
|
Rarely used outside of combos. Rarely used outside of combos.
|
| Damage
|
Red Damage
|
Proration
|
Cancel
|
Guard
|
| 800
|
606
|
90% (O)
|
N, J
|
HA
|
| First Active
|
Active
|
Recovery
|
Frame Adv
|
Circuit
|
Invuln
|
| 8
|
2
|
-
|
-
|
7.2%
|
-
|
|
Nearly identical to H-Nanaya's j.B but with less horizontal range below. It's a horizontal slash that hits once. Decent air-to-ground move and is really your only option if an airborne opponent is on-level with you. That said, it's not especially effective in air-air situations.
|
|
The ultimate in air footsies. The ultimate in air footsies.
|
| Damage
|
Red Damage
|
Proration
|
Cancel
|
Guard
|
| 1100
|
808
|
90% (M)
|
J
|
HA
|
| First Active
|
Active
|
Recovery
|
Frame Adv
|
Circuit
|
Invuln
|
| 10
|
6
|
-
|
-
|
9.9%
|
-
|
|
The downward stab shared by all Nanaya moons. It has notable start-up but its hitbox is respectable and is key to Nanaya's zoning and pressure game. Once the hitbox is out, it won't lose to much in air-to-air combat so as long as the opponent is below you.
|
|
Command Normals
This move is a meme for good reason. This move is a meme for good reason.
|
| Damage
|
Red Damage
|
Proration
|
Cancel
|
Guard
|
| 850
|
707
|
100%
|
-
|
HA
|
| First Active
|
Active
|
Recovery
|
Frame Adv
|
Circuit
|
Invuln
|
| 6
|
X
|
4
|
-4 ~ 12
|
9.0%
|
-
|
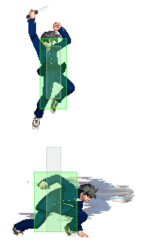
- The infamous "warui ne!" dive kick series. Technically special moves since you can Initiative Heat cancel them on whiff. Only works at the apex of any forward or neutral jump. Pretty much F-Nanaya's most versatile move, although no longer his "best." It's fast, crosses up, beats a good number of things in air-to-air if you are above them and will trade with most horizontal attempts to kill it. A good number of anti-airs can stamp it out easily though. If you did a jump-in with a move, and have one more jump left to spare you can jump cancel your previous move and use a dive kick. This also applies to IADs. The move is punishable if the opponent airblocks it at a certain height above ground though. The dive kicks also OTG relaunch, so they can be used to hit confirm deep 2Cs into an air combo.
A: Falls equivalent to about an 80 degree angle incline in respect to Nanaya. Depending on the timing and jump direction done before, it can cross-up or not. Safe on ground block and can be used to stagger pressure 2As or even initiate a tick throw after opponents respect the 2As.
B: Falls equivalent to about a 60 degree angle incline in respect to Nanaya. Done close to the opponent, it will likely always cross-up.
C: Falls equivalent to about a 40 degree angle incline in respect to Nanaya. Travels quite far horizontally, so it can be used to cover distance against opponents with poor anti-airs or to run away from a bad situation.
|
|
Universal Mechanics
|
|
| Damage
|
Red Damage
|
Proration
|
Cancel
|
Guard
|
| 1400
|
489
|
100%
|
-
|
U
|
| First Active
|
Active
|
Recovery
|
Frame Adv
|
Circuit
|
Invuln
|
| 3
|
1
|
20
|
-
|
0.0%
|
-
|
|
Great ground throw. Provides hard knockdown, recovers quickly enough for any oki you want. Does about 1400 damage.
|
|
|
|
| Damage
|
Red Damage
|
Proration
|
Cancel
|
Guard
|
| 1600 (1408)
|
533
|
30%
|
-
|
U
|
| First Active
|
Active
|
Recovery
|
Frame Adv
|
Circuit
|
Invuln
|
| 2
|
1
|
12
|
-
|
0.0%
|
-
|
|
Standard air throw. Ground bounces the opponent and makes Nanaya automatically enter Fastfall if done raw, cause an untechable knockdown and leaves you in a pretty lengthy landing recovery as a combo ender.
|
|
|
|
| Ground
|
Damage
|
Red Damage
|
Proration
|
Cancel
|
Guard
|
| 500 (303)
|
183
|
50%
|
SP, EX, (J)
|
LHA
|
| First Active
|
Active
|
Recovery
|
Frame Adv
|
Circuit
|
Invuln
|
| 9
|
4
|
18
|
-4
|
9.0%
|
-
|
|
Same animation as C-Moon's 5BB.
|
| Air
|
Damage
|
Red Damage
|
Proration
|
Cancel
|
Guard
|
| 500 (303)
|
183
|
50%
|
-
|
HA
|
| First Active
|
Active
|
Recovery
|
Frame Adv
|
Circuit
|
Invuln
|
| 9
|
4
|
-
|
-
|
9.0%
|
-
|
|
Same animation as j.C.
|
|
|
|
| Bunker
|
Damage
|
Red Damage
|
Proration
|
Cancel
|
Guard
|
| 500
|
202
|
50%
|
-
|
LHA
|
| First Active
|
Active
|
Recovery
|
Frame Adv
|
Circuit
|
Invuln
|
| 26
|
4
|
19
|
-5
|
0.0%
(-50.0% in blockstun)
|
Clash 1-10
|
| (Clash)
|
Damage
|
Red Damage
|
Proration
|
Cancel
|
Guard
|
| 500
|
202
|
50%
|
-
|
LHA
|
| First Active
|
Active
|
Recovery
|
Frame Adv
|
Circuit
|
Invuln
|
| 8
|
4
|
19
|
-5
|
0.0%/-50.0%
|
Strike 1-7
|
|
Similar to C-Moon's 5BB, again.
|
|
|
|
| Damage
|
Red Damage
|
Proration
|
Cancel
|
Guard
|
| 100
|
0
|
100%
|
-
|
U
|
| First Active
|
Active
|
Recovery
|
Frame Adv
|
Circuit
|
Invuln
|
| 16
|
6
|
25
|
-
|
-100.0% (min)
|
Full 1-23
|
|
Standard Heat activation, a bit on the faster side.
|
|
|
|
| Ground
|
Damage
|
Red Damage
|
Proration
|
Cancel
|
Guard
|
| 100
|
0
|
100%
|
-
|
U
|
| First Active
|
Active
|
Recovery
|
Frame Adv
|
Circuit
|
Invuln
|
| 11
|
10
|
20
|
-
|
removes all
|
Full 1-39
|
| Air
|
Damage
|
Red Damage
|
Proration
|
Cancel
|
Guard
|
| 100
|
0
|
100%
|
-
|
U
|
| First Active
|
Active
|
Recovery
|
Frame Adv
|
Circuit
|
Invuln
|
| 12
|
10
|
15
|
-
|
removes all
|
Strike 1-30
|
|
Universal burst mechanic. Unlike Crescent/Full Heat activation, the hitbox and frame data doesn't vary between characters. However, you can be thrown out of this move if you input it in the air.
|
|
Special Moves
Special Movement
For movement, mixups, and combos For movement, mixups, and combos
|
| Damage
|
Red Damage
|
Proration
|
Cancel
|
Guard
|
| -
|
-
|
-
|
-
|
-
|
| First Active
|
Active
|
Recovery
|
Frame Adv
|
Circuit
|
Invuln
|
| -
|
-
|
5
|
-
|
-
|
-
|
|
Nanaya's signature fastfall, no button input. Use it for cross-ups, high/low guesses, which-way guesses in the corner, and is essential to Nanaya's mix-up game.
|
|
Grounded Specials
A/B A/B EX EX
|
| A
|
Damage
|
Red Damage
|
Proration
|
Cancel
|
Guard
|
| 400
|
303
|
70% (O)
|
-CH-, -EX-
|
LH
|
| First Active
|
Active
|
Recovery
|
Frame Adv
|
Circuit
|
Invuln
|
| 6
|
5
|
20
|
-5
|
3.6%
|
-
|
- Rekka slashes. Nanaya lunges forward and does a series of slashes dependent on the user's input. After the first Rekka, subsequent 236A/B inputs result in the same follow-up moves.
Rekka starter. Moves you forward a bit and actually has low recovery and a good hitbox. You can use this to poke out every now and then, and if your opponent respects the Rekka sequence, you can run in with 2A or whatever; otherwise, you can beat out mashing with the second Rekka since the chain window is huge. Decent frame trap overall.
|
| B
|
Damage
|
Red Damage
|
Proration
|
Cancel
|
Guard
|
| 450
|
353
|
70% (O)
|
-CH-, -EX-
|
LH
|
| First Active
|
Active
|
Recovery
|
Frame Adv
|
Circuit
|
Invuln
|
| 8
|
5
|
23
|
-8
|
3.6%
|
-
|
|
Rekka starter. Lunges you further but is no longer advantageous on block by itself. Use this when hit confirming max range 2B/5B pokes.
|
| ~236A (1)
|
Damage
|
Red Damage
|
Proration
|
Cancel
|
Guard
|
| 700
|
505
|
80% (O)
|
-CH-, -EX-
|
LH
|
| First Active
|
Active
|
Recovery
|
Frame Adv
|
Circuit
|
Invuln
|
| 5
|
6
|
27
|
-5
|
4.5%
|
-
|
| ~236B (1)
|
Damage
|
Red Damage
|
Proration
|
Cancel
|
Guard
|
| 800
|
606
|
80% (O)
|
-CH-, -EX-
|
LH
|
| First Active
|
Active
|
Recovery
|
Frame Adv
|
Circuit
|
Invuln
|
| 4
|
6
|
33
|
-11
|
4.5%
|
-
|
|
Second hit of the Rekka series. On standing targets, it has a decent amount of hitstun, so Initiative Heat cancel this to get some of the deadlier combos in your arsenal. On falling foes it causes hard knockdown. Decent hitbox and safe on block, but you basically have to back out after this one if it's blocked.
|
| ~236A/B (2)
|
Damage
|
Red Damage
|
Proration
|
Cancel
|
Guard
|
| 900
|
707
|
80% (M)
|
EX
|
LH
|
| First Active
|
Active
|
Recovery
|
Frame Adv
|
Circuit
|
Invuln
|
| 8
|
2
|
36
|
-20
|
8.1%
|
-
|
|
Rekka ender. It causes hard knockdown on both standing and falling foes. On certain characters such as Akiha or Len, inputting this too quickly while they stand can cause the attack to whiff completely, giving them time to punish you. On falling opponents, you need to input this as quickly as possible to guarantee hard knockdown. Extremely laggy unless it gets hard knockdown and is unsafe on block unless IH cancelled. Its hitbox is also deceptively very poor so don't try to beat out mashing with it.
|
| EX
|
Damage
|
Red Damage
|
Proration
|
Cancel
|
Guard
|
| 500*2, 170*4, 2000 (3213)
|
(2080)
|
100%, 80% (O, Last hit)
|
N
|
LH(3), LHA(3)
|
| First Active
|
Active
|
Recovery
|
Frame Adv
|
Circuit
|
Invuln
|
| 2+10
|
27
|
30
|
-11
|
-100%
|
Full 1
|
|
One of F-Nanaya's best metered options, and is the go-to option to burn off extraneous meter. The move starts with two Rekka slashes into Sensa Hattenshou but it ends with the final Rekka hit giving him an okizeme setup with excellent damage, meaning you can end rounds with this. Careful though, the final (and most damaging) hit won't connect on an airborne/falling opponent. Using 236C over the A/B Rekkas gives you higher damage output while maintaining the same utility. However, 236C doesn't link from max range 2B/5B unless you got a counter hit, so in these cases, you have to use 2B/5B > 236B (first one only) - 236C, which sacrifices some damage but you'll likely break 3k anyway. Not safe on block.
|
|
A A B B EX EX
|
| A
|
Damage
|
Red Damage
|
Proration
|
Cancel
|
Guard
|
| 1500, 600 (2011)
|
(1455)
|
100%<
|
-CH-, EX
|
LH, LHA
|
| First Active
|
Active
|
Recovery
|
Frame Adv
|
Circuit
|
Invuln
|
| 8
|
2 (2) 5
|
33
|
-24, -20
|
10.8%, 7.2% (18.0%)
|
-
|
| ~X
|
Damage
|
Red Damage
|
Proration
|
Cancel
|
Guard
|
| -
|
-
|
-
|
-
|
-
|
| First Active
|
Active
|
Recovery
|
Frame Adv
|
Circuit
|
Invuln
|
| -
|
-
|
9
|
-
|
-
|
-
|
- Nanaya's Dragon Kick. Standard reversal move that happens to be EX cancelable on the first hit (except for EX DP itself).
No invincibility and is air blockable but it can be fastfall-canceled on whiff or hit by pressing a button after reaching its apex. It does have good proration should you combo from it though (from an air counter for example). Use this to mess up opponents who are sloppy in punishing your reversals. Should be used sparingly due to its situational utility.
|
| B
|
Damage
|
Red Damage
|
Proration
|
Cancel
|
Guard
|
| 1000, 600*2 (1502)
|
(1044)
|
50% (O), 60% (O)
|
-CH-, EX
|
LH
|
| First Active
|
Active
|
Recovery
|
Frame Adv
|
Circuit
|
Invuln
|
| 6
|
2 (2) 6
|
40
|
-32 ~ -25
|
9.0%, 5.4%*2 (19.8%)
|
Full 1-15
|
| ~X
|
Damage
|
Red Damage
|
Proration
|
Cancel
|
Guard
|
| 1000 (1900)
|
(1325)
|
70% (O)
|
(J)
|
LHA
|
| First Active
|
Active
|
Recovery
|
Frame Adv
|
Circuit
|
Invuln
|
| 7
|
2
|
36
|
-34 ~ -20
|
9.0% (28.8%)
|
-
|
|
The DP of choice and one of F-Nanaya's best (and lamest) moves. Air unblockable can be canceled into a flip-kick at the end of it by pressing any attack button again. It can also be EX canceled from the initial ground hit but that prorates poorly.
The flip-kick at the apex of 623B is jump cancelable, leading into an air combo. However, you'd best learn how to fastfall cancel the flipkick into another 623BB to get nearly 3k off any 623 reversal. Huge hitbox but is air blockable (safe on block though). On even unclean 623B hits, you can try to mash out the flip kick follow-up and super jump cancel into an air move.
|
| EX
|
Damage
|
Red Damage
|
Proration
|
Cancel
|
Guard
|
| 900, 500, 400*4 (2577)
|
(1851)
|
100%
|
-
|
LH, LHA
|
| First Active
|
Active
|
Recovery
|
Frame Adv
|
Circuit
|
Invuln
|
| 3+0
|
5 (2) 12
|
35
|
-35 ~-28
|
-100%
|
Full 1-16, Clash 3-6
|
|
The same as Crescent Moon's EX DP; you can still do links off it too. Also OTG relaunches into a tech punish set-up. Extremely situational since most combos from it do terrible damage in Full Moon mode, and it's air blockable again.
|
|
A A B B C C
|
| A
|
Damage
|
Red Damage
|
Proration
|
Cancel
|
Guard
|
| 1400
|
909
|
100%
|
-
|
H
|
| First Active
|
Active
|
Recovery
|
Frame Adv
|
Circuit
|
Invuln
|
| 32-33
|
2
|
29
|
-3
|
8.1%
|
Full 22-X
|
| (Whiff Data)
|
Damage
|
Red Damage
|
Proration
|
Cancel
|
Guard
|
| -
|
-
|
-
|
-
|
-
|
| First Active
|
Active
|
Recovery
|
Frame Adv
|
Circuit
|
Invuln
|
| 26
|
12
|
29
|
-
|
-
|
Full 22-37
|
- Offensive teleports nearly identical to Crescent Moon Nanaya's.
Air unblockable overhead slash that forces hard knockdown (even on OTG relaunch). Has fairly long start-up but can be used in conjunction with the rest of his teleports to keep the opponent guessing. On block, it's safe to block, but it essentially turns into a game of Rock-Paper-Scissors with the opponent. If the opponent tries to mash punish it, you can use 623B and do a double DP combo for a free 3k. If they respect it, you can throw them. In the corner, this leads to better okizeme than the Rekka series as you can do which-ways and have a lot of time to set-up teleport shenanigans.
|
| f.B
|
Damage
|
Red Damage
|
Proration
|
Cancel
|
Guard
|
| 900
|
909
|
40% (O)
|
-
|
L
|
| First Active
|
Active
|
Recovery
|
Frame Adv
|
Circuit
|
Invuln
|
| 14
|
3
|
38
|
-21
|
8.1%
|
Full 5-10
|
| c.B
|
Damage
|
Red Damage
|
Proration
|
Cancel
|
Guard
|
| 1600
|
1212
|
80% (M)
|
-
|
L
|
| First Active
|
Active
|
Recovery
|
Frame Adv
|
Circuit
|
Invuln
|
| 8/9
|
3
|
34
|
-12
|
13.5%
|
Full 5-X
|
|
A huge half-screen slash that either wallslams (if you attack "far") or launches the opponent upwards (if you attack "close"). The wallslam version is extremely unsafe on block but can be used in height-specific combos near the corner. The close version crosses up with the opponent on block and is slightly safer. Both versions are mainly used in positioning combos near the corner. Unlike the Crescent version, you cannot jump cancel the far version on hit. Furthermore, you cannot IH cancel this move.
|
| C
|
Damage
|
Red Damage
|
Proration
|
Cancel
|
Guard
|
| 2000
|
1761
|
50%
|
-
|
U
|
| First Active
|
Active
|
Recovery
|
Frame Adv
|
Circuit
|
Invuln
|
| 30 ~ 37
|
2
|
31
|
-
|
0.0%
|
High 20-X, Full X
|
| (Whiff Data)
|
Damage
|
Red Damage
|
Proration
|
Cancel
|
Guard
|
| -
|
-
|
-
|
-
|
-
|
| First Active
|
Active
|
Recovery
|
Frame Adv
|
Circuit
|
Invuln
|
| 24
|
8
|
29
|
-
|
-
|
High 20-31
|
|
A command throw. If your opponent is scared to mash, jump, or backdash out of your teleports, this will grab them. Puts you into an air state afterward with plenty of time to do teleport/fastfall mix-ups to keep the opponent on their toes as to how you will attack afterward.
|
|
A A B B C C
|
| A
|
Damage
|
Red Damage
|
Proration
|
Cancel
|
Guard
|
| -
|
-
|
-
|
Any*
|
-
|
| First Active
|
Active
|
Recovery
|
Frame Adv
|
Circuit
|
Invuln
|
| -
|
-
|
36
|
-
|
-
|
Full 12-23
|
- Nanaya's teleport set, largely for mix-ups and pressure. F-Nanaya's are nearly identical to H-Nanaya's for reference.
Teleports you forward and is good for cross-ups if your opponent respects your pressure. Easily mashed if anticipated by the opponent though. It's invincible during the teleport so you could pass through certain projectiles and set-ups.
|
| B
|
Damage
|
Red Damage
|
Proration
|
Cancel
|
Guard
|
| -
|
-
|
-
|
-
|
-
|
| First Active
|
Active
|
Recovery
|
Frame Adv
|
Circuit
|
Invuln
|
| -
|
-
|
33
|
-
|
-
|
Full 12-25
|
|
Teleports you into the air above where you were standing. It sets you at the apex of your jump, so you can do any option off an initial jump including your divekicks.
|
| C
|
Damage
|
Red Damage
|
Proration
|
Cancel
|
Guard
|
| -
|
-
|
-
|
-
|
-
|
| First Active
|
Active
|
Recovery
|
Frame Adv
|
Circuit
|
Invuln
|
| -
|
-
|
20
|
-
|
-
|
-
|
|
A feint that's great for F-Nanaya as it allows him to cancel normals for blockstrings and okizeme to keep up the pressure while being relatively safe. Since you cannot Reverse Beat in Full Moon, this is the next best thing.
|
|
Arc Drive
|
|
| AD
|
Damage
|
Red Damage
|
Proration
|
Cancel
|
Guard
|
| 2500
|
1960
|
30% (O)
|
-
|
LH
|
| First Active
|
Active
|
Recovery
|
Frame Adv
|
Circuit
|
Invuln
|
| 2+21
|
27
|
16
|
-16
|
removes all
|
Full 1-51
|
| ~1/2/3
|
Damage
|
Red Damage
|
Proration
|
Cancel
|
Guard
|
| 2200
|
1470
|
40% (O)
|
-
|
L
|
| First Active
|
Active
|
Recovery
|
Frame Adv
|
Circuit
|
Invuln
|
| 2+8
|
41
|
16
|
-24
|
removes all
|
Full 1-52
|
|
Nanaya slows time and does an arcing jump followed by a knife slash much like Tohno's Arc Drive. Hits mid provided that you do not hold 1, 2 or 3 for the lower version. Fully invincible during active frames. Can be blocked, and is very slow. Only real use it has is if you read a laggy move, since this will past through it and hit them. If you punish a jump-out with this, you can follow-up with a combo. If the opponent dodges the follow-up slash, your recovery is relatively low, so you may be able to block afterward.
Hold any down motion during the Arc Drive causes the move's start up and damage to decrease. However, it will also hit low in exchange.
|
|
Another Arc Drive
|
|
| Damage
|
Red Damage
|
Proration
|
Cancel
|
Guard
|
| 2500, 7000 (5483)
|
(3880)
|
50% (O)
|
-
|
U
|
| First Active
|
Active
|
Recovery
|
Frame Adv
|
Circuit
|
Invuln
|
| 3+12
|
46
|
16
|
-
|
removes all
|
Full 1-62
|
|
Nanaya assumes the same pose as his AD, but now creates a clone of himself that travels with him in order to cover a very large area of space on the screen. This is completely unblockable but is easily evaded by dodging. If it hits, it guarantees minimum of 5k damage so if you can combo into it, it will be to your benefit. On whiff it's very punishable however.
|
|
Last Arc
|
|
| Damage
|
Red Damage
|
Proration
|
Cancel
|
Guard
|
| 3500~7000
|
2900~5200
|
50% + 50% * remaining BH time
|
-
|
U
|
| First Active
|
Active
|
Recovery
|
Frame Adv
|
Circuit
|
Invuln
|
| 7+0
|
4
|
28
|
-
|
removes all
|
Full
|
|
Is essentially a screen-wide command throw, but it will miss if the opponent is invincible or crosses over you while in the start-up pose, meaning it could be punished. On a successful grab, he throws his knife at the opponent while teleporting behind their back and twists their neck as the knife hits. Does more damage the more HEAT gauge you have.
|
|
MBAACC Navigation


