Character Page Progress
This page is almost complete, consider joining as an editor to help finish it up. Please update this character's roadmap page when one of the editing goals have been reached.
| In Progress
|
- Combos:
- Add damage, meter gain/given numbers and video links to the pre-existing combos.
- Move Descriptions:
- Expand upon the descriptions for normal moves and universal mechanics, cite their uses, etc.
|
Additional Resources
H-Koha-Mech Match Video Database
Players to watch/ask
JP:
NA:
- GreenGM(in the main server)
- hwlen(in the main server)
- J J (in the main server)
Overview
Strengths / Weaknesses
| Strengths
|
- Simple gameplan.
- Easy combos.
- High damage.
- Kohaku's normals.
- Air unblockable spikeball.
- Safe on block overhead that gives high damage on hit.
- Simple corner pressure that is effective.
|
| Weaknesses
|
- Airdash is awkward for movement unlike Kohaku or C-Maids Kohaku.
- No invuln reversals other than bunker and 214214c.
- Mech assist other than 22A/B are fairly niche to use.
|
Kohaku felt like she couldn't do it alone and her sister was off somewhere but this nifty robot is happy to assist! Here lies H-kohamech, a relatively simple character most famous for their spikeball, A versatile tool that is air unblockable and ground bounces, allowing for easy conversions. She still holds many of the kohaku normals and like kohaku, also has a command grab to keep opponents on their toes when defending in the corner. The character is perfect for those who want a gameplan that is not only simple to understand but also very simple to execute and give many players problems in the corner, enough that spikeball demands a different set of answers from usual defense procedures.
General Gameplan
The usual gameplan of H kohamech is more centered on getting opponent to the corner to run run pressure via spikeball, 236[A] and command grab and capitalizing on the player's mistakes. Neutral its about utilizing kohamech's j.B, j.C, 22A and 22B and using some other summons in like 214C, 214[C] sparingly. In the corner, you're pretty much are running 22A pressure with the threat of 236[A] and 63214C. Its very easy to run 22A on autopilot since its an AUB, plus on block as well. While it may not be important at first it is also important to note while it may seem minute, but keep in mind that you want to pay attention to where mech is in terms of positioning if you want make the most out of her summon options.
Neutral
Her neutral isn't exactly copy paste from her kohaku counterpart since your airdash is different from kohaku(solo) but you are going to be playing melty fundamentals in which you use use your jumps accordingly. Get used to j.B for fishing for CH A2A as it as its excellent for that situation and your j.C is also no slouch in terms of being a good air to ground button that also hits cross up making it a good jump in. Along with that, your main tools for the job is 22B for when someone is not approaching you and is trying to stake you out in neutral and of course your 22A to cover yourself whenever possible if the mech is properly positioned and if the opponent is in the immediate area as the trade is always in your favor. When you're not using 22A/22B. and if you're noticing that someone is doing something committal zoning on the ground or in the air you can use 214C and 214[C] accordingly to deter them from using that tactic mindlessly as it also covers space above kohaku, but also be careful as when kohamech does j.214C, j.214[C] j.214A not only is she in recoverable state until she lands, but also all those options whiff on crouchers.
Pressure
H kohamech's pressure is relatively simple to understand and is really strong in the corner but let's go over a few things.
22A
This move is central to her corner pressure. The spikeball in air unblockable (only 22A, not 22B), bounces the opponent on hit for a nice beefy combo and you can move after it so if the opponent ground shields it you can throw them with the proper mech positioning, usually after air throw ender, slight walk 22A. However, after a spikeball you don't get the Mech followup to the command throw for a limited amount of time. Also beware that Mech can be hit before she launches the spikeball. There are also universal answers such as c moon jump, ex shield, double jump to also worry about so be mindful of using this special too liberally.
With 22A in mind you also have kohaku's normals as well. Mostly in the corner you have a bunch of normals to use at your disposal to deter jump outs such as 5[B], 2C and 2[C]. aside from normals you do have 236A which is cancellable to mech hisui's assist options such as 22A, 214B, 623B, Etc. you can also charge it for an overhead that is relatively safe on block and leads to big damage when it lands. Typically your pressure will look like this.
- 2A slight delay 2A, 2B(1 or 2) 5C 2[C] slight stagger 236A 22A
This is a just a sample string that you may typically see but the pressure revolves around spikeball as it is AUB and plus on block that allows kohaku to dash back in for pressure. When the opponent is respecting the threat of spikeball, that's where command grab comes into play and now you alter your pressure once again to gain mental stack of what the opponent is looking out for. Some examples of how to change up your offense include.
- 2A slight delay 2A, 2B(1) 5C 236[A]
- 2A slight delay 2A, 2B(1) 5C 2C 22A
- 2A slight delay 2A, 2B(2) 2[C] 236A 22A
- (dash back in after 22A) 2A, Command throw
The list goes on, While H kohamech's pressure is simple to execute it can get troublesome to deal with an opponent that either has F hime's 214C to punish spikeball pressure or an opponent that is a cmoon that can jump, ex shield, double jump out of the spikeball pressure, so its important to make use of the command grab and 236[A] whenever you can in order to deter them from looking for the pressure reset via spikeball. Other than that its that easy so have a blast!
623C
This is also one of the options to extend pressure if you need to meter dump if you are close to 200% as it give + frames for you to run back in afterwards.
- Okizeme
Most of the time your oki is dependent on what you ended the combo with. Starting from airthrow you pretty much either have run up 2A, Run up 22A, and Run up 236[A] and run up command throw as your options in the corner. Though there are times where you can end combos with 236C which allows you to set up 22C then you can do the following mix up.
a nice little fuzzy overhead. you can also use wall bounce via 236[B], 214[C] into 5C 236C 22C for a left/right via Super jump empty low. Other than that refer back to the pressure section for the majority of the decisions you may want to make as H kohamech
Defense
H kohamech doesn't really have any invuln reversal. you would have to depend on bunker, Abare and jumping out of pressure as your defense. You do have dodge to use in specific cases as she rolls but it isn't encouraged to crutch on it. Patience and good game decisions will let you out of a lot of pressure so jump, block and bunker accordingly.
Combos
| Combo Notation Help
|
Disclaimer: Combos are written by various writers, so the actual notation used in pages can differ from the standard one.
For more information, see Glossary and Controls.
|
| X > Y
|
X input is cancelled into Y.
|
| X > delay Y
|
Must wait for a short period before cancelling X input into Y.
|
| X, Y
|
X input is linked into Y, meaning Y is done after X's recovery period.
|
| X+Y
|
Buttons X and Y must be input simultaneously.
|
| X/Y
|
Either the X or Y input can be used.
|
| X~Y
|
This notation has two meanings.
- Use attack X with Y follow-up input.
- Input X then within a few frames, input Y. Usually used for option selects.
|
| X(w)
|
X input must not hit the opponent (Whiff).
|
| j.X
|
X input is done in the air, implies a jump/jump cancel if the previous move was done from the ground.
Applies to all air chain sections:
- Assume a forward jump cancel if no direction is given.
- Air chains such as j.A > j.B > j.C can be shortened to j.ABC.
|
| sj.X
|
X input is done after a super jump. Notated as sj8.X and sj9.X for neutral and forward super jumps respectively.
|
| dj.X
|
X input is done after a double jump.
|
| sdj.X
|
X input is done after a double super jump.
|
| tk.X
|
Stands for Tiger Knee. X motion must be buffered before jumping, inputting the move as close to the ground as possible. (ex. tk.236A)
|
| (X)
|
X is optional. Typically the combo will be easier if omitted.
|
| [X]
|
Input X is held down. Also referred to as Blowback Edge (BE). Depending on the character, this can indicate that this button is held down and not released until indicated by the release notation.
|
| ]X[
|
Input X is released. Will only appear if a button is previously held down. This type of input is referred to as Negative Edge.
|
| {X}
|
Button X should only be held down briefly to get a partially charged version instead of the fully charged one.
|
| X(N)
|
Attack "X" should only hit N times.
|
| (XYZ)xN
|
XYZ string must be performed N times. Combos using this notation are usually referred to as loops.
|
| (XYZ^)
|
A pre-existing combo labelled XYZ is inserted here for shortening purposes.
|
| CH
|
The first attack must be a Counter Hit.
|
| Air CH
|
The first attack must be a Counter Hit on an airborne opponent.
|
| 66
|
Performs a ground forward dash.
|
| j.66
|
Performs an aerial forward dash, used as a cancel for certain characters' air strings.
|
| IAD/IABD
|
Performs an Instant AirDash.
|
| AT
|
Performs an Air Throw. (j.6/4A+D)
|
| IH
|
Performs an Initiative Heat.
|
| AD
|
Performs an Arc Drive.
|
| AAD
|
Performs an Another Arc Drive.
|
Starters
| Condition
|
Notation
|
Damage
vs V.Sion
|
Notes
|
|
| Normal starter, grounded opponent
|
|
???
|
| |
| Meter Gained: ??? |
Meter Given (vs C-Moon): ??? |
| One of the more common starter that you will most likely use. |
|
|
| Normal starter, grounded opponent
|
|
???
|
| |
| Meter Gained: ??? |
Meter Given (vs C-Moon): ??? |
| This is one of the more optimal starters that either introduces corner carry combos or allows for facepalm loops that will be covered in the combo section. |
|
|
| Normal starter, grounded opponent
|
|
1500
|
| |
| Meter Gained: 10.5 |
Meter Given (vs C-Moon): 4.5 |
| Yes, it's that good. leads to big damage and is one of your main neutral and pressure tools. Get used to confirming big off of a clean 22A/B hit. |
|
|
| Overhead starter, grounded opponent
|
|
1620
|
| |
| Meter Gained: 7.0 |
Meter Given (vs C-Moon): 3.0 |
| Overhead starter that is seen more so when you have the corner. Leads to big damage. |
|
|
| Normal starter, grounded opponent
|
|
1334
|
| |
| Meter Gained: 7.0 |
Meter Given (vs C-Moon): 5.2 |
| Command grab, the combo itself is not too damaging, but it does end in an AT which is still your turn for your offense. |
|
|
Enders
| Condition
|
Notation
|
Damage
vs V.Sion
|
Notes
|
|
| Normal starter, grounded opponent
|
|
???
|
| |
| Meter Gained: ??? |
Meter Given (vs C-Moon): ??? |
| Typical air throw ender. Most of your combos will end in air throw unless you use the alternate ender for a set up. |
|
|
| Normal starter, grounded opponent
|
|
???
|
| |
| Meter Gained: ??? |
Meter Given (vs C-Moon): ??? |
| This is the alternate ender that you can use to set up 22C for either empty jump low or the fuzzy mix up. |
|
|
Normal Combos
| Condition
|
Notation
|
Damage
vs V.Sion
|
Notes
|
|
| Normal starter, grounded opponent
|
- 2AA > 2B > 2C > 5C(1) > 236BB > j.CB > dj.BC > AT
|
4381
|
|
| Meter Gained: 50.4% |
Meter Given (vs C-Moon): 22.7% |
(Video) |
| A simple BnB that you can learn and pick up. if you happen to autopilot to 2C then do this combo. |
|
|
| Normal starter, grounded opponent
|
- 2AA > 2B(1) > 5C(1) > 5A6AA > delay 2C > 236BB > j.[C]B > dj.BC >AT
|
4938
|
|
| Meter Gained: 62.6% |
Meter Given (vs C-Moon): 27.9% |
(Video) |
| Standard midscreen BnB. |
|
|
| Normal starter, grounded opponent
|
- 2AA > 2B(1) > 5C(1) > 5A6AA > 214B, 66 5C(1) > 236BB > j.[C]B > dj.BC > AT
|
4805
|
|
| Meter Gained: 64.0 |
Meter Given (vs C-Moon): 28.5 |
(Video) |
| Midscreen combo for more corner carry. However, it requires correct Mech positioning - if she is too close to the opponent the beams will whiff. Also note that the beam assist shouldn't be cancelled into its special dash followup, instead you should wait for it to recover fully and then dash. |
|
|
| 236[A] starter, grounded opponent
|
|
2778
|
|
| Meter Gained: -93.0 (7.0-100.0) |
Meter Given (vs C-Moon): 11.8 |
(Video) |
| Hitconfirm off midscreen overhead. Requires Mech positioning. Gives untechable knockdown. |
|
|
| 22A starter, grounded opponent
|
- 22A, 2C > (5C(1) >) 236BB > j.[C]B > dj.BC > AT
|
5066
|
|
| Meter Gained: 51.8% |
Meter Given (vs C-Moon): 23.3% |
(Video) |
| Midscreen 22A confirm |
|
|
| 63214C starter, grounded opponent
|
- 63214C, 8sj.BC > 9sdj.BC > AT
|
2573
|
|
| Meter Gained: 28% |
Meter Given (vs C-Moon): 15.3% |
(Video) |
| Midscreen command throw combo. |
|
|
Corner Combos
| Condition
|
Notation
|
Damage
vs V.Sion
|
Notes
|
|
| Normal starter, grounded opponent
|
- 2AA > 2B(1) > 5C(1) > 5A6AA > 214A, 5[B] > 5C(1) > 236A > 214A, 5[B] > 5C(1) > 236BB > j.CB > dj.BC > AT
|
5735
|
|
| Meter Gained: 93.4% |
Meter Given (vs C-Moon): 45.2% |
(Video) |
| *The full corner facepalm loop off normal hitconfirm. If the height after the second 214A is too small, instead you can go for 5B > 236B > j.AB > dj.ABC > AT for a fail-proof ending. You can also 5C(1) > 236A > 236C as your alternate ender to get a set up listed in the okizeme section. |
|
|
| Normal starter, grounded opponent
|
- 2AAA > 2B(1) > 2C > 5C(1) > 236a > 214A, 5[B] > 5C(1) > 2B(1) > 236A > 214A, 5[B] > 5C(1) > 2B(1) > 236BB > j.BC > dj.BC > AT
|
5233
|
| |
| Meter Gained: 100.8% |
Meter Given (vs C-Moon): 64.0% |
| Facepalm loop variation for when you're out of 5a6aa range. |
|
|
| 22A starter, grounded opponent
|
- 22A (bounce), 5C(1) > 236A > 214A... 5[B] > 5C(1) > 236BB > j.CB > dj.BC > AT
|
6037
|
|
| Meter Gained: 67.2% |
Meter Given (vs C-Moon): 29.9% |
(Video) |
| Confirm into this when the opponent is hit by 22A. The sheer amount of damage you get off this move should install fear into opponents. You can also 5C(1) > 236A > 236C as your alternate ender to get a set up listed in the okizeme section. |
|
|
| 236[A] starter, grounded opponent
|
- 236[A], 5C(1) > 236A > 214A, 5[B] > 5C(1) > 236BB > j.CB > j.BCA > AT
|
5232
|
|
| Meter Gained: 63.7% |
Meter Given (vs C-Moon): 28.4% |
(Video) |
| Overhead into facepalm loop. You can also 5C(1) 236A 236C as your alternate ender to get a set up listed in the okizeme section. |
|
|
| 63214C starter, grounded opponent
|
- 63214C, j.[B]C > dj.BC > AT
|
2602
|
|
| Meter Gained: 29.4% |
Meter Given (vs C-Moon): 15.9% |
(Video) |
| Corner command throw combo for an extra bit of damage. |
|
|
Move Descriptions
| Frame Data Help
|
| Header
|
Tooltip
|
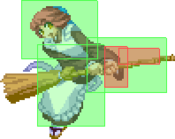
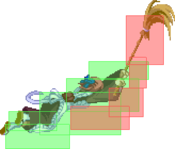
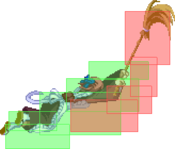
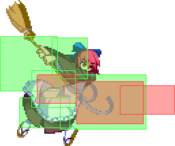
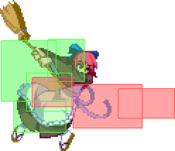
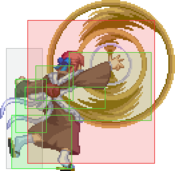
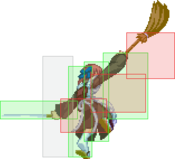
| Move Box Colors
|
Light gray = Collision Box (A move lacking one means it can go through the opponent's own collision box).
Green: Hurt Boxes.
Red: Hit(/Grab) Boxes.
Yellow: Clash Boxes (When an active hitbox strikes a clash box, the active hitbox stops being active. Multi-hit attacks can beat clash since they will still progress to the next hitbox.)
Magenta: Projectile-reflecting boxes OR Non-hit attack trigger boxes (usually).
Blue: Reflectable Projectile Boxes.
|
| Damage
|
Base damage done by this attack.
(X) denotes combined and scaled damage tested against standing V. Sion.
|
| Red Damage
|
Damage done to the recoverable red health bar by this attack. The values are inherently scaled and tested against standing V. Sion.
(X) denotes combined damage.
|
| Proration
|
The correction value set by this attack and the way it modifies the scaling during a string. See this page for more details.
X% (O) means X% Overrides the previous correction value in a combo if X is of a lower percentage.
X% (M) means the current correction value in a combo will be Multiplied by X%. This can also be referred to as relative proration.
|
| Circuit
|
Meter gained by this attack on hit.
(X%) denotes combined meter gain.
-X% denotes a meter cost.
|
| Cancel
|
Actions this move can be cancelled into.
SE = Self cancelable.
N = Normal cancelable.
SP = Special cancelable.
CH = Cancelable into the next part of the same attack (Chain in case of specials).
EX = EX cancelable.
J = Jump cancelable.
(X) = Cancelable only on hit.
-X- = Cancelable on whiff.
|
| Guard
|
The way this move must be blocked.
L = Can block crouching
H = Can block standing.
A = Can block in the air.
U = Unblockable.
|
| Startup
|
Amount of frames that must pass prior to reaching the active frames. Also referred to as "True Startup".
|
| Active
|
The amount of frames that this move will have a hitbox.
(x) denotes frame gaps where there are no hitboxes is present. Due to varied blockstuns, (x) frames are difficult to use to determine punish windows. Generally the larger the numbers, the more time you have to punish.
X denotes active frames with a duration separate from its origin move's frame data, such as projectile attacks. In this case, the total length of the move is startup+recovery only.
|
| Recovery
|
Frames that this move has after the active frames if not canceled. The character goes into one frame where they can block but not act afterwards, which is not counted here.
|
| Advantage
|
The difference in frames where you can act before your opponent when this move is blocked (assuming the move isn't canceled and the first active frame is blocked).
If the opponent uses a move with startup that is at least 2 frames less than this move's negative advantage, it will result in the opponent hitting that move.
±x~±y denotes a range of possible advantages.
|
| Invul
|
Lists any defensive properties this move has.
X y~z denotes X property happening between the y to z frames of the animations. If no frames are noted, it means the invincibility lasts through the entire move.
Invicibility:
- Strike = Strike invincible.
- Throw = Throw invincible.
Hurtbox-Based Properties:
- Full = No hurtboxes are present.
- High = Upper body lacks a hurtbox.
- Low = Lower body lacks a hurtbox.
Miscellaneous Properties
- Clash = Frames in which clash boxes are active.
- Reflect = Frames in which projectile-reflecting boxes are active.
- Super Armor = Frames in which the character can take hits without going into hit stun.
|
Normal Moves
Standing Normals
|
|
| 5A
|
Damage
|
Red Damage
|
Proration
|
Cancel
|
Guard
|
| 350
|
163
|
78% (O)
|
-SE-, -N-, -SP-, -CH-, -EX-, (J)
|
LH
|
| First Active
|
Active
|
Recovery
|
Frame Adv
|
Circuit
|
Invuln
|
| 5
|
4
|
8
|
0
|
2.45%
|
-
|
|
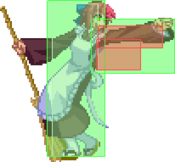
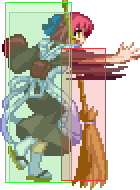
Standard 5A punch.
|
| 5A~6A
|
Damage
|
Red Damage
|
Proration
|
Cancel
|
Guard
|
| 600
|
384
|
80% (M)
|
N, SP, -CH-, EX, (J)
|
LH
|
| First Active
|
Active
|
Recovery
|
Frame Adv
|
Circuit
|
Invuln
|
| 8
|
4
|
16
|
-5
|
4.2%
|
-
|
|
Broom swipe followup.
|
| 5A~6A~6A
|
Damage
|
Red Damage
|
Proration
|
Cancel
|
Guard
|
| 1000
|
768
|
60% (O)
|
(N), SP, EX, (J)
|
LH
|
| First Active
|
Active
|
Recovery
|
Frame Adv
|
Circuit
|
Invuln
|
| 10
|
4
|
17
|
-3
|
7.0%
|
-
|
|
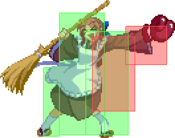
The boxing glove. Launches on hit.
|
|
|
|
| 5B
|
Damage
|
Red Damage
|
Proration
|
Cancel
|
Guard
|
| 600
|
384
|
70% (O)
|
N, SP, EX, (J)
|
H (Whiffs vs Crouch.),
LH
|
| First Active
|
Active
|
Recovery
|
Frame Adv
|
Circuit
|
Invuln
|
| 9
|
5
|
14
|
-4 (vs Stand.)
-2 (vs Crouch.)
|
4.2%
|
-
|
|
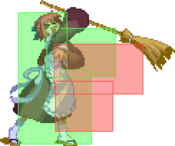
Downward broom swipe, first hitbox automatically whiffs on crouchers.
|
| 5[B]
|
Damage
|
Red Damage
|
Proration
|
Cancel
|
Guard
|
| 1000
|
672
|
70% (O)
|
N, SP, EX, (J)
|
LH
|
| First Active
|
Active
|
Recovery
|
Frame Adv
|
Circuit
|
Invuln
|
| 18
|
8
|
12
|
-5
|
7.0%
|
-
|
|
Disjointed charged version.
|
|
|
|
| Damage
|
Red Damage
|
Proration
|
Cancel
|
Guard
|
| 900, 150*3, 800 (2020)
|
(908)
|
100% (1-5), 60% (M)
|
N, SP, EX, (J)
|
LH (1), LHA
|
| First Active
|
Active
|
Recovery
|
Frame Adv
|
Circuit
|
Invuln
|
| 7
|
4 (8) 8
|
29
|
-31 ~ -13
|
3.5%*5 (17.5%)
|
-
|
|
Broom spin attack. Launches on hit.
|
|
Crouching Normals
|
|
| Damage
|
Red Damage
|
Proration
|
Cancel
|
Guard
|
| 350
|
96
|
75% (O)
|
-SE-, -N-, -SP-, -EX-, (J)
|
L
|
| First Active
|
Active
|
Recovery
|
Frame Adv
|
Circuit
|
Invuln
|
| 5
|
4
|
8
|
0
|
2.1%
|
-
|
|
Standard 2A low.
|
|
|
|
| Damage
|
Red Damage
|
Proration
|
Cancel
|
Guard
|
| 500*2 (911)
|
(540)
|
85% (O)
|
N, SP, EX, (J)
|
LH, L
|
| First Active
|
Active
|
Recovery
|
Frame Adv
|
Circuit
|
Invuln
|
| 8
|
5 (3) 4
|
17
|
-14, -6
|
3.5%*2 (7.0%)
|
Clash 8-12
|
|
Double broom swipe. First hit has clash frames, second hit is a low.
|
|
|
|
| 2C
|
Damage
|
Red Damage
|
Proration
|
Cancel
|
Guard
|
| 1000
|
768
|
60% (O)
|
N, SP, EX, (J)
|
L
|
| First Active
|
Active
|
Recovery
|
Frame Adv
|
Circuit
|
Invuln
|
| 11
|
4
|
24
|
-10
|
7.0%
|
-
|
|
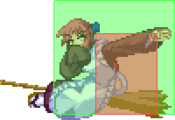
Broom sweep.
|
| 2[C]
|
Damage
|
Red Damage
|
Proration
|
Cancel
|
Guard
|
| 500, 800 (1042)
|
(644)
|
70% (O), 80% (O)
|
SP, EX
|
L
|
| First Active
|
Active
|
Recovery
|
Frame Adv
|
Circuit
|
Invuln
|
| 23
|
7
|
26
|
-15, -13
|
3.5%, 4.9% (8.4%)
|
-
|
|
Charged version hits 2 times, has forward momentum and can only be cancelled into specials.
|
|
Aerial Normals
|
|
| Damage
|
Red Damage
|
Proration
|
Cancel
|
Guard
|
| 300
|
96
|
73% (O)
|
SE, N, SP, J
|
LHA
|
| First Active
|
Active
|
Recovery
|
Frame Adv
|
Circuit
|
Invuln
|
| 6
|
4
|
10
|
-
|
2.1%
|
-
|
|
Broom handle poke.
|
|
|
|
| j.B
|
Damage
|
Red Damage
|
Proration
|
Cancel
|
Guard
|
| 600
|
384
|
90% (O)
|
N, SP, J
|
HA
|
| First Active
|
Active
|
Recovery
|
Frame Adv
|
Circuit
|
Invuln
|
| 7
|
4
|
-
|
-
|
3.5%
|
-
|
|
Huge air-to-air button.
|
| j.[B]
|
Damage
|
Red Damage
|
Proration
|
Cancel
|
Guard
|
| 700
|
480
|
80% (O)
|
N, SP, J
|
HA
|
| First Active
|
Active
|
Recovery
|
Frame Adv
|
Circuit
|
Invuln
|
| 21
|
4
|
-
|
-
|
4.9%
|
-
|
|
Charged version wallslams on hit.
|
|
|
|
| j.C
|
Damage
|
Red Damage
|
Proration
|
Cancel
|
Guard
|
| 1000
|
768
|
90% (O)
|
N, SP, J
|
HA
|
| First Active
|
Active
|
Recovery
|
Frame Adv
|
Circuit
|
Invuln
|
| 10
|
4
|
-
|
-
|
7.0%
|
-
|
|
Horizontal swipe.
|
| j.[C]
|
Damage
|
Red Damage
|
Proration
|
Cancel
|
Guard
|
| 1300
|
960
|
80% (O)
|
N, SP, J
|
HA
|
| First Active
|
Active
|
Recovery
|
Frame Adv
|
Circuit
|
Invuln
|
| 19
|
4
|
-
|
-
|
9.1%
|
-
|
|
Disjointed charged version.
|
|
Universal Mechanics
|
|
| Damage
|
Red Damage
|
Proration
|
Cancel
|
Guard
|
| 1000
|
480
|
100%
|
-
|
U
|
| First Active
|
Active
|
Recovery
|
Frame Adv
|
Circuit
|
Invuln
|
| 3
|
1
|
20
|
-
|
0.0%
|
-
|
|
Syringe hit. Untechable knockdown.
|
|
|
|
| Damage
|
Red Damage
|
Proration
|
Cancel
|
Guard
|
| 1600 (Raw)/1300
|
576
|
30%
|
-
|
U
|
| First Active
|
Active
|
Recovery
|
Frame Adv
|
Circuit
|
Invuln
|
| 2
|
1
|
12
|
-
|
0.0%
|
-
|
|
Ground bounces the opponnent using a 16-ton weight.
|
|
|
|
| Standing
|
Damage
|
Red Damage
|
Proration
|
Cancel
|
Guard
|
| 500 (345)
|
198
|
50%
|
(SP), (EX), (J)
|
LHA
|
| First Active
|
Active
|
Recovery
|
Frame Adv
|
Circuit
|
Invuln
|
| 9
|
4
|
18
|
-4
|
3.5%
|
-
|
|
Same animation as 5C.
|
| Crouching
|
Damage
|
Red Damage
|
Proration
|
Cancel
|
Guard
|
| 1500 (1117)
|
714
|
50%
|
(SP), (EX)
|
LA
|
| First Active
|
Active
|
Recovery
|
Frame Adv
|
Circuit
|
Invuln
|
| 9
|
4
|
18
|
-4
|
10.5%
|
-
|
|
Same hitboxes as 2C.
|
| Aerial
|
Damage
|
Red Damage
|
Proration
|
Cancel
|
Guard
|
| 500 (345)
|
198
|
50%
|
-
|
HA
|
| First Active
|
Active
|
Recovery
|
Frame Adv
|
Circuit
|
Invuln
|
| 9
|
4
|
-
|
-
|
3.5%
|
-
|
|
Same animation as j.B.
|
|
|
|
| Neutral
|
Damage
|
Red Damage
|
Proration
|
Cancel
|
Guard
|
| 500
|
192
|
50%
|
-
|
LHA
|
| First Active
|
Active
|
Recovery
|
Frame Adv
|
Circuit
|
Invuln
|
| 26
|
4
|
19
|
-5
|
0.0%
|
Clash 1-10
|
| (Clash)
|
Damage
|
Red Damage
|
Proration
|
Cancel
|
Guard
|
| 500
|
192
|
50%
|
-
|
LHA
|
| First Active
|
Active
|
Recovery
|
Frame Adv
|
Circuit
|
Invuln
|
| 8
|
4
|
19
|
-5
|
0.0%
|
Strike 1-7
|
|
Flaming battou swipe.
|
| Blockstun
|
Damage
|
Red Damage
|
Proration
|
Cancel
|
Guard
|
| 0
|
0
|
100%
|
-
|
LHA
|
| First Active
|
Active
|
Recovery
|
Frame Adv
|
Circuit
|
Invuln
|
| 19
|
3
|
22
|
-7
|
-100.0%
|
-
|
|
H-Moon specific reversal bunker.
|
|
|
|
| Ground
|
Damage
|
Red Damage
|
Proration
|
Cancel
|
Guard
|
| 100
|
0
|
100%
|
-
|
U
|
| First Active
|
Active
|
Recovery
|
Frame Adv
|
Circuit
|
Invuln
|
| 11
|
10
|
20
|
-
|
removes all
|
Full 1-39
|
| Air
|
Damage
|
Red Damage
|
Proration
|
Cancel
|
Guard
|
| 100
|
0
|
100%
|
-
|
U
|
| First Active
|
Active
|
Recovery
|
Frame Adv
|
Circuit
|
Invuln
|
| 12
|
10
|
15
|
-
|
removes all
|
Strike 1-30
|
|
Universal burst mechanic. Unlike Crescent/Full Heat activation, the hitbox and frame data doesn't vary between characters. However, you can be thrown out of this move if you input it in the air.
|
|
Special Moves
Special Movement
|
|
| Forward
|
Damage
|
Red Damage
|
Proration
|
Cancel
|
Guard
|
| -
|
-
|
-
|
-
|
-
|
| First Active
|
Active
|
Recovery
|
Frame Adv
|
Circuit
|
Invuln
|
| -
|
-
|
36
|
-
|
-
|
-
|
| Back
|
Damage
|
Red Damage
|
Proration
|
Cancel
|
Guard
|
| -
|
-
|
-
|
-
|
-
|
| First Active
|
Active
|
Recovery
|
Frame Adv
|
Circuit
|
Invuln
|
| -
|
-
|
33
|
-
|
-
|
-
|
|
Kohaku can cancel her assist call animation into a command dash. Forward version goes at a set distance and cannot be cancelled unlike her normal dash, and the command backdash has smaller hurtboxes.
Note: Your frame advantage will be much worse if you use this dash on a blocked assist call.
|
|
Grounded Specials
A A [A] [A] B B [B] [B] ~X ~X EX EX
|
| A
|
Damage
|
Red Damage
|
Proration
|
Cancel
|
Guard
|
| 800
|
643
|
85% (M)
|
SP, -CH-, -EX-
|
LHA
|
| First Active
|
Active
|
Recovery
|
Frame Adv
|
Circuit
|
Invuln
|
| 7
|
1
|
27
|
-10
|
4.9%
|
Clash 4
|
| [A]
|
Damage
|
Red Damage
|
Proration
|
Cancel
|
Guard
|
| 1500
|
931
|
60% (O)
|
-CH-, -EX-
|
HA
|
| First Active
|
Active
|
Recovery
|
Frame Adv
|
Circuit
|
Invuln
|
| 27
|
1
|
27
|
-10
|
7.0%
|
-
|
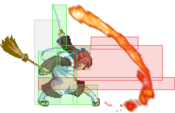
- Kohaku Battou attack. Similar to her Half Moon and Crescent Moon Kohaku battou attacks, with some slight differences. Pressing any button after the non-EX attack (on hit, whiff or block) will perform a broom-slam followup that can be jump cancelled. The followup attack launches up, and can be jump-cancelled on hit.
Low battou slash. Can be charged to become an overhead that wallslams on hit. The uncharged version inflicts untechable knockdown. In addition, this move may be cancelled on block or on hit into any special except itself. Useful in blockstrings to set up for 22A/B/C to cover resuming pressure, and in conjunction with 236B is your staple launcher. Cancelling it into 236C gives you a very long knockdown period to set up oki.
|
| B
|
Damage
|
Red Damage
|
Proration
|
Cancel
|
Guard
|
| 1000
|
643
|
70% (0)
|
-CH-, (J)
|
LHA
|
| First Active
|
Active
|
Recovery
|
Frame Adv
|
Circuit
|
Invuln
|
| 8
|
4
|
30
|
-10
|
2.1%
|
-
|
| [B]
|
Damage
|
Red Damage
|
Proration
|
Cancel
|
Guard
|
| 1200
|
960
|
70% (M)
|
-CH-, EX
|
LH
|
| First Active
|
Active
|
Recovery
|
Frame Adv
|
Circuit
|
Invuln
|
| 26
|
4
|
30
|
-10
|
7.0%
|
Clash 4
|
|
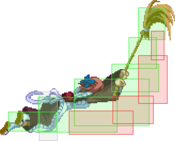
High battou slash. Can be charged to become air unblockable and wallslam. A somewhat risky antiair, but it has extremely long reach and a good angle, and can be followed up from if you land a successful hit. Combined with 236A for your staple launcher combo.
|
| ~X
|
Damage
|
Red Damage
|
Proration
|
Cancel
|
Guard
|
| 800
|
288
|
90% (M)
|
-EX-, (J)
|
LH
|
| First Active
|
Active
|
Recovery
|
Frame Adv
|
Circuit
|
Invuln
|
| 11
|
4
|
21
|
-7
|
5.6%
|
-
|
| EX
|
Damage
|
Red Damage
|
Proration
|
Cancel
|
Guard
|
| 2000
|
1536
|
100%
|
-
|
LH
|
| First Active
|
Active
|
Recovery
|
Frame Adv
|
Circuit
|
Invuln
|
| 4+6
|
1
|
55
|
-38
|
-100.0%
|
Full 1-7
|
|
Standard solo Kohaku EX Battou, this move inflicts hard knockdown on hit and is extremely unsafe on block. Your best tool to set up for oki after a combo, but depending on positioning it may be preferable to use 623C instead for the added damage.
Differences vs Crescent/Half solo Kohaku and Maids Kohaku:
- The slash has more recovery. Part of the recovery can be cancelled.
- 236A has hard knockdown, while 236[A] has wallslam instead of knockdown.
- 236A can be cancelled into any other special, not just 236B, and can be cancelled on block.
- Whereas solo Kohaku has multiple followups after using Battou with A, B, and C, all of this Kohaku's are the solo Kohaku A followup.
- The A followup launches up instead of behind, and can be jump-cancelled on hit.
|
|
|
|
| A
|
Damage
|
Red Damage
|
Proration
|
Cancel
|
Guard
|
| 400, 800 (1175)
|
(939)
|
100%
|
-CH-
|
LH
|
| First Active
|
Active
|
Recovery
|
Frame Adv
|
Circuit
|
Invuln
|
| 11
|
3 (3) 3
|
36
|
-21
|
2.8%, 5.6% (8.4%)
|
-
|
- H-Mech 623X lightning fist assist. Mech Hisui reaches across the screen and shoots lightning from her extended hand. All versions of this move are air unblockable and may be both forward-and-back-dash canceled to make them relatively safe.
The weakest version of the move. This has very few hits and is pretty unsafe on block, but it's the fastest version.
|
| B
|
Damage
|
Red Damage
|
Proration
|
Cancel
|
Guard
|
| 350*3, 800 (1742)
|
(1446)
|
100%
|
-CH-
|
LH
|
| First Active
|
Active
|
Recovery
|
Frame Adv
|
Circuit
|
Invuln
|
| 14
|
3 (3) x3, 3
|
22
|
-7
|
2.45%*3, 5.6% (12.95%)
|
-
|
|
The most practical version of the move, is safe on block when backdash cancelled and has a much larger hitbox than the A version, making it an effective way to punish jumps at long range or use as ranged antiair or to grab dashes or ranged attacks.
|
| EX
|
Damage
|
Red Damage
|
Proration
|
Cancel
|
Guard
|
| -
|
-
|
-
|
-CH-
|
-
|
| First Active
|
Active
|
Recovery
|
Frame Adv
|
Circuit
|
Invuln
|
| -
|
-
|
56
|
-
|
-100.0%
|
-
|
| (Mech-Hisui)
|
Damage
|
Red Damage
|
Proration
|
Cancel
|
Guard
|
| 300*7, 800 (2525)
|
(2046)
|
100%
|
-
|
LH
|
| First Active
|
Active
|
Recovery
|
Frame Adv
|
Circuit
|
Invuln
|
| 5+12
|
3 (3) x7, 3
|
-
|
23
|
0.0%
|
-
|
|
Though it costs 100 meter for only a little more damage than 623B and a bit more range and +frames when cancelled, this move inflicts hard knockdown on someone hit. With proper spacing this can also be used as a way to escape pressure by trading favorably, but that's a very risky choice as though the attack will not be cancelled if kohaku is hit once Mech starts moving, Mech herself can still be hit. Very situational move, but has some limited uses. Does more damage than 236C if you want to spend meter for damage and hard knockdown.
|
|
|
|
| A
|
Damage
|
Red Damage
|
Proration
|
Cancel
|
Guard
|
| 1000
|
672
|
70% (O)
|
-CH-
|
HA
(Whiffs vs Crouch.)
|
| First Active
|
Active
|
Recovery
|
Frame Adv
|
Circuit
|
Invuln
|
| 20
|
5
|
20
|
2
|
7.0%
|
-
|
- Some of Koha-Mech's assist moves, mostly focused around poking and zoning or combo tools. This can be cancelled into a special dack/backdash
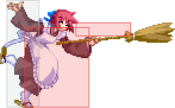
H-Mech 5B assist. Mech Hisui does a super-long range palm attack. This attack wallslams and can be comboed after provided you are in range. An excellent combo tool in the corner, but very poor for zoning as it is both air and ground blockable and whiffs crouching targets.
214A needs at least 8 startup frames to come out.
|
| B
|
Damage
|
Red Damage
|
Proration
|
Cancel
|
Guard
|
| 700
|
384
|
90% (M)
|
-CH-
|
LHA
|
| First Active
|
Active
|
Recovery
|
Frame Adv
|
Circuit
|
Invuln
|
| 24
|
3
|
19
|
3
|
4.9%
|
-
|
|
H-Mech j.236A assist. Mech Hisui jumps a short distance into the air and fires a laser beam at an angle downward. Hits nearly fullscreen on grounded targets, although it whiffs crouchers at close ranged. Has fast startup, also groundbounces if it connects on airborne targets, allowing a relaunch followup if you are close enough. Can be comboed into using 2C.
214B needs at least 5 startup frames to come out. Good abare option if you can sniff out 5 frame gap somewhere in the opponents pressure.
|
| C
|
Damage
|
Red Damage
|
Proration
|
Cancel
|
Guard
|
| -
|
-
|
-
|
-CH-
|
-
|
| First Active
|
Active
|
Recovery
|
Frame Adv
|
Circuit
|
Invuln
|
| -
|
-
|
39
|
-
|
-
|
-
|
| (Mech-Hisui)
|
Damage
|
Red Damage
|
Proration
|
Cancel
|
Guard
|
| 1000
|
672
|
90% (O)
|
-
|
LHA
|
| First Active
|
Active
|
Recovery
|
Frame Adv
|
Circuit
|
Invuln
|
| 26 ~ 29
|
X
|
-
|
11 ~ 14
|
4.9%
|
-
|
|
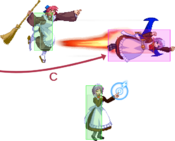
H-Mech 63214B assist. Mech Hisui summons a flying Mech Hisui clone to come in from behind and above Kohaku and fly across and upward. This Mech Hisui is vulnerable to attacks, but will eat any hits it takes, protecting you if you are also in the attack's hitbox and blocking projectiles. Backdash cancelling this move gives you an excellent tool to control airspace from the ground at minimal risk to yourself.
|
| [C]
|
Damage
|
Red Damage
|
Proration
|
Cancel
|
Guard
|
| -
|
-
|
-
|
-CH-
|
-
|
| First Active
|
Active
|
Recovery
|
Frame Adv
|
Circuit
|
Invuln
|
| -
|
-
|
51
|
-
|
-
|
-
|
| (Mech-Hisui)
|
Damage
|
Red Damage
|
Proration
|
Cancel
|
Guard
|
| 1000
|
672
|
90% (O)
|
-
|
LHA
|
| First Active
|
Active
|
Recovery
|
Frame Adv
|
Circuit
|
Invuln
|
| 26 ~ 27
|
X
|
-
|
-1 ~ 0
|
4.9%
|
-
|
|
The ground version can be charged, causing the Mech to come in at ground height and on the opposite side of the screen, providing a way to interrupt attacks from fullscreen which have slow startup.
|
|
|
|
| A
|
Damage
|
Red Damage
|
Proration
|
Cancel
|
Guard
|
| -
|
-
|
-
|
-
|
-
|
| First Active
|
Active
|
Recovery
|
Frame Adv
|
Circuit
|
Invuln
|
| -
|
-
|
37
|
-
|
-
|
-
|
| (Mech-Hisui)
|
Damage
|
Red Damage
|
Proration
|
Cancel
|
Guard
|
| 1500
|
1334
|
75% (O)
|
-
|
LH
|
| First Active
|
Active
|
Recovery
|
Frame Adv
|
Circuit
|
Invuln
|
| 40 ~ 63
|
15 ~ 18
|
-
|
29
|
10.5%
|
-
|
- Mech Hisui's pressure/oki oriented assists. Usually this is your go-to move after a hard knockdown to cover your pressure on wakeup and punish people for trying to reversal on wakeup. All 3 versions of this move recover significantly before the active frames of the attack begin, making it completely safe for this purpose.
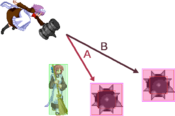
Short range Spiked Ball assist. Kohaku throws a spiked metal ball in the air, then Mech Hisui jumps upward and slams it down to the ground with her hammer. This move is air unblockable and groundslams on hit, making it extremely effective to cover your initial oki as if they were to reversal out on wakeup the ball would hit them and knock them back into the corner, netting you a free combo if you blocked their reversal and likely resetting you to neutral at worst on a trade.
22A Needs 5 frames of startup to pass spikeball to Mech-Hisui.
|
| B
|
Damage
|
Red Damage
|
Proration
|
Cancel
|
Guard
|
| -
|
-
|
-
|
-
|
-
|
| First Active
|
Active
|
Recovery
|
Frame Adv
|
Circuit
|
Invuln
|
| -
|
-
|
41
|
-
|
-
|
-
|
| (Mech-Hisui)
|
Damage
|
Red Damage
|
Proration
|
Cancel
|
Guard
|
| 1500
|
1334
|
65%
|
-
|
LHA
|
| First Active
|
Active
|
Recovery
|
Frame Adv
|
Circuit
|
Invuln
|
| 44 ~ 63
|
17 ~ 20
|
-
|
29
|
10.5%
|
-
|
|
Long range Spiked Ball assist. Same as the A version, however it flies farther and is not air unblockable. Usually used when Mech Hisui is too far away to use 22A/C or to cover approach attempts from a medium distance. Limited utility, but it has its usefulness.
|
| C
|
Damage
|
Red Damage
|
Proration
|
Cancel
|
Guard
|
| -
|
-
|
-
|
-
|
-
|
| First Active
|
Active
|
Recovery
|
Frame Adv
|
Circuit
|
Invuln
|
| -
|
-
|
60
|
-
|
-
|
-
|
| (Mech-Hisui)
|
Damage
|
Red Damage
|
Proration
|
Cancel
|
Guard
|
| 250*8
|
196*8
|
100%
|
-
|
LHA
|
| First Active
|
Active
|
Recovery
|
Frame Adv
|
Circuit
|
Invuln
|
| 68
|
24
|
-
|
39
|
1.4%*8 (11.2%)
|
-
|
|
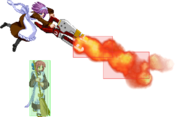
Flamethrower assist. Kohaku whips out a flamethrower, tossing it to Mech Hisui. Mech Hisui then jumps up and does her standard j.2C attack. This attack has slower startup than the spiked balls slightly, however the hitbox is massive and it has huge numbers of active frames, making it your best bet for covering movement or preventing your opponent from trying anything funny on wakeup.
|
|
|
|
| Damage
|
Red Damage
|
Proration
|
Cancel
|
Guard
|
| 0, 500, 1500 (1334)
|
(1109)
|
100%, 70% (O), 35% (O)
|
-
|
U
(Whiffs vs Air.)
|
| First Active
|
Active
|
Recovery
|
Frame Adv
|
Circuit
|
Invuln
|
| 4
|
1
|
22
|
-
|
7.0%
|
-
|
|
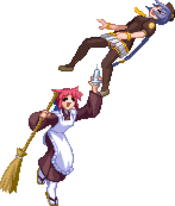
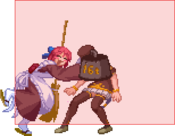
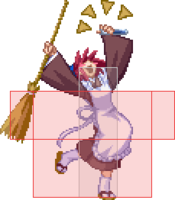
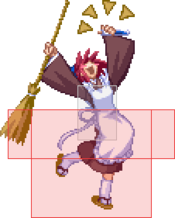
Koha-Mech's special command throw. Kohaku grabs the target, launching them into the air, then Mech Hisui summons a flying robot to hit them in the air. You can combo off of this move by jumping after you recover and hitting them once the robot connects. One of her stronger mixup tools, it's active on frame 4 (only 1f slower than standard throw) but allows for significantly more damage due to being comboable from.
|
|
Aerial Specials
|
|
| A
|
Damage
|
Red Damage
|
Proration
|
Cancel
|
Guard
|
| 1000
|
672
|
70% (O)
|
-
|
HA
(Whiffs vs Crouch.)
|
| First Active
|
Active
|
Recovery
|
Frame Adv
|
Circuit
|
Invuln
|
| 16
|
5
|
12
|
6
|
7.0%
|
-
|
- Aerial version of 214X series.
H-Mech 5B assist. Mech Hisui does a super-long range palm attack. Wallslams on hit.
|
| B
|
Damage
|
Red Damage
|
Proration
|
Cancel
|
Guard
|
| 1000
|
576
|
80% (O)
|
-
|
LHA
|
| First Active
|
Active
|
Recovery
|
Frame Adv
|
Circuit
|
Invuln
|
| 23
|
3
|
12
|
10
|
6.3%
|
-
|
|
H-Mech j.236A assist. Mech Hisui jumps a short distance into the air and fires a laser beam at an angle downward. Hits nearly fullscreen on grounded targets, although it whiffs crouchers at close ranged. Has fast startup.
|
| C
|
Damage
|
Red Damage
|
Proration
|
Cancel
|
Guard
|
| 1000
|
672
|
90% (O)
|
-
|
LHA
|
| First Active
|
Active
|
Recovery
|
Frame Adv
|
Circuit
|
Invuln
|
| 18 ~ 20
|
X
|
12
|
5 ~ 7
|
4.9%
|
-
|
|
H-Mech 63214B assist. Mech Hisui summons a flying Mech Hisui clone to come in from behind and above Kohaku and fly across and upward. This Mech Hisui is vulnerable to attacks, but will eat any hits it takes, protecting you if you are also in the attack's hitbox and blocking projectiles.
|
|
Arc Drives
|
|
| Damage
|
Red Damage
|
Proration
|
Cancel
|
Guard
|
| 7980 (4638)
|
(3009)
|
100%
|
-
|
LHA
|
| First Active
|
Active
|
Recovery
|
Frame Adv
|
Circuit
|
Invuln
|
| 2+5
|
4
|
22
|
-8
|
removes all
|
Full 1-10
|
|
Kohaku and Mech Hisui execute a team combo on the target. The startup of this move is fully invulnerable and the hitbox is fairly large, however it is blockable. A costly reversal since it consumes your entire Heat Gauge but also the only practical reversal H-KohaMech has due to her standard Arc Drive being so slow and easily punished. Kohaku recovers shortly before Mech Hisui finishes the combo, so although the combo itself is ground techable, you can punish them for teching if they do so. Active on frame 7.
|
|
|
|
| Damage
|
Red Damage
|
Proration
|
Cancel
|
Guard
|
| 4700 (2176)
|
(1082)
|
50% (O)
|
-
|
U
(Whiffs vs Air.)
|
| First Active
|
Active
|
Recovery
|
Frame Adv
|
Circuit
|
Invuln
|
| 2+15
|
X
|
Knockdown*
|
-
|
removes all
|
Full
|
|
The same as standard Kohaku's arc drive, an invulnerable and unblockable dash attack. If the first hit connects, she will execute a combo on the target dealing decent damage and inflicting Circuit Break. This attack will OTG, so it can be comboed off of any move that allows OTG followups such as 2C. It will not hit targets in the air or who are blocking however, and if it whiffs you will rebound off the wall and be punishable for a long duration, meaning using this move in any situation outside of a combo is an extremely risky choice and almost never worth it.
|
|
MBAACC Navigation
