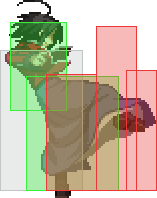
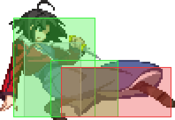
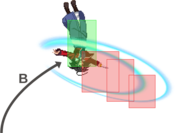
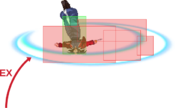
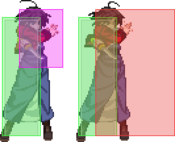
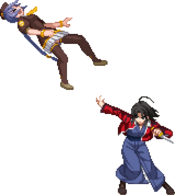
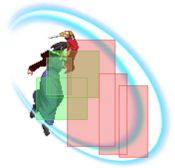
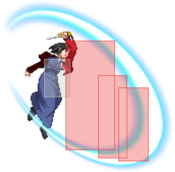
Melty Blood/MBAACC/Shiki Ryougi/Half Moon
Character Page Progress
This page is mostly complete, consider joining as an editor to help finish it up. Please update this character's roadmap page when one of the editing goals have been reached. When no main goals are left, please remove this section from this page.
| In Progress | To-do |
|---|---|
|
|
Overview
H-Ryougi trades C-Ryougi's gimmicks, F-Ryougi's improved rekkas, and both moons' unblockables for a toolkit focused almost entirely on her unique set of knife toss moves. Knife toss specials have fantastic all-around utility, and she arguably has the best pressure and okizeme of the three moons because of them. Her normals are a mixture of F and C's (debatably lesser) normals with all their pros and cons. Her ground buttons (disregarding command normals) are mostly the same as C-Ryougi's with one important exception, she takes 5C from F-Ryougi instead, giving her much better horizontal reach and ability to convert at range. Her air buttons are the exact same as F-Ryougi's, except jB has been split into two separate normals with j6B being the upwards hit.
This combination of strengths and weaknesses from her other two moons paired with her unique kit makes her overall much more suited for rushdown. That being said, the flaws in her neutral game and lack of safe ways to close the gap mean she often has to bide her time and play passive until an opening presents itself. H-Ryougi rewards good patience, tests your opponent's patience, and looks very cool while doing so.
Move Descriptions
| Frame Data Help | |
|---|---|
| Header | Tooltip |
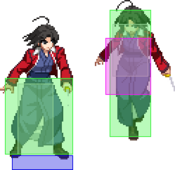
| Move Box Colors |
Light gray = Collision Box (A move lacking one means it can go through the opponent's own collision box). |
| Damage | Base damage done by this attack.
(X) denotes combined and scaled damage tested against standing V. Sion. |
| Red Damage | Damage done to the recoverable red health bar by this attack. The values are inherently scaled and tested against standing V. Sion.
(X) denotes combined damage. |
| Proration | The correction value set by this attack and the way it modifies the scaling during a string. See this page for more details.
X% (O) means X% Overrides the previous correction value in a combo if X is of a lower percentage. |
| Circuit | Meter gained by this attack on hit.
(X%) denotes combined meter gain. |
| Cancel | Actions this move can be cancelled into.
SE = Self cancelable. |
| Guard | The way this move must be blocked.
L = Can block crouching |
| Startup | Amount of frames that must pass prior to reaching the active frames. Also referred to as "True Startup". |
| Active | The amount of frames that this move will have a hitbox. (x) denotes frame gaps where there are no hitboxes is present. Due to varied blockstuns, (x) frames are difficult to use to determine punish windows. Generally the larger the numbers, the more time you have to punish. |
| Recovery | Frames that this move has after the active frames if not canceled. The character goes into one frame where they can block but not act afterwards, which is not counted here. |
| Advantage | The difference in frames where you can act before your opponent when this move is blocked (assuming the move isn't canceled and the first active frame is blocked). If the opponent uses a move with startup that is at least 2 frames less than this move's negative advantage, it will result in the opponent hitting that move. |
| Invul | Lists any defensive properties this move has.
X y~z denotes X property happening between the y to z frames of the animations. If no frames are noted, it means the invincibility lasts through the entire move. Invicibility:
Hurtbox-Based Properties:
Miscellaneous Properties
|
Normal Moves
Standing Normals
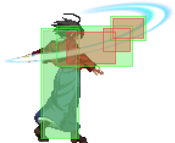
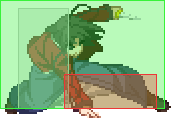
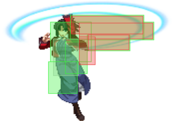
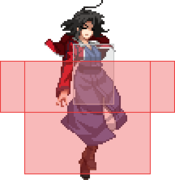
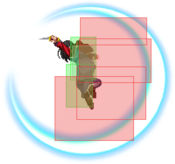
5A
5A 5A~6A~6A Swish Swish Stop jumping Stop jumping
|
|---|
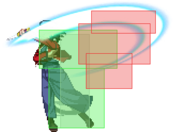
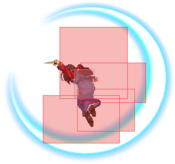
5B
5B 5B~B Don't whiff this Don't whiff this Always whiffs at max 5B range Always whiffs at max 5B range
|
|---|
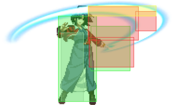
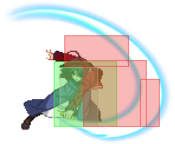
5C
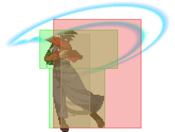
Swing for the fences Swing for the fences
|
|---|
Crouching Normals
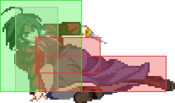
2A
2B
2 frames faster than C-moon 2B 2 frames faster than C-moon 2B
|
|---|
2C
Makes most advancing normals feel insecure Makes most advancing normals feel insecure
|
|---|
Aerial Normals
j.A
As green as the grass in springtime As green as the grass in springtime
|
|---|
j.B
The backbone of your air game The backbone of your air game
|
|---|
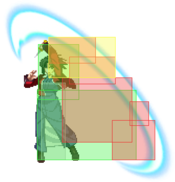
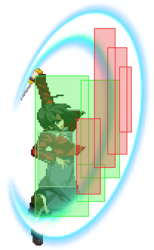
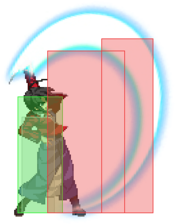
j.C
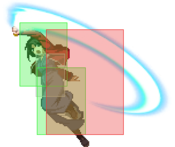
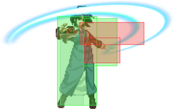
Pierce the heavens Pierce the heavens
|
|---|
Command Normals
3C
The disjoint can bait Heat attempts mid-pressure The disjoint can bait Heat attempts mid-pressure
|
|---|
4C
Wake-up call Wake-up call
|
|---|
j.6B
Situational but incredible preemptive air to air button Situational but incredible preemptive air to air button
|
|---|
Universal Mechanics
Ground Throw
Ground Throw 6/4A+D Remind them to do more than just block Remind them to do more than just block
|
|---|
Air Throw
Air Throw j.4/6A+D Raw Raw Combo Ender Combo Ender
|
|---|
Shield Counter
5D. Technically cancels into normals. Yes, really! 5D. Technically cancels into normals. Yes, really! 2D 2D j.D j.D
|
|---|
Shield Bunker
Shield Bunker 214D in neutral or blockstun Shares many unfortunate similarities with Terumi's CA Shares many unfortunate similarities with Terumi's CA
|
|---|
Circuit Spark
Special Moves
Special Movement
6A+B
Time to guess Time to guess
|
|---|
Special Mechanics
Auto-pickup
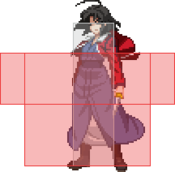
Auto-pickup boxes Auto-pickup boxes
|
|---|
Grounded Specials
236X
236A/B. Rekka 1 236A/B. Rekka 1 ~236X. Rekka 2 ~236X. Rekka 2 ~214X. Rekka 2 Overhead ~214X. Rekka 2 Overhead ~236A. Rekka 3 Knockdown ender ~236A. Rekka 3 Knockdown ender ~236B. Rekka 3 Launcher ender ~236B. Rekka 3 Launcher ender ~236C. Rekka 3 EX Cancel ender ~236C. Rekka 3 EX Cancel ender ~214D/X. Rekka 2/3 Low ender ~214D/X. Rekka 2/3 Low ender
|
|---|
623X
214X
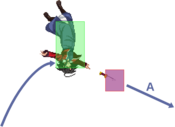
Avidya Moon 214A/B/C Don't use this Don't use this
|
|---|
421X
Ying Yang Mother-of-Pearl 421A/B/C (No EX) Gang signs Gang signs B/C B/C A/B Hit A/B Hit C Hit C Hit
|
|---|
22X
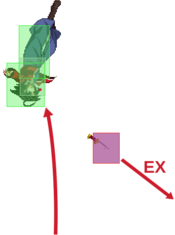
22A. 22A. 22B. 22B. 22C. Does everything. 22C. Does everything. Manual Pickup. Notably more useful on H than C or F Manual Pickup. Notably more useful on H than C or F
|
|---|
63214X
Pressure reset, combo extender, and niche movement tool Pressure reset, combo extender, and niche movement tool Running animation doesn't come out point blank Running animation doesn't come out point blank GENKYO! GENKYO!
|
|---|
Aerial Specials
j.236X
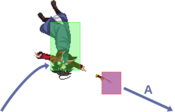
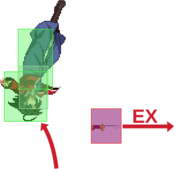
Glass Moon j.236A/B/C A version, even the hitbox is worse A version, even the hitbox is worse B version, the good one B version, the good one EX version EX version
|
|---|
j.22X
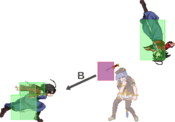
Hidden Knife (Air) j.22A/B/C The other two moons wish they got as much out of this move as you do! The other two moons wish they got as much out of this move as you do!
|
|---|
66/44/22X
A/B. A/B. EX for when you really hate having meter EX for when you really hate having meter
|
|---|
Arc Drive
Mystic Eyes of Death Perception - Five Scenic Collapse 41236C during Heat Just do a 200 meter route instead please Just do a 200 meter route instead please
|
|---|
General Gameplan
Work in Progress.
Neutral (WIP)
Since Ryougi doesn't have great ground-to-air or air-to-ground tools, you should usually try to force your opponent to play on your level and eventually convince them to stay grounded. Once the opponent agrees to play passively on the ground, you can start approaching with things like dash 5B or iad jC to force them to block and start your gameplan. This feeds back into a punish game where you can fake out approaches or simply toss your knife and maintain distance / run behind it on hit to start your turn. Learning to snag the startup of people's jumps in neutral inside of dash buttons range as either a read or educated guess is an important skill to develop, as this even further convinces opponents to let you do whatever you want.
Air game
Ryougi's preemptive airgame might seem strong with jB's hitbox and jC's upwards disjoint, but it has some notable flaws outside of falling jB. Mainly in not having an actionable on whiff jA or any sort of jump-in hitbox on any button. Without this, its not really possible for her to reliably scout opponent's approach options from the air or play a traditional Melty neutral game after jumping. Save these options for reaction air to air attempts or reads. You're much better off playing a grounded game with run under anti-airs, trip guards, and outspacing jump in attempts than you are fishing for air counter hits in matchups where you are allowed to. In matchups where you arent allowed to, most other characters arent allowed to play a ground focused anti-air game either, so dont be too upset about it. Luckily for Ryougi she does sport some tools few characters get access to. j6B and jC in particular have best in class hitboxes for their respective normal archetype, jC being the highest upwardly disjointed air normal in the game. Despite this, their applications are still quite niche. jC can be used as a bootleg run-under when used from an IAD (forwards or back), reaching much higher than something like run under 5B/2B would and leaving you much less exposed on whiff. You do have less control over microspacing though, as Ryougi's linear airdash is not cancellable from startup.
Ground game
This is the real meat of your neutral game, and you want your opponent respecting you enough to be playing here as much as possible. This is also where your better options to stop people from jumping around are due to the risk/reward being very skewed towards the opponent while trying to purely play an airgame, especially if you try to do more than passively preempt them with falling jB. With good spacing you can tag grounded or low air approaches (IADs and such) with 5B, you must be cautious as it does not hit as vertically as the animation implies and it has a lot of recovery. 5A uniquely has a suprisingly high hitbox that can be used to snipe airborne opponents either hugging your face or jumping ontop of you, but this extends a ton of green and can get you counterhit for trying to press it into an active hitbox. 5A6A, on the otherhand, is incredibly disjointed and even bigger than 5A hitbox wise. While this may seem tempting to use as a preemptive anti air, the total duration and additional startup from being forced to whiff 5A first make it a pretty niche tool for neutral application. Its much more suited to catching jump startups after a dash. 5C can be used as either a (just outside of) half screen preemptive wall of red to discourage brainless dashing at you, or as a fullscreen tool to try to goad your opponent into doing something on whiff. On hit at any range 623A will combo on grounded hit, and with 100 meter you can OTG for suprisingly high damage on such a short confirm, making this a decent enough buffer if you notice 5C is hitting dashers a lot. Think of it like a budget F-Ciel flicker. On air hit you dont get much unless its an air CH. Even with no cancel its entirely safe on block at -4. The proper counterplay versus this is to either airdash high or approach from the air, as its total duration will usually grant you a punish. 5C also extends a lot of green (about halfway through the sprite) and can be low profiled by things such as catwalk, some sweeps (satsuki is noteworthy), and some low profile dashes.
Pressure
On a fundamental level H-Ryougi's pressure is primarily strike / throw, but with way more levels dumped into the striking part than the throwing part. Thanks to 22A, manual knife pickup, 624A, 22C, and 3C, she has the ability to enforce pressure resets without needing to rely heavily on rebeat. Due to her ability to generate plus frames at will (provided her knife is on her person or nearby on the ground), mashing versus Ryougi is a dangerous prospect. Her large safe on block normals let her weave potent spacing traps into any string, and an absurdly forward-moving 2C lets her stay in her optimal range to access her full toolkit. As if this couldn't get any better, every single one of her crouching normals is a low. Players mashing backdash in blockstun or trying to fuzzy jump are prone to getting clipped low at any point, and its easy for her to keep her strings gapless for very long periods of time in order to do so.
Where her offense does fall short is actually opening up passive opponents. Between nonexistent air to ground hitboxes on her air normals and total lack of a strong mid-blockstring mixup, she really can't hurt the other player without their consent. Convincing your opponent to mash or jump out with throws without putting your life in danger can be quite difficult thanks to the range at which your large buttons often push you back to. Her throw is also only average (aside from a cool bug) and doesnt carry much threat behind it beyond a meaty. As for non-throw can openers; 4C leaves much to be desired in many aspects as a standing overhead in terms of reward. Your best bet with air options is iad jC, which has its own set of reliability problems ontop of already being fairly reactable. These options should mostly be reserved for catching your opponent asleep at the wheel, just don't go too crazy with it once you wake them up.
Ryougi's offense changes drastically depending on screen position, resources, matchup (obviously), and if she has her knife or not. This warrants splitting this section in two; midscreen pressure, and corner pressure.
Midscreen Pressure (WIP)
TLDR; Mostly safe on block sequences ending on either a normal with high pushback or rekka ~236A ender.
Avoid using any knife toss moves unless the situation calls for you to be a little greedy to take the round, the knife will land too far behind you for you to make use of after one reset attempt. Ryougi is most vulnerable to backdash and dodge midscreen, so exercise caution when using staggers. 2A staggers and redashes with 2A (despite being -1 on block) are effective as they make it easier to deal with backdash/dodge. Don't be scared to return to neutral, and don't be too afraid of letting the opponent escape without immediately being punished. Midscreen you're playing the long game and trying to work them to the corner without getting blown up yourself.
How to structure midscreen pressure (WIP)
You're mainly looking to either push the opponent away from you to a safe manageable distance with low commitment pressure, or reset them just enough to push them into the corner with higher commitment pressure. Thanks to 2C's massive forward movement and Ryougi's high pushback, the latter of those two is actually fairly accomplishable. It only takes two or three pressure resets to go from midscreen to the corner, provided you dont burn meter on 22C just to make sure.
- Example string: 2A > 2B > 5B(B) > 5C > 2C > (3C) > 236A~236A~236A
This is a very basic string you'll use a lot starting out, and midscreen this lets you gauge how your opponent will react to rekka on block. 3C > rekka will also condition your opponent out of mashing/jumping after 3C if you delay it and frametrap, letting you sneak in some resets every now and then. It also doubles as your basic rekka BNB, so it hitconfirms itself (lol).
Post-Rekka 3A on block (WIP)
- Your RPS options after rekka 3 are generally weaker midscreen than in the corner, so either trying to get away or hold your ground are usually the best courses of action here. Most players will try to disengage from you after blocking rekkas, obliging them and doing the same is perfectly fine as long as you're confident in your neutral. For aggressive options, fighting back on spaced out -6 both midscreen and near corner is very character dependent, as some characters have better ways to challenge than others do. Tohno and Nanaya notably have excellent ways to challenge after rekka on block because of their cancellable stepdash, F-Ryougi and Wara's massive normals also limit your options, F-Kouma's rekka is fast and blows through most aggressive options you can pick, etc etc.
- If your opponent decides to go airborne, this can let you either move forward and take space if they jump back, or (versus aggressive opponents) be met with a preemptive button like jB, j6B, or even (dash) 5A6A sometimes to stuff their air approach attempts.
- Dealing with 66 / dash and buttons after rekka depends on character, but generally speaking putting out 2A infront of you isnt a bad idea to attempt. This can check dashes and stuff the startup of slower normals. While Rekka 3 is -6, if an opponent dashes they have already used a decent chunk of those frames to close the gap, making their next action effectively slower. Preemptive 2A is less effective against characters with large, relatively fast buttons (Wara 2B for example). 22C can catch challenge attempts and reset pressure on block since its a 1f super, but this is not something you should ever default to, as you could have just guaranteed 22C with the cancellable rekka followup. Its a mediocre reward, high cost option thats good to present versus particularly mashy opponents who also have better buttons than you on -6. Just be wary of low profiles.
3C's usage midscreen
- While being +1 on block is still very useful midscreen, 3C's utility as a tool for resets is very limited outside of the corner. This move is best treated as a way to gauge what your opponent likes to do after blocking it at the end of a sequence, conditioning them out of aggressive options by delaying a cancel into rekka to frametrap. If they never stop pressing buttons on 3C, just keep doing rekkas. If they like to mash DP, stand shield, or some sort of reversal afterwards trying to blow up rekkas, just bait it. If they have a brain that is capable of pattern recognition and stop touching the hot stovetop, now you can start to play around 3C's framedata a little more. You might be thinking a pressure reset or throw here (with either dash 2A, or 624A depending on pushback) is ideal. It's still good to present if they're overly cautious. However, backing off yourself, or cancelling to 5C and ending the sequence at a very spaced out -4, tends to be a more rewarding option in matchups where you can afford to let the opponent attempt to re-enter neutral. No special cancel required. This lets you observe how the enemy tends to try to disengage. Properly responding can end up granting you much better positioning overall (this is VERY important to Ryougi's combo routing), and a potentially better (or more easily acquired) hit. Especially effective tactic if you're fighting a character / player who's neutral is worse or more volatile than yours. 3C leaves you closer to the franticly escaping opponent for more directly potent and consistent ways to punish their cowardice, while ending at 5C leaves you incredibly safe from retaliation, almost halfscreen away.
- Listing all the ways to trap escaping opponents would be an exhausting list, but a good place to start would be learning how to respond to j7 and backdash (as mentioned in the next bullet point). While cancelling to rekka does somewhat cover both options, the reward on hit without meter is simply just another knockdown, and the third hit of 236A rekka can even whiff, leaving you in an awkward scramble. Catching a backdash with a redash of your own into a normal has a much higher reward, even if it requires more effort and risk of retaliation. Properly responding to a jump can net you at the very least better positioning than rekkas would. Etc etc, the list goes on. Trust your instincts, and prey on their habits.
5C usage
- (WIP)
Dealing with backdash (WIP)
- Stagger B normals less often, redash into 2A > 5B to catch backdash. This carries the obvious risk of losing to mashing on reaction to the redash. Another option with meter is to chill out and 22C on reaction to backdash to catch the recovery as a punish. This is pretty wasteful, as your knife probably wont be accessible for followup pressure and the damage is lackluster for the meter you spent. Its justifiable if anything will kill or the next interaction decides the game anyways. Rekka also can clip backdash, but the A version can have the third hit whiff if the opponent gets too far away. B Version's slower startup and bad framedata on rekka 1 makes using it awkward to use outside of combo extensions, but if immediately cancelled into it might do a better job catching backdash.
Corner Pressure (WIP)
This is where you get the most mileage out of knife pickup and toss, the knife will bounce off the wall back into a spot where its easy to access and abuse. With the right sequences, you can manipulate pushback on block to always be ontop of your knife after its thrown. How you go about running corner pressure will change based on three main factors;
- Does my opponent know to EX Guard?
Your normal looping guardcrush strings will be much less effective, and might force 3C to whiff or place you outside of knife pickup range. EX Guard also makes jumping out much more effective, you might have to adjust and present more committal pressure options (dash 5B / 5a6a, etc) to stop jump. Vary the timing between your normals on block and present more things like redash 2A / staggers into tick throws to try to negate the advantage EX guard brings, regardless of frame advantage they still are susceptible to strike/throw.
- Is my opponent playing an H-Moon character?
If they are H-moon, you're going to have to keep a very close eye on their meter when running offense. Since H-Ryougi doesnt have a repeatable 5A that hits crouchers, she can't option select H-Bunker in pressure like some other characters can. Meaning she has to try to either outspace bunkers, hard-read them with a throw, or heavily stagger her normals in an attempt to bait it. Playing around H-Bunker is incredibly frustrating for Ryougi, often making belligerent mashing and fuzzy jumping much harder to stop versus opponents who love to slam on 214D as soon as you get out of 2A range.
Problems dealing with H-Bunker, however, completely become a non-factor if Ryougi catches the opponent blocking without 100 meter. If this happens, their situation is almost hopeless. Without EX Guard, Ryougi's guardcrush string becomes incredibly oppressive and almost C-Roa'esque, forcing opponents to gamble on plus frames for their lives or else be guard broken. This is pretty much your win condition versus other H-moons, and all it takes to get there is baiting a single bunker attempt properly.
- Do I have my knife, and if not, is it at least nearby on the ground?
(WIP)
How to structure corner pressure (WIP)
Utilize knifetoss as close to the opponent as possible, preferably tossed and picked up from 3C. Being closer to the opponent means throw is more of a threat, thus increasing the value of frametraps by association. Limit how often you rebeat over just using your knife to negate rebeat damage penalty, you want to squeeze as much damage as possible into any hit even if you give up some for a mixup. The pushback of 5C and 5BB is good for putting you in range for 624A to reset as well as creating spacing traps. Once your opponent shows they have a general idea of how to deal with looping knife guardcrush strings, then you can start to implement stagger pressure and rebeat whiffs on offense to throw them off.
- Example string: 2A > 5B(B) > 3C > 22A / 22X , (2A / 5B / 2B / run up throw) > ... x N
This is a very reliable sequence and incredibly common way to start your offense. A canned strike / throw mixup, more or less. 2A is gapless from 22A and 3C knife pickup, 5B / 2B frametrap while beating 2D / 5D respectively, and throw exists to convince them to mash on your frametraps. If they dont bite on a frametrap, the sequence loops back into itself again once you toss your knife or pickup cancel. Fantastic sequence to use as your baseline, level 1 autopilot. If a player doesnt know how to beat this, you have absolutely no reason to do anything else but loop it over and over until they get guardcrushed or mash. It's far from an unbeatable sequence, however. Once Ryougi is pushed out of 2A range and can no longer present either a gapless or whiff cancellable low, she becomes incredibly succeptable to backdash and spotdodge. 5B and 2B both have extremely long recovery, and in some cases can be outright punished by backdash and dodge. This makes presenting redash 2A or passively waiting after knife toss / pickup an absolute must versus better players, as then you can punish their dodge / backdash attempt.
3C usage in the corner
- (WIP)
What do I actually do with manual pickup anyways and how is it different than post-knife toss?
- (WIP)
624A
- (WIP)
Conditioning the opponent out of jumping on defense (WIP)
- Accept the risk of getting mashed on and start catching jump with dash up 5A6A after knife toss on block or any other common reset point. Doubles as a pressure reset that saves your 2A for rebeats if they dont jump, but still commit to passive defense. 5B also functions and covers mashing lows reasonably well, but is less consistent at catching jump and is much harder to confirm off of. You're making a trade between consistency, safety, and reward. Opponents who get their jumps caught this way or eat too many dash 5A6A pressure resets also might be more prone to mash on it in the future, opening up more opportunities to counterhit the opponent as they adjust away from jumping. Unfortunately unless you manage to convert into 214A > 2C > 3X~C (or a mixup of other sorts), your reward for catching a jump is quite lackluster, Ryougi's good damage almost soley comes from grounded hits.
Using 22C to extend pressure
- There are a couple advantages 22C has over 22A that can make it worth your meter to use in blockstrings. First off, its an EX move, meaning you can cancel into it from Rekka C enders on block for gapless pressure resets. Secondly, the variable framedata provided by EX knife toss' multihits opens up new offensive options. Point blank range its less plus (+3) than 22A (+5), making it easier to tick throw, and also creating a frametrap with 2A instead of a gapless string. Any farther away, and it's always more plus than 22A. Getting all 4 hits of EX knife is absurdly plus, and is always a full pressure reset from basically any distance. Get ready to throw or punish people trying to bunker through this a lot. Finally, having a blazing fast 1f startup makes this godlike abare tool fantastic on the offensive too. Even if you're minus, 22C will always be faster than whatever your opponent decided to do as long as its not a punish, and can be used as a way to rob your ended turn back at any time. Opponents who like to challenge with buttons can easily be shown their place (its the corner, they belong in the corner) with 22C no matter the range.
Dealing with bunker, both of them.
- (WIP)
Abusing the throw protection bug
- (WIP)
My knife is on the other side of the screen, oops
- (WIP)
Additional Pressure String Component Examples
Note: Melty Blood pressure is very freeform, especially for H-Ryougi. Do not take these examples as law, else your pressure will become too linear and flowchart-like. These examples are simply meant to give you a general idea of how to structure your offense.
- 2B > 5A(w)6A
- Frametrap at close range, farther out ~6A will whiff and you'll just stand there looking stupid before getting counterhit.
- 5A6A / 3C > 4C > 22A
- Overhead attempt, made safe by the knife. Additionally if the 4C connects, 22A will confirm the combo as long as you nailed the cancel window. See combo section later on the page for 4C conversions
- 5A6A > (delay) 2B / (delay) 5BB
- String component utilizing 5A6A's large cancel window, delaying will frametrap. Gapless otherwise. Can be used to condition the opponent to not expect 4C after 5A6A if they somehow cant react to an overhead this slow, or just as another cancel option for flavor. Why not?
- 2A > 3C
- Autotimed frametrap into 3C. Leaves you nice and close at +1, can even frametrap back into 2A again if your opponent's 2A is slower than 4F. Mashable if they EX Guard 2A
- 3C > 5A6A
- Another frametrap, moves you forwards very slightly.
Okizeme
Real, accessible mixups is a big advantage H-Ryougi has over her Full and Crescent moon peers. This is arguably what makes H-moon worth investing in over the other two long-term. Full moon doesn't get access to real mix at all other than a finnicky tk.236B l/r, and while Crescent's 236C setup is strong, it requires meter and is character specific. H-Ryougi gets better setups without needing to spend any meter at all. However, you do need to have quite good execution to consistently access her good setups, and then also capitalize off of the hit with looping setplay or a high damage route.
Mixups
All mixups / setups assume the opponent is cornered, her Rekka ender option selects can be done midscreen.
Roll L/R Setup
- ... Launch > 5BB > 214A, microwalk 2C > 3X~C > (421X / 22X pickup / 2A whiff) > 6[6] > manual delay 6A+B
- The roll mixup. Sets up a left/right mixup in the corner that can be looped for consistent setplay. Rolling as soon as possible will always leave Ryougi on the opposite side, crossing up the opponent, but this isn't very ambiguous and is effectively a waste of the setup. Rolling as late as possible after running the opponent completely into the corner will always be sameside. Sameside trips up people not used to fighting H-Ryougi, as they panic and try to fuzzy guard crossup looking at her sprite visibly overlapping with theirs.
- The strength of this mixup comes from understanding how long you can hold run, while still making the roll cross up. Once you understand the timing, you can make which side you'll end up on after roll very ambiguous. Smarter players will know that picking options that beat sameside is much safer due to the difficulty of pulling off an ambiguous crossup roll, so this is an important skill to learn. 2A and both B normals are the preferred options after you've picked a side to land on, but you can also IAD into the corner with j.C to present a fake reactable high option to blow up low shield for higher reward than 5B. 2A > 5B can clash with wakeup heat.
624A Knife Catch Setup
- ... (microwalk) 2C > 3X~C > 624A
- Occasionally called the butterfly setup, fancy. Knife throw mixup, same routing as the previous setup. Once you throw the knife, jump straight up with "8" and then drift with "6/4" to make a left/right mixup. "6" is preferable. How long you hold drift will determine which side you end up on. Once you land, you can meaty with 2A, 2B, or 5B. The big advantage of this setup over roll is the ability to present a real overhead option. You can airdash back > j.C after jump cancelling 624A for a quick cross up overhead, catching the knife midair in the process. Debatably reactable, but easier to execute than roll mix with more options for playing around system mechanics.
624C Knife Catch Setup
- ... (microwalk) 2C > 3X~C > 624C (Video example)
- Genkyo setup. Think of it as an enhanced knife throw mixup. Super jump to catch the knife as its falling, allowing you to perform numerous mixup options. If you don't press anything else and simply fall after catching the knife, you'll pass through the opponent and cross them up (albeit too early for this to really be a scary mixup or a perfectly timed meaty). After you cross up but before you land, jump forward and quickly air dash backwards to do an overhead with j.C. You can also airdash back > j.B after catching the knife for a sameside, spaced out safejump. With so many options to choose from, this is easily one of Ryougi's more versatile setups if you have the meter for it. The problem with this setup though is the resource cost vs reward over a 214c metered setup is questionable, as its hard to justify routing into this for how much damage the normal setup does initially. Having to catch the knife before it falls to the ground also puts you on an awkward time constraint, so a lot of options out of this are not actually meaty (potentially entirely reactable even).
214C L/R Setup
- ... microwalk 2C > 3X~C > (slight delay) 5C > 214C > j.B(w) > land > 3C
- ... Knife loops > 22A, 2C > (22X > 2A) > (delay) 5A6AA > 214A, 214C > j.B(w) > land > 3C (Video example)
- A metered left/right setup that doesnt require knife and can be done off of knife loops. Depending on how you route into it, this route does not sacrifice much of H-Ryougi's potential high corner damage for mix at all. As you build the meter for 214C mid-combo, even with a metered knife loop starter you can get enough right at the end of the route for 214C.
- The idea with this setup is you want to hit the opponent with reverse 3C, there isn't enough space inside the corner for crossunder 2C > 3X~C to connect as you are in its deadzone. This is a good thing. This mixup is much easier to actually execute than an ambiguous roll mixup because of this closeness to the corner. Once reverse 3C connects, either j8~6 drift, or simply j9 back into the corner, both work the same and will cross up. To present sameside, microwalk after 3C and before you jump. Its such a small microwalk that its possible to get it on accident, so when presenting crossup make sure to keep your fingers away from 6. Do not microdash, as that telegraphs sameside with the dust visual effect and sound cue. Meaty with 2A / 5B / 2B as always.
- Character specific, as versus some characters this setup is always sameside. Documentation WIP.
4C 624A Knife Catch H/L Setup (WIP)
- 4C > 624A~(delay)8 > delay 66 knife catch jC / 2A / 2B
- A high / low mixup off of a successful overhead attempt, Butterfly setup variant. Your damage reward off of 4C is usually quite low, so going for this mixup instead can be worthwhile if you have your knife. Both jC and 2B are great damage combo starters. To make the overhead part of the mix as legit as possible, you want to delay the jump cancel by 2-3f, and delay the airdash as much as humanly possible. At best, if you do it perfectly, its a mathmatically unreactable difference (11f) between high and low. Video example WIP.
- There arent many other ways to get this setup off of practical hits, but its technically possible to attempt the mixup off of a 623C OTG as well very inconsistently. This is usually fake.
Okizeme Closing Thoughts
Something worth noting is that these are just the guaranteed corner setups. There are many instances where depending on your distance to the corner you can get a roll/624A/624C setup off of combo routes that normally do not guarantee one. Any time crossunder 2C > 3X~C is possible in the corner, there is an opportunity to create a mixup. Recognizing these situations and capitalizing on them is an extremely important skill for H-Ryougi, as normally she has to get a clean grounded hit in the corner to run her setplay. Mastery of H-Ryougi's very freeform combo theory will make her mixups a threat off of most grounded hits anywhere near the corner, and sometimes even corner to corner.
Option Selects
Mixups aren't the only thing Ryougi has going for her in the okizeme department. As H-moon shares normals with C-Moon and obviously the signature 236X~236X~236X Ryougi rekka series, she has access to all of their moon-wide option selects. While nothing interaction-denying like F-Vaki's puffball, they are nevertheless a great boon in a game with such powerful defensive options.
Universal Backdash OS Variant
- ... HKD > Meaty 2A(w) > 5B
- Since Ryougi's 2C is a special snowflake forward moving sweep with insane recovery and no active frames to speak of, 5B is her preferred button for catching wakeup backdash. This works the same as any other Backdash OS. Getting this off of air throw requires conditioning the opponent to respect AT's subpar frame advantage, which will be covered in another segment.
5B > 2B DP Clash OS
- ... Air Throw ender > 5B(B) > (2B)
- ... Rekka HKD > 4 > delay 5B(B) > 2B
- Spaced properly, 5B > 2B can be timed to clash wakeup DPs and then either counterhit them after invuln expires (5BB) or low profile them entirely for a full punish (2B). This beats both mashing and DP on wakeup, and the spacing also makes wakeup Heat attempts whiff. How much you need to delay 5B will change depending on the startup of the character in question's DP, hitbox, wakeup time, etc. Here is an example of it in action vs C-Nanaya 623B. While this can be done from midscreen, backdash being a stronger option outside of the corner makes this less useful. In the corner its quite consistent, just be aware that too far out and 2B will whiff after 5B on block. This OS also does nothing to protect you from non-DP reversals such as Tohno 214C or Satsuki's... everything. As this OS requires character / DP specific manual delay, its quite possible to just mess it up entirely and still get smoked by DP. Maybe one day someone will figure out a framekill for it.
Rekka HKD Heat OS
- ... Rekka HKD > j9 (crosses over) > 2A(w) > 5B
- ... Rekka HKD > j8~6 (stays sameside) > 2A(w) > 5B
- (WIP) Very simple OS that autotimes a meaty 2A. Like most anti-Heat clash OSes, this works by having 2A whiff if the opponent mashes heat on wakeup, then buffering 5B behind it for a clash and full punish. Do not cancel 2A(w) into 5B as soon as you are able to, delay it very slightly. If they press buttons you get a combo anyways. If they backdash 2A whiffs and 5B might clip its recovery (in practice this feels finnicky).
Defense
Good news; you're one of the very few characters in the game with a one frame reversal super that can punish basically anything on block that isnt plus, while also being plus on block itself if you don't get a punish. This is as insane and kind of broken as it sounds.
Bad news; You need meter and your knife for that. You are also H-moon, and all your other defensive options are either kind of crap, very exploitable, or gimmicky.
With 100 Meter
22C is your problem solver. While it only has one frame of invuln on startup, it becomes active on frame 1, and will always hit at least twice unless you're point blank. This means that even if the opponent hits you, the knife will usually trade in your favor anyways even to the point of allowing you to combo. If the opponent blocks the knife? Foolish! Its so plus that nobody bothered to count anything but the minimum possible plus frames for one hit! Its your turn now by quite a large margin. If the opponent air blocks 22C? Even more foolish! They're usually stuck in blockstun long enough for you to air unblockable them with a normal, 5A6A and 5B will usually be the most consistent. 22C is absurdly strong, but it's important not to be over reliant on it. It can be low profiled by many moves (Arc 2B, Kohaku 2C, Nanaya 2C and 2B just to name a few notable ones), and even by some character's dash animations (e.g. Ciel, Kouma, F-Ryougi). It can also universally be jumped over. With great power comes great responsibility.
Using H-Bunker while in blockstun is also a decent use of meter when 22C wont cut it or you dont have your knife. The hard knockdown on hit gives you plenty of time to switch sides out of the corner or run rudimentary okizeme. While your bunker does hit lower to the ground than 22C does, you must exercise caution when you decide to bunker, as it too can tragically be low profiled. It also has the inherent weakness all H-moon bunkers do, and can be baited or OSed. It is not throw invuln. Try to look for specific moves to bunker on, and wait for the opponent to exhaust options in pressure that reliably low profile it (Satsuki slide for example).
j.236C is pretty standard fare for air moves with reversal utility. The tigerknee requirement means it cant beat meaties, its safe on block, and on hit the opponent is wallbounced giving you some breathing room. Nothing too crazy, but its nice to have when your knife is stuck on the other side of the stage.
214C has a lot of forwards movement, and can be used for a quick escape from the corner over the opponent's head. This is primarily a gimmick, and more or less just does the same thing 624B does (but worse) with some different attributes. While it does have relatively lengthy recovery, and doesn't have much invuln in the first place, the distance it puts you away from the corner is substantial enough that the opponent might not be able to punish you. This reversal looks very weak compared to your other options on paper, and it is, but it can save you in a pinch. As well as not requiring you to have your knife at hand, many moves that low profile 22C have significant recovery, and wont let the opponent punish you for flipping out on whiff. Just don't expect this to work more than once in a set, or at all. Can be shielded on reaction and whiffs on crouchers. If for whatever reason they standblock, its cancellable and they just got knowledge checked hard.
236C hard sucks, don't use this as a reversal. The invuln runs out before it becomes active. Any case where you use this on defense is incredibly niche and situational, so much so that those situations might as well not exist.
Meterless
Short answer, you messed up big time and are in mortal peril. Prepare for needlessly prolonged suffering if you choose life and block like a dog.
Long answer; make friends with downback and get ready to take some throws, as you entirely lack any character specific reversal options without meter. Your parry series might tempt you, but think of this more as a tool to use against very specific okizeme setups or a hard callout than a real reversal. Trying to use parry as a reversal out of blockstun is a fantastic way to get killed almost 90% of the time. They should NOT be used like a DP nor are parries supposed to be used that way in the first place.
As for normal abare, on wakeup Ryougi doesn't really have anything to enforce her ability to mash in the first place. Meaning wake up buttons is absolutely putting your life on the line in hopes your opponent is either incompetent or THAT scared of H-Shield. That being said, her abare isnt actually all that terrible, and you can't block or passively jump out forever. Her 5A actually covers an excellent angle, and is fast enough to be a great twitch anti-air for swatting IADs and bad offensive jumps, or even beat things like Akiha tk.236A flat out at close range. 2B might seem like its a decent abare option due to its reach, and since its her best starter the reward is enticing. It's actually inferior to 5B in all aspects bar 2B's ability to low profile. If you want to mash a midrange normal, mash 5B instead. It covers way more offensive options than 2B ever does. 2C has slow startup (and embarrassingly long recovery on whiff), but it propels Ryougi very far forward, letting you challenge things like Nero summons from farther away than you might expect. It cannot be stressed enough how risky 2C is, but it has its niche usefulness. Abare 2A is painfully average for a 2A, if not slightly below average. It serves its purpose for checking dash resets and not much else.
On the gimmicky side of things, Ryougi does have some tricks up the sleeves of that fancy leather jacket. You wouldn't think of it by looking at it, but 624B is a surprisingly powerful wakeup option against bad or non-meaty corner oki that doesnt catch jumps. It also crosses up and sideswitches, so opponents can still get hit doing stupid things like passively blocking or shimmying on offense in hopes to bait shield or bunker. The proration is... strangely good? If you do manage to get 100 meter it combos into Rekka on hit, and stopping on Rekka 2 to OTG with 236C gets you almost 5k damage for slobbering on the monkey flip input. Without meter, linking into rekka is still pretty great, HKD and a corner steal. 624B itself is slightly plus on block, but not enough to actually make use of. Its effectively safe. I've been singing 624B's praises like its the best thing since sliced bread, but I have yet to mention its fatal flaw in losing to anything that catches jump is exacerbated by the fact you are in counterhit state for the entire duration of the move. It also has absolutely no invuln, and you are soley relying on the move's naturally evasive hurtboxes to avoid harm. Be aware of its limits.
Defense Closing Thoughts
All of the options listed above require you to make some sort of risky commitment, or are options that are inherently button pressing. This can only get you so far on its own, and these tools are made much weaker if you do not augment them with fundamental Melty Blood passive defensive options. Jumping out of pressure usually requires your opponent to change their strings in order to catch jumps, leaving more exploitable openings for your committal options (mashing) and letting you take your turn back the violent way. If you do get caught jumping out of pressure and get hit mid air, its not nearly as punishing as tanking a clean grounded counterhit. Its the difference between taking 5k into a mixup where you guess for game, or taking maybe 2k and mediocre air throw oki. Ryougi doesn't have many options to force her ability to mash out in the first place, so this is absolutely vital, and will go a long way to improve your overall survivability. Remember, she has the fifth lowest effective HP pool, roses are delicate and should be treated with care.
Combos
| Combo Notation Help | |
|---|---|
| Disclaimer: Combos are written by various writers, so the actual notation used in pages can differ from the standard one. | |
| X > Y | X input is cancelled into Y. |
| X > delay Y | Must wait for a short period before cancelling X input into Y. |
| X, Y | X input is linked into Y, meaning Y is done after X's recovery period. |
| X+Y | Buttons X and Y must be input simultaneously. |
| X/Y | Either the X or Y input can be used. |
| X~Y | This notation has two meanings.
|
| X(w) | X input must not hit the opponent (Whiff). |
| j.X | X input is done in the air, implies a jump/jump cancel if the previous move was done from the ground. Applies to all air chain sections:
|
| sj.X | X input is done after a super jump. Notated as sj8.X and sj9.X for neutral and forward super jumps respectively. |
| dj.X | X input is done after a double jump. |
| sdj.X | X input is done after a double super jump. |
| tk.X | Stands for Tiger Knee. X motion must be buffered before jumping, inputting the move as close to the ground as possible. (ex. tk.236A) |
| (X) | X is optional. Typically the combo will be easier if omitted. |
| [X] | Input X is held down. Also referred to as Blowback Edge (BE). Depending on the character, this can indicate that this button is held down and not released until indicated by the release notation. |
| ]X[ | Input X is released. Will only appear if a button is previously held down. This type of input is referred to as Negative Edge. |
| {X} | Button X should only be held down briefly to get a partially charged version instead of the fully charged one. |
| X(N) | Attack "X" should only hit N times. |
| (XYZ)xN | XYZ string must be performed N times. Combos using this notation are usually referred to as loops. |
| (XYZ^) | A pre-existing combo labelled XYZ is inserted here for shortening purposes. |
| CH | The first attack must be a Counter Hit. |
| Air CH | The first attack must be a Counter Hit on an airborne opponent. |
| 66 | Performs a ground forward dash. |
| j.66 | Performs an aerial forward dash, used as a cancel for certain characters' air strings. |
| IAD/IABD | Performs an Instant AirDash. |
| AT | Performs an Air Throw. (j.6/4A+D) |
| IH | Performs an Initiative Heat. |
| AD | Performs an Arc Drive. |
| AAD | Performs an Another Arc Drive. |
Notes:
- 22X refers to knife pickup, rather than throw.
- 63214X is abbreviated as 624X, however this does not mean you can skip the diagonals.
- 2B and 5B can be used interchangeably as combo fodder quite often, however 2B > 5B does more damage than 5B > 2B.
- Ryougi can end almost any air combo with either Air Throw or j.236B, favoring positioning and damage respectively.
- For air combos, Ryougi's j.A, j.B, and j.6B have identical damage, but different hitboxes, different startups, and different changes to the opponent's momentum. You can interchange them in any air combo that uses j.B to see which one works better for you.
- Rekka ender gives better oki than air throw ender.
- On airborne opponents (example: 2C > rekkas), the final ~236A input must be reversed (~214A instead of ~236A) midscreen on every character except the following; Satsuki, Necos, and White Len at certain hitcounts
- 5BB > 214A drops after hitcount passes 11.
Normal Combos
Meterless
623B Loops
623B loops can be routed into on almost any opponent launched by 22A or 3C. They have much better meter gain, corner carry, and okizeme than air combos while still sporting comparable enough damage.
Since 623B does not have full untech, you want to hit them as close to the ground as possible after 2C > 3C so they cant airtech out before landing. Delaying 3C or partial charging 623{B} can help with consistency. If you are too far out for 2C to connect and don't want to drop you can cut the route early with 623A instead of 2C, giving you HKD. If you did the loop properly, you will pick your knife back up on the second rep, as you need to crouch for 2C right ontop of where you tossed it.
Airborne opponent
Ryougi's reward on hit versus airborne opponents leaves much to be desired, but is drastically improved by spending meter on a j22C extension.
4C Starter
All 4C > 22A combo routes have a ~3 frame cancel window for knife toss to connect.
Extremely Character Specific (WIP)
This section is subject to expand. This section will probably mostly be filled with rekka loops in the future, but sorting through which are practical on a reward basis will take some time. The key principle of rekka loops is hitting Rekka 1 in a way that causes Rekka 2 to whiff, allowing Rekka 3A ender to float the opponent high enough on hit to allow a 2A link after. The window to hit this link can be quite tight, one frame in many occasions.
OTG Routes
236C enables easy, unburstable relaunches on downed opponents. It can also do shockingly high damage depending on the preceding hit. Early 623A knockdowns can easily top 5k damage.
Metered
624C Combo Extensions
GENKYO! Big damage off of any grounded hit into Rekkas. H-Ryougi's midscreen damage is usually lackluster, so these are handy to learn. The highest damage midscreen version, the airdash route, is also considerably easier than a lot of H-Ryougi's other damage routes. It's recommended beginners learn that route once they're comfortable with the basics and need to get better reward on hit.
j.22C Combo Extensions
Ryougi can extend effectively any air combo with j.22C to get more damage and much better okizeme than her airthrow gives her, especially midscreen. This is absolutely vital, as otherwise Ryougi struggles to enforce her turn after an air combo ends. Thanks to H-moon's auto-pickup mechanic, you usually can get your knife back afterwards.
Corner Combos
Almost all of H-Ryougi's corner combos are either a knife loop variant, or some sort of setplay utilizing 2C > 3X~C. As the execution required for these routes can be daunting for beginners, a section of easier combos has been included.
Beginner / non-loop corner combos
Corner Steal Combos
Knife Pickup Loops
The loop H-Ryougi is known for. If you don't know anything else about H-moon, you know she has knife loops. Notable for very good meter build, effectively auto-heat on demand. The ability to consistently convert into knife loops massively improves your chances of winning if you can do it, and shoots her tier placement up at least a half a letter. Since H-Ryougi's routing is very freeform and can flow into other routes depending on positioning, its a bit futile to try to list every single possible loop starter. The combo theory behind knife loops, however, is generally consistent across all starters. Once you know how to do a rep or two, feel free to just use whatever sort of starter works for you (provided you actually get some damage out of it). The link gets tighter after about 3 reps if you do not change your routing, but that's just part of the combo theory.
If you wish to practice the timing on 2C pickup or the knife pickup cancel (or if you still struggle with 2C > tk.236b), you can do 2C > 5C > 22A or (standing only) stuff > 214A, 5A > 22A to start loops. Try to keep your hitcount at or below 32 hits total. While its very possible to go past that, the infinite prevention system kicks in and your opponent rapidly builds meter, meaning you get diminishing returns as burst is more available to the opponent.
Below is an incomplete list of possible loops:
- [2C > 3C > 22X > 5B > 22A] x N
- [2C > 3C > 22X > 2B > 22A] x N
- [2C > 3C > 22X > 2A > 2C > 22A] x N
- [2C > 3C > 22X > 2A > 2C > delay 5C > 22A] x N
- [2C > 3C > 22X > 2A > 2C > 3C > 5C > 22A] x N
The 5B variant is universal, 2A > 2C > delay 5C usually will start to work at higher gravity. Other than that, which loops do and don't work is somewhat character and hitcount specific.
Now here's a list of common possible loop enders:
- ... > 22A, 236A~236X~236A
- ... > 22A, 2C > 3C > ((623B,) 236A~236X~236A)
- ... > 22A, 2C > (3C) > 5A6AA > 4C > 22X
- ... > 22A, 2C > delay 5A6AA > 214A, 214C > jB(w) > 3C
Ender is mostly preference, but generally you want to end knifeloops with a hard knockdown. Meterless, a safejump / rekka oki is the best you're going to get. With meter for 214C though it is possible (but difficult) to set up a left/right mixup at higher hitcounts.
The combo table for this section should not be taken as law, as there are MANY ways to route into knife loops. Treat them as examples only.
Additional Resources
H-Ryougi Match Video Database
Melty Bits: H-Ryougi
H-Ryougi Combo Document
Rekka loop document sourced from Gantryman
Notable Players
| Name | Color | Region | Common Venues | Status | Details |
|---|---|---|---|---|---|
| Ruusha | Japan | Play Spot BIG ONE 2nd | Active | Legendary H-Ryougi player, absolute lab monster. Showcases almost everything the character has to offer, or at least he used to. Loves to go camping. Can be found on Twitter. | |
| Monarch | North America | Netplay | Active | Top BlazBlue player that picked up H-Ryougi on the side. Great gamesense. Known for his patience on defense in BlazBlue, and that carries over to this game as well. Very consistent. | |
| N2L | North America (Moved to Japan) | Netplay | Active(?) | Arguably the best H-Ryougi. Uses random color palettes most of the time. Found in the main Discord. Great at forcing arcane unconventional interactions, turning any interaction into a potential mixup. Showcases a ton of crazy setups and difficult combos. Most of his footage is unfortunately lost. | |
| nise | Europe | Netplay | Inactive | Europe's ryougi rep. Inconsistent performance, but occasionally showcases some interesting gimmicks such as IAD knifecatch j.C instant overhead. Very scrambly. |
Players to ask in the community
Opinions may differ between players and not all may agree on the same topic.
| Name | Discord username | Languages | Servers |
|---|---|---|---|
| Vsolid | vsolid | English | Meltycord |

