Character Page Progress
This page is awaiting renovation. Please consider joining as an editor to help expand it.
| In Progress |
To-do
|
- Move Descriptions:
- Add missing frame data.
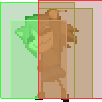
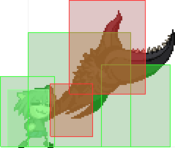
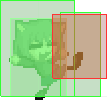
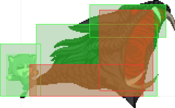
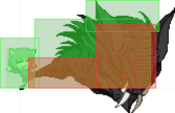
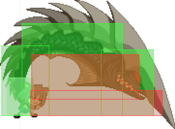
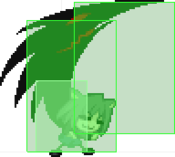
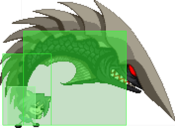
- Add hitboxes to the move images.
- Add descriptions to the moves, specify how they function, cite their uses, add captions where helpful, etc.
|
- Additional Ressources/Players to watch/ask
- Add any external links to ressources such as video guides or articles.
- If you know any players in particular that can be helpful for learning this character, please add them with, if possible a way to contact them (such as a Discord handle) and a name that can be searched in the match video database.
- Overview/General Gameplan:
- Add a short summary of this character with a list of strengths and weaknesses
- Do your best to describe how to play this character, change or add subsections based on what you would write as a guide.
- Combos:
- Add tech in the starters, enders, OTG pickup and normal/corner combo sections.
- Add damage, meter gain/given numbers and video links to combos as you add them.
|
Additional Resources
H-NAC Match Video Database
Players to watch/ask
| Name |
Color
|
Region |
Common Venues |
Status |
Details
|
Skeleton
(Skeleton#6953) |

|
North America |
Next Level,
Netplay |
Active |
I am the only H-NAC player.
Please do not pick this character.
|
Overview
Strengths / Weaknesses
| Strengths
|
- Not largely used, can knowledge check opponents
- Surprisingly decent pressure
- Decent keepaway game
- Bunker is kara cancellable
|
| Weaknesses
|
- Tiny, minus on block, non-active neco normals with worse frame data
- Air dash provides no mobility outside of stalling
- Worst backdash in the game
- Non-existent defensive options
- Awful shield counter
- Minimal health pool
- People will hate you if you pick this character
- No, seriously
|
General Gameplan
Playing H-NAC effectively (and playing against H-NAC effectively) requires a good understanding of fundamental game mechanics (primarily ground teching) and your opponent's habits. Go for safer options in mixup scenarios and see how your opponent reacts, evolving your gameplan accordingly.
Neutral
Most of your neutral will be spent zoning as far away from your opponent as possible. Air beams are an effective way to slow your opponent's advance, and can be used up to 4 times before landing if you have all of your movement options. Crows can also be useful zoning tools for opponents who prefer to stick close to the ground. If your opponent is directly above you in the air, using NAC's run to get distance can be a big help. H-NAC excels when he has annoyed his opponents enough with his subpar zoning tools that they try to get in on him, as he has decent anti-approach tools in a decently fast, somewhat active, disjointed and actionable-on-whiff j.A, an air throw hitbox with high vertical reach, and a very strong anti air in the form of 623A.
Pressure
All of your normals are minus on block. Reverse beating 2C into 2A is +0. 623A and B can be plus if you're close enough, but also give your opponent a ton of meter. 5{B} and 5{C} move you forward a bit, and 2B moves you forward quite a lot. 5[B](1) is jump-cancelable on block. 22B and 22A are decent command grabs. 2C is your only low, and you have pretty much no reason not to spam low shields vs this character, as 5C should never be used in pressure, and 5B is a terrible combo starter.
Okizeme
People generally do not like to respect NAC's oki, and for good reasons. Most of his normals have incredibly short active durations, making them difficult to meaty with. One of the best options against a NAC performing meaty is low shield, as all of his best meaty tools are low shieldable. As such, a well timed 5C (it has 2 active frames) can be very useful in deterring this behavior. He also has a very hard time dealing with backdashes, and must usually be called out with 22B, dash 2B, or delayed 5[C].
Defense
Being a half-moon character, H-NAC lacks the best defensive options in the game and has to make do with what he has. Unfortunately, his shield is very bad (in addition to being an H-moon shield, the counter will often whiff or be blocked against jump-ins due to how short the character is and how far forward it moves him). Shield bunker, dodge, and holding up are some of your better options.
Combos
| Combo Notation Help
|
Disclaimer: Combos are written by various writers, so the actual notation used in pages can differ from the standard one.
For more information, see Glossary and Controls.
|
| X > Y
|
X input is cancelled into Y.
|
| X > delay Y
|
Must wait for a short period before cancelling X input into Y.
|
| X, Y
|
X input is linked into Y, meaning Y is done after X's recovery period.
|
| X+Y
|
Buttons X and Y must be input simultaneously.
|
| X/Y
|
Either the X or Y input can be used.
|
| X~Y
|
This notation has two meanings.
- Use attack X with Y follow-up input.
- Input X then within a few frames, input Y. Usually used for option selects.
|
| X(w)
|
X input must not hit the opponent (Whiff).
|
| j.X
|
X input is done in the air, implies a jump/jump cancel if the previous move was done from the ground.
Applies to all air chain sections:
- Assume a forward jump cancel if no direction is given.
- Air chains such as j.A > j.B > j.C can be shortened to j.ABC.
|
| sj.X
|
X input is done after a super jump. Notated as sj8.X and sj9.X for neutral and forward super jumps respectively.
|
| dj.X
|
X input is done after a double jump.
|
| sdj.X
|
X input is done after a double super jump.
|
| tk.X
|
Stands for Tiger Knee. X motion must be buffered before jumping, inputting the move as close to the ground as possible. (ex. tk.236A)
|
| (X)
|
X is optional. Typically the combo will be easier if omitted.
|
| [X]
|
Input X is held down. Also referred to as Blowback Edge (BE). Depending on the character, this can indicate that this button is held down and not released until indicated by the release notation.
|
| ]X[
|
Input X is released. Will only appear if a button is previously held down. This type of input is referred to as Negative Edge.
|
| {X}
|
Button X should only be held down briefly to get a partially charged version instead of the fully charged one.
|
| X(N)
|
Attack "X" should only hit N times.
|
| (XYZ)xN
|
XYZ string must be performed N times. Combos using this notation are usually referred to as loops.
|
| (XYZ^)
|
A pre-existing combo labelled XYZ is inserted here for shortening purposes.
|
| CH
|
The first attack must be a Counter Hit.
|
| Air CH
|
The first attack must be a Counter Hit on an airborne opponent.
|
| 66
|
Performs a ground forward dash.
|
| j.66
|
Performs an aerial forward dash, used as a cancel for certain characters' air strings.
|
| IAD/IABD
|
Performs an Instant AirDash.
|
| AT
|
Performs an Air Throw. (j.6/4A+D)
|
| IH
|
Performs an Initiative Heat.
|
| AD
|
Performs an Arc Drive.
|
| AAD
|
Performs an Another Arc Drive.
|
Starter
| Condition
|
Notation
|
Damage
vs V.Sion
|
Notes
|
|
| Normal starter, grounded opponent
|
- (2A/5A >) 2B > 2C > dl.5C > etc.
|
2169 (5A Starter)
|
| |
| Meter Gained: 20.6 |
Meter Given (vs C-Moon): 8.8 |
| A simple, but rather low launcher. |
|
|
| Normal starter, grounded opponent
|
- (2B > dl.) 5A6AA > dl.2C > dl.5C > etc.
|
2971 (2B Starter)
|
| |
| Meter Gained: 31.8 |
Meter Given (vs C-Moon): 13.6 |
| Your best starter on the portion of the cast on which the following combo drops, or is too unreliable for you. |
|
|
| Normal starter, grounded opponent (optimal)
|
- (2B > dl.) 5A6AA > dl.2C > dl.5B > 5C > etc.
|
3329 (2B Starter)
|
| |
| Meter Gained: 36.7 |
Meter Given (vs C-Moon): 15.7 |
| Your best starter. Drops on Riesbyfe, Warc, Len, Ryougi, and Wlen. Also rather difficult (but not impossible) on Nanaya, Hime, and to a lesser extent, Satsuki. |
|
|
| Normal starter, grounded opponent
|
|
2538
|
| |
| Meter Gained: 18.2 |
Meter Given (vs C-Moon): 7.8 |
| A starter that you could use if you expected a low shield on wakeup or something. Low launch. |
|
|
| Normal starter, grounded opponent
|
|
2587
|
| |
| Meter Gained: 17.5 |
Meter Given (vs C-Moon): 7.5 |
| A starter that you'd use if you expected a low shield on wakeup or something. High launch. |
|
|
| Air counter hit starter
|
|
1682 (unprorated)
|
| |
| Meter Gained: 11.2 |
Meter Given (vs C-Moon): 4.8 |
| A route that keeps proration high for if you counterhit with j.B or j.C. 2B prorates better if it hits during the last 4 active frames, so shoot for those. |
|
|
| Air counter hit starter
|
|
1667 (unprorated)
|
| |
| Meter Gained: 10.5 |
Meter Given (vs C-Moon): 4.5 |
| A marginally better, but much more difficult air counterhit pickup off of j.A. Strictly worse off j.B and j.C if you can hit the 4-frame window in the above combo instead. |
|
|
| Air throw starter
|
|
2024
|
| |
| Meter Gained: 23.1 |
Meter Given (vs C-Moon): 9.9 |
| Fairly reliable launcher after an air throw starter. You will be getting these a lot if you are playing well. |
|
|
| Air throw starter
|
- AT > 2C > dl.5B > 5C > etc.
|
2158
|
| |
| Meter Gained: 24.5 |
Meter Given (vs C-Moon): 10.5 |
| Optimized, more difficult version of the above. |
|
|
Air Strings
| Condition
|
Notation
|
Damage
vs V.Sion
|
Notes
|
|
| After Launch
|
|
text
|
| |
| Meter Gained: text |
Meter Given (vs C-Moon): text |
| Probably the easiest air string. |
|
|
| After Normal Launch
|
- j.BC > (delay jump) dj.BC > ender
|
text
|
| |
| Meter Gained: text |
Meter Given (vs C-Moon): text |
| Simple air string that keeps proration very low. |
|
|
| After Low Launch
|
|
text
|
| |
| Meter Gained: text |
Meter Given (vs C-Moon): text |
| Picks up best after a low launch thanks to j.B's lower hitbox. |
|
|
| After High Launch
|
|
text
|
| |
| Meter Gained: text |
Meter Given (vs C-Moon): text |
| Best conversion after 6C |
|
|
Enders
| Condition
|
Notation
|
Damage
vs V.Sion
|
Notes
|
|
| Normal starter, grounded opponent
|
|
text
|
| |
| Meter Gained: text |
Meter Given (vs C-Moon): text |
| Air throw. Gives untechable KD and a bit of damage. |
|
|
| Normal starter, grounded opponent
|
|
text
|
| |
| Meter Gained: text |
Meter Given (vs C-Moon): text |
| Light rocket. Active quickly so can end combos where j.214B would drop. Sometimes it's nice to keep your opponent above you, especially if they do best on the ground. |
|
|
| Normal starter, grounded opponent
|
|
text
|
| |
| Meter Gained: text |
Meter Given (vs C-Moon): text |
| Medium rocket. Active a bit later so will drop if the opponent is too high. Sometimes it's nice to keep your opponent above you, especially if they do best on the ground. Consistently better damage than air throw. |
|
|
| Normal starter, grounded opponent
|
|
text
|
| |
| Meter Gained: text |
Meter Given (vs C-Moon): text |
| EX rocket. Active a bit later so will drop if the opponent is too high. Sometimes it's nice to keep your opponent above you, especially if they do best on the ground. Your highest damage ender. |
|
|
| Normal starter, grounded opponent
|
|
text
|
| |
| Meter Gained: text |
Meter Given (vs C-Moon): text |
| A techable ground bounce. This is your main yomi tool. When done in the corner, and properly spaced (easiest done by delaying an upward double jump), 2b will catch all techs, which can then lead into another combo, or you can re-jump and continue the combo for extra damage (but more importantly, meter). Try to hit the very bottom of their hurtbox to give you the biggest window to catch techs. |
|
|
OTG Pick ups
| Condition
|
Notation
|
Damage
vs V.Sion
|
Notes
|
|
| Normal starter, grounded opponent
|
|
text
|
| |
| Meter Gained: text |
Meter Given (vs C-Moon): text |
| Your go-to OTG. Gives untechable KD. |
|
|
| Normal starter, grounded opponent
|
|
text
|
| |
| Meter Gained: text |
Meter Given (vs C-Moon): text |
| Metered OTG. Gives a more damage than 22A, but way slower and harder to utilize. Also gives untechable KD, but fewer frames with which to perform oki. |
|
|
Move Descriptions
| Frame Data Help
|
| Header
|
Tooltip
|
| Move Box Colors
|
Light gray = Collision Box (A move lacking one means it can go through the opponent's own collision box).
Green: Hurt Boxes.
Red: Hit(/Grab) Boxes.
Yellow: Clash Boxes (When an active hitbox strikes a clash box, the active hitbox stops being active. Multi-hit attacks can beat clash since they will still progress to the next hitbox.)
Magenta: Projectile-reflecting boxes OR Non-hit attack trigger boxes (usually).
Blue: Reflectable Projectile Boxes.
|
| Damage
|
Base damage done by this attack.
(X) denotes combined and scaled damage tested against standing V. Sion.
|
| Red Damage
|
Damage done to the recoverable red health bar by this attack. The values are inherently scaled and tested against standing V. Sion.
(X) denotes combined damage.
|
| Proration
|
The correction value set by this attack and the way it modifies the scaling during a string. See this page for more details.
X% (O) means X% Overrides the previous correction value in a combo if X is of a lower percentage.
X% (M) means the current correction value in a combo will be Multiplied by X%. This can also be referred to as relative proration.
|
| Circuit
|
Meter gained by this attack on hit.
(X%) denotes combined meter gain.
-X% denotes a meter cost.
|
| Cancel
|
Actions this move can be cancelled into.
SE = Self cancelable.
N = Normal cancelable.
SP = Special cancelable.
CH = Cancelable into the next part of the same attack (Chain in case of specials).
EX = EX cancelable.
J = Jump cancelable.
(X) = Cancelable only on hit.
-X- = Cancelable on whiff.
|
| Guard
|
The way this move must be blocked.
L = Can block crouching
H = Can block standing.
A = Can block in the air.
U = Unblockable.
|
| Startup
|
Amount of frames that must pass prior to reaching the active frames. Also referred to as "True Startup".
|
| Active
|
The amount of frames that this move will have a hitbox.
(x) denotes frame gaps where there are no hitboxes is present. Due to varied blockstuns, (x) frames are difficult to use to determine punish windows. Generally the larger the numbers, the more time you have to punish.
X denotes active frames with a duration separate from its origin move's frame data, such as projectile attacks. In this case, the total length of the move is startup+recovery only.
|
| Recovery
|
Frames that this move has after the active frames if not canceled. The character goes into one frame where they can block but not act afterwards, which is not counted here.
|
| Advantage
|
The difference in frames where you can act before your opponent when this move is blocked (assuming the move isn't canceled and the first active frame is blocked).
If the opponent uses a move with startup that is at least 2 frames less than this move's negative advantage, it will result in the opponent hitting that move.
±x~±y denotes a range of possible advantages.
|
| Invul
|
Lists any defensive properties this move has.
X y~z denotes X property happening between the y to z frames of the animations. If no frames are noted, it means the invincibility lasts through the entire move.
Invicibility:
- Strike = Strike invincible.
- Throw = Throw invincible.
Hurtbox-Based Properties:
- Full = No hurtboxes are present.
- High = Upper body lacks a hurtbox.
- Low = Lower body lacks a hurtbox.
Miscellaneous Properties
- Clash = Frames in which clash boxes are active.
- Reflect = Frames in which projectile-reflecting boxes are active.
- Super Armor = Frames in which the character can take hits without going into hit stun.
|
Normal Moves
Standing Normals
|
|
| 5A
|
Damage
|
Red Damage
|
Proration
|
Cancel
|
Guard
|
| 350
|
192
|
75%
|
-SE-, -N-, -SP-, -CH-, -EX-, (J)
|
LH
|
| First Active
|
Active
|
Recovery
|
Frame Adv
|
Circuit
|
Invuln
|
| 5
|
4
|
12
|
-4
|
2.45%
|
-
|
|
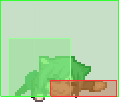
NAC burns the enemy with his cigarette. Terrible range.
|
| 5A~6A
|
Damage
|
Red Damage
|
Proration
|
Cancel
|
Guard
|
| 600
|
384
|
80%
|
N, SP, -CH-, EX, (J)
|
LH
|
| First Active
|
Active
|
Recovery
|
Frame Adv
|
Circuit
|
Invuln
|
| 8
|
4
|
15
|
-4
|
4.2%
|
-
|
|
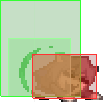
Second hit of 5A chain. Moves NAC forward pretty far, so has utility in pressure.
|
| 5A~6A~6A
|
Damage
|
Red Damage
|
Proration
|
Cancel
|
Guard
|
| 1000
|
768
|
60%
|
(N), SP, EX, (J)
|
LH
|
| First Active
|
Active
|
Recovery
|
Frame Adv
|
Circuit
|
Invuln
|
| 10
|
4
|
18
|
-4
|
7.0%
|
-
|
|
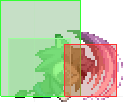
Launches on hit. Moves NAC forward even further, but pushes him out significantly on block.
|
|
5B 5B 5[B] 5[B]
|
| 5B
|
Damage
|
Red Damage
|
Proration
|
Cancel
|
Guard
|
| 850
|
528
|
80%
|
N, SP, EX, (J)
|
LH
|
| First Active
|
Active
|
Recovery
|
Frame Adv
|
Circuit
|
Invuln
|
| 7
|
2
|
16
|
-6
|
4.9%
|
-
|
|
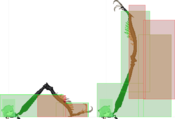
An upward punch with a bit of forward momentum. Launches on hit. Can be partially charged to keep NAC in during pressure..
|
| 5[B]
|
Damage
|
Red Damage
|
Proration
|
Cancel
|
Guard
|
| 500, 1000 (1351)
|
311, 654 (942)
|
100% / 50% (2nd hit)
|
N, SP, EX, (J)
|
LH
|
| First Active
|
Active
|
Recovery
|
Frame Adv
|
Circuit
|
Invuln
|
| 19
|
9
|
19
|
-12 / -5
|
3.5% + 5.6% (9.1%)
|
-
|
|
Charged version of 5B. Hits twice, moves NAC forward and has pretty nice reach. The first hit can be jump canceled even block, so is useful for pressure resets. Can spam B after the second hit for more hits which can catch some slower options if the move is dodged.
|
|
5C 5C 5[C] 5[C]
|
| 5C
|
Damage
|
Red Damage
|
Proration
|
Cancel
|
Guard
|
| 1200
|
720
|
100%
|
N, SP, EX, (J)
|
LH
|
| First Active
|
Active
|
Recovery
|
Frame Adv
|
Circuit
|
Invuln
|
| 5
|
2
|
14
|
-4
|
5.6%
|
-
|
|
NAC does a kick with his left leg, moving him very slightly forward. Can be partially charged to move NAC a bit further forward. Pushes NAC out too far on block to be useful in pressure.
|
| 5[C]
|
Damage
|
Red Damage
|
Proration
|
Cancel
|
Guard
|
| 500*3, 1000 (1315)
|
(834)
|
50%
|
N, SP, EX, (J)
|
LH
|
| First Active
|
Active
|
Recovery
|
Frame Adv
|
Circuit
|
Invuln
|
| 20
|
11
|
26
|
-22 ~ -14
|
3.5%*3 + 7.0% (17.5%)
|
-
|
|
Charged, multi-hitting version of 5C. Terrible combo scaling, but has decently long range and can be converted pretty easily at most ranges.
|
|
Before the active frames Before the active frames
|
| 6C
|
Damage
|
Red Damage
|
Proration
|
Cancel
|
Guard
|
| 1000
|
573
|
75%
|
(N), (SP), (EX), (J)
|
H
|
| First Active
|
Active
|
Recovery
|
Frame Adv
|
Circuit
|
Invuln
|
| 33
|
5
|
16
|
-6
|
5.6%
|
-
|
|
A slow and telegraphed overhead with a lot of range and large hurtboxes. Difficult or impossible to convert at longer ranges.
|
|
Crouching normals
|
|
| Damage
|
Red Damage
|
Proration
|
Cancel
|
Guard
|
| 350
|
192
|
75%
|
N, SP, EX, (J)
|
LH
|
| First Active
|
Active
|
Recovery
|
Frame Adv
|
Circuit
|
Invuln
|
| 5
|
4
|
9
|
-1
|
2.45%
|
-
|
|
A small poke used in blockstrings. Hits mid, despite its animation.
|
|
NYA NYA! NYA NYA!
|
| Damage
|
Red Damage
|
Proration
|
Cancel
|
Guard
|
| 750
|
528
|
80%
|
N, SP, EX, (J)
|
LHA
|
| First Active
|
Active
|
Recovery
|
Frame Adv
|
Circuit
|
Invuln
|
| 7
|
16
|
16
|
-20
|
5.6%
|
-
|
|
NAC slides forward, covering quite a bit of distance. Extremely active but very unsafe if whiffed or left uncancelled on block, can be used to frametrap with 2C due to its long recovery. Hits mid. Extremely useful in pressure, but is air blockable and will not catch jumpouts. Because of how active the move is and its forward movement, 2B is NAC's most important pressure tool and ground tech catch.
|
|
|
|
| Damage
|
Red Damage
|
Proration
|
Cancel
|
Guard
|
| 1000
|
528
|
60%
|
N, SP, EX, (J)
|
L
|
| First Active
|
Active
|
Recovery
|
Frame Adv
|
Circuit
|
Invuln
|
| 8
|
2
|
20
|
-4
|
7.0
|
-
|
|
NAC's main launcher and his only low. Moves NAC forward a bit, but pushes him pretty far out. Most useful in pressure when rebeat into 2A to cancel some of the pushback.
|
|
SEXY! SEXY! The green boxes The green boxes
|
| Damage
|
Red Damage
|
Proration
|
Cancel
|
Guard
|
| 700, 500 (955)
|
(530)
|
60%
|
(J)
|
LHA
|
| First Active
|
Active
|
Recovery
|
Frame Adv
|
Circuit
|
Invuln
|
| 13
|
12
|
17
|
-3
|
4.9%+3.5% (8.4%)
|
-
|
|
A two hitting copy of Nero's 4C, except it has a huge hurtbox before its active frames and can be blocked in the air. Can only combo into immediate double jump air throw on normal hit, but can be picked up with j.C on counterhit. Most useful after crow to condition against mash.
|
|
Universal Mechanics
Ground Throw
4/6A+D
|
| Damage
|
Red Damage
|
Proration
|
Cancel
|
Guard
|
| 1200
|
672
|
100%
|
-
|
U
|
| First Active
|
Active
|
Recovery
|
Frame Adv
|
Circuit
|
Invuln
|
| 3
|
1
|
22
|
-
|
0.0%
|
-
|
|
NAC holds the opponent in place while they get eaten, tripping NAC in the process.
|
|
Air Throw
j.4/6A+D
|
| Raw
|
Damage
|
Red Damage
|
Proration
|
Cancel
|
Guard
|
| 1600
|
506
|
30%
|
-
|
U
|
| First Active
|
Active
|
Recovery
|
Frame Adv
|
Circuit
|
Invuln
|
| 2
|
1
|
13
|
-
|
7.0%
|
-
|
|
NAC slams the opponent against the ground using up one ground bounce.
|
| Combo
|
Damage
|
Red Damage
|
Proration
|
Cancel
|
Guard
|
| 1300
|
506
|
100%
|
-
|
U
|
| First Active
|
Active
|
Recovery
|
Frame Adv
|
Circuit
|
Invuln
|
| 2
|
1
|
13
|
-
|
7.0%
|
-
|
|
NAC slams the opponent into the ground for an untechable knockdown. Gives pretty good frame advantage.
|
|
Shield Counter
Auto after a successful Shield
|
| Standing
|
Damage
|
Red Damage
|
Proration
|
Cancel
|
Guard
|
| 500 (345)
|
198
|
50%
|
(SP), (EX), (J)
|
LHA
|
| First Active
|
Active
|
Recovery
|
Frame Adv
|
Circuit
|
Invuln
|
| 9
|
4
|
18
|
-4
|
3.5%
|
-
|
|
Same animation as 5[B]. Moves NAC forward, which has a tendency to cause it to whiff against opponents who are not well in front of him. Also, due to how short NAC is, most jumpins against him tend to be rather deep, and most can usually land and block the shield counter as a result.
|
| Crouching
|
Damage
|
Red Damage
|
Proration
|
Cancel
|
Guard
|
| 1500 (1117)
|
714
|
50%
|
(SP), (EX)
|
LA
|
| First Active
|
Active
|
Recovery
|
Frame Adv
|
Circuit
|
Invuln
|
| 9
|
4
|
18
|
-4
|
10.5%
|
-
|
|
Same animation as C/F-Moon 2B. Knocks down.
|
| Air
|
Damage
|
Red Damage
|
Proration
|
Cancel
|
Guard
|
| 500 (303)
|
174
|
50%
|
-
|
HA
|
| First Active
|
Active
|
Recovery
|
Frame Adv
|
Circuit
|
Invuln
|
| 7
|
4
|
2
|
-
|
3.5%
|
-
|
|
Same animation as C/F-Moon j.B. Cancels all velocity when performed.
|
|
Shield Bunker
214D in neutral or blockstun
|
| Neutral
|
Damage
|
Red Damage
|
Proration
|
Cancel
|
Guard
|
| 500
|
192
|
50%
|
-
|
LHA
|
| First Active
|
Active
|
Recovery
|
Frame Adv
|
Circuit
|
Invuln
|
| 26
|
4
|
19
|
-5
|
0.0%
|
Clash 1-10
|
| (Clash)
|
Damage
|
Red Damage
|
Proration
|
Cancel
|
Guard
|
| 500
|
192
|
50%
|
-
|
LHA
|
| First Active
|
Active
|
Recovery
|
Frame Adv
|
Circuit
|
Invuln
|
| 8
|
4
|
19
|
-5
|
0.0%
|
Strike 1-7
|
|
Deceptively small hitbox, but good forward movement. Unique to NAC, if clashed on the first frame, bunker can be kara canceled into other multi-button inputs (dash, backdash, dodge, throw). Also unique to NAC, this bunker is counted as a B normal and will cause a rebeat if cancelled into from C normals.
|
| Blockstun
|
Damage
|
Red Damage
|
Proration
|
Cancel
|
Guard
|
| 0
|
0
|
100%
|
-
|
LHA
|
| First Active
|
Active
|
Recovery
|
Frame Adv
|
Circuit
|
Invuln
|
| 19
|
2
|
23
|
-6
|
-100.0%
|
-
|
|
H-moon specific bunker.
|
|
Circuit Spark
In Heat:
Auto during hitstun
A+B+C during blockstun
|
| Ground
|
Damage
|
Red Damage
|
Proration
|
Cancel
|
Guard
|
| 100
|
0
|
100%
|
-
|
U
|
| First Active
|
Active
|
Recovery
|
Frame Adv
|
Circuit
|
Invuln
|
| 11
|
10
|
12
|
-
|
removes all
|
Full
|
| Air
|
Damage
|
Red Damage
|
Proration
|
Cancel
|
Guard
|
| 100
|
0
|
100%
|
-
|
U
|
| First Active
|
Active
|
Recovery
|
Frame Adv
|
Circuit
|
Invuln
|
| 12
|
10
|
15
|
-
|
removes all
|
Full
|
|
Universal burst mechanic. Unlike Crescent/Full Heat activation, the hitbox and frame data doesn't vary between characters. However, you can be thrown out of this move if you input it in the air.
|
|
Special Moves
Grounded Specials
Bird - Half-Moon Version
(Nature's Counterattack)
236A/B/C
|
| A
|
Damage
|
Red Damage
|
Proration
|
Cancel
|
Guard
|
| 800
|
336
|
50% (O)
|
EX
|
LHA
|
| First Active
|
Active
|
Recovery
|
Frame Adv
|
Circuit
|
Invuln
|
| 16
|
X
|
26
|
-2
|
5.6%
|
-
|
|
NAC spits a bird straight forward across the stage.
|
| B
|
Damage
|
Red Damage
|
Proration
|
Cancel
|
Guard
|
| 800
|
336
|
50% (O)
|
EX
|
LHA
|
| First Active
|
Active
|
Recovery
|
Frame Adv
|
Circuit
|
Invuln
|
| 15
|
X
|
25
|
-2
|
5.6
|
-
|
|
Same as 236A but NAC spits the bird at roughly a 18 degree angle upwards.
|
| EX
|
Damage
|
Red Damage
|
Proration
|
Cancel
|
Guard
|
| 300*17 (2373)
|
200*17 (1516
|
95% (M) * 17
|
-
|
LHA
|
| First Active
|
Active
|
Recovery
|
Frame Adv
|
Circuit
|
Invuln
|
| 7+7
|
X
|
97
|
0
|
-100.0%
|
-
|
|
NAC spits 17 crows across the screen with positions just barely randomized enough to be inconsistent on hit.
|
|
EM Wave Ultimate Attack - Necoesthetics
(EX: Super EM Wave Ultimate Attack - Necoesthetics - Stamp Rally West Japan)
623A/B/C
|
| A
|
Damage
|
Red Damage
|
Proration
|
Cancel
|
Guard
|
| 80*30 (1305)
|
50*6, 32*24 (546)
|
100%
|
-
|
LHA
|
| First Active
|
Active
|
Recovery
|
Frame Adv
|
Circuit
|
Invuln
|
| 7
|
13
|
5
|
5
|
0.7%*6 (4.2%)
|
-
|
|
Very fast forward disjoint.
|
| B
|
Damage
|
Red Damage
|
Proration
|
Cancel
|
Guard
|
| 80*48 (1344)
|
50*6, 32*42 (587 - 629)
|
100%
|
-
|
LHA
|
| First Active
|
Active
|
Recovery
|
Frame Adv
|
Circuit
|
Invuln
|
| 13
|
13
|
3
|
7
|
0.7%*6 (4.2%)
|
-
|
|
A bit slower than 623A, but almost no recovery.
|
| EX
|
Damage
|
Red Damage
|
Proration
|
Cancel
|
Guard
|
| 0*106, -94*15 (-1034)
|
0*121 (0)
|
100%
|
-
|
LHA
|
| First Active
|
Active
|
Recovery
|
Frame Adv
|
Circuit
|
Invuln
|
| 1+9
|
30
|
12
|
-20
|
-100.0%
|
-
|
|
Causes Circuit Break for 360 frames on hit. Grounded opponents will be pushed out of the move's hitbox halfway through, making it punishable both on block and on hit.
|
|
Moriarty's Adventure
214A/B/C (No EX)
|
| A
|
Damage
|
Red Damage
|
Proration
|
Cancel
|
Guard
|
| 400*3 (932)
|
200*3 (448)
|
70% (O)
|
-
|
LHA
|
| First Active
|
Active
|
Recovery
|
Frame Adv
|
Circuit
|
Invuln
|
| 16
|
30
|
69
|
-4 ~ -20
|
2.8%*3 (8.4%)
|
Full 16-60
|
|
NAC burrows underground and reappears 150 pixels behind him (~58% round start distance, 20% of fullscreen distance). If an opponent is nearby, NAC will spawn some H-Nero 22X sludge. Only 2 hits will land on block midscreen, leaving NAC significantly more minus.
|
| B
|
Damage
|
Red Damage
|
Proration
|
Cancel
|
Guard
|
| 1200
|
672
|
70% (O)
|
-
|
LH
|
| First Active
|
Active
|
Recovery
|
Frame Adv
|
Circuit
|
Invuln
|
| 40
|
4
|
43
|
-19
|
-
|
Full 16-77
|
|
NAC burrows underground while an antlion attacks at his position before reappearing in-place.
|
| C
|
Damage
|
Red Damage
|
Proration
|
Cancel
|
Guard
|
| 400*3 (932)
|
200*3 (448)
|
70% (O)
|
-
|
LHA
|
| First Active
|
Active
|
Recovery
|
Frame Adv
|
Circuit
|
Invuln
|
| 16
|
30
|
69
|
-4 ~ -20
|
2.8%*3 (8.4%)
|
Full 16-60
|
|
Similar to 214A except NAC moves forward instead of backward (by the same amount)
|
|
Zoo! Zoo! Zoo!
22A/B/C
|
| A
|
Damage
|
Red Damage
|
Proration
|
Cancel
|
Guard
|
| 200*10 (1652)
|
80*10 (601)
|
100%
|
-
|
U (Whiffs vs. Air)
|
| First Active
|
Active
|
Recovery
|
Frame Adv
|
Circuit
|
Invuln
|
| 5
|
2
|
27
|
-
|
0%
|
-
|
|
One of H-NAC's only ways to open up opponents. Second active frame only hits during combos and can hit airborne as well as OTG for a bit of extra damage off stray knockdowns.
|
| B
|
Damage
|
Red Damage
|
Proration
|
Cancel
|
Guard
|
| 200*10 (1652)
|
80*10 (601)
|
100%
|
-
|
U (Whiffs vs. Air)
|
| First Active
|
Active
|
Recovery
|
Frame Adv
|
Circuit
|
Invuln
|
| 14 ~ 32
|
1
|
32
|
-
|
0%
|
-
|
|
Similar to 22A except that NAC automatically runs forward for up to 32 frames before trying to grab the opponent. Can not hit during combos or OTG.
|
| EX
|
Damage
|
Red Damage
|
Proration
|
Cancel
|
Guard
|
| 3200
|
2173
|
100%
|
-
|
U (Whiffs vs. Air)
|
| First Active
|
Active
|
Recovery
|
Frame Adv
|
Circuit
|
Invuln
|
| 1+28
|
1
|
42
|
-11 ~ 29
|
-100.0%
|
Full 1-20
|
|
NAC burrows underground and appears behind the opponent before trying to grab them. Can hit during combos.
|
|
Nyampsey Roll JC
63214C during HEAT
|
| Damage
|
Red Damage
|
Proration
|
Cancel
|
Guard
|
| 200*17 (2302)
|
120*17 (1317)
|
90%
|
-
|
LHA
|
| First Active
|
Active
|
Recovery
|
Frame Adv
|
Circuit
|
Invuln
|
| 5+10
|
66
|
76
|
-60
|
removes all
|
Full 1-129
|
|
Circuit breaks the opponent for 280f several times on hit and circuit breaks NAC for 180f always.
|
|
Aerial Specials
Chaos Beam
j.236A/B/C
|
| A
|
Damage
|
Red Damage
|
Proration
|
Cancel
|
Guard
|
| 250*4 (865)
|
120*4 (397)
|
100%
|
EX
|
LHA
|
| First Active
|
Active
|
Recovery
|
Frame Adv
|
Circuit
|
Invuln
|
| 15
|
14
|
10
|
-8
|
1.4*4 (5.6%)
|
-
|
|
NAC shoots his eye beams diagonally down at the ground. Stalls him in the air and can be used 4 times before landing between his 2 jumps and 2 airdashes. A staple of his ability to play keepaway.
|
| B
|
Damage
|
Red Damage
|
Proration
|
Cancel
|
Guard
|
| 250*7 (1418)
|
120*7 (651)
|
100%
|
EX
|
LHA
|
| First Active
|
Active
|
Recovery
|
Frame Adv
|
Circuit
|
Invuln
|
| 22
|
14
|
10
|
-11
|
1.4*7 (9.8%)
|
-
|
|
Same as A version but slower for more damage and more stalling.
|
| EX
|
Damage
|
Red Damage
|
Proration
|
Cancel
|
Guard
|
| 250*15 (2594)
|
150*15 (1492)
|
100%
|
-
|
LHA
|
| First Active
|
Active
|
Recovery
|
Frame Adv
|
Circuit
|
Invuln
|
| 6+26
|
30
|
10
|
-14
|
-100.0%
|
-
|
|
NAC shoots his beams in an arc underneath him, starting behind and moving forward. Unlike H-Neco, NAC does not retain his air actions.
|
|
I Want to Go to Crocodile Country
(EX: Six Segment God Cat)
j.214A/B/C
|
| A
|
Damage
|
Red Damage
|
Proration
|
Cancel
|
Guard
|
| 200*8 (1422)
|
100*8 (684)
|
100%
|
-EX-
|
LHA
|
| First Active
|
Active
|
Recovery
|
Frame Adv
|
Circuit
|
Invuln
|
| 7
|
40
|
8
|
-1
|
1.4*8 (11.2%)
|
-
|
|
NAC turns into a rocket and flies roughly halfway across the screen.
|
| B
|
Damage
|
Red Damage
|
Proration
|
Cancel
|
Guard
|
| 250*10 (1910)
|
120*10 (876)
|
100%
|
-EX-
|
LHA
|
| First Active
|
Active
|
Recovery
|
Frame Adv
|
Circuit
|
Invuln
|
| 10
|
50
|
8
|
-1
|
1.7*10 (17.5%)
|
-
|
|
NAC travels faster and farther, almost fullscreen. May also function as a pseudo-airdash.
|
| EX
|
Damage
|
Red Damage
|
Proration
|
Cancel
|
Guard
|
| 120, 300*16 (3178)
|
120, 230*16 (2343)
|
100%
|
-
|
LHA
|
| First Active
|
Active
|
Recovery
|
Frame Adv
|
Circuit
|
Invuln
|
| 11
|
3 (3) 80
|
8
|
-9
|
-100.0%
|
5-34
|
|
NAC splits into 6 parts before flying fullscreen. Common combo ender for damage. Can also be used when landing a stray j.214A/B.
|
|
Arc Drive
Dusk of the Cat
41236C during HEAT
|
| Damage
|
Red Damage
|
Proration
|
Cancel
|
Guard
|
| 390*25 (3251 - 3420)
|
280*25 (2250 - 2368)
|
96% (M) * 25
|
-
|
LHA
|
| First Active
|
Active
|
Recovery
|
Frame Adv
|
Circuit
|
Invuln
|
| 11+14
|
150
|
116
|
9 ~ 63
|
removes all
|
Full 1-18
|
|
A horde of NACs (and one Neco) come running through the screen. Nothing will spawn if NAC is hit during the first 3 vulnerable frames.
|
|
MBAACC Navigation


