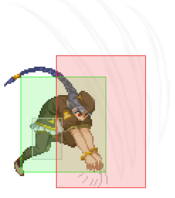
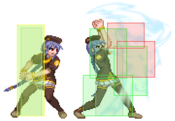
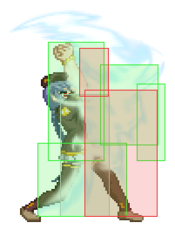
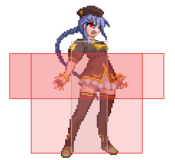
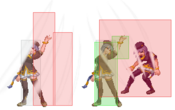
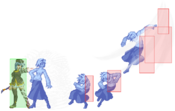
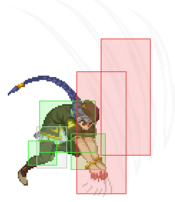
Melty Blood/MBAACC/Sion TATARI/Half Moon: Difference between revisions
(Updated frame data and formatting.) |
|||
| Line 1: | Line 1: | ||
{{TOC limit|3}} | {{TOC limit|3}} | ||
==Character Page Progress== | == Character Page Progress == | ||
{{#lst:Melty_Blood/MBAACC:Roadmap|H-VSion}} | {{#lst:Melty_Blood/MBAACC:Roadmap|H-VSion}} | ||
==Additional Resources== | == Additional Resources == | ||
[http://melty.games/?p1m=h&p1c=vsion&netplay=1&page=1 H-V.Sion Match Video Database]<br> | |||
[http://melty.games/ Match Video Database]<br | |||
[https://drunkardshade.com/2015/09/16/melty-bits-h-v-sion/ Melty Bits: H-V.Sion] | [https://drunkardshade.com/2015/09/16/melty-bits-h-v-sion/ Melty Bits: H-V.Sion] | ||
==Players to watch/ask== | == Players to watch/ask == | ||
'''JP:''' | '''JP:''' | ||
*Text goes here after asterisk | *Text goes here after asterisk | ||
*Text goes here after asterisk | *Text goes here after asterisk | ||
'''NA:''' | |||
*Text goes here after asterisk | *Text goes here after asterisk | ||
*Text goes here after asterisk | *Text goes here after asterisk | ||
==Overview== | == Overview == | ||
{| class="wikitable" | {| class="wikitable" | ||
|+Strengths Weaknesses | |+Strengths / Weaknesses | ||
|- | |- | ||
|Strengths | |Strengths | ||
| Line 30: | Line 30: | ||
|} | |} | ||
==General Gameplan== | == General Gameplan == | ||
Place text here* | Place text here* | ||
===Neutral=== | === Neutral === | ||
Place text here* | Place text here* | ||
===Pressure=== | === Pressure === | ||
Place text here | Place text here | ||
| Line 43: | Line 43: | ||
Place text here | Place text here | ||
===Defense=== | === Defense === | ||
place text here* | place text here* | ||
| Line 49: | Line 49: | ||
==Combos== | == Combos == | ||
* Note that all aerial enders can either be finished with the normal Air Throw or j.236C. Air Throw enders can also be followed up with j.2B. For the rest of this combo guide we'll simply use | {{ComboLegend-MB}} | ||
* Note that all aerial enders can either be finished with the normal Air Throw or j.236C. Air Throw enders can also be followed up with j.2B. For the rest of this combo guide we'll simply use AT as the notation. | |||
* Don't bother with j.236B enders unless you desperately need that extremely tiny bit of meter or want the tech chase. Does less damage than Airthrow enders and doesn't give a reliable knockdown, allows for airtech situations. | * Don't bother with j.236B enders unless you desperately need that extremely tiny bit of meter or want the tech chase. Does less damage than Airthrow enders and doesn't give a reliable knockdown, allows for airtech situations. | ||
===Normal Combos=== | === Normal Combos === | ||
{{CollapsingComboTable-MB | {{CollapsingComboTable-MB | ||
|data= | |data= | ||
{{CollapsingComboData-MB | {{CollapsingComboData-MB | ||
|condition=Normal starter, grounded opponent | |condition=Normal starter, grounded opponent | ||
|character= | |character= | ||
|damage= | |damage= | ||
|metergen= | |metergen= | ||
|metero= | |metero= | ||
|link= | |link= | ||
|input= * 5A6AA > 6C, | |input= * 5A6AA > 6C, 66 > 6C, 66 > 2C > 5C > 3C > sj8.BC > j.66 > j.C > sdj.BC > AT | ||
|simput= | |simput= | ||
|note= Staple H-Vsion combo, works on everyone. Opts for damage ender. | |note= Staple H-Vsion combo, works on everyone. Opts for damage ender. | ||
}} | }} | ||
{{CollapsingComboData-MB | {{CollapsingComboData-MB | ||
|condition=Normal starter, grounded opponent | |condition=Normal starter, grounded opponent | ||
|character=Everyone except Red Arcueid | |character=Everyone except Red Arcueid | ||
|damage= | |damage= | ||
|metergen= | |metergen= | ||
|metero= | |metero= | ||
|link= | |link= | ||
|input= * 5A6AA > 6C, 5A6A( | |input= * 5A6AA > 6C, 5A6A(w)A > 6C, 66 > 2C > 5C > 3C > sj8.BC > dj.BC > AT | ||
|simput= | |simput= | ||
|note= Optimized version of the above. | |note= Optimized version of the above. | ||
}} | }} | ||
{{CollapsingComboData-MB | {{CollapsingComboData-MB | ||
|condition=Normal starter, grounded opponent | |condition=Normal starter, grounded opponent | ||
|character= | |character= | ||
|damage= | |damage= | ||
|metergen= | |metergen= | ||
|metero= | |metero= | ||
|link= | |link= | ||
|input= * 5A6AA > 6C, | |input= * 5A6AA > 6C, 66 > 6C, 66 > 2C > j.2B, 2C > Summon | ||
|simput= | |simput= | ||
|note= Same as the above except now you're opting for okizeme. VSion can do her j.2B about halfway before the apex of her jump, but try to do the divekick about 3/4 through the initial jump, 1/4 before the apex, so that the enemy won't airtech out if hit too quickly, and so they'll be guaranteed to hit the ground. | |note= Same as the above except now you're opting for okizeme. VSion can do her j.2B about halfway before the apex of her jump, but try to do the divekick about 3/4 through the initial jump, 1/4 before the apex, so that the enemy won't airtech out if hit too quickly, and so they'll be guaranteed to hit the ground. | ||
}} | }} | ||
{{CollapsingComboData-MB | {{CollapsingComboData-MB | ||
|condition=Normal starter, grounded opponent | |condition=Normal starter, grounded opponent | ||
|character=Everyone except Red Arcueid | |character=Everyone except Red Arcueid | ||
|damage= | |damage= | ||
|metergen= | |metergen= | ||
|metero= | |metero= | ||
|link= | |link= | ||
|input= * 5A6AA > 6C, 5A6A( | |input= * 5A6AA > 6C, 5A6A(w)A > 6C, 66 > 2C > j.2B, 2C > Summon | ||
|simput= | |simput= | ||
|note= Optimized but harder version of the above. | |note= Optimized but harder version of the above. | ||
}} | }} | ||
{{CollapsingComboData-MB | {{CollapsingComboData-MB | ||
|condition=Normal starter, grounded opponent | |condition=Normal starter, grounded opponent | ||
|character=(See Notes) | |character=(See Notes) | ||
|damage= | |damage= | ||
|metergen= | |metergen= | ||
|metero= | |metero= | ||
|link= | |link= | ||
|input= * 5A6AA > 6C, 6[C], | |input= * 5A6AA > 6C, 6[C], 66 > 2C > 5C > 3C > j.BC > j.66 > j.C > sdj.BC > AT | ||
|simput= | |simput= | ||
|note= Character specific midscreen combo. No need to use the above combos if you fight the following: | |note= Character specific midscreen combo. No need to use the above combos if you fight the following: | ||
Archetype: Earth, Arcueid, Ciel, Kouma, Nero, Riesbyfe, Roa, Sion, Sion TATARI, Warachia | Archetype: Earth, Arcueid, Ciel, Kouma, Nero, Riesbyfe, Roa, Sion, Sion TATARI, Warachia | ||
}} | }} | ||
}} | }} | ||
===Corner Combos=== | === Corner Combos === | ||
{{CollapsingComboTable-MB | {{CollapsingComboTable-MB | ||
|data= | |data= | ||
{{CollapsingComboData-MB | {{CollapsingComboData-MB | ||
|condition=Normal starter, grounded opponent | |condition=Normal starter, grounded opponent | ||
|character=Everyone | |character=Everyone | ||
|damage= | |damage= | ||
|metergen= | |metergen= | ||
|metero= | |metero= | ||
|link= | |link= | ||
|input= * 5A6AA > 6C, 6[C], j.2[B] > land | |input= * 5A6AA > 6C, 6[C], j.2[B] > land 2C > 5C > 3C > j.BC > j.66 > j.C > sdj.BC > AT | ||
|simput= | |simput= | ||
|note= Staple H-Vsion corner combo. Replaces the dash with a j.2[B]. Damage variant. Same rules regarding j.2B timing for j.2[B]. | |note= Staple H-Vsion corner combo. Replaces the dash with a j.2[B]. Damage variant. Same rules regarding j.2B timing for j.2[B]. | ||
}} | }} | ||
{{CollapsingComboData-MB | {{CollapsingComboData-MB | ||
|condition=Normal starter, grounded opponent | |condition=Normal starter, grounded opponent | ||
|character= | |character= | ||
|damage= | |damage= | ||
|metergen= | |metergen= | ||
|metero= | |metero= | ||
|link= | |link= | ||
|input= * 5A6AA > 6C, 6[C], j.2[B] > land | |input= * 5A6AA > 6C, 6[C], j.2[B] > land 2C > j.2B > land 2C > Summon | ||
|simput= | |simput= | ||
|note= Okizeme variant of the above. | |note= Okizeme variant of the above. | ||
}} | }} | ||
}} | }} | ||
==Move Descriptions== | == Move Descriptions == | ||
{{AttackData-MB/Infobox}} | {{AttackData-MB/Infobox}} | ||
===Normal Moves=== | === Normal Moves === | ||
====Standing Normals==== | ==== Standing Normals ==== | ||
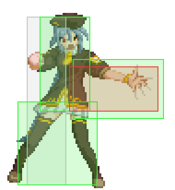
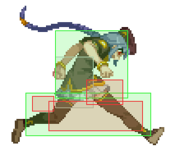
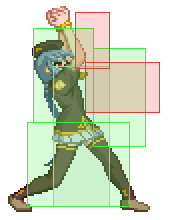
===== <span class="invisible-header">5A</span> ===== | |||
{{MoveData | {{MoveData | ||
|image=MBHVSion5A.png | |image=MBHVSion5A.png | ||
| Line 152: | Line 154: | ||
|caption= | |caption= | ||
|name=5A | |name=5A | ||
|linkname=5A | |||
|input=5A~6A~6A | |input=5A~6A~6A | ||
|data= | |data= | ||
{{AttackData-MB | {{AttackData-MB | ||
|version=5A | |||
|damage=350 | |||
|reddamage=144 | |||
|proration=78% (O) | |||
|circuit=2.1% | |||
|cancel=-SE-, -N-, -SP-, -CH-, -EX-, (J) | |||
|guard=LH | |||
|startup=4 | |||
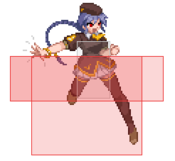
|active=4 | |||
|recovery=9 | |||
|frameAdv=-1 | |||
|invuln= | |||
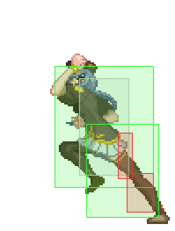
|description=Quick jab. Long hitbox makes it an excellent string starter as well as a method to tag jumpouts. | |||
}} | }} | ||
{{AttackData-MB | {{AttackData-MB | ||
|header=no | |||
|version=5A~6A | |||
|damage=600 | |||
|reddamage=384 | |||
|proration=80% (M) | |||
|circuit=4.2% | |||
|cancel=N, SP, -CH-, EX, (J) | |||
|guard=LH | |||
|startup=7 | |||
|active=4 | |||
|recovery=16 | |||
|frameAdv=-5 | |||
|invuln= | |||
|description= | |||
}} | }} | ||
{{AttackData-MB | {{AttackData-MB | ||
|header=no | |||
|version=5A~6A~6A | |||
|damage=1000 | |||
|reddamage=768 | |||
|proration=60% (O) | |||
|circuit=7.0% | |||
|cancel=(N), SP, EX, (J) | |||
|guard=LH | |||
|startup=9 | |||
|active=4 | |||
|recovery=17 | |||
|frameAdv=-3 | |||
|invuln= | |||
|description=Generic H-moon 5A followup. Extremely useful due to the range on her 5A. Second hit can be canceled into anything, third cancels into anything on hit but only specials, EX moves, and arc drives on block. On hit, cancel the final attack into 6C to continue into her optimal combo options. | |||
}} | |||
}} | }} | ||
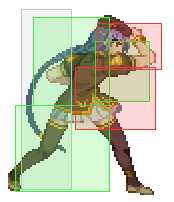
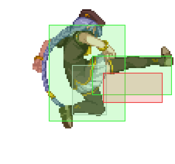
===== <span class="invisible-header">5B</span> ===== | |||
{{MoveData | {{MoveData | ||
|image=MBHVSion5B.png | |image=MBHVSion5B.png | ||
|caption= | |caption= | ||
|name=5B | |name=5B | ||
|linkname=5B | |||
|data= | |data= | ||
{{AttackData-MB | {{AttackData-MB | ||
|damage=600 | |||
|reddamage=384 | |||
|proration=80% (O) | |||
|circuit=4.2% | |||
|cancel=N, SP, EX, (J) | |||
|guard=LH | |||
|startup=6 | |||
|active=2 | |||
|recovery=19 | |||
|frameAdv=-6 | |||
|invuln=Clash 7-8 | |||
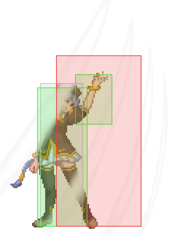
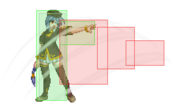
|description=An upward swipe that moves V.Sion forward a bit. Excellent for pressure & comboing due to the forward movement. Very effective anti-air when spaced properly. Often clashes with poorly placed opponent normals. | |||
}} | |||
}} | }} | ||
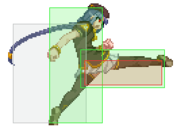
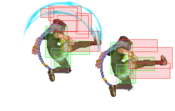
===== <span class="invisible-header">5C</span> ===== | |||
{{MoveData | {{MoveData | ||
|image=MBCVSion5C.png | |image=MBCVSion5C.png | ||
|caption= | |caption= | ||
|name=5C | |name=5C | ||
|linkname=5C | |||
|data= | |data= | ||
{{AttackData-MB | {{AttackData-MB | ||
|damage=400, 900 (1009) | |||
|reddamage=(647) | |||
|proration=70% (O) | |||
|circuit=2.8%, 6.3% (9.1%) | |||
|cancel=N, SP, EX, (J) | |||
|guard=LH, LHA | |||
|startup={{Tooltip | text=12| hovertext=A first hitbox shows up on frame 11 which does nothing.}} | |||
|active={{Tooltip | text=5| hovertext=2, 3}} | |||
|recovery=15 | |||
|frameAdv=-3 | |||
|invuln= | |||
|description= A 2-hit swipe. Integral to her BnB combo and has a sizable active window which making it useful for meaties and tech punishing. | |||
}} | |||
}} | }} | ||
====Crouching Normals==== | |||
==== Crouching Normals ==== | |||
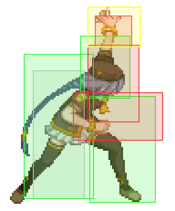
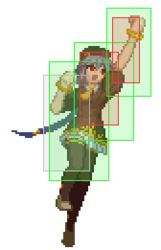
===== <span class="invisible-header">2A</span> ===== | |||
{{MoveData | {{MoveData | ||
|image=MBAACC_Vsion_2A.png | |image=MBAACC_Vsion_2A.png | ||
|caption= | |caption= | ||
|name=2A | |name=2A | ||
|linkname=2A | |||
|data= | |data= | ||
{{AttackData-MB | {{AttackData-MB | ||
|damage=350 | |||
|reddamage=115 | |||
|proration=75% (O) | |||
|circuit=1.4% | |||
|cancel=-SE-, -N-, -SP-, -EX-, (J) | |||
|guard=L | |||
|startup=3 | |||
|active=4 | |||
|recovery=9 | |||
|frameAdv=-1 | |||
|invuln= | |||
|description=Quick low kick, fast but short range. | |||
}} | |||
}} | }} | ||
===== <span class="invisible-header">2B</span> ===== | |||
{{MoveData | {{MoveData | ||
|image=MBHVSion2B.png | |image=MBHVSion2B.png | ||
|caption= | |caption= | ||
|name=2B | |name=2B | ||
|linkname=2B | |||
|data= | |data= | ||
{{AttackData-MB | {{AttackData-MB | ||
|damage=500 | |||
|reddamage=384 | |||
|proration=80% (O) | |||
|circuit=3.5% | |||
|cancel=N, SP, EX, (J) | |||
|guard=LH | |||
|startup=7 | |||
|active=4 | |||
|recovery=11 | |||
|frameAdv=0 | |||
|invuln= | |||
|description=A crouching poke that hits mid, has mediocre range but it moves her forward very slightly. Notable for being +0 on block which makes it great for ending a blockstring or starting chain resets. | |||
}} | |||
}} | }} | ||
===== <span class="invisible-header">2C</span> ===== | |||
{{MoveData | {{MoveData | ||
|image=MBCVSion2C.png | |image=MBCVSion2C.png | ||
|caption= | |caption= | ||
|name=2C | |name=2C | ||
|linkname=2C | |||
|data= | |data= | ||
{{AttackData-MB | {{AttackData-MB | ||
|damage=1200 | |||
|reddamage=768 | |||
|proration=55% (O) | |||
|circuit=8.4% | |||
|cancel=N, SP, EX, (J) | |||
|guard=L | |||
|startup=9 | |||
|active=3 | |||
|recovery=20 | |||
|frameAdv=-8 | |||
|invuln= | |||
|description=A low sweep with good range that gives an untechable knockdown on hit. | |||
}} | |||
}} | }} | ||
====Aerial Normals==== | |||
==== Aerial Normals ==== | |||
===== <span class="invisible-header">j.A</span> ===== | |||
{{MoveData | {{MoveData | ||
|image=MBCVSionjA.png | |image=MBCVSionjA.png | ||
|caption= | |caption= | ||
|name=j.A | |name=j.A | ||
|linkname=j.A | |||
|data= | |data= | ||
{{AttackData-MB | {{AttackData-MB | ||
|damage=300 | |||
|reddamage=172 | |||
|proration=75% (O) | |||
|circuit=2.1% | |||
|cancel=SE, N, SP, EX, J | |||
|guard=LHA | |||
|startup=5 | |||
|active=4 | |||
|recovery=10 | |||
|frameAdv=- | |||
|invuln= | |||
|description=Kick that has a downward attack angle. Does not hit overhead. | |||
}} | |||
}} | }} | ||
===== <span class="invisible-header">j.B</span> ===== | |||
{{MoveData | {{MoveData | ||
|image=MBHVSionjB.png | |image=MBHVSionjB.png | ||
|caption= | |caption= | ||
|name=j.B | |name=j.B | ||
|linkname=j.B | |||
|data= | |data= | ||
{{AttackData-MB | {{AttackData-MB | ||
|damage=750 | |||
|reddamage=432 | |||
|proration=80% | |||
|circuit=4.9% | |||
|cancel=N, SP, EX, J | |||
|guard=HA | |||
|startup=7 | |||
|active=6 | |||
|recovery=- | |||
|frameAdv=- | |||
|invuln= | |||
|description=Jumping kick that covers a wide area underneath her. Crosses up very nicely for a big combo on hit. | |||
}} | |||
}} | }} | ||
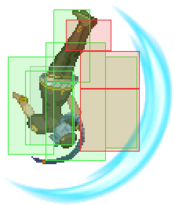
===== <span class="invisible-header">j.C</span> ===== | |||
{{MoveData | {{MoveData | ||
|image=MBCVSionjC.png | |image=MBCVSionjC.png | ||
|caption= | |caption= | ||
|name=j.C | |name=j.C | ||
|linkname=j.C | |||
|data= | |data= | ||
{{AttackData-MB | {{AttackData-MB | ||
|damage=900 | |||
|reddamage=432 | |||
|proration=90% (M) | |||
|circuit=6.3% | |||
|cancel=N, SP, EX, J | |||
|guard=HA | |||
|startup=5 | |||
|active=3 | |||
|recovery=- | |||
|frameAdv=- | |||
|invuln= | |||
|description=Flipping kick with a large attack arc that covers about 180 degrees in front of her. Comes out relatively quick and has solid priority with a decent amount of stun on both hit and block, making it a very solid air-to-air move. | |||
}} | |||
}} | }} | ||
====Command Normals==== | |||
==== Command Normals ==== | |||
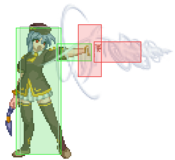
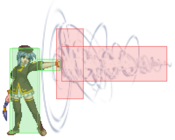
===== <span class="invisible-header">6B</span> ===== | |||
{{MoveData | {{MoveData | ||
|image=MBHVSion6B.png | |image=MBHVSion6B.png | ||
| Line 378: | Line 402: | ||
|caption= | |caption= | ||
|name=6B | |name=6B | ||
|linkname=6B | |||
|input=6[B] | |input=6[B] | ||
|data= | |data= | ||
{{AttackData-MB | {{AttackData-MB | ||
|version=6B | |||
|damage=300*3 (871) | |||
|reddamage=(499) | |||
|proration=100% | |||
|circuit=2.1%*3 (6.3%) | |||
|cancel=-EX- | |||
|guard=LH | |||
|startup=12 | |||
|active={{Tooltip | text=10| hovertext=4, 4, 2}} | |||
|recovery=12 | |||
|frameAdv=4 | |||
|invuln= | |||
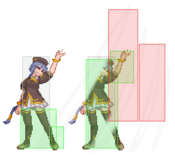
|description=V.Sion shoots a spiraling web from her hand that can be ducked but is air unblockable. | |||
}} | }} | ||
{{AttackData-MB | {{AttackData-MB | ||
|header=no | |||
|version=6[B] | |||
|damage=700*3 (2034) | |||
|reddamage=(1395) | |||
|proration=100% | |||
|circuit=4.9%x3 (14.7%) | |||
|cancel=-EX- | |||
|guard=LH | |||
|startup=26 | |||
|active={{Tooltip | text=12| hovertext=2, 2, 8}} | |||
|recovery=9 | |||
|frameAdv=1 | |||
|invuln= | |||
|description=The charged version has significantly increased range & damage, making it an obscenely good anti-air when placed carefully. This version also cannot be ducked when used at close range. | |||
}} | |||
}} | }} | ||
===== <span class="invisible-header">3C</span> ===== | |||
{{MoveData | {{MoveData | ||
|image=MB_H_VSion_3C.png | |image=MB_H_VSion_3C.png | ||
|caption= | |caption= | ||
|name=3C | |name=3C | ||
|linkname=3C | |||
|data= | |data= | ||
{{AttackData-MB | {{AttackData-MB | ||
|damage=700 | |||
|reddamage=384 | |||
|proration=80% (O) | |||
|circuit=4.9% | |||
|cancel=(SP), (EX), (J) | |||
|guard=LH | |||
|startup=9 | |||
|active=4 | |||
|recovery=19 | |||
|frameAdv=-5 | |||
|invuln= | |||
|description=A volleyball serve type of attack that launches the opponent in the air. Pressing 8 after it hits causes you to superjump straight up for an aerial followup. Air unblockable, but disadvantageous on ground block. | |||
}} | |||
}} | }} | ||
===== <span class="invisible-header">6C</span> ===== | |||
{{MoveData | {{MoveData | ||
|image=MBCVSion6C.png | |image=MBCVSion6C.png | ||
| Line 438: | Line 467: | ||
|caption= | |caption= | ||
|name=6C | |name=6C | ||
|linkname=6C | |||
|input=6[C] | |input=6[C] | ||
|data= | |data= | ||
{{AttackData-MB | {{AttackData-MB | ||
|version=6C | |||
|damage=800 | |||
|reddamage=480 | |||
|proration=65% (O) | |||
|circuit=5.6% | |||
|cancel= | |||
|guard=H | |||
|startup=26 | |||
|active=5 | |||
|recovery=12 | |||
|frameAdv=-2 | |||
|invuln= | |||
|description=A somersaulting kick that hits overhead. Can link into a combo off of it on standing/crouching hit. Causes an untechable ground bounce on air hit. At disadvantage but safe on block. | |||
}} | }} | ||
{{AttackData-MB | {{AttackData-MB | ||
|header=no | |||
|version=6[C] | |||
|damage=1500 | |||
|reddamage=960 | |||
|proration=65% (O) | |||
|circuit=10.5% | |||
|cancel= | |||
|guard=H | |||
|startup=33 | |||
|active=9 | |||
|recovery=8 | |||
|frameAdv={{Tooltip | text=1 ~ 8| hovertext=Distance dependent.}} | |||
|invuln= | |||
|description=The charged version has significantly more range, does more damage, and is advantageous on block. | |||
}} | |||
}} | }} | ||
===== <span class="invisible-header">j.6A</span> ===== | |||
{{MoveData | {{MoveData | ||
|image=MB_H_VSion_j6A.png | |image=MB_H_VSion_j6A.png | ||
|caption= | |caption= | ||
|name=j.6A | |name=j.6A | ||
|linkname=j.6A | |||
|data= | |data= | ||
{{AttackData-MB | {{AttackData-MB | ||
|damage=320 | |||
|reddamage=182 | |||
|proration=76% (O) | |||
|circuit=2.66% | |||
|cancel=SE, N, J | |||
|guard=LHA | |||
|startup=4 | |||
|active=4 | |||
|recovery=- | |||
|frameAdv=- | |||
|invuln= | |||
|description=Upward punch. Not particularly useful. | |||
}} | |||
}} | }} | ||
===== <span class="invisible-header">j.2B</span> ===== | |||
{{MoveData | {{MoveData | ||
|image=MBCVSionj2B.png | |image=MBCVSionj2B.png | ||
|caption= | |caption= | ||
|name=j.2B | |name=j.2B | ||
|linkname=j.2B | |||
|input=j.2[B] | |input=j.2[B] | ||
|data= | |data= | ||
{{AttackData-MB | {{AttackData-MB | ||
|version=j.2B | |||
|damage=800 | |||
|reddamage=576 | |||
|proration=60% (O)<br>35% (O, OTG) | |||
|circuit=5.6% | |||
|cancel= | |||
|guard=LHA | |||
|startup=10 | |||
|active={{Tooltip | text=X| hovertext=Active until landing.}} | |||
|recovery={{Tooltip | text=9| hovertext=Landing recovery.}} | |||
|frameAdv=1 ~ -4 | |||
|invuln= | |||
|description= | |||
}} | }} | ||
{{AttackData-MB | {{AttackData-MB | ||
|header=no | |||
|version=j.2[B] | |||
|damage=1000 | |||
|reddamage=672 | |||
|proration=60% (O) | |||
|circuit=7.0% | |||
|cancel= | |||
|guard=LHA | |||
|startup=18 | |||
|active={{Tooltip | text=X| hovertext=Active until landing.}} | |||
|recovery={{Tooltip | text=8| hovertext=Landing recovery.}} | |||
|frameAdv=2 ~ -4 | |||
|invuln= | |||
|description=Divekick, same as her old one. Causes her to quickly move at a downward angle. Does not hit overhead. It's very useful but can be unsafe when used improperly since it has noticeable landing recovery. When spaced so it hits your opponent as low as possible it is at advantage on block and can be linked into a 2A on hit. On CH it nets you a significantly longer stun which can easily be comboed off of. Can be charged, adding a larger amount of block or hitstun. OTG Relaunches both charged and uncharged. | |||
}} | |||
}} | }} | ||
===Universal Mechanics=== | |||
=== Universal Mechanics === | |||
===== <span class="invisible-header">Ground Throw</span> ===== | |||
{{MoveData | {{MoveData | ||
|image=MBCVSionThrow.png | |image=MBCVSionThrow.png | ||
|caption= | |caption= | ||
|name=Ground Throw | |name=Ground Throw | ||
|linkname=Ground Throw | |||
|input=6/4A+D | |input=6/4A+D | ||
|data= | |data= | ||
{{AttackData-MB | {{AttackData-MB | ||
|damage=1000 | |||
|reddamage=384 | |||
|proration=35% | |||
|circuit=0.0% | |||
|cancel= | |||
|guard=U | |||
|startup=2 | |||
|active=1 | |||
|recovery=20 | |||
|frameAdv= | |||
|invuln= | |||
|description=V. Sion grabs the opponent and launches them. Ground techable but you can combo from it in the corner. | |||
}} | |||
}} | }} | ||
===== <span class="invisible-header">Air Throw</span> ===== | |||
{{MoveData | {{MoveData | ||
|image=MBCVSionThrowAir.png | |image=MBCVSionThrowAir.png | ||
|caption= | |caption= | ||
|name=Air Throw | |name=Air Throw | ||
|linkname=Air Throw | |||
|input=j.6/4A+D | |input=j.6/4A+D | ||
|data= | |data= | ||
{{AttackData-MB | {{AttackData-MB | ||
|damage=1600 (Raw)/1200 | |||
|reddamage=480 | |||
|proration=30% | |||
|circuit=0.0% | |||
|cancel=(Any if Raw) | |||
|guard=U | |||
|startup=1 | |||
|active=1 | |||
|recovery={{Tooltip | text=13| hovertext=Landing recovery.}} | |||
|frameAdv= | |||
|invuln= | |||
|description=Works about the same as Sion's airthrow. Ground bounces the opponent if done raw, ground techable if done as a combo ender. | |||
}} | |||
}} | }} | ||
===== <span class="invisible-header">Shield Counter</span> ===== | |||
{{MoveData | {{MoveData | ||
|image=MBHVSionSC.png | |image=MBHVSionSC.png | ||
| Line 583: | Line 624: | ||
|caption= | |caption= | ||
|name=Shield Counter | |name=Shield Counter | ||
|linkname=Shield Counter | |||
|input=Auto after a successful Shield (Air OK) | |input=Auto after a successful Shield (Air OK) | ||
|data= | |data= | ||
{{AttackData-MB | {{AttackData-MB | ||
|version=Standing | |||
|damage=500 (345) | |||
|reddamage=198 | |||
|proration=50% | |||
|circuit=3.5% | |||
|cancel=(SP), (EX), (J) | |||
|guard=LHA | |||
|startup=8 | |||
|active=4 | |||
|recovery=18 | |||
|frameAdv=-4 | |||
|invuln= | |||
|description=Same animation as her 623 series. | |||
}} | }} | ||
{{AttackData-MB | {{AttackData-MB | ||
|header=no | |||
|version=Crouching | |||
|damage=1500 (1117) | |||
|reddamage=714 | |||
|proration=50% | |||
|circuit=10.5% | |||
|cancel=(SP), (EX) | |||
|guard=LA | |||
|startup=8 | |||
|active=4 | |||
|recovery=18 | |||
|frameAdv=-4 | |||
|invuln= | |||
|description=Same animation and hitbox as 2C. | |||
}} | }} | ||
{{AttackData-MB | {{AttackData-MB | ||
|header=no | |||
|version=Aerial | |||
|damage=500 (345) | |||
|reddamage=198 | |||
|proration=50% | |||
|circuit=3.5% | |||
|cancel= | |||
|guard=HA | |||
|startup=8 | |||
|active=4 | |||
|recovery= | |||
|frameAdv= | |||
|invuln= | |||
|description=Same animation as her j.236 series. | |||
}} | |||
}} | }} | ||
===== <span class="invisible-header">Shield Bunker</span> ===== | |||
{{MoveData | {{MoveData | ||
|image=MBCVSion214D.png | |image=MBCVSion214D.png | ||
| Line 637: | Line 682: | ||
|caption= | |caption= | ||
|name=Shield Bunker | |name=Shield Bunker | ||
|linkname=Shield Bunker | |||
|input=214D in neutral or blockstun | |input=214D in neutral or blockstun | ||
|data= | |data= | ||
{{AttackData-MB | {{AttackData-MB | ||
|version=Neutral | |||
|damage=500 | |||
|reddamage=192 | |||
|proration=50% | |||
|circuit=0.0% | |||
|cancel= | |||
|guard=LHA | |||
|startup=25 | |||
|active=4 | |||
|recovery=19 | |||
|frameAdv=-5 | |||
|invuln=Clash 1-10 | |||
|description= | |||
}} | |||
{{AttackData-MB | |||
|header=no | |||
|version={{Tooltip | text=(Clash)| hovertext=If an attack connects with this Shield Bunker's clash box, this is the followup that happens afterwards.}} | |||
|damage=500 | |||
|reddamage=192 | |||
|proration=50% | |||
|circuit=0.0% | |||
|cancel= | |||
|guard=LHA | |||
|startup=7 | |||
|active=4 | |||
|recovery=19 | |||
|frameAdv=-5 | |||
|invuln={{Tooltip | text=Strike 1-7| hovertext=1-15 Strike invicibility on whiff.}} | |||
|description=A fancier-looking 3C. | |||
}} | }} | ||
{{AttackData-MB | {{AttackData-MB | ||
|header=no | |||
|version=Blockstun | |||
|damage=0 | |||
|reddamage=0 | |||
|proration=100% | |||
|circuit=-100.0% | |||
|cancel= | |||
|guard=LHA | |||
|startup=18 | |||
|active=3 | |||
|recovery=22 | |||
|frameAdv=-7 | |||
|invuln= | |||
|description=H-Moon specific reversal bunker, with larger hit and hurt boxes, faster startup but deals no damage. | |||
}} | |||
}} | }} | ||
===== <span class="invisible-header">Circuit Spark</span> ===== | |||
{{MoveData | {{MoveData | ||
|image=MBCVSionCSpark.png | |image=MBCVSionCSpark.png | ||
|image2=MBCVSionCSparkAir.png | |image2=MBCVSionCSparkAir.png | ||
|name=Circuit Spark | |name=Circuit Spark | ||
|input=In Heat:<br | |linkname=Circuit Spark | ||
|input=In Heat:<br>Auto during hitstun<br>A+B+C during blockstun | |||
|caption= | |caption= | ||
|data= | |data= | ||
{{AttackData-MB | |||
|version=Ground | |||
|damage=100 | |||
|reddamage=0 | |||
|proration=100% | |||
|circuit=removes all | |||
|cancel= | |||
|guard=U | |||
|startup=10 | |||
|active=10 | |||
|recovery=20 | |||
|frameAdv= | |||
|invuln=Full 1-39 | |||
|description= | |||
}} | |||
{{AttackData-MB | {{AttackData-MB | ||
|header=no | |||
|version=Air | |||
|damage=100 | |||
|reddamage=0 | |||
|proration=100% | |||
|circuit=removes all | |||
|cancel= | |||
|guard=U | |||
|startup=11 | |||
|active=10 | |||
|recovery={{Tooltip | text=15| hovertext=Landing recovery.}} | |||
|frameAdv= | |||
|invuln=Strike 1-30 | |||
|description=Universal burst mechanic. Unlike Crescent/Full Heat activation, the hitbox and frame data doesn't vary between characters. However, you can be thrown out of this move if you input it in the air. | |||
}} | }} | ||
}} | }} | ||
===Special Moves=== | |||
====Grounded Specials==== | === Special Moves === | ||
==== Grounded Specials ==== | |||
===== <span class="invisible-header">236X</span> ===== | |||
{{MoveData | {{MoveData | ||
|image=MBCVSion236A.png | |image=MBCVSion236A.png | ||
| Line 719: | Line 786: | ||
|image4=MB_H_VSion_236C.png | |image4=MB_H_VSion_236C.png | ||
|name=Terror News (Lie) | |name=Terror News (Lie) | ||
|linkname=236X | |||
|input=236A/B/[B]/C | |input=236A/B/[B]/C | ||
|caption= | |caption= | ||
|data= | |data= | ||
{{AttackData-MB | {{AttackData-MB | ||
|version=A | |||
|damage=900 | |||
|reddamage=432 | |||
|proration=100% | |||
|circuit=3.5% | |||
|cancel=-EX- | |||
|guard=LH | |||
|startup={{Tooltip | text=13| hovertext=A first hitbox shows up on frame 13 which does nothing.}} | |||
|active=2 | |||
|recovery=30 | |||
|frameAdv=-8 | |||
|invuln= | |||
|description=Forward claw swipe. Fast but disadvantaged on block, the primary use is for ending blockstrings when you do not have whiff cancel options. It launches the opponent on hit. | |||
}} | }} | ||
{{AttackData-MB | {{AttackData-MB | ||
|header=no | |||
|version=B | |||
|damage=600*3 (1743) | |||
|reddamage=(837) | |||
|proration=100% | |||
|circuit=4.2%*3 (12.6%) | |||
|cancel=-EX- | |||
|guard=LHA | |||
|startup=22 | |||
|active={{Tooltip | text=3| hovertext=1, 1, 1}} | |||
|recovery=30 | |||
|frameAdv=5 | |||
|invuln=Clash 6-15 | |||
|description= | |||
}} | }} | ||
{{AttackData-MB | {{AttackData-MB | ||
|header=no | |||
|version=[B] | |||
|damage=600*3 (1743) | |||
|reddamage=(837) | |||
|proration=100% | |||
|circuit=4.2%*3 (12.6%) | |||
|cancel=-EX- | |||
|guard=LHA | |||
|startup=36 | |||
|active={{Tooltip | text=4| hovertext=Three Hits}} | |||
|recovery=24 | |||
|frameAdv=10 | |||
|invuln=Clash 6-29 | |||
|description=Slower than 236A, hits 3 times, and is advantageous on block. | |||
}} | }} | ||
{{AttackData-MB | {{AttackData-MB | ||
|header=no | |||
|version=EX | |||
|damage=850*3 (2124) | |||
|reddamage=(1680) | |||
|proration=93%*3 (M) | |||
|circuit=-100.0% | |||
|cancel= | |||
|guard=LHA | |||
|startup=5+11 | |||
|active={{Tooltip | text=3| hovertext=1, 1, 1}} | |||
|recovery=30 | |||
|frameAdv=5 | |||
|invuln=Full 1-12 | |||
|description=Similar to 236B but much faster startup and launches on hit, allowing for a followup combo. | |||
}} | |||
}} | }} | ||
===== <span class="invisible-header">623X</span> ===== | |||
{{MoveData | {{MoveData | ||
|image=MBCVSion623A.png | |image=MBCVSion623A.png | ||
| Line 790: | Line 861: | ||
|image3=MBCVSion623C.png | |image3=MBCVSion623C.png | ||
|name=Terror News (Malice) | |name=Terror News (Malice) | ||
|linkname=623X | |||
|input=623A/B/C | |input=623A/B/C | ||
|caption= | |caption= | ||
|data= | |data= | ||
{{AttackData-MB | {{AttackData-MB | ||
|version=A | |||
|damage=1200 | |||
|reddamage=864 | |||
|proration=70% (O) | |||
|circuit=9.1% | |||
|cancel= | |||
|guard=LH | |||
|startup=10 | |||
|active=2 | |||
|recovery=29 | |||
|frameAdv=-7 | |||
|invuln=High 1-10 | |||
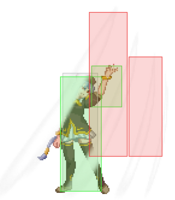
|description=Upwards claw swipe. Hits once and has upper body invincibility, making it an anti-air in some matchups. | |||
}} | }} | ||
{{AttackData-MB | {{AttackData-MB | ||
|header=no | |||
|version=B | |||
|damage=800*2 (1379) | |||
|reddamage=(843) | |||
|proration=85%*2 (M) | |||
|circuit=5.6%*2 (11.2%) | |||
|cancel= | |||
|guard=LHA | |||
|startup=10 | |||
|active={{Tooltip | text=2| hovertext=1, 1}} | |||
|recovery=32 | |||
|frameAdv=-3 | |||
|invuln= | |||
|description=Hits twice and launches, allowing a followup which makes it relevant in some obscure combos. | |||
}} | }} | ||
{{AttackData-MB | {{AttackData-MB | ||
|header=no | |||
|version=EX | |||
|damage=300, 500*6 (2969) | |||
|reddamage=(2216) | |||
|proration=100% | |||
|circuit=-100.0% | |||
|cancel= | |||
|guard=LH | |||
|startup=6+3 | |||
|active=2 | |||
|recovery=41 | |||
|frameAdv=-25 | |||
|invuln=Full 1-13 | |||
|description=Closest thing V.Sion has to a shoryuken. Invincible on startup, air unblockable, and is a hitgrab into untechable knockdown which allows for strong okizeme options afterwards. Not as useful of a wakeup shoryu but still very strong as a combo ender. | |||
}} | |||
}} | }} | ||
===== <span class="invisible-header">214X</span> ===== | |||
{{MoveData | {{MoveData | ||
|image=MB_H_VSion_214A.png | |image=MB_H_VSion_214A.png | ||
| Line 845: | Line 920: | ||
|image3=MBCVSion214C.png | |image3=MBCVSion214C.png | ||
|name=Replicant Conductor (Osiris) | |name=Replicant Conductor (Osiris) | ||
|linkname=214X | |||
|input=214A/B/C (No EX) | |input=214A/B/C (No EX) | ||
|caption= | |caption= | ||
|data= | |data= | ||
{{AttackData-MB | {{AttackData-MB | ||
|version=A | |||
|damage=400*4 (1353) | |||
|reddamage=(811) | |||
|proration=94%*4 (M) | |||
|circuit=2.1%*4 (8.4%) | |||
|cancel= | |||
|guard=LHA | |||
|startup=35 | |||
|active={{Tooltip | text=2 (2) 2 (2) 2| hovertext=1, 1 (2) 2 (2) 2}} | |||
|recovery=19 | |||
|frameAdv=18 (vs. Stand)<br>8 ~ -4 (vs. Crouch) | |||
|invuln= | |||
|description=Summons Arcueid, who performs her upward swipe. Advantageous on block if it hits fully. It can be used as antiair, but will dissipate if you are hit. Air blockable. Relaunches. | |||
}} | }} | ||
{{AttackData-MB | {{AttackData-MB | ||
|header=no | |||
|version=B | |||
|damage= | |||
|reddamage= | |||
|proration= | |||
|circuit= | |||
|cancel= | |||
|guard= | |||
|startup= | |||
|active= | |||
|recovery={{Tooltip | text=43| hovertext=Full duration.}} | |||
|frameAdv= | |||
|invuln= | |||
|description= | |||
}} | }} | ||
{{AttackData-MB | {{AttackData-MB | ||
|header=no | |||
|version=(Satsuki) | |||
|damage=1000 | |||
|reddamage=672 | |||
|proration=50% (O) | |||
|circuit=7.0% | |||
|cancel= | |||
|guard=LH | |||
|startup=122 | |||
|active=2 | |||
|recovery= | |||
|frameAdv= | |||
|invuln= | |||
|description=Summons Satsuki, who winds up and does her rush punch. It is persistent and launches on hit. Note that Satsuki doesn't have a collision box, so it's possible to freely pass through her. | |||
}} | }} | ||
{{AttackData-MB | {{AttackData-MB | ||
|header=no | |||
|version=C | |||
|damage= | |||
|reddamage= | |||
|proration= | |||
|circuit= | |||
|cancel= | |||
|guard= | |||
|startup= | |||
|active= | |||
|recovery={{Tooltip | text=45| hovertext=Full duration.}} | |||
|frameAdv= | |||
|invuln= | |||
|description= | |||
}} | }} | ||
{{AttackData-MB | {{AttackData-MB | ||
|header=no | |||
|version=(Akiha) | |||
|damage=1500 | |||
|reddamage=1078 | |||
|proration=80% (M) | |||
|circuit=10.0% | |||
|cancel= | |||
|guard=LH | |||
|startup={{Tooltip | text=96| hovertext=Collision box starts being active at frame 25.}} | |||
|active=2 | |||
|recovery= | |||
|frameAdv= | |||
|invuln= | |||
|description=Summons Akiha, who walks forward and does her 6C . Wallslams on hit. Has a collision box that will prevent the opponent from dashing through it. It will also destroy or dissipate anything that depends on a character stepping near it, such as Hisui bentos and Aoko proximity orbs. | |||
}} | |||
}} | }} | ||
====Aerial Specials==== | |||
==== Aerial Specials ==== | |||
===== <span class="invisible-header">j.236X</span> ===== | |||
{{MoveData | {{MoveData | ||
|image=MBHVSionj236AB.png | |image=MBHVSionj236AB.png | ||
|image2=MBHVSionj236C.png | |image2=MBHVSionj236C.png | ||
|name=Busy Bug | |name=Busy Bug | ||
|linkname=j.236X | |||
|input=j.236A/B/C | |input=j.236A/B/C | ||
|caption= | |caption= | ||
|data= | |data= | ||
{{AttackData-MB | {{AttackData-MB | ||
|version=A | |||
|damage=1000 | |||
|reddamage=768 | |||
|proration=70% (O) | |||
|circuit=7.0% | |||
|cancel= | |||
|guard=LH | |||
|startup=9 | |||
|active=4 | |||
|recovery={{Tooltip | text=10| hovertext=Landing recovery.}} | |||
|frameAdv=-4 (TK) | |||
|invuln= | |||
|description= Air claw swipe. Has limited use, but is notable for stopping your air momentum and beating some problem normals. Drops straight down afterwards. | |||
}} | }} | ||
{{AttackData-MB | {{AttackData-MB | ||
|header=no | |||
|version=B | |||
|damage=1000 | |||
|reddamage=768 | |||
|proration=70% (O) | |||
|circuit=7.0% | |||
|cancel= | |||
|guard=LHA | |||
|startup=11 | |||
|active=4 | |||
|recovery={{Tooltip | text=10| hovertext=Landing recovery.}} | |||
|frameAdv=-1 (TK) | |||
|invuln= | |||
|description=Same as above except when falling during the recovery she moves backwards a bit. This momentum makes it an useful aerial combo ender in certain matchups. | |||
}} | }} | ||
{{AttackData-MB | {{AttackData-MB | ||
|header=no | |||
|version=EX | |||
|damage=700*2, 1500 (2158) | |||
|reddamage=(1561) | |||
|proration=70% (O) | |||
|circuit=-100.0% | |||
|cancel= | |||
|guard=LHA | |||
|startup=2+5 | |||
|active={{Tooltip | text=7| hovertext=2, 2, 3}} | |||
|recovery={{Tooltip | text=4| hovertext=Landing recovery.}} | |||
|frameAdv=13 (TK) | |||
|invuln=Full 1-7 | |||
|description=Has some invincibility and forces a ground-techable knockdown. Useful as an aerial combo ender during Heat as it does more damage than airthrow or j.236B and leads to an extremely advantageous position near the corner. | |||
}} | |||
}} | }} | ||
===Arc Drive=== | |||
=== Arc Drive === | |||
{{MoveData | {{MoveData | ||
|image=MBCVSionAD.png | |image=MBCVSionAD.png | ||
|caption= | |caption= | ||
|name=Cruel Blood | |name=Cruel Blood | ||
|linkname=Arc Drive | |||
|input=41236C during Heat | |input=41236C during Heat | ||
|data= | |data= | ||
{{AttackData-MB | {{AttackData-MB | ||
|damage=3000 | |||
|reddamage=2137 | |||
|proration=100% | |||
|circuit=removes all | |||
|cancel= | |||
|guard=U<br>(Whiffs vs Air.) | |||
|startup=13+0 | |||
|active=2 | |||
|recovery=39 | |||
|frameAdv= | |||
|invuln=Full 1-15 | |||
|description=BITE! Command throw with invincibility. Good damage, refills some red life, and leads to a good wakeup situation. | |||
}} | |||
}} | }} | ||
{{Navbox-MBAACC}} | {{Navbox-MBAACC}} | ||
Revision as of 13:24, 30 July 2020
Character Page Progress
This page is mostly complete, consider joining as an editor to help expand finish it up. Please update this character's roadmap page when one of the editing goals have been reached.
| In Progress | To-do |
|---|---|
|
|
Additional Resources
H-V.Sion Match Video Database
Melty Bits: H-V.Sion
Players to watch/ask
JP:
- Text goes here after asterisk
- Text goes here after asterisk
NA:
- Text goes here after asterisk
- Text goes here after asterisk
Overview
| Strengths |
|
| Weaknesses |
|
General Gameplan
Place text here*
Neutral
Place text here*
Pressure
Place text here
Okizeme
Place text here
Defense
place text here*
Combos
| Combo Notation Help | |
|---|---|
| Disclaimer: Combos are written by various writers, so the actual notation used in pages can differ from the standard one. | |
| X > Y | X input is cancelled into Y. |
| X > delay Y | Must wait for a short period before cancelling X input into Y. |
| X, Y | X input is linked into Y, meaning Y is done after X's recovery period. |
| X+Y | Buttons X and Y must be input simultaneously. |
| X/Y | Either the X or Y input can be used. |
| X~Y | This notation has two meanings.
|
| X(w) | X input must not hit the opponent (Whiff). |
| j.X | X input is done in the air, implies a jump/jump cancel if the previous move was done from the ground. Applies to all air chain sections:
|
| sj.X | X input is done after a super jump. Notated as sj8.X and sj9.X for neutral and forward super jumps respectively. |
| dj.X | X input is done after a double jump. |
| sdj.X | X input is done after a double super jump. |
| tk.X | Stands for Tiger Knee. X motion must be buffered before jumping, inputting the move as close to the ground as possible. (ex. tk.236A) |
| (X) | X is optional. Typically the combo will be easier if omitted. |
| [X] | Input X is held down. Also referred to as Blowback Edge (BE). Depending on the character, this can indicate that this button is held down and not released until indicated by the release notation. |
| ]X[ | Input X is released. Will only appear if a button is previously held down. This type of input is referred to as Negative Edge. |
| {X} | Button X should only be held down briefly to get a partially charged version instead of the fully charged one. |
| X(N) | Attack "X" should only hit N times. |
| (XYZ)xN | XYZ string must be performed N times. Combos using this notation are usually referred to as loops. |
| (XYZ^) | A pre-existing combo labelled XYZ is inserted here for shortening purposes. |
| CH | The first attack must be a Counter Hit. |
| Air CH | The first attack must be a Counter Hit on an airborne opponent. |
| 66 | Performs a ground forward dash. |
| j.66 | Performs an aerial forward dash, used as a cancel for certain characters' air strings. |
| IAD/IABD | Performs an Instant AirDash. |
| AT | Performs an Air Throw. (j.6/4A+D) |
| IH | Performs an Initiative Heat. |
| AD | Performs an Arc Drive. |
| AAD | Performs an Another Arc Drive. |
- Note that all aerial enders can either be finished with the normal Air Throw or j.236C. Air Throw enders can also be followed up with j.2B. For the rest of this combo guide we'll simply use AT as the notation.
- Don't bother with j.236B enders unless you desperately need that extremely tiny bit of meter or want the tech chase. Does less damage than Airthrow enders and doesn't give a reliable knockdown, allows for airtech situations.
Normal Combos
Corner Combos
Move Descriptions
| Frame Data Help | |
|---|---|
| Header | Tooltip |
| Move Box Colors |
Light gray = Collision Box (A move lacking one means it can go through the opponent's own collision box). |
| Damage | Base damage done by this attack.
(X) denotes combined and scaled damage tested against standing V. Sion. |
| Red Damage | Damage done to the recoverable red health bar by this attack. The values are inherently scaled and tested against standing V. Sion.
(X) denotes combined damage. |
| Proration | The correction value set by this attack and the way it modifies the scaling during a string. See this page for more details.
X% (O) means X% Overrides the previous correction value in a combo if X is of a lower percentage. |
| Circuit | Meter gained by this attack on hit.
(X%) denotes combined meter gain. |
| Cancel | Actions this move can be cancelled into.
SE = Self cancelable. |
| Guard | The way this move must be blocked.
L = Can block crouching |
| Startup | Amount of frames that must pass prior to reaching the active frames. Also referred to as "True Startup". |
| Active | The amount of frames that this move will have a hitbox. (x) denotes frame gaps where there are no hitboxes is present. Due to varied blockstuns, (x) frames are difficult to use to determine punish windows. Generally the larger the numbers, the more time you have to punish. |
| Recovery | Frames that this move has after the active frames if not canceled. The character goes into one frame where they can block but not act afterwards, which is not counted here. |
| Advantage | The difference in frames where you can act before your opponent when this move is blocked (assuming the move isn't canceled and the first active frame is blocked). If the opponent uses a move with startup that is at least 2 frames less than this move's negative advantage, it will result in the opponent hitting that move. |
| Invul | Lists any defensive properties this move has.
X y~z denotes X property happening between the y to z frames of the animations. If no frames are noted, it means the invincibility lasts through the entire move. Invicibility:
Hurtbox-Based Properties:
Miscellaneous Properties
|
Normal Moves
Standing Normals
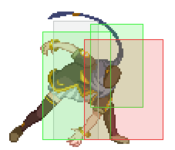
5A
5A
5A~6A~6A |
|---|
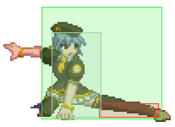
5B
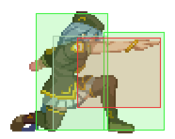
5C
Crouching Normals
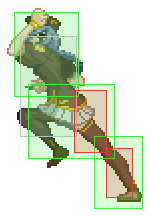
2A
2B
2C
Aerial Normals
j.A
j.B
j.C
Command Normals
6B
6B
6[B] |
|---|
3C
6C
6C
6[C] |
|---|
j.6A
j.2B
j.2B
j.2[B] |
|---|
Universal Mechanics
Ground Throw
Ground Throw
6/4A+D |
|---|
Air Throw
Air Throw
j.6/4A+D |
|---|
Shield Counter
Shield Counter
Auto after a successful Shield (Air OK) |
|---|
Shield Bunker
Shield Bunker
214D in neutral or blockstun |
|---|
Circuit Spark
Special Moves
Grounded Specials
236X
Terror News (Lie)
236A/B/[B]/C |
|---|
623X
Terror News (Malice)
623A/B/C |
|---|
214X
Replicant Conductor (Osiris)
214A/B/C (No EX) |
|---|
Aerial Specials
j.236X
Busy Bug
j.236A/B/C |
|---|
Arc Drive
Cruel Blood
41236C during Heat |
|---|
