Character Page Progress
This page is mostly complete, consider joining as an editor to help finish it up. Please update this character's roadmap page when one of the editing goals have been reached. When no main goals are left, please remove this section from this page.
| In Progress
|
- Overview / General Gameplan:
- Main Goal: Tidy page up and improve grammar / readability to modern standards.
|
Additional Resources
F-Aoko Match Video Database
Melty Bits: F-Aoko
Aoko Fuzzy Overhead set up on tall bodies
F-Aoko Essentials
Players to watch/ask
| Name |
Color
|
Region |
Common Venues |
Status |
Details
|
| chen (橙) |

|
Japan |
A-cho |
Active |
The best Aoko player. While he primarily uses C-Moon, he does play F-Moon in certain matchups. Very solid player. Complains when playing F-Aoko
|
mainyan
(麻衣にゃん) |

|
Japan |
A-cho,
KorewaMelty |
Inactive |
F-Moon solo main, very fun to watch.
|
| jefuri-manson (ジェフリーマンソン) |

|
Japan |
A-cho |
Inactive
|
Veteran Aoko player. Primarily plays C-Moon, but is proficient in F-Moon as well.
|
| RoverRuckus |

|
North America |
Netplay |
Inactive |
Strongest solo F-Aoko in NA. Known for doing a lot of staggers with 5B
|
| MoltyBleed |

|
Europe |
Netplay |
Inactive |
Mains C-Moon, but has a very strong F-Moon as well.
|
otousan
(お父さん) |

|
Japan |
KorewaMelty,
Clearlamp |
Inactive
|
Very inactive, but still worth watching. Sometimes listed as "Wiz Papa" (wizupapa/ウィズパパ).
|
Overview
Strengths / Weaknesses
| Strengths
|
- Newbie friendly but still very effective at high level with good fundamentals
- Double airdash gives her high mobility and offense
- Her EX moves provide good utility
- Has a fireball
- Has strong and simple mix ups
- Has higher level mix ups if you learn to hold orb
- Consistent damage
- Good air and ground normals
- Good ground mobility
|
| Weaknesses
|
- Needs meter to access some of her better mix-ups
- Defensive options are passable at best.
- 421X series isn't as versatile as her H and C variants.
- Anti-air capabilities are questionable.
- While she can airdash twice before landing, her airdash isn't that long.
- Like any Aoko variant, she can get clipped by things trying to jump out that other characters wouldn't.
|
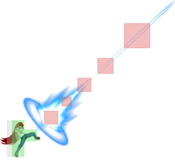
F-Aoko, the so-called "Shoto" of MBAACC (if such a thing even exists). Fitted with a lot of good normals for neutral, plenty of orbs and even a fireball, F-Aoko is a character whose basics will carry you far in Melty as long as you have strong understanding of the game's fundamentals. While her orbs aren't as varied or strong as in her other moons, she can still very easily sit back and turn the screen into a minefield using 236X, 214X, and j214X. She can also quickly transition from zoning to rushdown in an instant. With the power of 5B, j.B, j.C, and her airdash movement, she can quickly be in your face with stagger pressure and okizeme. Her EX moves also provide tons of utility, chief among those being 214C ("blue fiyah") which can lock the opponent down long enough for her to enforce a mixup. A stable character among many in the world of Melty.
Unique Mechanics
- Aoko has access to a second airdash.
General Gameplan
Depending on the matchup, F-Aoko can play in all ranges of the game's space. In some matchups you are free to use 236A liberally, however be warned most characters can simply duck under 236A (with the exceptions being Hime, Nero, and Wara). You can also use 214A/B along with TKj.214[A]/[B], allowing four orbs to be on-screen simultaneously. TKj.214[A]/[B] is slightly tougher for opponents to hit and disable which is nice for F-Aoko. F-Aoko can also use the orbs as bait, waiting to punish a whiffed normal as the opponent goes to swat them away. Note that this tactic is MU-specific, as you may not want to sit back vs some characters.
Once in the corner F-Aoko really shines, being able to use her 214C (sometimes referred to as blue fire) in conjunction with her multiple fast airdashes to run a strong high/low game. Without meter, F-Aoko still has access to strong and rewarding stagger pressure which can be further reinforced by orbs.
Neutral
TLDR; it all depends on the matchup.
Generally it's never a bad idea to test the waters with 236A to see how your opponent reacts. If they cannot deal with it effectively then feel free to use 236A liberally; against slow or less mobile characters like Kouma, Tohno, Akiha, for example, you can also afford to use 236A in tandem with 214A/B and see how the opponent plays around them. If they seek to approach from the air you can dash under them, if the space permits, and even trip guard them with dash under 2C. You can also call out jump-ins/air approaches with 5D or j.A air-to-air. Be sure to learn the ranges of 5B and play around with it in neutral, it's very similar to Ragna's 5B in from Blazblue. If you need to meter dump, use 236C, its easily avoidable but they have to jump into the air anyway. It's not an auto-win neutral tool, but it does force the opponent to move around, lest they be pressured and pushed into the corner.
In the event you are in MAX and need a safe way to get back health, you can 236A/B IH.
In the air, you're somewhat limited. She has a great jump-in in the form of j.C, but both her j.B and j.A leave something to be desired. J.A in particular is rather short, so you have to use caution while throwing out air normals. She does have two airdashes to supplement this, allowing her to bait and punish, or delay her landings. Note that her airdashes are actually relatively short, so make sure you space them properly.
While F-Moon's orb gameplay may be lacking compared to the other moons, she can still use them. You typically want to have j.214X set around head height, and play around from there. They can also be used to delay your landing. If j.214X is executed very quickly after airdash, Aoko retains her air momentum. This is referred to as "boost orb", and is yet another way to mix up your movement. Some characters, like Wara, can very easily clear orbs, in which case they may not be as useful.
Pressure
F-Aoko has a lot of tools at her disposal, with 2A/5A/2B being + on block, a strong 5B, orbs to lock down your opponent, and various other tools. There is a very large amount of ways to structure your pressure, but here are some pointers/basics:
- 2A delay 5A dash throw
- 2A delay 2A redash 2AA
- 2A delay 2A 5B 2B, IAD j.B
- 2A 2A delay 5B, 5B (5B linked into itself frame traps and links on CH)
- 2AAA 5B 4{c} 63214A, OTG pickup (best used in the corner)
- 2AAA 5B 4[C] OTG pickup (best used in the corner)
- 2A delay 2A delay 2A slight delay 2B, 5B (frame traps)
- 2A 2B, 2A delay 2A...
- 2A 5B 2B, 5B...
- IAD j.B j.214X, 2AAA (best used in the corner)
- IAD j.B j.214X, Throw
- IAD j.B j.214X, IAD j.B dj IAD j.B (best used in the corner)
This is only a small taste of what F-Aoko is capable of, so be sure to freestyle and test things in training mode. She has a lot of tools at her disposal, so don't forget to use them. (As an aside, when doing double overheads with F-Aoko's airdash, it's preferred to use 6956 rather than the A+B macro to perfom the airdash. This is because 6956 has a larger buffer window.)
Metered
- This is the basic way to set up Blue Fire:
- 2AAA 5B 2C (3C) 22A 214C
(Note that if 22A hits really shallow, 22a into Bluefire will leave a gap. Don't use 22B as your opponent can mash/jump/backdash.)
This is an incredibly strong tool, as it forces your opponent to block a high/low, which F-Aoko possesses great tools for. The visual effect of the move also obscures Aoko if spaced properly. After you've let it rip, your most basic options will be:
- 9 jump > land 2A
- 9 jump > late airdash j.A/B
- 9 jump > late j.A/B
The option to go low, as well as the timing differences on late j.A/B vs late airdash j.A/B, will keep your opponent guessing. You obviously have the option to airdash for an extra overhead from both of the overhead options. The above list is not the end-all of options during blue fire, but it simply a jumping-off point. IADs, superjumps, etc. can all be used to mess with your opponent's timing. Even if they block the mixup, you're still really plus and able to continue pressure. You can also sacrifice the mixup to set an orb with 214X, right outside of the range where it will activate, to make your opponent scared to mash on your next mixup.
Okizeme
F-Aoko's strongest oki most commonly starts from the j214C route, off of the following enders:
- j.214C 2C 63214B, (TKj.214[X])
- j.214C 2C (delay 214X)
- j.214C, 5[C] 4[C], (421X OR 214X)
The first two are really easy to understand, you can set the orb on top of them and proceed to dash up throw/2A pressure/IAD j.B (possibly even double-airdash j.B) it's very simple and effective to make people respect your offense once you get going. With TKj.214[A]/[B], you can even jumpback airdash j.A whiff for an L/R. The ender that sets up 421X is most effective with meter or if its very meaty. This is because the overhead followup is very hard to confirm off of on hit (it's a 1f link with 2A), but becomes much easier with the frame advantage of being meaty or during blue fire. The following are some examples of how 421X can be used:
- 2C 421A~[C], 421A(meaty), 2AA starter into combo
- 2C 421A~[C], dash 2AA 5B 2C 3C into aerial sequence
- 2C 421A~[C] empty jump, [release C], 2AA 5B 2C 3C into aerial sequence
- 2C 421A~[C], jump, [release C] airdash j.B/j.C
F-Aoko's air throw unfortunately sends the opponent a larger distance than some other characters, but she can still get oki off of it. Your go-to option here is to dash into 2A, but this is easily disrespected. If your opponent likes to jump or dash on wakeup, you can do 236A > 236C or just 236C to stop them. At some distances this can be jumped over, but you now have them in the air, and can take advantage of that. If your opponent likes to do reversals to beat your 2A, you can dash 2A (whiff) > whiff cancel 2C. If spaced properly, the 2A will stop your dash out of range of the reversal, and the 2C will whiff, letting you punish. If your opponent pressed a button, you can confirm the now-meaty 2C into a combo. If your opponent blocked and you have 100 meter, cancel into 22A > 214C for a blue fire setup.
Defense
One thing to note about Aoko in general is that she gets clipped more times for jumping out than other characters would, as a result of an awkward jumping hurtbox and a long superjump startup. As a result, you do have to be more mindful whenever you attempt to escape by jumping out. Aoko also has the slowest wakeup in the game, face up and down. While this can make it awkward for some people to time oki, if your opponent knows what they've doing, they can potentially get better setups against you. Defense-wise you do have the following at your disposal:
- 623B is indeed a real DP, however it's among the slowest DPs. Often times your opponent can do a meaty 2A and still have time to block 623B. It can also be clashed by some moves, and because it's multi-hit you won't often get a CH into a combo. You can, however, place a 214X orb after you land, and if you know which way your opponent will tech, you keep pressure and potentially get an unblockable setup.
- For Heat, she needs to be in Max to even utilize it, which is a problem, as F-Aoko is very meter-reliant. Other than that, it's very strong and gets you red health back instantly.
- Backdash is good to make people whiff slower moves, but other than that there's not much merit here as her backdash is poor.
- Next you have EX Guard, which is your best option. Because it pushes back and makes moves slight more unsafe, smart usage of EX Guard can give you space to jump or challenge your opponent's pressure strings.
- Bunker can be useful to get out of multi-hitting moves or tight strings, but it's not all that great.
- Finally, shield allows you to call out resets and punish certain reactable pressure options (like Len's charged ice spike or Ryougi's rekka overhead).
Keeping all of this in mind, your gameplan on defense is to use EX Guard and patience, looking for an opportunity to call out or escape from your opponent's pressure with jumps, mashes, or shields.
Combos
| Combo Notation Help
|
Disclaimer: Combos are written by various writers, so the actual notation used in pages can differ from the standard one.
For more information, see Glossary and Controls.
|
| X > Y
|
X input is cancelled into Y.
|
| X > delay Y
|
Must wait for a short period before cancelling X input into Y.
|
| X, Y
|
X input is linked into Y, meaning Y is done after X's recovery period.
|
| X+Y
|
Buttons X and Y must be input simultaneously.
|
| X/Y
|
Either the X or Y input can be used.
|
| X~Y
|
This notation has two meanings.
- Use attack X with Y follow-up input.
- Input X then within a few frames, input Y. Usually used for option selects.
|
| X(w)
|
X input must not hit the opponent (Whiff).
|
| j.X
|
X input is done in the air, implies a jump/jump cancel if the previous move was done from the ground.
Applies to all air chain sections:
- Assume a forward jump cancel if no direction is given.
- Air chains such as j.A > j.B > j.C can be shortened to j.ABC.
|
| sj.X
|
X input is done after a super jump. Notated as sj8.X and sj9.X for neutral and forward super jumps respectively.
|
| dj.X
|
X input is done after a double jump.
|
| sdj.X
|
X input is done after a double super jump.
|
| tk.X
|
Stands for Tiger Knee. X motion must be buffered before jumping, inputting the move as close to the ground as possible. (ex. tk.236A)
|
| (X)
|
X is optional. Typically the combo will be easier if omitted.
|
| [X]
|
Input X is held down. Also referred to as Blowback Edge (BE). Depending on the character, this can indicate that this button is held down and not released until indicated by the release notation.
|
| ]X[
|
Input X is released. Will only appear if a button is previously held down. This type of input is referred to as Negative Edge.
|
| {X}
|
Button X should only be held down briefly to get a partially charged version instead of the fully charged one.
|
| X(N)
|
Attack "X" should only hit N times.
|
| (XYZ)xN
|
XYZ string must be performed N times. Combos using this notation are usually referred to as loops.
|
| (XYZ^)
|
A pre-existing combo labelled XYZ is inserted here for shortening purposes.
|
| CH
|
The first attack must be a Counter Hit.
|
| Air CH
|
The first attack must be a Counter Hit on an airborne opponent.
|
| 66
|
Performs a ground forward dash.
|
| j.66
|
Performs an aerial forward dash, used as a cancel for certain characters' air strings.
|
| IAD/IABD
|
Performs an Instant AirDash.
|
| AT
|
Performs an Air Throw. (j.6/4A+D)
|
| IH
|
Performs an Initiative Heat.
|
| AD
|
Performs an Arc Drive.
|
| AAD
|
Performs an Another Arc Drive.
|
Video Demonstrations
Starters
| Condition
|
Notation
|
Damage
vs V.Sion
|
Notes
|
|
| Normal starter, grounded opponent,
|
- (2AA) > 5B > (2B >) 2C > 3C
|
2551
|
| |
| Meter Gained: 38.7 |
Meter Given (vs C-Moon): 12.9 |
| Common starter for F-Aoko. Might as well get comfortable with it. The parts in parenthesis such as 2AA is your usual hit confirms from 2A while the 2B you may have to omit in order for this starter to be stable. Cases like that happens around max 5B range. |
|
|
| Normal starter, grounded opponent,
|
|
1886
|
| |
| Meter Gained: 26.1 |
Meter Given (vs C-Moon): 8.7 |
| A starter that usually happens when you poke with 5B. |
|
|
| Counterhit starter, grounded opponent,
|
|
2509
|
| |
| Meter Gained: 33.3 |
Meter Given (vs C-Moon): 11.1 |
| CH starter that usually happens when you do 5B, 5B as a frame trap or when used as a poke. Does a nice chunk of damage. |
|
|
| Normal starter, grounded opponent,
|
|
850
|
| |
| Meter Gained: 9 |
Meter Given (vs C-Moon): 3 |
| A starter commonly seen if you air throw them in the corner and looking to catch a jump out, 5AA also catches jump outs in that situation as well. |
|
|
| Counterhit starter, grounded opponent,
|
|
1670
|
| |
| Meter Gained: 27 |
Meter Given (vs C-Moon): 9 |
| A starter that's rare but if it does happen then please use this. |
|
|
| Aerial counterhit starter, Airborne opponent,
|
|
1146
|
| |
| Meter Gained: 18.9 |
Meter Given (vs C-Moon): 6.3 |
| A starter that's used to pick up from aerial counterhit, if you feel its a bit difficult then use 5B into the air sequence you will see in combos. |
|
|
Enders
| Condition
|
Notation
|
Damage
vs V.Sion
|
Notes
|
|
| Normal ender
|
|
1600
|
| |
| Meter Gained: 0 |
Meter Given (vs C-Moon): 0 |
| Common for a Melty blood character is a hard knockdown as well and allows you to dash at your opponent. In the corner its much better since they don't have room to retreat. |
|
|
| Metered enders
|
- j.214C 2C 63214B, (tk.214[A]/[B])
- j.214C, 2C,(214A/B OR 421A)
- j.214C, 2C 22A, j.ABC sdj.ABC AT
|
1414, 1044, ~3302
|
| |
| Meter Gained: 8.1, 4.6, ~25.8 |
Meter Given (vs C-Moon): 7.4 , 4.7, ~16.4 |
| This is one of the enders you will use for your j.214C combo route. the first one is midscreen typically and you use TKj.214A/B to plant an orb on them as they wake up, you then either get a L/R mix up or you can simply dash in for pressure. The second one is generally for the corner and depending on what you would like you then get to choose between 214A/B or 421A. 214A/B puts a proximity orb that the opponent can't really do anything about as Aoko applying her IAD pressure in tandem with her staggers. 421A is a held orb above their head and can stay in place while Aoko does airdash mixups or empty jump low while the opponent is kept in blockstun since they are being kept in blocked stun by the released orb. The last extension is mainly for damage and nothing else This is one of her best enders no matter which way you go. |
|
|
| Normal starter, grounded opponent
|
- j.214C, 5[C] 4[C], (421A OR 214A/B)
|
1668
|
| |
| Meter Gained: 8.4 |
Meter Given (vs C-Moon): 107.7 |
| The timing after j.214C is a bit tricky at first, not typically seen but it does create better spacing to either plant a 421A over them or plant a 214A/B. |
|
|
OTG Pick-Ups
| Condition
|
Notation
|
Damage
vs V.Sion
|
Notes
|
|
| Normal starter, grounded opponent
|
- 2A > 5A(A) > 5B, (2B >) 2C (> 214A/B)
|
2358
|
| |
| Meter Gained: 33.7 |
Meter Given (vs C-Moon): 111.2 |
| F-Aoko's OTG pickups. Best in the corner since neutral tech and back tech get punished by the orb, if you think they will forward tech, omit the 214A/B and react to the tech with 2C. this is what it looks like. The parts in parenthesis are parts that can be omitted for an adjustment you feel comfortable with. |
|
|
Normal Combos
| Condition
|
Notation
|
Damage
vs V.Sion
|
Notes
|
|
| Normal starter, grounded opponent
|
- (2A >) 5B > 2B > 2C > 3C > j.(A)BC > dj.(A)BC > AT
|
4428
|
| |
| Meter Gained: 71.5 |
Meter Given (vs C-Moon): 23.8 |
| Basic string with launcher, you can omit either one or both j.A for easier execution since the loss in damage inflicted is insignificant. Although you can't follow up with orb oki, doing this combo in the corner gives you the chance to do a Melty_Blood/Glossary#Meaty meaty 5B confirm at max range. |
|
|
| Normal starter, grounded opponent, 100% meter
|
- (2A >) 5B > 2B > 2C > 3C > j.BC > dj/sdj.C > j.214C, 2C > 63214B (> tk.214[A]/[B])
|
4185
|
| |
| Meter Gained: 67.9 |
Meter Given (vs C-Moon): 27.3 |
| With some characters such as Nanaya and Aoko herself, you have to replace the double jump cancel with a super jump cancel, otherwise 214C won't hit. Is very likely that you will change sides by doing this which could make the rest of the string very awkward to do or straight up whiff, to fix positioning simply take a step backwards while your opponent falls from the 214C hit. |
|
|
| Normal starter, grounded opponent, 100% meter
|
- (2A >) 5B > 2B > 2C > 3C > j.BC > dj/sdj.C > j.214C > 5[C] > 4[C], (421A~[C] or 214A/B)
|
4294
|
| |
| Meter Gained: 68.3 |
Meter Given (vs C-Moon): 27.6 |
| A more damaging route, a bit tricky on the timing to land the 5[C] link after j.214C |
|
|
| Normal starter, grounded opponent, 100% meter
|
- (2A >) 5B > 2B > 2C > 3C > j.BC > dj/sdj.C > j.214C, 2C > 22A, j.ABC > sdj.ABC > AT
|
5243
|
| |
| Meter Gained: 90.7 |
Meter Given (vs C-Moon): 40.2 |
| Her most damaging combo off of j.214C route. the link is a bit tricky but nothing too difficult. |
|
|
| Normal starter, grounded opponent, 100% meter
|
- (2A >) 5B > 2B > 2C > 3C > j.BC > dj/sdj.C > j.214C, walkback 2C, (214A/B or 421A~[C])
|
4028
|
| |
| Meter Gained: 64.4 |
Meter Given (vs C-Moon): 24.6 |
| This variant is specifically for the corner. |
|
|
| Raw airthrow starter, anywhere
|
- Raw AT, (2C >) 3C > j.BC > dj.(B)C > AT
|
3099
|
| |
| Meter Gained: 49.5 |
Meter Given (vs C-Moon): 16.5 |
| Basic raw airthrow combo. you can choose to include 2C or not if you're execution savvy. |
|
|
| Raw airthrow starter, 100% meter, midscreen
|
- Raw airthrow, (2C >) 3C > j.BC > sdj.C > j.214C, 2C > 63214B, (tk.214A/B)
|
3001
|
| |
| Meter Gained: 51.3 |
Meter Given (vs C-Moon): 21.8 |
| Raw airthrow combo that uses j.214C. you can choose to include 2C or not if you're execution savvy. Ender is the same as the combos listed previously. |
|
|
| Raw airthrow, 100% meter, midscreen
|
- Raw airthrow, (2C >) 3C > j.BC > sdj.C > j.214C, 5[C] > 4[C] (> 421A OR 214A/B)
|
3062
|
| |
| Meter Gained: 51.6 |
Meter Given (vs C-Moon): 22.1 |
| Gold air throw combo that uses j214C that does a little bit more damage. you can choose to include 2C or not if you're execution savvy. ender is the same as the combos listed above. |
|
|
| Shield counter starter
|
- D > 236D > 2C > 3C > j.BC > sdj.BC > AT/214C > Enders
|
2277
|
| |
| Meter Gained: ??? |
Meter Given (vs C-Moon): 18.0 |
| Shield counter combo. You get the basic idea on how her enders work by this point. |
|
|
Move Descriptions
| Frame Data Help
|
| Header
|
Tooltip
|
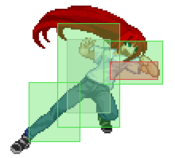
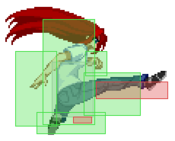
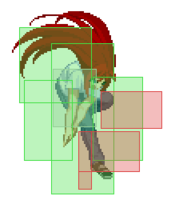
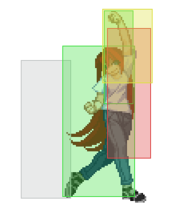
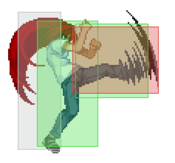
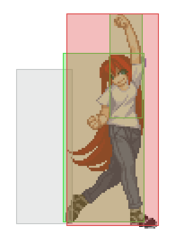
| Move Box Colors
|
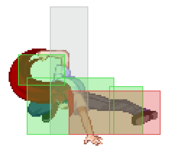
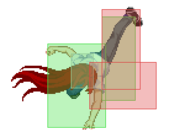
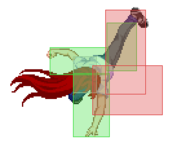
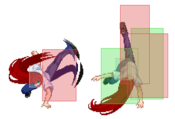
Light gray = Collision Box (A move lacking one means it can go through the opponent's own collision box).
Green: Hurt Boxes.
Red: Hit(/Grab) Boxes.
Yellow: Clash Boxes (When an active hitbox strikes a clash box, the active hitbox stops being active. Multi-hit attacks can beat clash since they will still progress to the next hitbox.)
Magenta: Projectile-reflecting boxes OR Non-hit attack trigger boxes (usually).
Blue: Reflectable Projectile Boxes.
|
| Damage
|
Base damage done by this attack.
(X) denotes combined and scaled damage tested against standing V. Sion.
|
| Red Damage
|
Damage done to the recoverable red health bar by this attack. The values are inherently scaled and tested against standing V. Sion.
(X) denotes combined damage.
|
| Proration
|
The correction value set by this attack and the way it modifies the scaling during a string. See this page for more details.
X% (O) means X% Overrides the previous correction value in a combo if X is of a lower percentage.
X% (M) means the current correction value in a combo will be Multiplied by X%. This can also be referred to as relative proration.
|
| Circuit
|
Meter gained by this attack on hit.
(X%) denotes combined meter gain.
-X% denotes a meter cost.
|
| Cancel
|
Actions this move can be cancelled into.
SE = Self cancelable.
N = Normal cancelable.
SP = Special cancelable.
CH = Cancelable into the next part of the same attack (Chain in case of specials).
EX = EX cancelable.
J = Jump cancelable.
(X) = Cancelable only on hit.
-X- = Cancelable on whiff.
|
| Guard
|
The way this move must be blocked.
L = Can block crouching
H = Can block standing.
A = Can block in the air.
U = Unblockable.
|
| Startup
|
Amount of frames that must pass prior to reaching the active frames. Also referred to as "True Startup".
|
| Active
|
The amount of frames that this move will have a hitbox.
(x) denotes frame gaps where there are no hitboxes is present. Due to varied blockstuns, (x) frames are difficult to use to determine punish windows. Generally the larger the numbers, the more time you have to punish.
X denotes active frames with a duration separate from its origin move's frame data, such as projectile attacks. In this case, the total length of the move is startup+recovery only.
|
| Recovery
|
Frames that this move has after the active frames if not canceled. The character goes into one frame where they can block but not act afterwards, which is not counted here.
|
| Advantage
|
The difference in frames where you can act before your opponent when this move is blocked (assuming the move isn't canceled and the first active frame is blocked).
If the opponent uses a move with startup that is at least 2 frames less than this move's negative advantage, it will result in the opponent hitting that move.
±x~±y denotes a range of possible advantages.
|
| Invul
|
Lists any defensive properties this move has.
X y~z denotes X property happening between the y to z frames of the animations. If no frames are noted, it means the invincibility lasts through the entire move.
Invicibility:
- Strike = Strike invincible.
- Throw = Throw invincible.
Hurtbox-Based Properties:
- Full = No hurtboxes are present.
- High = Upper body lacks a hurtbox.
- Low = Lower body lacks a hurtbox.
Miscellaneous Properties
- Clash = Frames in which clash boxes are active.
- Reflect = Frames in which projectile-reflecting boxes are active.
- Super Armor = Frames in which the character can take hits without going into hit stun.
|
Normal Moves
Standing Normals
|
|
| Damage
|
Red Damage
|
Proration
|
Cancel
|
Guard
|
| 350
|
202
|
75% (O)
|
-SE-,-N-,-SP-,-EX-, (J)
|
LH
|
| First Active
|
Active
|
Recovery
|
Frame Adv
|
Circuit
|
Invuln
|
| 4
|
4
|
5
|
3
|
3.15%
|
-
|
|
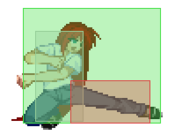
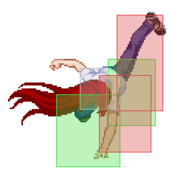
A very short-ranged knee strike that's only a frame slower than 2A. It's just as plus, but it doesn't have nearly as much range and can be blocked standing.
|
|
|
|
| Damage
|
Red Damage
|
Proration
|
Cancel
|
Guard
|
| 800
|
505
|
85% (O)
|
N, SP, EX, (J)
|
LH
|
| First Active
|
Active
|
Recovery
|
Frame Adv
|
Circuit
|
Invuln
|
| 7
|
5
|
10
|
0
|
7.2%
|
-
|
|
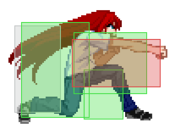
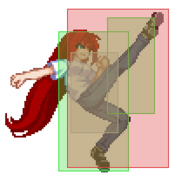
Aoko's primary poke in neutral due to its speed, range, and relative safety. It's 0 on block, so it can also be used to frame trap into itself. Confirms into itself on CH. It's also jump-cancelable, which makes it useful for picking up off of stray air counterhits or gold air throws.
|
|
|
|
| 5C
|
Damage
|
Red Damage
|
Proration
|
Cancel
|
Guard
|
| 850
|
555
|
100%
|
N, SP, EX, (J)
|
LH
|
| First Active
|
Active
|
Recovery
|
Frame Adv
|
Circuit
|
Invuln
|
| 10
|
7
|
14
|
-3
|
9.0%
|
-
|
|
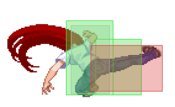
A long-reaching kick that can occasionally be used to anti-air opponents just outside 3C's range. You typically want to ignore this move, if you use it in a blockstring your turn is usually over. After a gold AT, you can use this move after you pick up with 5B for a bit more damage.
|
| 5[C]
|
Damage
|
Red Damage
|
Proration
|
Cancel
|
Guard
|
| 1200
|
1010
|
100%
|
N, SP, EX, (J)
|
LH
|
| First Active
|
Active
|
Recovery
|
Frame Adv
|
Circuit
|
Invuln
|
| 28
|
2
|
16
|
0
|
10.8%
|
-
|
| (Laser)
|
Damage
|
Red Damage
|
Proration
|
Cancel
|
Guard
|
| 350*3
|
200*3
|
100%
|
-
|
LHA
|
| First Active
|
Active
|
Recovery
|
Frame Adv
|
Circuit
|
Invuln
|
| 36
|
3
|
7
|
8 ~ 10
|
4.5%*3 (13.5%)
|
-
|
|
Aoko charges up 5C and shoots a beam from her foot. The kick and the beam have distinct hitboxes with different properties. It can be used as a preemptive anti-air, but despite the good damage and proration it's still relatively slow and avoidable.
The beam hits three times, and covers a massive amount of space in front and above Aoko. You can safely cancel this into orb on hit or block, and if you have meter you can confirm into 22C for some added damage.
|
|
Crouching Normals
|
|
| Damage
|
Red Damage
|
Proration
|
Cancel
|
Guard
|
| 350
|
202
|
75% (O)
|
-SE-, -N-, -SP-, -EX-, (J)
|
L
(Whiffs vs Air.)
|
| First Active
|
Active
|
Recovery
|
Frame Adv
|
Circuit
|
Invuln
|
| 3
|
4
|
5
|
3
|
3.15%
|
-
|
|
A short but fast low. Good for stagger pressure and tick throws.
|
|
|
|
| Damage
|
Red Damage
|
Proration
|
Cancel
|
Guard
|
| 700
|
404
|
100%
|
N, SP, EX, (J)
|
LH
|
| First Active
|
Active
|
Recovery
|
Frame Adv
|
Circuit
|
Invuln
|
| 6
|
4
|
9
|
2
|
6.3%
|
-
|
|
A crouching punch that hits mid. It's +2 on block, meaning it can be used for frame traps or tick throws.
|
|
|
|
| Damage
|
Red Damage
|
Proration
|
Cancel
|
Guard
|
| 800
|
505
|
65% (O)
|
N, SP, EX, (J)
|
L
|
| First Active
|
Active
|
Recovery
|
Frame Adv
|
Circuit
|
Invuln
|
| 8
|
5
|
18
|
-8
|
10.8%
|
-
|
|
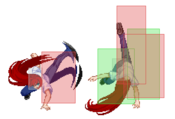
Aoko's sweep, causes a hard knockdown on hit. It has surprisingly decent range and is relatively safe when spaced out correctly.
|
|
Aerial Normals
|
|
| Damage
|
Red Damage
|
Proration
|
Cancel
|
Guard
|
| 250
|
151
|
75%
|
SE, N, SP, EX, (J)
|
HA
|
| First Active
|
Active
|
Recovery
|
Frame Adv
|
Circuit
|
Invuln
|
| 4
|
4
|
10
|
-
|
2.7%
|
-
|
|
Aoko's fastest air-to-air button, but with very short range. Mainly used as combo fodder or to confirm stray air hits.
|
|
|
|
| Damage
|
Red Damage
|
Proration
|
Cancel
|
Guard
|
| 700
|
353
|
90% (O)
|
N, SP, EX, (J)
|
HA
|
| First Active
|
Active
|
Recovery
|
Frame Adv
|
Circuit
|
Invuln
|
| 6
|
4
|
-
|
-
|
6.3%
|
-
|
|
Another air-to-air button. It has more range than j.A, but is harder to confirm on reaction. It also has a lower hitbox than j.A, making it better against opponents that are underneath Aoko.
|
|
|
|
| Damage
|
Red Damage
|
Proration
|
Cancel
|
Guard
|
| 1000
|
707
|
90% (O)
|
SP, EX, (J)
|
HA
|
| First Active
|
Active
|
Recovery
|
Frame Adv
|
Circuit
|
Invuln
|
| 8
|
4
|
-
|
-
|
9.0%
|
-
|
|
Aoko's primary jump-in button. Its wide range can it difficult for the opponent to anti-air it properly, depending on the matchup.
|
|
Command Normals
|
|
| Damage
|
Red Damage
|
Proration
|
Cancel
|
Guard
|
| 800
|
505
|
65% (O)
|
N, SP, EX, (J)
|
LH
|
| First Active
|
Active
|
Recovery
|
Frame Adv
|
Circuit
|
Invuln
|
| 9
|
3
|
21
|
-6
|
8.1%
|
Clash 6-12
|
|
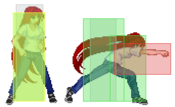
Aoko's launcher, and one of her few anti-air options. Moves her forward a small distance, and the pushback on block makes it safe. Also has a clash hitbox near the top.
|
|
|
|
| 4C
|
Damage
|
Red Damage
|
Proration
|
Cancel
|
Guard
|
| 1000
|
757
|
70% (O)
|
SP, EX
|
LH
|
| First Active
|
Active
|
Recovery
|
Frame Adv
|
Circuit
|
Invuln
|
| 14
|
1
|
19
|
-5 (vs Stand.), -2 (vs. Crouch)
|
9.0%
|
-
|
|
Aoko does an axe kick that hits mid. Generally used in combos to set up orb okizeme, or to fake a high mix-up by cancelling into 63214A.
|
| 4[C]
|
Damage
|
Red Damage
|
Proration
|
Cancel
|
Guard
|
| 1100
|
808
|
50% (O)
|
SP, EX, (J)
|
H
|
| First Active
|
Active
|
Recovery
|
Frame Adv
|
Circuit
|
Invuln
|
| 24
|
1
|
16
|
-2
|
9.0%
|
-
|
|
A charged version of 4C that becomes an overhead. Relatively slow for an overhead, but can be used alongside 63214A and partially charged 4C to set up ambiguous high/low pressure. For 100 meter you can cancel into 63214C to start a more damaging combo.
|
|
Universal Mechanics
|
|
| Damage
|
Red Damage
|
Proration
|
Cancel
|
Guard
|
| 1000
|
404
|
35%
|
-
|
U
|
| First Active
|
Active
|
Recovery
|
Frame Adv
|
Circuit
|
Invuln
|
| 2
|
1
|
20
|
-
|
0.0%
|
-
|
|
Aoko launches the opponent in the air toward the desired direction. Ground techable, and not comboable from.
|
|
|
|
| Damage
|
Red Damage
|
Proration
|
Cancel
|
Guard
|
| 1600
|
606
|
30%
|
(Any if Raw)
|
U
|
| First Active
|
Active
|
Recovery
|
Frame Adv
|
Circuit
|
Invuln
|
| 1
|
1
|
12
|
-
|
0.0%
|
-
|
|
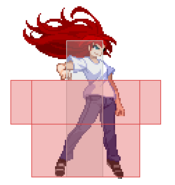
Aoko smacks her opponent to the ground. Ground bounces and pulls you toward the opponent when done raw, causes an untechable knockdown and pulls you away as a combo ender, leaving you with a bit of advantage.
|
|
|
|
| Ground
|
Damage
|
Red Damage
|
Proration
|
Cancel
|
Guard
|
| 500 (345)
|
209
|
40%
|
SP, EX, (J)
|
LHA
|
| First Active
|
Active
|
Recovery
|
Frame Adv
|
Circuit
|
Invuln
|
| 8
|
2
|
20
|
-4
|
4.5%
|
-
|
|
Same animation as 3C.
|
| Air
|
Damage
|
Red Damage
|
Proration
|
Cancel
|
Guard
|
| 500 (303)
|
183
|
50%
|
-
|
HA
|
| First Active
|
Active
|
Recovery
|
Frame Adv
|
Circuit
|
Invuln
|
| 6
|
4
|
-
|
-
|
4.5%
|
-
|
|
Same animation as C-Moon's j.B
|
|
|
|
| Bunker
|
Damage
|
Red Damage
|
Proration
|
Cancel
|
Guard
|
| 500
|
202
|
50%
|
-
|
LHA
|
| First Active
|
Active
|
Recovery
|
Frame Adv
|
Circuit
|
Invuln
|
| 25
|
4
|
19
|
-5
|
0.0%
(-50.0% in blockstun)
|
Clash 1-10
|
| (Clash)
|
Damage
|
Red Damage
|
Proration
|
Cancel
|
Guard
|
| 500
|
202
|
50%
|
-
|
LHA
|
| First Active
|
Active
|
Recovery
|
Frame Adv
|
Circuit
|
Invuln
|
| 7
|
4
|
19
|
-5
|
0.0%/-50.0%
|
Strike 1-7
|
|
Disjointed shield bunker punch.
|
|
|
|
| Damage
|
Red Damage
|
Proration
|
Cancel
|
Guard
|
| 100
|
0
|
100%
|
-
|
U
|
| First Active
|
Active
|
Recovery
|
Frame Adv
|
Circuit
|
Invuln
|
| 20
|
3
|
26
|
-
|
uses all
|
Full 1-23
|
|
Tied for second longest Heat startup in the game with V.Sion and Warachia.
|
|
|
|
| Ground
|
Damage
|
Red Damage
|
Proration
|
Cancel
|
Guard
|
| 100
|
0
|
100%
|
-
|
U
|
| First Active
|
Active
|
Recovery
|
Frame Adv
|
Circuit
|
Invuln
|
| 10
|
10
|
20
|
-
|
removes all
|
Full 1-39
|
| Air
|
Damage
|
Red Damage
|
Proration
|
Cancel
|
Guard
|
| 100
|
0
|
100%
|
-
|
U
|
| First Active
|
Active
|
Recovery
|
Frame Adv
|
Circuit
|
Invuln
|
| 11
|
10
|
15
|
-
|
removes all
|
Strike 1-30
|
|
Universal burst mechanic. Unlike Crescent/Full Heat activation, the hitbox and frame data doesn't vary between characters. However, you can be thrown out of this move if you input it in the air.
|
|
Special Moves
Grounded Specials
|
|
| A
|
Damage
|
Red Damage
|
Proration
|
Cancel
|
Guard
|
| 1000
|
808
|
80% (M)
|
-EX-
|
LHA
|
| First Active
|
Active
|
Recovery
|
Frame Adv
|
Circuit
|
Invuln
|
| 12
|
X
|
34
|
-6
|
9.0%
|
-
|
| [A]
|
Damage
|
Red Damage
|
Proration
|
Cancel
|
Guard
|
| 400*3, 700 (1796)
|
(952)
|
100%, 50% (O)
|
-EX-
|
LHA
|
| First Active
|
Active
|
Recovery
|
Frame Adv
|
Circuit
|
Invuln
|
| 35
|
X
|
33
|
14
|
3.6%*3, 6.3% (17.1%)
|
-
|
|
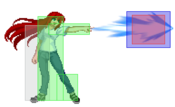
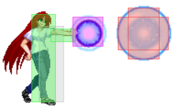
Aoko's fireball move. She points her finger forward and shoots out a beamlike projectile. Holding A increases the number of hits.
|
| B
|
Damage
|
Red Damage
|
Proration
|
Cancel
|
Guard
|
| 1000
|
808
|
80%
|
-EX-
|
LHA
|
| First Active
|
Active
|
Recovery
|
Frame Adv
|
Circuit
|
Invuln
|
| 11
|
X
|
33
|
-5
|
9.0% (M)
|
-
|
|
Slightly faster than the A version.
|
| EX
|
Damage
|
Red Damage
|
Proration
|
Cancel
|
Guard
|
| 100, 400*5 (1911)
|
(1371)
|
100%
|
-
|
LHA
|
| First Active
|
Active
|
Recovery
|
Frame Adv
|
Circuit
|
Invuln
|
| 2+13
|
X
|
20
|
39
|
-100.0%
|
Full 1-3
|
|
Creates a magic circle in front of Aoko that shoots multiple projectiles.
|
|
|
|
| A
|
Damage
|
Red Damage
|
Proration
|
Cancel
|
Guard
|
| 1000
|
808
|
70% (O)
|
-
|
LH
|
| First Active
|
Active
|
Recovery
|
Frame Adv
|
Circuit
|
Invuln
|
| 8
|
5
|
34
|
-21
|
9.0%
|
-
|
|
A ver hits once.
|
| B
|
Damage
|
Red Damage
|
Proration
|
Cancel
|
Guard
|
| 500, 1000 (1266)
|
(820)
|
90% (O)
|
-
|
LH
|
| First Active
|
Active
|
Recovery
|
Frame Adv
|
Circuit
|
Invuln
|
| 9
|
10
|
45
|
-37 ~ -33
|
11.7%
|
Full 1-11
|
|
B ver has startup invincibility and hits twice.
|
| EX
|
Damage
|
Red Damage
|
Proration
|
Cancel
|
Guard
|
| 500*5 (1955)
|
(788)
|
90% (O)
|
-
|
LH
|
| First Active
|
Active
|
Recovery
|
Frame Adv
|
Circuit
|
Invuln
|
| 2+1
|
20
|
38
|
-38 ~ -31
|
-100.0%
|
Full 1-7
|
|
EX ver is also invincible, but is 6f faster and hits five times.
|
|
|
|
| A/B
|
Damage
|
Red Damage
|
Proration
|
Cancel
|
Guard
|
| -
|
-
|
-
|
-
|
-
|
| First Active
|
Active
|
Recovery
|
Frame Adv
|
Circuit
|
Invuln
|
| -
|
-
|
40
|
-
|
-
|
-
|
(Default Maximum
Orb Duration)
|
Damage
|
Red Damage
|
Proration
|
Cancel
|
Guard
|
| 800
|
656
|
70% (O)
|
-
|
LHA
|
| First Active
|
Active
|
Recovery
|
Frame Adv
|
Circuit
|
Invuln
|
| 348
|
16
|
-
|
11
|
7.2%
|
-
|
|
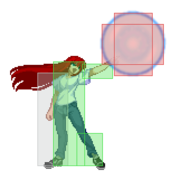
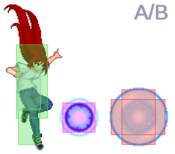
Aoko materializes an orb from her hand which lasts for very roughly 5 seconds and explodes when in contact with the opponent. You can have one orb up for each meterless version at the same time. Holding the attack button makes the orb go forward, with B version going a bit faster than A.
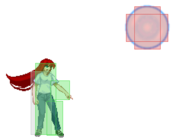
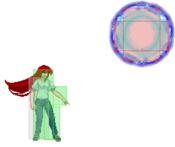
|
| EX
|
Damage
|
Red Damage
|
Proration
|
Cancel
|
Guard
|
| 100, 300*14 (2427)
|
(1564)
|
100%, 70% (O)
|
-
|
LHA
|
| First Active
|
Active
|
Recovery
|
Frame Adv
|
Circuit
|
Invuln
|
| 2+13
|
X
|
20
|
73
|
-100.0%
|
-
|
|
Instead of a bigger orb, the EX version is a series of explosions, similar to C and H Moon's 236C but without the beams. The explosions are random.
|
|
|
|
| A
|
Damage
|
Red Damage
|
Proration
|
Cancel
|
Guard
|
| 800
|
656
|
70% (M)
|
-
|
LHA
|
| First Active
|
Active
|
Recovery
|
Frame Adv
|
Circuit
|
Invuln
|
| 33
|
16
|
3
|
6
|
7.2%
|
-
|
|
Aoko points her finger diagonally upwards and shoots out a single orb that stays. The button needs to be held for the orb to stay and also won't hit the opponent as long as its held. Unlike other moons' 421, only one orb can be held at a time. The button used to hold the orb can be switched at any time between A, B and C. Places the orb diagonally upwards at a height slightly above her head. Note that the orb actually descends very slowly while held.
|
| B
|
Damage
|
Red Damage
|
Proration
|
Cancel
|
Guard
|
| 800
|
656
|
50%
|
-
|
LHA
|
| First Active
|
Active
|
Recovery
|
Frame Adv
|
Circuit
|
Invuln
|
| 43
|
16
|
N/A
|
16
|
7.2%
|
-
|
|
Places the orb further away and higher than the A ver.
|
| EX
|
Damage
|
Red Damage
|
Proration
|
Cancel
|
Guard
|
| 800
|
656
|
70%
|
-
|
LHA
|
| First Active
|
Active
|
Recovery
|
Frame Adv
|
Circuit
|
Invuln
|
| 3+33
|
3
|
N/A
|
21
|
-100.0%
|
-
|
|
Places a big orb at the same place as the B ver.
|
| A/B~421X
|
Damage
|
Red Damage
|
Proration
|
Cancel
|
Guard
|
| 500
|
303
|
50% (O)
|
-
|
HA
|
| First Active
|
Active
|
Recovery
|
Frame Adv
|
Circuit
|
Invuln
|
| 17
|
10
|
2
|
6
|
4.5%
|
-
|
| EX~421X
|
Damage
|
Red Damage
|
Proration
|
Cancel
|
Guard
|
| 500*5 (2342)
|
(1419)
|
100%
|
-
|
LHA
|
| First Active
|
Active
|
Recovery
|
Frame Adv
|
Circuit
|
Invuln
|
| 11
|
12
|
6
|
8
|
0.0%
|
-
|
|
Inputting 421X with an held orb in place results in a downward beam explosion. Beams from meterless orbs are overheads, while the EX orb's followup is quicker and more damaging but hits mid.
|
|
|
|
| A
|
Damage
|
Red Damage
|
Proration
|
Cancel
|
Guard
|
| 800*3 (1470)
|
(926)
|
50% (O)
|
-EX-
|
LHA
|
| First Active
|
Active
|
Recovery
|
Frame Adv
|
Circuit
|
Invuln
|
| 15
|
6
|
36
|
-2
|
3.6%*3 (10.8%)
|
-
|
|
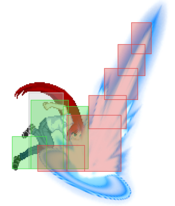
Aoko puts her hand on the ground and shoots a pillar diagonally upwards. All pillars are air blockable.
|
| B
|
Damage
|
Red Damage
|
Proration
|
Cancel
|
Guard
|
| 800*3 (1470)
|
(926)
|
50% (O)
|
-EX-
|
LHA
|
| First Active
|
Active
|
Recovery
|
Frame Adv
|
Circuit
|
Invuln
|
| 23
|
6
|
33
|
1
|
3.6%*3 (10.8%)
|
-
|
|
Shoots a pillar further from Aoko. Longer startup but safer than A.
|
| EX
|
Damage
|
Red Damage
|
Proration
|
Cancel
|
Guard
|
| 250*20 (3083)
|
(2476)
|
100%
|
-
|
LHA
|
| First Active
|
Active
|
Recovery
|
Frame Adv
|
Circuit
|
Invuln
|
| 3+15
|
28
|
22
|
-13
|
-100.0%
|
-
|
|
Shoots a wave of pillars that goes around half screen length. Pillars also extends higher than unmetered versions.
|
|
A/B A/B EX EX
|
| A
|
Damage
|
Red Damage
|
Proration
|
Cancel
|
Guard
|
| 900
|
505
|
55% (O)
|
-EX-
|
LA
|
| First Active
|
Active
|
Recovery
|
Frame Adv
|
Circuit
|
Invuln
|
| 8
|
7
|
15
|
-7
|
8.1%
|
-
|
|
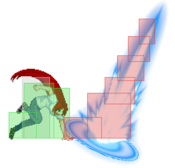
Aoko does a leg sweep.
|
| B
|
Damage
|
Red Damage
|
Proration
|
Cancel
|
Guard
|
| 900
|
505
|
55% (O)
|
-EX-
|
LA
|
| First Active
|
Active
|
Recovery
|
Frame Adv
|
Circuit
|
Invuln
|
| 16
|
7
|
11
|
-3
|
8.1%
|
-
|
|
A safer version.
|
| EX
|
Damage
|
Red Damage
|
Proration
|
Cancel
|
Guard
|
| 900, 400, 800 (1448)
|
(922)
|
55% (O), 100%, 40% (O)
|
(N), (SP), (EX), (J)
|
LA, LH, LHA
|
| First Active
|
Active
|
Recovery
|
Frame Adv
|
Circuit
|
Invuln
|
| 1+7
|
1 (10) 8 (4) 6
|
25
|
-38 ~ -13
|
-100.0%
|
-
|
|
Aoko extends the leg sweep by jumping and ending on a downwards kick. On hit, you can cancel into an airdash or air normal after the kick. Can be used to pickup if you hit the opponent with 2C and autopilot into 22X.
|
|
Aerial Specials
|
|
| A
|
Damage
|
Red Damage
|
Proration
|
Cancel
|
Guard
|
| 1000
|
808
|
70% (O)
|
-
|
LHA
|
| First Active
|
Active
|
Recovery
|
Frame Adv
|
Circuit
|
Invuln
|
| 4
|
5
|
6
|
-16 (TK)
|
9.0%
|
High 1-2
|
|
Faster than the grounded A version.
|
| B
|
Damage
|
Red Damage
|
Proration
|
Cancel
|
Guard
|
| 500, 1000 (1226)
|
(820)
|
90% (O)
|
-
|
LHA
|
| First Active
|
Active
|
Recovery
|
Frame Adv
|
Circuit
|
Invuln
|
| 4
|
10
|
9
|
-29 (TK)
|
11.7%
|
High 1-4
|
|
Same startup as A, hits twice.
|
| EX
|
Damage
|
Red Damage
|
Proration
|
Cancel
|
Guard
|
| 500*5 (1955)
|
(768)
|
90% (O)
|
-
|
LHA
|
| First Active
|
Active
|
Recovery
|
Frame Adv
|
Circuit
|
Invuln
|
| 2+1
|
20
|
9
|
-29 ~ -26
|
-100.0%
|
Full 1-7
|
|
Similar to grounded EX version.
|
|
|
|
A/B/[A]/[B]
(Default Maximum
Orb Duration)
|
Damage
|
Red Damage
|
Proration
|
Cancel
|
Guard
|
| 800
|
656
|
70% (O)
|
-
|
LHA
|
| First Active
|
Active
|
Recovery
|
Frame Adv
|
Circuit
|
Invuln
|
| 351/355
|
16
|
-
|
0/24
|
8.0%
|
-
|
|
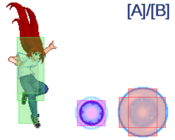
(A or B) Aoko sets up an orb then falls to the ground with the momentum she had before setting up the orb. You can have one orb up for each A, B and EX version at the same time. This move is great in pressure if your opponent will respect you as it grants lots of +frames. It's also good in conjunction with held orbs in neutral to keep your opponent from reaching you.
([A] or [B]) Aoko sets up an orb then falls to the ground without gathered momentum. There are no different properties to the orb after charging them up but you can TK a charged orb to get faster low orb placement than you can get with IABD orb.
|
EX
(Default Maximum
Orb Duration)
|
Damage
|
Red Damage
|
Proration
|
Cancel
|
Guard
|
| 800
|
656
|
50% (O)
|
-
|
LHA
|
| First Active
|
Active
|
Recovery
|
Frame Adv
|
Circuit
|
Invuln
|
| 3+175
|
3
|
-
|
-7 (TK)
|
-100.0%
|
-
|
|
Big EX orb. This move has a couple of uses. If you're about to run out of heat you can burn the remaining meter with EX orb to stay relatively safe behind it. The other great use for it is at the end of an air combo so that you can set up a held orb for oki.
|
|
Arc Drive
|
|
| Damage
|
Red Damage
|
Proration
|
Cancel
|
Guard
|
| 500, 600*6, 500, 600*6 (3344)
|
(2326)
|
50% (O)
|
-
|
LHA
|
| First Active
|
Active
|
Recovery
|
Frame Adv
|
Circuit
|
Invuln
|
| 9+4
|
28 (39) 28
|
58
|
-27
|
removes all
|
Full 1-73
|
|
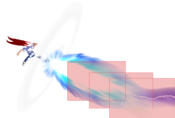
Assumes a similar stance to her 236X but instead of pointing forwards with her finger, she pulls her left arm back before she thrust forward like she would punch someone. A giant laser beam then extends out of her fist. After the first beams disappears she then repeats the same move with her right arm.
|
|
Another Arc Drive
|
|
| Damage
|
Red Damage
|
Proration
|
Cancel
|
Guard
|
| (~4900)
|
(~3500)
|
50% (O)
|
-
|
LHA
|
| First Active
|
Active
|
Recovery
|
Frame Adv
|
Circuit
|
Invuln
|
| 9+4
|
28 (39) 28 (43) 39
|
58
|
-27
|
removes all
|
Full 1-192
|
|
Similar to her AD, except she extends it after the second laser beam by jumping upwards and shooting down a laser from her foot that makes the ground explode. Does less damage at point-blank range.
|
|
Last Arc
|
|
| Damage
|
Red Damage
|
Proration
|
Cancel
|
Guard
|
350, 200*24, 3000
(3700~7000)
|
(2800~5200)
|
50% + 50% * remaining BH time
|
-
|
U
|
| First Active
|
Active
|
Recovery
|
Frame Adv
|
Circuit
|
Invuln
|
| 4
|
1+2
|
58
|
-
|
removes all
|
Full
|
|
One of the Last Arcs with a fullscreen hitbox on activation. Aoko traps her opponent in a blue energy cage, lifts them up while barraging them with energy orbs, then releases the energy cage in a huge explosion. Activated by performing an EX Shield on the ground.
|
|
MBAACC Navigation


