|
|
| Line 71: |
Line 71: |
| {{CollapsingComboData-MB | | {{CollapsingComboData-MB |
| |condition=Normal starter | | |condition=Normal starter |
| |damage=3864 | | |damage=3944 |
| |metergen= | | |metergen= |
| |metero= | | |metero= |
| |input=*2AAA > 5B > 2B > 5C > 6AAA > 2C > 6C > j.C > 22B > AT | | |input=*2AAA > 5B > 5C > 6AAA > 2C > 6C > j.C > 22B > AT |
| |simput= | | |simput= |
| |note=Basic combo. | | |note=Basic combo. |
Character Page Progress
This page is still a work in progress, consider joining as an editor to help expand it. Please update this character's roadmap page when one of the editing goals have been reached.
| In Progress |
To-do
|
- Combos:
- Add meter gain/given numbers and video links to the pre-existing combos.
|
- Additional Ressources/Players to watch/ask
- Add any external links to ressources such as video guides or articles.
- If you know any players in particular that can be helpful for learning this character, please add them with, if possible a way to contact them (such as a Discord handle) and a name that can be searched in the match video database.
- Overview/General Gameplan:
- Add a short summary of this character with a list of strengths and weaknesses
- Write the Defense and Okizeme sections
|
Additional Resources
H-Kouma Match Video Database
Players to watch/ask
JP:
- JIN
- Text goes here after asterisk
NA:
Overview
Strengths / Weaknesses
| Strengths
|
- Text goes here after asterisk
- Text goes here after asterisk
|
| Weaknesses
|
- Place text here be sure to use "*" for each point*
|
General Gameplan
Half Moon has less options than Crescent and Full, since he can't charge any normals, and loses his overhead. So what makes H-Kouma so special? In short, Half has slightly better aerial movement, and gains some tweaks to Crescent’s moveset, in exchange for lower damage output. So now, his normals have better priority; mix that up with some buffed aerial movement, the ability to Reverse Beat, some command grabs, and you have yourself a mixed bag char that can easily make anybody scared to block against him.
Neutral
Probably the hardest part of Kouma's playstyle that you have to master. The fact that he has little to no zoning capabilities hurts his overall neutral game. However, his normals have gained several important buffs from Crescent Moon in order to make his horizontal approach much easier. He retains the spammy 5A in order to force people to block, and his 2B and 5C normals have improved reach and priority. 2B is your most reliable anti-air out of anything in your arsenal, so use it generously. He has the best air game potential due to his altered j.22B, which gives some additional vertical hang time. His airdash was somewhat nerfed in terms of speed, so 66 > AT will not be as subtle as C or F-Moon. When Kouma is under pressure, he has very little reliable options; 214C is a gamble more than anything. Either they eat 3k or you eat 3k, possibly more. 5A would be your best bet to do anything to poke out of pressure, otherwise you have 2E (dodge) for the slower side of your enemy's normals and shield for everything else.
Pressure
Tick throws, tick throws everywhere. Kouma is definitely strong in the pressure department, and while H-Kouma can't charge anything for a stagger, he still has a variety of options in order to keep the enemy in place, particularly in the corner. You can Reverse Beat to make yourself safe and keep the blockstrings damn near endless, especially since you have a command grab. His main mindgame is to make the enemy have the opposite mindset of what they think you will do next. Afraid of getting grabbed? Mash 5A, etc etc.
Okizeme
214A
Kouma has access to sandoori and drift mixups after these knockdowns. The former consists of a super jump forward and an airdash back coupled with a falling j.C. The j.C can hit (same side, high) or whiff, allowing Kouma to instead use 2A for a fast low or 214A for a command grab. The drift mixup simply involves dashing forward, neutral jumping, and holding back, allowing Kouma to come down on either side of his opponent for a meaty 2A. For both mixups, 5C, 2B, and 214A are useful against opponents who like to shield. You're able to use 22C following a 214A knockdown as well to gain armor and have time to meaty. This armor will allow you to armor through wakeup options such as heat and various other reversals (e.g. Nanaya 623x) and be able to punish.
Defense
blocking is the name of the game for H-Kouma, your best bet for surviving on defense is to block it out and look for openings in your opponents pressure. use 5C and 5A to catch redashes or call out minus on block moves. 236A/B have their uses for catching your opponent running predictable offense but they only give you 1 hit of armor so using them defensively requires confidence and if you're wrong you will eat a full counterhit combo and be right back on defense. it is important to note that if you land a counterhit 236A you will have time to land a full combo. you also have access to H-moon bunker which is a costly but very strong option since it allows Hkouma to run a sandoori mixup if it lands. just make sure you arent predictable with your bunker attempts because strong opponents will either OS it with something like 5A6EEE or jump over it and punish.
Metered Defensive Options
236C-Extremley high risk very little invincibility more often than not this will trade and you will lose 100 meter for nothing. If it lands youll more than likely get a full combo and have your opponent in the corner
214C-Extremely high risk, full invincibility but terrible recovery, best used during your opponents blockstrings to punish a gap in their pressure since 214C can grab outstretched hitboxes, use this sparingly on wakeup as an aware opponent can easily avoid it and land a heavy punish.
22C-relatively Low risk, most characters cannot punish this if blocked except for those with excellent forward dashes like Tohno who gets a guaranteed throw punish. best used on wakeup to avoid l/r mixups. no need to guess when you can mash 22C, even so unless this counterhits Kouma is going right back to neutral and on block this move is -10 allowing most of the cast to hit him repeatedly until the armor wears off essentially negating the armor. when using 22C on wakeup its best to try and return to neutral once you have the armor, alternatively you can risk a 5A/2A mash but these are never guaranteed. Also keep in mind that opponents meating with 5A/2A can whiff cancel those normals into throw and throw you out of 22C before it becomes active.
623C-High risk, your standard metered DP, hits for a decent chunk of damage and has full invuln. is easily punished on block and puts the opponent in the air above Kounma on hit.
TK j.236C-Low risk, basically your 623C but better, on block youre plus and on hit you get 2B>j.C>j.22B>AT and a hard knockdown. meter is hard to come by on Hkouma but of all your reversals this is arguably the best to spend meter on. Getting the TK on wakeup can be tricky so be sure to practice this before you start busting it out in real matches.
Combos
| Combo Notation Help
|
Disclaimer: Combos are written by various writers, so the actual notation used in pages can differ from the standard one.
For more information, see Glossary and Controls.
|
| X > Y
|
X input is cancelled into Y.
|
| X > delay Y
|
Must wait for a short period before cancelling X input into Y.
|
| X, Y
|
X input is linked into Y, meaning Y is done after X's recovery period.
|
| X+Y
|
Buttons X and Y must be input simultaneously.
|
| X/Y
|
Either the X or Y input can be used.
|
| X~Y
|
This notation has two meanings.
- Use attack X with Y follow-up input.
- Input X then within a few frames, input Y. Usually used for option selects.
|
| X(w)
|
X input must not hit the opponent (Whiff).
|
| j.X
|
X input is done in the air, implies a jump/jump cancel if the previous move was done from the ground.
Applies to all air chain sections:
- Assume a forward jump cancel if no direction is given.
- Air chains such as j.A > j.B > j.C can be shortened to j.ABC.
|
| sj.X
|
X input is done after a super jump. Notated as sj8.X and sj9.X for neutral and forward super jumps respectively.
|
| dj.X
|
X input is done after a double jump.
|
| sdj.X
|
X input is done after a double super jump.
|
| tk.X
|
Stands for Tiger Knee. X motion must be buffered before jumping, inputting the move as close to the ground as possible. (ex. tk.236A)
|
| (X)
|
X is optional. Typically the combo will be easier if omitted.
|
| [X]
|
Input X is held down. Also referred to as Blowback Edge (BE). Depending on the character, this can indicate that this button is held down and not released until indicated by the release notation.
|
| ]X[
|
Input X is released. Will only appear if a button is previously held down. This type of input is referred to as Negative Edge.
|
| {X}
|
Button X should only be held down briefly to get a partially charged version instead of the fully charged one.
|
| X(N)
|
Attack "X" should only hit N times.
|
| (XYZ)xN
|
XYZ string must be performed N times. Combos using this notation are usually referred to as loops.
|
| (XYZ^)
|
A pre-existing combo labelled XYZ is inserted here for shortening purposes.
|
| CH
|
The first attack must be a Counter Hit.
|
| Air CH
|
The first attack must be a Counter Hit on an airborne opponent.
|
| 66
|
Performs a ground forward dash.
|
| j.66
|
Performs an aerial forward dash, used as a cancel for certain characters' air strings.
|
| IAD/IABD
|
Performs an Instant AirDash.
|
| AT
|
Performs an Air Throw. (j.6/4A+D)
|
| IH
|
Performs an Initiative Heat.
|
| AD
|
Performs an Arc Drive.
|
| AAD
|
Performs an Another Arc Drive.
|
Instead of ending combo with j.C > 22B > AT, you can also do j.C > j.236B~236B series.
You will lose oki, but will gain little extra damage and an additional 11.9% meter.
It is debatable which one is better.
About 2C > delay > 236B. The delay amount is dependent on gravity and character. Gravity can be controlled with 5A/2A amount.
For example Arc, with 3x A button starter doesn't even need delay.
VSion doesnt need delay with 4x A button starter.
Combos
| Condition
|
Notation
|
Damage
vs V.Sion
|
Notes
|
|
| Normal starter
|
- 2AAA > 5B > 5C > 6AAA > 2C > 6C > j.C > 22B > AT
|
3944
|
| |
| Meter Gained: ??? |
Meter Given (vs C-Moon): ??? |
| Basic combo. |
|
|
| Normal starter
|
- 2AAA > 5B > 2B > 5C > 2C > delay > 236B > 5AA > 5C > 2B > j.C > j.22B > AT
|
4756
|
| |
| Meter Gained: ??? |
Meter Given (vs C-Moon): ??? |
| H-Kouma's best meterless combo. |
|
|
| Raw Airthrow starter
|
- 5AA > 5C > 2B > j.C > j.22B > AT
|
2702
|
| |
| Meter Gained: ??? |
Meter Given (vs C-Moon): ??? |
| Can omit one 5A if you can't time opponent dropping lower. |
|
|
Normal starter, 100% meter
Midscreen or closer to corner
|
- 2AAA > 5B > 2B > 5C > 2C > delay > 236B > 5A > 236C > 5A > 5C > 2B > j.C > j.236B~236B
|
5253
|
???
|
|
Normal starter, 100% meter
Midscreen or closer to corner
|
- 2AAA > 5B > 2B > 5C > 2C > delay > 236B > 5A > 236C > (tiny walk back) > 2C > 2B > 5C > j.C > j.236B~236B
|
5407
|
| |
| Meter Gained: ??? |
Meter Given (vs C-Moon): ??? |
| More finnicky version. 2C timing is weird and sometimes it turns you around, walk back prevents that. This combo is probably character specific too. |
|
|
Normal starter, 100% meter
Corner to corner
|
- 2AAA > 5B > 2B > 5C > 2C > delay > 236B > 5A > 236C > dash > 2C > 2B > 5C > j.C > j.236B~236B
|
5407
|
| |
| Meter Gained: ??? |
Meter Given (vs C-Moon): ??? |
| This combo is same as above, but with a dash after 236C. |
|
|
Normal starter, 100% meter
Corner to corner
Works On: Arc at least
|
- 2AAA > 5B > 2B > 5C > 2C > delay > 236B > 5A > 2C > 236C > dash > 2C > 2B > 5C > j.C > j.236B~236B
|
5196
|
| |
| Meter Gained: ??? |
Meter Given (vs C-Moon): ??? |
| 5A > 2C link is easier on some characters than others. Works on Arc for example, gives 5196. Probably works on fat characters. |
|
|
Move Descriptions
| Frame Data Help
|
| Header
|
Tooltip
|
| Move Box Colors
|
Light gray = Collision Box (A move lacking one means it can go through the opponent's own collision box).
Green: Hurt Boxes.
Red: Hit(/Grab) Boxes.
Yellow: Clash Boxes (When an active hitbox strikes a clash box, the active hitbox stops being active. Multi-hit attacks can beat clash since they will still progress to the next hitbox.)
Magenta: Projectile-reflecting boxes OR Non-hit attack trigger boxes (usually).
Blue: Reflectable Projectile Boxes.
|
| Damage
|
Base damage done by this attack.
(X) denotes combined and scaled damage tested against standing V. Sion.
|
| Red Damage
|
Damage done to the recoverable red health bar by this attack. The values are inherently scaled and tested against standing V. Sion.
(X) denotes combined damage.
|
| Proration
|
The correction value set by this attack and the way it modifies the scaling during a string. See this page for more details.
X% (O) means X% Overrides the previous correction value in a combo if X is of a lower percentage.
X% (M) means the current correction value in a combo will be Multiplied by X%. This can also be referred to as relative proration.
|
| Circuit
|
Meter gained by this attack on hit.
(X%) denotes combined meter gain.
-X% denotes a meter cost.
|
| Cancel
|
Actions this move can be cancelled into.
SE = Self cancelable.
N = Normal cancelable.
SP = Special cancelable.
CH = Cancelable into the next part of the same attack (Chain in case of specials).
EX = EX cancelable.
J = Jump cancelable.
(X) = Cancelable only on hit.
-X- = Cancelable on whiff.
|
| Guard
|
The way this move must be blocked.
L = Can block crouching
H = Can block standing.
A = Can block in the air.
U = Unblockable.
|
| Startup
|
Amount of frames that must pass prior to reaching the active frames. Also referred to as "True Startup".
|
| Active
|
The amount of frames that this move will have a hitbox.
(x) denotes frame gaps where there are no hitboxes is present. Due to varied blockstuns, (x) frames are difficult to use to determine punish windows. Generally the larger the numbers, the more time you have to punish.
X denotes active frames with a duration separate from its origin move's frame data, such as projectile attacks. In this case, the total length of the move is startup+recovery only.
|
| Recovery
|
Frames that this move has after the active frames if not canceled. The character goes into one frame where they can block but not act afterwards, which is not counted here.
|
| Advantage
|
The difference in frames where you can act before your opponent when this move is blocked (assuming the move isn't canceled and the first active frame is blocked).
If the opponent uses a move with startup that is at least 2 frames less than this move's negative advantage, it will result in the opponent hitting that move.
±x~±y denotes a range of possible advantages.
|
| Invul
|
Lists any defensive properties this move has.
X y~z denotes X property happening between the y to z frames of the animations. If no frames are noted, it means the invincibility lasts through the entire move.
Invicibility:
- Strike = Strike invincible.
- Throw = Throw invincible.
Hurtbox-Based Properties:
- Full = No hurtboxes are present.
- High = Upper body lacks a hurtbox.
- Low = Lower body lacks a hurtbox.
Miscellaneous Properties
- Clash = Frames in which clash boxes are active.
- Reflect = Frames in which projectile-reflecting boxes are active.
- Super Armor = Frames in which the character can take hits without going into hit stun.
|
Normal Moves
Standing Normals
|
|
| 5A
|
Damage
|
Red Damage
|
Proration
|
Cancel
|
Guard
|
| 300
|
192
|
70% (O)
|
-SE-, -N-, -SP-, -CH-, -EX-, (J)
|
LH
|
| First Active
|
Active
|
Recovery
|
Frame Adv
|
Circuit
|
Invuln
|
| 4
|
4
|
8
|
0
|
2.1%
|
-
|
|
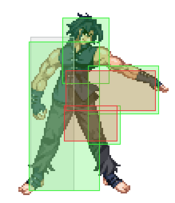
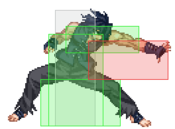
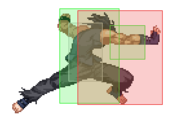
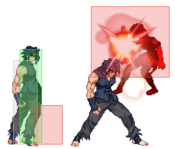
Nerfed version of C-Kouma's 5A, does 100 less damage. Comes out on frame 5, your fastest normal, this will be your main tool to catch people jumping out of your frame traps.
|
| 5A~6A
|
Damage
|
Red Damage
|
Proration
|
Cancel
|
Guard
|
| 600
|
384
|
80% (M)
|
N, SP, -CH-, EX, (J)
|
LH
|
| First Active
|
Active
|
Recovery
|
Frame Adv
|
Circuit
|
Invuln
|
| 7
|
4
|
16
|
-5
|
4.2%
|
-
|
|
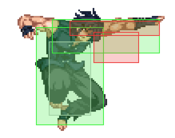
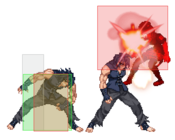
Elbow poke. Short range, has a great hitbox for catching opponents at IAD height making it a strong albeit difficult to use on reaction anti air. the forward momentum on this button makes it great for tick throws especially 5A>6A>214A which can be a very potent tool especially when combined with 5A>6A>2A and 5A>6A>5C allowing you to keep your opponent guessing.
|
| 5A~6A~6A
|
Damage
|
Red Damage
|
Proration
|
Cancel
|
Guard
|
| 1000
|
768
|
60% (O)
|
(N), SP, EX, (J)
|
LH
|
| First Active
|
Active
|
Recovery
|
Frame Adv
|
Circuit
|
Invuln
|
| 10
|
4
|
16
|
-2
|
7.0%
|
-
|
|
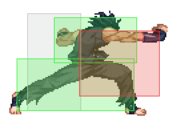
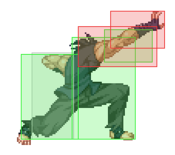
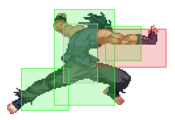
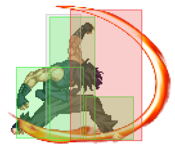
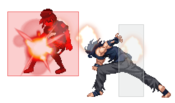
Arm side-swipe. This knocks the opponent off their feet, so you can’t do much afterwards except 2C into his standard aerial finisher. This button also has great anti-air potential although most anti-air s with this are not intentional. It is also important to note that this is only -2 and special cancelable making canceling 6AA into 623A a very strong frametrap that will punish mash and catch jump outs. 5A, 22A, and 236A are all also strong options to represent after 6AA once your opponent is respecting 6AA>623A, all these options will lose to stand shield so be sure to mix in a 2C here and there once you have your opponent afraid to challenge.
|
|
|
|
| Damage
|
Red Damage
|
Proration
|
Cancel
|
Guard
|
| 700
|
432
|
70% (O)
|
N, SP, EX, (J)
|
LH
|
| First Active
|
Active
|
Recovery
|
Frame Adv
|
Circuit
|
Invuln
|
| 9
|
8
|
12
|
-5
|
4.9%
|
-
|
|
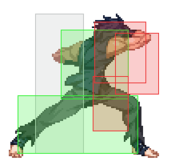
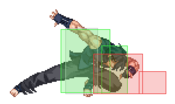
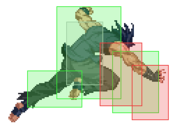
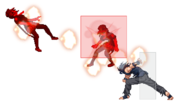
Long range poke. Can catch techs. EIGHT ACTIVE FRAMES, I CANNOT STRESS THIS ENOUGH THIS MOVE IS INSANELY ACTIVE. Best used to preemptively catch approaches, setup ambiguous delay cancels during pressure and punish ground techs.
|
|
|
|
| Damage
|
Red Damage
|
Proration
|
Cancel
|
Guard
|
| 1000
|
672
|
90% (O)
|
N, SP, EX, (J)
|
LH
|
| First Active
|
Active
|
Recovery
|
Frame Adv
|
Circuit
|
Invuln
|
| 7
|
4
|
19
|
-5
|
7.0%
|
-
|
|
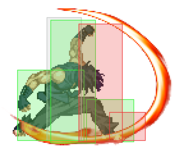
Palm thrust. Comes out on frame 7. Moves you a little bit forward, pretty fast for a C normal. great option to catch delay mashing and will often trade in kouma's favor, so keep this button in mind when looking to mash out or catch an antsy opponent after 236A
|
|
Crouching Normals
|
|
| Damage
|
Red Damage
|
Proration
|
Cancel
|
Guard
|
| 300
|
192
|
75% (O)
|
SE-, -N-, -SP-, -EX-, (J)
|
L
|
| First Active
|
Active
|
Recovery
|
Frame Adv
|
Circuit
|
Invuln
|
| 5
|
4
|
8
|
0
|
2.45%
|
-
|
|
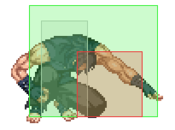
Comes out on frame 6. Your main low poking tool for poorly timed gaps in blockstrings. Proration of 75%, but that may not be all too bad. Considering 5B and 2B have a 70% prorate, you can do two or three of these, and end up doing more damage than if you started with 5B. Doing 2A > 5B isn’t as easy as other characters with Kouma, so practice dem hitconfirms. Or opt for 2A>5C because if youre in range for 2A to land 5C will connect.
|
|
|
|
| Damage
|
Red Damage
|
Proration
|
Cancel
|
Guard
|
| 800
|
432
|
70% (O)
|
N, SP, EX, (J)
|
LH
|
| First Active
|
Active
|
Recovery
|
Frame Adv
|
Circuit
|
Invuln
|
| 6
|
3
|
20
|
-8
|
5.6%
|
-
|
|
Nerfed F-Kouma 2B, has extra hurtbox, but hitboxes are the same so it's still good. Comes out on frame 7. On the ground, this induces little hitstun, so you have to be quick on pressing 5B/2C/whatever afterwards. If you hit your enemy in the air, chances are you got a CH, so just wait until they’re close to the ground and 2C into a finisher. Another thing to note about 2B is that it acts a solid tick throw meaty, 66>2B>214A is a potent tick throw that will catch many opponents off guard, but be careful going for it because if the opponent ex guards or you do not dash before the meaty 2B the 214A will whiff. Once establishing this tick throw 2B>Delay Cancel 5C is a very strong option to catch opponents attempting to jump or mash out of the potential 214A
|
|
|
|
| Damage
|
Red Damage
|
Proration
|
Cancel
|
Guard
|
| 800
|
432
|
65% (O)
|
N, SP, EX, (J)
|
L
|
| First Active
|
Active
|
Recovery
|
Frame Adv
|
Circuit
|
Invuln
|
| 9
|
3
|
14
|
1
|
6.65%
|
-
|
|
Come out on frame 10, hits low. Don’t be stupid and try to punish something unsafe with this move since it’s very slow. Your main sweep, and also used for 2B anti-air CH confirms. Makes for a good stagger, too.
Note that this is +1 on block. Meaning after recovery, H-Kouma's 5A will win or trade at worst. You can use 5A to go into 5A6A, into some command throw mind games.
|
|
Aerial Normals
|
|
| Damage
|
Red Damage
|
Proration
|
Cancel
|
Guard
|
| 300
|
144
|
75% (O)
|
-SP-, -EX-
|
LHA
|
| First Active
|
Active
|
Recovery
|
Frame Adv
|
Circuit
|
Invuln
|
| 4
|
3
|
-
|
-
|
6.65%
|
-
|
|
Frame 5 hand poke. Probably used best when you’re rising up in a jump arc. Doesn’t really reach that far, although it is useful for a “I want to hit this guy NOW” button, so I guess there’s that.
|
|
|
|
| Damage
|
Red Damage
|
Proration
|
Cancel
|
Guard
|
| 800
|
576
|
90% (O)
|
SP, EX
|
HA
|
| First Active
|
Active
|
Recovery
|
Frame Adv
|
Circuit
|
Invuln
|
| 5
|
3
|
-
|
-
|
5.6%
|
-
|
|
FORCE PUSH. Frame 6, has a little bit more reach than j.A. Also best used while rising in a jump, so if you get a CH, you get an easy confirm on the way down. The slight disjoint this button has makes it very useful as an air to air option especially when combined with airdash back
|
|
|
|
| Damage
|
Red Damage
|
Proration
|
Cancel
|
Guard
|
| 900
|
576
|
90% (O)
|
SP, EX
|
HA
|
| First Active
|
Active
|
Recovery
|
Frame Adv
|
Circuit
|
Invuln
|
| 10
|
5
|
-
|
-
|
6.3%
|
-
|
|
Your only jump-in normal, coming in at 11 frames. That being said, do be careful when pressing this button, because if you whiff this, you are in great danger of being hit. Also your only good meaty for oki after a 214 grab.
|
|
Command Normals
|
|
| Damage
|
Red Damage
|
Proration
|
Cancel
|
Guard
|
| 700
|
480
|
50% (O)
|
SP, EX, (J)
|
LH
|
| First Active
|
Active
|
Recovery
|
Frame Adv
|
Circuit
|
Invuln
|
| 14
|
4
|
19
|
-5
|
5.6%
|
-
|
|
Your slowest normal coming out at frame 15. Never end your blockstrings in this; always cancel this into a safe special. Launches the opponent in the air, so this is your lead-in for an aerial finisher. You can also use this after a raw airthrow. The hitbox is perfect for an anti-air, but the startup really screws you over for it to be used that way.
|
|
Universal Mechanics
|
|
| Damage
|
Red Damage
|
Proration
|
Cancel
|
Guard
|
| 1300
|
768
|
70%
|
-
|
U
|
| First Active
|
Active
|
Recovery
|
Frame Adv
|
Circuit
|
Invuln
|
| 2
|
1
|
20
|
-
|
0.0%
|
-
|
|
Grabs similarly to 214A/B, ground techable.
|
|
|
|
| Damage
|
Red Damage
|
Proration
|
Cancel
|
Guard
|
| 1600
|
576
|
30%
|
-
|
U
|
| First Active
|
Active
|
Recovery
|
Frame Adv
|
Circuit
|
Invuln
|
| 1
|
1
|
12
|
-
|
0.0%
|
-
|
|
Standard ground slam air throw. Ground bounces the opponent when done raw, causes an untechable knockdown as a combo ender.
|
|
|
|
| Standing
|
Damage
|
Red Damage
|
Proration
|
Cancel
|
Guard
|
| 500 (345)
|
300 (198)
|
40%
|
SP, EX, (J)
|
LHA
|
| First Active
|
Active
|
Recovery
|
Frame Adv
|
Circuit
|
Invuln
|
| 8
|
4
|
18
|
-4
|
3.5%
|
-
|
|
Same animation as 6C.
|
| Crouching
|
Damage
|
Red Damage
|
Proration
|
Cancel
|
Guard
|
| 1500 (1117)
|
1000 (714)
|
50%
|
SP, EX, (J)
|
LA
|
| First Active
|
Active
|
Recovery
|
Frame Adv
|
Circuit
|
Invuln
|
| 8
|
4
|
18
|
-4
|
11.5%
|
-
|
|
Same hitboxes as 2C.
|
| Air
|
Damage
|
Red Damage
|
Proration
|
Cancel
|
Guard
|
| 500 (303)
|
300 (174)
|
50%
|
-
|
HA
|
| First Active
|
Active
|
Recovery
|
Frame Adv
|
Circuit
|
Invuln
|
| 8
|
4
|
-
|
-
|
3.5%
|
-
|
|
Same animation as j.B.
|
|
|
|
| Neutral
|
Damage
|
Red Damage
|
Proration
|
Cancel
|
Guard
|
| 500
|
192
|
50%
|
-
|
LHA
|
| First Active
|
Active
|
Recovery
|
Frame Adv
|
Circuit
|
Invuln
|
| 25
|
4
|
19
|
-5
|
0.0%
|
Clash 1-10
|
| (Clash)
|
Damage
|
Red Damage
|
Proration
|
Cancel
|
Guard
|
| 500
|
192
|
50%
|
-
|
LHA
|
| First Active
|
Active
|
Recovery
|
Frame Adv
|
Circuit
|
Invuln
|
| 7
|
4
|
19
|
-5
|
0.0%
|
Strike 1-7
|
|
A fairly standard shield bunker.
|
| Blockstun
|
Damage
|
Red Damage
|
Proration
|
Cancel
|
Guard
|
| 0
|
0
|
100%
|
-
|
LHA
|
| First Active
|
Active
|
Recovery
|
Frame Adv
|
Circuit
|
Invuln
|
| 18
|
3
|
22
|
-7
|
-100.0%
|
-
|
|
H-Moon specific reversal bunker.
|
|
|
|
| Ground
|
Damage
|
Red Damage
|
Proration
|
Cancel
|
Guard
|
| 100
|
0
|
100%
|
-
|
U
|
| First Active
|
Active
|
Recovery
|
Frame Adv
|
Circuit
|
Invuln
|
| 10
|
10
|
20
|
-
|
removes all
|
Full 1-39
|
| Air
|
Damage
|
Red Damage
|
Proration
|
Cancel
|
Guard
|
| 100
|
0
|
100%
|
-
|
U
|
| First Active
|
Active
|
Recovery
|
Frame Adv
|
Circuit
|
Invuln
|
| 11
|
10
|
15
|
-
|
removes all
|
Strike 1-30
|
|
Universal burst mechanic. Unlike Crescent/Full Heat activation, the hitbox and frame data doesn't vary between characters. However, you can be thrown out of this move if you input it in the air.
|
|
Special Moves
Grounded Specials
|
|
| A
|
Damage
|
Red Damage
|
Proration
|
Cancel
|
Guard
|
| 550
|
384
|
100%
|
-EX-, (J)
|
LH
|
| First Active
|
Active
|
Recovery
|
Frame Adv
|
Circuit
|
Invuln
|
| 10
|
2
|
14
|
-1
|
2.45%
|
Super Armor 2-9
|
- Combines F-Kouma’s rekkas with C-Kouma’s rekka mechanics. H-Kouma’s rekkas doesn’t have followups, but they do have super armor, so it’s not bad to try and stagger this in your blockstrings every now and then.
Forward advancing palm strike. Unless you cancel into an EX or go into airthrow, you’re not getting anything else out of this on hit, even on his sweep. This is one of the safer specials to cancel into after 6C, with only -1 frame advantage. You can set up a tick throw with this.
|
| B
|
Damage
|
Red Damage
|
Proration
|
Cancel
|
Guard
|
| 550x2 (1100)
|
(756)
|
100%
|
-EX-, (J)
|
LH
|
| First Active
|
Active
|
Recovery
|
Frame Adv
|
Circuit
|
Invuln
|
| 10
|
3 (7) 2
|
17
|
-4
|
2.45%, 3.15% (5.6%)
|
Super Armor 2-9
|
|
Double palm strike. Goes farther than the A version.The second palm actually does a hard knockdown, so you can relax a bit if you land this. When you do land this, you can jump cancel the second hit, giving you plenty of time for oki. After a 2C, you can do 236B, 5A into an aerial finisher for a little bit extra damage. -4 frame advantage.
|
| EX
|
Damage
|
Red Damage
|
Proration
|
Cancel
|
Guard
|
| 850, 650, 950 (2563)
|
(1764)
|
100%, 80% (M, last hit)
|
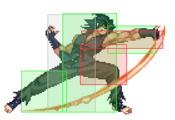
-
|
LH
|
| First Active
|
Active
|
Recovery
|
Frame Adv
|
Circuit
|
Invuln
|
| 2+8
|
8
|
23
|
-12
|
-100.0%
|
Full 1-10
|
|
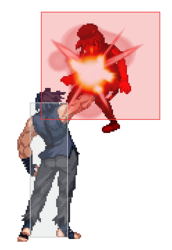
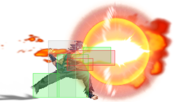
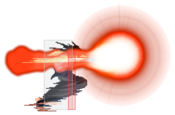
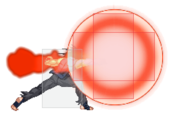
Super palm strike. Hits three times. Induces a wallbounce, allowing for an aerial combo afterwards. Has 10 frames of invincibility, so you can use it as a decent reversal. Don’t rely on this too often to get people off of you, the hitbox only extends to his hand, and not as far as the flames. Lots of untechable frames, giving you plenty of time to followup if you’re midscreen.
|
|
A A B B EX EX
|
| A
|
Damage
|
Red Damage
|
Proration
|
Cancel
|
Guard
|
| 1000, 400*2 (1502)
|
(912)
|
75% (O)
|
-EX-
|
LH
|
| First Active
|
Active
|
Recovery
|
Frame Adv
|
Circuit
|
Invuln
|
| 22
|
8
|
13
|
1
|
7.0% , 1.4%*2 (9.8%)
|
-
|
- Standard DPs, with the exception of A version. You won’t be using these moves too often (unless you often rely on DP on wakeup to escape pressure).
MANLINESS. Manly football punt. 3 hits, 1502 damage (vs V.Sion). This is pretty slow (comes out on frame 23), but it’s still decent as a stagger. Every once in a blue moon, you can do this on enemy wakeup since it’s actually +1 on block. Remember to poke with 5A and not 2A afterwards; it’s your fastest normal.
|
| B
|
Damage
|
Red Damage
|
Proration
|
Cancel
|
Guard
|
| 400*2, 800 (1400)
|
(1008)
|
100%
|
-CH-
|
L, LH
|
| First Active
|
Active
|
Recovery
|
Frame Adv
|
Circuit
|
Invuln
|
| 5
|
6 (6) 3
|
35
|
-29
|
2.1%*2, 5.6% (9.8%)
4.2% (14.0%)
|
High 1-5
|
| ~236X
|
Damage
|
Red Damage
|
Proration
|
Cancel
|
Guard
|
| 600 (1877)
|
(1417)
|
80% (M)
|
-
|
LHA
|
| First Active
|
Active
|
Recovery
|
Frame Adv
|
Circuit
|
Invuln
|
| 13
|
2
|
-
|
-
|
4.2% (14.0%)
|
-
|
|
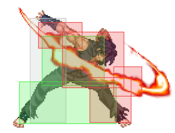
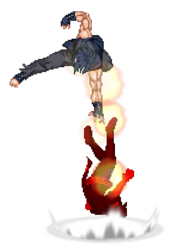
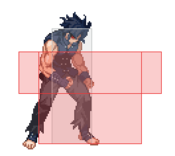
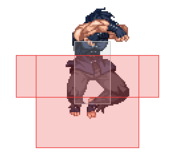
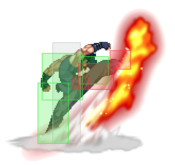
Rocket punt. Generic DP, although it’s not nearly as reliable as other characters’ DPs. Does 3 hits. He is upper-body invulnerable for the first three frames, and the first hitbox comes out on the fourth frame, when he is fully invulnerable, and then he can be hit anywhere else in the animation. It’s pretty hard to punish at first, but of course the enemy will get wise and just 66 > block or something in order to bait you. This also can serve as an anti-air, albeit a slow one. Try not to rely on this too much, if at all. Just block and wait for a gap for you to shield or 5A.
~236X: Missile kick. Kouma wants you to get the fuck back down onto the ground, and so he does. The thing is, this is groundtechable, twice. Once when you immediately touch the ground, and again when you land after the ground bounce. This makes punishing Kouma when he falls down very easy when he’s in the corner. At midscreen, not so much, but they can still get the upper hand on you, real quick. If they tech forward after the ground bounce, though, you can do the traditional 2AC tech chase, and 2C will autocorrect (if you time it right).
|
| EX
|
Damage
|
Red Damage
|
Proration
|
Cancel
|
Guard
|
| 800*2, 400*6 (3270)
|
(2767)
|
100%
|
-
|
LH (2), LHA (4)
|
| First Active
|
Active
|
Recovery
|
Frame Adv
|
Circuit
|
Invuln
|
| 3+2
|
6 (2) 13
|
36
|
-24
|
-100.0%
|
Full 1-11
|
|
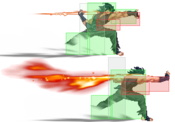
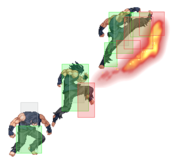
Missile punt. This is a true reversal, invulnerable all the way until the flames’ hitbox comes out (frames 1-11). As always, this is very unsafe when blocked/baited.
|
|
A A B B ~2 ~2 ~4 ~4 ~236C ~236C EX EX
|
A
~2/4
|
Damage
|
Red Damage
|
Proration
|
Cancel
|
Guard
|
2000
2200/2700
|
1440
960/1440
|
100%
100%/25%
|
(CH)
|
U
|
| First Active
|
Active
|
Recovery
|
Frame Adv
|
Circuit
|
Invuln
|
| 3
|
1
|
27
|
-
|
0.0%
|
-
|
- Kouma’s universal grab special. This is essential for any Kouma player to master, and utilizing this to make the opponent scared to block is crucial for his pressure.
Kouma grabs the enemy and bows his head in pity of you being grabbed. He then explodes the enemy’s face off. Delicious. COMES OUT ON FRAME 4. Perfect for tick throws and the like. This leads into Kouma’s sandoori, which is also essential to his pressure. He has various options for sandoori, but he also has a followup to this where you can throw them into the corner, get more damage, and still get a hard knockdown.
~[2]: Well, really, you don’t need to hold the button, but the timing for simply pressing the button is kinda strict, and yeah. Just hold the button. Anyways, this followup makes Kouma throw the opponent behind him into the ground, adding a little bit more damage. This destroys all your oki options, and you’ll have to resort to 5A when they wakeup. Absolutely useless.
~[4]: This is what happens when you get caught by his grab too much. Kouma gets disgusted by your stupidity and throws you to the wall. This does more damage than the [2] followup, and if you’re in the corner, you can pull off some swag and get a hard knockdown (see combo section above). Otherwise, if you’re midscreen, please just resort to not holding anything down, his sandoori is good enough for oki.
|
B
~2/4
|
Damage
|
Red Damage
|
Proration
|
Cancel
|
Guard
|
2000
2200/2700
|
1440
960/1440
|
100%
100%/25%
|
(CH)
|
U
|
| First Active
|
Active
|
Recovery
|
Frame Adv
|
Circuit
|
Invuln
|
| 28
|
1
|
14
|
-
|
0.0%
|
-
|
|
Delayed grab. It’s good to stagger with this every now and then, but just be careful, this certainly is not fast at all; active on frame 29. Although, the hitbox is deceptive since on this version he moves forward a good amount before grabbing the enemy. All the followups mentioned above are still possible after this version of the grab.
|
| A/B~236C
|
Damage
|
Red Damage
|
Proration
|
Cancel
|
Guard
|
| 3000
|
2119
|
100%
|
-
|
-
|
| First Active
|
Active
|
Recovery
|
Frame Adv
|
Circuit
|
Invuln
|
| -
|
-
|
-
|
-
|
-100.0%
|
-
|
|
Kouma is tired of your shit, and punches your head straight off your body. Untechable knockdown, and sends the opponent fullscreen. This does even more damage than the [4] followup. Use this when you know this will kill, cause you certainly don’t want to be at neutral/zoned out if it doesn’t.
|
| EX
|
Damage
|
Red Damage
|
Proration
|
Cancel
|
Guard
|
| 3200
|
(2208)
|
100%
|
-
|
U
|
| First Active
|
Active
|
Recovery
|
Frame Adv
|
Circuit
|
Invuln
|
| 5+6
|
1
|
36
|
-
|
-100.0%
|
Full 1-12
|
|
EX grab. Kouma decides it’s time to slam and jam, and dunks you into the ground, telling you to SHOVE THAT BULLSHIT UP YOUR ASS. This does so much damage for an EX, it’s ridiculous. If you have 200% meter, you can do two 214Cs back to back, and your enemy will never be the wiser. This also grabs limbs, which can make your enemy think twice before trying to poke out of your blockstrings. The enemy can still jump on reaction after the superflash, but, this has the same bogus hitbox that C-Moon has. Combine this with your invul frames, and you get a very powerful offensive tool. This is how powerful Kouma can be, and how he can scare people so easily.
|
|
A A B B EX EX
|
| A
|
Damage
|
Red Damage
|
Proration
|
Cancel
|
Guard
|
| 1000
|
720
|
75% (O)
|
N/A
|
LH
|
| First Active
|
Active
|
Recovery
|
Frame Adv
|
Circuit
|
Invuln
|
| 9
|
4
|
32
|
-8
|
5.6%
|
Reflect 9-13
Super Armor 6-22
|
- Combines C-Moon’s 22A with F-Moon’s 421A. You won’t be using these too much, but it’s good to mix this into Kouma’s blockstrings every now and then.
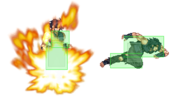
Stomp. Creates a vertical wave of flame right in front of Kouma. Contains superarmor before the stomp, so if you suspect a DP, you can use this to blow through it. This also reflects certain projectiles such as Ciel’s knives.
|
| B
|
Damage
|
Red Damage
|
Proration
|
Cancel
|
Guard
|
| -
|
-
|
-
|
-
|
-
|
| First Active
|
Active
|
Recovery
|
Frame Adv
|
Circuit
|
Invuln
|
| -
|
-
|
58
|
-
|
-
|
Full 6-25
Super Armor 26-37
|
|
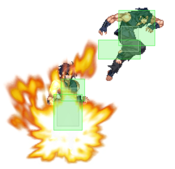
Fake stomp; Kouma dashes forward instead. This also contains superarmor until he recovers from the dash. Also something you won’t be using very often. However, in the corner, you can make use of it with a gimmick. When you get a hard knockdown, the dust that’s kicked up from his stomp actually obscures you and the enemy for a short moment, so they can’t really see where your attack is coming from. You can use this to your advantage, and go for a grab when they think you will poke with 5A/2A. Also, at point blank range, Kouma will switch sides with the enemy, so if the enemy is just outside the corner, you can kick dust in their face, switch sides, and do 236A/grab.
|
| EX
|
Damage
|
Red Damage
|
Proration
|
Cancel
|
Guard
|
| 1000
|
576
|
100%
|
-
|
LHA
|
| First Active
|
Active
|
Recovery
|
Frame Adv
|
Circuit
|
Invuln
|
| 7+11
|
2
|
26
|
-6
|
-100.0%
|
Full 1-8
Reflect 9-32
Super Armor 9-157
|
|
MANLY STOMP. Kouma exerts so much manliness, he blows up everything around him. Unfortunately, the hitbox isn’t as big as the explosion. However, it does have 8 frames of invul from frame 1, and activates superarmor for TWO WHOLE SECONDS. You can use this after a hard knockdown or on wakeup, but either way, it’ll most likely work out in your favor, but that’s if you manage to get the upper hand on the enemy. This is also safe on block, so don’t be afraid to poke with 5A after this. Higher-tier players will know what to do about this super, though, so they might try to shield you.
|
|
Aerial Specials
A/B A/B EX EX
|
| A
|
Damage
|
Red Damage
|
Proration
|
Cancel
|
Guard
|
| 800
|
576
|
100%
|
-CH-
|
LHA
|
| First Active
|
Active
|
Recovery
|
Frame Adv
|
Circuit
|
Invuln
|
| 9
|
3
|
-
|
-9 (TK)
|
5.6%
|
-
|
- C-Moon’s air punts, just as you remember them. Damn near useless. Essentially, you can make tech punishes with this, or set up an air game, but both of those options are situational.
Football punt in the air. Gets rid of all your aerial momentum that you had before you did this move, and you’re left in a recovery animation until you reach terra firma again (which, really, is where Kouma rightfully belongs). You can set up an air game with this, but it’s better to just end your aerial combos with airthrow, since your combos won’t leave you high off the ground anyways. Use J.236B if you want a better airgame.
|
| B
|
Damage
|
Red Damage
|
Proration
|
Cancel
|
Guard
|
| 500, 700 (1096)
|
(793)
|
100%
|
-CH-
|
LHA
|
| First Active
|
Active
|
Recovery
|
Frame Adv
|
Circuit
|
Invuln
|
| 7
|
5
|
-
|
-9 (TK)
|
3.5%, 4.2% (7.7%)
|
-
|
|
Another football punt. Does two hits this time, and gives you a small upwards boost while doing it. Retains all the properties that the A version has, including its followup. If you do decide to end your aerial combo with the punt, it’s better to use this version.
|
| ~236X
|
Damage
|
Red Damage
|
Proration
|
Cancel
|
Guard
|
| 600
|
-
|
80% (M)
|
-
|
LHA
|
| First Active
|
Active
|
Recovery
|
Frame Adv
|
Circuit
|
Invuln
|
| 13
|
2
|
-
|
-
|
4.2%
|
-
|
|
Missile kick. Pretty much the same thing as the followup to grounded 623.
|
| EX
|
Damage
|
Red Damage
|
Proration
|
Cancel
|
Guard
|
| 300, 600, 350*5 (1883)
|
(1498)
|
80% (O)
|
-
|
LHA
|
| First Active
|
Active
|
Recovery
|
Frame Adv
|
Circuit
|
Invuln
|
| 2+1
|
2 (2) 13
|
-
|
18 (vs Stand)
10 (vs Crouch)
(TK)
|
-100.0%
|
Full 1-10
|
|
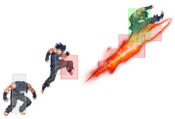
Aerial missile punt. This retains the same invulnerability that 623C has, so you can TK this on wakeup, and because Kouma doesn’t actually move that far up, you can followup with a normal afterwards and go into aerial stuff. That being said, if you choose to take unnecessary risks (aka using DP instead of 22C on wakeup) and waste your meter, TK this instead of the regular 623.
|
|
A A B B C C
|
| A
|
Damage
|
Red Damage
|
Proration
|
Cancel
|
Guard
|
| -
|
-
|
-
|
-
|
-
|
| First Active
|
Active
|
Recovery
|
Frame Adv
|
Circuit
|
Invuln
|
| -
|
-
|
33
|
-
|
-
|
-
|
- C/F-Moon’s command dashes. These are what gives Kouma his most mobility ANYWHERE on the screen, so please use these with care. Also, keep in mind that when you use this, you can’t airdash afterwards.
Kouma pauses for a split-second (causing an explosion, so fucking manly) as he readies himself to propel forward, and does so generously. Traverses about the same distance as an airdash. Not much use here, but you can use this to give that extra momentum you need to close the distance between you and your opponent. He’s still vulnerable when he falls down, though, so press J.B or air dodge (provided you’re close to the ground) to make yourself safer.
|
| B
|
Damage
|
Red Damage
|
Proration
|
Cancel
|
Guard
|
| -
|
-
|
-
|
-J-
|
-
|
| First Active
|
Active
|
Recovery
|
Frame Adv
|
Circuit
|
Invuln
|
| -
|
-
|
38
|
-
|
-
|
-
|
|
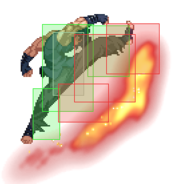
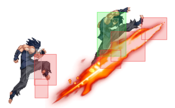
Altered version of C/F-Moon’s J.22B. Instead of going forward even farther, he goes upward in a diagonal direction. I hope you realize how important this is to Kouma’s neutral game. This the best aerial movement option he has. The dash is actually not as long as it seems, and so can you do a normal or airthrow right after he dashes. That being said, this is what you’ll be using to help you end your aerial BnBs.
|
| C
|
Damage
|
Red Damage
|
Proration
|
Cancel
|
Guard
|
| -
|
-
|
-
|
-
|
-
|
| First Active
|
Active
|
Recovery
|
Frame Adv
|
Circuit
|
Invuln
|
| -
|
-
|
10
|
-
|
-
|
-
|
|
Not actually an EX version. Kouma wants to go forward, but he quickly says “lol noep” and drops back down to the ground. That is to say, he does the explosion (still manly), but fakes the dash. There’s some funny stuff you can do with this to confuse your enemy. For example, after a 214 grab, you can dash up to them, TK this, and grab them again, if you time it right. Also serves as a momentum stopper if you see something you don't like on the enemy's side of offense.
|
|
Arc Drive
|
|
(Grab)
(Hit)
|
Damage
|
Red Damage
|
Proration
|
Cancel
|
Guard
|
900*10, 1200 (4017)
2500
|
(2412)
(2016)
|
50%
80%
|
-
|
U
LHA
|
| First Active
|
Active
|
Recovery
|
Frame Adv
|
Circuit
|
Invuln
|
| 4+0
|
1 (3) 8
|
43
|
-21
|
removes all
|
Full 1-10
|
|
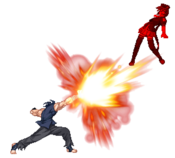
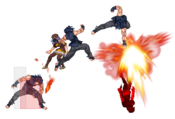
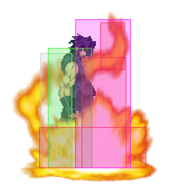
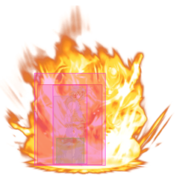
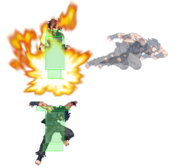
“ENJOOOOU” Kouma grabs the enemy and barbecues them through a fiery pillar. Does 4.2k damage. In order to do this, you must be at point blank range. If not, he just smacks them with his palm, which causes a wallbounce. The hitbox doesn’t extend to the tip, only to the rim of the blast circle. You can’t really follow up after the wallbounce, so if you’re midscreen, you just fucked up, cause now you’re gonna waste even more effort to get on the offensive again. The good thing about the grab is, unlike 214C, you can’t jump out after the superflash (tick throw, anyone?). So if they get caught, prepare your oki in advance. This is completely invincible from frame 1, so if you have a little bit of HEAT left and don’t know what to do (spend it on 22C) or you just don’t care anymore, go ahead and stick this out there if they like being in your face all the time.
|
|
MBAACC Navigation
