|
|
| Line 1,197: |
Line 1,197: |
| |frameAdv=-35 (min) | | |frameAdv=-35 (min) |
| |invuln=Full 1-13 | | |invuln=Full 1-13 |
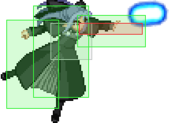
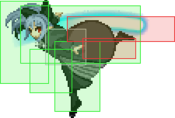
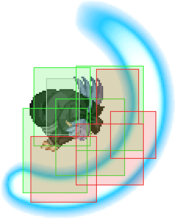
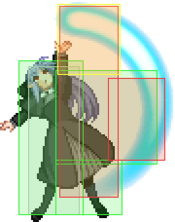
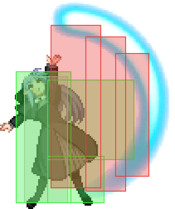
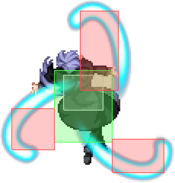
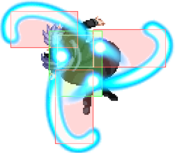
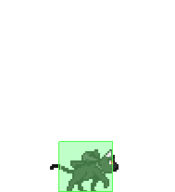
| |description=Fires a fast, unshieldable orb. On hit, goes into a cutscene of Len changing to a random costume dealing a series of blows onto the opponent in the dark. If performed on a cornered opponent, it will leave a small gap behind them. NOTE, Holding a button after Another Arc Drive hits will guarantee a costume in the cutscene. Holding A will give pajamas, B will give swimsuit, C will give maid and D will give kimono. Don't tell nobody else. | | |description=Fires a fast, unshieldable orb. On hit, goes into a cutscene of Len changing to a random costume dealing a series of blows onto the opponent in the dark. If performed on a cornered opponent, it may leave a small gap behind them. NOTE, Holding a button after Another Arc Drive hits will guarantee a costume in the cutscene. Holding A will give pajamas, B will give swimsuit, C will give maid and D will give kimono. Don't tell nobody else. |
| }} | | }} |
| }} | | }} |
Revision as of 00:23, 2 April 2022
Character Page Progress
This page is a translation from the French wiki BasGrosPoing.
This page is still a work in progress, consider joining as an editor to help expand it. Please update this character's roadmap page when one of the editing goals have been reached.
| In Progress |
To-do
|
- Overview/General Gameplan:
- Update strengths/weaknesses to look better probably.
- Address the elephant in the room and list the differences between her and H-Len.
- Flesh out gameplans other than pressure.
- Move Descriptions:
- Trim down excess info on things like j236x and migrate it to a new section below the movelist, detailing more advanced application and theory.
|
- Additional Resources/Players to watch/ask
- Add any external links to ressources such as video guides or articles.
- Pretty up this section to be more in line with other character pages.
- Combos:
- Clean up combo section, maybe even restructure it completely.
- Add throw loop guide.
- Consider putting this entire section below move descriptions.
|
Additional Resources
C-Len Match Video Database
Players to watch/ask
JP:
NA:
- Limescale (Limescale#9166)
Overview
Strengths / Weaknesses
| Strengths
|
- Amazing air normals and good air movement.
- Black cats and neco rockets give her solid screen control.
- Tricky neutral and okizeme with feints and teleports.
- Good meter gain along with a lot of ways to use it.
- Comboable throw in the corner makes her strike/throw very threatening.
- Fuzzy overhead mixup that's easy to set up and works on almost everyone.
- Fast, bufferable abare normal in 3C.
- Can low profile a lot of things with her catwalk.
|
| Weaknesses
|
- Low health and mediocre damage.
- Slow ground movement, ground normals are very punishable on whiff.
- Lackluster corner pressure.
- No invincible reversal if disregarding her awful 623C.
- Lacks good antiairs, relies on low profiling.
- Only one stubby low normal.
|
General Gameplan
Place text here*
Neutral
Place text here*
Pressure
5C (any number of hits) > 2A (hopefully whiffed) is her bread and butter. From here you can attempt to dash up and reset the sequence with a 5A, or try to catch the opponent mashing with 5B/5C/3C and confirm off of that. Instant airdash jB/jC can also reset while doubling as a fuzzy overhead setup, but both are easily stuffed by 5As. You can j7 > j9 > airdash instead to go over their mash, but expending all of your movement options makes you easily shielded or DP'd. You may want to simply j9 > jC (or j2C) and try to react to whatever the opponent does.
5A is good for tick throwing, but it's somewhat difficult to stay in your opponent's face long enough to threaten with this often. More on throw setups in a future section.
5C (first hit) done from close to max range > 2C can loop back into itself and will bully characters with slow As. Otherwise, 2C > 3C is usually still a potent frametrap.
236A/B can also be used to safely end your pressure. 236A is massively plus when charged and hits low regardless, which catches a lot of players off guard, but a prepared opponent can easily jump before you get a chance to finish it. 236B is safer on block and charges faster, catching jumpers with its second upward-hitting icicle as a bonus, but it hits mid and can't be EX cancelled like the A version.
623A will close the gap and leave you at -2 if you do no followups, which can be ok or bad depending on the matchup (aka bullying of slow A-havers). More details to come in a future section.
Okizeme
Place text here
Defense
EX guard, 3C and Heat are your friends.
Combos
| Combo Notation Help
|
Disclaimer: Combos are written by various writers, so the actual notation used in pages can differ from the standard one.
For more information, see Glossary and Controls.
|
| X > Y
|
X input is cancelled into Y.
|
| X > delay Y
|
Must wait for a short period before cancelling X input into Y.
|
| X, Y
|
X input is linked into Y, meaning Y is done after X's recovery period.
|
| X+Y
|
Buttons X and Y must be input simultaneously.
|
| X/Y
|
Either the X or Y input can be used.
|
| X~Y
|
This notation has two meanings.
- Use attack X with Y follow-up input.
- Input X then within a few frames, input Y. Usually used for option selects.
|
| X(w)
|
X input must not hit the opponent (Whiff).
|
| j.X
|
X input is done in the air, implies a jump/jump cancel if the previous move was done from the ground.
Applies to all air chain sections:
- Assume a forward jump cancel if no direction is given.
- Air chains such as j.A > j.B > j.C can be shortened to j.ABC.
|
| sj.X
|
X input is done after a super jump. Notated as sj8.X and sj9.X for neutral and forward super jumps respectively.
|
| dj.X
|
X input is done after a double jump.
|
| sdj.X
|
X input is done after a double super jump.
|
| tk.X
|
Stands for Tiger Knee. X motion must be buffered before jumping, inputting the move as close to the ground as possible. (ex. tk.236A)
|
| (X)
|
X is optional. Typically the combo will be easier if omitted.
|
| [X]
|
Input X is held down. Also referred to as Blowback Edge (BE). Depending on the character, this can indicate that this button is held down and not released until indicated by the release notation.
|
| ]X[
|
Input X is released. Will only appear if a button is previously held down. This type of input is referred to as Negative Edge.
|
| {X}
|
Button X should only be held down briefly to get a partially charged version instead of the fully charged one.
|
| X(N)
|
Attack "X" should only hit N times.
|
| (XYZ)xN
|
XYZ string must be performed N times. Combos using this notation are usually referred to as loops.
|
| (XYZ^)
|
A pre-existing combo labelled XYZ is inserted here for shortening purposes.
|
| CH
|
The first attack must be a Counter Hit.
|
| Air CH
|
The first attack must be a Counter Hit on an airborne opponent.
|
| 66
|
Performs a ground forward dash.
|
| j.66
|
Performs an aerial forward dash, used as a cancel for certain characters' air strings.
|
| IAD/IABD
|
Performs an Instant AirDash.
|
| AT
|
Performs an Air Throw. (j.6/4A+D)
|
| IH
|
Performs an Initiative Heat.
|
| AD
|
Performs an Arc Drive.
|
| AAD
|
Performs an Another Arc Drive.
|
Basic combos
| Condition
|
Notation
|
Damage
vs V.Sion
|
Notes
|
|
| Normal starter, grounded opponent
|
- (5A >) 5C(4) > 4B > j.BC > dj.BC > AT
|
4022
|
???
|
|
| Normal starter, grounded opponent, 100% meter
|
- (5A >) 5C(4) > 4B > 236C, 236[A], 236[B], j.ABC > dj.BC > AT
|
4864
|
| |
| Meter Gained: ??? |
Meter Given (vs C-Moon): ??? |
| Metered combo. |
|
|
| Normal starter, grounded opponent, 100% meter
|
- (5A >) 5C(4) > 236C, 236[A], 63214C, 2B
|
???
|
| |
| Meter Gained: ??? |
Meter Given (vs C-Moon): ??? |
Metered combo that gives an hard knockdown and good mixup options midscreen.
End combo at 236[A] to move the opponent out of the corner. |
|
|
Advanced combos
| Condition
|
Notation
|
Damage
vs V.Sion
|
Notes
|
|
| Normal starter, grounded opponent, Corner
|
- (5A >) 5C(4) > 4B > j.B > j.66 > delay AT, 5A > 4B > 2A(w), j.A > j.66 > delay AT, 5A > 4B > 2A(w), j.ABC > j.BC > AT
|
???
|
| |
| Meter Gained: ??? |
Meter Given (vs C-Moon): ??? |
| Corner combo. |
|
|
| Normal starter, grounded opponent, Corner
|
- (5A >) 5C(4) > 4B > j.B > j.66 > delay AT, 5A > 4B > 2A(w), j.B > j.66 > delay AT, 5A > 4B > 2A(w), j.AC > j.66 > delay AT, 5A > 2B
|
???
|
| |
| Meter Gained: ??? |
Meter Given (vs C-Moon): ??? |
| Knockdown ending. |
|
|
| Normal starter, grounded opponent, Corner
|
- (5A >) 5C(4) > 4B > j.B > j.66 > delay AT, 5A > 4B > 2A(w), j.B > j.66 > delay AT, 5A > 4B > 2A(w), j.ABC > dj.ABC > AT
|
???
|
| |
| Meter Gained: ??? |
Meter Given (vs C-Moon): ??? |
| AirCombo ending instead of knockdown. |
|
|
Move Descriptions
| Frame Data Help
|
| Header
|
Tooltip
|
| Move Box Colors
|
Light gray = Collision Box (A move lacking one means it can go through the opponent's own collision box).
Green: Hurt Boxes.
Red: Hit(/Grab) Boxes.
Yellow: Clash Boxes (When an active hitbox strikes a clash box, the active hitbox stops being active. Multi-hit attacks can beat clash since they will still progress to the next hitbox.)
Magenta: Projectile-reflecting boxes OR Non-hit attack trigger boxes (usually).
Blue: Reflectable Projectile Boxes.
|
| Damage
|
Base damage done by this attack.
(X) denotes combined and scaled damage tested against standing V. Sion.
|
| Red Damage
|
Damage done to the recoverable red health bar by this attack. The values are inherently scaled and tested against standing V. Sion.
(X) denotes combined damage.
|
| Proration
|
The correction value set by this attack and the way it modifies the scaling during a string. See this page for more details.
X% (O) means X% Overrides the previous correction value in a combo if X is of a lower percentage.
X% (M) means the current correction value in a combo will be Multiplied by X%. This can also be referred to as relative proration.
|
| Circuit
|
Meter gained by this attack on hit.
(X%) denotes combined meter gain.
-X% denotes a meter cost.
|
| Cancel
|
Actions this move can be cancelled into.
SE = Self cancelable.
N = Normal cancelable.
SP = Special cancelable.
CH = Cancelable into the next part of the same attack (Chain in case of specials).
EX = EX cancelable.
J = Jump cancelable.
(X) = Cancelable only on hit.
-X- = Cancelable on whiff.
|
| Guard
|
The way this move must be blocked.
L = Can block crouching
H = Can block standing.
A = Can block in the air.
U = Unblockable.
|
| Startup
|
Amount of frames that must pass prior to reaching the active frames. Also referred to as "True Startup".
|
| Active
|
The amount of frames that this move will have a hitbox.
(x) denotes frame gaps where there are no hitboxes is present. Due to varied blockstuns, (x) frames are difficult to use to determine punish windows. Generally the larger the numbers, the more time you have to punish.
X denotes active frames with a duration separate from its origin move's frame data, such as projectile attacks. In this case, the total length of the move is startup+recovery only.
|
| Recovery
|
Frames that this move has after the active frames if not canceled. The character goes into one frame where they can block but not act afterwards, which is not counted here.
|
| Advantage
|
The difference in frames where you can act before your opponent when this move is blocked (assuming the move isn't canceled and the first active frame is blocked).
If the opponent uses a move with startup that is at least 2 frames less than this move's negative advantage, it will result in the opponent hitting that move.
±x~±y denotes a range of possible advantages.
|
| Invul
|
Lists any defensive properties this move has.
X y~z denotes X property happening between the y to z frames of the animations. If no frames are noted, it means the invincibility lasts through the entire move.
Invicibility:
- Strike = Strike invincible.
- Throw = Throw invincible.
Hurtbox-Based Properties:
- Full = No hurtboxes are present.
- High = Upper body lacks a hurtbox.
- Low = Lower body lacks a hurtbox.
Miscellaneous Properties
- Clash = Frames in which clash boxes are active.
- Reflect = Frames in which projectile-reflecting boxes are active.
- Super Armor = Frames in which the character can take hits without going into hit stun.
|
Normal Moves
Standing Normals
|
|
| Damage
|
Red Damage
|
Proration
|
Cancel
|
Guard
|
| 350*2 (614)
|
(343)
|
78% (O)
|
-SE-, -N-, -SP-, -EX-, (J)
|
LH
|
| First Active
|
Active
|
Recovery
|
Frame Adv
|
Circuit
|
Invuln
|
| 3
|
1 (2) 5
|
5
|
-1, 2
|
4.0%*2 (8.0%)
|
-
|
|
Fast 2-hit jab. The second hit is pretty active, so it's easy to use as a meaty if you hit the button early. The first hit is only active for a frame though and there's a gap between the two, so if your meaty attempt doesn't work this might explain why. It doesn't reach as high as you'd like it to.
|
|
|
|
| Damage
|
Red Damage
|
Proration
|
Cancel
|
Guard
|
| 300, 500*2 (1061)
|
(643)
|
80% (O)
|
N, SP, EX, (J)
|
LH
|
| First Active
|
Active
|
Recovery
|
Frame Adv
|
Circuit
|
Invuln
|
| 7
|
8
|
10
|
-6 ~ -1
|
2.5%, 4.5*2 (11.5%)
|
-
|
|
Mid-range 3-hit swipe. Very active, your go-to move for covering the opponent's techs and meatying people who like to gamble on wakeup shield. You can try to use it as a poke sometimes. Doesn't combo into anything from further away aside from AAD, but you can buffer an instant airdash out of it. Due to collision box shenanigans, she can be pushed out of the way of the opponent's heat if this is used as a meaty.
|
|
|
|
| Damage
|
Red Damage
|
Proration
|
Cancel
|
Guard
|
| 450, 400*4 (1700)
|
(1058)
|
85% (O)
|
N, SP, EX, (J)
|
LH
|
| First Active
|
Active
|
Recovery
|
Frame Adv
|
Circuit
|
Invuln
|
| 6
|
5 (11) 3 (1) 4
|
16
|
-25 ~ -5
|
5.0%, 3.0%*3, 5.0% (19.0%)
|
-
|
|
Len moves forward and rotates an orb upward 2 times; the first spin is 2 hits while the second is 3. Staple button in combos and pressure and can even be used as an antiair at times. However, whiffing or even hitting it from too far away can spell disaster. Either the first hit or the last must connect in order for you to cancel/reverse beat, otherwise Len will have to go through the full recovery animation which may leave her unsafe on block. If you cancel this into 4B or 236C, do so immediately after one of the hits or you may risk the combo dropping.
|
|
Crouching Normals
|
|
| Damage
|
Red Damage
|
Proration
|
Cancel
|
Guard
|
| 300
|
117
|
76% (O)
|
-SE-, -N-, -SP-, -EX-, (J)
|
LH
|
| First Active
|
Active
|
Recovery
|
Frame Adv
|
Circuit
|
Invuln
|
| 3
|
3
|
9
|
0
|
3.0%
|
-
|
|
A crouching orb jab. As fast as a 2A can be, but hits mid. Use this for poking out of pressure and reverse beating your own.
|
|
|
|
| Damage
|
Red Damage
|
Proration
|
Cancel
|
Guard
|
| 650
|
392
|
65% (O)
|
N, SP, EX, (J)
|
L
|
| First Active
|
Active
|
Recovery
|
Frame Adv
|
Circuit
|
Invuln
|
| 7
|
3
|
16
|
-4
|
7.0%
|
-
|
|
C-Len's only low normal. Untechable knockdown on hit. It can low profile some DPs if spaced correctly. You may unexpectedly catch opponents defaulting to high block by saving this for later in a blockstring.
|
|
|
|
| Damage
|
Red Damage
|
Proration
|
Cancel
|
Guard
|
| 750
|
441
|
100%
|
-
|
LH
|
| First Active
|
Active
|
Recovery
|
Frame Adv
|
Circuit
|
Invuln
|
| 13
|
7
|
17
|
-4 ~ 2
|
10.0%
|
-
|
|
Spawns a Len afterimage that lunges forward with a massive disjoint, launching on hit. Can't be cancelled into anything, but with spacing it can be made slightly plus on block. Visually it's very similar to her 3C, so mixing the two together can confuse the opponent. Len won't move and suffers no pushback whatsoever on hit or block, so you could do this multiple times in a row if your opponent respects it too much. Nets you easy conversions on counterhit, but on a normal hit you can only attempt a tech trap. When whiffed beneath a cornered opponent from close range, this may force them out and create a small gap.
|
|
Air Normals
|
|
| Damage
|
Red Damage
|
Proration
|
Cancel
|
Guard
|
| 300
|
156
|
75% (O)
|
SE, N, SP, EX, J
|
LHA
|
| First Active
|
Active
|
Recovery
|
Frame Adv
|
Circuit
|
Invuln
|
| 5
|
4
|
8
|
-
|
3.0%
|
-
|
|
Her fastest air normal. Good for air-to-air like most jAs, but following it up can be awkward as it doesn't lend itself well to chaining for stability.
|
|
|
|
| Damage
|
Red Damage
|
Proration
|
Cancel
|
Guard
|
| 700
|
392
|
90% (O)
|
N, SP, EX, J
|
HA
|
| First Active
|
Active
|
Recovery
|
Frame Adv
|
Circuit
|
Invuln
|
| 7
|
8
|
-
|
-
|
8.0%
|
-
|
|
An air button with a long horizontal disjoint and generous active frames. Fantastic air to air when lined up properly that's also good for instant airdash pressure. Buffering an airdash will let you capitalize off counterhits more easily or even tick into a gold airthrow on block. It can also be used to set up her fuzzy overhead.
|
|
|
|
| Damage
|
Red Damage
|
Proration
|
Cancel
|
Guard
|
| 1050
|
686
|
90% (M)
|
N, SP, EX, J
|
HA
|
| First Active
|
Active
|
Recovery
|
Frame Adv
|
Circuit
|
Invuln
|
| 10
|
3
|
-
|
-
|
12.0%
|
-
|
|
Downward orb swipe. Len's best air to ground move, covering a nice angle in front of and below her with a fair amount of disjoint and the rare ability to reliably crossup. This move is a key component of her fuzzy overhead mixup, and is also the preferred air normal to set it up with. Also a very good button for instant airdashes, though it's considerably more finicky than jB.
|
|
Command Normals
|
|
| 4B
|
Damage
|
Red Damage
|
Proration
|
Cancel
|
Guard
|
| 800
|
490
|
75% (O)
|
N, SP, EX, (J)
|
LH
|
| First Active
|
Active
|
Recovery
|
Frame Adv
|
Circuit
|
Invuln
|
| 9
|
4
|
20
|
-9
|
8.0%
|
Clash 10-13
|
|
Len's standard launcher for combos. Because it's partially chargeable, you can variably stagger this button in pressure. It can be used pre-emptively as an antiair sometimes, though it may clash.
|
| 4[B]
|
Damage
|
Red Damage
|
Proration
|
Cancel
|
Guard
|
| 1200
|
686
|
75% (O)
|
N, SP, EX, (J)
|
LH
|
| First Active
|
Active
|
Recovery
|
Frame Adv
|
Circuit
|
Invuln
|
| 21
|
4
|
16
|
-3
|
10.0%
|
-
|
|
Charged version exclusive to Crescent. In addition to having better frame advantage, this will actually OTG relaunch the opponent and let you combo them again. You can opt to tack on extra damage or go into 236C for stronger oki, but both require you to scare the opponent out of teching first.
|
|
|
|
| Damage
|
Red Damage
|
Proration
|
Cancel
|
Guard
|
| 1000
|
588
|
78% (O)
|
N, SP, EX, (J)
|
LH
|
| First Active
|
Active
|
Recovery
|
Frame Adv
|
Circuit
|
Invuln
|
| 5
|
7
|
24
|
-13
|
10.0%
|
-
|
|
Non-fakeout version of 2C. Has a quick 5f startup, moves Len forward and even low profiles to some degree. Launches on hit which means trades almost always favor her, and being a command normal means you can buffer it for consistent reversal timing. Amazing button that should be used often both during and under pressure, but it's horribly unsafe to whiff so be careful. Most characters can readily punish it by backdashing if it's used to frametrap midscreen. The cancel window is fairly late which takes getting used to, and it makes 3C > 5C feel like a link.
|
|
|
|
| Damage
|
Red Damage
|
Proration
|
Cancel
|
Guard
|
| 300*4 (849)
|
(414)
|
80% (M)*4
|
-
|
HA
|
| First Active
|
Active
|
Recovery
|
Frame Adv
|
Circuit
|
Invuln
|
| 9
|
4 (6) 4
|
-
|
-
|
4.0%*4 (16.0%)
|
-
|
|
Len spins several orbs around her for up to 4 hits. This move is active for 14 frames or until she reaches the ground, though it sort of 'flickers' on and off for its duration which can cause it to connect unpredictably. While the hitboxes are pretty disjointed, this move tends to lose to active air-to-air and antiair buttons, so it relies on hitting their startup instead. Can be hard to consistently link normals on the ground after landing so opponents who know this may try to mash or shield in-between to catch your mistiming. If the opponent blocks this in the air close to the ground, you can usually guard break them with 5A/5C. You can hold 7/8/9 during its startup to halt all momentum and cause Len to rise a bit, which can be situationally useful. For some reason, this button is coded like an F-moon normal and recovers faster upon landing.
|
|
Universal Mechanics
|
|
| Damage
|
Red Damage
|
Proration
|
Cancel
|
Guard
|
| 1200
|
490
|
30%
|
-
|
U
|
| First Active
|
Active
|
Recovery
|
Frame Adv
|
Circuit
|
Invuln
|
| 2
|
1
|
20
|
-
|
0.0%
|
-
|
|
Len launches the opponent in the air. Comboable when close enough to the corner. Ground techable otherwise.
|
|
|
|
| Damage
|
Red Damage
|
Proration
|
Cancel
|
Guard
|
1600 (1440, Raw)
1100
|
441
|
30%
|
-
|
U
|
| First Active
|
Active
|
Recovery
|
Frame Adv
|
Circuit
|
Invuln
|
| 1
|
1
|
12
|
-
|
0.0%
|
-
|
|
Launches the opponent upwards again. As a combo ender, this is ground techable and can actually be combo'd from in the corner if done low enough to the ground.
|
|
|
|
| Bunker
|
Damage
|
Red Damage
|
Proration
|
Cancel
|
Guard
|
| 500
|
196
|
100%
|
-
|
LHA
|
| First Active
|
Active
|
Recovery
|
Frame Adv
|
Circuit
|
Invuln
|
| 25
|
4
|
19
|
-5
|
0.0%
(-50.0% in blockstun)
|
Clash 1-10
|
| (Clash)
|
Damage
|
Red Damage
|
Proration
|
Cancel
|
Guard
|
| 500
|
196
|
100%
|
-
|
LHA
|
| First Active
|
Active
|
Recovery
|
Frame Adv
|
Circuit
|
Invuln
|
| 7
|
4
|
19
|
-5
|
0.0%/-50.0%
|
Strike 1-7
|
|
Upward shield bunker. If performed on a cornered opponent, you can tech trap with 236C. While this sounds like a weird time to bunker someone, it's a surprisingly okay option after a blocked 623A.
|
|
|
|
| Damage
|
Red Damage
|
Proration
|
Cancel
|
Guard
|
| 100
|
0
|
100%
|
-
|
U
|
| First Active
|
Active
|
Recovery
|
Frame Adv
|
Circuit
|
Invuln
|
| 18
|
3
|
25
|
-
|
-100.0% (min)
|
Full 1-21
|
|
Forward heat hitbox. Despite its small size, this will hit pretty often.
|
|
|
|
| Ground
|
Damage
|
Red Damage
|
Proration
|
Cancel
|
Guard
|
| 100
|
0
|
100%
|
-
|
U
|
| First Active
|
Active
|
Recovery
|
Frame Adv
|
Circuit
|
Invuln
|
| 10
|
10
|
20
|
-
|
removes all
|
Full 1-39
|
| Air
|
Damage
|
Red Damage
|
Proration
|
Cancel
|
Guard
|
| 100
|
0
|
100%
|
-
|
U
|
| First Active
|
Active
|
Recovery
|
Frame Adv
|
Circuit
|
Invuln
|
| 11
|
10
|
15
|
-
|
removes all
|
Strike 1-30
|
|
Universal burst mechanic. Unlike Crescent/Full Heat activation, the hitbox and frame data doesn't vary between characters. However, you can be thrown out of this move if you input it in the air.
|
|
Special Moves
Special Movement
|
|
| Damage
|
Red Damage
|
Proration
|
Cancel
|
Guard
|
| -
|
-
|
-
|
-
|
-
|
| First Active
|
Active
|
Recovery
|
Frame Adv
|
Circuit
|
Invuln
|
| -
|
-
|
-
|
-
|
-
|
-
|
|
Len can walk foward while crouching with her unique catwalk. Turns into a cat with an extremely small hitbox, allowing her to duck alot of moves. The lowered profile of her catwalk is not active until 4f after starting it. If 3 is released to go back to holding 2, there is a 5f animation before returning to her regular crouch animation. This recovery is entirely cancellable. If 3 is released to 6, there is no recovery.
|
|
Grounded Specials
A A B B [B] [B] EX EX
|
| A
|
Damage
|
Red Damage
|
Proration
|
Cancel
|
Guard
|
| 800
|
539
|
100%
|
-EX-
|
LA
|
| First Active
|
Active
|
Recovery
|
Frame Adv
|
Circuit
|
Invuln
|
| 18
|
8
|
26
|
-9
|
8.0%
|
-
|
| [A]
|
Damage
|
Red Damage
|
Proration
|
Cancel
|
Guard
|
| 1500
|
833
|
60% (O)
|
-EX-
|
L
|
| First Active
|
Active
|
Recovery
|
Frame Adv
|
Circuit
|
Invuln
|
| 44
|
8
|
8
|
28
|
12.0%
|
-
|
|
Summons a low-hitting icicle, which launches into an air tech state on hit. Can be charged for untechable knockdown, air unblockable and significant frame advantage. You have enough time to perform an instant airdash jB during the charged version's blockstun, which can set up a fuzzy overhead. Its counterhits are very rewarding regardless of charge, and if you're unsure how to end a blockstring after being pushed out too far you can try your luck playing chicken. Can be immediately cancelled into 236C on whiff which will catch people trying to jump over it and towards you, but the charged version has a slight delay before the window appears.
|
| B
|
Damage
|
Red Damage
|
Proration
|
Cancel
|
Guard
|
| 800
|
539
|
100%
|
-
|
LHA
|
| First Active
|
Active
|
Recovery
|
Frame Adv
|
Circuit
|
Invuln
|
| 16
|
8
|
15
|
-8
|
8.0%
|
-
|
| [B]
|
Damage
|
Red Damage
|
Proration
|
Cancel
|
Guard
|
| 800*2 (1209)
|
(814)
|
60% (O)
|
-
|
LH
|
| First Active
|
Active
|
Recovery
|
Frame Adv
|
Circuit
|
Invuln
|
| 32
|
10
|
23
|
11 ~ 13
|
8.0%*2 (16.0%)
|
-
|
|
B version hits mid. Charged version has an extra icicle that angled higher and is air unblockable. the top icicle comes out 2f earlier. Both charged and uncharged versions are faster than their A counterparts, with the uncharged one being a little bit safer on block. The charged version is better than 236[A] at catching jumpouts, but has much less frame advantage on block (though it's still significantly plus). Neither can be cancelled into 236C.
|
| EX
|
Damage
|
Red Damage
|
Proration
|
Cancel
|
Guard
|
| 500*8 (3188)
|
(1904)
|
40% (O)
|
-
|
LH
|
| First Active
|
Active
|
Recovery
|
Frame Adv
|
Circuit
|
Invuln
|
| 3+13
|
17
|
18
|
-17 ~ 18
|
-100.0%
|
Full 1-3
|
|
Spawns several icicles on top of Len. The icicle effects have random positions but the hitbox is consistent, and also separate from Len. This means that if enough hits connect, you can recover before active frames end and have significant frame advantage, which goes for both hit and block. This is a staple of Len's metered combos and is commonly followed up with 236[A], which can transition into a max damage airthrow ender, hammer loops + hard knockdown, or another setup such as a teleport left/right. It's also very useful as an air tech trap and sometimes even as a pre-emptive antiair, though beware that it's easily stuffed after the super flash. You can heat immediately after landing this and still have time to finish the combo if you're fast.
A grounded C or H-moon opponent not in hit or blockstun can usually dodge (2A+B) this on reaction to punish Len, while F-moons can shield counter it. If Len uses this on you while you're in her airspace, jump away from the center where the hitbox reaches the highest, else you will need to time several shields manually to avoid getting hit.
|
|
A A B B EX EX
|
| A
|
Damage
|
Red Damage
|
Proration
|
Cancel
|
Guard
|
| 300*3, 500 (1324)
|
(549)
|
100%
|
-CH-, -EX-
|
LHA
|
| First Active
|
Active
|
Recovery
|
Frame Adv
|
Circuit
|
Invuln
|
| 6
|
17 (7) 3
|
14
|
-2
|
3.0%*3, 6.0% (15.0%)
|
Low 4-23
|
| ~A
|
Damage
|
Red Damage
|
Proration
|
Cancel
|
Guard
|
| 300*6, 500
|
98*6, 294
|
100%
|
-EX-
|
LHA
|
| First Active
|
Active
|
Recovery
|
Frame Adv
|
Circuit
|
Invuln
|
| 6
|
17 (15) 17 (11) 2
|
9
|
1
|
3.0%*6, 6.0% (24.0%)
|
Low 4-23
|
| ~B
|
Damage
|
Red Damage
|
Proration
|
Cancel
|
Guard
|
| 300*3 (871)
|
(283)
|
100%
|
-EX-
|
LHA
|
| First Active
|
Active
|
Recovery
|
Frame Adv
|
Circuit
|
Invuln
|
| 6
|
17
|
21
|
-14
|
3.0%*3 (9.0%)
|
Low 4-23
|
|
Len does a lower body invulnerable, spinning forward jump ending in a kick. A/B can be pressed just after landing to either perform a second spin into a kick, or to not perform the last hit.
If the opponent EX Guards the last hit of the spin as soon as possible, they can act 1 frame before the kick is active.
On hit, you can either cancel the kick into 623C to deal extra damage and send the opponent far away, or freely mash 2/5A afterwards. Brave or unaware opponents may be caught trying to challenge or jump out here, but if not, you can also just continue your pressure.
On block, the situation is reversed, with the opponent being in a more favorable position to mash. Characters with slow As such as Warachia and Hime may have to respect this move regardless.
|
| B
|
Damage
|
Red Damage
|
Proration
|
Cancel
|
Guard
|
| 350*3, 1000 (2104)
|
(1227)
|
80% (M)
|
-CH-
|
LHA
|
| First Active
|
Active
|
Recovery
|
Frame Adv
|
Circuit
|
Invuln
|
| 9
|
17 (11) 3
|
24
|
-15
|
3.0%*3, 12.0% (21.0%)
|
Low 7-26
|
| ~A
|
Damage
|
Red Damage
|
Proration
|
Cancel
|
Guard
|
| 350*3, 300*3, 500
|
117*3, 98*3, 294
|
100%
|
-EX-
|
LHA
|
| First Active
|
Active
|
Recovery
|
Frame Adv
|
Circuit
|
Invuln
|
| 9
|
17 (16) 17 (11) 2
|
9
|
1
|
3.0%*6, 6.0% (24.0%)
|
Low 7-26
|
| ~B
|
Damage
|
Red Damage
|
Proration
|
Cancel
|
Guard
|
| 350*3 (1017)
|
(339)
|
100%
|
-EX-
|
LHA
|
| First Active
|
Active
|
Recovery
|
Frame Adv
|
Circuit
|
Invuln
|
| 9
|
17
|
21
|
-14
|
3.0%*3 (9.0%)
|
Low 7-26
|
|
B version goes a bit farther and the kick wallslams on hit, but it's very unsafe on block. If the last spin hit is EX Guarded, the opponent can act at most 5 frames before the kick is active. Used in optimal meterless corner combos versus characters who air throw loops don't work properly on.
|
| EX
|
Damage
|
Red Damage
|
Proration
|
Cancel
|
Guard
|
| 300*8, 1000 (2884)
|
(1927)
|
70% (M)
|
-
|
LHA
|
| First Active
|
Active
|
Recovery
|
Frame Adv
|
Circuit
|
Invuln
|
| 2+3
|
24 (11) 9
|
19
|
-16
|
-100.0%
|
Full 1-5, Low 6-29
|
|
EX version has full invulnerability on startup. Last hit wallslams. The opponent can act 1 frame before the kick is active on regular block. Useful as a confirm off of her 623A, but as a reversal it's abysmal. It will nearly always trade with an opponent's button, and unfavorably so to the point of being punishable. Can be followed up in the corner with 5A similarly to her 623B.
|
|
A A B B
|
| A
|
Damage
|
Red Damage
|
Proration
|
Cancel
|
Guard
|
| -
|
-
|
-
|
-
|
-
|
| First Active
|
Active
|
Recovery
|
Frame Adv
|
Circuit
|
Invuln
|
| 27
|
1
|
11
|
-
|
-
|
-
|
| (Brown)
|
Damage
|
Red Damage
|
Proration
|
Cancel
|
Guard
|
| -
|
-
|
-
|
-
|
-
|
| First Active
|
Active
|
Recovery
|
Frame Adv
|
Circuit
|
Invuln
|
| -
|
288
|
-
|
-
|
-
|
-
|
| (Tiger)
|
Damage
|
Red Damage
|
Proration
|
Cancel
|
Guard
|
| 100
|
0
|
100%
|
-
|
LHA
|
| First Active
|
Active
|
Recovery
|
Frame Adv
|
Circuit
|
Invuln
|
| 18
|
144
|
-
|
19
|
-
|
-
|
|
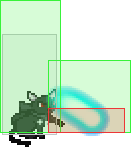
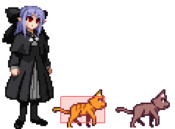
214A summons either a brown or tiger cat. Can have two 214A cats out at a time. The brown cat is the most useless summon for Len as it does nothing and takes the longest to disappear. Tiger cat moves the fastest out of all the cats and launches on hit which you can convert into a combo. This move isn't favored much due to its inconsistency and the fact that it counts towards the same limit as her 214C (Neco rocket), but tiger cats can be disruptive to characters with a fullscreen presence.
|
| B
|
Damage
|
Red Damage
|
Proration
|
Cancel
|
Guard
|
| -
|
-
|
-
|
-
|
-
|
| First Active
|
Active
|
Recovery
|
Frame Adv
|
Circuit
|
Invuln
|
| 27
|
1
|
11(+16)
|
-
|
-
|
-
|
| (Black)
|
Damage
|
Red Damage
|
Proration
|
Cancel
|
Guard
|
| 100
|
0
|
50%
|
-
|
LHA
|
| First Active
|
Active
|
Recovery
|
Frame Adv
|
Circuit
|
Invuln
|
| 18
|
384
|
-
|
19
|
-
|
-
|
| (Silver)
|
Damage
|
Red Damage
|
Proration
|
Cancel
|
Guard
|
| -
|
-
|
-
|
-
|
-
|
| First Active
|
Active
|
Recovery
|
Frame Adv
|
Circuit
|
Invuln
|
| 18
|
325
|
-
|
-
|
-
|
-
|
|
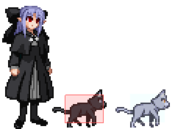
214B summons either a black or silver cat. Can only have one 214B cat out at a time. Black cat is the most useful cat out of the cat summons since it causes a hard knockdown on hit. It can also launch an opponent allowing for combos while having a lower proration than the tiger cat. You can guarantee a black cat summon by inputting 214B~4/6 but you'll recover slower with 27f recovery. Silver cat pushes the opponent towards its direction based on their collision box. Usage for silver cat is limited but it can cause the opponent to drop their combo and pressure while on the ground. C-Len has an easier time sandwiching the opponent between the silver cat and herself thanks to her 421A teleport, which can lead to some funny combos and setups.
|
|
Nya nya nya... Nya nya nya...
|
| Damage
|
Red Damage
|
Proration
|
Cancel
|
Guard
|
| 222, 850
|
100, 250
|
100%, 50%
|
-
|
LHA
|
| First Active
|
Active
|
Recovery
|
Frame Adv
|
Circuit
|
Invuln
|
| 27
|
22, (30), 6, [(3), 3]xN
|
11
|
-10, 18+26
|
0.70%, 2.10%
|
-
|
|
Important tool with many uses. Len throws out a rocket Neco that launches itself into the air after landing. Can have two Necos out at a time, though her 214A cats also count towards this limit. Len recovers and can act once the Neco touches the ground. The hitbox of the Neco while Len is throwing it hits high while it's hitbox when flying hits mid. It can be used for space control in neutral, catch people blocking low and bad jump-outs in corner pressure and as an oki tool. The hitbox for the second hit stays active until Neco goes offscreen or it hits the opponent. Opponents need to be cautious when pressuring or comboing Len while a Neco is in play, as they have a tendency to counterhit extended hurtboxes.
|
|
|
|
| A
|
Damage
|
Red Damage
|
Proration
|
Cancel
|
Guard
|
| -
|
-
|
-
|
-
|
-
|
| First Active
|
Active
|
Recovery
|
Frame Adv
|
Circuit
|
Invuln
|
| -
|
-
|
37
|
-
|
-
|
High 1-17, Full 18-27
|
| B
|
Damage
|
Red Damage
|
Proration
|
Cancel
|
Guard
|
| -
|
-
|
-
|
-
|
-
|
| First Active
|
Active
|
Recovery
|
Frame Adv
|
Circuit
|
Invuln
|
| -
|
-
|
32
|
-
|
-
|
-
|
| C
|
Damage
|
Red Damage
|
Proration
|
Cancel
|
Guard
|
| -
|
-
|
-
|
-
|
-
|
| First Active
|
Active
|
Recovery
|
Frame Adv
|
Circuit
|
Invuln
|
| -
|
-
|
288
|
-
|
-
|
-
|
|
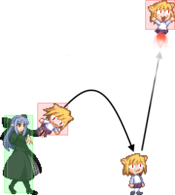
Len disappears and performs a teleport/fakeout-type move.
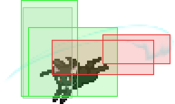
A: Crouches and then teleports forward a little more than 1/3rd of the screen. Has a very low profile during its startup followed by full invulnerability after she disappears. She is vulnerable briefly upon arrival, but can act almost the instant she fully reappears. This move can be an invaluable escape option and allows her to navigate the ground more quickly and safely than her other moons. It's also the key ingredient of her left/right mixups, particularly off 236C > 236[A] midscreen. Len will avoid almost everything including last arcs while mid-teleport. If you're having trouble with a C-Len player abusing this, try to react to her crouching animation and mash 2A where she would reappear.
B: Produces an illusion of a jumping Len, while the real one stays in place with a smaller hurtbox. In neutral, this can be used to bait the opponent into expending air options or hitting a jump button early. Its most conventional use however is in high/low mixups, where Len either jumps at you with jB/C or fakes you out with a 2B instead. The tell for this mixup is that the camera will shift slightly upward (begins shifting on frame 13 of her jump) when it's real while remaining stationary for the fake one, which while unintuitive is reactable. If the C-Len player hasn't tightened it up, you may be able to fuzzy block 4~1 because the low option tends to come later.
C: Produces an illusion of a dashing Len, while the real one walks forward in a catwalk-like state which can pass through the opponent. This is effectively a mini teleport and can be used for many of the same types of left/right mixups as the A version. It's a little more difficult to apply in neutral than her fake jump because the forward movement could get you hit by the options you were hoping to bait out (long range grounded normals usually). Furthermore, if you don't make use of her run all that much, the feint will be obvious.
|
|
|
|
| Damage
|
Red Damage
|
Proration
|
Cancel
|
Guard
|
| 1200
|
588
|
60% (O)
|
-
|
H
|
| First Active
|
Active
|
Recovery
|
Frame Adv
|
Circuit
|
Invuln
|
| 41
|
4
|
26
|
-2
|
5.0%
|
High 6-71
|
|
Starts out like 421A, but summons a huge hammer for a slow overhead. Launches on hit and can be used after 2B as an OTG relaunch. Most often looped to set up the hard knockdown from her metered combos. Because most of the startup resembles her 421A teleport, if they're conditioned to look for that they may be caught off guard despite its slow speed. Though it's -2 on block, most opponents can still be frametrapped by 3C afterwards when spaced. Surprisingly effective at low profiling DPs.
|
|
|
|
| Damage
|
Red Damage
|
Proration
|
Cancel
|
Guard
|
| 500
|
392
|
100% (O)
|
-
|
N/A*
|
| First Active
|
Active
|
Recovery
|
Frame Adv
|
Circuit
|
Invuln
|
| 31
|
X 398
|
11
|
-
|
5.0%
|
-
|
|
Spawns an orb that circles around Len, which detonates in contact with opponents in hitstun. Orbs last for approx 6.5 seconds, and up to 2 orbs can be active at a time. Disappears if Len gets hit. Powder snow's orbit is a constant, set based on the direction Len faced when summoning it. When making contact with an opponent not in hitstun, they will gradually deal red damage. Len's guard meter also regenerates quickly while it's active.
It's hard to find times to summon them in neutral, and they don't really add as much damage as you'd like on top of randomly messing up your air counterhits. They have plenty of theoretical uses in setups such as midscreen throw combos, but they require more frames to summon than you typically have, and their reliance upon being at specific points in their orbit is limiting. Their most practical use is in combos, softening transitions from 236[A] to 2B and enabling sideswitches.
|
|
Aerial Specials
|
|
| A
|
Damage
|
Red Damage
|
Proration
|
Cancel
|
Guard
|
| 800
|
539
|
100%
|
-EX-
|
LHA
|
| First Active
|
Active
|
Recovery
|
Frame Adv
|
Circuit
|
Invuln
|
| 10
|
8
|
6
|
-9 (TK)
|
8.0%
|
-
|
|
Stops Len's momentum and summons a downward-angle icicle. Fairly minus on block, but has a lot of reach and can be used to snipe opponents, especially if performed with a tiger knee motion on the ground. She falls very slowly during this move, and if she touches the ground at any point it will fully cancel the recovery, which is difficult to consistently set up but always welcome when it happens.
|
| B
|
Damage
|
Red Damage
|
Proration
|
Cancel
|
Guard
|
| 800
|
539
|
100%
|
-EX-
|
LHA
|
| First Active
|
Active
|
Recovery
|
Frame Adv
|
Circuit
|
Invuln
|
| 11
|
8
|
6
|
-4 (TK)
|
8.0%
|
-
|
|
Summons an horizontal icicle. Does not reach as far as the A version. Can be partially charged to stall in the air, in which case she will fall further downward, enabling the tiger knee'd version to hit a short/crouching opponent more easily. Like the A version, her recovery will be cancelled if she touches the ground at any point during it.
|
| [B]
|
Damage
|
Red Damage
|
Proration
|
Cancel
|
Guard
|
| 800*2
|
539*2
|
60% (O)
|
-
|
LHA
|
| First Active
|
Active
|
Recovery
|
Frame Adv
|
Circuit
|
Invuln
|
| 27
|
8
|
6
|
24 (TK)
|
8.0%*2 (16.0%)
|
-
|
|
Charged version summons diagonally upward icicles on both sides. Difficult to convert off this if used too high in the air unless it counterhits. If it counterhits just above Len's head, both icicles will apply their heavily modified hitstun at once and leave the opponent floating helplessly in the air for several seconds. If they're low enough to the ground, you can then run into them and push them towards the corner before your pickup. If you tiger knee it next to the opponent, it should always connect on them crouching (unless they're a Neco) which can be an unexpectedly good wakeup option with a ton of frame advantage. This will also cancel if she lands at the right time, but it's rare and not especially useful as no hitboxes actually come out.
|
| EX
|
Damage
|
Red Damage
|
Proration
|
Cancel
|
Guard
|
| 500*7 (2904)
|
(2533)
|
100%
|
-
|
LHA
|
| First Active
|
Active
|
Recovery
|
Frame Adv
|
Circuit
|
Invuln
|
| 1+9 ~ 12
|
~18
|
6
|
-2 (TK)
|
-100.0%
|
Full 1-13
|
|
Summons 7 j.236A-type icicles at random times and positions. The damage varies with how many icicles connect, but a clean hit should net you at least 2k. This move has pretty generous invulnerability and will win out against most attacks, in addition to being relatively safe on block. If done with a tiger knee motion, it can disrupt a lot of mid to long-range options such as projectiles and summons, and if you're quick enough it becomes a formidable abare tool as well. You can also use it to cover ground techs after air throwing the opponent towards the corner. Like the meterless versions, Len falls slowly for its duration and will cancel her recovery if she hits the ground, but beware as if you're too low you may see a super flash followed by nothing (you still spend the meter).
|
|
Arc Drive
|
|
| Damage
|
Red Damage
|
Proration
|
Cancel
|
Guard
|
| 440*N
|
352*N
|
50% (O)
|
-
|
LHA
|
| First Active
|
Active
|
Recovery
|
Frame Adv
|
Circuit
|
Invuln
|
| 8+10
|
X
|
41
|
-10 (min)
|
removes all
|
Full 1-16, Clash 19-X
|
|
Shoots an orb projectile which multi-hits indefinitely, having the potential to push the opponent to the other side of the screen. The projectile also clashes with enemy hitboxes, shielding Len from most attacks as it travels along. Placing a Neco (214C) prior to activating will momentarily create a wall, and wary opponents who retreat into the air may find themselves boxed into their upper quadrant of the screen.
As the opponent, if you're forced to block this, it should be safe to shield bunker when the orb is at least halfway through you. Also, watch your head.
|
|
Another Arc Drive
|
|
| Damage
|
Red Damage
|
Proration
|
Cancel
|
Guard
|
| 250, 850*14, 1000 (4765)
|
(3316)
|
50% (O)
|
-
|
LHA
|
| First Active
|
Active
|
Recovery
|
Frame Adv
|
Circuit
|
Invuln
|
| 4+1
|
X
|
86
|
-35 (min)
|
removes all
|
Full 1-13
|
|
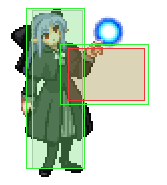
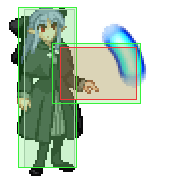
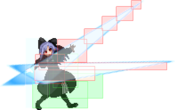
Fires a fast, unshieldable orb. On hit, goes into a cutscene of Len changing to a random costume dealing a series of blows onto the opponent in the dark. If performed on a cornered opponent, it may leave a small gap behind them. NOTE, Holding a button after Another Arc Drive hits will guarantee a costume in the cutscene. Holding A will give pajamas, B will give swimsuit, C will give maid and D will give kimono. Don't tell nobody else.
|
|
Last Arc
|
|
| Damage
|
Red Damage
|
Proration
|
Cancel
|
Guard
|
| 750*12, 500 (3772 ~ 7169)
|
(3312 ~ 6257)
|
50% + 50% * remaining BH time
|
-
|
U
|
| First Active
|
Active
|
Recovery
|
Frame Adv
|
Circuit
|
Invuln
|
| 1+0
|
16*
|
36
|
-
|
removes all
|
Full 1-X, High (on Landing)
|
|
Spawns a giant cake to fall on top of the opponent . On hit, circuit breaks the opponent and stabs them with various cutlery while they're trapped in the cake. Having to air EX shield kind of sucks.
|
|
MBAACC Navigation
