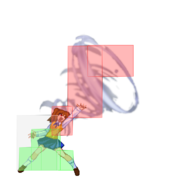
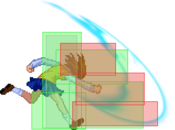
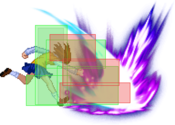
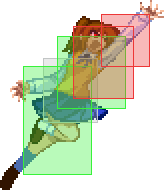
Melty Blood/MBAACC/Satsuki Yumizuka/Full Moon: Difference between revisions
(→5B) |
(→2A) |
||
| Line 354: | Line 354: | ||
|frameAdv=3 | |frameAdv=3 | ||
|invuln= | |invuln= | ||
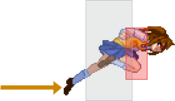
|description=Fast low | |description=Fast, fairly standard 2A that hits low. | ||
}} | }} | ||
}} | }} | ||
Revision as of 13:37, 16 September 2022
Character Page Progress
This page is still a work in progress, consider joining as an editor to help expand it. Please update this character's roadmap page when one of the editing goals have been reached.
| In Progress | To-do |
|---|---|
|
Additional Resources
F-Satsuki Match Video Database
Ale_Man's F-Satsuki Combo Video
Chace's F-Satsuki Blog
Satsuki Discord
Notable Players
| Name | Color | Region | Common Venues | Status | Details |
|---|---|---|---|---|---|
| Ale_Man | South America | Dream Match, Netplay | Active | Creator of the "F de Facha" combo video, has a good knowledge for techs with F-Sats, also has a YouTube channel with exhibitions. Subscribe to Zanzibarland | |
| Ridory | Japan | Netplay | Active | C-Satsuki main who uses a secondary F-Satsuki for counterpick reasons. | |
| Chace<3 | North America | Netplay | Active | NA F-Satsuki main and 214C > 2C enthusiast. Active in both discords and always willing to chat about the character. Posts FSats tech on their YouTube page and their F-Satsuki Blog |
Overview
| Strengths |
|
| Weaknesses |
|
General Gameplan
Similar to C-Satsuki, F-Sats' gameplan revolves around scoring a hit, carrying the opponent to the corner, and starting her setplay. Because F-Satsuki sports high damage off of most starters and her okizeme setups are highly ambigious it is not uncommon for F-Satsuki to turn a hit into a mixup, into another mixup, into the end of a round. Because of the strength of her gameplan F-Satsuki can opt to either play aggressive and rushdown to try to score a hit out of neutral and frametraps or choose a more defensive and opportunistic playstyle to start her offense.
Neutral
F Satsuki has a very strong kit for controlling neutral on the ground an protecting her airspace:
- Tools like 5B and 5C([C]) move her forward and have hearty disjoints that cover both ground and IAD approach angles.
- 623C is an infamously large anti air command grab that can be used to snipe jump startups, air approaches, and TK moves.
- 236C is invuln in the middle of its animation and moves Satsuki forward a considerable amount, allowing her to punish projectiles and other moves with poor recovery on reaction. Matchup defining move.
- 2B is plus on block, fairly fast, and has a great disjointed hitbox, making it a good tool for stuffing out grounded approaches and resets.
- 2C is a ludicrously fast sweep that can be used either as an abare option (committal) poke out of a dash, as a niche anti air to low profile poorly disjointed air approaches.
- 3C and 3[C] are slow but can low profile many projectiles (and moves!), making these a decent option to get in in certain matchups. Do not overly rely on this as these moves are particularly unsafe.
- 22A and 22B occupy a decent amount of space on the ground which can stuff out grounded approaches. This is most notable with 22B as this can be EX cancelled to catch jumps with a buffered 623C
- j7.B and rising j.A are powerful (while committal) answers to air approaches if you do not have the time for a 5[C] or 623X anti air.
Pressure
In addition to standard Full Moon stagger pressure F-Satsuki has many buttons that are disjointed and plus on block, allowing her to layer frametraps in her blockstrings and extend pressure longer than Crescent. This puts her pressure is somewhat in the middle of the Satsuki lineup, just shy under Half due to the moon's lack of rebeats. One thing to note is that while Full Moon has longer pressure sequences these are mostly composed of mids and lows. Because of this, F-Sats offense often requires a fair level of commitment when it comes to opening up overly respectful opponents.
Full moon Satsuki can structure her pressure after 5A/2A stagger by stacking plus frames to create frametraps.
Example strings include:
- 5B > 2B > 5B
- 5B > 5[C]
- 2B > 2B
- 5B > dl. 2B
Most of her buttons are plus and many move you forward so get creative with this.
Strings like X > 22A > 5B are risky but can be somewhat safe if spaced to not get hit by opponents mashing out with A normals. Do note that cancelling into moves like 2C, 2[C], 3C will effectively mark the end of your pressure sequence, making you either commit to a reset or end pressure. If your string ends in 3C consider using 3C > dl. 623[A] to make 3C +4 on block.
When you get pushed out too far to continue your offense, moves like 214[A], 22A and 236A can be used to safely end pressure
Once you have established respect from your opponent you can opt for a reset to either go for a mixup or reset pressure.
22C is a very strong option for pressure resets as it is hugely plus on block and gives you a way to trim meter if you are looking to avoid going into MAX.
However, while 22C has a strong risk/reward the cost/benefit may not be in your favor if the opponent chooses to just bunker out, paying 50 meter compared to your 100 to end pressure and return to neutral.
Do note that while 22B is unsafe at most ranges, it is EX cancellable, meaning that you can use the move towards the end of a blockstring and buffer 623C to catch jumpouts. This is particularly useful in the corner but generally will mark the end of your pressure sequence.
Redash 2A is generally a decent option after using one of your more advantageous normals like 5[C].
236B is a very strong pressure reset tool as it moves you directly next to the opponent, can be confirmed on hit into a full combo with OTG > 623C, and puts you at +4 effectively giving you a full pressure reset.
Do note that at 32 frames of startup 236B is a HUGE risk as you can be mashed out of the hop and the hit portion of the grab can be shielded on reaction. This is still worth going for at least once in a match because if your opponent respects this move your pressure becomes much more substantial and the threat of guard breaking your opponent is now on the table.
For resetting out of or during a pressure sequence you can choose to go for 214B([B]) or IAD j.C after a plus frame move for an overhead option. If the opponent is successfully conditioned 214X moves having the same startup animation can create a mental mixup as 214A is a mid, 214B is an overhead, 214[B] beats shield attempts, and 214[A] does absolutely nothing. If you notice that your opponent likes to shield your 214B attempts you can use 214[B] as a (wildly unsafe and telegraphed) deterrent.
2A and 5A are good for setting up tick throw attempts. For strike/throw it is usually more beneficial for Satsuki to use Bite instead of 6/4E if you have the meter as it does more damage, has greatly increased range (about the same as 2B!) and gives a better knockdown.
You can gimmick your way into a quick Bite either mid string using redash > Bite, 236[A] > Bite, or towards the end of a string with 214A(w) > Bite.
Example 214A(w) > Bite string: 2/5AA > 5B > 2B > 5B > 5C> 3C > 214A(w) > Bite.
If you are pressed for meter and choose to use regular throw, 5B or 2C will cover neutral, forward, and backwards ground techs in the corner.
Okizeme
Just like Crescent Moon Satsuki, Full Moon Satsuki revolves around okizeme. Getting one hit in can lead to the opponent eating combo after combo. Unlike Crescent, F Moon's 623A anti-air hitgrab leads to an untechable knockdown. In addition to this this change making 623A a strong head-invuln anti air option this gives F the potential to land a stray hit in neutral, half-health the enemy, and chuck them midscreen to put them into an unfair 4 way guessing game without using any meter. Remember that each character in the game has unique wakeup speeds for different sorts of knockdowns. Most of the time, the small difference in wakeup timing is not a problem, but some characters require extra delay to meaty, while Miyako in particular's wakeup is so short some setups cannot hit meaty without extra workarounds. It's important to be familiar with some of the characters with unique wakeup timings as you will need to adapt to their wakeup speeds to land certain mixups. C-Satsuki Knockdown Durations
Primer: Sandoori
Sandoori is a technique where Satsuki double jumps and immediately airdashes back, which allows a very hard to react to crossup high. Input frame perfectly, sandoori is only 2 frames slower than a regular airdash back.
This video contains example footage, slow motion instruction, and ways to practice it!
The input for sandoori can be 496, 476, or 76A+B. These inputs are all based on your original facing direction. For the two manual inputs, 4 can be input before or after crossing over, but the other inputs have to be after you are already past them. 496 will give a very fast sandoori. 476 will give a slower sandoori, because of required time to go from 7 to 6. It has the perk of moving you closer to your opponent, so in some cases where 496 will overshoot, 476 will be perfect. If the manual input is challenging, then it is acceptable to use the airdash macro instead.
Midscreen after 623A throw, 236A, or 63214C:
- Dash j8. This gives a 3 way mixup. Do the 8 as soon as the dash starts. After you're in the air, holding 6 gives crossup, doing nothing doesn't crossup, and holding 6 and doing an air backdash j.C gives high option without crossing up.
- 4A236[B]. This gives ambiguous crossup. Do it early and you'll cross over. Do it late and you won't.
Midscreen after 421A/B:
- sj9. This gives a 4 way mixup. Superjump forward will cross up or not depending on when you whiff an aerial attack. Whiff a j.B early and you won't cross up. Whiff it late and you will. Don't whiff anything for high options. Air backdash j.C for a noncrossup option and instant air backdash after you crossup for a crossup high option.
- 236[B]236[A]. This gives ambiguous crossup. Do it early and you'll cross over. Do it late and you won't.
Midscreen after 623C or 236C:
- Dash j8. This gives a 4 way. Holding 4 gets a noncrossup, holding 6 gives crossup, air backdash j.C gives noncrossup high, instant air backdash after crossing up gives crossup high.
Midscreen or corner with gap after 623[B], 236B, or 3C
- 29. This gives a 2 way mixup. Air backdash j.C for noncrossup and instant air backdash after crossing up for crossup high. You can try to go for lows if you know that they'll respect it, but it's not safe and can be mashed out of.
- 236[A]. Early to cross up, late to not cross up.
Corner with gap after 623C:
- Dash j8. This gives a 4 way mixup. Do the 8 as soon as the dash starts for crossup and do it a bit late after you've pushed their body into the corner for noncrossup. Air backdash j.C for high and instant air backdash j.C after jumping the dash early for crossup high.
Made F-Satsuki's setups can be made heat-safe with 5AA > 5C as 5C will clash on heat, allowing you to confirm into a full combo with 3C. This is particularly strong against characters with poor defensive options. If you think there is a chance that the opponent would rather heat on wakeup than gamble on holding your Oki, land and go for this string as a meaty low option.
These are just a few common setups but F-Satsuki has a bit more mixup potential than the other moons so there are ton of possible mixups you can go for: Extensive F-Satsuki Okizeme Guide
Defense
Because of the nature of Full Moon and lack of Crescent's 22X, F-Satsuki has somewhat weaker defensive options than her sister character.
2A, and 2C are generally her best abare options, notably with 2C as its speed and range are hard for many characters to contest when pressed on a gap in a blockstring. 2C(1) on a gap can be confirmed into (3C)236C for a full combo.
214C is the closest thing to a reversal she has but is not invulnerable, can be shielded on super flash, and has a sizeable deadzone above Satsuki, which makes this a decent option to respond to non A-normal meaties or gaps in pressure but a poor choice on wakeup or when low on health.
Lack of EX Shield limits her cancel options when shielding jump ins or overheads. Usually her best options out of shield are shield counter or 623X to respond to certain jump ins.
You can cancel into Bite from a clashed A normal to beat strike throw setups like F Hisui 22X but outside of this Bite is generally not the strongest defensive tool.
Generally your defense with F-Satsuki is going to be fairly fundamental, relying on mechanics like EX Guard to create openings to either mash or jump out.
Combos
| Combo Notation Help | |
|---|---|
| Disclaimer: Combos are written by various writers, so the actual notation used in pages can differ from the standard one. | |
| X > Y | X input is cancelled into Y. |
| X > delay Y | Must wait for a short period before cancelling X input into Y. |
| X, Y | X input is linked into Y, meaning Y is done after X's recovery period. |
| X+Y | Buttons X and Y must be input simultaneously. |
| X/Y | Either the X or Y input can be used. |
| X~Y | This notation has two meanings.
|
| X(w) | X input must not hit the opponent (Whiff). |
| j.X | X input is done in the air, implies a jump/jump cancel if the previous move was done from the ground. Applies to all air chain sections:
|
| sj.X | X input is done after a super jump. Notated as sj8.X and sj9.X for neutral and forward super jumps respectively. |
| dj.X | X input is done after a double jump. |
| sdj.X | X input is done after a double super jump. |
| tk.X | Stands for Tiger Knee. X motion must be buffered before jumping, inputting the move as close to the ground as possible. (ex. tk.236A) |
| (X) | X is optional. Typically the combo will be easier if omitted. |
| [X] | Input X is held down. Also referred to as Blowback Edge (BE). Depending on the character, this can indicate that this button is held down and not released until indicated by the release notation. |
| ]X[ | Input X is released. Will only appear if a button is previously held down. This type of input is referred to as Negative Edge. |
| {X} | Button X should only be held down briefly to get a partially charged version instead of the fully charged one. |
| X(N) | Attack "X" should only hit N times. |
| (XYZ)xN | XYZ string must be performed N times. Combos using this notation are usually referred to as loops. |
| (XYZ^) | A pre-existing combo labelled XYZ is inserted here for shortening purposes. |
| CH | The first attack must be a Counter Hit. |
| Air CH | The first attack must be a Counter Hit on an airborne opponent. |
| 66 | Performs a ground forward dash. |
| j.66 | Performs an aerial forward dash, used as a cancel for certain characters' air strings. |
| IAD/IABD | Performs an Instant AirDash. |
| AT | Performs an Air Throw. (j.6/4A+D) |
| IH | Performs an Initiative Heat. |
| AD | Performs an Arc Drive. |
| AAD | Performs an Another Arc Drive. |
All corner combos involving 2[C], 2C can be used midscreen by using dash 2C instead. Some characters require dash 2C. 2C(2) > 3C starter works better than 5C > 3C in corners and if you're too far away.
623[A] > j[C] - The Link
Almost all of F-Satsuki's routes require you to connect 623[A] > j[C]. This is a one-frame link.
To make this more consistent, you can to use a technique called “plinking” to make the link an entire frame more lenient and double your chances of not dropping.
To plink this, jump after the 623[A]; press and hold C, then one frame later press and hold 5E (stick MUST be at 5).
It might feel strange at first, but eventually you will get extremely consistent at pressing C and E exactly one frame apart. Humans are good at this sort of thing.
Don't get too pressed about missing this link as it is very challenging to get this consistent at first. It's worth noting that if you drop this link, the opponent must also plink within the same one-frame window to air tech out.
Get used to seeing Invalid! on your combo counter.
Normal Combos
Metered Combos
IH Combos
Move Descriptions
| Frame Data Help | |
|---|---|
| Header | Tooltip |
| Move Box Colors |
Light gray = Collision Box (A move lacking one means it can go through the opponent's own collision box). |
| Damage | Base damage done by this attack.
(X) denotes combined and scaled damage tested against standing V. Sion. |
| Red Damage | Damage done to the recoverable red health bar by this attack. The values are inherently scaled and tested against standing V. Sion.
(X) denotes combined damage. |
| Proration | The correction value set by this attack and the way it modifies the scaling during a string. See this page for more details.
X% (O) means X% Overrides the previous correction value in a combo if X is of a lower percentage. |
| Circuit | Meter gained by this attack on hit.
(X%) denotes combined meter gain. |
| Cancel | Actions this move can be cancelled into.
SE = Self cancelable. |
| Guard | The way this move must be blocked.
L = Can block crouching |
| Startup | Amount of frames that must pass prior to reaching the active frames. Also referred to as "True Startup". |
| Active | The amount of frames that this move will have a hitbox. (x) denotes frame gaps where there are no hitboxes is present. Due to varied blockstuns, (x) frames are difficult to use to determine punish windows. Generally the larger the numbers, the more time you have to punish. |
| Recovery | Frames that this move has after the active frames if not canceled. The character goes into one frame where they can block but not act afterwards, which is not counted here. |
| Advantage | The difference in frames where you can act before your opponent when this move is blocked (assuming the move isn't canceled and the first active frame is blocked). If the opponent uses a move with startup that is at least 2 frames less than this move's negative advantage, it will result in the opponent hitting that move. |
| Invul | Lists any defensive properties this move has.
X y~z denotes X property happening between the y to z frames of the animations. If no frames are noted, it means the invincibility lasts through the entire move. Invicibility:
Hurtbox-Based Properties:
Miscellaneous Properties
|
Normal Moves
Standing Normals
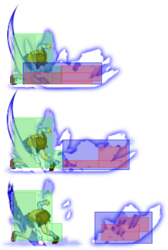
5A
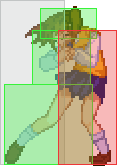
5B
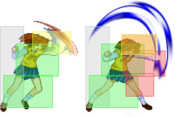
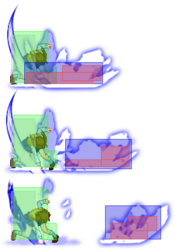
5C
5C
5[C] |
|---|
Crouching Normals
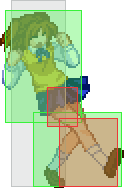
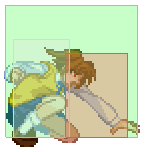
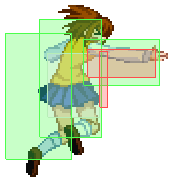
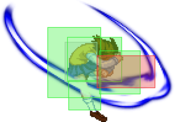
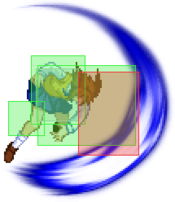
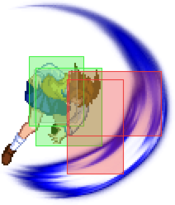
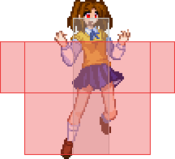
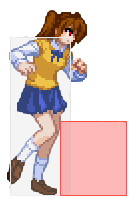
2A
2B
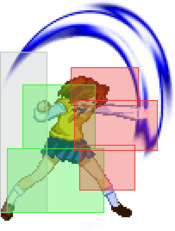
2C
2C
2[C] |
|---|
Aerial Normals
Notes:
- All of F-Satsuki's air normals except for j.[C] can only be cancelled into Initiative Heat. j.[C] retains regular cancel properties which in F-Satsuki's case are double jump cancel, air throw or IH.
- j.A doesn't recover in mid-air unlike with most characters.
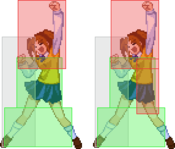
j.A
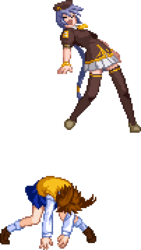
yes, that's where the frame data is, sacchin yes, that's where the frame data is, sacchin
|
|---|
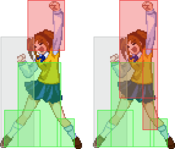
j.B
j.C
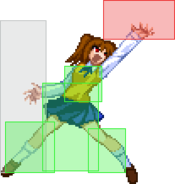
j.C
j.[C] |
|---|
Command Normals
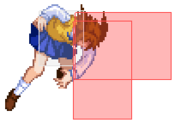
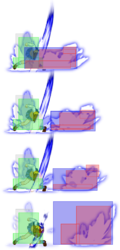
3C
3C
3[C] |
|---|
Universal Mechanics
Ground Throw
Ground Throw
6/4A+D |
|---|
Air Throw
Air Throw
j.6/4A+D |
|---|
Shield Counter
Shield Counter
236D after a successful Shield (Air OK) |
|---|
Shield Bunker
Shield Bunker
214D in neutral or blockstun |
|---|
Blood Heat
Blood Heat
A+B+C during MAX |
|---|
Circuit Spark
Circuit Spark
A+B+C during hitstun/blockstun at MAX |
|---|
Special Moves
236X
Sacchin Arm: Aerial Dash
236A/[A]/B/[B]/C |
|---|
623X
Sacchin Arm: Chasing the Uncatchable Dream 623A/[A]/B/[B]/C A A [A] [A] B B [B] [B] EX EX
|
|---|
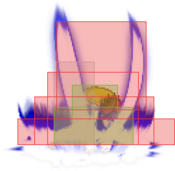
214X
Here I go~! 214A/[A]/B/[B]/C A A B B [B] [B] EX EX
|
|---|
421X
22X
Don't come near me! 22A/B/C A A B B EX (2nd Projectile) EX (2nd Projectile)
|
|---|
63214C
Sorry, just one bite!
63214C |
|---|
Arc Drive
Now I'm mad...!
41236C during MAX/Heat |
|---|
Another Arc Drive
Now I'm mad...!
41236C during Blood Heat |
|---|
Last Arc
Reality Marble - Depletion Garden
Grounded EX Shield during Blood Heat |
|---|

