Additional Resources
C-P.Ciel Match Video Database
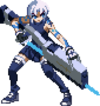
Overview
Playstyle
 C-PCiel is a character that offers good damage, corner carry, and a very straightforward, but effective setplay that nullifies conventional Wake up options. C-PCiel is a character that offers good damage, corner carry, and a very straightforward, but effective setplay that nullifies conventional Wake up options. |
| Pros |
Cons |
- Lot's of buttons: She offers a variety of (mostly) disjointed normals that complement her ability to combo, poke, anti-air, whiff punish, and even confirm at long ranges.
- Survivability: Being able to ex-guard, ex-shield, and also having access to the fastest heat in the game (not counting necos) alongside with Hime, that has a pretty generous hitbox, she does better in terms of defense than the other two moons.
- Horizontal Lightning: The character's defining move, uncharged versions of 214A/B and j.214A/B have their purpose as okay, long range pokes in neutral, while charged versions are used for her okizeme after every single hard knockdown, which is very hard to disrespect.
- Air to Air: C-P.Ciel j.B and j.C are good air buttons that will secure your needed air CH's to get your game started.
- Timer Scammer: While not as good as F in that regard, C-PCiel combos still take a while to do, specially in the corner, so opponents will have problems trying to comeback if time becomes a factor for them.
- Comboable throw: Just like Miyako, P.Ciel offers a combo after every successfull grab anywhere on the screen, giving more reward compared to other throws in the game, and since opponents are unable to burst out, you can make them waste MAX mode with a long combo.
- Pressure: C-P.Ciel pressure is good, her buttons have large cancel windows to compensate for their lack of + frames, so you can heavily punish your opponent for trying to press buttons.
|
- Unorthodox combos: C-P.Ciel combo routes differ greatly from the majority of the cast, even when comparing her to the other moons, she has to do different things for damage and corner carry, which can be hard/tedious to pull off consistently.
- Awkward Neutral: P.Ciel has bad mobility in both the air and on the ground, and out of all her moons, C is the one that has the weakest tools for neutral, so being put in an unadvantageous position is more likely to happen.
- Air to Ground: C-P.Ciel air buttons are serviceable in air to air situations, but they are not the best against grounded opponents, so you are susceptible to being anti-aired, specially against characters that have dedicated buttons for that, like H/F-Kouma's 2B.
- Mediocre Defense: Even with C-Moon's mechanics, she still has poor health, slower than average abare due to fastest normals being active at the 6th frame, slower jump startup than the rest of the cast, and no good reversals outside of Heat, which can be baited just like any other in the game.
- Meter Usage: She does have good meter gain but terrible meter dump options that don't help her achieve her goal, so you are most likely to use meter for Heat or burst when you are in MAX.
- Charged Lightning is weak to bunker: 214[A]/[B] goes away if C-Pciel gets hit, this means that regular bunker, and specially H bunker are a strong option that your opponent has to disrespect your Okizeme, requiring you to have good reactions to Ex-Shield and punish.
|
Notable Players
| Name |
Color
|
Region |
Common Venues |
Status |
Details
|
| ueda (上田) |

|
Japan |
Kirisugu |
Inactive |
The original C-P.Ciel main also known as kuga (くが) , sometimes shows some weird, if not questionable decision making, but he's still the best one to watch in Japan.
|
| ashie (あしぇ) |
|
Japan |
KorewaMelty |
Inactive |
More recent C-P.Ciel player, not that much footage to watch, but i recommend checking him out if you are starting to learn the character.
|
Starlow
(StarlowMora#3060) |

|
South America |
Netplay |
Active |
I edited the wiki, not a lot of matches to be found yet, but if you have questions about the character, i can answer, just DM me on discord. :)
|
General Gameplan
C-P.Ciel overall gameplan revolves around trying to secure a hit in neutral, getting that hard knockdown, locking your opponents with Lightning Okizeme, starting your offense and forcing them to guess, primarily with your strong Strike/Throw game, and if they make a mistake, you loop the process over and over again until they lose.
Neutral
Getting anything done in neutral can be challenging against some MU's, but you are already struggling in general, since you are the slowest character in the game, so a lot of patience and good decision making is crucial to play C-P.Ciel.
If you want to move in the ground, her dash has a fixed travel distance, that also allows you to dashblock, just keep in mind that you are vulnerable during that extra startup frames.
Also in the ground, the most common buttons you will be using are 5B, which is good for poking and anti-airing, for long range confirms and punishes, you have 5C > 236A for a guaranteed combo even at tip range, and whenever you are looking for a whiff-punish, press your magic 3C.
623A and 623B are DP's that retain your air options when the recovery ends, so you can use those as a tool to occasionally navigate through neutral instead of jumping.
You can sometimes try to chip your opponent with 214A/B and j.214A/B, it has increased utility against characters that want to put stuff on the screen, like Nero and Aoko.
In the air you will be trying to fish for counterhits, so you switch between j.B and j.C depending on the situation, and in extreme cases you can use j.A, if you have good reactions you can confirm a regular hit with any of these into Air DP.
j.C is your best jump in tool, but it's not particularly good for that purpose, and smart opponents will try to anti-air you a lot. In order to not become too predictable with your aerial approaches, you do have air dodge, and also j.214A/B for stalling, since it does actually retain your air options.
Pressure
C-PCiel is strong when in this regard, she has good buttons with large cancel windows, a strong, comboable throw, and a workable overhead/low game, how do you use these tools will depend on how your opponents reacts during the match. Most of your damage will come from your Strike/Throw game, and 95% of your pressure resets will be done with your ground dash, IAD resets are not good with this character, and you don't have guaranteed ways to extend pressure with specials or EX moves.
2A > delay 5B > 5A whiff > dash X
2A > 2B > delay 5B
2A > delay 2A > dash 5A
2AA > 2B > delay 6C
2AAA > walk Throw/Button
These are just a few examples to get started on your pressure, the cancel windows on your normals alone can make your opponents think twice before pressing a button, but you might also want to condition them to stop jumping, and granted you can check jumps, sometimes it might be hard get a good confirm out of these, but it's still doable.
Once you condition your opponent to block more often, you can complement your offense with 6[B]/6B>2A to mix your opponent from time to time.
214[B] can be used as a pressure reset, but it might not work against good players without a considerable amount of conditioning, and some character have access to EX moves they can use on reaction to punish you whenever they feel like using meter, like C/H-Ciel's 236C, so you better know what are you fighting against.
Okizeme
You do your combo, get the hard knockdown with the divekick, then OTG with 236B~B, and finally, you put a 214[A] or 214[B] on their wake-up, pretty simple.
Since your setplay is based around a projectile, which lasts for a very long time, and gives you a lot of + frames, your opponents have very limited options outside of blocking, we're gonna talk about them now.
- Shield: If they decide to do this, they are forced to shield every tick of your lightning, so it's very easy to just punish with a throw, but some opponents might purposefully sacrifice a little bit of health to do it, since shielding your okizeme gives them a lot of meter, and if you decide to punish with a throw, you are going to give them even more. Unfortunately there's no way to prevent C and F moons from doing that, but you can actually punish H moon characters way harder, if they shield your lightning, you run and make them also shield your 5A, this will make them automatically do a shield counter, and since it has a fixed startup, you can ex-shield and punish, doing more damage than with a regular throw.
- Bunker: The overview isn't lying, your charged lightnings disappear if you get hit, so regular bunker is a strong option against it. You have a harder time against H Bunker, because it's faster, safer, and gives even more reward to your opponent with a hard knockdown. Luckily for you, bunkers have fixed startup, you only got to look out if your opponent is using H or not, so it's possible to get consistent with your Ex-shield punishes, but you still have to be cautious, since your opponent can always alter their timing when they want to disrespect your okizeme.
Defense
As C-P.Ciel, you don't struggle as much as the other two, but your defensive options are still not good, so a careful use of your system mechanics and the tools in your kit is very important to do well with this character.
You have access to a really fast heat, with a good hitbox, you use it on wake up or against predictable approaches. and it will certainly save you from a lot of bad situations, but use it sparingly, since it's your only reversal, and smart opponents will try to bait it. You can also flip the coin doing wake-up shield whenever you feel like it, but you would want to block most of the time, do ex-guard as much as you can to push them away and have more opportunity to do stuff, and if you are paying attention, you can even start shielding and punish your opponent for fake stuff like F-Miyako's 421A or C-Arc's 236[A], you can also bunker specific multi-hitting stuff, like C/H-Aoko's 63214B.
The easiest option when you notice a gap in your opponent's offense is to jump, which might have increased startup than the rest of the cast, but it still works and is not as risky as trying to press your slower than average buttons.
When you want to mash, you might be tempted to use a lot of 3C as abare, but this button has a lot of recovery on whiff, making it particularly weak against IAD resets, so i suggest mixing it up with 2A, it's not very good, but that faster recovery time might prove useful sometimes.
If you are expecting an IAD reset you can always try to use 5A or 623A when you see it.
Speaking of 623A, it's faster than 2A and 3C, but take in consideration the extra time and effort to put the motion. If it whiffs or it gets blocked, you are left in the air and close to the opponent, which is not the best place to be, if the DP actually hits, sometimes you won't get a good confirm, but if you are lucky, you might get a CH trade on your favor, giving you enough time to recover and do a 3C pickup for a combo.
In any gap during your opponents pressure, you can use 623C as a sort of get out of the jail free card, since you don't need meter to do combos or extend pressure, and very few characters can actually punish you for doing it, C/H-Ciel's 236C, H-Roa's 236C and Hime with j.236C.
Combos
| Combo Notation Help
|
Disclaimer: Combos are written by various writers, so the actual notation used in pages can differ from the standard one.
For more information, see Glossary and Controls.
|
| X > Y
|
X input is cancelled into Y.
|
| X > delay Y
|
Must wait for a short period before cancelling X input into Y.
|
| X, Y
|
X input is linked into Y, meaning Y is done after X's recovery period.
|
| X+Y
|
Buttons X and Y must be input simultaneously.
|
| X/Y
|
Either the X or Y input can be used.
|
| X~Y
|
This notation has two meanings.
- Use attack X with Y follow-up input.
- Input X then within a few frames, input Y. Usually used for option selects.
|
| X(w)
|
X input must not hit the opponent (Whiff).
|
| j.X
|
X input is done in the air, implies a jump/jump cancel if the previous move was done from the ground.
Applies to all air chain sections:
- Assume a forward jump cancel if no direction is given.
- Air chains such as j.A > j.B > j.C can be shortened to j.ABC.
|
| sj.X
|
X input is done after a super jump. Notated as sj8.X and sj9.X for neutral and forward super jumps respectively.
|
| dj.X
|
X input is done after a double jump.
|
| sdj.X
|
X input is done after a double super jump.
|
| tk.X
|
Stands for Tiger Knee. X motion must be buffered before jumping, inputting the move as close to the ground as possible. (ex. tk.236A)
|
| (X)
|
X is optional. Typically the combo will be easier if omitted.
|
| [X]
|
Input X is held down. Also referred to as Blowback Edge (BE). Depending on the character, this can indicate that this button is held down and not released until indicated by the release notation.
|
| ]X[
|
Input X is released. Will only appear if a button is previously held down. This type of input is referred to as Negative Edge.
|
| {X}
|
Button X should only be held down briefly to get a partially charged version instead of the fully charged one.
|
| X(N)
|
Attack "X" should only hit N times.
|
| (XYZ)xN
|
XYZ string must be performed N times. Combos using this notation are usually referred to as loops.
|
| (XYZ^)
|
A pre-existing combo labelled XYZ is inserted here for shortening purposes.
|
| CH
|
The first attack must be a Counter Hit.
|
| Air CH
|
The first attack must be a Counter Hit on an airborne opponent.
|
| 66
|
Performs a ground forward dash.
|
| j.66
|
Performs an aerial forward dash, used as a cancel for certain characters' air strings.
|
| IAD/IABD
|
Performs an Instant AirDash.
|
| AT
|
Performs an Air Throw. (j.6/4A+D)
|
| IH
|
Performs an Initiative Heat.
|
| AD
|
Performs an Arc Drive.
|
| AAD
|
Performs an Another Arc Drive.
|
All C-PCiel's routes will have a demonstration video if you click on the expand button.
Sometimes when you are going for j.C > j.236A~X, due to the hurtboxes of some characters like Hime, Ries, and particularly Nanaya, the divekick will make you switch sides, which really hurts your okizeme with 236B~B, so against those character, i suggest skipping j.C and doing j.236A~X, or do some more advanced corner carry combos.
Normal Combos
| Condition
|
Notation
|
Damage
vs V.Sion
|
Notes
|
|
| Normal starter, grounded opponent
|
- 2A > 2B > 5B > 5C > 6C > 236B~C > 3C > small delay > 6C > 6B > 2B > 5C > j.C > j.236A~A > 236B~B
|
4962
|
| |
| Meter Gained: 78.5% |
Meter Given (vs C-Moon): 25.2% |
| Demonstration Simple, and relatively easy combo that you can do when you are starting with the character. |
|
|
| Normal starter, grounded opponent
|
- 2A > 2B > 5B > 5C > 6C > 236B~C > dash > 2B > 6B > 3C > small delay > 2C > 3C > 6C > 6B > 2B > 5C > j.C > j.236A~A > 236B~B
|
5258
|
| |
| Meter Gained: 103.5% |
Meter Given (vs C-Moon): 38.6% |
| Demonstration More optimal midscreen route that you should generally go for. |
|
|
Corner Combos
| Condition
|
Notation
|
Damage
vs V.Sion
|
Notes
|
|
| Normal starter, grounded opponent
|
- 2A > 2B > 5B > 5C > 6C > 236B~C > 236[A] > 2B > 6B > 3C > small delay > 2C > 3C > 6C > 6B > 2B > 5C > j.C > j.236A~A > 236B~B
|
5469
|
| |
| Meter Gained: 115.5% |
Meter Given (vs C-Moon): 46.5% |
| Demonstration Basic corner optimized combo. 236[A] only connects with the second hit in this combo. |
|
|
| Normal starter, grounded opponent
|
- 2A > 2B > 5B > 5C > 6C > 236B~C > 236[A] > 5[C] > 236[A] > 6[B] > 236[A] > dash 2B > 6B > 3C > 2C > 3C > delay 6C > 6B > 2B > 5C > 4C > AT > j.236A~A > 236B~B
|
6018
|
| |
| Meter Gained: 160.5% |
Meter Given (vs C-Moon): 87.8% |
| Demonstration Optimal corner combo, this combo takes a lot of time to pull off, also look how much meter you are giving to your opponent. |
|
|
| Normal starter, grounded opponent
|
- 2A > 2B > 5B > 5C > 6C > 236B~C > 236[A] > delay 236B~A > 3C > 6C > 6B > 2C > 3C > delay 6C > 6B > 2B > 5C > 4C > AT > j.236A~A > 236B~B
|
5892
|
| |
| Meter Gained: 134.5% |
Meter Given (vs C-Moon): 52,2% |
| DemonstrationThis combo is good since it gives less meter to the opponent than the one above, with very little damage lost, and it takes a bit less time to pull off.
Against Satsuki, Ries, and Roa, you cant do 2C OTG properly, so you have 2 options, either go straight into AT, or be extra precise with the 236B~A so the 2C will hit before your opponent gets to the ground, like shown in this Video. |
|
|
Advanced Combos
These routes can be optimized, i did only put the ones that give the least amount of meter to the opponent, and again, click the expand button to see a demonstration video.
| Condition
|
Notation
|
Damage
vs V.Sion
|
Notes
|
|
| Cornered Opponent
|
- 5[C] > 4C > AT > j.236A~X > land 3C > 6C > 6B > 2B > 5A > AT > delay j.236A~X > 236B~B
|
4495
|
| |
| Meter Gained: 89% |
Meter Given (vs C-Moon): 29.4% |
| Demonstration Route for 5[C] starter that gives you lightning okizeme. |
|
|
| Normal starter, grounded opponent, almost anywhere
|
- 2A > 2B > 5C > 6C > 236B~C > 6[B] > 236[A] > 5[C] > 236[A] > dash 3C > small delay 6C > 6B > 2B > 5C > 4C > AT > j.236A~X > 236B~B
|
5694
|
| |
| Meter Gained: 118.5% |
Meter Given (vs C-Moon): 43.1% |
| Demonstration Optimal corner carry combo. You can't do this combo when you have your back directly in the corner against small characters or the ones that have weird hurtboxes, requiring you to be just a bit further away from it. |
|
|
Cornered Opponent, backthrow starter
Works On: Arcueid, Hime, Nero, Wara
|
- Backthrow > 2B > 5B > 6C > 3C > 4C > 6B > 5[C] > 236[A] > 5[C] > 236[A] > dash 3C > small delay 6C > 6B > 2B > 5C > 4C > AT > j.236A~X > 236B~B
|
3349 (vs Arcueid)
|
| |
| Meter Gained: 141,5% |
Meter Given (vs C-Moon): 56.8% |
| Demonstration |
|
|
Cornered Opponent, backthrow starter
Works On: V.Sion, Tohno, Nanaya, Miyako, WArc, Aki, VAki, Sei, Koha, Aoko, Kouma.
|
- Backthrow > 2B > 5B > 3C > 4C > 6B > 5[C] > 236[A] > 5[C] > 236[A] > dash 3C > small delay 6C > 6B > 2B > 5C > 4C > AT > j.236A~X > 236B~B
|
3543
|
| |
| Meter Gained: 136,5% |
Meter Given (vs C-Moon): 52.8% |
| Demonstration You need to do a delayed 6B after the 4C against Kouma and Aoko. |
|
|
Cornered Opponent, backthrow starter
Works On: Sion, Ries, Roa, Hisui, Mech.
|
- Backthrow > 2B > delay 3C > 4C > 6B > 5[C] > 236[A] > 5[C] > 236[A] > dash 3C > small delay 6C > 6B > 2B > 5C > 4C > AT > j.236A~X > 236B~B
|
3383 (vs Sion)
|
| |
| Meter Gained: 136,5% |
Meter Given (vs C-Moon): 52.8% |
| Demonstration |
|
|
Cornered Opponent, backthrow starter
Works On: Ryougi, Len, WLen.
|
- Backthrow > 2B > 3C > 4C > delay 6B > 5[C] > 236[A] > dash 3C > small delay 6C > 6B > 2B > 5C > 4C > AT > j.236A~X > 236B~B
|
3462 (vs Ryougi)
|
| |
| Meter Gained: 111,5% |
Meter Given (vs C-Moon): 37.6% |
| Demonstration |
|
|
Safe Heat Setups
These combos give you safe heat + Lightning Okizeme, Setup #2 is for characters that the combo on Setup #1 is possible, but since they have some kind of meterless/metered reversal, they can hit you without allowing you to recover, and Setup #3 is for characters that neither of the first two options work, once again, demonstration videos for everyone.
Unfortunately no setup is good enough against C/H-Ciel's 236C, H-Ryougi's 22C, and F-Vsion's 214C, because those reversals will still hit you if you try to go for 214[A]/[B], so they are not forced to respect you whenever they have meter to spend.
| Condition
|
Notation
|
Damage
vs V.Sion
|
Notes
|
|
Normal/Throw starter, cornered Opponent
Works On: Vsion , Koha, Hisui, Hime, C/H-Tohno, F-Ries, Kouma, Roa, Mech, H/F-Nero, Wara.
|
- 2A > 2B > 5B > 5C > 6C > 236B~C > 236[A] > 5[C] > 236[A] > 6[B] > 236[A] > 6[B] > 5A(w) > Heat > 214[B]
|
4495
|
| |
|
|
Cornered Opponent, backthrow starter
Works On: Sion, Aoko, Nanaya, F-ciel, F-tohno, C/H-ries, Satsuki, C-Nero.
|
- Backthrow > 236B~massive delay C > 6[B] > 236[A] > 6[B] > 236[A] > 6[B] > 5A(w) > Heat > 214[A]
|
1492 (vs Nanaya)
|
| |
|
|
Cornered Opponent, backthrow starter
Works On: Aki, Vaki, Sei, Miyako, Len, Wlen, WArc, C/F-Ryougi
|
- Backthrow > 236B~massive delay C > walk back 3C > 6C > 6B > 5[C] > delay 236[A] > 5[C] > 6[B] > 5A(w) > Heat > 214[A]
|
2145 (vs Vakiha)
|
| |
|
|
Move Descriptions
| Frame Data Help
|
| Header
|
Tooltip
|
| Move Box Colors
|
Light gray = Collision Box (A move lacking one means it can go through the opponent's own collision box).
Green: Hurt Boxes.
Red: Hit(/Grab) Boxes.
Yellow: Clash Boxes (When an active hitbox strikes a clash box, the active hitbox stops being active. Multi-hit attacks can beat clash since they will still progress to the next hitbox.)
Magenta: Projectile-reflecting boxes OR Non-hit attack trigger boxes (usually).
Blue: Reflectable Projectile Boxes.
|
| Damage
|
Base damage done by this attack.
(X) denotes combined and scaled damage tested against standing V. Sion.
|
| Red Damage
|
Damage done to the recoverable red health bar by this attack. The values are inherently scaled and tested against standing V. Sion.
(X) denotes combined damage.
|
| Proration
|
The correction value set by this attack and the way it modifies the scaling during a string. See this page for more details.
X% (O) means X% Overrides the previous correction value in a combo if X is of a lower percentage.
X% (M) means the current correction value in a combo will be Multiplied by X%. This can also be referred to as relative proration.
|
| Circuit
|
Meter gained by this attack on hit.
(X%) denotes combined meter gain.
-X% denotes a meter cost.
|
| Cancel
|
Actions this move can be cancelled into.
SE = Self cancelable.
N = Normal cancelable.
SP = Special cancelable.
CH = Cancelable into the next part of the same attack (Chain in case of specials).
EX = EX cancelable.
J = Jump cancelable.
(X) = Cancelable only on hit.
-X- = Cancelable on whiff.
|
| Guard
|
The way this move must be blocked.
L = Can block crouching
H = Can block standing.
A = Can block in the air.
U = Unblockable.
|
| Startup
|
Amount of frames that must pass prior to reaching the active frames. Also referred to as "True Startup".
|
| Active
|
The amount of frames that this move will have a hitbox.
(x) denotes frame gaps where there are no hitboxes is present. Due to varied blockstuns, (x) frames are difficult to use to determine punish windows. Generally the larger the numbers, the more time you have to punish.
X denotes active frames with a duration separate from its origin move's frame data, such as projectile attacks. In this case, the total length of the move is startup+recovery only.
|
| Recovery
|
Frames that this move has after the active frames if not canceled. The character goes into one frame where they can block but not act afterwards, which is not counted here.
|
| Advantage
|
The difference in frames where you can act before your opponent when this move is blocked (assuming the move isn't canceled and the first active frame is blocked).
If the opponent uses a move with startup that is at least 2 frames less than this move's negative advantage, it will result in the opponent hitting that move.
±x~±y denotes a range of possible advantages.
|
| Invul
|
Lists any defensive properties this move has.
X y~z denotes X property happening between the y to z frames of the animations. If no frames are noted, it means the invincibility lasts through the entire move.
Invicibility:
- Strike = Strike invincible.
- Throw = Throw invincible.
Hurtbox-Based Properties:
- Full = No hurtboxes are present.
- High = Upper body lacks a hurtbox.
- Low = Lower body lacks a hurtbox.
Miscellaneous Properties
- Clash = Frames in which clash boxes are active.
- Reflect = Frames in which projectile-reflecting boxes are active.
- Super Armor = Frames in which the character can take hits without going into hit stun.
|
Normal Moves
Standing Normals
|
|
| Damage
|
Red Damage
|
Proration
|
Cancel
|
Guard
|
| 350
|
98
|
75% (O)
|
-SE-, -N-, -SP-, -EX-, (J)
|
LH
|
| First Active
|
Active
|
Recovery
|
Frame Adv
|
Circuit
|
Invuln
|
| 7
|
3
|
9
|
0
|
3.5%
|
-
|
|
Slightly disjointed knife stab. Mostly used for rebeats in pressure, also an emergency anti-air, but the slower startup makes it quite situational. Also, this is your only normal that is whiff-cancellable, which makes it very important for your safe heat setups.
|
|
|
|
| Damage
|
Red Damage
|
Proration
|
Cancel
|
Guard
|
| 600
|
392
|
80% (O)
|
N, SP, EX, (J)
|
LH
|
| First Active
|
Active
|
Recovery
|
Frame Adv
|
Circuit
|
Invuln
|
| 8
|
3
|
17
|
-5
|
5.0%
|
-
|
|
Very good button, large amount of disjointed red when it gets active, and a retreating hurtbox before that happens, very important tool all around. Unfortunately it has a noticeable recovery and not a lot of active frames, so you should be careful when trying to poke your opponent, specially if it has long range buttons  . .
|
|
|
|
| 5C
|
Damage
|
Red Damage
|
Proration
|
Cancel
|
Guard
|
| 1000
|
686
|
70% (O)
|
N, SP, EX, (J)
|
LH
|
| First Active
|
Active
|
Recovery
|
Frame Adv
|
Circuit
|
Invuln
|
| 11
|
3
|
24
|
-9
|
5.0%
|
-
|
|
Large swipe with her pile-bunker. Very impressive range, but it's best used as a combo and punish tool, due to the large recovery on whiff, and also that it won't hit crouching opponents from further away.
|
| 5[C]
|
Damage
|
Red Damage
|
Proration
|
Cancel
|
Guard
|
| 1000
|
686
|
70% (O)
|
N, SP, EX, (J)
|
LH
|
| First Active
|
Active
|
Recovery
|
Frame Adv
|
Circuit
|
Invuln
|
| 24
|
3
|
24
|
-9
|
8.0%
|
-
|
|
Charged version has slightly better hitboxes, moves you forward a lot, and that it wallbounces on hit. Good for catching jumps in the corner, but it's also used in combos.
|
|
Crouching Normals
|
|
| Damage
|
Red Damage
|
Proration
|
Cancel
|
Guard
|
| 300
|
98
|
72% (O)
|
SE, N, SP, EX, (J)
|
L
|
| First Active
|
Active
|
Recovery
|
Frame Adv
|
Circuit
|
Invuln
|
| 6
|
4
|
8
|
0
|
2.0%
|
-
|
|
Crouching knife poke that hits low. Quite bad for 2A standards, you can't even whiff cancel it, but it's still your main combo and pressure starter.
|
|
|
|
| Damage
|
Red Damage
|
Proration
|
Cancel
|
Guard
|
| 700
|
441
|
80% (O)
|
N, SP, EX, (J)
|
LH
|
| First Active
|
Active
|
Recovery
|
Frame Adv
|
Circuit
|
Invuln
|
| 8
|
4
|
17
|
-6
|
6.0%
|
-
|
|
Crouching knife slash that doesn't hit low. This is your optimal combo starter, and your only other option outside of 3C to beat Standing shield, not used a lot outside of that due to 5B being superior in most cases.
|
|
|
|
| Damage
|
Red Damage
|
Proration
|
Cancel
|
Guard
|
| 500*2 (838)
|
(657)
|
70% (O), 65% (O)
|
N, SP, EX, (J)
|
LH
|
| First Active
|
Active
|
Recovery
|
Frame Adv
|
Circuit
|
Invuln
|
| 10
|
2 (7) 3
|
11
|
-8, 4
|
5.0%*2 (10.0%)
|
Low 1-18
|
|
Multi hitting upward kick. Used a lot in combos, but it's nearly useless for everything else, the 2nd hit generates a lot of pushback, so you can't really abuse that +4 on block.
|
|
Jumping Normals
Notes:
- P.Ciel's air normals cannot be canceled into other air normals, double jump, air dashes or air throw. They can still be Special/EX canceled on block, however.
- j.A does not recover in midair, P.Ciel must land before recovering if j.A isn't canceled.
|
|
| Damage
|
Red Damage
|
Proration
|
Cancel
|
Guard
|
| 300
|
98
|
75% (O)
|
SP, EX
|
LHA
|
| First Active
|
Active
|
Recovery
|
Frame Adv
|
Circuit
|
Invuln
|
| 6
|
4
|
-
|
-
|
2.0%
|
-
|
|
This is not the greatest air to air button, and the fact that it doesn't recover in the air unlike other character's j.A makes it even worse, however, it's still your fastest option, and it can make the different between you and your opponent on who's going to get the CH.
|
|
|
|
| Damage
|
Red Damage
|
Proration
|
Cancel
|
Guard
|
| 500
|
392
|
90% (O)
|
SP, EX
|
HA
|
| First Active
|
Active
|
Recovery
|
Frame Adv
|
Circuit
|
Invuln
|
| 7
|
4
|
-
|
-
|
5.0%
|
-
|
|
Upward knife slash. Very important tool in neutral, respectable startup and decent disjoint, it will give the Counter hits you desperately need, whether your opponent is in front or above you.
|
|
|
|
| Damage
|
Red Damage
|
Proration
|
Cancel
|
Guard
|
| 1000
|
686
|
90% (O)
|
SP, EX
|
HA
|
| First Active
|
Active
|
Recovery
|
Frame Adv
|
Circuit
|
Invuln
|
| 10
|
5
|
-
|
-
|
7.0%
|
-
|
|
Split-kick. Your j.C is to fish for a CH from further away, offering more active frames and having a superior disjoint than j.B, but it's very risky to do when you are closer to the opponent, due to how slow it is.
As a jumpin tool, it can hit crossup, but it's startup and upward angled hitbox makes you very vulnerable to anti-airs, even rising j.A's will beat you clean with how slow it is, so be careful on how you approach a grounded opponent.
|
|
Command Normals
Wake up please Wake up please
|
| 6B
|
Damage
|
Red Damage
|
Proration
|
Cancel
|
Guard
|
| 600
|
294
|
50% (O)
|
N, SP, EX, (J)
|
LH
|
| First Active
|
Active
|
Recovery
|
Frame Adv
|
Circuit
|
Invuln
|
| 11
|
2
|
34
|
-18
|
4.0%
|
-
|
|
Hard knockdown vs any airborne target, crucial move for your combos just like 2C.
|
| 6[B]
|
Damage
|
Red Damage
|
Proration
|
Cancel
|
Guard
|
| 700
|
294
|
50% (O)
|
N, SP, EX, (J)
|
H
|
| First Active
|
Active
|
Recovery
|
Frame Adv
|
Circuit
|
Invuln
|
| 25
|
2
|
34
|
-18
|
5.0%
|
-
|
|
Charged version groundbounces an airbone target, it is used for your optimal corner combo, and also advanced routes alongside 5[C].
Charging this will make it an overhead, unfortunately quite reactable due to the pretty obvious startup animation, it also makes you prone to be mashed without some conditioning.
Mixing 6[B] with Half charge 6B > 2A will give you an overhead/low mix, stronger than F's mix because you have a better chance of keeping your pressure going.
This mix, while very strong in japanese arcades due to the extra input lag, you shoudn't abuse it very often in netplay, specially offline, because it's much easier to block, remember that you will primarily get your damage with your Strike/Throw game.
|
|
The Princess Sweep The Princess Sweep
|
| Damage
|
Red Damage
|
Proration
|
Cancel
|
Guard
|
| 800
|
294
|
65% (O)
|
N, SP, EX, (J)
|
L
|
| First Active
|
Active
|
Recovery
|
Frame Adv
|
Circuit
|
Invuln
|
| 6
|
4
|
27
|
-13
|
5.0%
|
-
|
|
If you played the other moons, it might annoy you that your sweep input requires a 3 input instead of a 2, also, unlike the other two, 3C doesn't move you forward.
Very fast for being a C normal, it's one of your better tools, you can always press this magic button when looking for a fast whiff punish, it can also be used in pressure to try and and catch your opponent doing something, but be careful because if they block it, there's a big chance you are going to return to neutral. If you use it as a poke, you can visually confirm whether it hits or gets blocked, if blocked you rebeat into 5A, and if it hits, you can do 2A > 6C into the air combo, or simply 236B~B for that hard knockdown and corner carry.
|
|
Linne is that you? Linne is that you?
|
| Damage
|
Red Damage
|
Proration
|
Cancel
|
Guard
|
| 800
|
686
|
80% (O)
|
N, SP, EX, (J)
|
LH
|
| First Active
|
Active
|
Recovery
|
Frame Adv
|
Circuit
|
Invuln
|
| 12
|
3
|
23
|
-8
|
5.0%
|
-
|
|
Upward slash similar to j.B, that is exclusively used for combos.
|
|
I'm inside I'm inside
|
| Damage
|
Red Damage
|
Proration
|
Cancel
|
Guard
|
| 1000
|
490
|
70% (O)
|
N, SP, EX, (J)
|
LH
|
| First Active
|
Active
|
Recovery
|
Frame Adv
|
Circuit
|
Invuln
|
| 12
|
4
|
25
|
-11
|
5.0%
|
Low 1-15
|
|
6C is special, it's used for both combos and pressure all around, but it has some particular uses on defense.
It offers some low-invul from frame 1, unlike F-Pciel's 5C where the invul starts at frame 3, this means that, your 6C, as a mashing tool, can low crush a lot of stuff, it certainly depends on the character, but to name an example, you can avoid C-Sion's 236A/B entirely.
Don't try to abuse it though, because this move is very slow, and you will get blown by any mid or move that has enough hitbox to hit you out of it.
|
|
Universal Mechanics
|
|
| Damage
|
Red Damage
|
Proration
|
Cancel
|
Guard
|
| 600
|
392
|
30%
|
(Any)
|
U
|
| First Active
|
Active
|
Recovery
|
Frame Adv
|
Circuit
|
Invuln
|
| 3
|
1
|
20
|
-
|
6.0%
|
-
|
|
A ground throw that gives no knockdown but acts as a combo starter, much like Miyako's.
|
|
|
|
| Damage
|
Red Damage
|
Proration
|
Cancel
|
Guard
|
1600 (1408, Raw)
1200
|
1034
|
30%
|
(Any if Raw)
(SP, EX)
|
U
|
| First Active
|
Active
|
Recovery
|
Frame Adv
|
Circuit
|
Invuln
|
| 2
|
1
|
12
|
-
|
16.0% (Raw)
12.0%
|
-
|
|
P.Ciel launches the opponent upwards. Hard knockdown if done raw, Air techable but special/EX cancelable if done in a combo.
|
|
|
|
| Bunker
|
Damage
|
Red Damage
|
Proration
|
Cancel
|
Guard
|
| 500
|
196
|
50%
|
-
|
LHA
|
| First Active
|
Active
|
Recovery
|
Frame Adv
|
Circuit
|
Invuln
|
| 26
|
4
|
19
|
-5
|
0.0%
(-50.0% in blockstun)
|
Clash 1-10
|
| (Clash)
|
Damage
|
Red Damage
|
Proration
|
Cancel
|
Guard
|
| 500
|
196
|
50%
|
-
|
LHA
|
| First Active
|
Active
|
Recovery
|
Frame Adv
|
Circuit
|
Invuln
|
| 8
|
4
|
19
|
-5
|
0.0%/-50.0%
|
Strike 1-7
|
|
Big bunker.
|
|
|
|
| Damage
|
Red Damage
|
Proration
|
Cancel
|
Guard
|
| 100
|
0
|
100%
|
-
|
U
|
| First Active
|
Active
|
Recovery
|
Frame Adv
|
Circuit
|
Invuln
|
| 15
|
5
|
26
|
-
|
-100.0% (min)
|
Full 1-19
|
|
Second fastest heat startup in the game along with Hime's, generous hitbox.
|
|
|
|
| Ground
|
Damage
|
Red Damage
|
Proration
|
Cancel
|
Guard
|
| 100
|
0
|
100%
|
-
|
U
|
| First Active
|
Active
|
Recovery
|
Frame Adv
|
Circuit
|
Invuln
|
| 11
|
10
|
20
|
-
|
removes all
|
Full 1-39
|
| Air
|
Damage
|
Red Damage
|
Proration
|
Cancel
|
Guard
|
| 100
|
0
|
100%
|
-
|
U
|
| First Active
|
Active
|
Recovery
|
Frame Adv
|
Circuit
|
Invuln
|
| 12
|
10
|
15
|
-
|
removes all
|
Strike 1-30
|
|
Universal burst mechanic. Unlike Crescent/Full Heat activation, the hitbox and frame data doesn't vary between characters. However, you can be thrown out of this move if you input it in the air.
|
|
Special Moves
Grounded Specials
A A [A] [A] ~A ~A ~B ~B ~C ~C
|
| A
|
Damage
|
Red Damage
|
Proration
|
Cancel
|
Guard
|
| 800*2 (1575)
|
(964)
|
100%, 50% (M)
|
-
|
LH
|
| First Active
|
Active
|
Recovery
|
Frame Adv
|
Circuit
|
Invuln
|
| 12
|
3 (8) 3
|
34
|
-19
|
7.0%*2 (14.0%)
|
Low 23-37
|
|
First P.Ciel dashes with her pile-bunker, and a hitbox appears to stab the opponent, and the second part is an automatic flip-kick follow up, it's odd in that it is EX cancellable on whiff until the kick animation starts.
On grounded opponents it will launch them into an air techable state, but it will give you enough time to do j.B/j.C > j.236A~X to have a hard knockdown, you won’t be able to combo if for some reason you hit an airborne opponent, since they will be able to tech much sooner.
This is -19 so it’s VERY punishable, use only when you need to.
|
| [A]
|
Damage
|
Red Damage
|
Proration
|
Cancel
|
Guard
|
| 800, 1100 (1865)
|
(1439)
|
100%, 70% (?)
|
-
|
LH, H
|
| First Active
|
Active
|
Recovery
|
Frame Adv
|
Circuit
|
Invuln
|
| 12
|
3 (19) 4
|
29
|
-35, -15
|
7.0%, 12.0% (19.0%)
|
Low 34-55
|
|
Charging the move makes the kick follow up change, suddenly it has a thicker hitbox, deals more damage, and your opponent can no longer tech mid air… it also becomes an overhead, but please don’t use it for that because it’s just a knowledge check, and it’s still quite minus on block, the good use for this move is for optimal combo routes.
|
| B
|
Damage
|
Red Damage
|
Proration
|
Cancel
|
Guard
|
| -
|
-
|
-
|
-CH-
|
-
|
| First Active
|
Active
|
Recovery
|
Frame Adv
|
Circuit
|
Invuln
|
| -
|
-
|
46
|
-
|
6
|
Clash 6-20
|
|
P.Ciel rushes forward pretty much like 236A, but it moves her 3/4 of the screen very fast, and with no stab hitbox, but with a yellow clash box.
Being only a single point of clash, multihitting attacks (and also lows) will kill you, so it’s really not MU changer or anything you can abuse in neutral, it's ok against single hit projectiles, and it certainly can work but you will get blown more often than not if you are randomly trying to catch something with the clash.
The actual good thing about 236B comes from his 3 optional follow ups, it’s important to know that if you were to cancel into any of the follow-ups listed below, you instantly lose the clash box.
|
| ~A
|
Damage
|
Red Damage
|
Proration
|
Cancel
|
Guard
|
| 1200
|
980
|
50% (O)
|
-
|
LH
|
| First Active
|
Active
|
Recovery
|
Frame Adv
|
Circuit
|
Invuln
|
| 23
|
4
|
30
|
-16
|
12.0%
|
-
|
|
Large, unshieldable, and air unblockable pile-bunker explosion in front of you, this is the least used follow-up, outside of one specific combo in the corner, there’s not too much you can do with this move, but I guess it’s okay to very rarely throw this in neutral to see if you catch your opponent off guard, it’s quite minus but at longer ranges you should be fine in most cases.
|
| ~B
|
Damage
|
Red Damage
|
Proration
|
Cancel
|
Guard
|
| 1500
|
980
|
100%
|
-
|
LH
|
| First Active
|
Active
|
Recovery
|
Frame Adv
|
Circuit
|
Invuln
|
| 19
|
6
|
39
|
-27
|
10.0%
|
-
|
|
This move, being also unshieldable and air unblockable, with the added bonus of a hard knockdown, might be tempting to use as an anti-air, but as you can see, the hitbox is not as big as the actual animation, and it has 39f of recovery, so if it whiffs you should get punished every single time, same thing if they block it in the ground because it’s -27.
The real use for this move is to OTG after every single combo you do, letting you start your setplay.
|
| ~C
|
Damage
|
Red Damage
|
Proration
|
Cancel
|
Guard
|
| 700
|
490
|
70% (M)/65% (O)*
|
-
|
LH*
|
| First Active
|
Active
|
Recovery
|
Frame Adv
|
Circuit
|
Invuln
|
| 9
|
4
|
30
|
-15
|
5.0%
|
Low 9-24
|
|
Your most common follow up, it is the flipkick from 236A, but it's air untechable whenever you hit a grounded opponent, acting as your main launcher in any combo.
You can ocassionaly use it as an anti air, a regular hit doesn't give you good reward, but an air CH will give you a full combo, just be careful on how you use it, because the flipckick has a significant amount of recovery, and it's very minus, so best case scenario will be your opponent taking his turn.
|
| EX
|
Damage
|
Red Damage
|
Proration
|
Cancel
|
Guard
|
| 250*10, 1400 (3106)
|
(1324)
|
100%
|
-
|
LH
|
| First Active
|
Active
|
Recovery
|
Frame Adv
|
Circuit
|
Invuln
|
| 1+3
|
36
|
27
|
0
|
-100.0%
|
-
|
|
Your worst EX move , no invul, no hard knockdown, and no + frames on block, however, this thing has a VERY specific use against a character like H-Kohamech, to prevent spikeball resets all day, you use 236C on reaction, it's fast enough to be a punish and avoid the spikeball, you will return to neutral, but it's certainly better than being on defense against that character.
|
|
623A~X followup 623A~X followup My people need me My people need me
|
| A
|
Damage
|
Red Damage
|
Proration
|
Cancel
|
Guard
|
| 500*3 (1336)
|
(883)
|
100%
|
-CH-, -J-
|
LH (1), LHA (2-3)
|
| First Active
|
Active
|
Recovery
|
Frame Adv
|
Circuit
|
Invuln
|
| 5
|
11
|
19
|
-
|
5.0%, 2.0%*2 (9.0%)
|
-
|
|
DP, your fastest abare option, hits 3 times, it doesn't have any invul, but it's still a workable anti-air, since your hurtbox shrinks a bit during startup and has a nice hitbox, the only problem is the fact that opponents can block it in the air, also, it retains your air options when you don't cancel it into it's follow up.
|
| ~X
|
Damage
|
Red Damage
|
Proration
|
Cancel
|
Guard
|
| 350*N
|
196*N
|
90% (M), 70% (O)
|
-
|
LHA
|
| First Active
|
Active
|
Recovery
|
Frame Adv
|
Circuit
|
Invuln
|
| 10
|
X
|
15
|
-4
|
2.0%*N
|
-
|
|
Optional divekick follow up, this is -4, so opponents can immediately take their turn if they block it, or do a throw punish if they are close enough, however if you hit them with the DP and you cancel in the follow up, you will be able to OTG with 3C into a combo if you can make the divekick hit 4 times, that’s hard or easy depending on hurtboxes, the good thing is that, if you don't get the hard knockdown with 4 hits and they decide to tech, you can actually tech punish with 5C, or 2A if they do it right next to you.
|
| B
|
Damage
|
Red Damage
|
Proration
|
Cancel
|
Guard
|
| 500, 1500, 110*4, 1000 (2318)
|
(1594)
|
100%, 40% (O)
|
-
|
LH (1), LHA
|
| First Active
|
Active
|
Recovery
|
Frame Adv
|
Circuit
|
Invuln
|
| 11
|
14
|
27
|
-
|
5.0%, 15.0%, 10.0% (30.0%)
|
-
|
|
This is a common option in neutral because just like 623A, you still retain your air options, but this sends you MUCH higher, allowing you to reposition yourself better, beware of how much space you are giving to your opponent when using it though, you can use this and control space at the same time like H.
It might be slow but it can still be used as a situational anti-air, because it has a much bigger hitbox and shrinks your hurtbox furthen than 623A, keep in mind that only the 1st part of the move (before you leave the ground) is air unblockable, your opponent can block the rest of the move in the air.
|
| EX
|
Damage
|
Red Damage
|
Proration
|
Cancel
|
Guard
|
| 1500, 250*6, 1000 (2489)
|
(1645)
|
100%, 40% (O)
|
-
|
LH
|
| First Active
|
Active
|
Recovery
|
Frame Adv
|
Circuit
|
Invuln
|
| 1+0
|
10
|
(~40)
|
-
|
-100.0%
|
Full 1
|
|
Fake reversal, since this move works as a hitgrab, any regular hitbox in contact with this right after the super flash will beat it, so you can't really use it on wake-up because meaties, just block please.
Can be used as an anti-air, but if your opponent didn't press any button, he will be able to shield it post super flash if not point blank.
The actual use for this would be to get out of the corner as soon as you see a gap on your opponents pressure, just like the others, you retain your air options on whiff and on block, also this move can avoid Nero's common crow setups.
|
|
A A B B [A]/[B] [A]/[B] EX EX The reason why you should play this character. The reason why you should play this character.
|
| A
|
Damage
|
Red Damage
|
Proration
|
Cancel
|
Guard
|
| 1000
|
686
|
50% (O)
|
-
|
LHA
|
| First Active
|
Active
|
Recovery
|
Frame Adv
|
Circuit
|
Invuln
|
| 22
|
4
|
17
|
-6
|
5.0%
|
-
|
|
Single hit, horizontal lightning, reaches more than 3/4 of the screen, even though it's -6, it has some implications in pressure, since it recovers so quickly, your opponents might react slowly to it, so you can actually catch them trying to do something after you recover.
|
| [A]
|
Damage
|
Red Damage
|
Proration
|
Cancel
|
Guard
|
| 250*14 (1514)
|
(1184)
|
50% (O)
|
-
|
LHA
|
| First Active
|
Active
|
Recovery
|
Frame Adv
|
Circuit
|
Invuln
|
| 34
|
49
|
64
|
33
|
0.8%*14 (11.2%)
|
-
|
|
Charged version is your most common okizeme tool after every 236B~B, deals okay chip damage, and gives you a lot of + frames to recover, run and start your pressure.
|
| B
|
Damage
|
Red Damage
|
Proration
|
Cancel
|
Guard
|
| 500*6 (1490)
|
(1023)
|
50% (O)
|
-
|
LHA
|
| First Active
|
Active
|
Recovery
|
Frame Adv
|
Circuit
|
Invuln
|
| 22
|
8
|
20
|
-1
|
1.0%*6 (6.0%)
|
-
|
|
B version is mostly the same, except the hitbox appears a little lower to the ground, and now is multi-hit, dealing good chip damage, and on hit, it launches the opponent.
This is the most common version to use on the ground, since it has the same startup as A version, with only a few more frames of recovery, but with greater benefits on hit and block.
|
| [B]
|
Damage
|
Red Damage
|
Proration
|
Cancel
|
Guard
|
| 250*17 (1528)
|
(1195)
|
50% (O)
|
-
|
LHA
|
| First Active
|
Active
|
Recovery
|
Frame Adv
|
Circuit
|
Invuln
|
| 30
|
38
|
60
|
26
|
0.5%*15, 2.5%*2 (12.5%)
|
-
|
|
214[B] can also be used as an okizeme, it deals greater chip damage than [A], but offers you less + frames to work with, this move is also the one you use for pressure resets, but it's slow so you better condition your opponent well enough.
|
| EX
|
Damage
|
Red Damage
|
Proration
|
Cancel
|
Guard
|
| 450*10 (2151)
|
(1876)
|
50% (O)
|
-
|
LHA
|
| First Active
|
Active
|
Recovery
|
Frame Adv
|
Circuit
|
Invuln
|
| 6+18
|
40
|
6+54
|
20
|
-100.0%
|
-
|
|
This is a pretty sad EX move, less + frames than charged versions, no apllications in neutral, and there's no way to actually extend pressure with this without making it fake, it's only redeeming quality is the fact that if C-Pciel gets hit, this lightning doesn't dissapear, so you can trick opponents into doing bunker when they are low on health, and they will lose.
The only practical use in any situation for 214C is when your opponent is already blocking 214[A] or 214[B] to increase the chip damage when you are in MAX.
|
|
Aerial Specials
j.236A~X followup j.236A~X followup B/EX B/EX
|
| A
|
Damage
|
Red Damage
|
Proration
|
Cancel
|
Guard
|
| 500*2 (925)
|
(543)
|
100%
|
-CH-
|
LHA
|
| First Active
|
Active
|
Recovery
|
Frame Adv
|
Circuit
|
Invuln
|
| 10
|
6
|
12
|
-
|
2.0%*2 (4.0%)
|
-
|
| ~X
|
Damage
|
Red Damage
|
Proration
|
Cancel
|
Guard
|
| 350*N
|
196*N
|
90% (M), 70% (O)
|
-
|
LHA
|
| First Active
|
Active
|
Recovery
|
Frame Adv
|
Circuit
|
Invuln
|
| 10
|
X
|
15
|
-4
|
2.0%*N
|
-
|
| B
|
Damage
|
Red Damage
|
Proration
|
Cancel
|
Guard
|
| 1500, 110*4, 1000 (2061)
|
(1361)
|
100%, 40% (O)
|
-
|
LHA
|
| First Active
|
Active
|
Recovery
|
Frame Adv
|
Circuit
|
Invuln
|
| 10
|
5
|
12
|
-
|
15.0%, 10.0% (25.0%)
|
-
|
| EX
|
Damage
|
Red Damage
|
Proration
|
Cancel
|
Guard
|
| 1500, 250*9, 1000 (2674)
|
(1754)
|
100%, 40% (O)
|
-
|
LHA
|
| First Active
|
Active
|
Recovery
|
Frame Adv
|
Circuit
|
Invuln
|
| 1+2
|
5
|
12
|
-
|
-100.0%
|
-
|
|
For some reason you have a different input for your DP in the air, but they are mostly the same as their grounded version, j.236A itself does 2 hits instead of 3, and you still have the divekick follow up, understanding how it works is important for C.Pciel combos, j.236B and j.236C are just going to be round enders.
One VERY important thing to know is the fact that air dp’s DON’T retain air options, so if you did j.236A, your only option will be the divekick, otherwise you will be vulnerable even when you hit the ground, until you recover.
|
|
A A B B [A]/[B] [A]/[B] EX EX No lightning sprites due to a framedisplay bug. No lightning sprites due to a framedisplay bug.
|
| A
|
Damage
|
Red Damage
|
Proration
|
Cancel
|
Guard
|
| 1000
|
686
|
50% (O)
|
-N-, -J-
|
LHA
|
| First Active
|
Active
|
Recovery
|
Frame Adv
|
Circuit
|
Invuln
|
| 26
|
4
|
14
|
-
|
5.0%
|
-
|
| [A]
|
Damage
|
Red Damage
|
Proration
|
Cancel
|
Guard
|
| 250*14 (1514)
|
(1184)
|
50% (O)
|
-
|
LHA
|
| First Active
|
Active
|
Recovery
|
Frame Adv
|
Circuit
|
Invuln
|
| 36
|
49
|
12
|
-
|
0.8%*14 (11.2%)
|
-
|
| B
|
Damage
|
Red Damage
|
Proration
|
Cancel
|
Guard
|
| 500*6 (1490)
|
(1023)
|
50% (O)
|
-N-, -J-
|
LHA
|
| First Active
|
Active
|
Recovery
|
Frame Adv
|
Circuit
|
Invuln
|
| 26
|
8
|
10
|
-
|
1.0%*6 (6.0%)
|
-
|
| [B]
|
Damage
|
Red Damage
|
Proration
|
Cancel
|
Guard
|
| 250*17 (1528)
|
(1195)
|
50% (O)
|
-
|
LHA
|
| First Active
|
Active
|
Recovery
|
Frame Adv
|
Circuit
|
Invuln
|
| 35
|
38
|
12
|
-
|
0.5%*15, 2.5%*2 (12.5%)
|
-
|
| EX
|
Damage
|
Red Damage
|
Proration
|
Cancel
|
Guard
|
| 450*10 (2151)
|
(1876)
|
50% (O)
|
-
|
LHA
|
| First Active
|
Active
|
Recovery
|
Frame Adv
|
Circuit
|
Invuln
|
| 6+18
|
40
|
12
|
-
|
-100.0%
|
-
|
|
Air horizontal lightnings, same as in the ground, except that they have slower startup, and uncharged versions retain your air options, so don't use j.214[A]/[B].
In neutral, j.214A, pretty much like the grounded version, servers very little purpose since you have j.214B, the only good thing about it is that, if you get an air CH, you get a combo, unfortunately you would have to be very close to your opponent for that to be possible.
j.214C is very bad, it's only purpose is to make 236[A] “safe” which also let's you begin or reset pressure, but that's fake, since the second hit of 236[A] is not a true blockstring, and opponents can just shield it, but if they block it, and they have invul moves to go right through it, you will still get killed.
|
|
Arc Drive
|
|
| Damage
|
Red Damage
|
Proration
|
Cancel
|
Guard
|
| 700, 400*16, 2700 (3526)
|
(2685)
|
50% (O)
|
-
|
LH
|
| First Active
|
Active
|
Recovery
|
Frame Adv
|
Circuit
|
Invuln
|
| 3+10
|
18
|
27
|
-12
|
removes all
|
Full 1-30
|
|
C-P.Ciel's only reversal outside of heat, she rushes in with her pilebunker, and on hit, this finishes with a 236B~A-like attack that knocks the opponent down but leaves you very far from them no matter where on the screen you perform this move, which gives you bad okizeme.
|
|
Another Arc Drive
|
|
| Damage
|
Red Damage
|
Proration
|
Cancel
|
Guard
|
| 700, 400*16, 7000, 600*8 (4965)
|
(3602)
|
50% (O)
|
-
|
LH
|
| First Active
|
Active
|
Recovery
|
Frame Adv
|
Circuit
|
Invuln
|
| 2+10
|
18
|
27
|
-12
|
removes all
|
Full 1-29
|
|
Similar to Arc Drive, but the followup on hit does much more damage and launches the opponent upwards, still not particularly good okizeme.
|
|
Last Arc
|
|
| Damage
|
Red Damage
|
Proration
|
Cancel
|
Guard
|
| 52300 (4328 ~ 7254)
|
(3522 ~ 5973)
|
50% + 50% * remaining BH time
|
-
|
U
|
| First Active
|
Active
|
Recovery
|
Frame Adv
|
Circuit
|
Invuln
|
| 0
|
2
|
23
|
-
|
removes all
|
Full
|
|
Fullscreen-type Last Arc that is instant and goes into a cutscene on hit. P.Ciel launches the opponent into the sky and summons a 99-hit lightning strike.
|
|
MBAACC Navigation


