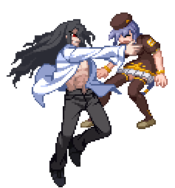
Character Page Progress
This page is still a work in progress, consider joining as an editor to help expand it. Please update this character's roadmap page when one of the editing goals have been reached.
| In Progress |
To-do
|
- Combos:
- Combo damage/meter numbers in progress.
- Advanced combos in progress. (Adding video footage for those could be good)
- Move Descriptions:
- Add descriptions for the uses of Roa's AD/AAD/LA and universal mechanics.
|
- General Gameplan:
- Write the "Advanced Techniques" section.
- Revise the "Okizeme section"
|
Additional Resources
C-Roa Match Video Database
Melty Bits: C-Roa
Notable Players
| Name |
Color
|
Region |
Common Venues |
Status |
Details
|
| Alma |

|
North America |
Netplay |
Active |
C-WArc main with a solid C-Roa. Found in the Melty Blood Community Server.
|
| hikonyan (ひこにゃん) |

|
Japan |
KorewaMelty |
Inactive |
|
| Kurodyne |

|
North America |
Netplay |
Active |
|
| Nanyako |

|
South America |
Dream Match, Netplay |
Active |
|
| nouburu (ノーブル) |

|
Japan |
A-cho, Play Spot BIG ONE 2nd |
Inactive |
|
| ragu (らぐ) |

|
Japan |
A-cho |
Inactive |
|
| Red Melon (赤いメロン) |

|
Japan |
Play Spot BIG ONE 2nd |
Active |
The trademark red coat Japanese C-Roa player.
Has been playing the character at a high level for a long time, so a wide array of footage is available.
|
| Shana |

|
North America |
Next Level |
Active |
|
| Topone |

|
Brazil |
Netplay |
Active |
|
Overview
Playstyle
 C-Roa is a zoner with ridiculously powerful screen control and horrifying pressure. C-Roa is a zoner with ridiculously powerful screen control and horrifying pressure. |
| Pros |
Cons |
- Pressure: Suffocating pressure that is almost inescapable.
- Mobility: Above average speed.
- Great meter gain: One of the biggest heat activations in the game.
- Neutral: Orbs which are incredibly versatile and getting even one out in a match could mean the end.
- Whiff Punish: Access to a nearly full screen whiff punish tool in 236C.
|
- None: C-Roa doesn't have any outright weaknesses, even without an orb out he has competent tools to work with.
|
C-Roa is considered one of the strongest characters in Current Code right below F-Hime (or above, depending on who you ask). Sporting some of the most powerful special moves in the game, including his infamous orbs which have incredibly fast start up, which are air unblockable when blowback edged (holding down the button, similar to increasing a move in UNIST), can be confirmed into a combo at most ranges, and grant massive frame advantage and meter gain on block. Outside of his orbs, he sports above average ground and air speed, a myriad of reversals, and solid albeit average normals. All of these traits create a character truly worthy of the community given nickname of “War Crime”. Although he is extremely strong, he does require a lot of practice to play well as his combos are pretty difficult so be ready to spend a lot of time in training mode.
General Gameplan
C-Roa is known for being an extremely oppressive character by those who are familiar with Melty. His fast dashes coupled with the ability to cancel his specials and obtaining massive frame advantage grant him not only one of the strongest pressures in the game, but also an infinite skill ceiling. It’s not wrong to highlight the fact that it’s up to the player whether C-Roa is a top tier or not, it all boils down to the dedication put forth by anyone who picks him.
His game plan consists of finding space to set his orbs in an efficient and safe way, so the Roa player doesn’t suffer any risks, and gathers neutral advantage. For that, you’ll have to be extremely cautious with your movement, as spacing determines whether your opponent will be able to close the gap between you both and score a counter hit during your orb setups. The same thought process can also apply to 22A, which is not only your go to cancel, but a great way to build more and more damage as the match progresses and will have its properties explained in a while. Your short normals make it hard to play matchups like Len and Wara, who can easily invade your space, either due catwalk in Len’s case, or the sheer speed and huge normals that Wara possesses, all requiring extra cautiousness from the player. In contrast to what the majority thinks, C-Roa isn’t unbeatable. A badly timed orb detonation, poor defense, or simple lack of patience to make his setups can surely put you in a tight spot against aggressive players and cost you the match. Also, it is extremely important C-Roa to save some meter for 236C, as it grants you a free corner carry on hit.
Being patient is your greatest weapon when learning this character, be it for playing his neutral or learning his intricate setups. Be sure you have a large amount of it by your side.
Neutral
Great part of C-Roa's neutral revolves around placing his orbs (214X / j.214X), and being able to vary their detonation timings, for that you will have to find ways to score counter hits using his normals such as 5A, 2A, 2B, 5B (a detail about his B normals: they can punish backdash attempts) and j.A. You can place orbs vertically and horizontally, and depending on your gameplan and the matchup, you can end up using one more than the other. Something crucial when playing C-Roa is knowing that charged orbs are air unblockable, deal more damage, and also have amplified range.
Regarding orb usage: vertical orbs are usually set uncharged as they have quicker startup, and significantly faster recovery compared to horizontal 214X and are mainly used in the lighting loops. As for horizontal orbs, you’ll seek to place their charged version, since they possess the advantages mentioned in the above paragraph. Seek to place charged orbs whenever there’s enough space between you and your opponent, or safely after a hard knockdown. You can also stop them from contesting your orb setups by instantly detonating one for them with 214[A] > 214[B] > 214[A](!).
The real problem is, contrary to the belief that C-Roa is unbeatable in neutral, having room for all of that. As said before: being patient with C-Roa can be game changing for anyone learning him.
Pressure
C-Roa's pressure is powerful because he can use a lot of resources to stop the opponent from trying to escape his pressure while gaining a lot of Magic Circuit in the process. It consists on using specials like 236A, 22C, 236B (sometimes), and his 5A > 5B > 2B > 2C > 5C(1) coupled to Rebeat.
The basic way to apply pressure is to simply do 2A > 2B > 5B > 5C > 236A > 22C or 22A, C-Roa is the only character in the game able to cancel specials into specials, for that reason you have more freedom when applying pressure. 236A is a great tool for this, due to its speed and leaving you plus when cancelled in 22C or 22A. Usually 236A is used after a string with normals. 2A can be used like an starter, but it is not your only one, you can start pressuring with of your any normals. 22C is mostly used when the opponent is already in the corner, because it gives you total advantage in addition to catching any escape attempts. From there, 2A will normally be used to keep pressuring.
You can implement the use of regular orbs in the pressure as well if you place them safely, for example: (Blockstring) > 236A > 214X > 22C. This 236A give you time to set one orb and hit the opponent with 22C. After that, just restart the pressure having an orb to activate freely. t is not recommended to place charged orbs in the pressure, since it's slower than a regular one, placing you in a dangerous situation.
Your 236B is a more slower and has less damaging version or your 236A and cancels only into 22A or 22C, it is only used in the loaded version, or as a form of frametrap to capture button attempts in some cases. You can also use 236[A] > 236[B] to push your opponent to the corner or even delay them as a trap to catch mashes, but don't use it too much, as shielding wins agaisnt this. Horizontal charged orbs, if set in advance, can also be used in pressure as they last for 15 seconds until they disappear and, thanks to them, your opponent will usually be afraid to press any buttons at all.
Using IAD is also a good way to start the pressure. Knowing what do to in a given situation comes with experiece
Okizeme
Well, the okizeme of C-Roa is a good okizeme since it has the chance to be able to define horizontal charged orbs always after a hard knockdown, that's usually what you want, you can also do something like 2AA > 236C, 2C > (3x Charged Orb Set) after the hard knockdown with 2c. With 22c you usually can put 2x Charged Orb Set.
After a hard knock down with 22C, a charged orb is usually set and you can detonate or try a mixup safely, since not all characters have the same wakeup time and not even the same hurtbox, the safest way is always to put one and thus keep the pressure, you will only want to use, all three orbs after a setup with 2C. For example: After 236C you can do this, or in a more advanced way: 2AA > 2B > 5C(1) > 2C > 214[A] > 22C > 214[A](!) > 2C and place three TK j.214X, this type of setup is not 100% functional in all characters and 236C remais the most practical way to do this.
You can also try an okizeme with IAD and meaty,you can also space out so you can safely use the 236a to catch shield attempts or even DP, because you can do the cancel of vertical orb set to 22A, and try to use a meaty or delay, vertical loaded orbs are also a good fit for okizeme, for example after 236C, 2C > 6C > 22C, you can do 214[X] > 22A, this will make recovery after setting the charged orb faster, giving you time to try an iad, meaty, a delay blow or even detonate the orb.
Advanced Techniques
still under construction.
Defense
Roa is a character that requires an understanding of how to block and play patently since many characters will attempt to rush you down to prevent you from setting orbs in neutral. Roa's defensive options are relatively strong owing both C-moon mechanics, his high meter gain allowing use of these options, and his high reward that comes from spending meter defensively.
C-Moon mechanics benefit Roa massively, with strong options out of shield and EX shield as well as the high meter gain to utilize heat activation, shield bunker, and circuit spark more frequently than others:
- EX guard compliments his already high meter gain and allows him to create space to contest a dash back in, force his turn through 236C, or return back to neutral and begin his attempt at establishing orbs.
- Shield allows Roa to reversal out of gaps in pressure, gain plus frames with 236C, or score anti-air counterhits with EX shield 5A.
- Roa's shield bunker can force advantageous situations for Roa and create an opening to return to neutral or utilize set orbs that will expire by the time the blockstring is over.
- Roa's heat activation is larger than average and on hit allows him to safely establish a charged orb or two while regaining red health and sending the opponent full screen.
- Circuit spark is enabled by Roa's high meter gain and allows him to force a left-right mixup with a charged orb on hit, further refunding a significant amount of meter.
Roa's buttons all serve specific purposes on defense and none other than 2C are particularly notable:
- His 5A and 2A are stubby and have 5f startup but can catch out aggressive opponents trying to extend their turn.
- His 5B and 2B are larger but have more significant startup and mostly serve to contest opponents trying to outspace A buttons.
- 2C serves as a strong defensive button for Roa by being an advancing low that both catches jumps and beats out pokes that aren't disjointed while starting pressure through reverse beats but will get beaten out by larger disjoints such as Warachia 2C, C-Nero 5[C].
- 5C(2) can also serve as a slow and very niche anti-air and extends a high hitbox that Roa normally does not cover without orbs.
- Roa has another anti-air in the form of 22C which will cover the entire vertical space in front of him. Despite this, 22C not a go to anti-air owing to its slow startup and the fact that the bolt will land from where Roa inputs the motion and not where Roa is when the move becomes active. Opponents pushing Roa backwards through their forward movement will cause the bolt to whiff. 22C mainly sees use in sniping opponents high out of the air or serving as a hard callout to far airdashes.
Roa's defense is made up of using many of the melty mechanics to escape your opponent's pressure. Roa's normals each serve a purpose on defense and many of the tools such as air-to-air j.A or airthrow work just as well with Roa as they do with other characters. Despite his many tools and reverals, Roa's defense without meter is average at best and often times just blocking is the correct answer. Many of Roa's defensive options apart from blocking require risk and trigger happy Roa players will quickly find themselves out of meter and in bad situations. Players who can leverage Roa's variety of reversals and defensive options will find themselves greatly rewarded for their ability to read their opponent's offense with the ability to convert defensive situations into offensive ones. Mismanaging these options will lead to very quick losses and a lack of the resources that give Roa his top tier status.
Combos
| Combo Notation Help
|
Disclaimer: Combos are written by various writers, so the actual notation used in pages can differ from the standard one.
For more information, see Glossary and Controls.
|
| X > Y
|
X input is cancelled into Y.
|
| X > delay Y
|
Must wait for a short period before cancelling X input into Y.
|
| X, Y
|
X input is linked into Y, meaning Y is done after X's recovery period.
|
| X+Y
|
Buttons X and Y must be input simultaneously.
|
| X/Y
|
Either the X or Y input can be used.
|
| X~Y
|
This notation has two meanings.
- Use attack X with Y follow-up input.
- Input X then within a few frames, input Y. Usually used for option selects.
|
| X(w)
|
X input must not hit the opponent (Whiff).
|
| j.X
|
X input is done in the air, implies a jump/jump cancel if the previous move was done from the ground.
Applies to all air chain sections:
- Assume a forward jump cancel if no direction is given.
- Air chains such as j.A > j.B > j.C can be shortened to j.ABC.
|
| sj.X
|
X input is done after a super jump. Notated as sj8.X and sj9.X for neutral and forward super jumps respectively.
|
| dj.X
|
X input is done after a double jump.
|
| sdj.X
|
X input is done after a double super jump.
|
| tk.X
|
Stands for Tiger Knee. X motion must be buffered before jumping, inputting the move as close to the ground as possible. (ex. tk.236A)
|
| (X)
|
X is optional. Typically the combo will be easier if omitted.
|
| [X]
|
Input X is held down. Also referred to as Blowback Edge (BE). Depending on the character, this can indicate that this button is held down and not released until indicated by the release notation.
|
| ]X[
|
Input X is released. Will only appear if a button is previously held down. This type of input is referred to as Negative Edge.
|
| {X}
|
Button X should only be held down briefly to get a partially charged version instead of the fully charged one.
|
| X(N)
|
Attack "X" should only hit N times.
|
| (XYZ)xN
|
XYZ string must be performed N times. Combos using this notation are usually referred to as loops.
|
| (XYZ^)
|
A pre-existing combo labelled XYZ is inserted here for shortening purposes.
|
| CH
|
The first attack must be a Counter Hit.
|
| Air CH
|
The first attack must be a Counter Hit on an airborne opponent.
|
| 66
|
Performs a ground forward dash.
|
| j.66
|
Performs an aerial forward dash, used as a cancel for certain characters' air strings.
|
| IAD/IABD
|
Performs an Instant AirDash.
|
| AT
|
Performs an Air Throw. (j.6/4A+D)
|
| IH
|
Performs an Initiative Heat.
|
| AD
|
Performs an Arc Drive.
|
| AAD
|
Performs an Another Arc Drive.
|
Enders
- Airthrow (4123)
- j.623B (4211)
- j.623A > j.623C (4517)
- 214X, 2C, TK 214A, 214B
- 214X 22C, TK 214A, 214B
- 2c, 3x TK Orb set
- 2c > 214[a] > 22c
Normal Combos
Caption text
| Let's start |
Basic combos of C Roa |
OTTO!
|
| Combo 1 |
2A > 2B > 5B > 5C > 2C > 6C > j.BC > j.BC > AT |
Basic Combo.
|
| Combo 2 |
2A > 2B > 5B > 5C(1) > 6c > 2C xx 236A xx 22C > 22C > 22c |
Basic Combo.
|
| Combo 3 |
2A > 5B > 2B > 5C > 2C xx 236A > 22C > 22c > 214(x) xx 22a (Orb Set) |
Basic Combo with regular orb oki.
|
| Combo 4 |
2AA > 5B > 2B > 5C(1) > 6C > 2C xx 236A > 22C > 22C > tk charged orb |
Basic Combo with charged tk orb oki.
|
Metered Combos
| Condition
|
Notation
|
Damage
vs V.Sion
|
Notes
|
|
| Normal starter, grounded opponent, 100% meter
|
- 2A > 5B > 2B > 5C(2) > 6C > 236C > (66) > 2C > ...
|
Variable
|
| |
| Meter Gained: Variable |
Meter Given (vs C-Moon): Variable |
| This combo can be ended in two ways. |
|
|
| (Follow-up of the combo above)
|
- ... > 6C > j.BC > dj.BC > Ender
|
4622
|
| |
| Meter Gained: ??? |
Meter Given (vs C-Moon): ??? |
| Midscreen/corner. |
|
|
| (Follow-up of the combo above)
|
|
4102
|
| |
| Meter Gained: ??? |
Meter Given (vs C-Moon): ??? |
| Leads to 3-way mixup. (high/low + crossup) |
|
|
| (Follow-up of the combo above)
|
- ... > 2147[X] > 214[X] >...
|
???
|
| |
| Meter Gained: ??? |
Meter Given (vs C-Moon): ??? |
| TK orb set up. Crucial to learn for optimal C-Roa. Always make sure to follow up 236C with a dash 2C, followed by TK orb setups. |
|
|
Advanced Combos
Special notations:
- xx: Cancel
- 214(x): Orb Set
- 214X(!): Detonate orb.
- 214[x]: Charged Orb set
- 214[!]: Charged Orb detonation
- 22C(x): x number of 22A charges in gauge.
- 236{x}: That's in certain combos with 1 or more counters against certain characters.
- VS Ryougi you have to use A orbs instead of B orbs in lightning loops.
Midscreen Combos
| Condition
|
Notation
|
Damage
vs V.Sion
|
Notes
|
|
| Normal starter, grounded opponent
|
- 2A > 5B > 2B > 5C(1) > 2C > 236A > 22A > 5A > j.BC > dj.BC > Ender
|
~3975
|
| |
| Meter Gained: ??? |
Meter Given (vs C-Moon): ??? |
| +1 charge combo. Does not work on all characters except in the corner |
|
|
| Normal starter, grounded opponent
|
- 2A > 5B > 2B > 5C(2) > 2C > 236A > 214B > 22C, {214B(!), 214B > 22C}x2,
|
3505
|
| |
| Meter Gained: 71.0% |
Meter Given (vs C-Moon): ??? |
| Orb set loop. Deals decent damage and sets you up an uncharged orb. You can do [214X > 22A] after for an extra uncharged orb and a charge of lightning, or you can do tk.214[X]. |
|
|
| Normal starter, grounded opponent
|
- 2A >5B > 2B > 5C(2) > 2C > 214[B] > 22C, 214[B](!), 214[X] > 22C
|
2857
|
| |
| Meter Gained: 53.2% |
Meter Given (vs C-Moon): ??? |
| Charged orb combo. Deals less damage than uncharged orb loop, but leaves you with a charged orb which gives better frame advantage than an uncharged one. The last 22C can be omitted for a 2C to set tk.214[X] orbs. |
|
|
| Normal starter, grounded opponent
|
- 2A > 5B > 2B > 5C(2) > 2C > (Delay) 236A > 22A, 5C > 22C(1), 2A > (Delay) 2C > 236A > 214B > 22C, (214B(!), 214B > 22C )x2
|
4472
|
|
| Meter Gained: 115.5% |
Meter Given (vs C-Moon): ??? |
(Video) |
Optimized combo, works anywhere. 5C hitting depends on height of opponent and number of hits in the combo. More hits allows for easier 5C pickups and leniency on the delay of 236A. 236A delay is character specific. Pick up timing on 2A > 2C depends on character and on number of hits before 2C. Must delay second 2C depending on 2A hit height, Nero and Len always require delays. Does not work on Ryougi.
Minimum hitcount table
| Character
|
Hits before 2C > 236A
|
| Akiha
|
5
|
| Aoko
|
5
|
| Arcueid
|
3
|
| Ciel
|
5
|
| Hime
|
4
|
| Hisui
|
7
|
| Kohaku
|
5
|
| Kouma
|
4
|
| Len
|
5
|
| Mech
|
4
|
| Miyako
|
5
|
| Nanaya
|
6
|
| Nero
|
5
|
| P.Ciel
|
4
|
| Riesbyfe
|
5
|
| Roa
|
4
|
| Satsuki
|
5
|
| Seifuku
|
5
|
| Sion
|
5
|
| Tohno
|
6
|
| V.Akiha
|
4
|
| V.Sion
|
3
|
| Warachia
|
5
|
| Warc
|
4
|
| W.Len
|
6
|
|
|
|
| Normal starter, grounded opponent, 100% meter
|
- 2A > 5B > 2B > 5C(2) > 6C > 236A > 214C > 236C, 66, 2C > 236A > 22A, 5A, j.B > Delay j.C > j.214C(!), 22C(1), 2C > 236A > 214X > 22C, 214X(!), 214X > 22C
|
4431
|
|
| Meter Gained: 22.0% |
Meter Given (vs C-Moon): ??? |
(Video) |
| Midscreen 236C combo to push towards the corner while doing damage. 214C can be replaced by any orb set, but is preferable as it is most likely to reach the corner and orbs cannot be set offscreen. |
|
|
Corner Combos
| Condition
|
Notation
|
Damage
vs V.Sion
|
Notes
|
|
| Corner to Corner, grounded opponent, 100% meter
|
- 2A > 5B > 2B > 5C(2) > 2C > 236A > 22A, 236C, sj9, 2C > 5C > 22C, 2A > 2C > 236A > 214X > 22C(1), 214X(!), 214X > 22C
|
4450
|
|
| Meter Gained: -2.0% |
Meter Given (vs C-Moon): ??? |
(Video) |
| Corner to corner combo using 236C to travel across the screen. If the character would fall too quickly after 236C to pick up with 2C; 2A > 5A > 5C can be used instead. |
|
|
| Corner starter, crouching opponent, 0 charges
|
- iad j.C, (2A > 5C(1) > 236A > 22C) x2-3, 2A > 5B > 2B > 5C > 2C > 214[X] > 22C, 214[X](!), 2C > tk.214[X}
|
5270/5863
|
|
| Meter Gained: 143.3% |
Meter Given (vs C-Moon): ??? |
(Video) |
| Corner crouch confirm. 3 reps of 2A > 5C > 22C are only possible on Miyako, Sion, Vsion, Roa, Arcueid, and Ryougi. For all other characters only 2 reps is possible. |
|
|
| Corner starter, grounded opponent, 1 orb
|
- 2A > 5B > 2B > 5C(2) > 2C > 6C > 214X(!), (214X > 22C, 214X(!) ) x3
|
3811/4279
|
|
| Meter Gained: 81%/109.5% |
Meter Given (vs C-Moon): ??? |
(Video) |
| Corner combo with orbs. If you placed a charged orb, you can use charged orbs for the loops, but not if you used an uncharged orb to launch them. 3811 with uncharged orbs, 4279 with charged orbs. |
|
|
| Corner starter, grounded opponent, 1 orb
|
- ... 2C > 236A > 22A, 5A, j.B > Delay j.C > j.214X(!), 22C(1), 2C > 236A > (214X > 22C, 214X(!) ) x2
|
4976
|
|
| Meter Gained: 132.5% |
Meter Given (vs C-Moon): ??? |
(Video) |
| Corner combo with one uncharged orb. Can set double charged orbs safely by cancelling 2C into tk.214[X]. For a charged orb replace j.B > Delay j.C > 214X(!) with j.BC j.BC > Delay 214[X](!) https://streamable.com/t3ck7k example with charged orb |
|
|
| Corner starter, grounded opponent, 1 orb, 1 charge
|
- ... 2C > 6C > 214X(!), 214X > 22C, 2A > 6A > 214X(!), (214X > 22C, 214X(!) ) x3
|
4681/4890
|
|
| Meter Gained: 117%/160.5% |
Meter Given (vs C-Moon): ??? |
(Video) |
| Corner combo with 1 orb and 1 charge of lightning. 1 charge reduces the 22C recovery time, allowing you to link a 2A before they reach the ground. |
|
|
| Corner starter, grounded opponent, 2 orbs
|
- ... 2C > 6C > 214X(!), 214X(!), 214X > 22C, 2A > 6C > 214X(!), (214X > 22C, 214X(!) ) x3
|
4831/4881
|
|
| Meter Gained: 124%/182.5% |
Meter Given (vs C-Moon): ??? |
(Video) |
| Corner combo with 2 orbs. On charged orbs, delay the activations so the opponent gets launched up high enough for 2A to link. |
|
|
| Corner starter, grounded opponent, 2 orbs, 1 charge
|
- ... 2C > 6C > 214X(!), 214X > 22C(1), 2A > 6A > 214X(!), 214X(!), 214X > 22C, 2A > 6A > 214X(!), (214X > 22C, 214X(!) ) x3
|
5445/5059
|
|
| Meter Gained: 160%/208.9% |
Meter Given (vs C-Moon): ??? |
(Video) |
| Corner combo with 2 orbs. It's just 1 charge's 2A link (214X(!), 214X > 22C, 2A), followed by 2 orbs' 2A link (214X(!), 214X(!), 214X > 22C, 2A). High damage off of a very common oki situation for Roa. |
|
|
| Corner starter, grounded opponent, 2 orbs, 1 charge
|
- ... 6C > 236A > 214X(!), Delay 5C > 214X(!), 214X > 22C, 2C > 236A > 22A, 5A, j.B > Delay j.C > j.214X(!), 22C(1), 2C > 236A > (214X > 22C, 214X(!) ) x2
|
6162
|
|
| Meter Gained: 185.5% |
Meter Given (vs C-Moon): ??? |
(Video) |
| Corner combo with 2 orbs. Following the 2C, the combo follows the 4976 damage single orb routing. For an uncharged orb and a charged orb, set a charged orb after the charged orb detonation and make the charged orb detonation adjustment listed in the notes of the single orb combo. |
|
|
WIP
- 214C 22A 5B
- 214[C] 22A 2A
- TK214[X]
Move Descriptions
| Frame Data Help
|
| Header
|
Tooltip
|
| Move Box Colors
|
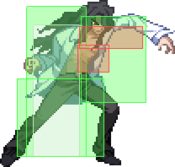
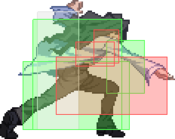
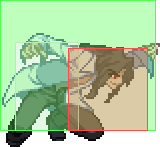
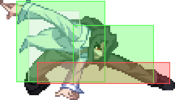
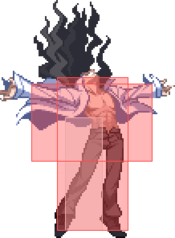
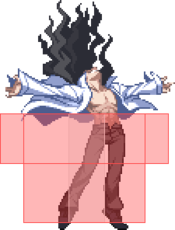
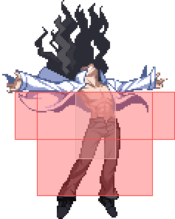
Light gray = Collision Box (A move lacking one means it can go through the opponent's own collision box).
Green: Hurt Boxes.
Red: Hit(/Grab) Boxes.
Yellow: Clash Boxes (When an active hitbox strikes a clash box, the active hitbox stops being active. Multi-hit attacks can beat clash since they will still progress to the next hitbox.)
Magenta: Projectile-reflecting boxes OR Non-hit attack trigger boxes (usually).
Blue: Reflectable Projectile Boxes.
|
| Damage
|
Base damage done by this attack.
(X) denotes combined and scaled damage tested against standing V. Sion.
|
| Red Damage
|
Damage done to the recoverable red health bar by this attack. The values are inherently scaled and tested against standing V. Sion.
(X) denotes combined damage.
|
| Proration
|
The correction value set by this attack and the way it modifies the scaling during a string. See this page for more details.
X% (O) means X% Overrides the previous correction value in a combo if X is of a lower percentage.
X% (M) means the current correction value in a combo will be Multiplied by X%. This can also be referred to as relative proration.
|
| Circuit
|
Meter gained by this attack on hit.
(X%) denotes combined meter gain.
-X% denotes a meter cost.
|
| Cancel
|
Actions this move can be cancelled into.
SE = Self cancelable.
N = Normal cancelable.
SP = Special cancelable.
CH = Cancelable into the next part of the same attack (Chain in case of specials).
EX = EX cancelable.
J = Jump cancelable.
(X) = Cancelable only on hit.
-X- = Cancelable on whiff.
|
| Guard
|
The way this move must be blocked.
L = Can block crouching
H = Can block standing.
A = Can block in the air.
U = Unblockable.
|
| Startup
|
Amount of frames that must pass prior to reaching the active frames. Also referred to as "True Startup".
|
| Active
|
The amount of frames that this move will have a hitbox.
(x) denotes frame gaps where there are no hitboxes is present. Due to varied blockstuns, (x) frames are difficult to use to determine punish windows. Generally the larger the numbers, the more time you have to punish.
X denotes active frames with a duration separate from its origin move's frame data, such as projectile attacks. In this case, the total length of the move is startup+recovery only.
|
| Recovery
|
Frames that this move has after the active frames if not canceled. The character goes into one frame where they can block but not act afterwards, which is not counted here.
|
| Advantage
|
The difference in frames where you can act before your opponent when this move is blocked (assuming the move isn't canceled and the first active frame is blocked).
If the opponent uses a move with startup that is at least 2 frames less than this move's negative advantage, it will result in the opponent hitting that move.
±x~±y denotes a range of possible advantages.
|
| Invul
|
Lists any defensive properties this move has.
X y~z denotes X property happening between the y to z frames of the animations. If no frames are noted, it means the invincibility lasts through the entire move.
Invicibility:
- Strike = Strike invincible.
- Throw = Throw invincible.
Hurtbox-Based Properties:
- Full = No hurtboxes are present.
- High = Upper body lacks a hurtbox.
- Low = Lower body lacks a hurtbox.
Miscellaneous Properties
- Clash = Frames in which clash boxes are active.
- Reflect = Frames in which projectile-reflecting boxes are active.
- Super Armor = Frames in which the character can take hits without going into hit stun.
|
Normal Moves
Standing Normals
|
|
| Damage
|
Red Damage
|
Proration
|
Cancel
|
Guard
|
| 300
|
147
|
75% (O)
|
-SE-, -N-, -SP-, -EX-, (J)
|
LH
|
| First Active
|
Active
|
Recovery
|
Frame Adv
|
Circuit
|
Invuln
|
| 5
|
4
|
8
|
0
|
3.0%
|
-
|
|
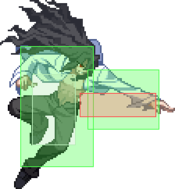
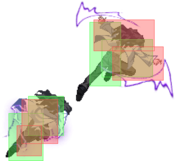
Whiff cancelable. Kinda stubby, and the outer hitbox will whiff on most crouchers. The inner hitbox is great for staggers and tick throws, and when further out the move is solid for reverse beating into as well as catching jump outs. It doesn’t push Roa very far away so it’s useful for the anti H-Moon bunker OS and since it hits crouchers you can use the anti-heat OS when resetting your pressure.
|
|
|
|
| Damage
|
Red Damage
|
Proration
|
Cancel
|
Guard
|
| 550
|
392
|
80% (O)
|
N, SP, EX, (J)
|
LH
|
| First Active
|
Active
|
Recovery
|
Frame Adv
|
Circuit
|
Invuln
|
| 9
|
5
|
13
|
-3
|
5.5%
|
-
|
|
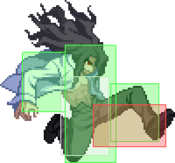
Mid with an exceptionally long reverse beat window. It can be whiff canceled into for staggers and can be used after 22C(0) at distance to continue blockstrings as it will beat out most 2As.
|
|
|
|
| Damage
|
Red Damage
|
Proration
|
Cancel
|
Guard
|
| 400, 550 (825)
|
(559)
|
80% (O), 90% (M)
|
N, SP, EX, (J)
|
LH
|
| First Active
|
Active
|
Recovery
|
Frame Adv
|
Circuit
|
Invuln
|
| 9
|
3 (10) 7
|
14
|
-16, -3 ~ 0
|
4.0%, 5.5% (9.5%)
|
-
|
|
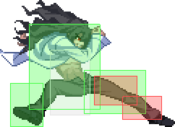
2 kicks that hit mid. Really you should always be canceling before the second hit on block, as the first hit getting ex blocked will usually result in the second hit whiffing and you dying. On top of that people can bunker out between the two hits. That’s not to say that the second hit is useless, 5C(2) is difficult to get over due to its height and covers a large area while active as it covers 2 sprite states over 7 active frames. Additionally it moves Roa forward quite a ways, so it can be used as a sort of way to get back in after getting pushed out by your pressure while throwing out a hitbox that will challenge attempts to escape. It’s situational for sure, but in conjunction with plus specials like 236[A] > 22A and 236C, you can use 5C(1) whiff to some strong results.
|
|
Crouching Normals
|
|
| Damage
|
Red Damage
|
Proration
|
Cancel
|
Guard
|
| 300
|
196
|
75% (O)
|
-SE-, -N-, -SP-, -EX-, (J)
|
LH
|
| First Active
|
Active
|
Recovery
|
Frame Adv
|
Circuit
|
Invuln
|
| 5
|
4
|
8
|
0
|
3.0%
|
-
|
|
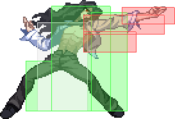
The normal of choice for Roa’s extended staggers and a good normal for tick throws. Like his 5A, it’s a bit stubby so it’s not that great for abare.
|
|
|
|
| Damage
|
Red Damage
|
Proration
|
Cancel
|
Guard
|
| 550
|
343
|
80% (O)
|
N, SP, EX, (J)
|
L
|
| First Active
|
Active
|
Recovery
|
Frame Adv
|
Circuit
|
Invuln
|
| 8
|
6
|
14
|
-5
|
6.0%
|
-
|
|
Another decent normal that can be used to follow up 22C(0) at distance, when spaced properly it will beat out most 5As, but it will lose to 2A mash.
|
|
|
|
| Damage
|
Red Damage
|
Proration
|
Cancel
|
Guard
|
| 900
|
686
|
55% (O)
|
N, SP, EX, (J)
|
L
|
| First Active
|
Active
|
Recovery
|
Frame Adv
|
Circuit
|
Invuln
|
| 9
|
11
|
13
|
-6
|
9.0%
|
-
|
|
Hard knockdown. A solid 2C that slides Roa forward and has a small disjoint, it’s useful to call out jump outs due to causing hard knockdown and having a hitbox that extends rather high up. Helps Roa establish presence in pressure outside of 2B range. Can be used as abare to challenge characters able to pressure outside of the range of 2A as it is relatively quick and since it moves him forward so much covers a large amount of ground. The disjoint will cause it to beat out a number of normals, like Nero’s 2B before frame 13 and F Nanaya’s 5B, and its relatively low startup lets Roa contest more than he would otherwise be able to. Good places to look to use it as abare are after a Reverse Beat into 2A/5A when you think they are going to follow up by poking to try to catch a jump, pokes after moves that are neutral or minus, such as F-Sion using 236A 2B, or when your opponent is using repeated non-disjointed pokes. Keep in mind though, while it’s quick and moves him quite a ways, it will still get blown up by big disjointed normals such as Warachia 2C, C-Nero 5[C] and the like.
|
|
Aerial Normals
|
|
| Damage
|
Red Damage
|
Proration
|
Cancel
|
Guard
|
| 250
|
147
|
75% (O)
|
SE, N, SP, EX, J
|
LHA
|
| First Active
|
Active
|
Recovery
|
Frame Adv
|
Circuit
|
Invuln
|
| 6
|
4
|
10
|
-
|
2.5%
|
-
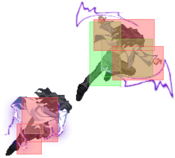
|
|
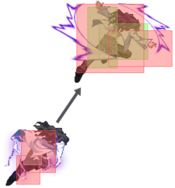
Roa’s go to air to air, it’s quick and can be canceled into itself, letting you confirm or air tick throw. You can use it to cancel your forward airdashes while running away to get to the ground quicker.
|
|
|
|
| Damage
|
Red Damage
|
Proration
|
Cancel
|
Guard
|
| 700
|
490
|
90% (O)
|
N, SP, EX, J
|
HA
|
| First Active
|
Active
|
Recovery
|
Frame Adv
|
Circuit
|
Invuln
|
| 7
|
7
|
-
|
-
|
7.0%
|
-
|
|
Roa’s usual jump outside of the corner as it won’t push the opponent out nearly as much as j.C on block. It’s active for 7 frames so you can use it somewhat early when you are jumping in so you don’t run the risk of being airthrown. Used as an air to air for opponents under you.
|
|
|
|
| Damage
|
Red Damage
|
Proration
|
Cancel
|
Guard
|
| 950
|
686
|
90% (O)
|
-
|
HA
|
| First Active
|
Active
|
Recovery
|
Frame Adv
|
Circuit
|
Invuln
|
| 8
|
4
|
-
|
-
|
9.5%
|
-
|
|
Used heavily in IAD shenanigans as its long reach and ability to link into 2B lets Roa combo off airdash back J.C, which plays a large part in his mixups and okizeme. Another solid air to air for opponents under you, but since it’s less active than J.B its less useful for scrambles.
|
|
Command Normals
|
|
| Damage
|
Red Damage
|
Proration
|
Cancel
|
Guard
|
| 1000
|
784
|
65% (O)
|
N, SP, EX, (J)
|
LH
|
| First Active
|
Active
|
Recovery
|
Frame Adv
|
Circuit
|
Invuln
|
| 12
|
5
|
16
|
-3
|
10.0%
|
-
|
|
Reverse Beatable mid command normal. Solid for calling out jump outs from too far out to use 5A, and more reliable than 2C or 5C due to hitting higher up. Generally, when using it to poke like this, cancel into 22C when farther out to get a hard knockdown on hit and plus frames on block, and 5a when a bit closer to whiff cancel back into your blockstring or confirm into 22C on hit. One strong example of this kind of tool is distanced 5C(1) > reverse beat 5A whiff cancel 6C > 22C, which is a solid way to spending 1-3 22A charges to reset pressure.
|
|
Universal Mechanics
|
|
| Neutral
|
Damage
|
Red Damage
|
Proration
|
Cancel
|
Guard
|
| 1000
|
392
|
50%
|
-
|
U
|
| First Active
|
Active
|
Recovery
|
Frame Adv
|
Circuit
|
Invuln
|
| 3
|
1
|
20
|
-
|
0.0%
|
-
|
|
Roa takes the opponent by the neck then throws them forward/backward. Ground techable knockdown.
|
| ~2
|
Damage
|
Red Damage
|
Proration
|
Cancel
|
Guard
|
| 800
|
392
|
50%
|
-
|
U
|
| First Active
|
Active
|
Recovery
|
Frame Adv
|
Circuit
|
Invuln
|
| 3
|
1
|
20
|
-
|
0.0%
|
-
|
|
Throws the opponent into an invincible untechable knockdown directly next to Roa.
|
|
|
|
| Damage
|
Red Damage
|
Proration
|
Cancel
|
Guard
|
1600 (Raw)
1200 (Ender)
|
588
|
100%
|
-
|
U
|
| First Active
|
Active
|
Recovery
|
Frame Adv
|
Circuit
|
Invuln
|
| 2
|
1
|
12
|
-
|
0.0%
|
-
|
|
OTG-able ground bounce when done raw, untechable knockdown as a combo ender.
|
|
|
|
| Bunker
|
Damage
|
Red Damage
|
Proration
|
Cancel
|
Guard
|
| 500
|
196
|
100%
|
-
|
LHA
|
| First Active
|
Active
|
Recovery
|
Frame Adv
|
Circuit
|
Invuln
|
| 26
|
4
|
19
|
-5
|
0.0%
(-50.0% in blockstun)
|
Clash 1-10
|
| (Clash)
|
Damage
|
Red Damage
|
Proration
|
Cancel
|
Guard
|
| 500
|
196
|
100%
|
-
|
LHA
|
| First Active
|
Active
|
Recovery
|
Frame Adv
|
Circuit
|
Invuln
|
| 8
|
4
|
19
|
-5
|
0.0%/-50.0%
|
Strike 1-7
|
|
Similar to 6C.
|
|
|
|
| Damage
|
Red Damage
|
Proration
|
Cancel
|
Guard
|
| 100
|
0
|
100%
|
-
|
U
|
| First Active
|
Active
|
Recovery
|
Frame Adv
|
Circuit
|
Invuln
|
| 19
|
3
|
25
|
-
|
-100.0% (min)
|
Full 1-21
|
|
One of the larger heat activations out there.
|
|
|
|
| Ground
|
Damage
|
Red Damage
|
Proration
|
Cancel
|
Guard
|
| 100
|
0
|
100%
|
-
|
U
|
| First Active
|
Active
|
Recovery
|
Frame Adv
|
Circuit
|
Invuln
|
| 11
|
10
|
20
|
-
|
removes all
|
Full 1-39
|
| Air
|
Damage
|
Red Damage
|
Proration
|
Cancel
|
Guard
|
| 100
|
0
|
100%
|
-
|
U
|
| First Active
|
Active
|
Recovery
|
Frame Adv
|
Circuit
|
Invuln
|
| 12
|
10
|
15
|
-
|
removes all
|
Strike 1-30
|
|
Universal burst mechanic. Unlike Crescent/Full Heat activation, the hitbox and frame data doesn't vary between characters. However, you can be thrown out of this move if you input it in the air.
|
|
Special Moves
Grounded Specials
A A [A] [A] B B [B] [B] EX EX
|
| A
|
Damage
|
Red Damage
|
Proration
|
Cancel
|
Guard
|
| 1000
|
784
|
70% (O)
|
-SP-, -EX-
|
LHA
|
| First Active
|
Active
|
Recovery
|
Frame Adv
|
Circuit
|
Invuln
|
| 14
|
2
|
23
|
-2 (3)
|
10.0%
|
-
|
| [A]
|
Damage
|
Red Damage
|
Proration
|
Cancel
|
Guard
|
| 1400
|
1176
|
70% (O)
|
-SP-, -EX-
|
LHA
|
| First Active
|
Active
|
Recovery
|
Frame Adv
|
Circuit
|
Invuln
|
| 25
|
2
|
19
|
7 (8)
|
10.0%
|
-
|
- Roa shoots a horizontal needle a short distance in front of him.
Horizontal lightning that can be blowback edged to make it +7 on block and increases the range. The blowback edged version of it can also be canceled into 236B/[B].
Can also be canceled into 22A to become +3/+8 at the earliest possible cancel.
|
| B
|
Damage
|
Red Damage
|
Proration
|
Cancel
|
Guard
|
| 700*2 (1242)
|
(1043)
|
80% (O)
|
-SP-, -EX-
|
LHA
|
| First Active
|
Active
|
Recovery
|
Frame Adv
|
Circuit
|
Invuln
|
| 16
|
4
|
21
|
-2 (1)
|
7.0%*2 (14.0%)
|
-
|
| [B]
|
Damage
|
Red Damage
|
Proration
|
Cancel
|
Guard
|
| 1000*2 (1774)
|
(1217)
|
80% (O)
|
-SP-, -EX-
|
LHA
|
| First Active
|
Active
|
Recovery
|
Frame Adv
|
Circuit
|
Invuln
|
| 23
|
4
|
17
|
5 (4)
|
7.0%*2 (14.0%)
|
-
|
|
Same properties as 236A but the blowback edged version is only +5 and canceling uncharged version into 22A is only +1.
|
| EX
|
Damage
|
Red Damage
|
Proration
|
Cancel
|
Guard
|
| 1200*3 (2650)
|
(1731)
|
80% (M)*3
|
-
|
LH
|
| First Active
|
Active
|
Recovery
|
Frame Adv
|
Circuit
|
Invuln
|
| 4+5
|
10
|
14
|
3 ~ 4
|
-100.0%
|
Full 4
|
|
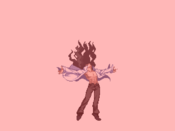
Triple pronged lightning that is +3~4 on block, air unblockable, wall bounces and covers almost the entire screen. Just as powerful as it sounds, you will be spending most of your meter on this move as it is extremely versatile. It can be used to anti air at a distance, done out of EX Shield to beat certain safe jumps, used to continue pressure, corner carry, and a combo tool.
|
|
|
|
| A
|
Damage
|
Red Damage
|
Proration
|
Cancel
|
Guard
|
| 500, 1500 (1351)
|
(1059)
|
100%
|
-EX-
|
LH
|
| First Active
|
Active
|
Recovery
|
Frame Adv
|
Circuit
|
Invuln
|
| 5
|
7
|
42
|
-31, -27
|
3.0%, 10.0% (13.0%)
|
-
|
- Typical DP that's on the weak side but still useful as a reversal.
Air unblockable, but no invulnerability. Air version is fully air blockable but can still be used as an anti air after setting orbs to catch an air dashing opponent off guard.
|
| B
|
Damage
|
Red Damage
|
Proration
|
Cancel
|
Guard
|
| 500*3, 1000 (2133)
|
(1671)
|
100%
|
-
|
LH (1), LHA (2-4)
|
| First Active
|
Active
|
Recovery
|
Frame Adv
|
Circuit
|
Invuln
|
| 4
|
12
|
46
|
-40, -36,
-32, -30
|
3.0%*3, 10.0% (19.0%)
|
Full 1-5
|
|
A true DP with invulnerability. Not as good as an anti air since it’s only 2 frames air unblockable but can be effective in certain situations.
|
| EX
|
Damage
|
Red Damage
|
Proration
|
Cancel
|
Guard
|
| 400*6, 1000 (2706)
|
(2023)
|
100%
|
-
|
LH
|
| First Active
|
Active
|
Recovery
|
Frame Adv
|
Circuit
|
Invuln
|
| 2+0
|
25
|
44
|
-58 (min)
|
-100.0%
|
Full 1-4
|
|
Fully air unblockable and each hit must be shielded individually and wall slams on hit. Air version is air blockable but still has invulnerability. Mostly situational as most of the time it’s not worth the meter.
|
|
BE Orbs appear 25% larger. BE Orbs appear 25% larger.
|
| 214X
|
Damage
|
Red Damage
|
Proration
|
Cancel
|
Guard
|
| -
|
-
|
-
|
-
|
-
|
| First Active
|
Active
|
Recovery
|
Frame Adv
|
Circuit
|
Invuln
|
| 12
|
1
|
18
|
-
|
-
|
-
|
| 214[X]
|
Damage
|
Red Damage
|
Proration
|
Cancel
|
Guard
|
| -
|
-
|
-
|
-
|
-
|
| First Active
|
Active
|
Recovery
|
Frame Adv
|
Circuit
|
Invuln
|
| 21
|
1
|
14
|
-
|
-
|
-
|
| ~214X(!)
|
Damage
|
Red Damage
|
Proration
|
Cancel
|
Guard
|
| 1000
|
784
|
70% (O)
|
-
|
LH (/ LHA)
|
| First Active
|
Active
|
Recovery
|
Frame Adv
|
Circuit
|
Invuln
|
| 17
|
6
|
4
|
18
|
10.0%
|
-
|
| ~214[X](!)
|
Damage
|
Red Damage
|
Proration
|
Cancel
|
Guard
|
| 500*5 (1630)
|
(1279)
|
70% (O)
|
-
|
LH
|
| First Active
|
Active
|
Recovery
|
Frame Adv
|
Circuit
|
Invuln
|
| 17
|
10
|
0
|
26
|
5.0%*5 (25.0%)
|
-
|
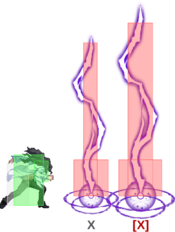
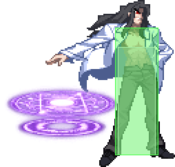
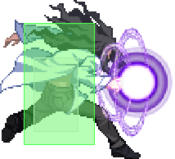
- The reason you play C-Roa. If his orbs were their own characters they would be better than most of the cast. For notation, 214X(!) means a specific orb is detonated, and 214[X](!) only means that the detonated orb was set as a Blowback Edge one beforehand instead of the detonation input itself being held. The only difference in frame data between detonating a ground or air orb on the ground, is that uncharged air orbs are still air blockable.
Effectively a swiss army knife of a move as it can allow you to switch between zoning and pressuring freely as well as serving as an effective anti-air due to the fact it is extremely active and will trade with almost any jump in and allows you to confirm afterwards.
With a normal orb being +18 on block and the blowback version being a whopping +26 means that blocking one can result in almost inescapable pressure when combined with rebeat pressure and his ability to cancel his specials into other specials.
Although this move is extremely powerful it does have few although hard to exploit weaknesses that should be noted. The start up is rather slow on the blow back version so if an opponent has a fullscreen attack such as a fast projectile or can position themselves to bait Roa into setting an orb they can punish accordingly. Some notable ways to do this are C-Ciel and H-Roa 236C, Nero and Wara airdash j.C, and H-Ryougi's knife throw.
|
|
A/B A/B C C
|
| A (Min)
|
Damage
|
Red Damage
|
Proration
|
Cancel
|
Guard
|
| -
|
-
|
-
|
-
|
-
|
| First Active
|
Active
|
Recovery
|
Frame Adv
|
Circuit
|
Invuln
|
| 7
|
1
|
14
|
-
|
-
|
-
|
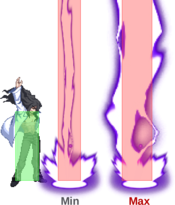
- Charges up a lightning bolt, or releases it. If the charge would go over 9, it's treated as 22C instead (i.e. doesn't add charges, just releases lightning).
Charges up +1. Can be held to continue charging, giving an additional charge every 32 frames this move is held in total, although you can cancel this move into itself rapidly to get more charges in a shorter amount of time than you would get than just holding the input.
|
| B
|
Damage
|
Red Damage
|
Proration
|
Cancel
|
Guard
|
| -
|
-
|
-
|
-
|
-
|
| First Active
|
Active
|
Recovery
|
Frame Adv
|
Circuit
|
Invuln
|
| 8
|
1
|
28
|
-
|
-
|
-
|
|
Charges up +3. Cannot be held.
|
C
0 ~ Best
|
Damage
|
Red Damage
|
Proration
|
Cancel
|
Guard
|
| 1000 ~ 3500
|
686 ~ 2705
|
50% (O)
|
-
|
LHA ~ LH
|
| First Active
|
Active
|
Recovery
|
Frame Adv
|
Circuit
|
Invuln
|
| 15 ~ 13
|
2
|
18 ~ 8
|
2 ~ 18
|
10.0% ~ 30.0%
|
-
|
|
Releases the lightning in front of you, expending all charges.
Details
There are actually two counters for charges: visible and hidden.
Visible: The number of charges, as displayed on the screen. If you'd end up at more than 9 charges, lightning is released.
- Recovery is reduced with more charges. Compared to a 0-charge bolt, 1-3 charges reduces recovery by 6 frames, 4-6 by 8 frames, and 7-9 by 10 frames.
- At 4+, it sets off your orbs.
- At exactly 6, the lightning Circuit Breaks (400f) and deals less damage than normal, and the bolt comes out one frame later (+1 startup, -1 recovery). Knocks down if hidden charges <5 (at least one B-charge), else launches (6 A-charges).
- At 7+, it strikes where the opponent is, rather than in front of you.
Hidden: The number of times charges have been added. All A-version charges count fully, but B-version charges count the number of times the move was used, so each use counts as 1 instead of 3.
- Increases damage. See table below.
- At 0-3, airborne opponents will be knocked down.
- At 1+, launches grounded opponents. (At 0, it only knocks them back.).
- At 3+, launches grounded opponents higher.
- At 4+, the launch is untechable. Airborne opponents will bounce up instead of going down. (If visible=6, airborne opponents start bouncing at 5+.)
- At 5+, the bolt comes out two frames earlier (-2 startup, +2 recovery). This even applies to the Circuit Break bolt's +17.
- At 6+, it is air unblockable.
- At 9, it has a larger (4/3x) hitbox. This even applies to the Circuit Break bolt.
Damage, frame advantage by charges
Visible
charges
|
| 22B count
|
Notes
|
| 0 |
1 |
2 |
3
|
| 0 |
1000, +2 |
- |
- |
- |
|
| 1 |
1300, +14 |
- |
- |
- |
|
| 2 |
1500, +14 |
- |
- |
- |
|
| 3 |
1700, +14 |
1200, +14 |
- |
- |
|
| 4 |
2000, +16 |
1500, +16 |
- |
- |
|
| 5 |
2200, +14 |
1700, +16 |
- |
- |
|
| 6 |
2000, +15 |
1500, +17 |
1200, +17 |
- |
Circuit Break
|
| 7 |
2800, +16 |
2200, +16 |
1700, +18 |
- |
|
| 8 |
3100, +16 |
2600, +16 |
2000, +18 |
- |
|
| 9 |
3500, +16 |
2800, +16 |
2200, +16 |
1700, +18 |
|
|
|
Aerial Specials
|
|
| A
|
Damage
|
Red Damage
|
Proration
|
Cancel
|
Guard
|
| 500, 1500 (1351)
|
(1059)
|
100%
|
-EX-
|
LHA
|
| First Active
|
Active
|
Recovery
|
Frame Adv
|
Circuit
|
Invuln
|
| 5
|
7
|
6
|
-
|
3.0%, 10.0% (13.0%)
|
-
|
- Aerial version of Roa's DP. All versions are air blockable.
Despite being air blockable, it can still be used as an anti air after setting orbs to catch an air dashing opponent off guard.
|
| B
|
Damage
|
Red Damage
|
Proration
|
Cancel
|
Guard
|
| 300*3, 1000 (1599)
|
(1278)
|
100%
|
-
|
LHA
|
| First Active
|
Active
|
Recovery
|
Frame Adv
|
Circuit
|
Invuln
|
| 5
|
12
|
9
|
-
|
3.0%*3, 10.0% (19.0%)
|
-
|
|
Higher reach, but no invincibility.
|
| EX
|
Damage
|
Red Damage
|
Proration
|
Cancel
|
Guard
|
| 350*6, 1000 (2456)
|
(1778)
|
100%
|
-
|
LHA
|
| First Active
|
Active
|
Recovery
|
Frame Adv
|
Circuit
|
Invuln
|
| 3+2
|
25
|
9
|
-
|
-100.0%
|
Full 1-6
|
|
Air version is air blockable but still has invulnerability. Mostly situational as most of the time it’s not worth the meter.
|
|
|
|
| j.214X
|
Damage
|
Red Damage
|
Proration
|
Cancel
|
Guard
|
| -
|
-
|
-
|
-J-
|
-
|
| First Active
|
Active
|
Recovery
|
Frame Adv
|
Circuit
|
Invuln
|
| 9
|
1
|
11
|
-
|
-
|
-
|
| j.214[X]
|
Damage
|
Red Damage
|
Proration
|
Cancel
|
Guard
|
| -
|
-
|
-
|
-SP-, -EX-, -J-
|
-
|
| First Active
|
Active
|
Recovery
|
Frame Adv
|
Circuit
|
Invuln
|
| 18
|
1
|
11
|
-
|
-
|
-
|
| ~j.214X(!)
|
Damage
|
Red Damage
|
Proration
|
Cancel
|
Guard
|
| 1000
|
784
|
70% (O)
|
-J-
|
LHA (/ LH)
|
| First Active
|
Active
|
Recovery
|
Frame Adv
|
Circuit
|
Invuln
|
| 13
|
6
|
3
|
-
|
10.0%
|
-
|
| ~j.214[X](!)
|
Damage
|
Red Damage
|
Proration
|
Cancel
|
Guard
|
| 500*5 (1630)
|
(1279)
|
70% (O)
|
-
|
LH
|
| First Active
|
Active
|
Recovery
|
Frame Adv
|
Circuit
|
Invuln
|
| 13
|
X (10)
|
9
|
-
|
5.0%*5 (25.0%)
|
-
|
- Data on C-Roa's air orbs. For notation, j.214X(!) means a specific orb is detonated, and j.214[X](!) only means that the detonated orb was set as a Blowback Edge one beforehand instead of the detonation input itself being held.
The ability to cancel a blowback edge air orb set into shield, jump and DP means you can almost always stay safe after a successful orb set.
They almost go fullscreen and become air unblockable when blowback edged meaning once you get an orb out the opponent is taking a huge risk when approaching you in any way as getting hit by an orb means eating a combo into more orbs being set up.
|
|
Arc Drive
|
|
| Damage
|
Red Damage
|
Proration
|
Cancel
|
Guard
|
| 7000 (3080)
|
(2182)
|
50% (O)
|
-
|
LH
|
| First Active
|
Active
|
Recovery
|
Frame Adv
|
Circuit
|
Invuln
|
| 7+6
|
2
|
38
|
-15
|
removes all
|
Full 7-8, 13-14
|
|
An almost fullscreen horizontal lightning strike which goes into a cutscene on hit. Untechable knockdown.
|
|
Another Arc Drive
|
|
| Damage
|
Red Damage
|
Proration
|
Cancel
|
Guard
|
| 8000 (3520)
|
(2380)
|
50% (O)
|
-
|
LH
|
| First Active
|
Active
|
Recovery
|
Frame Adv
|
Circuit
|
Invuln
|
| 6+6
|
2
|
38
|
-15
|
removes all
|
Full 6-7, 12-13
|
|
Functions the same as Arc Drive, with more damage added. Untechable knockdown that can be hit OTG.
|
|
Last Arc
|
|
| Damage
|
Red Damage
|
Proration
|
Cancel
|
Guard
|
| 5000
|
3920
|
N/A
|
-
|
U
|
| First Active
|
Active
|
Recovery
|
Frame Adv
|
Circuit
|
Invuln
|
| 4
|
1+1
|
40
|
-
|
removes all
|
Full
|
|
Fullscreen command grab Last Arc. Notable for doing fixed damage no matter how much Blood Heat gauge Roa has left.
|
|
MBAACC Navigation


