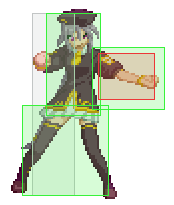
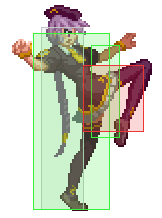
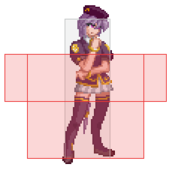
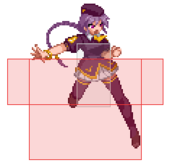
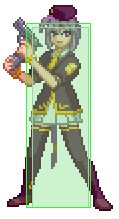
Character Page Progress
This page is mostly complete, consider joining as an editor to help finish it up. Please update this character's roadmap page when one of the editing goals have been reached. When no main goals are left, please remove this section from this page.
| In Progress |
To-do
|
- Combos:
- Add damage, meter gain/given numbers and video links to the pre-existing combos.
|
|
Additional Resources
C-Sion Match Video Database
Melty Bits: C-Sion
YouTube video showing off C-Sion's basic combos. Many thanks to FrostyTempered!
Notable Players
| Name |
Color
|
Region |
Common Venues |
Status |
Details
|
Abysswalker
(Abysswalker#3894) |

|
North America |
Netplay |
Inactive |
Heavy focus on high-speed gameplay and setting a fast game pace. On indefinite hiatus as of Fall 2022.
|
ScrawtVermillion
(ScrawtV#7952) |

|
North America |
Netplay |
Inactive |
NA's #1 threat of the last few years. Very aggressive playstyle, emphasizing good movement and suffocating offense.
|
yuu
(ユウ) |

|
Japan |
A-cho, Port 24 |
Active |
Has been at the forefront of the Japanese MBAACC scene for a decade. Typically showcases very creative and esoteric options.
|
Overview
Strengths / Weaknesses
| Strengths
|
- Extremely reliable toolbox that serves her gameplan well.
- Very strong frametrap pressure, is almost constantly plus on block.
- Some of the best ground mobility in the game thanks to her dash.
- Very high damage overall.
- Good air normals.
- Strong mixup on metered oki routes.
- Great metergain from j.[C] loops with low meter demand.
- You can instantly make her victory lines funny by inserting some variation of "Erm, actually" at the beginning.
- You do not play Sion; you become Sion.
|
| Weaknesses
|
- Small ground normals force her to rely on other options for neutral and abare frequently.
- Mediocre backdash.
- Can struggle in neutral if kept outside of her preferred range.
- Optimal play requires high overall execution and effort in most every gamestate.
- Mediocre corner carry options.
- Lacks reliable oki off of most air CH conversions.
- You do not play Sion; you become Sion.
|
Unique Mechanics
Sion has an Ammo gauge that affects how many bullets can be shot from her 236 specials. If she runs out of ammo after one of these specials, she will automatically go into a reloading state during the move's recovery, where she loads all bullets back in but is left vulnerable and very minus. Unique to Crescent Moon, she can reload her ammo manually by inputting 22D.
General Gameplan
C-Sion is a high-execution footsies character with an overall aggressive feel. Her general gameplan revolves around using her large toolbox to force the opponent into making mistakes in neutral, and then punishing them with her extremely high overall damage. She then leads this into strong pressure and/or positional advantage, especially in the corner. Her dash affords her incredible whiff punish options and her air buttons allow her to intercept the opponent's options and enforce her space well, though her ability to directly challenge can be lacking, especially on the ground, and her high-damage combos are both difficult to perform and necessary to execute her gameplan. Momentum and okizeme are important for this character; it's not uncommon for her to kill the opponent off of a single mistake.
Neutral
Sion's neutral revolves heavily around her great overall movement and whiff punish ability. She has the best run in the game, at near top speed frame 1, and a 4F startup 5A, allowing her to crossunder anti-air very effectively. 5A is +1 on block and decent at catching jumpouts, which makes upbacking against her risky in close quarters. Another defining neutral option is 214A. With 12f startup and nearly half screen reach, she can use this to harass zoners and catch landings to then set up a left/right mixup. She tends to lack a way to directly challenge jump-ins aside from 623B on the ground, however, which typically forces her to rely on preemptive dash-under, shield, or taking to the air.
In the air, she has quite a few options to assert her space, though none of them hit behind her. Air scouting with rising j.A is strong, with good framedata to chase jumps, interrupt jump-ins and force the opponent back to the ground. j.C is big and fast and hits primarily above her, allowing her to rise with it to anti air, defend her airspace or simply harass her opponent while below them, though it has a blind spot at roughly 45 degrees below her. She also has j.B as a strong jump-in, with a big hitbox and long active frames, and she has a reliable option to land safely with j.2C, which shares many of j.B's strengths while hitting directly below her.
Pressure
Her pressure leverages heavy amounts of plus frames and her run, and typically starts with 2A. Your goal on pressure as Sion is to force people into bad decisions and make your resources count, relying on your ability to stay in their face and create heavy amounts of ambiguity to force the opponent to panic; in any given game of RPS, you should have three options to an opponent's one. Her main reset options are rebeat 5A, 6C 4C, and 236[B]. 5A and 2A both set up tick throws, and 2B moves her forward. 5C(1) is rebeatable. She can also 421[B] to redash, though it's a heavy commitment and adds rebeat penalty with each use. 6B becomes important after the opponent begins to respect her pressure, being a very difficult to react to standing overhead.
Okizeme
As mentioned above, keeping momentum via okizeme is important.
You have three main okizeme situations: j.623X midscreen ender, corner airthrow, and 214A ender.
j.623X midscreen ends with Sion directly under the opponent, allowing you to chase however you please, typically by following their airtech and pinning their landing.
Airthrow is your primary meterless ender in the corner, but does not give hard knockdown. If you think they'll forward tech, you can press an air normal just before landing to reduce your landing recovery and catch it, typically with throw. J.214C after airthrow catches back and neutral tech for damage and hard knockdown.
Your other option is 214A ender, typically obtained after spending meter. This sets up her left/right mixup, performed by doing upback and then airdashing forward (7 66). Whether or not you whiff an air normal on the way down determines which side you're on; no air normal or very late air normal means crossup, earlier means same-side. Do note that this mixup doesn't work on Hime because of her bugged collision box on knockdown. Examples of alternative mixups to use versus her can be found here.
Defense
C-Sion relies heavily on system mechanics, especially EX Guard and Shield, to escape pressure.
In terms of abare, her A normals tend to be mediocre due to being small (though 2A is lightning fast if they're prone to relying too much on throw), so she relies on dashing out or jumping out to escape the corner typically. Upforward j.A is one of her strongest reliable escape options against larger gaps, though like any jumpout, it can easily end with you being hit for not blocking. 214A can also disrespect certain pressure options that outspace everything else or are typically slow but unsafe to challenge, such as Nero deer or mouth, or H-Kohamech spikeball. Versus options that are big and fast but have long recovery, such as Nero 5[C] or Satsuki 2C, she has 421C, which, while slow and risky, catches moves similar to those previously mentioned and leads to a full combo. 421A and B are niche as reversals, but do provide full body invuln for a few frames and a low profile hitbox until cancellable. 623B is a reliable option unless the opponent is directly above you in the corner thanks to its speed and reach, though it can be somewhat easy to bait due to its forward movement. Sion wins any trades with 623A due to it launching on hit and it's very easy to trade with thanks to its quick startup.
As for system mechanics: her shield bunker is unique in that while it lacks vertical reach, making it somewhat risky to use versus jumpins, it has prodigious horizontal reach, which allows her to ignore certain pressure resets (C-Aoko 624C for example can be bunkered on reaction) and challenge multihits that would typically be safe. Shield is a reliable option for her due her general traits as a crescent moon character, and due to 623A and 623B coming out during shield stop, making them impossible to counteract if inputted correctly. Her specials are very low reward regardless of which option you choose out of shield, but her 5A is active a frame after shield stop ends, making it OSable. Her dodge on the ground is very unreliable, owing to its slow framedata and short distance.
Combos
| Combo Notation Help
|
Disclaimer: Combos are written by various writers, so the actual notation used in pages can differ from the standard one.
For more information, see Glossary and Controls.
|
| X > Y
|
X input is cancelled into Y.
|
| X > delay Y
|
Must wait for a short period before cancelling X input into Y.
|
| X, Y
|
X input is linked into Y, meaning Y is done after X's recovery period.
|
| X+Y
|
Buttons X and Y must be input simultaneously.
|
| X/Y
|
Either the X or Y input can be used.
|
| X~Y
|
This notation has two meanings.
- Use attack X with Y follow-up input.
- Input X then within a few frames, input Y. Usually used for option selects.
|
| X(w)
|
X input must not hit the opponent (Whiff).
|
| j.X
|
X input is done in the air, implies a jump/jump cancel if the previous move was done from the ground.
Applies to all air chain sections:
- Assume a forward jump cancel if no direction is given.
- Air chains such as j.A > j.B > j.C can be shortened to j.ABC.
|
| sj.X
|
X input is done after a super jump. Notated as sj8.X and sj9.X for neutral and forward super jumps respectively.
|
| dj.X
|
X input is done after a double jump.
|
| sdj.X
|
X input is done after a double super jump.
|
| tk.X
|
Stands for Tiger Knee. X motion must be buffered before jumping, inputting the move as close to the ground as possible. (ex. tk.236A)
|
| (X)
|
X is optional. Typically the combo will be easier if omitted.
|
| [X]
|
Input X is held down. Also referred to as Blowback Edge (BE). Depending on the character, this can indicate that this button is held down and not released until indicated by the release notation.
|
| ]X[
|
Input X is released. Will only appear if a button is previously held down. This type of input is referred to as Negative Edge.
|
| {X}
|
Button X should only be held down briefly to get a partially charged version instead of the fully charged one.
|
| X(N)
|
Attack "X" should only hit N times.
|
| (XYZ)xN
|
XYZ string must be performed N times. Combos using this notation are usually referred to as loops.
|
| (XYZ^)
|
A pre-existing combo labelled XYZ is inserted here for shortening purposes.
|
| CH
|
The first attack must be a Counter Hit.
|
| Air CH
|
The first attack must be a Counter Hit on an airborne opponent.
|
| 66
|
Performs a ground forward dash.
|
| j.66
|
Performs an aerial forward dash, used as a cancel for certain characters' air strings.
|
| IAD/IABD
|
Performs an Instant AirDash.
|
| AT
|
Performs an Air Throw. (j.6/4A+D)
|
| IH
|
Performs an Initiative Heat.
|
| AD
|
Performs an Arc Drive.
|
| AAD
|
Performs an Another Arc Drive.
|
As a note for all combos:
- If the opponent is crouching, 5C will launch them and you will just want to go into air-combo afterwards. If there are specifics needed they will be noted.
- If you don't trust your execution, you can omit the airdash j.C combo enders in all of these.
Enders
| Condition
|
Notation
|
Damage
vs V.Sion
|
Notes
|
|
| Airborne opponent
|
|
1600
|
| |
| Meter Gained: 0 |
Meter Given (vs C-Moon): 0 |
| Used in the corner. |
|
|
| Airborne opponent
|
|
1632
|
| |
| Meter Gained: 20 |
Meter Given (vs C-Moon): 6 |
| Used midscreen. |
|
|
| Airborne opponent, 100% meter
|
|
3258
|
| |
| Meter Gained: 0 |
Meter Given (vs C-Moon): 1.1 |
| Corner carry. Less damage than j.623A>J.623C. |
|
|
Normal Combos
All of these work both midscreen and in the corner. If you're far away from the opponent, do 2B > 3C. All combos listed with Ender use Airthrow in the corner and j.623X midscreen.
| Condition
|
Notation
|
Damage
vs V.Sion
|
Notes
|
|
| Normal starter, standing opponent
|
- (2A/5A) > 5B > 2B > 5C > 3C > j.BC > dj.BC > j.66 > j.C > Ender
|
5058
|
| |
| Meter Gained: 73 |
Meter Given (vs C-Moon): 21.9 |
| Basic combo, basic damage. At midscreen, j.623B ender is preferred. |
|
|
| Normal starter, crouching opponent
|
- (2A/5A) > 5B > 2B > 5C > j.BC > j.66 > j.C > dj.BC > Ender
|
5191
|
| |
| Meter Gained: 66 |
Meter Given (vs C-Moon): 19.8 |
| Crouching variant of the above for better height control. At midscreen, j.623B ender is preferred. |
|
|
| Normal starter, standing opponent (100% meter for 236C)
|
- (2A/5A) > 5B > 2B > 5C > 2C > 214A/236C
|
3685/4517
|
| |
| Meter Gained: 41/31 |
Meter Given (vs C-Moon): 13.4/24.8 |
| Basic combo, allows for okizeme afterwards. 214A allows Sion to perform a safe-jump and 50/50 mix-up. |
|
|
| Normal starter, standing opponent
|
- (2A/5A) > 5B > 2B > 5C > 3C > j.[C] > delay j.66 > j.[C] > dj delay j.[C] > j.214A(w), land j.BC > dj.BC > j.66 > j.C > Ender
|
6011
|
| |
| Meter Gained: 100 |
Meter Given (vs C-Moon): 30 |
| Also known as the Yuu combo. Low hitcount starters don't work on Aoko and Nanaya. Airdash into the opponent to connect the second j.[C] midscreen. |
|
|
| Normal starter, standing opponent, vs Aoko/Nanaya
|
- (2A/5A) > 5B > 2B > 5C > 3C > j.[C] > dj8[4] delay j.[C] > j.214A(w), land j.BC > dj.BC > (j.66 > j.C) > Ender
|
???
|
| |
| Meter Gained: ??? |
Meter Given (vs C-Moon): ??? |
| Stable variant of the above for characters who won't fall low enough to airdash into on low hitcount starters. |
|
|
| Normal starter, crouching opponent
|
- (2A/5A) > 5B > 2B > 5C > j.C > dj.[C] > delay j.66 > j.[C] > j.214A(w), land j.BC > dj.BC > j.66 > j.C > Ender
|
6403
|
| |
| Meter Gained: 93 |
Meter Given (vs C-Moon): 27.9 |
| Crouching variant of the above. On certain characters, you need to do j.B > delay j.C before the dj.[C]. Tends to sideswap on the rejump. |
|
|
| Normal starter, standing opponent
|
- (2A/5A) > 5B > 2B > 5C > 3C > j.[C] > delay j.66 > j.[C] > dj delay j.[C] > j.214A(w), land j.BC > dj.[C] > delay j.66 > j.[C](A)B > Ender
|
6106
|
| |
| Meter Gained: 103 |
Meter Given (vs C-Moon): 30.9 |
| Fully optimized meterless version of the standard kyaa loop. Provides slightly more damage, much better carry and more meter. |
|
|
| Normal starter, crouching opponent
|
- (2A/5A) > 5B > 2B > 5C > j.C > dj.[C] > delay j.66 > j.[C] > j.214A(w), land j.BC > dj.[C] > delay j.66 > j.[C](A)B > Ender
|
6573
|
|
| Meter Gained: 96 |
Meter Given (vs C-Moon): 28.8 |
(Video) |
| Crouching variant of the above. On certain characters, you need to do j.B > delay j.C before the dj.[C]. Tends to sideswap on the rejump. |
|
|
| Normal starter, standing opponent, 100% meter
|
- (2A/5A) > 5B > 2B > 5C > 2C > 214C, 5A > 5B > 2B > 5C > 2C > 214A/air-combo/236C
|
5362/>5128/5598
|
| |
| Meter Gained: ??? |
Meter Given (vs C-Moon): ??? |
| Basic meter extension off of a 2C. Mainly used for setups and okizeme. |
|
|
| 214B starter, grounded opponent
|
- 214B, 66 > 5A > 5B > 2B > 5C > 2C > 214A/236C
|
3246/3865
|
| |
| Meter Gained: ??? |
Meter Given (vs C-Moon): ??? |
| Off of a raw 214B, the damage output on an air-combo follow-up isn't really worth it. Stick to this unless you're sure that the air-combo will kill. |
|
|
| Raw airthrow starter
|
- Raw AT, land 66 > 5A > 5C > j.ABC > dj.BC > j.66 > j.C > Ender
|
???
|
| |
| Meter Gained: ??? |
Meter Given (vs C-Moon): ??? |
| Midscreen raw airthrow combo. A raw airthrow will throw your opponent across the screen bouncing them up a good height. Be careful not to input the dash too early, because this will NOT work if you airdash instead. |
|
|
| Counterhit starter, airborne opponent
|
- Air CH, (land) 2B/5B > 5C > j.ABC > j.BC > j.66 > j.C > Ender
|
???
|
| |
| Meter Gained: ??? |
Meter Given (vs C-Moon): ??? |
| This is your go-to aerial counterhit follow-up. If need be, replace the 2B with 5B if you're too close to the opponent. You can also do the crouching j.[C] loop combo from 2B/5B > 5C. |
|
|
Corner Combos
| Condition
|
Notation
|
Damage
vs V.Sion
|
Notes
|
|
| Normal starter, grounded opponent, 100% meter
|
- 5B > 2B > 5C > 3C > 421C > j.214A(w), land 5[C] > (2A(w) >) 6[B] > 214B, dash (5AA) > 5B > 2B > 5C > 2C > 214A/236C
|
5475
|
| |
| Meter Gained: -44 |
Meter Given (vs C-Moon): 36 |
| Between the 5[C] and 6[B] you will need to whiff a 2A and do reverse hit 6[B] for it to hit properly. If you end up hitting them with the reverse hit, you'll need to input 214B as 236B. Versus some characters you may need to manually delay and do 5[C]>6[B] (Nero and Miyako being examples). |
|
|
| Normal starter, grounded opponent, 100% meter
|
- 5B > 2B > 5C > 421C > j.214A(w), land 5[C] > 6[B] > 214B, dash (5AA) > 5B > 2B > 5C > 2C > 214A/236C
|
5342
|
| |
| Meter Gained: -51 |
Meter Given (vs C-Moon): 33 |
| Crouching confirm version of the above. The link on the 5[C] is tighter but it makes the input rules from above unnecessary as you'll never cross the opponent up. |
|
|
| Normal starter, grounded opponent, 200% meter
|
- 5B > 2B > 5C > 3C > j.[C] > delay j.66 > j.[C] > dj delay j.[C] > j.214C(w) > 421C > j.214A(w), land 5[C] > (2A(w) >) 6[B] > 214B, dash (5AA) > 5B > 2B > 5C > 2C > 214A/236C
|
6394
|
| |
| Meter Gained: -114 |
Meter Given (vs C-Moon): 62 |
| MAX mode confirm version of the above. The input rules from above apply. The height control will only work on a properly delayed kyaa loop. |
|
|
| Normal starter, grounded opponent, 200% meter
|
- 5B > 2B > 5C > j.C > dj.[C] > delay j.66 > j.[C] > j.214C(w) > 421C > j.214A(w), land 5[C] > (2A(w) >) 6[B] > 214B, dash (5AA) > 5B > 2B > 5C > 2C > 214A/236C
|
6478
|
| |
| Meter Gained: -121 |
Meter Given (vs C-Moon): 58 |
| Crouching confirm version of the above. The input rules from above apply. The height control will only work on a properly delayed kyaa loop. On certain characters, you need to do j.B > delay j.C before the dj.[C]. |
|
|
| Raw airthrow starter
|
- Raw AT, land 2B > 5B > 5C > j.ABC > dj.BC > j.66 > j.C > Ender
|
???
|
| |
| Meter Gained: ??? |
Meter Given (vs C-Moon): ??? |
| It is essentially the same as the midscreen combo, but with a 2B tacked on at the start. |
|
|
Move Descriptions
| Frame Data Help
|
| Header
|
Tooltip
|
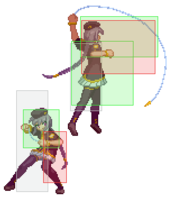
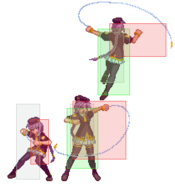
| Move Box Colors
|
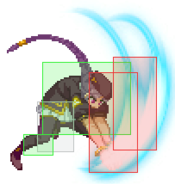
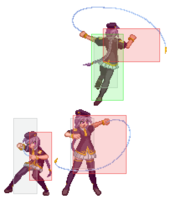
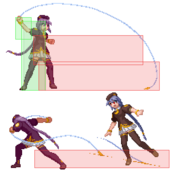
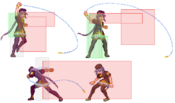
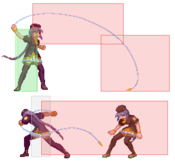
Light gray = Collision Box (A move lacking one means it can go through the opponent's own collision box).
Green: Hurt Boxes.
Red: Hit(/Grab) Boxes.
Yellow: Clash Boxes (When an active hitbox strikes a clash box, the active hitbox stops being active. Multi-hit attacks can beat clash since they will still progress to the next hitbox.)
Magenta: Projectile-reflecting boxes OR Non-hit attack trigger boxes (usually).
Blue: Reflectable Projectile Boxes.
|
| Damage
|
Base damage done by this attack.
(X) denotes combined and scaled damage tested against standing V. Sion.
|
| Red Damage
|
Damage done to the recoverable red health bar by this attack. The values are inherently scaled and tested against standing V. Sion.
(X) denotes combined damage.
|
| Proration
|
The correction value set by this attack and the way it modifies the scaling during a string. See this page for more details.
X% (O) means X% Overrides the previous correction value in a combo if X is of a lower percentage.
X% (M) means the current correction value in a combo will be Multiplied by X%. This can also be referred to as relative proration.
|
| Circuit
|
Meter gained by this attack on hit.
(X%) denotes combined meter gain.
-X% denotes a meter cost.
|
| Cancel
|
Actions this move can be cancelled into.
SE = Self cancelable.
N = Normal cancelable.
SP = Special cancelable.
CH = Cancelable into the next part of the same attack (Chain in case of specials).
EX = EX cancelable.
J = Jump cancelable.
(X) = Cancelable only on hit.
-X- = Cancelable on whiff.
|
| Guard
|
The way this move must be blocked.
L = Can block crouching
H = Can block standing.
A = Can block in the air.
U = Unblockable.
|
| Startup
|
Amount of frames that must pass prior to reaching the active frames. Also referred to as "True Startup".
|
| Active
|
The amount of frames that this move will have a hitbox.
(x) denotes frame gaps where there are no hitboxes is present. Due to varied blockstuns, (x) frames are difficult to use to determine punish windows. Generally the larger the numbers, the more time you have to punish.
X denotes active frames with a duration separate from its origin move's frame data, such as projectile attacks. In this case, the total length of the move is startup+recovery only.
|
| Recovery
|
Frames that this move has after the active frames if not canceled. The character goes into one frame where they can block but not act afterwards, which is not counted here.
|
| Advantage
|
The difference in frames where you can act before your opponent when this move is blocked (assuming the move isn't canceled and the first active frame is blocked).
If the opponent uses a move with startup that is at least 2 frames less than this move's negative advantage, it will result in the opponent hitting that move.
±x~±y denotes a range of possible advantages.
|
| Invul
|
Lists any defensive properties this move has.
X y~z denotes X property happening between the y to z frames of the animations. If no frames are noted, it means the invincibility lasts through the entire move.
Invicibility:
- Strike = Strike invincible.
- Throw = Throw invincible.
Hurtbox-Based Properties:
- Full = No hurtboxes are present.
- High = Upper body lacks a hurtbox.
- Low = Lower body lacks a hurtbox.
Miscellaneous Properties
- Clash = Frames in which clash boxes are active.
- Reflect = Frames in which projectile-reflecting boxes are active.
- Super Armor = Frames in which the character can take hits without going into hit stun.
|
Normal Moves
Standing Normals
|
|
| Damage
|
Red Damage
|
Proration
|
Cancel
|
Guard
|
| 350
|
147
|
75% (O)
|
-SE-, -N-, -SP-, -EX-, (J)
|
LH
|
| First Active
|
Active
|
Recovery
|
Frame Adv
|
Circuit
|
Invuln
|
| 5
|
4
|
7
|
1
|
3.0%
|
-
|
|
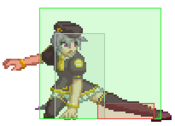
A downward angled jab. Has good range, combos into itself, hits crouchers. Your main whiff-cancel move and a strong poke when combined with your dash. It has frame advantage on block.
|
|
|
|
| Damage
|
Red Damage
|
Proration
|
Cancel
|
Guard
|
| 600
|
313
|
100%
|
N, SP, EX, (J)
|
LH
|
| First Active
|
Active
|
Recovery
|
Frame Adv
|
Circuit
|
Invuln
|
| 6
|
4
|
15
|
-4
|
5.0%
|
-
|
|
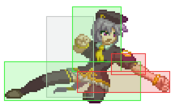
A knee that moves Sion forward slightly.
|
|
|
|
| 5C
|
Damage
|
Red Damage
|
Proration
|
Cancel
|
Guard
|
| 400, 700 (1078)
|
(721)
|
100%
|
N, SP, EX, (J)
|
LH
|
| First Active
|
Active
|
Recovery
|
Frame Adv
|
Circuit
|
Invuln
|
| 7
|
2 (2) 6
|
15
|
-10, -3
|
4.0%, 5.0% (9.0%)
|
-
|
|
Sion kicks low and high for a two-hit attack. First hit can be cancelled into anything. At maximum range, first kick hits and second kick whiffs on crouchers. Has no hittable box from her knee out making it sort of useful for anti-airing. Can be used as an anti air, but very risky, and not worth it on some characters. As an example, Ryougi is very easy to anti air with 5C, Nanaya is next to impossible to anti air with it.
|
| 5[C]
|
Damage
|
Red Damage
|
Proration
|
Cancel
|
Guard
|
| 1000, 900 (1783)
|
(1014)
|
90%*2 (M)
|
N, SP, EX, (J)
|
LH
|
| First Active
|
Active
|
Recovery
|
Frame Adv
|
Circuit
|
Invuln
|
| 22
|
2 (2) 8
|
17
|
-11, -7
|
6.0%, 10.0% (16.0%)
|
-
|
|
Charged version of 5C. Shares the same traits as 5C. Second hit causes a wallslam. Not very useful outside of combos, and even then its uses are limited.
|
|
Crouching Normals
|
|
| Damage
|
Red Damage
|
Proration
|
Cancel
|
Guard
|
| 300
|
98
|
75% (O)
|
-SE-, -N-, -SP-, -EX-, (J)
|
L
|
| First Active
|
Active
|
Recovery
|
Frame Adv
|
Circuit
|
Invuln
|
| 4
|
4
|
9
|
-1
|
3.0%
|
-
|
|
A low kick. Has medium range, combos into itself, a great poke. Primarily used for hit-confirms, tick-throws, and staggers. Your fundamental BnB start-up.
|
|
|
|
| Damage
|
Red Damage
|
Proration
|
Cancel
|
Guard
|
| 500
|
294
|
100%
|
N, SP, EX, (J)
|
L
|
| First Active
|
Active
|
Recovery
|
Frame Adv
|
Circuit
|
Invuln
|
| 7
|
6
|
13
|
-4
|
5.0%
|
-
|
|
A lunging low punch that moves Sion forward and reaches far. Good for poking and hit-confirms.
|
|
|
|
| Damage
|
Red Damage
|
Proration
|
Cancel
|
Guard
|
| 1200
|
784
|
80% (O)
|
SP, EX
|
L
|
| First Active
|
Active
|
Recovery
|
Frame Adv
|
Circuit
|
Invuln
|
| 16
|
3
|
22
|
-7
|
12.0%
|
-
|
|
Sion sweeps her opponent with her etherlite whip. Similar to her 2C from Act Cadenza, but comes out much faster and can be combo-ed into. Reaches about 1/3rd of the screen. Can be cancelled into specials on hit/block.
|
|
Aerial Normals
|
|
| Damage
|
Red Damage
|
Proration
|
Cancel
|
Guard
|
| 300
|
176
|
75%
|
SE, N, SP, EX, J
|
LHA
|
| First Active
|
Active
|
Recovery
|
Frame Adv
|
Circuit
|
Invuln
|
| 6
|
5
|
11
|
-
|
3.0%
|
-
|
|
A downward angled kick with a rather high hitbox. This is your go-to move to keep people on the ground if you're above them.
|
|
|
|
| Damage
|
Red Damage
|
Proration
|
Cancel
|
Guard
|
| 700/560
|
490/392
|
90% (O)
|
N, SP, EX, J
|
HA
|
| First Active
|
Active
|
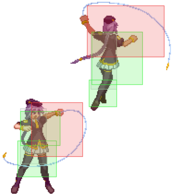
Recovery
|
Frame Adv
|
Circuit
|
Invuln
|
| 8
|
5
|
-
|
-
|
7.0%
|
-
|
|
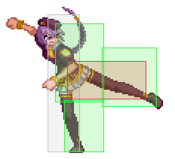
A fast arm swing attack. Great range and hitbox. This is your go to move with Sion in the air to air and ground. After extended play this move beats out j.C is most situations when the opponent is not above you.
|
|
|
|
| j.C
|
Damage
|
Red Damage
|
Proration
|
Cancel
|
Guard
|
| 1000
|
588
|
90% (M)
|
N, SP, EX, J
|
HA
|
| First Active
|
Active
|
Recovery
|
Frame Adv
|
Circuit
|
Invuln
|
| 7
|
2
|
-
|
-
|
10.0%
|
-
|
|
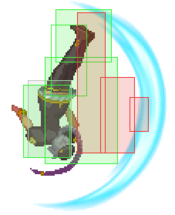
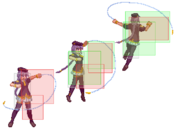
Jumping somersault kick with a nice big hitbox. Your general air-to-anything move. If your opponent is above you, this move is going to beat anything they do 80% of the time; most moves that can beat it while you're under them come out really slow. Unfortunately, if you're ABOVE your opponent it loses to a lot of things if you're bad at timing.
|
| j.[C]
|
Damage
|
Red Damage
|
Proration
|
Cancel
|
Guard
|
| 1000
|
499
|
98% (M)
|
N, SP, EX, J
|
HA
|
| First Active
|
Active
|
Recovery
|
Frame Adv
|
Circuit
|
Invuln
|
| 18
|
4
|
23
|
-
|
10.0%
|
-
|
|
Same as j.C but charged. Generally only used for fuzzy guards, fakeout high or combos. On whiff, after you pop up, you retain your air options, meaning you can double jump/air dash and/or use an attack or special.
|
|
Command Normals
|
|
| 6B
|
Damage
|
Red Damage
|
Proration
|
Cancel
|
Guard
|
| 700
|
392
|
72% (O)
|
(N), (SP), (EX), (J)
|
H
|
| First Active
|
Active
|
Recovery
|
Frame Adv
|
Circuit
|
Invuln
|
| 25
|
2
|
19
|
-3
|
7.0%
|
-
|
|
An overhead knee attack, only cancels into anything on hit, safe on block. An essential component of Sion's mix-up game.
|
| 6[B]
|
Damage
|
Red Damage
|
Proration
|
Cancel
|
Guard
|
| 700
|
392
|
75% (O)
|
N, SP, EX, (J)
|
H
|
| First Active
|
Active
|
Recovery
|
Frame Adv
|
Circuit
|
Invuln
|
| 31
|
3
|
15
|
0
|
7.0%
|
-
|
|
Charged version of Sion's 6B. Cancellable on block. Untechable bounce on hit. Terrible in combos now.
|
|
|
|
| Damage
|
Red Damage
|
Proration
|
Cancel
|
Guard
|
| 700
|
392
|
75% (O)
|
(SP), (EX), (J)
|
LH
|
| First Active
|
Active
|
Recovery
|
Frame Adv
|
Circuit
|
Invuln
|
| 10
|
4
|
27
|
-13
|
7.0%
|
-
|
|
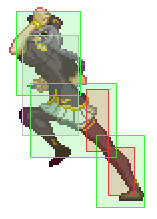
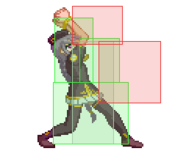
Sion does a double fist volleyball uppercut which launches her opponent. Cancels into anything on hit but is unsafe on block. Inputting 8 on hit will allow Sion to do an extra high follow-up jump.
|
|
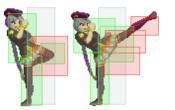
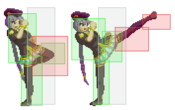
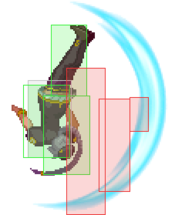
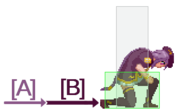
Hurtboxes on Block/Hit Hurtboxes on Block/Hit
|
| 6C
|
Damage
|
Red Damage
|
Proration
|
Cancel
|
Guard
|
| 1000
|
686
|
100%
|
SP, CH, EX, (J)
|
LH
|
| First Active
|
Active
|
Recovery
|
Frame Adv
|
Circuit
|
Invuln
|
| 21
|
4
|
21
|
-9
|
10.0%
|
-
|
|
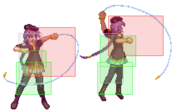
Sion throws out her whip to hit the opponent about 1/3rd of the screen away. Somewhat slow start-up. Can be cancelled into specials on hit/block.
|
| ~4C
|
Damage
|
Red Damage
|
Proration
|
Cancel
|
Guard
|
| 700
|
588
|
60%
|
-
|
LHA
|
| First Active
|
Active
|
Recovery
|
Frame Adv
|
Circuit
|
Invuln
|
| 12
|
1
|
13
|
5
|
6.0%
|
-
|
|
Sion retracts the etherlite whip she sent out with 6C. Pulls the opponent towards you on block and grants a small frame advantage. Knockdown on hit.
|
|
|
|
| Damage
|
Red Damage
|
Proration
|
Cancel
|
Guard
|
| 1000
|
784
|
70% (O)
|
-
|
HA
|
| First Active
|
Active
|
Recovery
|
Frame Adv
|
Circuit
|
Invuln
|
| 12
|
8
|
23
|
-
|
10.0%
|
-
|
|
A downward double fist attack that will beat out a few anti-airs and generally a better move to jump in with than j.C. Slow but has lots of active frames and a great hit box.
|
|
Universal Mechanics
|
|
| Damage
|
Red Damage
|
Proration
|
Cancel
|
Guard
|
| 1500
|
735
|
100%
|
-
|
U
|
| First Active
|
Active
|
Recovery
|
Frame Adv
|
Circuit
|
Invuln
|
| 3
|
1
|
20
|
-
|
0.0%
|
-
|
|
Sion grabs the opponent and kicks them. Untechable knockdown.
|
|
|
|
| Damage
|
Red Damage
|
Proration
|
Cancel
|
Guard
|
| 1600 (Raw)/1300
|
490
|
30%
|
(Any if Raw)
|
U
|
| First Active
|
Active
|
Recovery
|
Frame Adv
|
Circuit
|
Invuln
|
| 2
|
1
|
12
|
-
|
0.0%
|
-
|
|
Standard air throw. Ground bounces the opponent if done raw, ground techable if done as a combo ender.
|
|
|
|
| Bunker
|
Damage
|
Red Damage
|
Proration
|
Cancel
|
Guard
|
| 500
|
196
|
50%
|
-
|
LHA
|
| First Active
|
Active
|
Recovery
|
Frame Adv
|
Circuit
|
Invuln
|
| 26
|
4
|
19
|
-5
|
0.0%
(-50.0% in blockstun)
|
Clash 1-10
|
| (Clash)
|
Damage
|
Red Damage
|
Proration
|
Cancel
|
Guard
|
| 500
|
196
|
50%
|
-
|
LHA
|
| First Active
|
Active
|
Recovery
|
Frame Adv
|
Circuit
|
Invuln
|
| 8
|
4
|
19
|
-5
|
0.0%/-50.0%
|
Strike 1-7
|
|
Similar to 6C and F Moon's 5C, but the huge hurtboxes also appear on whiff.
|
|
|
|
| Damage
|
Red Damage
|
Proration
|
Cancel
|
Guard
|
| 100
|
0
|
100%
|
-
|
U
|
| First Active
|
Active
|
Recovery
|
Frame Adv
|
Circuit
|
Invuln
|
| 16
|
5
|
25
|
-
|
-100.0% (min)
|
Full 1-20
|
|
Standard Heat hitbox.
|
|
|
|
| Ground
|
Damage
|
Red Damage
|
Proration
|
Cancel
|
Guard
|
| 100
|
0
|
100%
|
-
|
U
|
| First Active
|
Active
|
Recovery
|
Frame Adv
|
Circuit
|
Invuln
|
| 11
|
10
|
20
|
-
|
removes all
|
Full 1-39
|
| Air
|
Damage
|
Red Damage
|
Proration
|
Cancel
|
Guard
|
| 100
|
0
|
100%
|
-
|
U
|
| First Active
|
Active
|
Recovery
|
Frame Adv
|
Circuit
|
Invuln
|
| 12
|
10
|
15
|
-
|
removes all
|
Strike 1-30
|
|
Universal burst mechanic. Unlike Crescent/Full Heat activation, the hitbox and frame data doesn't vary between characters. However, you can be thrown out of this move if you input it in the air.
|
|
Special Moves
Grounded Specials
|
|
| A
|
Damage
|
Red Damage
|
Proration
|
Cancel
|
Guard
|
| 400
|
294
|
70% (O)
|
-
|
LH
|
| First Active
|
Active
|
Recovery
|
Frame Adv
|
Circuit
|
Invuln
|
| 7
|
4
|
22
49 (Reload)
|
-4
-31 (Reload)
|
3.0%
|
-
|
| [A]
|
Damage
|
Red Damage
|
Proration
|
Cancel
|
Guard
|
| 400*2 (670)
|
(492)
|
70% (O)
|
-
|
LH
|
| First Active
|
Active
|
Recovery
|
Frame Adv
|
Circuit
|
Invuln
|
| 7
|
4 (10) 4
|
22
49 (Reload)
|
-1
-28 (Reload)
|
3.0%*2 (6.0%)
|
-
|
|
Sion uses bullets to shoot the ground near her opponent. A component of your pressure game. Used in combos for more damage and meter. Hold A to shoot two bullets.
|
| B
|
Damage
|
Red Damage
|
Proration
|
Cancel
|
Guard
|
| 400*3 (1009)
|
(741)
|
80% (O)
|
-
|
LH
|
| First Active
|
Active
|
Recovery
|
Frame Adv
|
Circuit
|
Invuln
|
| 7
|
4 (10) x3
|
21
50 (Reload)
|
3
-25 (Reload)
|
3.0%*3 (9.0%)
|
-
|
| [B]
|
Damage
|
Red Damage
|
Proration
|
Cancel
|
Guard
|
| 400*5 (1578)
|
(1158)
|
80% (O)
|
-
|
LH
|
| First Active
|
Active
|
Recovery
|
Frame Adv
|
Circuit
|
Invuln
|
| 6
|
4 (10) x5
|
21
50 (Reload)
|
7
-25 (Reload)
|
3.0%*5 (15.0%)
|
-
|
|
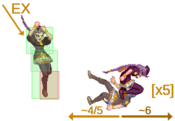
One of the defining components of Sion's pressure game. Shoots 3 bullets at the ground. Hold to shoot up to 5 bullets. Last two bullets can be delayed very slightly.
|
| EX
|
Damage
|
Red Damage
|
Proration
|
Cancel
|
Guard
|
| 300*Ammo, 300 (581 ~ 2750)
|
(284 ~ 1341)
|
97%*Ammo (M), 97% (O)
|
-
|
LHA
|
| First Active
|
Active
|
Recovery
|
Frame Adv
|
Circuit
|
Invuln
|
| 4+9
|
4 ~ 76
|
55
|
-36 ~ -28
|
-100%
|
-
|
|
Uses the remaining amount of bullets to shoot the opponent. Pushes the opponent to the end of the screen for an untechable circuit breaking knockdown, regardless of how many bullets are left. Circuit Break occurs on the last hit. Great for punishing midscreen HEAT activation.
|
|
|
|
| A
|
Damage
|
Red Damage
|
Proration
|
Cancel
|
Guard
|
| 1000, 800 (1682)
|
(676)
|
100%, 60% (O)
|
EX
|
LHA, LH
|
| First Active
|
Active
|
Recovery
|
Frame Adv
|
Circuit
|
Invuln
|
| 4
|
2 (2) 8
|
31
|
-21
|
10.0%, 8.0% (18.0%)
|
Full 1, Low 2-5
|
|
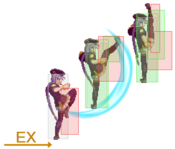
A 2 hit DP that can be EX-cancelled, mainly into 214C and 421C. Has one frame of invincibility and low invulnerability.
|
| B
|
Damage
|
Red Damage
|
Proration
|
Cancel
|
Guard
|
| 800, 500, 300*5 (2375)
|
(1111)
|
100%
|
-
|
LH
|
| First Active
|
Active
|
Recovery
|
Frame Adv
|
Circuit
|
Invuln
|
| 4
|
18
|
32
|
-25
|
8.0%, 5.0%, 3.0%*5 (28.0%)
|
Full 1-7
|
|
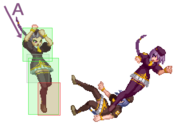
7 hit air unblockable DP. Great reversal and anti air, as it's hard to safejump and it typically beats out jump-ins due to its large hitboxes.
|
| EX
|
Damage
|
Red Damage
|
Proration
|
Cancel
|
Guard
|
| 800, 500, 400*5 (3101)
|
(1952)
|
100%
|
-
|
LH(1), LHA(2-7)
|
| First Active
|
Active
|
Recovery
|
Frame Adv
|
Circuit
|
Invuln
|
| 2+2
|
18
|
34
|
-31
|
-100.0%
|
Full 1-10
|
|
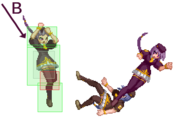
8 hit EX DP. Only the first hit is air unblockable, making this a much less reliable option compared to B DP.
|
|
A A B B EX EX
|
| A
|
Damage
|
Red Damage
|
Proration
|
Cancel
|
Guard
|
| 1000 (880)
|
(603)
|
100%
|
-
|
LA
|
| First Active
|
Active
|
Recovery
|
Frame Adv
|
Circuit
|
Invuln
|
| 13
|
4
|
21
|
-13 ~ -11
|
10.0%
|
-
|
|
A fast whip used for knockdown. Hits low, comes out fast, sets up Sion's okizeme. Comboable from 2C or 6C.
|
| B
|
Damage
|
Red Damage
|
Proration
|
Cancel
|
Guard
|
| 200*2 (373)
|
(182)
|
90%*2 (M)
|
(J)
|
LHA
|
| First Active
|
Active
|
Recovery
|
Frame Adv
|
Circuit
|
Invuln
|
| 24
|
4
|
23
|
-15 ~ -13
|
0.5%*2 (1.0%)
|
Low 1-25
|
|
A slow whip that brings the enemy closer to you. Hits mid. Has lower body invicibility until the second half of the active frames. Dash forward 5A into combo.
|
| EX
|
Damage
|
Red Damage
|
Proration
|
Cancel
|
Guard
|
| 350*4 (1334)
|
(933)
|
100%*3, 70% (M)
|
-
|
LHA
|
| First Active
|
Active
|
Recovery
|
Frame Adv
|
Circuit
|
Invuln
|
| 5+17
|
4
|
23
|
-13
|
-100%
|
-
|
|
A fast whip that brings the enemy closer to you and hits 4 times. Hits mid, comes out fast (not as fast as 214A), sets up opponent for combos from 2C or 3C.
|
|
|
|
| A
|
Damage
|
Red Damage
|
Proration
|
Cancel
|
Guard
|
| 600, 1000 (1207)
|
(709)
|
100%, 65% (O)
|
(J)
|
LH
|
| First Active
|
Active
|
Recovery
|
Frame Adv
|
Circuit
|
Invuln
|
| 31
|
2 (2) 3
|
21
|
-6
|
5.0%, 8.0% (13.0%)
|
Full 5-13 15-25, High 14
|
| [A]
|
Damage
|
Red Damage
|
Proration
|
Cancel
|
Guard
|
| -
|
-
|
-
|
-
|
-
|
| First Active
|
Active
|
Recovery
|
Frame Adv
|
Circuit
|
Invuln
|
| -
|
-
|
22
|
-
|
-
|
Full 5-13, High 14-22
|
|
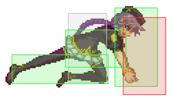
A slide with a kick that launches your opponent. Can pass through certain characters midscreen if close enough (frames 8-13). Hidden -22.5% Reverse Beat penalty.
Hold A to fakeout. Fakeout has upper invincibility.
|
| B
|
Damage
|
Red Damage
|
Proration
|
Cancel
|
Guard
|
| 600, 1000 (1207)
|
(709)
|
100%, 65% (O)
|
(J)
|
LH
|
| First Active
|
Active
|
Recovery
|
Frame Adv
|
Circuit
|
Invuln
|
| 32
|
2 (2) 3
|
21
|
-6
|
5.0%, 8.0% (13.0%)
|
Full 6-14 16-26, High 15
|
| [B]
|
Damage
|
Red Damage
|
Proration
|
Cancel
|
Guard
|
| -
|
-
|
-
|
-
|
-
|
| First Active
|
Active
|
Recovery
|
Frame Adv
|
Circuit
|
Invuln
|
| -
|
-
|
24
|
-
|
-
|
Full 6-14, High 15-24
|
|
A slide with a kick that launches your opponent. Air unblockable, jump cancellable, can be continued into air combo. Hidden -22.5% Reverse Beat penalty.
Hold B to fakeout. Fakeout has upper invincibility.
|
| EX
|
Damage
|
Red Damage
|
Proration
|
Cancel
|
Guard
|
| 600*2, 800, 1200 (2006)
|
(1375)
|
70% (O), 65%*2 (O), 90% (M)
|
(N), (SP), (EX), (J)
|
LH
|
| First Active
|
Active
|
Recovery
|
Frame Adv
|
Circuit
|
Invuln
|
| 2+15
|
16
|
42
|
-40
|
-100.0%
|
Full 1-17
|
|
EX slide with a jumping kick that hits the opponent 4 times. Launches, air unblockable, can be cancelled into anything on hit, unsafe on block. A major component of Sion's more damaging corner combos.
|
|
|
|
| 22D
|
Damage
|
Red Damage
|
Proration
|
Cancel
|
Guard
|
| -
|
-
|
-
|
-
|
-
|
| First Active
|
Active
|
Recovery
|
Frame Adv
|
Circuit
|
Invuln
|
| 39
|
1
|
18
|
-
|
-
|
-
|
| (Full Ammo)
|
Damage
|
Red Damage
|
Proration
|
Cancel
|
Guard
|
| -
|
-
|
-
|
-
|
-
|
| First Active
|
Active
|
Recovery
|
Frame Adv
|
Circuit
|
Invuln
|
| -
|
-
|
27
|
-
|
-
|
-
|
|
Sion reloads the bullets in her magazine. Much slower in Actress Again compared to Act Cadenza. If done while having full ammo, Sion will enter an uncancelable 27-frame animation.
|
|
Aerial Specials
|
|
| A
|
Damage
|
Red Damage
|
Proration
|
Cancel
|
Guard
|
| 800*2 (1209)
|
(591)
|
60% (O)
|
EX
|
LHA
|
| First Active
|
Active
|
Recovery
|
Frame Adv
|
Circuit
|
Invuln
|
| 4
|
8
|
7
|
-17 (TK)
|
10.0%*2 (20.0%)
|
High 4-7
|
|
Air DP. Starts out with pretty small hurtboxes.
|
| B
|
Damage
|
Red Damage
|
Proration
|
Cancel
|
Guard
|
| 500, 300*4 (1470)
|
(607)
|
100%
|
-
|
LHA
|
| First Active
|
Active
|
Recovery
|
Frame Adv
|
Circuit
|
Invuln
|
| 4
|
17
|
10
|
-29 (TK)
|
5.0%, 3.0%*4 (17.0%)
|
-
|
|
6-hit air DP. Mainly used to end her air combos mid screen, as it provides better positioning than airthrow.
|
| EX
|
Damage
|
Red Damage
|
Proration
|
Cancel
|
Guard
|
| 500, 400*4 (1796)
|
(926)
|
100%
|
-
|
LHA
|
| First Active
|
Active
|
Recovery
|
Frame Adv
|
Circuit
|
Invuln
|
| 1+3
|
17
|
10
|
-26 (TK)
|
-100.0%
|
Full 1-6
|
|
Essentially a more damaging version of j.623B. Not much utility outside of combos, but valuable when cancelled into from j.623A to add more damage and seal games.
|
|
|
|
| A
|
Damage
|
Red Damage
|
Proration
|
Cancel
|
Guard
|
| 100, 1200 (1262)
|
(1047)
|
100%
|
-
|
LH
(Whiffs vs Air.)
|
| First Active
|
Active
|
Recovery
|
Frame Adv
|
Circuit
|
Invuln
|
| 12
|
X
|
4
|
2 ~ -3
|
1.0%
|
-
|
|
A fast air slide attack. Safe on block with very fast recovery, even on whiff. A and EX versions gain upper body invicibility until landing when blocked, for some reason.
|
| B
|
Damage
|
Red Damage
|
Proration
|
Cancel
|
Guard
|
| 100, 800 (900)
|
382
|
100%
|
-
|
U
|
| First Active
|
Active
|
Recovery
|
Frame Adv
|
Circuit
|
Invuln
|
| 30
|
X
|
22
|
-
|
1.0%
|
-
|
|
A slow air slide attack, but is unblockable. Unsafe on whiff.
|
| EX
|
Damage
|
Red Damage
|
Proration
|
Cancel
|
Guard
|
| 100, 700*5 (3270)
|
(1361)
|
100%
|
-
|
HA
|
| First Active
|
Active
|
Recovery
|
Frame Adv
|
Circuit
|
Invuln
|
| 3+2
|
X
|
6
|
4 ~ -5
|
-100.0%
|
-
|
|
EX air slide. Flips the opponents 5 times. Hold 4 or 6 to control the direction of her throw. Safe on block and whiff.
|
|
Arc Drive
Der bullet Der bullet
|
| AD
|
Damage
|
Red Damage
|
Proration
|
Cancel
|
Guard
|
| 100, 450*10 (3076)
|
(2251)
|
90% (O)
|
-
|
LH, LHA
|
| First Active
|
Active
|
Recovery
|
Frame Adv
|
Circuit
|
Invuln
|
| 9
|
33 (18) 19
|
81
|
-133 (First Hit)
|
removes all
|
Full 1-133
|
| ~C Max.
|
Damage
|
Red Damage
|
Proration
|
Cancel
|
Guard
|
| 400*6 (4023)
|
(2023)
|
-
|
-
|
-
|
| First Active
|
Active
|
Recovery
|
Frame Adv
|
Circuit
|
Invuln
|
| -
|
-
|
-
|
-
|
-
|
-
|
|
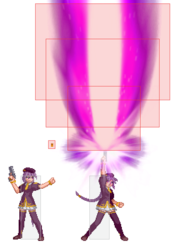
Sion flips an air unblockable bullet into the sky and then fires a huge purple laser upward from her gun. You get more hits if you mash C as she fires the laser. Good anti air if you think it will kill, as it's barely telegraphed at all, with no superflash until she fires the gun. As an arc drive, it also works as a reversal, as it has ludicrous amounts of invuln starting from frame 1, though it's a free punish for the opponent if it's blocked.
|
|
Another Arc Drive
Running to the other end of the screen just for you Running to the other end of the screen just for you Fly away home Fly away home
|
| AAD
|
Damage
|
Red Damage
|
Proration
|
Cancel
|
Guard
|
| 900, 800*10 (3740)
|
(3096)
|
50%
|
-
|
LH
|
| First Active
|
Active
|
Recovery
|
Frame Adv
|
Circuit
|
Invuln
|
| 1+7 ~ 1+35
|
3
|
43
|
-28
|
removes all
|
Full 1-(Until end of active frames)
|
| ~C Max.
|
Damage
|
Red Damage
|
Proration
|
Cancel
|
Guard
|
| 800*6 (4832)
|
(2885)
|
-
|
-
|
-
|
| First Active
|
Active
|
Recovery
|
Frame Adv
|
Circuit
|
Invuln
|
| -
|
-
|
-
|
-
|
-
|
-
|
|
Sion runs forward. If she runs into an enemy, she will automatically throw out an uppercut, which will launch the opponent high into the sky before she performs her normal arc drive animation. This move isn't as good as her normal arc drive, due to half of the base damage being eaten by the 50% prorate on the uppercut, and it has superflash frame 1 after the input, making it much more telegraphed. It works well as a combo ender, though, if you think it'll kill, and it's a decent reversal since she moves fast.
|
|
Last Arc
GUN GUN
|
| Damage
|
Red Damage
|
Proration
|
Cancel
|
Guard
|
| 10450
|
5895
|
50% + 50% * remaining BH time
|
-
|
-
|
| First Active
|
Active
|
Recovery
|
Frame Adv
|
Circuit
|
Invuln
|
| -
|
-
|
-
|
-
|
removes all
|
-
|
|
Sion spins around, anchoring herself with etherlite before she fires a massive purple blast from her pistol. This is a pretty standard last arc, all things considered, but it's a much better return for your meter burn than AAD considering that even at the bottom of your meter you'll still do nearly 6000 damage. It wall slams after the hits, which gives you no real oki off of it, but considering that even against Akiha you can reasonably expect to take half of your opponent's life bar at minimum, it does the job it's meant to do and looks fantastic while it does so.
|
|
MBAACC Navigation


