|
|
| Line 97: |
Line 97: |
| '''Dash 5B:''' Surprisingly fast and long range approach option. Useful for catching passive opponents waiting to bait and whiff punish something else. Good pressure starter. | | '''Dash 5B:''' Surprisingly fast and long range approach option. Useful for catching passive opponents waiting to bait and whiff punish something else. Good pressure starter. |
|
| |
|
| '''236A:''' Extremely strong tool to check grounded opponents and disrupt zoning. Useful for discouraging grounded aggression as beats almost anything on the ground and is generally only weak to air approaches. | | '''236A:''' Extremely strong tool to check grounded opponents and disrupt zoning. Useful for discouraging grounded aggression as it beats almost anything on the ground and is generally only weak to air approaches. |
|
| |
|
| '''214A:''' Similar in application to 236A, but a little safer. Good at forcing opponents into the air or trading with other projectiles. | | '''214A:''' Similar in application to 236A, but a little safer. Good at forcing opponents into the air or trading with other projectiles. |
Character Page Progress
Additional Resources
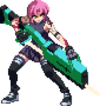
Overview
Playstyle
 F-PCiel oppressively controls the screen, and punishes opponents with brutal okizeme and pressure. F-PCiel oppressively controls the screen, and punishes opponents with brutal okizeme and pressure. |
| Pros |
Cons |
- Space control: Large, disjointed tools allow her to dominate the mid-range in most matchups.
- Antiairs: Arguably the best antiairs in the entire game, in a game where traditional strong grounded antiairs are uncommon.
- Combo depth: Fullscreen corner carry and okizeme from any hit, and a unique ability to transition to unburstable airthrow routes at any point.
- Meter management: Very high meter gain from combos, and EX moves that allow her to safely vent meter in neutral, mid-combo, and on defense to prevent inopportune MAX timing.
- Projectile okizeme: High quality knockdowns into 624B rocks allow F-PCiel to subject her opponent to unreactable mixups while simultaneously covering many reversals.
- Pressure: Multiple sources of meterless plus frames and forward advancing normals.
- Comboable throw: One of the strongest throws in the game, able to deal upwards of 3,000 damage while generating a full combo worth of meter.
- Great options out of shield: Possesses a 5 frame special which leads into a full combo on counterhit, functioning similarly to a Crescent moon EX shield 5A.
|
- High commitment neutral tools: Grounded tools all have significant recovery making them susceptible to whiff punishing.
- Slow aerial mobility: Somewhat linear approach options due to a weak superjump and short airdash.
- High execution floor: Difficult to pick up and play due to unique move properties and a high reliance on half circle inputs.
- Combos are easy to reduce: Rhythmic, repetitive loops result in her practical damage often being much lower than it appears on paper.
- Lackluster defense: Poor defense modifier and no true reversals outside of system mechanics.
- High jump startup: Uniquely has the slowest jump startup in the entire game, meaning she cannot jump to escape from Full/Half moon shield counters.
|
Notable Players
| Name |
Color
|
Region |
Common Venues |
Status |
Details
|
| Kouki (コウキ) |
|
Japan |
Play Spot BIG ONE 2nd |
Inactive |
C-Arc legend with a surprisingly good pocket F-PCiel. Highly aggressive, always looking to force mixups in neutral and bully opponents in close range scrambles. The most optimal F-PCiel by a considerable margin in terms of combos.
|
| Hirohiro (ひろひろ) |
|
Japan |
Play Spot BIG ONE 2nd |
Inactive |
The most prolific arcade F-PCiel main. Very aerial neutral with a strong focus on proactively putting out large, low commitment hitboxes to control space. Tends to stick with simple, reliable combo routes.
|
| Sunohara (すのはら) |
|
Japan |
A-Cho |
Inactive |
A very old school PCiel player who has tri-mained all three PCiel moons since she was added to the game in version 1.05. Grounded neutral with adept usage of aggressive dashes mixed into stationary zoning. Shows some unique optimization in midscreen routes, with high damage 2C extensions after 623AA.
|
| m |

|
Europe |
Netplay |
Inactive |
The top F-PCiel outside of Japan. Defensive, grounded neutral gameplan with a high emphasis on forcing opponents into making risky aerial approaches. Practical combo selection with strong meter management, and a robust okizeme flowchart focused on restricting the opponent's defensive options.
|
| TSA |

|
Japan |
A-Cho |
Inactive |
C-Kohaku specialist with many strong secondaries, including F-PCiel. Strong, fundamental playstyle with minimal reliance on 624B.
|
| Zakuro (ザクロ) |
|
Japan |
Game Fuji Ichikawa |
Inactive |
A player with very creative okizeme, showcasing the full variety of setups available to the character.
|
General Gameplan
F-PCiel is a technical character who excels at controlling the screen with large, disjointed tools, most notably the infamous 624B rock, one of the most powerful and versatile projectiles in the entire game.
In contrast to her other two moons, F-PCiel's toolkit possesses a high degree of synergy, meaning that each tool complements her others and covers their weaknesses. For example, 236A is a very strong tool for controlling ground space, but is weak to proactive aerial movement, which 624B is strong against.
This synergy extends into her offense, largely due to the many oppressive applications of 624B rocks against a cornered opponent. F-PCiel's offense demands that her opponent take risks in order to escape, while PCiel herself can choose to remain very safe, and her ability to capitalize on her opponent's risks is very high due to her deep combo routes, unreactable okizeme, and punishing pressure.
To make up for this, she possesses a fairly low defense modifier and no true reversals. She is not completely helpless on defense though, with a very high ability to take advantage of her Full Moon system mechanics such as Shield and EX Guard, and the ability to reassert control over a losing round immediately with effective meter management through Initiative Heat or Circuit Spark.
Overall, F-PCiel is a character with a very strong, very flexible toolkit who rewards a variety of different playstyles with singularly powerful offense once she lands a hit.
Neutral
Long range
624B: Rocks are generally safe to pull at long range. Can be played around aggressively or defensively, to hold your ground or to claim large amounts of space and safely approach.
214A: Quickly and effectively denies grounded approaches, and gives large frame advantage on block if you dash in after it. Use this to force opponents to either jump or shield.
Mid range
624B: Rocks are still strong here, but are a large frame commitment vulnerable to aggressive approaches. Useful against passive, conditioned opponents or as part of a mixup with her other midrange tools.
Dash 5B: Surprisingly fast and long range approach option. Useful for catching passive opponents waiting to bait and whiff punish something else. Good pressure starter.
236A: Extremely strong tool to check grounded opponents and disrupt zoning. Useful for discouraging grounded aggression as it beats almost anything on the ground and is generally only weak to air approaches.
214A: Similar in application to 236A, but a little safer. Good at forcing opponents into the air or trading with other projectiles.
623A: Quickly puts you into an aggressive position in the air, while also acting similarly to a conventional j.9A check against aerial approaches due to its low commitment.
Close range
5B: Very large for an 8f move. Can outpoke most characters in the game with this, but be aware that it can be low profiled by many characters.
2C: Higher risk, lower reward version of 5B. Slightly faster, cannot be low profiled, and lacks a hurtbox until active.
623A: Antiair/scramble move. Relatively safe to whiff, making it generally a good option to use if you feel scared.
2B: Low risk antiair and counterpoke. Strong hitbox, high active frames, low recovery. Somewhat similar in application to 623A but allows you to stay grounded instead of going into the air.
In the air
j.C: Very large, very disjointed air-to-air, with a jump-in crossup hitbox. Somewhat slow, so it is more effective the earlier you press it. The disjoint extends upwards, making it easy for grounded opponents to antiair at most spacings.
j.B: Deep, disjointed jump-in. Beats most antiairs when spaced, but is vulnerable to antiair shield due to PCiel's inability to jump out of air normals.
j.A: Very fast, very active close range button. Good in aerial scrambles and easily confirmed on non-counterhit with j.236AA.
Airthrow: High risk, high reward callout against opponents looking to exploit PCiel's lack of cancel options on block in the air. Feels amazing to land, but pretty unsafe.
624B>j.B: A good way to attack the ground from the air while staying safe. Useful to pin down aggressive grounded movement and gain solid momentum from the frame advantage.
j.214X: A good way to protect your landings if your opponent is seeking to chase down your air movement. Its high recovery is easy to exploit if the opponent is looking for it, however.
j.236AA: A divekick, kind of. Not very good due to the high landing recovery, but can sometimes be used as an escape option if all other movement options are exhausted.
Pressure
5B>6B>624B: Simple, strong pressure sequence which can be looped into itself indefinitely. 5B and 6B move forward, allowing the 624B to connect in an airtight string against crouching opponents, which will be +4 at minimum. Weak to EX guard.
Throw: Extremely, extremely rewarding throw. Good to structure your pressure around due to the high risk of many defensive actions that beat throw.
2A/5A: Fast, low, plus A normals. Good for setting up tick throws and catching people who stand tech.
3[B]: Relatively fast overhead. Forces a high/low mixup at close range, but generally ends pressure if blocked.
236[A]: Slow, unshieldable, long range move that is +14 on block. One of F-PCiel's highest damage starters. Useful to buy your way back into pressure after pushing yourself out if your opponent does not represent the proper counterplay. Also useful as a hard callout for bunker and certain actions after being EX guarded.
624A: Sometimes useful for punishing low mashes capable of poking underneath 624B. Forces opponents into pre-block from very far away, so it can be used to prevent people from holding upback.
5C: Low invuln move which combos into 236[A] for absurd damage on counterhit. Can be used in throw mixup scenarios to beat low mash/low shield.
Okizeme
Defense
Patience: Recommended. PCiel's low health and large hitstun hurtboxes make it very punishing for her to be hit in the corner, so the risk/reward on many defensive actions is skewed heavily against her.
EX Guard: As a Full moon, F-PCiel has access to EX Guard. Very useful to get into the habit of using, as it pushes opponents away and creates openings in their pressure with essentially no opportunity cost.
j.7>sdj9: Despite PCiel's high jump startup, upback is still a reliable defensive option in many scenarios, and her super double jump is one of her few movement options which covers a similar distance to the rest of the cast, allowing her to return to midscreen with relative safety.
Shield: Arguably the character's most reliable defensive option due to her ability to cancel it into 623A, which, unlike shield counter, is inescapable once the shield has been triggered. PCiel's strong shield makes it rewarding to wait for options that can be shielded on reaction, or as a challenge to attempts to enforce frame advantage.
Bunker: Good, long range bunker. Can be used to escape from multi-hitting pressure reset moves, or as a lower reward, slightly lower risk alternative to shield.
Backdash: Surprisingly good backdash. Very strong for escaping midscreen pressure, but has fairly high recovery, making it vulnerable in the corner.
2A: 4f low mash. Good for disrespecting neutral or +1 frame advantage against characters with 5f A normals, and as a relatively safe way to check dashes.
2C: 6f sweep. High risk, medium reward. Extremely fast for its range, allowing PCiel to challenge opponents in many situations they may not typically expect. Very good for forcing trades due to its lack of a hurtbox on startup. Also very unsafe on whiff, often resulting in full crouching grounded punishes.
623A: 5f bufferable move. Can be a good defensive tool in many situations due to the fast startup and very strong hitbox, and is relatively safe on whiff or block.
623C: 1f EX move that sends you into the sky. Very good at disrespecting gaps in pressure, but has a high cost.
236C: Long range EX move with some invuln in the middle, allowing it to go through projectiles sometimes. Not very reliable, and extremely unsafe if blocked.
Combos
| Combo Notation Help
|
Disclaimer: Combos are written by various writers, so the actual notation used in pages can differ from the standard one.
For more information, see Glossary and Controls.
|
| X > Y
|
X input is cancelled into Y.
|
| X > delay Y
|
Must wait for a short period before cancelling X input into Y.
|
| X, Y
|
X input is linked into Y, meaning Y is done after X's recovery period.
|
| X+Y
|
Buttons X and Y must be input simultaneously.
|
| X/Y
|
Either the X or Y input can be used.
|
| X~Y
|
This notation has two meanings.
- Use attack X with Y follow-up input.
- Input X then within a few frames, input Y. Usually used for option selects.
|
| X(w)
|
X input must not hit the opponent (Whiff).
|
| j.X
|
X input is done in the air, implies a jump/jump cancel if the previous move was done from the ground.
Applies to all air chain sections:
- Assume a forward jump cancel if no direction is given.
- Air chains such as j.A > j.B > j.C can be shortened to j.ABC.
|
| sj.X
|
X input is done after a super jump. Notated as sj8.X and sj9.X for neutral and forward super jumps respectively.
|
| dj.X
|
X input is done after a double jump.
|
| sdj.X
|
X input is done after a double super jump.
|
| tk.X
|
Stands for Tiger Knee. X motion must be buffered before jumping, inputting the move as close to the ground as possible. (ex. tk.236A)
|
| (X)
|
X is optional. Typically the combo will be easier if omitted.
|
| [X]
|
Input X is held down. Also referred to as Blowback Edge (BE). Depending on the character, this can indicate that this button is held down and not released until indicated by the release notation.
|
| ]X[
|
Input X is released. Will only appear if a button is previously held down. This type of input is referred to as Negative Edge.
|
| {X}
|
Button X should only be held down briefly to get a partially charged version instead of the fully charged one.
|
| X(N)
|
Attack "X" should only hit N times.
|
| (XYZ)xN
|
XYZ string must be performed N times. Combos using this notation are usually referred to as loops.
|
| (XYZ^)
|
A pre-existing combo labelled XYZ is inserted here for shortening purposes.
|
| CH
|
The first attack must be a Counter Hit.
|
| Air CH
|
The first attack must be a Counter Hit on an airborne opponent.
|
| 66
|
Performs a ground forward dash.
|
| j.66
|
Performs an aerial forward dash, used as a cancel for certain characters' air strings.
|
| IAD/IABD
|
Performs an Instant AirDash.
|
| AT
|
Performs an Air Throw. (j.6/4A+D)
|
| IH
|
Performs an Initiative Heat.
|
| AD
|
Performs an Arc Drive.
|
| AAD
|
Performs an Another Arc Drive.
|
The below combos are intended primarily as a starting resource for beginner F-PCiel players. I would encourage players interested in learning F-PCiel to think of her combos less as a strict series of inputs from start to finish and more like a series of individual chunks that can be fit together depending on the situation. F-PCiel's combo routes are very flexible, and the ability to adjust them depending on situation will come with experience and watching a lot of Hirohiro and Kouki match footage. Good luck!
Normal Combos
| Condition
|
Notation
|
Damage
vs V.Sion
|
Notes
|
|
| Beginner, Midscreen
|
|
3249
|
| |
| Meter Gained: 36,9% |
Meter Given (vs C-Moon): 12,3% |
| Basic, easy midscreen confirm ending in 236A knockdown that works anywhere. 2C>3C>j.B forms the core of most of F-PCiel's grounded confirms, so it is important to learn the timing for the j.B delay early. |
|
|
| Corner Carry, Midscreen
|
- 5B>6B>2C>3C>j.B>6B>2C>623A~X>2A>236A
|
4263
|
|
| Meter Gained: 57,6% |
Meter Given (vs C-Moon): 19,2% |
(Video) |
| Standard midscreen bnb. Mostly consistent across the entire cast, and goes from corner to corner allowing for 624[B] oki. j.B must be delayed for the 6B to connect, and the 623A must be delayed for all of the hits of the followup to connect and allow it to combo into 2A. |
|
|
| Midscreen transition into corner loop
|
- 5B>6B>2C>3C>j.B>6B>2C>3C>624B>j.B>2A>3B>2C>624B>3B>2C>236A
|
???
|
| |
| Meter Gained: ??? |
Meter Given (vs C-Moon): ??? |
| Advanced combo which transitions from the midscreen route to the corner rock loop when close enough to the corner. In general, the 3C before 624B will need to be delayed in order for the rock to connect. After 624B>j.B, 2C>236A can be used as an ender if 2A will not reach. |
|
|
| Air CH, Midscreen
|
- (Air CH) 2C>3C>j.B>rest of combo
|
???
|
| |
| Meter Gained: ??? |
Meter Given (vs C-Moon): ??? |
| Easy air CH pickup. 2B>3B>2C can be used instead at close ranges, but it can be awkward to space and time so it is generally not worth it to go for it over simply picking up with 2C. |
|
|
Corner Combos
| Condition
|
Notation
|
Damage
vs V.Sion
|
Notes
|
|
| Rock Loop, Corner
|
- 5B>2C>3C>j.B>2B>(3B>2C>624B)x3>3B>624B>3B>2C>624B>3B>2C>236A
|
5046
|
|
| Meter Gained: 95.4% |
Meter Given (vs C-Moon): 33.4% |
(Video) |
| Essential corner combo. The damage, meter gain and knockdown granted by this combo are essential in making F-PCiel's hits threatening. Against certain characters such as Satsuki, or with too many hits in the opening ground string, getting 3 full loops in the first half becomes impossible and the third must be omitted. |
|
|
| 236[A] starter, Corner
|
- 236[A]>66>5B>3C>superjump cancel>airthrow>j.236A~X>2A>5A>3B>2C>624B>(rock loop)
|
???
|
| |
| Meter Gained: ??? |
Meter Given (vs C-Moon): ??? |
| Far 236[A} starter into rock loop. From closer ranges, 66>3B>2C>3C>j.B can be used to start a rock loop for higher damage, but be aware that the 236[A] will have used up one groundbounce. |
|
|
Move Descriptions
| Frame Data Help
|
| Header
|
Tooltip
|
| Move Box Colors
|
Light gray = Collision Box (A move lacking one means it can go through the opponent's own collision box).
Green: Hurt Boxes.
Red: Hit(/Grab) Boxes.
Yellow: Clash Boxes (When an active hitbox strikes a clash box, the active hitbox stops being active. Multi-hit attacks can beat clash since they will still progress to the next hitbox.)
Magenta: Projectile-reflecting boxes OR Non-hit attack trigger boxes (usually).
Blue: Reflectable Projectile Boxes.
|
| Damage
|
Base damage done by this attack.
(X) denotes combined and scaled damage tested against standing V. Sion.
|
| Red Damage
|
Damage done to the recoverable red health bar by this attack. The values are inherently scaled and tested against standing V. Sion.
(X) denotes combined damage.
|
| Proration
|
The correction value set by this attack and the way it modifies the scaling during a string. See this page for more details.
X% (O) means X% Overrides the previous correction value in a combo if X is of a lower percentage.
X% (M) means the current correction value in a combo will be Multiplied by X%. This can also be referred to as relative proration.
|
| Circuit
|
Meter gained by this attack on hit.
(X%) denotes combined meter gain.
-X% denotes a meter cost.
|
| Cancel
|
Actions this move can be cancelled into.
SE = Self cancelable.
N = Normal cancelable.
SP = Special cancelable.
CH = Cancelable into the next part of the same attack (Chain in case of specials).
EX = EX cancelable.
J = Jump cancelable.
(X) = Cancelable only on hit.
-X- = Cancelable on whiff.
|
| Guard
|
The way this move must be blocked.
L = Can block crouching
H = Can block standing.
A = Can block in the air.
U = Unblockable.
|
| Startup
|
Amount of frames that must pass prior to reaching the active frames. Also referred to as "True Startup".
|
| Active
|
The amount of frames that this move will have a hitbox.
(x) denotes frame gaps where there are no hitboxes is present. Due to varied blockstuns, (x) frames are difficult to use to determine punish windows. Generally the larger the numbers, the more time you have to punish.
X denotes active frames with a duration separate from its origin move's frame data, such as projectile attacks. In this case, the total length of the move is startup+recovery only.
|
| Recovery
|
Frames that this move has after the active frames if not canceled. The character goes into one frame where they can block but not act afterwards, which is not counted here.
|
| Advantage
|
The difference in frames where you can act before your opponent when this move is blocked (assuming the move isn't canceled and the first active frame is blocked).
If the opponent uses a move with startup that is at least 2 frames less than this move's negative advantage, it will result in the opponent hitting that move.
±x~±y denotes a range of possible advantages.
|
| Invul
|
Lists any defensive properties this move has.
X y~z denotes X property happening between the y to z frames of the animations. If no frames are noted, it means the invincibility lasts through the entire move.
Invicibility:
- Strike = Strike invincible.
- Throw = Throw invincible.
Hurtbox-Based Properties:
- Full = No hurtboxes are present.
- High = Upper body lacks a hurtbox.
- Low = Lower body lacks a hurtbox.
Miscellaneous Properties
- Clash = Frames in which clash boxes are active.
- Reflect = Frames in which projectile-reflecting boxes are active.
- Super Armor = Frames in which the character can take hits without going into hit stun.
|
Normal Moves
Standing Normals
|
|
| Damage
|
Red Damage
|
Proration
|
Cancel
|
Guard
|
| 350
|
151
|
72% (O)
|
-SE-, -N-, -SP-, -EX-, (J)
|
L
|
| First Active
|
Active
|
Recovery
|
Frame Adv
|
Circuit
|
Invuln
|
| 5
|
4
|
5
|
3
|
3.15%
|
-
|
|
One of the unfortunate low kick style 5As, meaning it cannot be used as an emergency antiair. Fortunately, F-PCiel has a variety of extremely strong antiairs that make the lack of an antiair 5A relatively insignificant.
The slower startup and shorter range compared to 2A make it generally less desirable as a starter, but during pressure, 5A's faster recovery compared to 2A makes it preferable for setting up redashes for tick throws and such.
|
|
|
|
| 5B
|
Damage
|
Red Damage
|
Proration
|
Cancel
|
Guard
|
| 700
|
505
|
70% (O)
|
N, SP, -CH-, EX, (J)
|
LH
|
| First Active
|
Active
|
Recovery
|
Frame Adv
|
Circuit
|
Invuln
|
| 8
|
2
|
18
|
-2
|
4.5%
|
-
|
|
A midrange poke with good startup, and extremely good range due to the way it physically slides her collision box forward to give it even greater range than the hitbox alone would suggest. This move is difficult to whiff punish on the ground, but the recovery makes it rather easy to punish if it whiffs vs an airborne opponent.
The high placement of the hitbox also leaves this button susceptible to being low profiled, and as such it loses a lot of its power in matchups against characters with strong low profile moves, such as Arcueid's 2B.
|
| 5B~B
|
Damage
|
Red Damage
|
Proration
|
Cancel
|
Guard
|
| 500
|
353
|
60% (O)
|
N, SP, EX, (J)
|
LH
|
| First Active
|
Active
|
Recovery
|
Frame Adv
|
Circuit
|
Invuln
|
| 10
|
3
|
24
|
-9
|
2.7%
|
-
|
|
5B followup. The poor proration and extremely high pushback render this move practically useless in pressure or combos, and in neutral it suffers from high startup and recovery, making 5BB a move that is almost never desirable to use.
|
|
|
|
| Damage
|
Red Damage
|
Proration
|
Cancel
|
Guard
|
| 950
|
707
|
70% (O)
|
N, SP, EX, (J)
|
LH
|
| First Active
|
Active
|
Recovery
|
Frame Adv
|
Circuit
|
Invuln
|
| 13
|
6
|
24
|
-12
|
5.85%
|
Low 3-25
|
|
Named 'Idol Kick' in the game's files. This move slides PCiel forward a decent amount, making it useful in pressure to counteract the pushback caused by EX Guard during standard 5B>6B>624B strings.
Has relatively fast lower body invincibility and good range on paper, but it completely halts all dash momentum upon use, has limited cancel options, and is very unsafe on whiff, which limit its usefulness in neutral.
|
|
Crouching Normals
|
|
| Damage
|
Red Damage
|
Proration
|
Cancel
|
Guard
|
| 300
|
101
|
72% (O)
|
-SE-, -N-, -SP-, -EX-, (J)
|
L
|
| First Active
|
Active
|
Recovery
|
Frame Adv
|
Circuit
|
Invuln
|
| 4
|
3
|
7
|
2
|
1.8%
|
-
|
|
A low kick. It's fast, has good range, and hits low, making it a very strong 2A and F-PCiel's go-to option if she needs a fast button on the ground.
2A (or 2AA) into 3[B] will become a gapless blockstring if done meaty during standard 624[B] okizeme, which makes establishing meaty 2A an important part of F-PCiel's offense as it gives her a safe high/low mixup on block. As an A normal, however, it is susceptible to both high and low shield, so be sure to represent other options.
|
|
|
|
| Damage
|
Red Damage
|
Proration
|
Cancel
|
Guard
|
| 900
|
505
|
80% (O)
|
N, SP, EX, (J)
|
LH
|
| First Active
|
Active
|
Recovery
|
Frame Adv
|
Circuit
|
Invuln
|
| 7
|
5
|
13
|
0
|
4.5%
|
-
|
|
PCiel swings with the back of the Seventh Holy Scripture while crouching. While this move is rather small, its long active frames and disjointed hitbox make it extremely powerful in the right situations. As an antiair, 2B's hitbox will either cleanly beat or trade with most air buttons that aren't sufficiently disjointed. As a grounded footsies tool, 2B's long active frames make it a situational, but strong counterpoke that is relatively safe to put out thanks to its low recovery compared to F-PCiel's other grounded tools.
|
|
|
|
| Damage
|
Red Damage
|
Proration
|
Cancel
|
Guard
|
| 800
|
303
|
65% (O)
|
N, SP, EX, (J)
|
L
|
| First Active
|
Active
|
Recovery
|
Frame Adv
|
Circuit
|
Invuln
|
| 6
|
4
|
42
|
-15
|
4.5%
|
-
|
|
A low sweeping kick with both legs. One of F-PCiel's most notorious moves, and for good reason. This sweep has only 5 frames of startup, making it an obnoxiously powerful defensive abare tool. The fast startup comes at a cost, however, as the 42 frames of recovery make it extremely easy to punish if it whiffs for any reason.
2C is a very good poke in neutral as it does not extend any green before becoming active, meaning that when spaced correctly it cannot be cleanly beaten, and will trade at worst.
|
|
Jumping Normals
Notes:
- P.Ciel's air normals cannot be canceled into other air normals, double jump, air dashes or air throw. They can still be Special/EX canceled on block, however.
- j.A does not recover in midair, P.Ciel must land before recovering if j.A isn't canceled.
|
|
| Damage
|
Red Damage
|
Proration
|
Cancel
|
Guard
|
| 300, 500 (725)
|
(596)
|
100%
|
SP, EX
|
HA
|
| First Active
|
Active
|
Recovery
|
Frame Adv
|
Circuit
|
Invuln
|
| 6
|
5
|
-
|
-
|
2.7%, 4.5% (7.2%)
|
-
|
|
Two hit normal. PCiel knees, then extends her leg for an upwards kick. A strong close range air-to-air button thanks to its startup, active frames, and upwards angle. j.A hits overhead twice.
On ground hit, j.A can be confirmed with 3C superjump, and on air hit with j.236A~X into 2A for a full conversion even if both hits connect.
|
|
|
|
| Damage
|
Red Damage
|
Proration
|
Cancel
|
Guard
|
| 500
|
353
|
100%
|
SP, EX
|
HA
|
| First Active
|
Active
|
Recovery
|
Frame Adv
|
Circuit
|
Invuln
|
| 8
|
6
|
-
|
-
|
3.6%
|
-
|
|
A deep kick directly below and in front of PCiel. A very disjointed jump-in, and an essential combo tool. On air hit, j.B will slam and ground bounce, which can be picked up into a full combo depending on height.
|
|
|
|
| Damage
|
Red Damage
|
Proration
|
Cancel
|
Guard
|
| 1000
|
707
|
90% (O)
|
SP, EX
|
HA
|
| First Active
|
Active
|
Recovery
|
Frame Adv
|
Circuit
|
Invuln
|
| 10
|
5
|
-
|
-
|
6.3%
|
-
|
|
A long, disjointed horizontal kick with a slight upwards angle. An extremely powerful air-to-air spacing tool, especially when done with backwards momentum.
|
|
Command Normals
|
|
| 3B
|
Damage
|
Red Damage
|
Proration
|
Cancel
|
Guard
|
| 600
|
303
|
50% (O)
|
N, SP, EX, (J)
|
LH
|
| First Active
|
Active
|
Recovery
|
Frame Adv
|
Circuit
|
Invuln
|
| 11
|
2
|
34
|
-18
|
3.6%
|
-
|
|
A short overhead swing with the butt of the Seventh Holy Scripture. The uncharged version hits mid. Combo filler, and one half of F-PCiel's grounded high/low mixup when half charged into 2C.
Knocks airborne opponents into the ground into a small groundbounce on hit.
|
| 3[B]
|
Damage
|
Red Damage
|
Proration
|
Cancel
|
Guard
|
| 700
|
303
|
50% (O)
|
N, SP, EX, (J)
|
H
|
| First Active
|
Active
|
Recovery
|
Frame Adv
|
Circuit
|
Invuln
|
| 25
|
2
|
34
|
-18
|
4.5%
|
-
|
|
Charged 3B. A rather fast grounded overhead by Melty Blood standards.
If 3[B] hits and airborne opponent, this move will put them into a higher-launching untechable ground bounce.
|
|
|
|
| Damage
|
Red Damage
|
Proration
|
Cancel
|
Guard
|
| 500
|
303
|
75% (O)
|
N, SP, EX, (J)
|
LH
|
| First Active
|
Active
|
Recovery
|
Frame Adv
|
Circuit
|
Invuln
|
| 12
|
4
|
22
|
-8
|
3.6%
|
-
|
|
A long step forward into a donkey kick which sends opponents flying into a wallbounce if close enough to the corner. A very useful blockstring and combo filler move, as it PCiel moves forward a great deal.
|
|
|
|
| Damage
|
Red Damage
|
Proration
|
Cancel
|
Guard
|
| 1000
|
672
|
65% (O)
|
SP, EX, (J)
|
LH
|
| First Active
|
Active
|
Recovery
|
Frame Adv
|
Circuit
|
Invuln
|
| 11
|
2
|
35
|
-19
|
3.5%
|
Low 11-24
|
|
A flip kick upwards using the Seventh Holy Scripture as a base. Mostly combo filler, but has some niche anti-jump applications in corner pressure.
Despite its appearance, 3C extends a massive hurtbox upwards before becoming active, making it rather unreliable as a defensive antiair. Can be super-jump canceled by holding 8 for certain conversions.
|
|
|
|
| Damage
|
Red Damage
|
Proration
|
Cancel
|
Guard
|
| 1000
|
707
|
80% (O)
|
SP, EX
|
HA
|
| First Active
|
Active
|
Recovery
|
Frame Adv
|
Circuit
|
Invuln
|
| 9
|
5
|
-
|
-
|
9.0%
|
-
|
|
A spinning strike with the butt of the Seventh Holy Scripture. j.6C has shorter range than j.C and blows back on hit, making it impossible to convert into a combo in most situations. Generally not very useful compared to her other air normals.
|
|
Universal Mechanics
|
|
| Damage
|
Red Damage
|
Proration
|
Cancel
|
Guard
|
| 600
|
404
|
30%
|
(Any)
|
U
|
| First Active
|
Active
|
Recovery
|
Frame Adv
|
Circuit
|
Invuln
|
| 2
|
1
|
20
|
-
|
5.4%
|
-
|
|
PCiel grabs her opponent and shoves them. A ground throw that gives no knockdown but acts as a combo starter, leading to dramatically higher reward than most throws in the game. As a throw, the resulting combo is also burst safe for the entire duration.
|
|
|
|
| Damage
|
Red Damage
|
Proration
|
Cancel
|
Guard
|
1600 (1408, Raw)
1200
|
1066
|
30%
|
(Any if Raw)
(SP, EX)
|
U
|
| First Active
|
Active
|
Recovery
|
Frame Adv
|
Circuit
|
Invuln
|
| 1
|
1
|
12
|
-
|
14.4% (Raw)
10.8%
|
-
|
|
PCiel grabs her opponent and tosses them upwards. A somewhat odd airthrow that retains cancel options while keeping the opponent airborne, allowing for combo extensions afterwards.
Due to the way throws reset the ground bounce limit, PCiel's airthrow can be used to dramatically extend the length of combos with proper routing and execution.
|
|
|
|
| Ground
|
Damage
|
Red Damage
|
Proration
|
Cancel
|
Guard
|
| 500 (345)
|
202
|
50%
|
(SP), (EX), (J)
|
LHA
|
| First Active
|
Active
|
Recovery
|
Frame Adv
|
Circuit
|
Invuln
|
| 8
|
4
|
18
|
-4
|
4.5%
|
-
|
|
Standard Full Moon Shield Counter. Can be followed up with 2C>3C for an easy combo.
While a perfectly servicable option out of shield, F-PCiel's access to a 5 frame special cancel in 623A makes Shield Counter generally obsolete outside of situations where the invulnerability is absolutely necessary.
|
| Air
|
Damage
|
Red Damage
|
Proration
|
Cancel
|
Guard
|
| 500 (345)
|
202
|
50%
|
-
|
HA
|
| First Active
|
Active
|
Recovery
|
Frame Adv
|
Circuit
|
Invuln
|
| 8
|
4
|
-
|
-
|
4.5%
|
-
|
|
Same animation as j.6C.
|
|
|
|
| Bunker
|
Damage
|
Red Damage
|
Proration
|
Cancel
|
Guard
|
| 500
|
202
|
50%
|
-
|
LHA
|
| First Active
|
Active
|
Recovery
|
Frame Adv
|
Circuit
|
Invuln
|
| 25
|
4
|
19
|
-5
|
0.0%
(-50.0% in blockstun)
|
Clash 1-10
|
| (Clash)
|
Damage
|
Red Damage
|
Proration
|
Cancel
|
Guard
|
| 500
|
202
|
50%
|
-
|
LHA
|
| First Active
|
Active
|
Recovery
|
Frame Adv
|
Circuit
|
Invuln
|
| 7
|
4
|
19
|
-5
|
0.0%/-50.0%
|
Strike 1-7
|
|
Big Bunker. Can be low profiled by certain attacks.
|
|
|
|
| Damage
|
Red Damage
|
Proration
|
Cancel
|
Guard
|
| 100
|
0
|
100%
|
-
|
U
|
| First Active
|
Active
|
Recovery
|
Frame Adv
|
Circuit
|
Invuln
|
| 14
|
5
|
26
|
-
|
uses all
|
Full 1-19
|
|
Second fastest heat startup in the game along with Hime's. Generally not as useful as Initiative Heat.
|
|
|
|
| Ground
|
Damage
|
Red Damage
|
Proration
|
Cancel
|
Guard
|
| 100
|
0
|
100%
|
-
|
U
|
| First Active
|
Active
|
Recovery
|
Frame Adv
|
Circuit
|
Invuln
|
| 10
|
10
|
20
|
-
|
removes all
|
Full 1-39
|
| Air
|
Damage
|
Red Damage
|
Proration
|
Cancel
|
Guard
|
| 100
|
0
|
100%
|
-
|
U
|
| First Active
|
Active
|
Recovery
|
Frame Adv
|
Circuit
|
Invuln
|
| 11
|
10
|
15
|
-
|
removes all
|
Strike 1-30
|
|
Universal burst mechanic. Unlike Crescent/Full Heat activation, the hitbox and frame data doesn't vary between characters. Susceptible to airthrows if performed in the air.
|
|
Special Moves
Grounded Specials
A A [A] [A] B B [B] [B] EX EX
|
| A
|
Damage
|
Red Damage
|
Proration
|
Cancel
|
Guard
|
| 1400
|
808
|
100%
|
-
|
LH
|
| First Active
|
Active
|
Recovery
|
Frame Adv
|
Circuit
|
Invuln
|
| 13
|
4
|
30
|
-1
|
12.6%
|
-
|
|
PCiel leans back and fires a blast of energy from the Seventh Holy Scripture. A completely disjointed midrange poke with surprisingly fast startup and good frame data on block for its size. PCiel's hurtbox retracts during the startup, similarly to C-Nero's 5[C]. Knocks opponents into a fullscreen, untechable knockdown on hit.
236A is one of F-PCiel's most important grounded pokes as the disjoint is powerful enough to cleanly beat almost anything her opponent could attempt to contest her grounded space with when spaced correctly. It is disjointed enough to cleanly beat tools that are usually virtually uncontestable such as F-Hime 2C or C-Nero 5[C], and will trade very favourably with anything that it does not outright beat.
The very long recovery and low to the ground hitbox make 236A somewhat vulnerable to aggressive superjump or IAD approaches.
|
| [A]
|
Damage
|
Red Damage
|
Proration
|
Cancel
|
Guard
|
| 1700
|
1212
|
85% (M)
|
-
|
LH
|
| First Active
|
Active
|
Recovery
|
Frame Adv
|
Circuit
|
Invuln
|
| 25
|
4
|
30
|
13
|
10.8%
|
-
|
|
The charged version of 236A retains all of its positive qualities while becoming twice as large, unshieldable, +13 on block, and causing a comboable wallbounce in the corner. One of F-PCiel's highest damage starters.
The slower startup limits its application in neutral somewhat, but it is universally an incredibly potent pressure tool which leads to massive reward on hit and a practically guaranteed pressure reset if it is blocked.
|
| B
|
Damage
|
Red Damage
|
Proration
|
Cancel
|
Guard
|
| 1500
|
1010
|
50% (O)
|
-
|
LH
|
| First Active
|
Active
|
Recovery
|
Frame Adv
|
Circuit
|
Invuln
|
| 16
|
6
|
37
|
-10
|
10.8%
|
-
|
|
A slower, upward angled version of 236A which is sadly air techable on normal hit and ground techable on counterhit. While the angle and disjoint would suggest this move has good potential as an antiair, the poor startup and even worse recovery make it largely impractical, especially when compared to amazing antiairs such as 623A and 2B.
|
| [B]
|
Damage
|
Red Damage
|
Proration
|
Cancel
|
Guard
|
| 1700
|
1212
|
100%
|
-
|
LH
|
| First Active
|
Active
|
Recovery
|
Frame Adv
|
Circuit
|
Invuln
|
| 24
|
6
|
37
|
-25
|
10.8%
|
-
|
|
236[B], much like 236B, is also fairly underwhelming, as it maintains all of the flaws of its uncharged version while also not being comboable on normal or counter hit, due to being hard-coded to cause an uncomboable launch into ground tech on hit. One of F-PCiel's very few moves that can be described as truly useless.
|
| EX
|
Damage
|
Red Damage
|
Proration
|
Cancel
|
Guard
|
| 500, 2500 (2630)
|
(1973)
|
100%
|
-
|
LH
|
| First Active
|
Active
|
Recovery
|
Frame Adv
|
Circuit
|
Invuln
|
| 1+9
|
6
|
34
|
-28
|
-100.0%
|
-
|
|
PCiel rushes forward, skewering opponents with the Seventh Holy Scripture before blasting them away. A highly damaging hitgrab that gives hard knockdown on hit.
While the knockdown is weaker than 236A, it is still strong enough to pull an uncharged 624B rock and get okizeme, so it sees a lot of use as a combo ender when seeking to avoid entering MAX or to stabilize the knockdown when too deep into the corner for 624[B] to connect.
Has some invuln in the middle, making it occasionally able to disrespect gaps in pressure.
|
|
623A~X followup 623A~X followup
|
| A
|
Damage
|
Red Damage
|
Proration
|
Cancel
|
Guard
|
| 500*3 (1336)
|
(910)
|
100%
|
-CH-, -J-
|
LH (1), LHA (2-3)
|
| First Active
|
Active
|
Recovery
|
Frame Adv
|
Circuit
|
Invuln
|
| 5
|
11
|
19
|
-
|
4.5%, 1.8%*2 (8.1%)
|
-
|
|
PCiel crouches down, anchoring the Seventh Holy Scripture against the ground before launching into the air. A very strong, surprisingly low risk anti-air and close range abare tool. Has an air unblockable grounded hitbox with upper body invuln that comes out on frame 5, then launches into the air for two further air blockable hitboxes. Jump cancelable and cancelable into 623A~X on whiff, block or hit.
Does not possess any invulnerability, despite its appearance.
|
| ~X
|
Damage
|
Red Damage
|
Proration
|
Cancel
|
Guard
|
| 350*N
|
202*N
|
90% (M), 70% (O)
|
-
|
LHA
|
| First Active
|
Active
|
Recovery
|
Frame Adv
|
Circuit
|
Invuln
|
| 10
|
X
|
15
|
-4
|
1.8%*N
|
-
|
|
623A followup. A downward divekick from the air to the ground. The majority of this move's hits will knock opponents downwards into a ground-techable knockdown, but there is a final unique hitbox that activates when landing which launches opponents into a comboable groundbounce if they are low enough for it to connect, allowing for full conversions and combo extensions. Used to ground airborne opponents after raw antiair 623A hits, or as a scramble option to punish opponents for trying to move after blocking 623A on the ground.
If the opponent chooses to tech after getting hit by the middle hits, neutral tech can be punished with 5A/2A, and forward/back techs can generally be punished with 5B depending on spacing.
This move is safe on block to anything with more than 2 frames of startup, meaning that most characters can only punish it with throw.
|
| B
|
Damage
|
Red Damage
|
Proration
|
Cancel
|
Guard
|
| 500, 1500, 110*4, 1000 (2318)
|
(1643)
|
100%, 40% (O)
|
-
|
LH (1), LHA
|
| First Active
|
Active
|
Recovery
|
Frame Adv
|
Circuit
|
Invuln
|
| 11
|
14
|
27
|
-
|
4.5%, 13.5%, 9.0% (27.0%)
|
-
|
|
A slower version of Shaft Drive which launches much, much higher into the air.
The B version of Shaft Drive shares many of its strengths with 623A such as the great disjoint and air unblockable first hit, but has even more generous upper body invuln on startup and launches PCiel far higher into the air, sending her practically beyond the top of the screen. On hit, it functions like a hitgrab, locking opponents into all of the remaining hits and being unburstable. Due to the slower startup it is better used pre-emptively to cut off certain movement angles rather than as a reaction antiair.
|
| EX
|
Damage
|
Red Damage
|
Proration
|
Cancel
|
Guard
|
| 1500, 250*6, 1000 (2489)
|
(1697)
|
100%, 40% (O)
|
-
|
LH
|
| First Active
|
Active
|
Recovery
|
Frame Adv
|
Circuit
|
Invuln
|
| 1+1
|
10
|
(~40)
|
-
|
-100.0%
|
Full 1
|
|
Fully air unblockable for the entire duration, unlike the non-EX versions. Functions like a hitgrab, similar to 623B, but without the initial grounded hitbox.
This version has a ludicrous 1 frame of startup, which may appear game breaking at first glance, but upon closer inspection the move has several flaws which limit its application on defense. While it is technically invuln, its properties as a hitgrab make it unable to be used as a true reversal against meaty attacks due to hitgrabs losing to strike attacks if they connect on the same frame in Melty Blood.
It can be used as a relatively safe way to get out of the corner by exploiting gaps in opponents' pressure, but due to the high cost and the importance of meter management to F-PCiel's gameplan, it is more of a desperation option than a reliable defensive tool.
In combos, this move does a high amount of damage in a lot of hits very quickly, making it an effective killing move as it is difficult to reduce.
|
|
|
|
| A
|
Damage
|
Red Damage
|
Proration
|
Cancel
|
Guard
|
| 1500
|
1010
|
50% (O)
|
-EX-
|
LHA
|
| First Active
|
Active
|
Recovery
|
Frame Adv
|
Circuit
|
Invuln
|
| 15
|
X
|
32
|
-6
|
13.5%
|
-
|
|
PCiel flips the Seventh Holy Scripture over her shoulder and fires a missile from it. A simple fullscreen horizontal projectile. EX cancelable on whiff. Does very high damage for a single hit projectile, and launches opponents into the air where they can either air tech on regular hit or ground tech on counter hit. Can be picked up on counterhit with 2C if close enough.
While often overshadowed by F-PCiel's more obviously potent neutral tools, 214A fills a very important niche in her ground game as it protects the grounded space in front of her without being possible to whiff punish from the ground, unlike her grounded pokes which all have very low active frames and high recovery. Establishing 214A is thus an important part of matchups vs characters who excel at poking and whiff punishing with high ground mobility and good midrange pokes such as Nanaya, as it is her most effective means of discouraging them from using their strongest approach options and instead forcing them to make risky approaches from the air.
|
| B
|
Damage
|
Red Damage
|
Proration
|
Cancel
|
Guard
|
| 1500
|
1010
|
50% (O)
|
-EX-
|
LHA
|
| First Active
|
Active
|
Recovery
|
Frame Adv
|
Circuit
|
Invuln
|
| 24
|
X
|
41
|
-13
|
13.5%
|
-
|
|
214B has PCiel jump backwards into the air and fire a missile diagonally down into the ground. It is largely useless and mostly only seen as a misinput 624B.
|
| EX
|
Damage
|
Red Damage
|
Proration
|
Cancel
|
Guard
|
| 350*3, 400*8, 2500 (2479)
|
(1651)
|
50% (O)
|
-
|
LHA
|
| First Active
|
Active
|
Recovery
|
Frame Adv
|
Circuit
|
Invuln
|
| 3+2
|
X
|
178
|
-
|
-100.0%
|
Full 3
|
|
214C fires 3 missiles on the ground before becoming airborne and firing 8 additional missiles, ending in a final one missile which inflicts a hard knockdown which can be picked up with OTG 236[A] or 236C.
The grounded version of this move has almost no practical application, and is usually only seen as some kind of misinput during corner rock loops. Massively unsafe on whiff, but surprisingly difficult to punish on block in most scenarios.
|
|
A followup A followup
|
| A
|
Damage
|
Red Damage
|
Proration
|
Cancel
|
Guard
|
| 500
|
353
|
75% (O)
|
-
|
LHA
|
| First Active
|
Active
|
Recovery
|
Frame Adv
|
Circuit
|
Invuln
|
| 20
|
X (33)
|
22
|
-2
|
3.6%
|
-
|
|
PCiel sticks the Seventh Holy Scripture into the ground and pulls a large rock out of the ground to use as a projectile. The A version of Grand Zappa launches the rock at a shallow horizontal angle, traveling a few character lengths before exploding on its own.
Has certain niche applications such as during spaced pressure strings to catch attempts to mash the startup of 624B, but is overall less versatile than its B counterpart.
|
| ~X
|
Damage
|
Red Damage
|
Proration
|
Cancel
|
Guard
|
| 650
|
303
|
75% (O)
|
SP, EX
|
LH
|
| First Active
|
Active
|
Recovery
|
Frame Adv
|
Circuit
|
Invuln
|
| 16
|
4
|
23
|
-10
|
4.5%
|
-
|
|
Pressing any button after 624A will trigger a followup kick using 6B's animation, which will cause the rock to explode with a large hitbox. Special and EX cancelable on hit or block, and most commonly followed up with 624B on hit or 236[A] on block.
|
| B
|
Damage
|
Red Damage
|
Proration
|
Cancel
|
Guard
|
| 500
|
353/404
|
75% (O)/100%
|
-
|
LHA
|
| First Active
|
Active
|
Recovery
|
Frame Adv
|
Circuit
|
Invuln
|
| 18
|
X (53)
|
16
|
4
|
3.6%/4.5%
|
-
|
|
F-PCiel's defining move: The Rock. The B version pulls a rock which launches upwards and in front of PCiel for a moment, before descending back down to the ground. PCiel recovers quickly enough to be able to interact with the rock using her normals, each of which will send the rock flying at a slightly different angle and inflict a very, very high amount of hitstun/blockstun if it connects with the opponent. EX cancelable on whiff, block or hit.
624B is an extremely versatile tool, heavily enabling F-PCiel in almost all areas of gameplay. In neutral, its large, active hitbox cuts off most aerial approach angles from characters without a strong crossup normal, and allows PCiel to threaten to put a very plus hitbox almost anywhere on the screen very quickly via hitting it with a normal. As an offensive tool, it is a minimum of +4 on block if it hits at close range and can be used from PCiel's strong advancing normals to set up airtight blockstrings that PCiel's opponent must take risks to escape from. As an okizeme tool, it allows PCiel to bait almost any reversal in the game without commitment, and still subject her opponent to a mixup if they choose to block.
624B is arguably the character's most powerful tool, but its startup is somewhat vulnerable to characters with fast grounded approaches and strong low profile moves, making it important for F-PCiel players to assess the risk/reward of each rock that they pull to maximize their effectiveness.
|
| [B]
|
Damage
|
Red Damage
|
Proration
|
Cancel
|
Guard
|
| 500
|
353/404
|
75% (O)/100%
|
-
|
LHA
|
| First Active
|
Active
|
Recovery
|
Frame Adv
|
Circuit
|
Invuln
|
| 33
|
X (63)
|
14
|
14
|
3.6%/4.5%
|
-
|
|
The charged version of B Grand Zappa is similar to the uncharged version, but launches at a much steeper angle, trading almost double the startup in exchange for a rock which covers even more space in the air and is even more plus on block.
The increased height of 624[B] opens up slightly higher angles if PCiel hits it with her normals, allowing her to threaten opponents from a greater distance as it travels farther.
The charged version is also generally better for okizeme when compared to uncharged rocks, as following up a 2C or 236A knockdown with an immediate 624[B] will cause the rock to hover above the opponent for a moment before making contact with them, leaving PCiel's attack options more ambiguous as the threat of throw is present for longer due to the increased time spent potentially not in blockstun.
In pressure, 624[B] is a minimum of +14 on block, which causes 624[B]>dash>2A to be an airtight blockstring, allowing PCiel to close the distance for a close range mixup without fear of being mashed out.
|
| EX
|
Damage
|
Red Damage
|
Proration
|
Cancel
|
Guard
|
| 500, 300*3, 700 (1455)
|
(1109)
|
50% (O)
|
-
|
LHA
|
| First Active
|
Active
|
Recovery
|
Frame Adv
|
Circuit
|
Invuln
|
| 6+1
|
20 (1) 6
|
25
|
9
|
-100.0%
|
Full 6
|
|
The EX version of Grand Zappa pulls a rock, and then automatically follows up with a kick which shatters the rock into a multi-hitting explosion which is +9 on block and sends the opponent flying into a wallbounce that is comboable in the corner.
Learning how to incorporate 624C into combos is extremely valuable as it allows F-PCiel to manage her meter during combos without sacrificing damage or knockdown quality by having to rely on 236C. Most commonly done by replacing the 3B>624B bounce with 3B>2C>624C in corner rock loops.
Despite being +9, the super flash and large number of hits makes this move rather vulnerable to Shield Bunker, so it is generally unwise to use this move during pressure over the meterless versions.
|
|
Aerial Specials
j.236A~X followup j.236A~X followup B/EX B/EX
|
| A
|
Damage
|
Red Damage
|
Proration
|
Cancel
|
Guard
|
| 500*2 (925)
|
(560)
|
100%
|
-CH-
|
LHA
|
| First Active
|
Active
|
Recovery
|
Frame Adv
|
Circuit
|
Invuln
|
| 10
|
6
|
12
|
-
|
1.8%*2 (3.6%)
|
-
|
|
Airborne version of 623A, with a different input. Unlike the grounded version, j.236A's recovery cannot be canceled into movement. Mostly a combo tool.
As PCiel cannot cancel her air normals into anything other than specials or EX moves, j.236A is her only option to convert non-counterhit air normal hits into a full combo using the j.236A~X followup. It is also the only way to extend a combo after using a mid-combo airthrow, making it a staple feature of her burst safe airthrow extensions.
|
| ~X
|
Damage
|
Red Damage
|
Proration
|
Cancel
|
Guard
|
| 350*N
|
202*N
|
90% (M), 70% (O)
|
-
|
LHA
|
| First Active
|
Active
|
Recovery
|
Frame Adv
|
Circuit
|
Invuln
|
| 10
|
X
|
15
|
-4
|
1.8%*N
|
-
|
|
Followup divekick. Functions the same as the grounded version, but will often hit in strange ways due to the variable height of airborne opponents.
Much like the grounded version, the majority of this move's hits will knock the opponent towards the ground into a techable knockdown, but the final landing hitbox will instead cause a comboable groundbounce, allowing confirms from j.236A~X into 2A for a full combo.
|
| B
|
Damage
|
Red Damage
|
Proration
|
Cancel
|
Guard
|
| 1500, 110*4, 1000 (2061)
|
(1403)
|
100%, 40% (O)
|
-
|
LHA
|
| First Active
|
Active
|
Recovery
|
Frame Adv
|
Circuit
|
Invuln
|
| 10
|
5
|
12
|
-
|
13.5%, 9.0% (22.5%)
|
-
|
|
Airborne version of 623B. The lack of safe cancel options leaves this move with very few valid applications. Can be used as a source of burst damage to end a combo with in the air, but it can be finnicky to get all of the hits to connect, often resulting in less damage than desired.
|
| EX
|
Damage
|
Red Damage
|
Proration
|
Cancel
|
Guard
|
| 1500, 250*9, 1000 (2674)
|
(1811)
|
100%, 40% (O)
|
-
|
LHA
|
| First Active
|
Active
|
Recovery
|
Frame Adv
|
Circuit
|
Invuln
|
| 1+2
|
5
|
12
|
-
|
-100.0%
|
-
|
|
Airborne version of 623C. Shares most of its properties with 623B, but is faster and deals more damage.
|
|
|
|
| A/B
|
Damage
|
Red Damage
|
Proration
|
Cancel
|
Guard
|
| 1500
|
1010
|
50% (O)
|
-EX-
|
LHA
|
| First Active
|
Active
|
Recovery
|
Frame Adv
|
Circuit
|
Invuln
|
| 16
|
X
|
18
|
-
|
13.5%
|
-
|
|
Airborne version of F-PCiel's missiles. j.214A fires at a downward angle similar to 214B, while j.214B fires at a shallower angle which covers more horizontal distance.
|
| EX
|
Damage
|
Red Damage
|
Proration
|
Cancel
|
Guard
|
| 400*12, 2500 (2651)
|
(1789)
|
50% (O)
|
-
|
LHA
|
| First Active
|
Active
|
Recovery
|
Frame Adv
|
Circuit
|
Invuln
|
| 3+2
|
X
|
15
|
-
|
-100.0%
|
-
|
|
The EX air version shoots 12 aerial missiles instead of the grounded version's 8, and deals surprisingly high damage, making it a good way to close out rounds while airborne.
|
|
Arc Drive
|
|
| Damage
|
Red Damage
|
Proration
|
Cancel
|
Guard
|
| 700, 400*16, 2700 (3526)
|
(2766)
|
50% (O)
|
-
|
LH
|
| First Active
|
Active
|
Recovery
|
Frame Adv
|
Circuit
|
Invuln
|
| 3+9
|
18
|
27
|
-12
|
removes all
|
Full 1-30
|
|
PCiel rushes in with the Seventh Holy Scripture. On hit, this finishes with a Rapid Stake-like attack which knocks the opponent down but resets PCiel's position to midscreen. The high damage and long, unburstable animation makes this a practical and stylish way to close out a game-winning round when in MAX.
Fully invincible well beyond startup, making it F-PCiel's only true reversal.
|
|
Another Arc Drive
|
|
| Damage
|
Red Damage
|
Proration
|
Cancel
|
Guard
|
| 700, 400*16, 7000, 600*8 (4965)
|
(3714)
|
50% (O)
|
-
|
LH
|
| First Active
|
Active
|
Recovery
|
Frame Adv
|
Circuit
|
Invuln
|
| 2+9
|
18
|
27
|
-12
|
removes all
|
Full 1-29
|
|
Similar to Arc Drive, but the followup on hit does much more damage and launches the opponent upwards.
|
|
Last Arc
|
|
| Damage
|
Red Damage
|
Proration
|
Cancel
|
Guard
|
| 52300 (4328 ~ 7254)
|
(3615 ~ 6153)
|
50% + 50% * remaining BH time
|
-
|
U
|
| First Active
|
Active
|
Recovery
|
Frame Adv
|
Circuit
|
Invuln
|
| 0
|
2
|
23
|
-
|
removes all
|
Full
|
|
Fullscreen-type Last Arc that is instant and goes into a cutscene on hit. PCiel launches the opponent into the sky and summons a 99-hit lightning strike. Donates a lot of meter.
|
|
MBAACC Navigation


.png)


