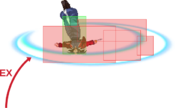
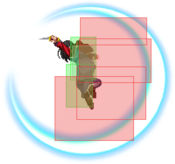
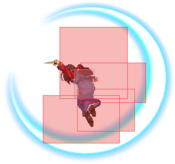
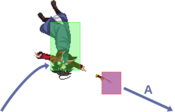
Melty Blood/MBAACC/Shiki Ryougi/Full Moon: Difference between revisions
m (formatting fix in pressure section) |
|||
| (34 intermediate revisions by 7 users not shown) | |||
| Line 3: | Line 3: | ||
{{#lst:Melty_Blood/MBAACC:Roadmap|F-Ryougi}} | {{#lst:Melty_Blood/MBAACC:Roadmap|F-Ryougi}} | ||
== | == Overview == | ||
[ | {{StrengthsAndWeaknesses | ||
|intro=[[File:Ryougishiki head.png|link]] '''F-Ryougi''' is a simple midrange dominance character with good high damage confirms and safe pressure. | |||
|pros= | |||
*'''Good general mobility''': She has a stepdash unique to F-moon, and her airdash is fantastic in both directions as with H and C. | |||
*'''Very strong neutral''': Her j.B controls the skies like her 2B does the ground. She outranges most of the cast and can use the aforementioned mobility to quickly reposition to catch airborne opponents landing. | |||
*'''Safe offense''': While she struggles to open people up, almost any option she chooses is safe, as her buttons push her beyond mashing distance and she gets at least a meaty off of every hit or throw. Combine this with long cancel windows and good anti-jump buttons, and you can easily keep opponents pinned. | |||
*'''Menacing in Blood Heat''': A fearsome character in BH, her AAD is one of if not the best reversal in the game that doubles as a 1f command grab. Her Last Arc does ''7k damage unscaled'', is full screen, and is near impossible to dodge. | |||
= | |cons= | ||
*'''Poor defense''': While 2B can be a surprisingly useful abare button due to its range and speed, she really lacks a way to enforce her ability to mash. She completely lacks a good reversal outside of Blood Heat and system mechanics. | |||
*'''Weak air-to-ground game''': Just like H moon, her best jump-in button is sadly j.C. None of her buttons are ideal for air approaches, making her weak to anti-airs in all forms, even sweeps and other lows. | |||
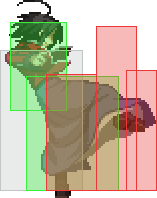
*'''Extended hurtboxes''': F-Ryougi extends a lot of green, and most of her moves have very long total duration. Its easy to get counter-hit with poor spacing. In practice, this can make it difficult to antiair characters with extremely disjointed normals. | |||
*'''Frequent returns to neutral''': Her airthrow gives her lackluster okizeme midscreen and only slightly better okizeme in the corner, whereas j.236B/C ender is usually a return to stacked neutral if the opponent doesn't risk a reset or down by not teching. | |||
*'''Low health''': Ryougi has the 5th lowest effective HP in the game. She bleeds for her mistakes; F-Ryougi arguably more so than the other moons due to how often she returns to neutral and lack of a real reversal. | |||
*'''Long recovery on pokes''': Her recovery on non-5A moves is at best 17 frames, a whiffed ground normal even if not punished could easily cost you your turn. | |||
|tablewidth=80 | |||
}} | |||
== Move Descriptions == | |||
{{AttackData-MB/Infobox}} | |||
| | === Normal Moves === | ||
==== Standing Normals ==== | |||
===== <span class="invisible-header">5A</span> ===== | |||
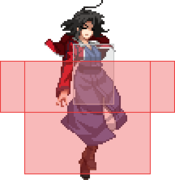
| | {{MoveData | ||
|image=Fryougurt5A.png | |||
| | |caption= | ||
|- | |name=5A | ||
|linkname=5A | |||
|data= | |||
{{AttackData-MB | |||
|damage=350 | |||
|reddamage=202 | |||
|proration=75% (O) | |||
|circuit=3.15% | |||
|cancel=-SE-, -N-, -SP-, -EX-, (J) | |||
|guard=LH | |||
|startup=5 | |||
|active=3 | |||
|recovery=9 | |||
|frameAdv=0 | |||
|invuln= | |||
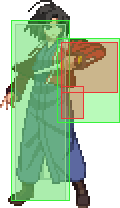
|description=Her fastest normal. Air unblockable. The range is not much for a F-Ryougi move, but it's still decent. If you really need to, you can use it as an emergency anti-air, but you'll probably get beat out. Good for frame traps and throw setups. | |||
}} | |||
}} | |||
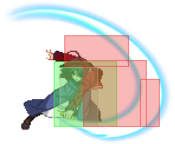
===== <span class="invisible-header">5B</span> ===== | |||
{{MoveData | |||
| | |image=Fryougurt5B.png | ||
| | |caption= | ||
|name=5B | |||
| | |linkname=5B | ||
|data= | |||
| | {{AttackData-MB | ||
| | |damage=500 | ||
|reddamage=303 | |||
| | |proration=85% (O) | ||
|circuit=4.5% | |||
| | |cancel=N, SP, EX, (J) | ||
| | |guard=LH | ||
| | |startup=9 | ||
|active=3 | |||
|recovery=22 | |||
|frameAdv=-10 | |||
| | |invuln=Clash 9-11 | ||
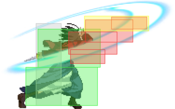
| | |description=Big poke that's good at catching jumpers. Air unblockable. Clashes. Just like 2B, don't whiff this. Can be crouched under at the extreme range. As long as you don't whiff, it's pretty safe. | ||
}} | |||
}} | |||
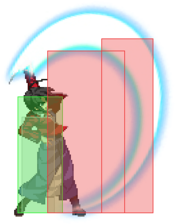
===== <span class="invisible-header">5C</span> ===== | |||
{{MoveData | |||
|image=Fryougurt5C.png | |||
|caption= | |||
|name=5C | |||
|input=5[C] | |||
|linkname=5C | |||
|data= | |||
{{AttackData-MB | |||
|version=5C | |||
|damage=850 | |||
|reddamage=505 | |||
|proration=100% | |||
|circuit=6.3% | |||
|cancel=N, SP, EX, (J) | |||
|guard=LH | |||
|startup=14 | |||
|active=5 | |||
|recovery=17 | |||
|frameAdv=-4 | |||
|invuln=Clash 14-18 | |||
|description= | |||
}} | |||
{{AttackData-MB | |||
|version=5[C] | |||
|damage=1500 | |||
|reddamage=3030 | |||
|proration=100% | |||
|circuit=13.5% | |||
|cancel=(N), (SP), (EX), (J) | |||
|guard=U | |||
|startup=31 | |||
|active=5 | |||
|recovery=25 | |||
|frameAdv= | |||
|invuln=Clash 31-35 | |||
|description=Air unblockable. Clashes. Long range like her other normals. Longer, even. If you don't whiff, it's STILL pretty safe. If charged it becomes unblockable, can be used once in a while to keep the enemy on their feet, but its pretty easy to hold shield on reaction. The charged unblockable wallslams and is jump cancellable, letting you get some extra advantage on hit (but no conversion). | |||
}} | |||
}} | }} | ||
== | ==== Crouching Normals ==== | ||
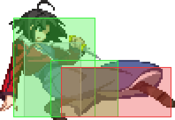
===== <span class="invisible-header">2A</span> ===== | |||
{{MoveData | |||
=== | |image=Fryougurt2A.png | ||
A | |caption=that's a lot of green | ||
|name=2A | |||
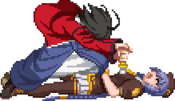
|linkname=2A | |||
|data= | |||
{{AttackData-MB | |||
|damage=300 | |||
|reddamage=151 | |||
|proration=75% (O) | |||
|circuit=2.7% | |||
|cancel=N, SP, EX, (J) | |||
|guard=LH | |||
|startup=6 | |||
|active=3 | |||
|recovery=17 | |||
|frameAdv=-8 | |||
|invuln= | |||
|description=A lot of range for a 2A. It doesn't cancel to itself, however. Hits mid. If this gets blocked at close range, it's actually safer on block to continue into rekka. At most ranges, though, it's fairly safe on block since most moves that are fast enough can't reach. | |||
}} | |||
}} | |||
=== | ===== <span class="invisible-header">2B</span> ===== | ||
{{MoveData | |||
|image=Fryougurt2B.png | |||
=== | |caption= | ||
|name=2B | |||
|linkname=2B | |||
|data= | |||
{{AttackData-MB | |||
|damage=500 | |||
|reddamage=353 | |||
|proration=90% (O) | |||
|circuit=4.5% | |||
|cancel=N, SP, EX, (J) | |||
|guard=L | |||
|startup=8 | |||
|active=4 | |||
|recovery=17 | |||
|frameAdv=-6 | |||
|invuln= | |||
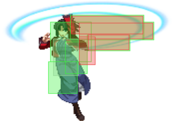
|description=Great range and good start up. Fantastic low hitting poke, dash 2B covers almost full screen. Long recovery with a lot of green on whiff, as is standard of Ryougi's B normals across all moons. | |||
}} | |||
}} | |||
< | ===== <span class="invisible-header">2C</span> ===== | ||
{{MoveData | |||
|image=Fryougurt2C.png | |||
|caption= | |||
|name=2C | |||
|linkname=2C | |||
|data= | |||
{{AttackData-MB | |||
|damage=900 | |||
|reddamage=505 | |||
|proration=55% (O) | |||
|circuit=8.1% | |||
|cancel=N, SP, EX, (J) | |||
|guard=L | |||
|startup=14 | |||
|active=2 | |||
|recovery=28 | |||
|frameAdv=-12 | |||
|invuln= | |||
|description=Mostly blockstring/combo filler before you use 3C. Hard knockdown. Move you forward. At long range, though, this is pretty safe as long as you don't whiff. | |||
}} | |||
}} | |||
< | ==== Aerial Normals ==== | ||
===== <span class="invisible-header">j.A</span> ===== | |||
{{MoveData | |||
'' | |image=FryougurtJA.png | ||
|caption= | |||
|name=j.A | |||
|linkname=j.A | |||
|data= | |||
{{AttackData-MB | |||
|damage=350 | |||
|reddamage=151 | |||
|proration=75% (O) | |||
|circuit=3.15% | |||
|cancel=N, SP, EX, J | |||
|guard=LHA | |||
|startup=7 | |||
|active=3 | |||
|recovery= | |||
|frameAdv= | |||
|invuln= | |||
|description=Okay for when they're above you. Can't cancel into itself. | |||
}} | |||
}} | |||
This is | ===== <span class="invisible-header">j.B</span> ===== | ||
{{MoveData | |||
|image=FryougurtJB1.png | |||
|image2=FryougurtJB2.png | |||
|caption=This is Ryougi's airspace, you're just living in it. | |||
|name=j.B | |||
|linkname=j.B | |||
|data= | |||
{{AttackData-MB | |||
|damage=350*2 (621) | |||
|reddamage=151*2 (267) | |||
|proration=80% (O) | |||
|circuit=3.15%*2 (6.3%) | |||
|cancel=N, SP, EX, J | |||
|guard=HA | |||
|startup=7 | |||
|active=2 (4) 2 | |||
|recovery= | |||
|frameAdv= | |||
|invuln= | |||
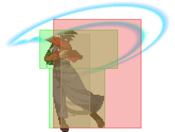
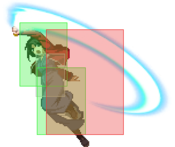
|description=Amazing air to air move. It's fast, it's got a great hitbox, and it's long enough to easy combo after. It's a two hitter, but you'll cancel the second hit into j.C a lot of the time during combos 'cause the second hit adds minimal damage (maybe 250 if you get both second hits in an air combo) and risks them getting too high for your combo ender to connect. | |||
}} | |||
}} | |||
===== <span class="invisible-header">j.C</span> ===== | |||
{{MoveData | |||
|image=FryougurtJC.png | |||
|caption= | |||
|name=j.C | |||
|linkname=j.C | |||
|data= | |||
{{AttackData-MB | |||
|damage=900 | |||
|reddamage=404 | |||
|proration=90% (O) | |||
|circuit=8.1% | |||
|cancel=SP, EX, J | |||
|guard=HA | |||
|startup=8 | |||
|active=3 | |||
|recovery= | |||
|frameAdv= | |||
|invuln= | |||
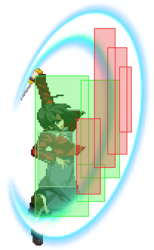
|description=Hitbox goes really high. If anyone is above you, you'll probably beat them out. Good for approaches with iAD. | |||
}} | |||
}} | |||
==== Command Normals ==== | |||
===== <span class="invisible-header">3C</span> ===== | |||
{{MoveData | |||
|image=Fryougurt3C.png | |||
|caption= | |||
|name=3C | |||
|linkname=3C | |||
|data= | |||
{{AttackData-MB | |||
|damage=900 | |||
|reddamage=707 | |||
|proration=65% (O) | |||
|circuit=8.1% | |||
|cancel=SP, EX, (J) | |||
|guard=L | |||
|startup=14 | |||
|active=9 | |||
|recovery=24 | |||
|frameAdv=-15 | |||
|invuln= | |||
|description=Great move, but don't end on it in blockstrings. Moves you in real close. Plus, huge amounts of active frames. Definitely not safe on block unless you start it from far away. If you do it from that far, though, people can react and punish you. If you see them using something that takes a while, you can dash in and 3C for a fairly quick full screen punish. | |||
}} | |||
}} | |||
===== <span class="invisible-header">4C</span> ===== | |||
{{MoveData | |||
|image=Fryougurt4C.png | |||
|caption= | |||
|name=4C | |||
|linkname=4C | |||
|data= | |||
{{AttackData-MB | |||
|damage=800 | |||
|reddamage=606 | |||
|proration=45% (O) | |||
|circuit=7.2% | |||
|cancel=SP, EX | |||
|guard=H | |||
|startup=27 | |||
|active=1 | |||
|recovery=35 | |||
|frameAdv=-9 | |||
|invuln= | |||
|description=Low reward, slow overhead. Can only be special cancelled, on hit cancel into rekkas or knife toss(?) | |||
}} | |||
}} | |||
=== Universal Mechanics === | |||
===== <span class="invisible-header">Ground Throw</span> ===== | |||
=== | {{MoveData | ||
|image=MB_C-Ryougi_Throw.png | |||
|caption= | |||
== | |name=Ground Throw | ||
|linkname=Ground Throw | |||
|input=6/4A+D | |||
|data= | |||
== | {{AttackData-MB | ||
{{ | |damage=1500 | ||
| | |reddamage=1010 | ||
|proration=100% | |||
|circuit=13.5% | |||
|cancel= | |||
|guard=U | |||
|startup=3 | |||
|active=1 | |||
| | |recovery=20 | ||
| | |frameAdv={{Tooltip | text=13 ~ 18| hovertext=13 - Everyone else 
14 - Tohno, Nanaya, Warachia, Satsuki 
15 - P.Ciel 
16 - Kouma, Warc 
17 - Aoko, Len, W.Len, Nero 
18 - Riesbyfe}} | ||
| | |invuln= | ||
| | |description=Ryougi pins the opponent to the ground then stabs them in the chest. Lets you hit the opponent on the neutral frame as they get up and doesn't give them wakeup throw protection. This lets F-Ryougi do safe meaties against the whole cast after a throw and go for unmashable throw attempts if you take the corner. | ||
| | |||
| | |||
| | |||
| | |||
| | |||
| | |||
| | |||
| | |||
}} | }} | ||
}} | }} | ||
{{ | |||
===== <span class="invisible-header">Air Throw</span> ===== | |||
{{MoveData | |||
|image=MB_C-Ryougi_Throw_Air_Raw.png | |||
|image2=MB_C-Ryougi_Throw_Air_Ender.png | |||
|caption=Raw | |||
| | |caption2=Combo Ender | ||
| | |name=Air Throw | ||
| | |linkname=Air Throw | ||
| | |input=j.6/4A+D | ||
|data= | |||
{{AttackData-MB | |||
| | |version=Raw /<br>Combo Ender | ||
| | |damage=1600 (1408)<br>1000 | ||
| | |reddamage=(888)<br>808 | ||
| | |proration=35%<br>100% | ||
| | |circuit=0.0%<br>9.0% | ||
| | |cancel= | ||
| | |guard=U | ||
| | |startup=2 | ||
| | |active=1 | ||
|recovery={{Tooltip | text=12| hovertext=Landing recovery.}} | |||
|frameAdv=-<br>{{Tooltip | text=4 ~ 9| hovertext=4 - Everyone else 
5 - Tohno, Nanaya, Warachia, Satsuki 
6 - P.Ciel 
7 - Kouma, Warc 
8 - Aoko, Len, W.Len, Nero 
9 - Riesbyfe}} | |||
|invuln= | |||
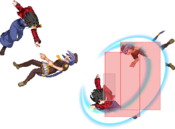
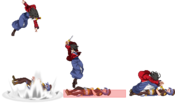
|description=Has completely different animations for whether this is done raw or during a combo. For the former, Ryougi will launch the opponent diagonally downward then slice them, resulting in a ground bounce. For the latter, she will drop the opponent straight below her then stab them like in her ground throw. | |||
As an ender, this lets you hit the opponent on the neutral frame as they get up and doesn't give them wakeup throw protection. In practice, this isn't very useful as Ryougi's frame advantage off of airthrow is poor, but F-Ryougi gets to do safe meaties against Riesbyfe due to her slow wakeup. | |||
}} | }} | ||
}} | }} | ||
{{ | |||
===== <span class="invisible-header">Shield Counter</span> ===== | |||
{{MoveData | |||
|image=MB_F-Ryougi_236D.png | |||
|image2=MB_F-Ryougi_j.236D.png | |||
|caption= | |||
| | |name=Shield Counter | ||
| | |input=236D after a successful Shield (Air OK) | ||
| | |linkname=Shield Counter | ||
| | |data= | ||
{{AttackData-MB | |||
|version=Standing | |||
| | |damage=500 (345) | ||
| | |reddamage=202 | ||
| | |proration=45% | ||
| | |circuit=4.5% | ||
| | |cancel=(SP), (EX), (J) | ||
| | |guard=LHA | ||
| | |startup=9 | ||
|active=4 | |||
| | |recovery=18 | ||
|frameAdv=-4 | |||
|invuln= | |||
|description=Same animation as H-Moon 5A6A. | |||
}} | }} | ||
{{ | {{AttackData-MB | ||
| | |version=Aerial | ||
| | |damage=500 (345) | ||
| | |reddamage=202 | ||
| | |proration=45% | ||
| | |circuit=4.5% | ||
| | |cancel= | ||
| | |guard=HA | ||
| | |startup=9 | ||
| | |active=4 | ||
|recovery= | |||
|frameAdv=16 (Max) | |||
|invuln= | |||
|description=Same animation as C-Moon j.C. | |||
}} | }} | ||
}} | }} | ||
{{ | |||
| | ===== <span class="invisible-header">Shield Bunker</span> ===== | ||
| | {{MoveData | ||
| | |image=MB_C-Ryougi_214D.png | ||
| | |caption= | ||
| | |name=Shield Bunker | ||
| | |linkname=Shield Bunker | ||
| | |input=214D in neutral or blockstun | ||
| | |data= | ||
| | {{AttackData-MB | ||
|version=Bunker | |||
|damage=500 | |||
|reddamage=202 | |||
|proration=100% | |||
|circuit=0.0%<br>(-50.0% in blockstun) | |||
|cancel= | |||
|guard=LHA | |||
|startup=26 | |||
|active=4 | |||
|recovery=19 | |||
|frameAdv=-5 | |||
|invuln=Clash 1-10 | |||
|description= | |||
}} | |||
{{AttackData-MB | |||
|version={{Tooltip | text=(Clash)| hovertext=If an attack connects with this Shield Bunker's clash box, this is the followup that happens afterwards.}} | |||
|damage=500 | |||
|reddamage=202 | |||
|proration=100% | |||
|circuit=0.0%/-50.0% | |||
|cancel= | |||
|guard=LHA | |||
|startup=8 | |||
|active=4 | |||
|recovery=19 | |||
|frameAdv=-5 | |||
|invuln={{Tooltip | text=Strike 1-7| hovertext=1-15 Strike invicibility on whiff.}} | |||
|description=A standing-height slash. | |||
}} | }} | ||
}} | }} | ||
{{ | |||
===== <span class="invisible-header">Blood Heat</span> ===== | |||
{{MoveData | |||
|image=MB_C-Ryougi_ABC.png | |||
|caption= | |||
|name=Blood Heat | |||
|linkname=Blood Heat | |||
| | |input=A+B+C during MAX | ||
| | |data= | ||
| | {{AttackData-MB | ||
|damage=100 | |||
|reddamage=0 | |||
| | |proration=100% | ||
| | |circuit=uses all | ||
| | |cancel= | ||
| | |guard=U | ||
| | |startup=17 | ||
| | |active=2 | ||
| | |recovery=29 | ||
| | |frameAdv= | ||
| | |invuln=Full 1-18 | ||
|description=Hitbox covers Ryougi completely. | |||
}} | }} | ||
}} | }} | ||
=== | ===== <span class="invisible-header">Circuit Spark</span> ===== | ||
{{ | {{MoveData | ||
|data= | |image=MB_C-Ryougi_CSpark.png | ||
{{ | |image2=MB_C-Ryougi_CSpark_Air.png | ||
| | |name=Circuit Spark | ||
| | |linkname=Circuit Spark | ||
| | |input=A+B+C during hitstun/blockstun at MAX | ||
| | |caption= | ||
| | |data= | ||
| | {{AttackData-MB | ||
| | |version=Ground | ||
| | |damage=100 | ||
| | |reddamage=0 | ||
|proration=100% | |||
|circuit=removes all | |||
|cancel= | |||
|guard=U | |||
|startup=11 | |||
|active=10 | |||
|recovery=20 | |||
|frameAdv= | |||
|invuln=Full 1-39 | |||
|description= | |||
}} | }} | ||
{{ | {{AttackData-MB | ||
| | |header=no | ||
| | |version=Air | ||
| | |damage=100 | ||
| | |reddamage=0 | ||
| | |proration=100% | ||
| | |circuit=removes all | ||
| | |cancel= | ||
| | |guard=U | ||
| | |startup=12 | ||
|active=10 | |||
|recovery={{Tooltip | text=15| hovertext=Landing recovery.}} | |||
|frameAdv= | |||
|invuln=Strike 1-30 | |||
|description=Universal burst mechanic. Unlike Crescent/Full Heat activation, the hitbox and frame data doesn't vary between characters. However, you can be thrown out of this move if you input it in the air. | |||
}} | }} | ||
}} | }} | ||
{{ | |||
=== Special Moves === | |||
==== Grounded Specials ==== | |||
===== <span class="invisible-header">236X</span> ===== | |||
{{MoveData | |||
|image=Mbacryougi236.png | |||
|image2=Mbacryougi236236.png | |||
|image3=Mbacryougi236214.png | |||
|image4=Mbacryougi236a.png | |||
|image5=Mbacryougi236b.png | |||
|image6=Mbacryougi236c.png | |||
{{ | |image7=Mbacryougilowkick.png | ||
| | |caption=A/B | ||
| | |caption2=~236X/[X] | ||
| | |caption3=~214X | ||
| | |caption4=~236A (Ender) | ||
| | |caption5=~236B (Ender) | ||
| | |caption6=~236C/[C] (Ender) | ||
| | |caption7=~214D/X (Ender) | ||
| | |name=Double Belfry <br>(EX: Double Belfry - Row of Beads) | ||
| | |linkname=236X | ||
|input=236A/B/C <br>(236A/B~236X/[X] / 214X/D)<br>(~236A/B/C/[C] / 214X) | |||
|data= | |||
{{AttackData-MB | |||
|version=A | |||
|damage=750 | |||
|reddamage=555 | |||
|proration=80% (O) | |||
|circuit=6.75% | |||
|cancel=-CH- | |||
|guard=LH | |||
|startup=10 | |||
|active=4 | |||
|recovery=21 | |||
|frameAdv=-7 | |||
|invuln= | |||
|description= | |||
}} | }} | ||
{{ | {{AttackData-MB | ||
| | |version=B | ||
| | |damage=750 | ||
| | |reddamage=555 | ||
| | |proration=80% (O) | ||
| | |circuit=6.75% | ||
| | |cancel=-CH- | ||
| | |guard=LH | ||
| | |startup=16 | ||
| | |active=3 | ||
|recovery=33 | |||
|frameAdv=-18 | |||
|invuln= | |||
|description=* Ryougi's rekka series. Very useful for just about everything. | |||
'''A:''' Rekka starter. Ryougi moves forward and slashes. Not safe on block.<br> | |||
'''B:''' Same as A version, except moves Ryougi farther. Also a bit slower. Even less safe on block. | |||
}} | }} | ||
{{ | {{AttackData-MB | ||
| | |version=~236X | ||
| | |damage=900 | ||
| | |reddamage=757 | ||
| | |proration=80% (O) | ||
| | |circuit=8.1% | ||
| | |cancel=-CH- | ||
| | |guard=LH | ||
| | |startup=5 | ||
| | |active=4 | ||
|recovery=16 | |||
|frameAdv=-2 | |||
|invuln= | |||
|description= | |||
}} | }} | ||
{{ | {{AttackData-MB | ||
| | |version=~236[X] | ||
| | |damage=1200 | ||
| | |reddamage=606 | ||
| | |proration=80% (O) | ||
| | |circuit=10.8% | ||
| | |cancel=-CH- | ||
| | |guard=LH | ||
| | |startup=19 | ||
| | |active=3 | ||
|recovery=15 | |||
|frameAdv=-1 | |||
|invuln= | |||
|description= | |||
}} | }} | ||
{{AttackData-MB | |||
|version=~214X | |||
|damage=1200 | |||
|reddamage=909 | |||
|proration=75% (O) | |||
|circuit=10.8% | |||
|cancel=-CH- | |||
|guard=H | |||
|startup=26 ~ 27 | |||
|active=3 | |||
|recovery=19 | |||
|frameAdv=-7 | |||
|invuln= | |||
|description= | |||
}} | }} | ||
{{AttackData-MB | |||
|version=~214D | |||
{{ | |damage=450 | ||
|reddamage=353 | |||
|proration=100% (O) | |||
| | |circuit=4.05% | ||
|cancel=-EX- | |||
|damage= | |guard=L | ||
|startup=11 | |||
| | |active=3 | ||
| | |recovery=22 | ||
|frameAdv=-7 | |||
| | |invuln= | ||
| | |description=* Rekka extenders. | ||
'''236X:''' Just another slash. Safe on block.<br> | |||
| | '''236[X]:''' Just another slash. Won't combo on standing target from rekka starter. Use this on falling enemies, though, 'cause it will combo after those. Also use this in blockstrings once in a while to make frame traps. Safe on block.<br> | ||
| | '''214X:''' Overhead. Doesn't combo from rekka starter. Not safe on block.<br> | ||
| | '''214D:''' Ends the rekka. Hits low. Hard knockdown. Can be EX canceled. Not safe on block. | ||
| | |||
| | |||
| | |||
| | |||
}} | }} | ||
{{AttackData-MB | |||
|version=236A | |||
|damage=700 | |||
|reddamage=404 | |||
|proration=50% (O) | |||
|circuit=6.3% | |||
|cancel= | |||
|guard=LH | |||
|startup=8 ~ 9 | |||
|active=4 | |||
|recovery=20 | |||
|frameAdv=-6 | |||
|invuln= | |||
|description= | |||
}} | }} | ||
{{AttackData-MB | |||
|version=236B | |||
{{ | |damage=1200 | ||
|reddamage=808 | |||
|proration=40% (M) | |||
| | |circuit=10.8% | ||
|cancel= | |||
|damage= | |guard=LH | ||
|startup=12 ~ 13 | |||
| | |active=6 | ||
| | |recovery=24 | ||
|frameAdv=-12 | |||
| | |invuln= | ||
|description= | |||
| | |||
| | |||
| | |||
| | |||
| | |||
| | |||
| | |||
| | |||
}} | }} | ||
{{ | {{AttackData-MB | ||
| | |version=236C | ||
|damage=1500 | |||
|damage= | |reddamage=1010 | ||
| | |proration=100% | ||
| | |circuit=13.5% | ||
|cancel=-EX- | |||
| | |guard=LH | ||
| | |startup=20 ~ 21 | ||
|active=10 | |||
|recovery=16 | |||
|frameAdv=-10 | |||
| | |invuln= | ||
| | |description= | ||
| | |||
| | |||
| | |||
| | |||
| | |||
}} | }} | ||
{{AttackData-MB | |||
|version=236[C] | |||
|damage=1500 | |||
|reddamage=3030 | |||
|proration=100% | |||
|circuit=13.5% | |||
|cancel=-EX- | |||
|guard={{Tooltip | text=U| hovertext=First 2 active frames.}} / LH | |||
|startup=36 ~ 37 | |||
|active=10 | |||
|recovery=16 | |||
|frameAdv=-8 | |||
|invuln= | |||
|description= | |||
}} | }} | ||
{{AttackData-MB | |||
|version=214X/D | |||
|damage=450 | |||
|reddamage=353 | |||
|proration=50% (O) | |||
|circuit=4.05% | |||
|cancel= | |||
|guard=L | |||
|startup=9 | |||
|active=3 | |||
|recovery=28 | |||
|frameAdv=-13 | |||
|invuln= | |||
|description=*Rekka enders. | |||
'''236A:''' HARD knockdown. Use this when you want oki. If you're using this on a falling enemy midscreen, enter the 236 in reverse (214) because the rekka extender will cross under. Safe on block.<br> | |||
'''236B:''' Launcher. You can 2A/2B after this for combos. You use this for your bread and butter. Generally safe on block, but can be punished by extremely fast and long range moves like C-Ciel 236C.<br> | |||
'''236C:''' Stab through. Deals high damage and can be canceled into 214C for a combo if you're too far for the rekka launcher to hit, netting you good damage and a side switch. Unsafe on block, and will side switch on block at point blank.<br> | |||
'''236[C]:''' Unblockable (First 2 active frames). Obviously won't combo from rekka extenders. Don't hold this half way. This isn't Warc's 5{B}. If this gets blocked half charged, you eat 5k damage. Use this in blockstrings sometimes. It's got decent speed. If they get wise and start not respecting, you should just stop doing this move instead of trying to half charge it to catch them.<br> | |||
'''214X/D:''' Low hit. Same as using 236A/B~214D. If you're using this on a falling enemy midscreen (why?), enter the 214 in reverse (236) because the rekka extender will cross under. | |||
{ | }} | ||
{{AttackData-MB | {{AttackData-MB | ||
|damage= | |version=EX | ||
|reddamage= | |damage=400*7 (2107) | ||
|proration= | |reddamage=288*7 (1595) | ||
|circuit= | |proration=80% (O)/{{Tooltip | text=(M)| hovertext=Final Hit}} | ||
|cancel= | |circuit=-100.0% | ||
|cancel=(J) | |||
|guard=LH | |guard=LH | ||
|startup= | |startup=1+7 | ||
|active= | |active={{Tooltip | text=62| hovertext=2 (12) 2 (6) 2 (6) 2 (6) 2 (6) 2 (8) 6}} | ||
|recovery= | |recovery=25 | ||
|frameAdv= | |frameAdv=-13 | ||
|invuln= | |invuln=Full 1-6 | ||
|description= | |description= Ryougi dashes in and does 6 rekka slashes in rapid succession followed by a jump cancellable B Ender. Most notable as her best OTG pickup after rekka hard knockdown. Due to hitgrab properties, all combos are burst safe after it hits. Starts off with 6 frames of invulnerability, so it's your only "reversal" type move. It's a terrible reversal, though. After that 6 frames wears off, you get a frame of you just running forward before you start attacking. A decent meaty can easy beat it out. Also, no invincibility any time after that. People who are careless on punishing this might get caught by the American reset, 'cause the last slash has a decent hitbox. | ||
}} | }} | ||
}} | }} | ||
===== <span class="invisible-header"> | ===== <span class="invisible-header">623X</span> ===== | ||
{{MoveData | {{MoveData | ||
|image= | |image=MB_H-Ryougi_421A.png | ||
| | |image2=MB_H-Ryougi_421BC.png | ||
| | |image3=MB_F-Ryougi_623AB_Hit.png | ||
| | |image4=MB_H-Ryougi_421AB_Hit.png | ||
|caption=A/C | |||
|caption2=B | |||
|caption3=A/B Hit | |||
|caption4=C Hit | |||
|name=Ying Yang Spiral | |||
|linkname=623X | |||
|input=623A/B/C (No EX) | |||
| | |||
| | |||
| | |||
|input= | |||
|data= | |data= | ||
{{AttackData-MB | {{AttackData-MB | ||
|version= | |version=A/B | ||
|damage= | |damage=0 | ||
|reddamage= | |reddamage=0 | ||
|proration= | |proration=70% | ||
|circuit= | |circuit=0.0% | ||
|cancel= | |cancel= | ||
|guard= | |guard= | ||
|startup= | |startup=5 | ||
|active= | |active={{Tooltip | text=12| hovertext=Trigger box active frames.}} | ||
|recovery= | |recovery=20 | ||
|frameAdv= | |frameAdv=14 (Hit) | ||
|invuln= | |invuln= | ||
|description= | |description=* Ryougi's first set of counters. If an enemy hitbox of the corresponding guard properties connects with the counter trigger box, she catches the enemy and throws them behind her if they are close enough, leaving them standing. Successful parries are invulnerable through recovery after 1f. You can combo after A and B versions with a 5B, netting you the highest damage of any of Ryougi's counters. | ||
'''A:''' Counters high/mid-hitting attacks. | |||
'''B:''' Counters low/mid-hitting attacks. | |||
}} | }} | ||
{{AttackData-MB | {{AttackData-MB | ||
|version= | |version=C | ||
|damage= | |damage=0 | ||
|reddamage= | |reddamage=0 | ||
|proration= | |proration=60% | ||
|circuit= | |circuit=0.0% | ||
|cancel= | |cancel= | ||
|guard= | |guard= | ||
|startup= | |startup=5 | ||
|active= | |active={{Tooltip | text=12| hovertext=Trigger box active frames.}} | ||
|recovery= | |recovery=16 | ||
|frameAdv= | |frameAdv= | ||
|invuln= | |invuln= | ||
|description= | |description=Counters high/mid-hitting attacks, but throws them off their feet. Can combo with 2C after. Recovers marginally faster than 623A/B | ||
}} | }} | ||
}} | }} | ||
===== <span class="invisible-header">214X</span> ===== | |||
===== <span class="invisible-header"> | |||
{{MoveData | {{MoveData | ||
|image= | |image=MBFRyougi214A.png | ||
|caption= | |image2=MBFRyougi214B.png | ||
|name= | |image3=MBFRyougi214EX.png | ||
|linkname= | |caption= | ||
|data= | |name=Avidya Moon | ||
{{AttackData-MB | |linkname=214X | ||
|damage= | |input=214A/B/C | ||
|reddamage= | |data= | ||
|proration= | {{AttackData-MB | ||
|circuit= | |version=A | ||
|cancel= | |damage=1000 | ||
|guard= | |reddamage=959 | ||
|startup= | |proration={{Tooltip | text=(90% (M))| hovertext=Hitstun-extending hitbox.}}, 85% (M) | ||
|active= | |circuit=9.0% | ||
|recovery= | |cancel=-EX- | ||
|frameAdv=- | |guard=H | ||
|invuln= | |startup={{Tooltip | text=24| hovertext=Hitstun-extending hitbox active on frames 11-13.}} | ||
|description= | |active=4 | ||
|recovery=20 | |||
|frameAdv=-6 | |||
|invuln= | |||
|description=* Ryougi's signature moonsault slashes. | |||
Whiffs crouchers, is air unblockable, and wall slams. Looks kinda terrible outside of combos and it really is. It's a gimmicky anti air at best. Can be EX cancelled, so you can do some gimmicks with it. Has an additional hitbox during start-up that only "hits" if the opponent is in hitstun on the ground already, allowing it to combo off of normals despite its slow speed. If you are too far from the corner you can't combo off of the wall slam reasonably. You can use it for high corner carry combos at the cost of damage, which pretty much relegates it to style combos. | |||
}} | }} | ||
{{AttackData-MB | |||
|version=B | |||
===== | |damage=1200 | ||
|reddamage=1010 | |||
| | |proration=50% (O) | ||
| | |circuit=10.8% | ||
| | |cancel=-EX- | ||
| | |guard=H | ||
| | |startup=27 | ||
{{AttackData-MB | |active=3 | ||
|damage= | |recovery=24 | ||
|reddamage= | |frameAdv=-8 | ||
|proration= | |invuln= | ||
|circuit= | |description=Unsafe on block overhead slash. Can be EX cancelled. The fact that one whiffs crouchers and the other is an overhead might make it sound like a reasonable overhead, but both are unsafe on block on a standing opponent anyway if not spaced super well, and the jump forward generally hurts your chances of actually being in that range unless you do it raw. | ||
|cancel=N, SP, EX, | }} | ||
|guard= | {{AttackData-MB | ||
|startup= | |version=EX | ||
|active=4 | |damage=1400 | ||
|recovery= | |reddamage=1010 | ||
|frameAdv=- | |proration=50% (M) | ||
|invuln= | |circuit=-100.0% | ||
|description= | |cancel=N, SP, EX, J | ||
|guard=LH | |||
|startup=1+14 | |||
|active=4 | |||
|recovery=22 | |||
|frameAdv=-9 | |||
|invuln=Full 1 | |||
|description=It hits practically everything in the air. In fact, you should be surprised when it whiffs and the enemy is in the air. Air unblockable. Can be air dash cancelled and even cancelled into air normals! You have free movement after this as if you just jumped off the ground. You can catch people with this if they aren't careful. This isn't invincible so it can still be beat out so don't just use it like an EX. Very useful for metered combo extensions and side switching. | |||
}} | }} | ||
}} | }} | ||
===== <span class="invisible-header"> | ===== <span class="invisible-header">421X</span> ===== | ||
{{MoveData | {{MoveData | ||
|image= | |image=MB_H-Ryougi_421A.png | ||
|caption= | |image2=MB_H-Ryougi_421BC.png | ||
|name= | |image3=MB_H-Ryougi_421C_Hit.png | ||
|linkname= | |image4=MB_H-Ryougi_421AB_Hit.png | ||
|caption=A | |||
|caption2=B/C | |||
|caption3=A/B Hit | |||
|caption4=C Hit | |||
|name=Ying Yang Mother-of-Pearl | |||
|linkname=421X | |||
|input=421A/B/C (No EX) | |||
|data= | |data= | ||
{{AttackData-MB | {{AttackData-MB | ||
|damage= | |version=A/B | ||
|reddamage= | |damage=1000 | ||
|proration= | |reddamage=707 | ||
|circuit= | |proration=60% | ||
|cancel=N, SP, EX, (J) | |circuit=0.0% | ||
|guard= | |cancel=(N), (SP), (EX), (J) | ||
|startup= | |guard= | ||
|active= | |startup=5 | ||
|recovery= | |active={{Tooltip | text=9| hovertext=Trigger box active frames.}} | ||
|frameAdv= | |recovery=7 | ||
|invuln= | |frameAdv= | ||
|description= | |invuln= | ||
|description=* Ryougi's second set of counters. If an enemy hitbox of the corresponding guard properties connects with the counter trigger box, she catches the enemy and throws them behind her into hard knockdown if they are close enough. Successful parries are invulnerable through recovery after 1f. Unlike the 623X series, 421A/B recovers quite quickly, though using them is still a risk, and unlike 623X and 421C, you cannot reliably combo off of these unless you are cornered AND spend meter for 236C. Just stick with 623A/B for the most part. | |||
'''A:''' Counters high/mid-hitting attacks. | |||
'''B:''' Counters low/mid-hitting attacks. | |||
}} | |||
{{AttackData-MB | |||
|version=C | |||
|damage=0 | |||
|reddamage=0 | |||
|proration=45% | |||
|circuit=0.0% | |||
|cancel= | |||
|guard= | |||
|startup=5 | |||
|active={{Tooltip | text=12| hovertext=Trigger box active frames.}} | |||
|recovery=16 | |||
|frameAdv= | |||
|invuln= | |||
|description=Low version of 623C. Counters low/mid-hitting attacks, and throws them off their feet like 623C. Can combo with 2C after. | |||
}} | }} | ||
}} | }} | ||
===== <span class="invisible-header">22X</span> ===== | |||
===== <span class="invisible-header"> | |||
{{MoveData | {{MoveData | ||
|image= | |image=MB_H-Ryougi_22A.png | ||
|image2=MB_C-Ryougi_22B.png | |||
|image3=MB_F-Ryougi_22B_BE.png | |||
|image4=MB_F-Ryougi_22C.png | |||
|image5=MB_C-Ryougi_22X_Pickup.png | |||
|caption= | |caption= | ||
|name= | |name=Hidden Dagger | ||
|linkname= | |linkname=22X | ||
|data= | |input=22A/B/[B]/C<br>(~22X Near Knife) | ||
{{AttackData-MB | |data= | ||
|damage= | {{AttackData-MB | ||
|reddamage= | |version=A | ||
|proration= | |damage=950 | ||
|circuit= | |reddamage=757 | ||
|cancel= | |proration=60% (O) | ||
|circuit=8.55% | |||
|cancel= | |||
|guard=LHA | |guard=LHA | ||
|startup= | |startup=14 | ||
|active= | |active=X | ||
|recovery= | |recovery=22 | ||
|frameAdv= | |frameAdv=5 | ||
|invuln= | |invuln= | ||
|description= | |description=* Ryougi throws a knife. This knife will bounce back before planting on the ground if it reaches the edge of the screen. | ||
Knife is thrown horizontally and lands midscreen. Useful for blockstrings and combos. Positive on block, so you can use it as a one time pressure extender, just make sure to pick it back up. | |||
}} | }} | ||
{{AttackData-MB | |||
|version=B | |||
|damage=950 | |||
|reddamage=757 | |||
|proration=60% (O) | |||
|circuit=8.55% | |||
|cancel= | |||
|guard=LA | |||
|startup=17 | |||
|active=17 | |||
|recovery=18 | |||
|frameAdv=-3 | |||
|invuln= | |||
|description=Knife is thrown at a downward angle. Whiffs full screen. Lands where the knife hits unless if it hits the wall, in which case it lands midscreen. You can't combo after it. Hits low though to catch people sleeping. | |||
}} | }} | ||
{{AttackData-MB | |||
|version=[B] | |||
{{ | |damage=1000 | ||
|reddamage=707 | |||
|proration=100% | |||
|circuit=9.0% | |||
| | |cancel= | ||
|guard=LA | |||
|startup=34 | |||
|active=9 | |||
|recovery=24 | |||
|frameAdv=0 | |||
|invuln= | |||
|description=Knife is thrown at a more downward angle. You STILL can't combo after it. Plus, it hits the ground even closer. And it whiffs point blank. Hits low. However, should your opponent be committing to fullscreen projectiles or whatnot, this move DOES cause hard knockdown, meaning should you catch them sleeping, you can make your way in. Don't count on it, though. | |||
|invuln= | |||
|description= | |||
}} | }} | ||
{{AttackData-MB | |||
|version=EX | |||
|damage=950 | |||
|reddamage=757 | |||
|proration=50% (O) | |||
|circuit=-100.0% | |||
|cancel= | |||
|guard=LA | |||
|startup=1+6 | |||
|active=17 | |||
|recovery=34 | |||
|frameAdv=-19 | |||
|invuln=Full 1 | |||
|description=Knife is thrown at an angle between A and B versions. Hits full screen. Lots of hitstun, so free confirms if you want to spend the bar, but your other EX moves extend combos for better damage, too. Whiffs point blank. Hits low. | |||
}} | }} | ||
{{AttackData-MB | |||
===== <span class="invisible-header">j. | |version=~22X<br>(Pickup) | ||
|damage= | |||
|reddamage= | |||
|proration= | |||
|circuit= | |||
|cancel= | |||
|guard= | |||
|startup= | |||
|active= | |||
|recovery={{Tooltip | text=15| hovertext=Full duration. 
Knife picked up on frame 12.}} | |||
|frameAdv= | |||
|invuln= | |||
|description=Ryougi picks up her knife. A/B/C versions are identical. It can works like a whiff cancel in blockstrings. | |||
}} | |||
}} | |||
==== Aerial Specials ==== | |||
===== <span class="invisible-header">j.236X</span> ===== | |||
{{MoveData | {{MoveData | ||
|image= | |image=Mbacryougij236a.png | ||
|image2=Mbacryougij236b.png | |||
|image3=Mbacryougij236c.png | |||
|caption= | |caption= | ||
|name=j. | |name=Glass Moon | ||
| | |linkname=j.236X | ||
|data= | |input=j.236A/B/C | ||
{{AttackData-MB | |data= | ||
|damage= | {{AttackData-MB | ||
|reddamage= | |version=A | ||
|proration= | |damage=1500 | ||
|circuit= | |reddamage=1414 | ||
|cancel= | |proration=75% (O) | ||
|circuit=13.5% | |||
|cancel= | |||
|guard=HA | |guard=HA | ||
|startup= | |startup=18 | ||
|active= | |active=2 | ||
|recovery= | |recovery={{Tooltip | text=15| hovertext=Landing recovery.}} | ||
|frameAdv= | |frameAdv=-17 (TK) | ||
|invuln= | |invuln= | ||
|description= | |description=* Ryougi slashes in a half circle around her. | ||
This one has a small hitbox. It hits high, so you can TK it for blockstrings. Pray to Nasu they crouch or you're eating a huge punish. | |||
}} | }} | ||
{{AttackData-MB | |||
|version=B | |||
|damage=1600 | |||
|reddamage=1515 | |||
|proration=75% (O) | |||
|circuit=14.4% | |||
|cancel= | |||
|guard=LHA | |||
|startup=11 | |||
|active=2 | |||
|recovery={{Tooltip | text=3| hovertext=Landing recovery.}} | |||
|frameAdv=-5 (TK) | |||
|invuln= | |||
|description=This one has a big hitbox. It doesn't hit high, but you can still TK it for variation. It's not like people can tell. It's safer than TK j.236A (but not safe). You're mostly going to use this for air to air or to end combos. Launches fullscreen on hit. | |||
}} | }} | ||
{{AttackData-MB | |||
|version=EX | |||
|damage=2200 | |||
{{ | |reddamage=2020 | ||
| | |proration=40% (O) | ||
|circuit=-100.0% | |||
|cancel= | |||
|guard=HA | |||
|startup=1+10 | |||
|active=2 | |||
|damage= | |recovery={{Tooltip | text=6| hovertext=Landing recovery.}} | ||
|reddamage= | |frameAdv=-6 (TK) | ||
|proration= | |invuln=Full 1-14 | ||
|circuit= | |description=This one has a HUGE hitbox. Hits high. 1 frame more minus on TK than B version. Unfortunately there's this big bright super flash to tell your opponent to block high. | ||
|cancel= | |||
|guard= | |||
|startup= | |||
|active= | |||
|recovery= | |||
|frameAdv=- | |||
|invuln= | |||
|description= | |||
}} | }} | ||
}} | }} | ||
===== <span class="invisible-header"> | ===== <span class="invisible-header">j.22X</span> ===== | ||
{{MoveData | {{MoveData | ||
|image= | |image=MB_C-Ryougi_j.22A.png | ||
|image2=MB_C-Ryougi_j.22B.png | |||
|image3=MB_C-Ryougi_j.22C.png | |||
|caption= | |caption= | ||
|name= | |name=Hidden Dagger (Air) | ||
|linkname= | |linkname=j.22X | ||
|data= | |input=j.22A/B/C | ||
{{AttackData-MB | |data= | ||
|damage= | {{AttackData-MB | ||
|reddamage= | |version=A / B | ||
|proration= | |damage=950 | ||
|circuit= | |reddamage=757 | ||
|cancel= | |proration=90% (M) | ||
|guard= | |circuit=8.55% | ||
|startup= | |cancel= | ||
|active= | |guard=LHA | ||
|recovery= | |startup=20 / 21 | ||
|frameAdv= | |active=X | ||
|invuln= | |recovery={{Tooltip | text=3| hovertext=Landing recovery.}} | ||
|description= | |frameAdv= | ||
|invuln= | |||
|description=Ryougi flips then throws the knife at a downward angle. A version goes forward, B goes backward. | |||
}} | |||
{{AttackData-MB | |||
|header=no | |||
|version=EX | |||
|damage=950 | |||
|reddamage=735 | |||
|proration=50% (M) | |||
|circuit=-100.0% | |||
|cancel= | |||
|guard=LHA | |||
|startup=1+0 | |||
|active=X | |||
|recovery={{Tooltip | text=17| hovertext=Landing recovery.}} | |||
|frameAdv= | |||
|invuln= | |||
|description=Ryougi flips backward and throws the knife straight forward. Air-untechable knockdown. | |||
}} | }} | ||
}} | }} | ||
===== <span class="invisible-header">44/66/22X</span> ===== | |||
===== <span class="invisible-header"> | |||
{{MoveData | {{MoveData | ||
|image= | |image=Mbacryougitumblingcat.png | ||
|caption= | |image2=Mbacryougitumblingcatex.png | ||
|name= | |caption=A/B | ||
|linkname= | |caption2=EX | ||
|input= | |name=Stumbling Cat | ||
|data= | |linkname=44/66/22X | ||
{{AttackData-MB | |input=(During Air Tech)<br>44/66/22A/B/C | ||
|damage= | |data= | ||
|reddamage= | {{AttackData-MB | ||
|proration= | |version=A | ||
|circuit= | |damage=1100 | ||
|reddamage=757 | |||
|proration=50% | |||
|circuit=7.7% | |||
|cancel= | |cancel= | ||
|guard= | |guard=LHA | ||
|startup= | |startup=21 | ||
|active= | |active=2 | ||
|recovery= | |recovery={{Tooltip | text=7| hovertext=Landing recovery.}} | ||
|frameAdv={{Tooltip | text= | |frameAdv={{Tooltip | text=9| hovertext=Lowest height.}} | ||
|invuln= | |invuln=Full 1-3 | ||
|description=Ryougi | |description=* Ryougi air techs, then slashes. Doesn't hit high. The misinputs into miracles button- weird gimmicky reversal. Knocks the opponent back fullscreen on hit. A version is actually quite plus if it's blocked close to the ground. Amazing in the knowledge check department. Not so great in the experienced player department. | ||
This one is slow. | |||
}} | }} | ||
{{AttackData-MB | |||
|version=B | |||
===== | |damage=1100 | ||
{{ | |reddamage=757 | ||
| | |proration=50% | ||
| | |circuit=7.7% | ||
| | |cancel= | ||
| | |guard=LHA | ||
| | |startup=16 | ||
| | |active=2 | ||
| | |recovery={{Tooltip | text=15| hovertext=Landing recovery.}} | ||
|frameAdv={{Tooltip | text=1| hovertext=Lowest height.}} | |||
{{AttackData-MB | |invuln=Full 1-3 | ||
|version= | |description=This one is fast. | ||
|damage= | }} | ||
|reddamage= | {{AttackData-MB | ||
|proration= | |version=EX | ||
|circuit= | |damage=1800 | ||
|reddamage=1212 | |||
|proration=75% | |||
|circuit=-100.0% | |||
|cancel= | |cancel= | ||
|guard= | |guard=LHA | ||
|startup= | |startup=6+7 | ||
|active= | |active=2 | ||
|recovery={{Tooltip | text= | |recovery={{Tooltip | text=15| hovertext=Landing recovery.}} | ||
|frameAdv= | |frameAdv={{Tooltip | text=-4| hovertext=Lowest height.}} | ||
|invuln= | |invuln=Full 1-14 | ||
|description= | |description=This one has invulnerability frames. For when you just plain hate your meter. | ||
}} | }} | ||
}} | }} | ||
=== | === Arc Drive === | ||
{{MoveData | {{MoveData | ||
|image= | |image=MB_C-Ryougi_AD.png | ||
|caption= | |caption= | ||
|name= | |name=Mystic Eyes of Death Perception - Five Scenic Collapse | ||
| | |linkname=Arc Drive | ||
| | |input=41236C during MAX/Heat | ||
|data= | |data= | ||
{{AttackData-MB | {{AttackData-MB | ||
|damage=3500 (3080) | |||
|damage= | |reddamage=(4907) | ||
|reddamage | |proration=100% | ||
|circuit=removes all | |||
|proration= | |||
|circuit= | |||
|cancel= | |cancel= | ||
|guard= | |guard=U, LHA | ||
|startup= | |startup=17+4 | ||
|active= | |active=2 (35) 5 | ||
|recovery= | |recovery=45 | ||
|frameAdv= | |frameAdv=-31 | ||
|invuln= | |invuln=Full 1-2, 17-70 | ||
|description= | |description=Ryougi activates her Mystic Eyes and lunges forward. If they are in a throwable state after she activates her eyes (they won't be), this is unblockable. This is so slow that no one will ever get caught by it unless they're respecting you so much that they're not even considering jumping. It's easily dodged by jumping. | ||
}} | }} | ||
}} | }} | ||
=== | === Another Arc Drive === | ||
{{MoveData | {{MoveData | ||
|image=MB_C- | |image=MB_C-Ryougi_AAD.png | ||
|caption= | |caption= | ||
|name= | |name=Mystic Eyes of Death Perception - Seven Scenic Demise | ||
|linkname= | |linkname=Another Arc Drive | ||
|input= | |input=41236C during Blood Heat | ||
|data= | |data= | ||
{{AttackData-MB | {{AttackData-MB | ||
|damage=5000 (4400) | |||
|reddamage=(8179) | |||
|proration=100% | |||
|circuit=removes all | |||
|cancel= | |||
|guard=U, LHA | |||
|startup={{Tooltip | text=3+20*| hovertext=Unblockable hitbox active during superflash.}} | |||
|active=5 | |||
|recovery=45 | |||
|frameAdv=-31 | |||
|invuln=Full 1-36 | |||
|description=Ryougi freezes the opponent in place, seeing the lines of death and cutting them apart. Active on frame 1, it is an unblockable super that works as a grab/throw. You have to jump before the super flash, or you'll be caught by it. Can OTG and blow through projectiles. You can't dodge it, as dodge runs out of active frames before the appearance of the lines. Very strong reversal at the cost of BLOOD HEAT. | |||
|description= | }} | ||
}} | }} | ||
=== Last Arc === | |||
{{MoveData | |||
|image=MBFRyougiLA.png | |||
|caption= 7k damage unscaled lol | |||
|name=Pure Knowledge - Empty Boundaries | |||
|linkname=Last Arc | |||
|input=Grounded EX Shield during Blood Heat | |||
|data= | |||
{{AttackData-MB | |||
|damage=7000 | |||
|reddamage=7070 | |||
|proration=N/A | |||
|circuit=removes all | |||
{{MoveData | |||
|image= | |||
|caption= | |||
|name= | |||
|linkname= | |||
|input= | |||
|data= | |||
{{AttackData-MB | |||
|damage= | |||
|reddamage= | |||
|proration= | |||
|circuit= | |||
|cancel= | |cancel= | ||
|guard=U | |guard=U | ||
|startup= | |startup=0 | ||
|active= | |active=5 | ||
|recovery= | |recovery=26 | ||
|frameAdv= | |frameAdv= | ||
|invuln=Full 1- | |invuln=Full 1-8 | ||
|description= | |description=This is what makes Ryougi in Blood Heat so menacing. No longer removes all red health, though, so it's not as overpowered. | ||
}} | }} | ||
}} | }} | ||
== General Gameplan == | |||
to-do: expand on Okizeme options, update Neutral, Pressure, and Defense | |||
===== | === Neutral === | ||
Universally, F-Ryougi has one of the longest normals outside of certain top characters, the difference lies on how she utilize said normals to force opponents to your own gameplan, which is to patiently throw normals while mindful of hitting your opponents with them. Your goal is to overwhelm your opponent by abusing your lengthy range and whiff-punish through your movement and suffocating strike-throw strategy. | |||
<u>'''Ground'''</u> | |||
5B/2B are good neutral options but do ''NOT'' whiff, as they have lengthy recovery for your opponent to approach, let alone eat a fat punish out of them. F-Ryougi is on the lower side of health, you can't afford as many mistakes as other characters on the cast. Be mindful when spacing yourself to your opponent and play along your sweetspot range. 5B hits most of the cast but cannot deal crouching opponents normally. 2B is extremely lengthy and fast, and it's your primary whiff-punish tool on the ground. | |||
F-Ryougi has one of the fastest step dashes in the game, which complements with your large pokes, hitting your opponents at ranges they don't normally expect. You can also cancel your step dash's momentum with 5A, able to stop at any time with your dash. | |||
<u>'''Air'''</u> | |||
In the air, you approach your opponents with moves such as j.B or j.C, depending on their position in the air. j.B works excellent to state your zone coverage horizontally, j.C works to hit anybody right above you, potentially winning majority of traits and perhaps your strongest button in the air, albeit the most punishable. You can use rising j.A every now and then, but it has a HUUUGE hurtbox, only use it knowingly it'll land on your opponent. However, your air tools are abysmal as air-to-ground, as j.C is your main go-to option for that, every other buttons mainly whiff on already crouching opponents unfortunately, so you have to stick to doing air-to-air most of the times. | |||
Your air dash behaves differently to the rest of the cast, more similarly to old Guilty Gear air dashes. It's fast and horizontal, however you act out of it very slowly so be committal when using it, as it travels very linear, which can make you prone to punishes in the air. | |||
=== Pressure === | |||
F-Ryougi's pressure basis is to land your big hitting moves to your opponent, and know when to position yourself in the screen and your normals. Your normals on whiff has a lot of recovery, but your main goal is to force your opponent to block as much as they can, as you're effectively safe so long as you keep your opponent locked up. | |||
<u>'''Normals'''</u> | |||
Big buttons such as 5B/2B has absurdly high cancel windows for you to lead on other moves, potentially stagger pressuring your opponents as well as to condition them to block more of your attacks. Other moves like 5A/2A are useful for staggering too, but 5A whiffs on crouching opponents when using consecutively, and 2A doesn't cancel on its own, so you're normally forced to cancel into other normals on pressure. You can also reapproach to your opponent by cancelling 5C into 3C and continue pressure from there, but NEVER end your pressure in 3C, as it puts you vulnerable to punishes. One niche option you have is your 4C during pressure, but poor scaling and lengthy animation doesn't really give much reward as a tool, but it's good every now and then to keep your opponent awake during pressure, as it doesn't has a flash when used unlike most charged hits. | |||
<u>'''Knife'''</u> | |||
Your knife is a vital repressure tool, whether you have it in hand or not. For as long as you have your knife in hand, you can cancel your normals into 22A, effectively putting you in +5 against your opponent. This is useful as it leads to strong frame traps with your normals, especially point blank, just leaving a 1 frame gap with your 2A on your opponent (3 frame gap with 2B potentially), but it can be beaten by invincible reversals or shield if not careful enough. Once your knife is on the floor, you can always cancel your normals into knife pickup at any time whenever you're found just below the knife, giving you opportunities to potential pressure resets and throws as well by immediately dashing at your opponent. | |||
<u>'''Rekka'''</u> | |||
Your rekka series are also an excellent stagger tool by setting up your opponent to tick throws as well as your main pressure enders, essentially putting you back to neutral depending on which options you go. Just like your normals, your rekkas has huge cancel windows and you can mix up your opponent by doing overheads and charged hits should your opponent respect you enough, but don't overuse them as these are easily mashable for your opponent. They're air unblockable too, so your opponent must be wary to jump on these as they have massive hitboxes enough to catch anybody jumping out of them as well. | |||
<u>'''Okizeme'''</u> | |||
F-Ryougi's Okizeme out of airthrow as a combo ender is very poor on both midscreen and corner, as you're very limited with what you can follow up after landing (normally a meaty 2B, but this is not recommended as some characters can simply DP or even just shield out of it). Despite this, you can still force some scenarios with what you can do, by doing a meaty 2B, you can follow up with 22A and reset your pressure, or by throwing out a 214B as it can catch on jumpers and also force a Hard Knockdown on your opponent. | |||
These following routes can cause HKD to perform Oki with: | |||
<blockquote><font color="red">IMPORTANT NOTE:</font> The third 236A input MUST be reversed (effectively inputting it as 214A) as characters will tend to cross-under during the Rekka. This is only applicable after performing 2C > 3C either or, as it forces the enemy airborne.</blockquote> | |||
'''Grounded Combo Ender''' | |||
« … 2C > 3C > 236A~236[A]~236A » | |||
This is your most important ender route as it is used in several combo routes, but done alone normally does not yield much damage and it's mainly used for OTG pickups with 236C instead. It is still worth learning, as you'll want to place down your Oki more often than not through this, as it is the most stable out of the rest. | |||
'''Grounded Metered Combo Ender''' | |||
« … 214C > j.B(w) > 2C > 3C > 236A~236[A]~236A » | |||
One of your Go-to's Oki route options, a very safe meter dump both on midscreen and corner combos, as it is very easy to perform and provides good damage and good amount of frame advantage to perform your okizeme. | |||
'''Aerial Metered Combo Ender''' | |||
« … j.22C > 2C > 3C > 236A~236[A]~236A » | |||
''' | Use this to replace your Air Throw for your rejump ender. Requires knife and meter to perform, so it's rather costly to perform, but completely worth for its utility. | ||
' | |||
Once you set hard knockdown on your opponent, you can try mixing up by doing neutral jump drifted forward and safejump j.C or air backdash j.B as meaty. It is also possible to perform a tiger knee j.236B, depending whether you force a whiff on your second rekka or not, you can end up either back or forth of your opponent and set a left/right mixup on them, forcing them to guess. | |||
=== Defense === | |||
Defending as F-Ryougi is really not something you wish to happen on you, lack of true reversals and get-me-off options are often discouraged as you're often stuck relying on system mechanics such as F-Moon shield and shield bunker to escape pressure. The best you can do is to learn to react your opponent's pressure whenever you're being staggered. Be extremely mindful when mashing, as your best abare option often lies using 2A, and this is not very advisable as how much hurtbox shoots out than your actual hitbox. 2B is a solid abare option however, with how much range it actually has and allowing you to hit your opponent further away than they may expect, but still inherently risky for how likely it'll be jumped over and punished due to your lengthy recovery. Your main goal as Ryougi is to learn not to be pressured by your opponent most of the times, and often rely not sticking too long on the corner, risking yourself lengthy block strings by other opponents. Focusing playing on neutral and making your opponent respect your range is your best bet to not be stuck on pressure as much as you do. | |||
Your 214C, despite not being an actual reversal, the fact it's invincible frame 1 and can move you out of the corner quickly, is a viable way to move you out of danger from it, however, it will still make you very much negative whenever your opponent reacts you to it quickly enough, and can punish you accordingly if you overcommit to it. | |||
== Combos == | |||
{{ComboLegend-MB}} | |||
Most j.236B enders can be switched for an airthrow. End in j.236B for extra damage and meter charge time. End in airthrow for okizeme. Let j.B hit once if you plan on ending with air throw. When doing 236A~236[A]~236A midscreen on an airborne opponent, enter the last 236A in reverse (214A), as 236[A] will cross under temporarily. In the corner, enter 236A normally. | |||
=== Normal Combos === | |||
{{CollapsingComboTable-MB | |||
|data= | |||
{{CollapsingComboData-MB | |||
|condition=Midscreen, Standard | |||
|character= | |||
|damage=4766 | |||
|metergen=97.6 | |||
|metero=32.5 | |||
|link= | |||
|input=*(2A) > 5B > 2B > 5C > 236B~236B~236B, 2A/2B > 5C > j.BC > dj.BC > j.236B | |||
|simput= | |||
|note=Standard midscreen bread and butter combo from close distances. Use 2A instead of 2B when you're especially close for a slightly easier link. | |||
}} | }} | ||
{{ | {{CollapsingComboData-MB | ||
| | |condition=Corner | ||
| | |character= | ||
| | |damage=5090 | ||
| | |metergen=108.9 | ||
| | |metero=36.3 | ||
| | |link= | ||
| | |input=*(2A) > 5B > 2B > 5C > 236B~236B~236B, 2A/2B > 5C > TK j.236B, j.AC > dj.BC > j.236B | ||
| | |simput= | ||
| | |note=Corner combo from close distances. Use 2A instead of 2B when you're especially close for a slightly easier link. | ||
}} | }} | ||
{{ | {{CollapsingComboData-MB | ||
| | |condition=Midscreen, Advanced | ||
| | |character= | ||
| | |damage=3933 | ||
| | |metergen=62.5 | ||
| | |metero=20.8 | ||
| | |link= | ||
| | |input=*(2A) > 5B > 2B > 5C > 236B~236B~236B, 2B > 236A(w) instant 236A~236A | ||
| | |simput= | ||
| | |note= significantly better reward hkd route than just doing 236B~236B~236A. Drops against aoko, tohno, miyako, pciel, arc, ryougi, nac/neco, and koha. | ||
}} | }} | ||
{{ | {{CollapsingComboData-MB | ||
| | |condition=Midscreen, Standard | ||
| | |character=aoko, tohno, miyako, pciel, arc, ryougi, nac/neco, and koha | ||
| | |damage=3592 on tohno | ||
| | |metergen=61.2 | ||
| | |metero=20.4 | ||
| | |link= | ||
| | |input=*(2A) > 5B > 2B > 5C > 236B~236B~236B, 2B > 236A dl.236A(w) dl.236A | ||
|simput= | |||
| | |note= Alternate version of above route for characters where it drops | ||
| | |||
}} | }} | ||
{{ | {{CollapsingComboData-MB | ||
| | |condition=Far, Has Knife | ||
| | |character= | ||
| | |damage=3791 | ||
| | |metergen=90.4 | ||
| | |metero=30.1 | ||
| | |link= | ||
| | |input=*(2A) > 5B > 2B > 2C > 3C > 22A, 2B > 5C > j.BC > dj.BC > j.236B | ||
| | |simput= | ||
| | |note=When you're too far to use the rekka launcher combo but you have your knife. Do 5B or 5C instead of the 2B > 5C after 22A for a bit less damage if you aren't able to delay the 2B consistently. | ||
' | |||
}} | }} | ||
{{ | {{CollapsingComboData-MB | ||
| | |condition=Far, Corner, Has Knife | ||
| | |character= | ||
| | |damage=4146 | ||
| | |metergen=101.7 | ||
| | |metero=33.9 | ||
|link= | |||
|input=*(2A) > 5B > 2B > 2C > 3C > 22A, 2B > 5C > TK j.236B, j.AC > dj.BC > j.236B | |||
|simput= | |||
| | |note=Corner version of the above. | ||
| | |||
| | |||
| | |||
}} | }} | ||
{{ | {{CollapsingComboData-MB | ||
| | |condition=Far, Knifeless | ||
| | |character= | ||
| | |damage=3030 | ||
| | |metergen=51.7 | ||
| | |metero=17.2 | ||
| | |link= | ||
| | |input=*(2A) > 5B > 2B > 2C > 3C > 236A~236[A]~236A | ||
|simput= | |||
| | |note=When you have no knife and you're too far to use the rekka launcher combo. | ||
| | |||
}} | }} | ||
{{ | {{CollapsingComboData-MB | ||
| | |condition=Midscreen, Overhead, Has Knife | ||
|damage= | |character= | ||
| | |damage=2310 | ||
| | |metergen=55.8 | ||
| | |metero=18.6 | ||
| | |link= | ||
| | |input=*4C > 22A, 2C > 3C > 236A~236[A]~236A | ||
| | |simput= | ||
| | |note=Overhead starter into hard knockdown for okizeme. | ||
| | }} | ||
| | {{CollapsingComboData-MB | ||
| | |condition=Midscreen, Overhead, Has Knife | ||
| | |character= | ||
|damage=2621 | |||
|metergen=69.7 | |||
|metero=23.2 | |||
|link= | |||
|input=*4C > 22A, 2B > 5C > j.BC > dj.BC > j.236B | |||
|simput= | |||
|note=Overhead starter into wallslam for damage and meter charge time. Do 5B or 5C instead of 2B > 5C if you can't do it reliably. | |||
}} | }} | ||
{{ | {{CollapsingComboData-MB | ||
| | |condition=Corner, Overhead, Has Knife | ||
| | |character= | ||
| | |damage=2968 | ||
| | |metergen=81.0 | ||
| | |metero=24.2 | ||
| | |link= | ||
| | |input=*4C > 22A, 2B > 5C > TK j.236B, j.AC > dj.BC > j.236B | ||
| | |simput= | ||
| | |note=Corner version of the above. | ||
}} | }} | ||
{{ | {{CollapsingComboData-MB | ||
| | |condition=Midscreen, Overhead, Knifeless | ||
| | |character= | ||
| | |damage=1765 | ||
| | |metergen=31.0 | ||
| | |metero=10.3 | ||
|link= | |||
|input=*4C > 236A~236[A]~236A | |||
|simput= | |||
|note=Knifeless overhead starter into hard knockdown for okizeme. | |||
| | |||
| | |||
| | |||
| | |||
}} | }} | ||
{{ | {{CollapsingComboData-MB | ||
| | |condition=Counter/AirThrow, Knifeless | ||
| | |character= | ||
| | |damage=2953 /<br>2111 /<br>3561 | ||
| | |metergen=54.0 / 57.5 / 57.1 | ||
| | |metero=17.1 / 19.5 / 19.0 | ||
| | |link= | ||
| | |input=*(Raw AT/Shield Counter/Air CH) > 2B > 5C > j.BC > dj.BC > j.236B | ||
|simput= | |||
|note=Change 2B > 5C to 5B if you can't time it right. Values are for raw AT, shield counter, and CH 5A, respectively. | |||
| | |||
| | |||
}} | }} | ||
{{CollapsingComboData-MB | |||
|condition=Counter, Knifeless, Corner | |||
|character= | |||
|damage=2511 /<br>4252 | |||
|metergen=69.7 / 68.4 | |||
|metero=23.2 / 22.8 | |||
|link= | |||
|input=*(Shield Counter/Air CH) > 2B > 5C > TK j.236B, j.AC > dj.BC > j.236B | |||
|simput= | |||
|note=Corner version of the above. Does not work from Raw AT because Raw AT uses up two wallbounces. Values are for shield counter and CH 5A, respectively. | |||
}} | }} | ||
{{CollapsingComboData-MB | |||
=== | |condition=Counter/AirThrow | ||
|character= | |||
| | |damage=3123 /<br>2354 /<br>2232 | ||
| | |metergen=68.8 / 77 / 35.1 | ||
| | |metero=24 / 25.5 / 11.7 | ||
| | |link= https://youtu.be/yv59i50JUSw | ||
| | |input=*(Raw AT/Shield Counter/Air CH) 5C/5A > 236A > 236A(w) > 214A > 5A > 5A > 5C > j.ABC > dj.AC > j.236B | ||
| | |simput= | ||
|note=rekka combo off of air hit. Hard but adds damage+metergain midscreen can can extend with wallbounces if you have them left. 5C works on some characters, and on others you can do another loop. | |||
}} | |||
}} | |||
=== Metered Combos === | |||
{{CollapsingComboTable-MB | |||
{{ | |data= | ||
{{CollapsingComboData-MB | |||
|condition=Midscreen, Has Knife<br>100% meter | |||
| | |character= | ||
|damage=4917 | |||
| | |metergen=94.1 | ||
| | |metero=40.1 | ||
| | |link= | ||
| | |input=*(Launcher) > j.BC > dj.BC > j.22C, 2C > 3C > 236A~236[A]~236A | ||
|simput= | |||
| | |note=For okizeme off of an air combo. Cancel j.B after the first hit. | ||
| | |||
| | |||
| | |||
}} | }} | ||
{{ | {{CollapsingComboData-MB | ||
| | |condition=Anywhere<br>100% meter | ||
|character= | |||
|damage= | |||
|metergen= | |||
| | |metero= | ||
| | |link=http://www.youtube.com/watch?v=REftmyxfxhA | ||
| | |input=*(2A) > 5B > 2B > 5C > 236B~236B~236C > 214C > 8j.C, 5B > j.BC > dj.BC > j.236B | ||
| | |simput= | ||
| | |note=Neutral jump cancel the 214C and delay the j.C as late as possible so that your 5B will connect. | ||
| | |||
| | |||
| | |||
}} | }} | ||
{{CollapsingComboData-MB | |||
|condition=Anywhere<br>100% meter | |||
|character= | |||
|damage=4678 | |||
|metergen=69.4 | |||
|metero=34.5 | |||
|link= | |||
|input=*(2A) > 5B > 2B > 5C > 236B~236B~236C > 214C > j.B(w), dl.2B > 5C > j.BC > dj.BC > j.236B | |||
|simput= | |||
|note=Slightly easier version. Slightly delay 2B after j.B(w). | |||
}} | |||
{{CollapsingComboData-MB | |||
|condition=Corner<br>100% meter | |||
|character= | |||
|damage= | |||
|metergen= | |||
|metero= | |||
|link= | |||
|input=*(2A) > 5B > 2B > 5C > 236B~236B~236C > 214C > j.B(w), dl.2B > 5C > TK j.236B, j.BC > dj.BC > j.236B | |||
|simput= | |||
|note=Corner version of the above. | |||
}} | }} | ||
{{CollapsingComboData-MB | |||
|condition=Anywhere<br>100% meter | |||
|character= | |||
|damage=4559 | |||
|metergen=63.5 | |||
|metero=29.9 | |||
|link=http://www.youtube.com/watch?v=DSNA3rXkp3Y | |||
|input=*(2A) > 5B > 2B > 5C > 236B~236B~236C > 214C > j.B(w), 2C > 3C > 236A~236[A]~236A | |||
|simput= | |||
|note=For hard knockdown. | |||
}} | |||
{{ | {{CollapsingComboData-MB | ||
| | |condition=Anywhere<br>100% meter | ||
| | |character= | ||
| | |damage=4791 | ||
| | |metergen=68.4 | ||
| | |metero=41.7 | ||
| | |link= | ||
|input=*(2A) > 5B > 2B > 5C > 3C > 236A~236[A]~236A > 236C > j.BC > dj.BC > j.236B | |||
| | |simput= | ||
|note=For some extra damage off of 236A rekka ender. You can do similar combos from 236C off of any hard knockdown. | |||
| | |||
| | |||
}} | |||
{{ | |||
| | |||
| | |||
| | |||
| | |||
| | |||
| | |||
| | |||
| | |||
| | |||
}} | }} | ||
{{ | {{CollapsingComboData-MB | ||
| | |condition=Anywhere<br>100% meter | ||
|damage= | |character= | ||
| | |damage= | ||
| | |metergen= | ||
| | |metero= | ||
| | |link= | ||
| | |input=*(Rekka x2)~214A > 236C > j.BC > dj.BC > j.236B | ||
| | |simput= | ||
| | |note=For if your first two rekkas are blocked but you land the low rekka. | ||
| | }} | ||
| | {{CollapsingComboData-MB | ||
| | |condition=Anywhere, 5B anti-air | ||
| | |character= | ||
|damage=2919 | |||
|metergen= | |||
|metero= | |||
|link= | |||
|input=*5B > 214C > 2A > 5B > j.BC > dj.BC > j.236B | |||
|simput= | |||
|note= Does low damage for 100% meter, so use only if you're gonna kill or have meter to spend, 214C cause sideswitch on midscreen. | |||
}} | }} | ||
}} | }} | ||
=== | === Initiative Heat Combos === | ||
{{ | {{CollapsingComboTable-MB | ||
| | |data= | ||
{{CollapsingComboData-MB | |||
| | |condition=Anywhere<br>MAX mode | ||
| | |character= | ||
| | |damage=5884 | ||
| | |metergen= | ||
| | |metero= | ||
| | |link= | ||
| | |input=*(2A) > 5B > 2B > 5C > 236B~236B~236C > IH j.BC > dj.BC > j.236C | ||
| | |simput= | ||
| | |note=Does around 6k. | ||
}} | |||
{{ | {{CollapsingComboData-MB | ||
| | |condition=Corner<br>MAX mode | ||
|damage= | |character= | ||
| | |damage= | ||
| | |metergen= | ||
| | |metero= | ||
| | |link= | ||
| | |input=*(2A) > 5B > 2B > 5C > 236B~236B~236C > IH 214A, 5A > 5C > TK j.236B, j.B > delay j.C, j.BC > dj.BC > j.236C | ||
| | |simput= | ||
|note=For mad hype near the corner. | |||
}} | |||
}} | |||
=== Swag Combos === | |||
{{CollapsingComboTable-MB | |||
''' | |data= | ||
{{CollapsingComboData-MB | |||
|condition=Anywhere, Has Knife | |||
|character= | |||
|damage=5034 | |||
|metergen= | |||
|metero= | |||
|link= | |||
|input=*(2A) > 5B > 2B > 5C > 3C > TK j.236B, 5A > 22A, TK j.236B, j.AC > dj.BC > j.236B | |||
|simput= | |||
|note=Delay the 5A. Replacement for '''(2A) > 5B > 2B > 5C > 3C > 22A, 2B > 5C > TK j.236B, j.AC > dj.BC > j.236B''' | |||
}} | }} | ||
{{ | {{CollapsingComboData-MB | ||
| | |condition=Anywhere, Knifeless | ||
|damage= | |character= | ||
| | |damage=4929 | ||
| | |metergen= | ||
| | |metero= | ||
| | |link= | ||
| | |input=*5B > 2B > 5C > 3C > TK j.236B, 5A > 5C > 214C > j.B(whiff), 2C > 3C > 236A~236[A]~236A | ||
| | |simput= | ||
| | |note=Delay the 5A. Replacement for '''(2A) > 5B > 2B > 5C > 236B~236B~236C > 214C > j.B(w), 2C > 3C > 236A~236[A]~236A'''. Actually better if the opponent reduces reasonably well and is reasonably easy for a bnb. | ||
| | }} | ||
| | {{CollapsingComboData-MB | ||
| | |condition=Anywhere, Has Knife | ||
| | |character= | ||
|damage=5351 | |||
|metergen= | |||
|metero= | |||
|link= | |||
|input=*5B > 2B > 5C > 236B~236B~236C > 214C > 8j.C > j.22B, 2B > 5C > j.236B, j.AC > j.B(2)C > j.236B | |||
|simput= | |||
|note=Delay the first j.C. Knife version of '''(2A) > 5B > 2B > 5C > 236B~236B~236C > 214C > 8j.C, 5B > j.BC > dj.BC > j.236B''' | |||
}} | |||
{{CollapsingComboData-MB | |||
|condition=Near Corner<br>100% meter | |||
|character= | |||
|damage= | |||
|metergen= | |||
|metero= | |||
|link= | |||
|input=*5AA > 5B > 2B > 5C > 3C > TK j.236C, 5A > 2C > 236A~236A(whiff)~236A, 5A > 2C > 3C > 236A~236[A]~236A | |||
|simput= | |||
|note=Impossible swaaaaaaaag. Loop 5A 2C rekkas on some characters for more swaaaaaaaag. Burs. | |||
}} | }} | ||
}} | }} | ||
===== | == Additional Resources == | ||
{ | [http://mbaacc.melty.games/?p1moon=f&p1char=ryougi F-Ryougi Match Video Database]<br> | ||
| | [https://www.youtube.com/watch?v=IVglXKGAeds Horokei's F-Ryougi BnB Guide] | ||
| | == Notable Players == | ||
| | |||
{| class="wikitable" | |||
| | !width="170"|Name!! width="70"|Color | ||
| | !width="125"|Region !! Common Venues !! Status !! Details | ||
|- | |||
| | |||
| | |[http://mbaacc.melty.games/?p1moon=f&p1char=ryougi&p1name=namiyan%20(%E3%81%AA%E3%81%BF%E3%82%84%E3%82%93) namiyan]|| style="text-align:center;"| | ||
[[File:Ryougi_Colors_14.png|Color|65px]] | |||
| Japan || Play Spot BIG ONE 2nd || Active || | |||
|- | |||
|[http://mbaacc.melty.games/?p1moon=f&p1char=ryougi&p1name=Tsa Tsa]|| style="text-align:center;"| | |||
[[File:Ryougi_Colors_24.png|Color|65px]] | |||
| Japan || A-Cho || Inactive || | |||
|- | |||
|[http://mbaacc.melty.games/?p1moon=f&p1char=ryougi&p1name=Isaiaerz Isaiaerz]|| style="text-align:center;"| | |||
[[File:Ryougi_Color34.png|Color|65px]] | |||
| North America || Netplay || Active || | |||
|- | |||
| | |||
| | |||
| | |||
| | |||
| | |||
| | |||
| | |||
| | |||
|[http://mbaacc.melty.games/?p1moon=f&p1char=ryougi&p1name=Zenzen Zenzen]|| style="text-align:center;"| | |||
[[File:Ryougi_Colors_20.png|Color|65px]] | |||
| North America || Netplay || Inactive || | |||
|- | |||
|[http://mbaacc.melty.games/?p1moon=f&p1char=ryougi&p1name=Ellie Ellie]|| style="text-align:center;"| | |||
[[File:Ryougi_Colors.png|Color|65px]] | |||
| Europe || Netplay || Active || | |||
|- | |||
|} | |||
{{Navbox-MBAACC}} | {{Navbox-MBAACC}} | ||
[[Category:Melty Blood Actress Again Current Code]] | [[Category:Melty Blood Actress Again Current Code]] | ||
[[Category:Shiki Ryougi]] | [[Category:Shiki Ryougi]] | ||
Latest revision as of 06:04, 3 October 2023
Character Page Progress
This page is still a work in progress, consider joining as an editor to help expand it. Please update this character's roadmap page when one of the editing goals have been reached.
| In Progress | To-do |
|---|---|
|
|
Overview
Move Descriptions
| Frame Data Help | |
|---|---|
| Header | Tooltip |
| Move Box Colors |
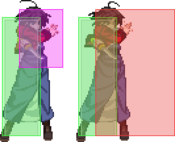
Light gray = Collision Box (A move lacking one means it can go through the opponent's own collision box). |
| Damage | Base damage done by this attack.
(X) denotes combined and scaled damage tested against standing V. Sion. |
| Red Damage | Damage done to the recoverable red health bar by this attack. The values are inherently scaled and tested against standing V. Sion.
(X) denotes combined damage. |
| Proration | The correction value set by this attack and the way it modifies the scaling during a string. See this page for more details.
X% (O) means X% Overrides the previous correction value in a combo if X is of a lower percentage. |
| Circuit | Meter gained by this attack on hit.
(X%) denotes combined meter gain. |
| Cancel | Actions this move can be cancelled into.
SE = Self cancelable. |
| Guard | The way this move must be blocked.
L = Can block crouching |
| Startup | Amount of frames that must pass prior to reaching the active frames. Also referred to as "True Startup". |
| Active | The amount of frames that this move will have a hitbox. (x) denotes frame gaps where there are no hitboxes is present. Due to varied blockstuns, (x) frames are difficult to use to determine punish windows. Generally the larger the numbers, the more time you have to punish. |
| Recovery | Frames that this move has after the active frames if not canceled. The character goes into one frame where they can block but not act afterwards, which is not counted here. |
| Advantage | The difference in frames where you can act before your opponent when this move is blocked (assuming the move isn't canceled and the first active frame is blocked). If the opponent uses a move with startup that is at least 2 frames less than this move's negative advantage, it will result in the opponent hitting that move. |
| Invul | Lists any defensive properties this move has.
X y~z denotes X property happening between the y to z frames of the animations. If no frames are noted, it means the invincibility lasts through the entire move. Invicibility:
Hurtbox-Based Properties:
Miscellaneous Properties
|
Normal Moves
Standing Normals
5A
5B
5C
5C
5[C] |
|---|
Crouching Normals
2A
that's a lot of green that's a lot of green
|
|---|
2B
2C
Aerial Normals
j.A
j.B
This is Ryougi's airspace, you're just living in it. This is Ryougi's airspace, you're just living in it.
|
|---|
j.C
Command Normals
3C
4C
Universal Mechanics
Ground Throw
Ground Throw
6/4A+D |
|---|
Air Throw
Air Throw j.6/4A+D Raw Raw Combo Ender Combo Ender
|
|---|
Shield Counter
Shield Counter
236D after a successful Shield (Air OK) |
|---|
Shield Bunker
Shield Bunker
214D in neutral or blockstun |
|---|
Blood Heat
Blood Heat
A+B+C during MAX |
|---|
Circuit Spark
Circuit Spark
A+B+C during hitstun/blockstun at MAX |
|---|
Special Moves
Grounded Specials
236X
Double Belfry (EX: Double Belfry - Row of Beads) 236A/B/C (236A/B~236X/[X] / 214X/D) (~236A/B/C/[C] / 214X) A/B A/B ~236X/[X] ~236X/[X] ~214X ~214X ~236A (Ender) ~236A (Ender) ~236B (Ender) ~236B (Ender) ~236C/[C] (Ender) ~236C/[C] (Ender) ~214D/X (Ender) ~214D/X (Ender)
|
|---|
623X
Ying Yang Spiral 623A/B/C (No EX) A/C A/C B B A/B Hit A/B Hit C Hit C Hit
|
|---|
214X
Avidya Moon
214A/B/C |
|---|
421X
Ying Yang Mother-of-Pearl 421A/B/C (No EX) A A B/C B/C A/B Hit A/B Hit C Hit C Hit
|
|---|
22X
Aerial Specials
j.236X
Glass Moon
j.236A/B/C |
|---|
j.22X
Hidden Dagger (Air)
j.22A/B/C |
|---|
44/66/22X
A/B A/B EX EX
|
|---|
Arc Drive
Mystic Eyes of Death Perception - Five Scenic Collapse
41236C during MAX/Heat |
|---|
Another Arc Drive
Mystic Eyes of Death Perception - Seven Scenic Demise
41236C during Blood Heat |
|---|
Last Arc
Pure Knowledge - Empty Boundaries Grounded EX Shield during Blood Heat 7k damage unscaled lol 7k damage unscaled lol
|
|---|
General Gameplan
to-do: expand on Okizeme options, update Neutral, Pressure, and Defense
Neutral
Universally, F-Ryougi has one of the longest normals outside of certain top characters, the difference lies on how she utilize said normals to force opponents to your own gameplan, which is to patiently throw normals while mindful of hitting your opponents with them. Your goal is to overwhelm your opponent by abusing your lengthy range and whiff-punish through your movement and suffocating strike-throw strategy.
Ground
5B/2B are good neutral options but do NOT whiff, as they have lengthy recovery for your opponent to approach, let alone eat a fat punish out of them. F-Ryougi is on the lower side of health, you can't afford as many mistakes as other characters on the cast. Be mindful when spacing yourself to your opponent and play along your sweetspot range. 5B hits most of the cast but cannot deal crouching opponents normally. 2B is extremely lengthy and fast, and it's your primary whiff-punish tool on the ground.
F-Ryougi has one of the fastest step dashes in the game, which complements with your large pokes, hitting your opponents at ranges they don't normally expect. You can also cancel your step dash's momentum with 5A, able to stop at any time with your dash.
Air
In the air, you approach your opponents with moves such as j.B or j.C, depending on their position in the air. j.B works excellent to state your zone coverage horizontally, j.C works to hit anybody right above you, potentially winning majority of traits and perhaps your strongest button in the air, albeit the most punishable. You can use rising j.A every now and then, but it has a HUUUGE hurtbox, only use it knowingly it'll land on your opponent. However, your air tools are abysmal as air-to-ground, as j.C is your main go-to option for that, every other buttons mainly whiff on already crouching opponents unfortunately, so you have to stick to doing air-to-air most of the times.
Your air dash behaves differently to the rest of the cast, more similarly to old Guilty Gear air dashes. It's fast and horizontal, however you act out of it very slowly so be committal when using it, as it travels very linear, which can make you prone to punishes in the air.
Pressure
F-Ryougi's pressure basis is to land your big hitting moves to your opponent, and know when to position yourself in the screen and your normals. Your normals on whiff has a lot of recovery, but your main goal is to force your opponent to block as much as they can, as you're effectively safe so long as you keep your opponent locked up.
Normals
Big buttons such as 5B/2B has absurdly high cancel windows for you to lead on other moves, potentially stagger pressuring your opponents as well as to condition them to block more of your attacks. Other moves like 5A/2A are useful for staggering too, but 5A whiffs on crouching opponents when using consecutively, and 2A doesn't cancel on its own, so you're normally forced to cancel into other normals on pressure. You can also reapproach to your opponent by cancelling 5C into 3C and continue pressure from there, but NEVER end your pressure in 3C, as it puts you vulnerable to punishes. One niche option you have is your 4C during pressure, but poor scaling and lengthy animation doesn't really give much reward as a tool, but it's good every now and then to keep your opponent awake during pressure, as it doesn't has a flash when used unlike most charged hits.
Knife
Your knife is a vital repressure tool, whether you have it in hand or not. For as long as you have your knife in hand, you can cancel your normals into 22A, effectively putting you in +5 against your opponent. This is useful as it leads to strong frame traps with your normals, especially point blank, just leaving a 1 frame gap with your 2A on your opponent (3 frame gap with 2B potentially), but it can be beaten by invincible reversals or shield if not careful enough. Once your knife is on the floor, you can always cancel your normals into knife pickup at any time whenever you're found just below the knife, giving you opportunities to potential pressure resets and throws as well by immediately dashing at your opponent.
Rekka
Your rekka series are also an excellent stagger tool by setting up your opponent to tick throws as well as your main pressure enders, essentially putting you back to neutral depending on which options you go. Just like your normals, your rekkas has huge cancel windows and you can mix up your opponent by doing overheads and charged hits should your opponent respect you enough, but don't overuse them as these are easily mashable for your opponent. They're air unblockable too, so your opponent must be wary to jump on these as they have massive hitboxes enough to catch anybody jumping out of them as well.
Okizeme
F-Ryougi's Okizeme out of airthrow as a combo ender is very poor on both midscreen and corner, as you're very limited with what you can follow up after landing (normally a meaty 2B, but this is not recommended as some characters can simply DP or even just shield out of it). Despite this, you can still force some scenarios with what you can do, by doing a meaty 2B, you can follow up with 22A and reset your pressure, or by throwing out a 214B as it can catch on jumpers and also force a Hard Knockdown on your opponent.
These following routes can cause HKD to perform Oki with:
IMPORTANT NOTE: The third 236A input MUST be reversed (effectively inputting it as 214A) as characters will tend to cross-under during the Rekka. This is only applicable after performing 2C > 3C either or, as it forces the enemy airborne.
Grounded Combo Ender
« … 2C > 3C > 236A~236[A]~236A »
This is your most important ender route as it is used in several combo routes, but done alone normally does not yield much damage and it's mainly used for OTG pickups with 236C instead. It is still worth learning, as you'll want to place down your Oki more often than not through this, as it is the most stable out of the rest.
Grounded Metered Combo Ender
« … 214C > j.B(w) > 2C > 3C > 236A~236[A]~236A »
One of your Go-to's Oki route options, a very safe meter dump both on midscreen and corner combos, as it is very easy to perform and provides good damage and good amount of frame advantage to perform your okizeme.
Aerial Metered Combo Ender
« … j.22C > 2C > 3C > 236A~236[A]~236A »
Use this to replace your Air Throw for your rejump ender. Requires knife and meter to perform, so it's rather costly to perform, but completely worth for its utility.
Once you set hard knockdown on your opponent, you can try mixing up by doing neutral jump drifted forward and safejump j.C or air backdash j.B as meaty. It is also possible to perform a tiger knee j.236B, depending whether you force a whiff on your second rekka or not, you can end up either back or forth of your opponent and set a left/right mixup on them, forcing them to guess.
Defense
Defending as F-Ryougi is really not something you wish to happen on you, lack of true reversals and get-me-off options are often discouraged as you're often stuck relying on system mechanics such as F-Moon shield and shield bunker to escape pressure. The best you can do is to learn to react your opponent's pressure whenever you're being staggered. Be extremely mindful when mashing, as your best abare option often lies using 2A, and this is not very advisable as how much hurtbox shoots out than your actual hitbox. 2B is a solid abare option however, with how much range it actually has and allowing you to hit your opponent further away than they may expect, but still inherently risky for how likely it'll be jumped over and punished due to your lengthy recovery. Your main goal as Ryougi is to learn not to be pressured by your opponent most of the times, and often rely not sticking too long on the corner, risking yourself lengthy block strings by other opponents. Focusing playing on neutral and making your opponent respect your range is your best bet to not be stuck on pressure as much as you do.
Your 214C, despite not being an actual reversal, the fact it's invincible frame 1 and can move you out of the corner quickly, is a viable way to move you out of danger from it, however, it will still make you very much negative whenever your opponent reacts you to it quickly enough, and can punish you accordingly if you overcommit to it.
Combos
| Combo Notation Help | |
|---|---|
| Disclaimer: Combos are written by various writers, so the actual notation used in pages can differ from the standard one. | |
| X > Y | X input is cancelled into Y. |
| X > delay Y | Must wait for a short period before cancelling X input into Y. |
| X, Y | X input is linked into Y, meaning Y is done after X's recovery period. |
| X+Y | Buttons X and Y must be input simultaneously. |
| X/Y | Either the X or Y input can be used. |
| X~Y | This notation has two meanings.
|
| X(w) | X input must not hit the opponent (Whiff). |
| j.X | X input is done in the air, implies a jump/jump cancel if the previous move was done from the ground. Applies to all air chain sections:
|
| sj.X | X input is done after a super jump. Notated as sj8.X and sj9.X for neutral and forward super jumps respectively. |
| dj.X | X input is done after a double jump. |
| sdj.X | X input is done after a double super jump. |
| tk.X | Stands for Tiger Knee. X motion must be buffered before jumping, inputting the move as close to the ground as possible. (ex. tk.236A) |
| (X) | X is optional. Typically the combo will be easier if omitted. |
| [X] | Input X is held down. Also referred to as Blowback Edge (BE). Depending on the character, this can indicate that this button is held down and not released until indicated by the release notation. |
| ]X[ | Input X is released. Will only appear if a button is previously held down. This type of input is referred to as Negative Edge. |
| {X} | Button X should only be held down briefly to get a partially charged version instead of the fully charged one. |
| X(N) | Attack "X" should only hit N times. |
| (XYZ)xN | XYZ string must be performed N times. Combos using this notation are usually referred to as loops. |
| (XYZ^) | A pre-existing combo labelled XYZ is inserted here for shortening purposes. |
| CH | The first attack must be a Counter Hit. |
| Air CH | The first attack must be a Counter Hit on an airborne opponent. |
| 66 | Performs a ground forward dash. |
| j.66 | Performs an aerial forward dash, used as a cancel for certain characters' air strings. |
| IAD/IABD | Performs an Instant AirDash. |
| AT | Performs an Air Throw. (j.6/4A+D) |
| IH | Performs an Initiative Heat. |
| AD | Performs an Arc Drive. |
| AAD | Performs an Another Arc Drive. |
Most j.236B enders can be switched for an airthrow. End in j.236B for extra damage and meter charge time. End in airthrow for okizeme. Let j.B hit once if you plan on ending with air throw. When doing 236A~236[A]~236A midscreen on an airborne opponent, enter the last 236A in reverse (214A), as 236[A] will cross under temporarily. In the corner, enter 236A normally.
Normal Combos
Metered Combos
Initiative Heat Combos
Swag Combos
Additional Resources
F-Ryougi Match Video Database
Horokei's F-Ryougi BnB Guide
Notable Players
| Name | Color | Region | Common Venues | Status | Details |
|---|---|---|---|---|---|
| namiyan | Japan | Play Spot BIG ONE 2nd | Active | ||
| Tsa | Japan | A-Cho | Inactive | ||
| Isaiaerz | North America | Netplay | Active | ||
| Zenzen | North America | Netplay | Inactive | ||
| Ellie | Europe | Netplay | Active |

