Melty Blood/MBAACC/Akiha Tohno (Seifuku)/Half Moon: Difference between revisions
(Empty page, transfer of knowledge from French Wiki : http://wiki.basgrospoing.fr/index.php/Melty_Blood/Akiha_Tohno_(Seifuku)/Half_Moon) |
No edit summary |
||
| Line 1: | Line 1: | ||
=Combos= | =Combos= | ||
~ = Means the combo can be started from any normals. | ~ = Means the combo can be started from any normals. | ||
Combo ender | '''Combo ender''' | ||
j.BC djc j.BC(A) air throw | j.BC djc j.BC(A) air throw | ||
| Line 13: | Line 12: | ||
j.BC djc j.[C] | j.BC djc j.[C] | ||
deals less damage but gives a better okizeme | |||
j.BC djc j.[C] delay j.214A land jump j.BC j.BC airthrow | j.BC djc j.[C] delay j.214A land jump j.BC j.BC airthrow | ||
| Line 20: | Line 19: | ||
Combo midscreen | '''Combo midscreen''' | ||
~ 2C 5C/6C combo ender | ~ 2C 5C/6C combo ender | ||
| Line 31: | Line 30: | ||
Combo corner | '''Combo corner''' | ||
~ 2C 5C/6C 236C combo ender | ~ 2C 5C/6C 236C combo ender | ||
Combo post-63214C | '''Combo post-63214C''' | ||
63214C 2A 5B 2B 6B 5C 6C 2C 22A | 63214C 2A 5B 2B 6B 5C 6C 2C 22A | ||
Gives okizeme) | |||
63214C 2Ax1~3 5B 2B 5C(1) 6C 5A 6AA 22B 2C delay 5C combo ender | 63214C 2Ax1~3 5B 2B 5C(1) 6C 5A 6AA 22B 2C delay 5C combo ender | ||
Revision as of 12:15, 5 July 2016
Combos
~ = Means the combo can be started from any normals.
Combo ender
j.BC djc j.BC(A) air throw
j.BC djc j.BC adc (j.A) air throw
j.BC adc j.B sdjc j.(A)BC air throw
   j.BC djc j.[C]
deals less damage but gives a better okizeme
j.BC djc j.[C] delay j.214A land jump j.BC j.BC airthrow
j.BC djc j.[C] delay j.214A land jump j.BC j.[C]
Combo midscreen
~ 2C 5C/6C combo ender
~ 5A 6AA delay 2C 5C/6C combo ender
~ 5A 6AA 22A 2C 5C/6C combo ender
~ 5C 6C 22C 6B combo ender
Combo corner
~ 2C 5C/6C 236C combo ender
Combo post-63214C
   63214C 2A 5B 2B 6B 5C 6C 2C 22A
Gives okizeme)
63214C 2Ax1~3 5B 2B 5C(1) 6C 5A 6AA 22B 2C delay 5C combo ender
Strategy
Do what you need to do to extrapolate on the character. Here are example categories below.
Half
Spacing
Pressure
Move Descriptions
Normal Moves
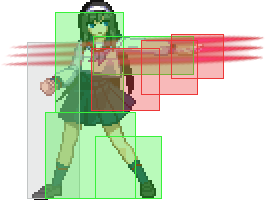
| 2A [Mid]
Startup: 5f | Active: 4f | Recovery: 10f The moves in number and strength order. Explain how the moves works, what it's best suited for and where it lacks. |
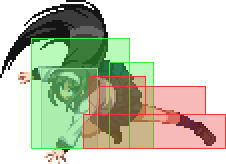
| 5A [Low]
Startup: 7f | Active: 3f | Recovery: 13f - |
| 6A [Mid]
Startup: 10f | Active: 6f | Recovery: 16f - |
| 6AA [Mid]
Startup: 13f | Active: 3f | Recovery: 14f - |
| 2B [Low]
Startup: 7f | Active: 4f | Recovery: 19f - |
| 5B [Low]
Startup: 8f | Active: 4f | Recovery: 10f - |
| 6B [Mid]
Startup: 9f | Active: 4f | Recovery: 18f - |
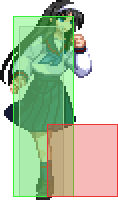
| 2C [Low]
Startup: 9f | Active: 4f | Recovery: 20f - |
| 5C [Mid]
Startup: 10f | Active: 5f | Recovery: 19f - |
| 6C [Mid]
Startup: 10f | Active: 4f | Recovery: 13f - |
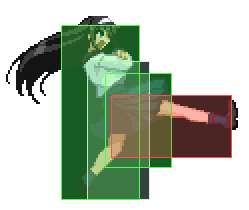
| JA [Mid]
Startup: 6f | Active: 4f | Recovery: --f - |
| JB [High]
Startup: 9f | Active: 4f | Recovery: --f - |
| JC [High]
Startup: 9f | Active: 4f | Recovery: --f - |
| BEJC [High]
Startup: 18f | Active: 7f | Recovery: --f - |
Special Moves
Name 「JP name」 - 22ABC
|
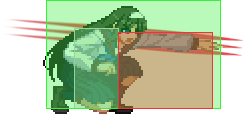
| Command Grab 「」 - 63214C
Startup: 6f | Active: 1f | Recovery: 29f
|
「」 - 28ABC
|
「」 - 623ABC
|
「」 - 214ABC
|
「」 - 421ABC
|
「」 - J22ABC
|
「」 - 426ABC
|
「」 - BC
|
Arc Drive
「」
|
